Inhaltsverzeichnis

Verwandte Anleitungen für Wine Guardian SS018


Inhaltszusammenfassung für Wine Guardian SS018
- Seite 1 Wine Guardian® Ductless Split Wine cellar Cooling System Models SS018, WGS25 Quick Start Installation Guide www.wineguardian.com USA + 1 315-452-7400 info@wineguardian.com Part #15H0156-01 RevA 04/2021...
-
Seite 2: Optional Equipment
Wine Guardian Ductless Split System This document is a pictorial guide for installing the Wine Guardian Ductless Split System. It is not intended to replace the detailed instructions found in the Installation, Operation and Maintenance (IOM) manual, which includes important safety messages all installers and owners should follow for safe and optimal performance of the system. -
Seite 3: Surface Mounting
2. Installing the Fan Coil Wine Guardian split system fan coil units should be in- stalled indoors inside the wine room. The fan coil unit can be located either above, or below the condensing unit in height Keep any height difference to a maximum of 15’... - Seite 4 *** See Wine Guardian Operations and installation manual for a more in depth charging procedure at wineguardian.com. Includes charts on sys- tem Pressures, Superheat, and Sub-cooling.
- Seite 5 Wiring the Unit for Power Connect line power to the contactor inside the condens- ing unit as shown. (220v) Run 24 volt low voltage signal wires from Y and C termi- nals on fan coil to Y and C connections in condenser housing (shown in image to the left).
-
Seite 6: Optionale Ausstattung
Wine Guardian Split-System Dieses Dokument ist eine bildliche Anleitung für die Montage des kabellosen Split Systems von Wine Guardian. Sie soll nicht die detaillierten Anweisungen des Installations-, Bedienungs- und Wartungshandbuchs (IBW) ersetzen, das wichtige Sicherheitsinformationen enthält, die alle Installateure und Besitzer für einen sicheren und optimalen Betrieb des Systems beachten sollten. -
Seite 7: Aufbaumontage
2. Installieren des Gebläsekonvektors Die Gebläsekonvektoren des Wine Guardian Split-Systems müssen im Innenbereich des Weinraums installiert werden. Die Gebläsekonvektoreinheit kann entweder oberhalb oder unterhalb der Kondensatoreinheit in einer Höhe von 4,57 Meter (15‘) angebracht werden. Aufbaumontage Bild 1 A. Legen Sie die Wandbolzen mit einem Bolzenfinder fest und markieren Sie die Positionen. -
Seite 8: Installation Der Kondensatoreinheit
Für eine typische Basisverbindungsleitung von 7,62 m / 25 Zoll sind hier die empfohlenen werkseitigen Gesamtkältemittelfüllungen des Systems für jedes Modell aufgeführt: SS018=51 oz / 1,45 kg (einschließlich der zusätzlichen Füllung, die für ein XLA-System erforderlich ist) WGS25=1,53 kg (einschließlich der zusätzlichen Füllung, die für ein XLA-System erforderlich ist) * Passen Sie für jede Rohrleitung, die 1 Fuß... - Seite 9 Verkabelung des Einheit für die Stromversorgung A. Schließen Sie die Netzspannung wie abgebildet an den Schütz im Inneren der Kondensatoreinheit an. (220v) B. Führen Sie die 24-Volt-Niederspannungssignalkabel von den Klemmen Y und C am Gebläsekonvektor zu den Anschlüssen Y und C im Kondensatirgehäuse (siehe Abbildung links).
-
Seite 10: Equipo Opcional
Si tiene alguna otra pregunta relacionada con su sistema Split de refrigeración sin conducto de bodegas Wine Guardian, póngase en contacto con un distribuidor autorizado de Wine Guardian o con su oficina local de Wine Guardian. Rellene la lista de comprobación de puesta en marcha del sistema Split WG que puede encontrar descargando el manual completo de instalación,... - Seite 11 2. Instalación del ventiloconvector Las unidades de ventiloconvectores del sistema split Wine Guardian deben instalarse en el interior de la bodega. La unidad de ventiloconvector puede situarse por encima o por debajo de la unidad condensadora instalada en alto Puede mantener cualquier diferencia de altura, siempre que no supere los 4,57 metros.
- Seite 12 SS018= 51 oz/1,45 kg (incluye la carga adicional necesaria si es un sistema XLA) WGS25= 1,53 kg (incluye la carga adicional necesaria si se trata de un sistema XLA) ** Por cada 1 pie o 1 metro más o menos de tubería de 25 pies/7,62 metros, ajuste la...
- Seite 13 Cableado del suministro de alimentación de la unidad A. Conecte la línea de alimentación al contactor interior de la unidad de condensación como se muestra en la imagen. (220v) B. Pase los cables de señal de baja tensión de 24 voltios desde los terminales Y y C del ventiloconvector hasta las conexiones Y y C de la carcasa del condensador (se muestran en la imagen de la izquierda).
- Seite 14 Wine Guardian Split-System Ce document est un guide illustré pour l’installation du système Split sans conduit Wine Guardian. Il n’est pas destiné à remplacer les instructions détaillées du manuel d’installation, d’utilisation et d’entretien, lequel comprend d’importants messages de sécurité que toute personne installant et possédant ce système doit suivre pour garantir son fonctionnement sûr et optimal.
- Seite 15 2. Installation du ventilo-convecteur Le ventilo-convecteur du système Split Wine Guardian doit être installé en intérieur, dans la cave à vin. Le ventilo-convecteur peut être positionné au-dessus ou en dessous de l’unité de condensa- tion. La différence de hauteur ne doit pas dépasser un maximum Image 1 de 4,57 mètres (15’).
- Seite 16 7,62 mètres. Pour les systèmes de conduites de liquide ayant un diamètre de ¼ po : SS018/WGS25 : Pour un ensemble de lignes d'interconnexion de base typique de 25 pi / 7,62 mètres, voici les charges de réfrigérant totales recommandées en usine du système par modèle :...
- Seite 17 Câblage de l’unité pour le raccorder au courant A. Brancher le câble électrique au contacteur à l’intérieur de l’unité de condensation comme indiqué. (220 V) B. Faire passer les câbles de transmission 24 V à basse ten- sion des terminaux Y et C du ventilo-convecteur aux branchements Y et C du boîtier du condenseur (comme indiqué...
- Seite 18 Chinese Wine Guardian 分体式系统 本文件是关于安装 Wine Guardian 无管道分体式系统的图解指南。不可用于代 替安装、操作和维护 (IOM) 手册中的详细说明,其中包括为了确保系统的安全 和最佳性能,所有安装人员和用户应遵守的重要安全信息。 完整的 IOM 手册可参见 www.wineguardian.com 的资源和手册页面。如果您对 Wine Guardian 无管道分体式酒窖冷却系统有其他问题,请联系 Wine Guardian 授权经销商或当地的 Wine Guardian 办事处。 请填写适合您的型号的 WG 分体式系统的启动清单,该清单可通过我们的网站 下载完整的安装、操作和维护手册获得。 可选设备 加湿 —— 独立 —— 为您的酒窖增加湿度的理想选择。 温度/湿度远程传感器 —— 感知并控制您的房间内的多个位置 (最多三个)。 异形房间或多房间应用的理想选择。...
- Seite 19 2.安装风机盘管 Wine Guardian 分体式系统风机盘管装置应安装在酒窖 内。风机盘管装置可位于冷凝装置的上方,也可位于冷凝 装置的下方,高度差最大为 15 英尺(4.57 米)。 图 1 表面安装 A. 用墙骨定位器确定墙骨位置并标记。(图 1 和 2) B. 在墙上标出托架的安装位置,并将托架固定在墙骨上。 图 2 (图 3) C. 在墙上需要铺设制冷剂管线的地方标记一个 1/4 英寸和 5/16 英寸的孔,在冷凝水排水管线的地方标记 1/2 英 寸的孔。 图 3 D. 在墙上开孔,铺设制冷剂管路、冷凝水排水管和 24 伏 控制电缆。 E. 将风机盘管挂在托架上。...
- Seite 20 安装冷凝装置 冷凝装置必须如图所示水平安装在其 A. Wine Guardian 底座上,端与端之间的水平度为 +/-¼ 英寸,侧 与侧之间为 1/8 英寸。 B. 冷凝装置周围至少需要 12 英寸的空间,以确保有适当 的气流通过装置并进行检修 C. 每铺设 10 英尺,就在吸入和液体管线上提供一个朝向蒸发器的 1 英寸的节 距,以防止在装置关闭时吸入管线中冷凝的任何制冷剂流入压缩机。 D. 将系统安装在外部高于平均降雪高度的混凝土板上。装置也可以安装在房屋 的侧面,或安装在面积至少是地窖三 (3) 倍的室内大型爬行空间、阁楼或机械房 内。 E. 防止出现凹陷、下陷或其他低点,以免存住制冷剂油。 F. 通过打开液体管线截止阀或拆下液体管线出口接头或堵头(以适用于您的装置 为准),从装置中排出干燥空气,对室内装置吸入和液体管线进行排空和检漏。 有关更详细的加液程序,请参见 Wine Guardian 的操作和安装手册,网址 为 wineguardian.com 。包括系统压力、过热度和过冷度的图表。...
- Seite 21 装置电源接线 A. 图所示,将电源线连接至冷凝装置内部的接触器。 (220v) B. 24 伏的低压信号线从风机盘管的 Y 和 C 端子接到冷凝 器外壳的 Y 和 C 接头上(如左图所示)。 C. 系统启动前 24 小时打开冷凝装置的电源,使曲轴箱加 热器预热压缩机。 * 整接线示意图请参见用户手册第 21 页。冷凝装置内部也 有示意图。 打开装置 下系统本机界面上的开/关按钮。 用户界面预设为室温 55°F (13°C)。 B. “向上”箭头一次。显示屏将显示现有的温度设定点。按 “向上或向下”箭头按钮,将温度调整到所需的设定点 C. 系统将在 5 分钟的时间延迟后打开,冷风部分将开始输送冷 开/关 风。如果系统无法打开,请联系 Air Innovations。 注意:对于无线安装,或连接远程接口和/或传感器,请参见位于...
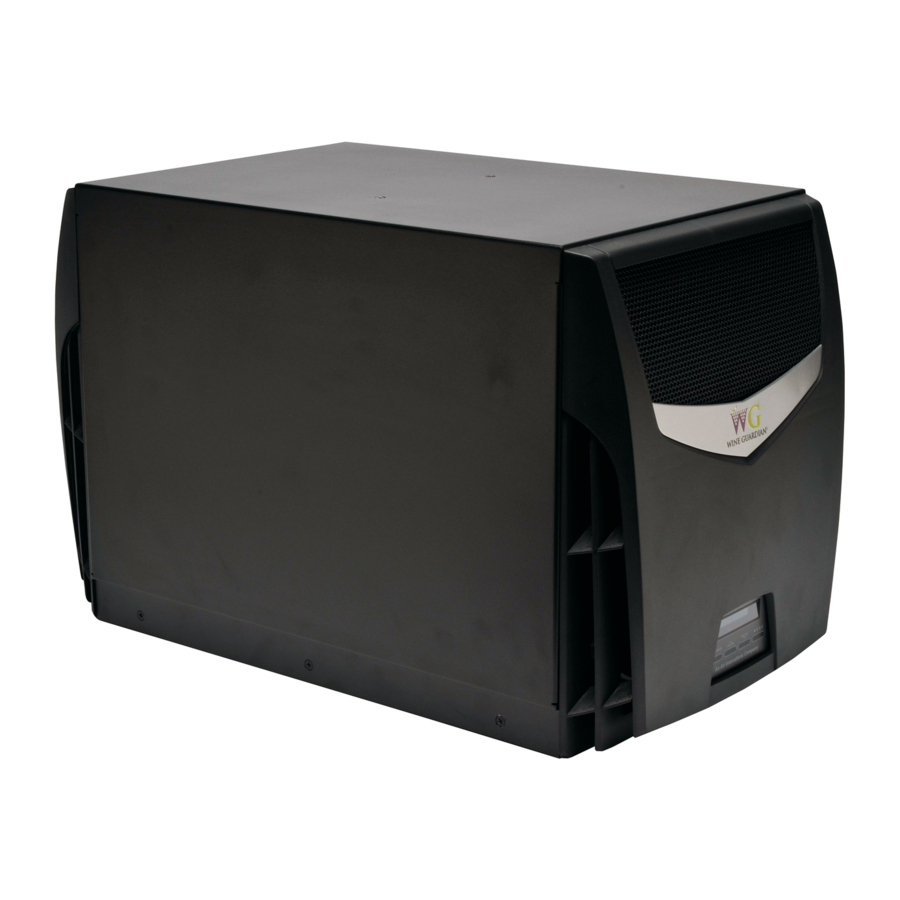
- Seite 22 Fan Coil B. Wall Mounted Bracket A. Supply Air (unit to cellar) G. Drain Line C. Local User Interface D. Return Air E. Refrigeration Line F. Power Cord (115v) Condensing Unit Refrigerant Line Connections High Pressure Switch Condenser Coil Refrigerant Sight Glass Compressor Outdoor Cover...
- Seite 23 Deustch A. Zuluft (Einheit zum Keller) H. Kältemittel-Leitungsanschlüsse B. Wandhalterung I Kältemittel-Sichtglas C. Lokale Benutzeroberfläche J. Kompressor D. Rückluft K. Hochdruckschalter E. Kältemittelleitung L. Kondensator-Spule F. Netzkabel (115 V) M. Außenhülle G. Ablaufleitung N. Hebegriffe Español Suministro de aire (unidad a la bodega) Conexiones de línea con el refrigerador I.
- Seite 24 Preserving it is Ours U. S. Headquarters 7000 Performance Drive North Syracuse, New York USA 13212 +1 315-452-7400 www.wineguardian.com info@wineguardian.com European Office Wine Guardian GmbH Pestalozzistrasse 2 CH 8201 Schaffhausen Switzerland +41 52 224 0490 15H0156-01 Part No. Rev. A 04-2021...