Herunterladen Inhalt Inhalt Diese Seite drucken
Inhaltsverzeichnis

Werbung

Verfügbare Sprachen
  • DE

Verfügbare Sprachen

  • DEUTSCH, seite 51
Abbattitori di temperatura - Manuale di istruzione
Blast Chillers - Instruction manual
Armoires de Refroidissement - Notice d'instructions
Abatidores Ultracongeladores - Instrucciones de Uso
5 10 15

Werbung

Inhaltsverzeichnis
loading

Inhaltszusammenfassung für sammic AB-10

  • Seite 1 Abbattitori di temperatura - Manuale di istruzione Blast Chillers - Instruction manual Armoires de Refroidissement - Notice d'instructions Abatidores Ultracongeladores - Instrucciones de Uso 5 10 15...
  • Seite 2 Gentile Cliente, Sehr geehrter Kunde! La ringraziamo per aver preferito uno dei Wir danken Ihnen für Ihre Wahl eines nostri prodotti, frutto di lunga esperienza unserer Produkte, welches das Ergebnis e di una continua ricerca per un prodotto einer langen Erfahrung und stetiger superiore in termini di affidabilità, Forschungsarbeit ist.
  • Seite 3 PULSANTI E LED Start/Stop Stato ciclo Tasto abbattimento positivo (+3°c) soft/hard Tasto surgelazione (-18°c) / Ciclo gelato Tasto modalità abbattimento Tasto decremento valori Tasto incremento valori ICONE DI STATO Led allarme porta Led ciclo a tempo (giallo) Led ciclo a temperatura (giallo) Led ciclo abbattimento positivo (verde) Led ciclo abbattimento hard (giallo) Led ciclo surgelazione (verde)
  • Seite 4 PREFAZIONE ATTENZIONE • Il presente manuale costituisce parte inte- LE OPERAZIONI EVIDENZIATE CON QUESTO SIMBOLO grante del prodotto, e fornisce tutte le indi- SONO STRETTAMENTE RISERVATE cazioni necessarie per una corretta AL TECNICO PATENTATO. istallazione, un corretto uso e manuten- zione della macchina.
  • Seite 5: Inhaltsverzeichnis

    INDICE Descrizione Pag. Descrizione Pag. DOCUMENTAZIONE GENERALE PARAMETRI INFORMAZIONI GENERALI ......2 ACCESSO MODIFICA PARAMETRI ....9 INSTALLAZIONE .
  • Seite 6: Documentazione Generale

    1. DOCUMENTAZIONE GENERALE 1.1 INFORMAZIONI GENERALI • Il presente manuale costituisce parte integrante del prodotto, e fornisce tutte le indicazioni necessarie per una corretta istal- lazione, un corretto uso e manutenzione della macchina. • È obbligatorio, da parte dell’utilizzatore, leggere attenta- mente il manuale e fare sempre riferimento ad esso per l’uti- lizzo della macchina.
  • Seite 7: Installazione

    2. INSTALLAZIONE Evitare QUESTE OPERAZIONI DEVONO ESSERE • Luoghi esposti ai raggi diretti del sole. EFFETTUATE ESCLUSIVAMENTE • Luoghi chiusi ad elevate temperature e scarso ricambio d’aria. DA UN INSTALLATORE PATENTATO • Evitare di installare la macchina vicino a qualsiasi fonte di ca- lore.
  • Seite 8: Allacciamento Frigorifero

    2.6 ALLACCIAMENTO FRIGORIFERO GRUPPI A DISTANZA 2.9 SISTEMI DI SICUREZZA E CONTROLLO I diametri delle tubazioni di alimentazione delle apparec- • Microinteruttore porta: chiature sono dimensionati per distanze di installazione fino blocca il funzionamento dei ventilatori in cella quando viene a 10 metri.
  • Seite 9: Consigli Per Il Buon Funzionamento

    3. CONSIGLI PER IL BUON FUNZIONAMENTO 3.1 MODI DI ARRESTO d) La sonda al cuore deve essere posizionata correttamente al In caso di emergenza per spegnere la macchina togliere l’ali- centro del prodotto di taglio o pezzatura più grossa, avendo mentazione dal quadro generale agendo sul sezionatore o cura che la punta della sonda non fuoriesca o tocchi la te- scollegando la spina dalla presa.
  • Seite 10: Istruzioni Di Programmazionee Funzionamento

    4. ISTRUZIONI DI PROGRAMMAZIONE E FUNZIONAMENTO 4.3 FUNZIONAMENTO IN CASO DI MALFUNZIONAMENTO Si consiglia di eseguire sempre un preraffreddamento CHIAMARE IL TECNICO PATENTATO della macchina la prima volta che si esegue un abbatti- mento o surgelazione. In questo modo si ottimizza il ciclo di lavoro riducendo il tempo (vedi cap.
  • Seite 11 4.3.3 Selezione ciclo di abbattimento positivo hard a tempo Al raggiungimento della temperatura di abbattimento im- Con macchina in standby selezionare 2 VOLTE il tasto abbat- postata al cuore del prodotto la macchina passerà automa- timento positivo , comparirà a display il valore 90 min con ticamente in conservazione.
  • Seite 12: Selezione Ciclo Indurimento Gelato

    4.3.7 Selezione rapida ciclo di abbattimento positivo a tempo 4.5 VISUALIZZAZIONI RAPIDE VALORI indefinito DI TEMPO E TEMPERATURA Con macchina in standby selezionare il tasto abb. positivo Con macchina in funzione si possono rilevare i seguenti va- per almeno 3", subito dopo partirà in esecuzione un ciclo po- lori di funzionamento: sitivo a Tempo indefinito, e a display comparira la scritta POS.
  • Seite 13: Parametri

    5. PARAMETRI 5.1 ACCESSO MODIFICA PARAMETRI 5.4 DISPOSITIVO DI REGISTRAZIONE DATI USB (OPTIONAL) L'accesso parametri può avvenire solo in modalità di mac- • Il dispositivo di registrazione dati USB registra in un file .txt china OFF. Basta premere per 3" il tasto modalità di abbatti- tutti i dati raccolti durante i cicli della macchina: abbatti- mento e comparirà...
  • Seite 14: Il Grande Valore Della Tecnologiae Del Processo

    6 IL GRANDE VALORE DELLA TECNOLOGIA E DEL PROCESSO • È sbagliato mettere il cibo appena cotto direttamente nel 6.3 SURGELAZIONE RAPIDA conservatore! Il raffreddamento è statico e poco potente, il Funzione disponibile solo in alcuni modelli. tempo di abbattimento troppo lungo ed i batteri si svilup- Da +70°C a -18°C al cuore del prodotto il più...
  • Seite 15: Lista Allarmi

    7 LISTA ALLARMI Nota: Guasti sonde Una volta sostituita la sonda l'allarme Allarme spillone non inserito scompare dopo 10 secondi. Gli allarmi sonda a -50°C sono inibiti Causa: Mancato inserimento della sonda a spillone all’in- durante la surgelazione a -18°C e durante la funzione di induri- terno del prodotto durante l’esecuzione di un ab- mento superficiale gelato.
  • Seite 16: Manutenzione Ordinaria

    8 MANUTENZIONE ORDINARIA Il condensatore presenta bordi taglienti. Du- QUESTE OPERAZIONI DEVONO ESSERE rante le sopracitate operazioni indossare EFFETTUATE ESCLUSIVAMENTE sempre guanti prottetivi, occhiali e ma- schere di protezione delle vie respiratorie. DA UN INSTALLATORE PATENTATO Le informazioni e le istruzioni di questo capitolo sono desti- 8.3 PULIZIA CELLA nate a tutto il personale che opera sulla macchina: l’utilizza- •...
  • Seite 17: Scarico Acqua Di Sbrinamento

    Pulizia evaporatore 8.5 SCARICO ACQUA DI SBRINAMENTO • È necessario effettuare periodicamente la pulizia interna del- • L’impianto è predisposto per degli sbrinamenti automatici l’evaporatore procedendo nel modo seguente: (nei modelli previsti) e manuali quando necessario. • Verificare il corretto drenaggio dell’acqua dell’evaporatore Fig.
  • Seite 18 Gentile Cliente, Sehr geehrter Kunde! La ringraziamo per aver preferito uno dei Wir danken Ihnen für Ihre Wahl eines nostri prodotti, frutto di lunga esperienza unserer Produkte, welches das Ergebnis e di una continua ricerca per un prodotto einer langen Erfahrung und stetiger superiore in termini di affidabilità, Forschungsarbeit ist.
  • Seite 19: Buttons And Leds

    BUTTONS AND LEDS Start/Stop Cycle status Soft/hard positive blast chilling button (+3°c) Blast freezing button (-18°c)/ice cream cycle Blast chilling mode Decrease value key Increase value key STATUS ICONS Door alarm LED Timed cycle LED (yellow) Temperature cycle LED (yellow) Positive blast chilling cycle LED (green) Hard blast chilling cycle LED (yellow) Blast freezing cycle LED (green)
  • Seite 20 PREFACE CAUTION • This manual is an integral part of the pro- duct, providing all the information required to ensure correct installation, operation and THE FOLLOWING OPERATIONS AND THOSE HIGHLIGHTED maintenance of the machine. BY THIS SYMBOL MUST NOT BE PERFORMED BY THE APPLIANCE USER •...
  • Seite 21 INDEX Description Page Description Page GENERAL DOCUMENTATION PARAMETERS GENERAL INFORMATION ......2 PARAMETER MODIFICATION ACCESS ....9 INSTALLATION .
  • Seite 22: General Information

    1. GENERAL DOCUMENTATION 1.1 GENERAL INFORMATION • This manual is an integral part of the product, providing all the information required to ensure correct installation, ope- ration and maintenance of the machine. • Read the manual carefully, making reference to it for machine operation.
  • Seite 23: Connecting The Appliance To The Power Supply

    2. INSTALLATION Avoid THESE OPERATIONS MUST BE • direct exposure to sunlight; PERFORMED BY A CERTIFIED • closed sites with high temperatures and poor air circulation; • installing the machine near sources of heat. INSTALLATION TECHNICIAN ONLY 2.1 DATA PLATE INFORMATION •...
  • Seite 24: Safety And Control Systems

    2.6 REFRIGERATION COMPONENT CONNECTIONS 2.9 SAFETY AND CONTROL SYSTEMS REMOTE ASSEMBLIES • Door microswitch: Appliance power lines are sized for installation distances of shuts down fan operation in the cell when the door is ope- up to 10 metres. For greater distances, seek advice from. ned.
  • Seite 25: Operating Tips

    3. ADVICE TO ENSURE EFFICIENT APPLIANCE OPERATION 3.1 SHUT-DOWN PROCEDURES d) Position the core probe at the centre of the largest product In the event of emergency, shut down the appliance by swit- or food item; make sure that the tip of the probe does not ching off power at the main panel, by means of the knife protrude or touch the tray.
  • Seite 26: In The Event Of A Malfunction, Call The Certified Technician

    4. PROGRAMMING AND OPERATION INSTRUCTIONS 4.3 OPERATION IN THE EVENT OF A MALFUNCTION, It is recommended always to pre-cool the machine the CALL THE CERTIFIED TECHNICIAN first time blast-chilling or deep freezing is performed. The work cycle is optimized in this way by reducing the time (see chap.
  • Seite 27 4.3.3 Selecting positive hard blast chilling timed cycle Once the set blast chilling temperature has been reached in With the machine in standby, select the positive blast chilling the product core, the machine will automatically go into sto- button twice. The display will show the value 90 min with rage mode.
  • Seite 28: Drying Cycle

    4.3.7 quick selection of positive blast chilling indefinite timed 4.5 RAPID DISPLAY OF TIME AND TEMPERATURE VALUES cycle With the machine in operation, the following operation va- With the machine in standby, select the positive blast chilling lues can be seen: button for at least 3", a positive cycle for an indefinite •...
  • Seite 29: List Of Parameters

    5. PARAMETERS PASS 5.1 PARAMETER MODIFICATION ACCESS 5.4 USB DATA RECORDER (OPTIONAL) The parameters can be accessed only when the machine is • The USB data recorder will register into a .txt file all the data off. Just press the blast chilling button for three seconds, during the cycles of the machine: Blast Chilling or Freezing will appear on the display and the up...
  • Seite 30 6 GREAT TECHNOLOGY AND PROCESS VALUE • Putting freshly cooked food directly in the storage unit is a 6.3 QUICK BLAST FREEZING mistake! Cooling is static and not very powerful, the chilling function available only in certain models time is too long and bacteria develop rapidly in large quan- From +70°c to -18°c at the product core as quickly as possibly tities.
  • Seite 31 7 ALARMS LIST Note: Faults probes Once the sensor is replaced, the alarm di- Probe not inserted alarm sappears after 10 seconds. The sensor alarms at -50°C are disa- Cause: failure to insert the probe inside the product du- bled during freezing at -18°C and during the ice cream ring execution of temperature controlled blast chilling hardening function.
  • Seite 32: Ordinary Maintenance

    8 ORDINARY MAINTENANCE The condenser has sharp edges. During the THESE OPERATIONS MUST BE above-mentioned operations, always wear PERFORMED ExCLUSIVELY safety gloves, safety glasses and masks to protect the respiratory tract. BY A CERTIFIED INSTALLER The information and instructions in this chapter are intended 8.3 CELL CLEANING for all personnel who operate the machine: the user, main- •...
  • Seite 33 Evaporator cleaning 7.5 DEFROST WATER DRAINING • The interior of the evaporator must be cleaned periodically • the system is set up for automatic (in certain models) in the following manner: and manual defrosting when necessary. • make sure that the evaporator water is correctly draining in Fig.
  • Seite 34 Gentile Cliente, Sehr geehrter Kunde! La ringraziamo per aver preferito uno dei Wir danken Ihnen für Ihre Wahl eines nostri prodotti, frutto di lunga esperienza unserer Produkte, welches das Ergebnis e di una continua ricerca per un prodotto einer langen Erfahrung und stetiger superiore in termini di affidabilità, Forschungsarbeit ist.
  • Seite 35 BOUTONS ET DEL Marche/Arrêt État de cycle Touche refroidissement positif (+3°c) soft/hard Touche refroidissement rapide (-18°c) / Cycle gelé Touche modalité refroidissement Touche diminution des valeurs Touche augmentation des valeurs ICÔNE D’ÉTAT Del alarme de la porte Del cycle à temps (jaune) Del cycle à...
  • Seite 36 PRéFACE ATTENTION • La présente notice contient des instructions qui fournissent des indications importantes pour l’installation, l’utilisation et l’entretien LES OPERATIONS SUIVANTES ET LES OPERATIONS MARQUEES DU de la machine. La présente notice fait partie SYMBOLE CI-CONTRE SONT intégrante du produit. STRICTEMENT INTERDITES AUX UTILISATEURS DE LA MACHINE •...
  • Seite 37 INDEX Description Page Description Page DOCUMENTATION géNéRALE PARAMÈTRES INFORMATIONS GÉNÉRALES ..... . . 2 ACCèS MODIFICATION DES PARAMèTRES ..9 INSTALLATION .
  • Seite 38 1. DOCUMENTATION gENERALE 1.1 géNéRALITéS • Pour la manutention de l’appareil/sous-ensembles, il faut pren- • La présente notice contient des instructions qui fournissent dre toutes les précautions nécessaires pour ne pas les endom- des indications importantes pour l’installation, l’utilisation et mager en respectant les indications inscrites sur l’emballage.
  • Seite 39: Emplacement

    2. INSTALLATION EVITER CES OPERATIONS DOIVENT ETRE • Tous lieux exposés aux rayons directs du soleil EFFECTUEES UNIQUEMENT PAR UN • Tous lieux clos à températures élévées et faible renouvelle- ment d’air INSTALLATEUR AgREE • Eviter d’installer la machine à proximité d’une source de cha- leur quelconque.
  • Seite 40 2.6 RACCORDEMENT AU CIRCUIT FRIgORIFIQUE 2.9 SYSTèMES DE SéCURITé ET DE CONTRôLE gROUPES DéPORTéS • Micro-interrupteur de verrouillage de porte: Les diamètres des conduits d’alimentation des appareils sont il arrête le fonctionnement des ventilateurs en cellule lors de dimensionnés pour des distances d’installation jusqu’à 10 l’ouverture de la porte.
  • Seite 41: Conseils Pour L'utilisation

    3. CONSEILS POUR LE BON FONCTIONNEMENT 3.1 MODES D’ARRêT d) La sonde de cuisson à coeur doit être correctement piquée Pour mettre hors service la machine en cas d’urgence, cou- au centre de la pièce la plus grosse en prenant garde que la per la tension d’alimentation en agissant sur le sectionneur pointe de la sonde ne sorte pas ni ne touche la plaque.
  • Seite 42 4. PROgRAMMATION ET FONCTIONNEMENT 4.3 FONCTIONNEMENT EN CAS DE MAUVAIS FONCTIONNEMENT Il est conseillé de faire un pré-refroidissement de la APPELER LE TECHNICIEN BREVETé machine la première fois que l’on effectue un refroidis- sement ou une congélation. De cette façon le cycle de travail s’optimise, en réduisant le temps (voir chapitre 4.1 ACTIVATION DE LA MACHINE 4.3.7)
  • Seite 43 4.3.3 Sélection du cycle de refroidissement positif Hard à temps quand la température programmée est rejointe au coeur du Avec machine de mise en attente sélectionner 2 fois la produit, la machine passera automatiquement en conserva- touche refroidissement positif , la valeur 90 min s’affiche tion.
  • Seite 44 4.3.7 Sélection rapide cycle de refroidissement positif à temps 4.5 VISUALISATION RAPIDE VALEURS indéfini DE TEMPS ET TEMPéRATURE Avec machine en mise en attente sélectionner la touche re- Avec la machine en fonction il est possible de relever les valeurs froidissement positif pendant au moins 3", immédiate- de fonctionnement suivantes:...
  • Seite 45: Liste Des Paramètres

    5. PARAMèTRES 5.1 ACCèS MODIFICATION PARAMèTRES 5.4 ENREgISTREUR DE DONNéES USB (OPTIONAL) L’accès aux paramètres peut advenir uniquement en moda- • L'enregistreur de données USb va enregistrer dans un fichier lité de machine Arrêt. Il suffit d’appuyer pendant 3" la tou- .txt toutes les données pendant les cycles de la machine : Re- che modalité...
  • Seite 46 6 LA gRANDE VALEUR DE LA TECHNOLOgIE DU PROCESSUS • Il est erronné de mettre les aliments à peine cuits dans le 6.3 SURgéLATION RAPIDE conservateur ! Le refroidissement est statique et peu puis- De +70°c à -18°c au cœur du produit le plus rapidement pos- sant, le temps de refroidissement trop long, et les bactéries sible et dans un délai de 4 heures, avec température de l’air se développent rapidement en grande quantité.
  • Seite 47: Liste Des Alarmes

    7 LISTE DES ALARMES Alarme grande aiguille non insérée Remarque: Pannes sonde Une fois la sonde substituée, l'alarme Cause: Insertion manqué de la sonde à grande aiguille à l’in- disparaît après 10 secondes. Les alarmes sondes à -50°C sont in- térieur du produit pendant l’exécution d’un refroidis- hibées pendant la congélation à...
  • Seite 48: Maintenance Courante

    8 MAINTENANCE COURANTE Les bords du condenseur sont coupants. Por- CES OPERATIONS DOIVENT ETRE ter toujours de gants et lunettes de protec- EFFECTUEES UNIQUEMENT PAR tion et des masques pour effectuer ces opérations. PAR UN INSTALLATEUR AgREE Les informations et les instructions de ce chapitre sont de- 8.3 NETTOYAgE DE LA CELLULE stinées à...
  • Seite 49 Nettoyage de l'evaporateur 8.5 EVACUATION DE L’EAU DE DEgIVRAgE • Il est necessaire d'effectuer periodiquement un nettoyage • Pour garantir la salubrité des produits alimentaires traités, le a l'interieur de l'evaporateur et de l a facon suivante: nettoyage intérieur de la cellule doit être effectuée fré- quemment, et cela en fonction du type d’aliments conser- Fig.
  • Seite 50 Gentile Cliente, Sehr geehrter Kunde! La ringraziamo per aver preferito uno dei Wir danken Ihnen für Ihre Wahl eines nostri prodotti, frutto di lunga esperienza unserer Produkte, welches das Ergebnis e di una continua ricerca per un prodotto einer langen Erfahrung und stetiger superiore in termini di affidabilità, Forschungsarbeit ist.
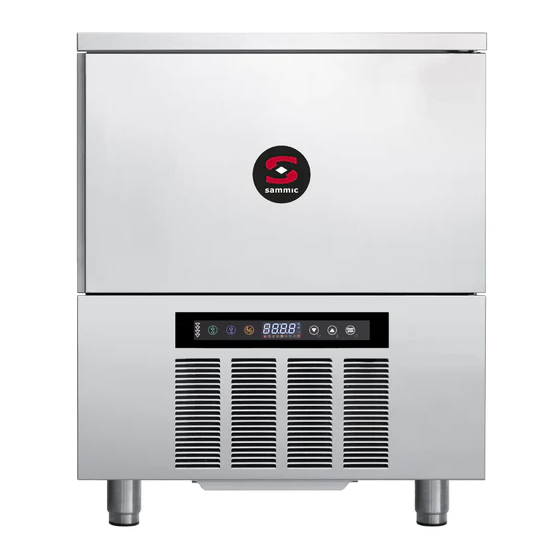
  • Seite 51: Tasten Und Led-Anzeigen

    TASTEN UND LED-ANZEIGEN Start/Stop Zykluszustand Taste positive Reduzierung (+3°c) Soft/Hard Gefriertaste (-18°c) / Blast Freezing Taste Reduzierungsmodalität Taste Werte Senken Tast Werte Erhöhen FUNKTIONSSYMBOLE Led-Anzeige Türalarm Led-Anzeige Zeitzyklus (gelb) Led-Anzeige Temperaturzyklus (gelb) Led-Anzeige Reduzierungszyklus positiv (grün) Led-Anzeige Reduzierungszyklus Hard (gelb) Led-Anzeige Reduzierungszyklus negativ (grün) Led-Anzeige Konservierungszyklus (grün) Led-Anzeige Auftauphase (grün)
  • Seite 52: Niederspannung 2006/95/Cee, Elektroma

    VORWORT ACHTUNG • Das vorliegende Handbuch ist ein wesen- tlicher Bestandteil der Maschine und liefert alle erforderlichen Informationen für die DIE AUSFÜHRUNG DER DURCH DAS NEBENSTEHENDE SYMBOL vorschriftsmäßige Installation, den sachge- GEKENNZEICHNETEN ARBEITEN IST DEM mäßen Gebrauch und die Wartung der Ma- BENUTZER STRENGSTENS UNTERSAGT schine.
  • Seite 53 INHALT Beschreibung Beschreibung ALLGEMEINE DOKUMENTATION PARAMETER ALLGEMEINE INFORMATIONEN ....2 ZUGANG PARAMETER ÄNDERN ....9 INSTALLATION .
  • Seite 54: Allgemeine Dokumentation

    1. ALLGEMEINE DOKUMENTATION 1.1 ALLGEMEINE INFORMATIONEN derliche Tragfähigkeit aufweisen. • Das vorliegende Handbuch ist ein wesentlicher Bestandteil • Beim Handling des Gerätes und der Aggregate sind alle zur der Maschine und liefert alle erforderlichen Informationen für Vermeidung von Beschädigungen erforderlichen Vorsichts- die vorschriftsmäßige Installation, den sachgemäßen Ge- maßnahmen zu ergreifen und die auf der Verpackung (Abb.
  • Seite 55: Installation

    2. INSTALLATION DIESE VORGÄNGE DÜRFEN AUSSCHLIESS Vermeiden sie LICH DURCH EINEN FACHLICH • Standorte mit direkter Sonneneinstrahlung • Geschlossene Räume mit hohen Temperaturen und gerin- AUSGEBILDETEN INSTALLATEUR ERFOLGEN gem Luftwechsel • Die Aufstellung der Maschine in der Nähe von Wärmequel- 2.1 TYPENSCHILDANGABEN len.
  • Seite 56: Entsorgung Der Maschine

    2.6 ANSCHLUSS VON KÜHLSCHRANK UND EXTERNEN 2.9 SICHERHEITS UND STEUEREINRICHTUNGEN GRUPPEN • Mikrotürschalter: Kälteaggregate Die Durchmesser der Versorgungsleitungen schaltet die Ventilatoren der Kühlzelle ab, sobald die Tür ge- der Geräte sind für Entfernungen bis zu 10 m ausgelegt. öffnet wird. Wenden Sie sich bei größeren Entfernungen an den Herstel- •...
  • Seite 57: Ratschläge Für Den Einwandfreien Betrieb

    3. RATSCHLÄGE FÜR DEN EINWANDFREIEN BETRIEB 3.1 MASCHIEN STOPPS d) Der Kerntemperaturfühler muss genau in die Mitte des Ge- Im Notfall die Maschine durch Betätigung des Hauptschalters frierguts oder des Fleischstücks eingeführt werden und darf auf der Schalttafel oder durch Ziehen des Netzsteckers ab- nicht auf der anderen Seite herausragen oder den Behälter schalten.
  • Seite 58: Programmierungs Und Betriebsanweisungen

    4. PROGRAMMIERUNGS UND BETRIEBSANWEISUNGEN 4.3 FUNKTIONSWEISE IM FALL VON BETRIEBSSTÖRUNGEN Wenn man das erste Mal eine Schnell- oder Schockfro- QUALIFIZIERTEN TECHNIKER KONTAKTIEREN stung vornimmt, wird empfohlen eine Vorabkühlung der Maschine auszuführen. Auf diese Weise optimiert man den Arbeitszyklus und reduziert die Dauer (siehe 4.1 EINSCHALTEN DER MASCHINE Kap.
  • Seite 59: Reduzierungszyklus Positiv Hard Nach Zeit

    4.3.3 Reduzierungszyklus Hard positiv nach Zeit Hinweis: Die Temperaturreduzierung Hard nach Temperatur Mit der Maschine in Stand-By die Taste positive Temperatur- funktioniert in der ersten Phase mit einer negativen Temperatur reduzierung 2 Mal wählen, auf dem Display erscheint der in der Zelle, bis die Nadelsonde in der Produktmitte eine Tempe- Wert 90 Min mit vorgesetztem H, als Anzeige für einen Hard- ratur von 15°C erhebt.
  • Seite 60: Schnellwahl Reduzierungszyklus Positiv

    4.3.7 Schnellwahl Reduzierungszyklus positiv 4.5 SCHNELLANZEIGE ZEIT UND TEMPERATURWERTE mit unbestimmter Dauer Mit der Maschine im Betrieb können folgende Betriebswerte Mit der Maschine in Stand-By die Taste positive Temperatur- entnommen werden: reduzierung mindestens 3“ lang drücken, sofort danach • Eingestellte Gesamtzeit eines positiven Zyklus Soft/Hard startet ein positiver Zyklus mit unbestimmter Dauer und auf auf Zeit dem Display erscheint die Anzeige POS.
  • Seite 61: Zugang Parameter Ändern

    5. PARAMETER 5.1 ZUGANG PARAMETER ÄNDERN 5.4 USB DATENREGESTRIERGERÄT (OPTIONAL) PASS Der Zugang zu den Parametern kann nur in der Modalität • Das USB Datenregestriergerät registiert in eine .txt Datei alle Maschine OFF erfolgen. Es ist ausreichend 3“ lang die Taste Daten des Maschinenzyklus: Schockfrosten oder Tiefkühlen Reduzierart zu drücken, es erscheint die Meldung...
  • Seite 62: Die Grosse Bedeutung Von Technologie

    6 DIE GROSSE BEDEUTUNG VON TECHNOLOGIE UND ABLAUF • Es ist falsch soeben zubereite Gerichte sofort in den Konser- 6.3 SHOCKFROSTEN vierer zu geben! Die Abkühlung ist statisch und wenig lei- Nur bei einigen Modellen verfügbar. stungsstark, die Reduzierzeit zu lang und Bakterien Von +70°C auf 18°C im Produktkern sind auf jeden Fall entwickeln sich schnell und in großen Mengen.
  • Seite 63: Alarmverzeichnis

    7 ALARMVERZEICHNIS Note: Nach Auswechseln der Sonde verschwindet der Alarm nach 10 Alarm Nadel nicht eingeführt Sekunden. Die Sondenalarme bei -50°C werden während der Gefrier- Ursache: Fehlendes Einführen der Nadelsonde in das Produkt wäh- phase bei - 18°C und während der Oberflächenhärtung von Eis. Falls rend der Durchführung einer Temperaturreduzierung nicht anders angegeben wird jeder Alarm von einem Signalton beglei- Auswirkung: Das Display zeigt den Alarm AL4 an, das...
  • Seite 64: Ordentliche Wartung

    8 ORDENTLICHE WARTUNG Der Kondensator verfügt über scharfe Kanten. DIESE VORGÄNGE DÜRFEN AUSSCHLIESS Während der oben genannten Vorgänge LICH DURCH EINEN FACHLICH immer Schutzhandschuhe, Schutzbrille und Atemschutzmaske tragen. AUSGEBILDETEN INSTALLATEUR ERFOLGEN Die Informationen und Anweisungen dieses Kapitels sind für das 8.3 REINIGUNG DER KÜHLZELLE gesamte Personal bestimmt, das mit der Maschine arbeitet: Der •...
  • Seite 65: Abfluss Abtauwasser

    Reinigung des Verdampfers 7.5 ABFLUSS ABTAUWASSER • Regelmäßig ist eine Reinigung im Innenbereich des Verdamp- • Die Anlage ist für automatische (bei den vorgesehenen Model- fers durchzuführen. Dabei wie folgt vorgehen: len) und falls erforderlich auch für manuelle Abtauvorgänge aus- gerichtet.
  • Seite 66 Gentile Cliente, Sehr geehrter Kunde! La ringraziamo per aver preferito uno dei Wir danken Ihnen für Ihre Wahl eines nostri prodotti, frutto di lunga esperienza unserer Produkte, welches das Ergebnis e di una continua ricerca per un prodotto einer langen Erfahrung und stetiger superiore in termini di affidabilità, Forschungsarbeit ist.
  • Seite 67 PULSADORES Y LED Start/Stop Estado de ciclo Tecla abatimiento positivo (+3°c) soft/hard Tecla sobrecongelación (-18°c) / Ciclo helado Tecla modalidad abatimiento Tecla decremento valores Tecla incremento valores ICONOS DE ESTADO Led alarma puerta Led ciclo de tiempo (amarillo) Led ciclo de temperatura (amarillo) Led ciclo (verde) abatimiento positivo Led ciclo abatimiento hard (amarillo) Led ciclo abatimiento negativo (verde)
  • Seite 68 PRÓLOGO ATENCIÓN • Este manual es parte integrante del pro- ducto y contiene las instrucciones para rea- lizar correctamente la instalación, el uso y LAS SIGUIENTES OPERACIONES, Y LAS QUE ESTÁN IDENTIFICADAS POR EL SÍMBOLO QUE APARECE A el mantenimiento del equipo. LA IZQUIERDA DE ESTAS LÍNEAS, QUEDAN TERMI- NANTEMENTE VEDADAS AL USUARIO DEL EQUIPO.
  • Seite 69 ÍNDICE Descripción Pág. Descripción Pág. DOCUMENTACIÓN GENERAL PARÁMETROS INFORMACIONES GENERALES .....2 ACCESO MODIFICACIóN PARáMETROS ... .9 INSTALACIóN .
  • Seite 70: Documentación General

    1. DOCUMENTACIÓN GENERAL 1.1 INFORMACIÓN GENERAL • Este manual es parte integrante del producto y contiene las instrucciones para realizar correctamente la instalación, el uso y el mantenimiento del equipo. • Léalo con atención antes de utilizar el equipo y consúltelo siempre que sea necesario.
  • Seite 71: Instalación

    2. INSTALACIÓN Evite instalar el equipo: ESTAS OPERACIONES DEBEN SER • en un lugar expuesto a los rayos directos del sol; REALIZADAS ExCLUSIVAMENTE POR UN • en un lugar cerrado que no tenga recambio de aire sufi- ciente; INSTALADOR MATRICULADO •...
  • Seite 72: Notas Para El Instalador

    2.6 CONExIÓN FRIGORÍFICA - GRUPOS REMOTOS 2.9 SISTEMAS DE SEGURIDAD Y CONTROL El diámetro de los conductos de alimentación de los equi- • Microinterruptor de la puerta: pos está calculado para distancias de instalación de hasta 10 bloquea el funcionamiento de los ventiladores de la cámara m.
  • Seite 73: Consejos Para El Uso

    3. CONSEjOS PARA UN BUEN FUNCIONAMIENTO 3.1 MODOS DE PARAR EL EQUIPO d) La sonda de aguja debe introducirse justo en el centro del Para detener el equipo en caso de emergencia, desconecte producto más grueso, con cuidado de que la punta no so- la corriente con el seccionador del cuadro general o desen- bresalga ni toque la bandeja.
  • Seite 74: Instrucciones De Programacióny Funcionamiento

    4. INSTRUCCIONES DE PROGRAMACIÓN Y FUNCIONAMIENTO 4.3 FUNCIONAMIENTO EN CASO DE MAL FUNCIONAMIENTO Se aconseja enfriar siempre previamente la máquina la CONTACTE AL TéCNICO HABILITADO primera vez que se realiza una bajada rápida de la tem- peratura o una congelación. De esta forma se optimiza el ciclo de trabajo reduciendo el tiempo (ver cap.
  • Seite 75: Selección Ciclo Sobrecongelación De Tiempo

    4.3.3 Selección ciclo de abatimiento positivo hard de tiempo ratura al centro del producto de +3°C. Por lo tanto el abatidor con la máquina en standby seleccione 2 veces la tecla abati- pasará a la fase de conservación. miento positivo , se visualizará...
  • Seite 76: Ciclo De Secado

    4.3.7 Selección rápida ciclo de abatimiento positivo de 4.5 VISUALIZACIONES RÁPIDAS VALORES tiempo indefinido DE TIEMPO Y TEMPERATURA con máquina en standby seleccione la tecla abat. positivo Con la máquina en función se pueden relevar los siguientes por lo menos 3", enseguida después iniciará en ejecución un valores de funcionamiento: ciclo positivo de tiempo indefinido, y en la pantalla se visua- •...
  • Seite 77: Parámetros

    5. PARÁMETROS 5.1 ACCESO MODIFICACIÓN PARÁMETROS 5.12 GRABADOR DE DATOS USB (OPTIONAL) El acceso a los parámetros se puede realizar sólo con la mo- • El grabador de datos USB registrará en un archivo .txt todos dalidad de la máquina off. Si presiona por 3" la tecla modali- los datos durante los ciclos de la máquina: Enfriamiento rápido dad de abatimiento y se visualizará...
  • Seite 78: El Grande Valor De La Tecnologíay Del Proceso

    6 EL GRAN VALOR DE LA TECNOLOGÍA Y DEL PROCESO • Es erróneo meter la comida apenas cocida directamente en 6.3 CONGELACIÓN RÁPIDA el conservador. El enfriamiento es estático y poco potente, Función disponible sólo en algunos modelos. el tiempo de abatimiento demasiado largo y las bacterias se Desde +70°c hasta -18°c al centro del producto el más rápi- desarrollan rápidamente en gran cantidad.
  • Seite 79: Lista De Alarmas

    7 LISTA DE ALARMAS Alarma agujón no introducido Nota: Averías en las sondas Una vez sustituida la sonda la Causa: falta introducción de la sonda de agujón en el in- alarma desaparece después de 10 segundos. Las alarmas sonda terior del producto durante la ejecución de un a -50°c están inhibidos durante la sobrecongelación a -18°c y abatimiento de temperatura durante la función de endurecimiento superficial helado.
  • Seite 80: Mantenimiento Ordinario

    8 MANTENIMIENTO ORDINARIO Los bordes del condensador son cortantes. ESTAS OPERACIONES DEBEN SER Realice la limpieza con guantes de seguri- REALIZADAS ExCLUSIVAMENTE POR dad, gafas y mascarilla. UN INSTALADOR MATRICULADO 8.3 LIMPIEZA DE LA CÁMARA Los contenidos de este capítulo están destinados a todas las •...
  • Seite 81 Cómo acceder al evaporador para realizar la limpieza 8.5 DESCARGA DEL AGUA DE DESESCARCHE • Se puede ingresar a la parte interna del evaporador para rea- • El equipo puede realizar desescarches automáticos y ma- lizar la limpieza: nuales. • Controle que el agua del evaporador fluya correctamente Fig.
  • Seite 82 ISTRUCCIONES ABATIDORES 05/2014...
  • Seite 83 05/2014 ISTRUCCIONES ABATIDORES...

Diese Anleitung auch für:

Ab-15Ab-5

Inhaltsverzeichnis