Herunterladen Inhalt Inhalt Diese Seite drucken
Inhaltsverzeichnis

Werbung

Verfügbare Sprachen

Verfügbare Sprachen

TGA914EX_1(e).book Page 1 Tuesday, August 8, 2006 2:21 PM
Contents/Inhalt/Table des matières
English instructions
Deutsche Anleitung
Instructions en français
This cordless camera is an accessory unit for use with Panasonic Digital
Cordless Phone:
KX-TG9120/KX-TG9140/KX-TG9150
You must register this cordless camera with your base unit before it can
be used.
Please read these Operating Instructions before using the unit and save for
future reference.
Operating Instructions
Cordless Camera
KX-TGA914EX
Model No.
Indoor Use Only
Page/Seite/Page
1 – 20
(1) – (20)
<1> – <20>

Werbung

Inhaltsverzeichnis
loading

Inhaltszusammenfassung für Panasonic KX-TGA914EX

  • Seite 1 Deutsche Anleitung (1) – (20) Instructions en français <1> – <20> This cordless camera is an accessory unit for use with Panasonic Digital Cordless Phone: KX-TG9120/KX-TG9140/KX-TG9150 You must register this cordless camera with your base unit before it can be used.
  • Seite 2: Inhaltsverzeichnis

    TGA914EX_1(e).book Page 2 Tuesday, August 8, 2006 2:21 PM Table of Contents Introduction Introduction ............. 3 Accessory information .
  • Seite 3: Introduction

    TGA914EX_1(e).book Page 3 Tuesday, August 8, 2006 2:21 PM Introduction Introduction Thank you for purchasing the cordless camera. For your future reference Attach or keep original receipt to assist with any repair under warranty. Serial No. (found on the bottom of the unit) Date of purchase Name and address of dealer Feature highlight...
  • Seite 4: Accessory Information

    TGA914EX_1(e).book Page 4 Tuesday, August 8, 2006 2:21 PM Introduction Accessory information Included accessories No. Accessory item Quantity AC adaptor Part No. PQLV209CE Wall-mounting adaptor Call button...
  • Seite 5: Important Information

    TGA914EX_1(e).book Page 5 Tuesday, August 8, 2006 2:21 PM Introduction Conditions for using the cordless Important information camera L The cordless camera is intended for General indoor use only. Prolonged exposure to L Use only the AC adaptor included with this direct sunlight or halogen light may product, noted on page 4.
  • Seite 6: Preparation

    TGA914EX_1(e).book Page 6 Tuesday, August 8, 2006 2:21 PM Preparation Controls A Antenna E Indicator B Camera lens F DIP switches C MIC (Microphone) G Speaker D Call button H PROG. (Program) Understanding the cordless camera indicator The cordless camera indicator shows the status as follows. Status Description Red (flashing rapidly)
  • Seite 7: Setting Up The Cordless Camera

    TGA914EX_1(e).book Page 7 Tuesday, August 8, 2006 2:21 PM Preparation Setting up the cordless camera Connecting the AC adaptor and the call button Connect the AC adaptor cord by pressing the plug firmly (A). Connect the call button cord until it clicks into the unit (B). L Use only the included AC adaptor.
  • Seite 8 TGA914EX_1(e).book Page 8 Tuesday, August 8, 2006 2:21 PM Preparation Adjusting the cordless camera lens angle Aim the camera lens by pushing the tab (A) and rotating the lens up or down. L Using the handset, confirm that the area you want to monitor from the cordless camera is displayed (page 11).
  • Seite 9: Setting The Dip Switches

    TGA914EX_1(e).book Page 9 Tuesday, August 8, 2006 2:21 PM Preparation Setting the DIP switches DIP switches (Default position: ON) OFF*1 You can set the following functions by using DIP switches 2 and 3. DIP switch 1 is not used for any settings. Slide each switch with a pointed object such as a pen as necessary.
  • Seite 10: Symbols Used In These Operating Instructions

    TGA914EX_1(e).book Page 10 Tuesday, August 8, 2006 2:21 PM Preparation Symbols used in these operating instructions Symbol Meaning Press J (centre of joystick). Proceed to the next operation. Press L (centre of joystick). “ ” Select the words in quotations shown on the display (e.g., “Cancel Handset”) by pushing the joystick up or...
  • Seite 11: Camera Monitoring

    TGA914EX_1(e).book Page 11 Tuesday, August 8, 2006 2:21 PM Camera Monitoring – while you are on a call with the handset. Camera monitoring using (In this case you will hear 2 tones and z will flash on the handset.) a handset L You cannot make a monitoring connection via a DECT repeater.
  • Seite 12 TGA914EX_1(e).book Page 12 Tuesday, August 8, 2006 2:21 PM Camera Monitoring Press {s} to answer the page. Handset display item for camera L You can monitor the room where the monitoring camera is located. Displayed Meaning Handset: item To mute your sound output, press {C/T} Example: The handset is connected if necessary.
  • Seite 13 TGA914EX_1(e).book Page 13 Tuesday, August 8, 2006 2:21 PM Camera Monitoring When you finish monitoring, press Setting the audio detection sensitivity {ih} or place the handset on the base The cordless camera features a sensor that unit or charger. detects human voices such as a baby cry. Sounds other than human voices may be Useful settings while camera difficult to detect.
  • Seite 14: Useful Information

    TGA914EX_1(e).book Page 14 Tuesday, August 8, 2006 2:21 PM Useful Information Wall mounting The cordless camera can be mounted by the standard mounting or upside down mounting. CAUTION: L Mount the cordless camera on the stable location where the unit can be adequately supported when installing.
  • Seite 15 TGA914EX_1(e).book Page 15 Tuesday, August 8, 2006 2:21 PM Useful Information Mounting the cordless camera on the wall Standard mounting Drive the screws (not included) into the Mount the cordless camera (A), then wall at a recommended height of 1.8 m slide it down (B) and to the right (C) until or below using the wall mount template it is secure.
  • Seite 16 TGA914EX_1(e).book Page 16 Tuesday, August 8, 2006 2:21 PM Useful Information About the screws for wall mounting L Use the recommended screw size below. L Drive the mounting screws leaving enough length from the wall to hook the cordless camera. Space Max.
  • Seite 17: Troubleshooting

    TGA914EX_1(e).book Page 17 Tuesday, August 8, 2006 2:21 PM Useful Information Troubleshooting Problem Cause & solution The cordless camera does L Check the connections (page 7). not work. L The cordless camera is not registered to the base unit. Register the cordless camera to the base unit (page 10).
  • Seite 18 TGA914EX_1(e).book Page 18 Tuesday, August 8, 2006 2:21 PM Useful Information Problem Cause & solution The handset speaker and/or L Move the handset away from the cordless camera. the cordless camera emit a howling noise while monitoring. When using the handset L Lower the speaker volume by pushing the joystick speakerphone to have an down.
  • Seite 19: Specifications

    TGA914EX_1(e).book Page 19 Tuesday, August 8, 2006 2:21 PM Useful Information L The illustrations used in these operating Specifications instructions may differ slightly from the actual product. N Standard: DECT (Digital Enhanced Cordless Telecommunications) N Number of channels: 120 Duplex Channels N Frequency range: 1.88 GHz to 1.9 GHz N Duplex procedure:...
  • Seite 20 TGA914EX_1(e).book Page 20 Tuesday, August 8, 2006 2:21 PM Copyright: This material is copyrighted by Panasonic Communications Co., Ltd., and may be reproduced for internal use only. All other reproduction, in whole or in part, is prohibited without the written consent of Panasonic Communications Co., Ltd.
  • Seite 21 KX-TGA914EX Modellbez. Nur für den Innenbereich geeignet Diese schnurlose Kamera ist ein Zubehör für die folgenden digitalen Schnurlos- Telefone von Panasonic: KX-TG9120/KX-TG9140/KX-TG9150 Vor der Benutzung muss diese schnurlose Kamera an Ihrer Basisstation registriert werden. Bitte lesen Sie diese Bedienungsanleitung durch, bevor Sie das Gerät in Betrieb...
  • Seite 22 TGA914EX_1(g).book Page 2 Monday, August 7, 2006 12:00 PM Inhalt Einführung Einführung ..............3 Zubehör .
  • Seite 23: Einführung

    TGA914EX_1(g).book Page 3 Monday, August 7, 2006 12:00 PM Einführung Einführung Vielen Dank, dass Sie sich für den Kauf dieser schnurlosen Kamera entschieden haben. Zur künftigen Bezugnahme Bewahren Sie den Originalbeleg auf oder heften Sie ihn ab, damit Sie ihn bei Reparaturen innerhalb des Garantiezeitraums stets verfügbar haben.
  • Seite 24: Zubehör

    TGA914EX_1(g).book Page 4 Monday, August 7, 2006 12:00 PM Einführung Zubehör Mitgeliefertes Zubehör Zubehör Menge Netzteil Teilenummer PQLV209CE Wandhalterung Rufvorrichtung für Mobilteil...
  • Seite 25: Wichtige Informationen

    TGA914EX_1(g).book Page 5 Monday, August 7, 2006 12:00 PM Einführung das Gerät nicht mehr raucht, und wenden Sie Wichtige Informationen sich an eine autorisierte Kundendienststelle. Pflege Allgemein L Nachdem der Staub von der Linse entfernt L Verwenden Sie nur das im Lieferumfang wurde, die Linse mit einem Wattestäbchen enthaltene, auf Seite 4 angegebene Netzteil.
  • Seite 26: Vorbereitung

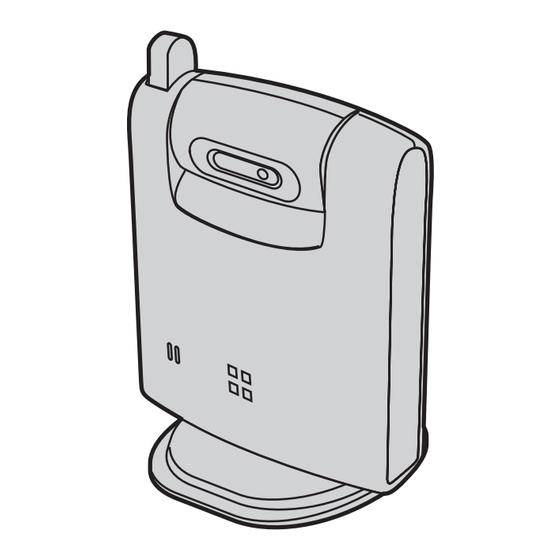
    TGA914EX_1(g).book Page 6 Monday, August 7, 2006 12:00 PM Vorbereitung Bedienelemente A Antenne E Anzeige B Kameralinse F DIP-Schalter C MIC (Mikrofon) G Lautsprecher D Rufvorrichtung für Mobilteil H PROG. (Programmieren) Die Anzeige der schnurlosen Kamera Die Anzeige der schnurlosen Kamera zeigt den Status wie folgt an. Status Beschreibung Rot (blinkt schnell)
  • Seite 27: Einrichten Der Schnurlosen Kamera

    TGA914EX_1(g).book Page 7 Monday, August 7, 2006 12:00 PM Vorbereitung Einrichten der schnurlosen Kamera Anschluss des Netzteils und der Ruftaste Schließen Sie das Netzteilkabel an, indem Sie den Stecker fest in die Buchse drücken (A). Schließen Sie das Kabel der Rufvorrichtung so an, dass der Stecker im Gerät einrastet (B). L Verwenden Sie nur das mitgelieferte Netzteil.
  • Seite 28: Einstellen Des Linsenwinkels Der Schnurlosen Kamera

    TGA914EX_1(g).book Page 8 Monday, August 7, 2006 12:00 PM Vorbereitung Einstellen des Linsenwinkels der schnurlosen Kamera Drücken Sie den Stift (A) und richten Sie die Kameralinse aus, indem Sie sie auf und ab bewegen. L Überprüfen Sie mit dem Mobilteil, dass die Kamera auch das von Ihnen gewünschte Gebiet erfasst (Seite 11).
  • Seite 29: Einstellen Der Dip-Schalter

    TGA914EX_1(g).book Page 9 Monday, August 7, 2006 12:00 PM Vorbereitung Einstellen der DIP-Schalter DIP-Schalter (Voreinstellung: AN) AUS*1 Sie können die folgenden Funktionen mit den DIP-Schaltern 2 und 3 einstellen. Mit dem DIP-Schalter 1 werden keine Einstellungen vorgenommen. Schieben Sie die Tasten mit einem spitzen Gegenstand, beispielsweise einem Stift, nach Bedarf. DIP-Schalter Funktionsmodus ON (AN)
  • Seite 30: In Dieser Bedienungsanleitung Verwendete Symbole

    TGA914EX_1(g).book Page 10 Monday, August 7, 2006 12:00 PM Vorbereitung um den Vorgang zu beenden. Wiederholen In dieser Sie den Vorgang erneut ab Schritt 1. Bedienungsanleitung verwendete Symbole Symbol Bedeutung Drücken Sie auf J (Joystickmitte). Gehen Sie weiter zum nächsten Vorgang.
  • Seite 31: Kameraüberwachung

    TGA914EX_1(g).book Page 11 Monday, August 7, 2006 12:00 PM Kameraüberwachung – wenn andere Benutzer gerade interne Kameraüberwachung über Anrufe tätigen oder in einer Konferenzschaltung sind. das Mobilteil – wenn durch elektrische Interferenz bedingte Störungen durch andere Elektrogeräte auftreten. – wenn Sie gerade einen Anruf mit dem Mobilteil tätigen.
  • Seite 32: Mobilteile Von Der Schnurlosen Kamera Aus Rufen

    TGA914EX_1(g).book Page 12 Monday, August 7, 2006 12:00 PM Kameraüberwachung Kamera: Das Anzeigenelement des Mobilteils für die Die Kamera erkennt Geräusche. Kameraüberwachung L Die Kamera gibt einen Ton ab und ruft das Mobilteil eine Minute lang. Angezeigter Bedeutung Eintrag Mobilteil: Beispiel: Das Mobilteil ist mit der Drücken Sie {s}, um auf das Rufen zu...
  • Seite 33: Nützliche Einstellungen Während Der Kameraüberwachung

    TGA914EX_1(g).book Page 13 Monday, August 7, 2006 12:00 PM Kameraüberwachung Mobilteil: Einstellen der Empfindlichkeit der Audio- Drücken Sie {s}, um auf das Rufen zu Erkennung reagieren. Die schnurlose Kamera ist mit einem Sensor L Sie können den Raum, in dem sich die ausgestattet, der menschliche Stimmen, wie Kamera befindet, überwachen.
  • Seite 34: Nützliche Informationen

    TGA914EX_1(g).book Page 14 Monday, August 7, 2006 12:00 PM Nützliche Informationen Wandmontage Die schnurlose Kamera kann normal oder um 180° gedreht angebracht werden. VORSICHT: L Bringen Sie die schnurlose Kamera an dem zukünftigen Standort an und achten Sie darauf, dass das Gerät bei der Montage gut befestigt wird.
  • Seite 35: Wandmontage Der Schnurlosen Kamera

    TGA914EX_1(g).book Page 15 Monday, August 7, 2006 12:00 PM Nützliche Informationen Wandmontage der schnurlosen Kamera Standard-Montage Benutzen Sie die Wandmontageschablone Bringen Sie die schnurlose Kamera an (A), (Seite 16) als Vorlage, um die Schrauben schieben Sie sie dann nach unten (B) und (nicht mitgeliefert) in der empfohlenen nach rechts (C), bis sie sicher sitzt.
  • Seite 36: Entfernen Der Wandhalterung

    TGA914EX_1(g).book Page 16 Monday, August 7, 2006 12:00 PM Nützliche Informationen Zu den Schrauben für die Wandmontage L Benutzen Sie Schrauben der unten angegebenen Größe. L Schrauben Sie die Schrauben in die Wand, lassen Sie aber genügend Abstand zur Wand, um die schnurlose Kamera aufzuhängen.
  • Seite 37: Fehlerbehebung

    TGA914EX_1(g).book Page 17 Monday, August 7, 2006 12:00 PM Nützliche Informationen Fehlerbehebung Problem Ursache und Lösung Die schnurlose Kamera L Prüfen Sie die Anschlüsse (Seite 7). funktioniert nicht. L Die schnurlose Kamera ist nicht an der Basisstation registriert. Registrieren Sie die schnurlose Kamera an der Basisstation (Seite 10).
  • Seite 38 TGA914EX_1(g).book Page 18 Monday, August 7, 2006 12:00 PM Nützliche Informationen Problem Ursache und Lösung Ich habe die Ruftaste gedrückt, L Während das Bild der schnurlosen Kamera mit einem aber die schnurlose Kamera Mobilteil überwacht wird, reagiert die Ruftaste nicht. ruft das Mobilteil nicht.
  • Seite 39: Technische Daten

    TGA914EX_1(g).book Page 19 Monday, August 7, 2006 12:00 PM Nützliche Informationen Technische Daten Hinweis: L Änderungen der technischen Daten ohne N Standard: vorherige Ankündigung vorbehalten. DECT (Digital Enhanced Cordless L Die in dieser Bedienungsanleitung Telecommunications: Digitale, schnurlose verwendeten Abbildungen können vom verbesserte Telekommunikation) eigentlichen Produkt geringfügig abweichen.
  • Seite 40 TGA914EX_1(g).book Page 20 Monday, August 7, 2006 12:00 PM Urheberrecht: Dieses Material ist von Panasonic Communications Co., Ltd. urheberrechtlich geschützt und darf nur für interne Zwecke reproduziert werden. Jede weitere Reproduktion des Materials, sowohl im Ganzen als auch auszugsweise, ist ohne schriftliche Genehmigung von Panasonic Communications Co., Ltd. nicht gestattet.
  • Seite 41 KX-TGA914EX Modèle Pour usage à l’intérieur seulement Cette caméra sans fil est un accessoire à utiliser avec le téléphone numérique sans fil Panasonic: KX-TG9120/KX-TG9140/KX-TG9150 Vous devez enregistrer cette caméra sans fil avec votre base avant de pouvoir l’utiliser. Veuillez lire le présent manuel avant d’utiliser l’appareil et conservez-le pour...
  • Seite 42 TGA914EX_1(fr).book Page 2 Monday, July 31, 2006 6:04 PM Sommaire Introduction Introduction ..............3 Informations sur les accessoires.
  • Seite 43 TGA914EX_1(fr).book Page 3 Monday, July 31, 2006 6:04 PM Introduction Introduction Vous venez d’acquérir une caméra sans fil et nous vous en remercions. Références à nous communiquer lors de tout contact Gardez la facture d’achat de l’appareil à portée de la main lors de toute demande de réparation sous garantie.
  • Seite 44: Informations Sur Les Accessoires

    TGA914EX_1(fr).book Page 4 Monday, July 31, 2006 6:04 PM Introduction Informations sur les accessoires Accessoires inclus N° Accessoire Quantité Adaptateur secteur Référence PQLV209CE Adaptateur à montage mural Bouton d’appel <4>...
  • Seite 45: Informations Importantes

    TGA914EX_1(fr).book Page 5 Monday, July 31, 2006 6:04 PM Introduction Conditions d’utilisation de la caméra sans fil Informations importantes L La caméra sans fil est destiné à un usage intérieur uniquement. Une exposition Généralités prolongée aux rayons directs du soleil ou à la lumière d’un halogène peut endommager L N’utilisez que l’adaptateur secteur fourni avec l’objectif de la caméra.
  • Seite 46: Préparatifs

    TGA914EX_1(fr).book Page 6 Monday, July 31, 2006 6:04 PM Préparatifs Commandes A Antenne E Voyant B Objectif de la caméra F Commutateurs DIP C MIC (micro) G Haut-parleur D Bouton d’appel H PROG. (programme) Voyant de la caméra sans fil Le voyant de la caméra sans fil indique l’état comme suit.
  • Seite 47: Installation De La Caméra Sans Fil

    TGA914EX_1(fr).book Page 7 Monday, July 31, 2006 6:04 PM Préparatifs Installation de la caméra sans fil Raccordement de l’adaptateur secteur et du bouton d’appel Branchez le cordon de l’adaptateur secteur en insérant fermement la fiche (A). Branchez le cordon du bouton d’appel sur l’appareil jusqu’au déclic (B).
  • Seite 48 TGA914EX_1(fr).book Page 8 Monday, July 31, 2006 6:04 PM Préparatifs Réglage de l’angle de vue de l’objectif de la caméra sans fil Dirigez l’objectif de la caméra en appuyant sur la languette (A) et en faisant pivoter l’objectif vers le haut ou vers le bas.
  • Seite 49: Réglage Des Commutateurs Dip

    TGA914EX_1(fr).book Page 9 Monday, July 31, 2006 6:04 PM Préparatifs Réglage des commutateurs DIP Commutateurs DIP (Par défaut: ON (Activation)) OFF (Désactivation)*1 Vous pouvez régler les fonctions suivantes à l’aide des commutateurs DIP 2 et 3. Le commutateur DIP 1 n’est pas utilisé pour n’importe quel paramètre. Déplacez chaque commutateur avec un objet pointu (un stylo, par exemple) au besoin.
  • Seite 50: Symboles Utilisés Dans Ce Manuel Utilisateur

    TGA914EX_1(fr).book Page 10 Monday, July 31, 2006 6:04 PM Préparatifs Symboles utilisés dans ce manuel utilisateur Symbole Signification Appuyez sur la touche J (centre de la touche de navigation). Procédez à l’opération suivante. Appuyez sur la touche L (centre de la touche de navigation). “...
  • Seite 51: Fonction De Surveillance De La Caméra

    TGA914EX_1(fr).book Page 11 Monday, July 31, 2006 6:04 PM Fonction de surveillance de la caméra – lorsque des interférences électriques sont Fonction de surveillance de émises par des appareils électriques ; – lorsque vous êtes en communication avec le la caméra à l’aide d’un combiné.
  • Seite 52 TGA914EX_1(fr).book Page 12 Monday, July 31, 2006 6:04 PM Fonction de surveillance de la caméra L La caméra produit un bip et appelle les Elément affiché sur le combiné pour la combinés pendant 1 minute. fonction de surveillance de la caméra Combiné...
  • Seite 53 TGA914EX_1(fr).book Page 13 Monday, July 31, 2006 6:04 PM Fonction de surveillance de la caméra Caméra sans fil : Réglage de la sensibilité de la détection audio Lorsque l’utilisateur du combiné répond, La caméra sans fil est muni d’un capteur qui parlez clairement dans le micro.
  • Seite 54: Informations Utiles

    TGA914EX_1(fr).book Page 14 Monday, July 31, 2006 6:04 PM Informations utiles Montage mural La caméra sans fil peut être installé via le montage standard ou le montage inversé. ATTENTION : L Montez la caméra sans fil sur un emplacement stable sur lequel l’appareil peut être pris en charge de manière appropriée lors de son installation.
  • Seite 55 TGA914EX_1(fr).book Page 15 Monday, July 31, 2006 6:04 PM Informations utiles Montage mural de la caméra sans fil Montage standard Enfoncez les vis (non fournies) dans le mur Montez la caméra sans fil (A), puis faites-le (hauteur recommandée : 1,8 m ou moins) glisser vers le bas (B) et vers la droite (C) en utilisant le gabarit de montage mural jusqu’à...
  • Seite 56 TGA914EX_1(fr).book Page 16 Monday, July 31, 2006 6:04 PM Informations utiles A propos des vis de montage mural L Utilisez des vis dont la taille recommandée est indiquée ci-dessous. L Enfoncez les vis de montage tout en laissant un espace suffisant au niveau du mur pour accrocher la caméra sans fil.
  • Seite 57: Dépannage

    TGA914EX_1(fr).book Page 17 Monday, July 31, 2006 6:04 PM Informations utiles Dépannage Problème Problèmes et solutions La caméra sans fil ne L Vérifiez les raccordements (page 7). fonctionne pas. L La caméra sans fil n’est pas enregistré sur la base. Enregistrez-le sur la base (page 10).
  • Seite 58 TGA914EX_1(fr).book Page 18 Monday, July 31, 2006 6:04 PM Informations utiles Problème Problèmes et solutions Lorsque vous utilisez le haut- L Diminuez le volume du haut-parleur en déplaçant la touche de parleur du combiné pour passer navigation vers le bas. un appel d’intercommunication avec la caméra sans fil, le son est coupé...
  • Seite 59: Caractéristiques

    TGA914EX_1(fr).book Page 19 Monday, July 31, 2006 6:04 PM Informations utiles Angle horizontal : Environ 45° Caractéristiques Remarque : N Norme : L Les caractéristiques peuvent changer. DECT (Digital Enhanced Cordless L Les illustrations figurant dans ce manuel Telecommunications : télécommunications utilisateur peuvent différer légèrement du numériques sans fil améliorées) produit réel.
  • Seite 60 3 Ping Xi 8 Lu, Nanping Keji Gongye Yuan, Zhuhai, Guangdong, China 519060 Droit d’auteur : Cette documentation est protégée par le droit d’auteur acquis par Panasonic Communications Co., Ltd. et ne peut être reproduite qu’à des fins d’utilisation interne. Toutes les autres reproductions, partielles ou intégrales, ne sont autorisées que moyennant le consentement écrit de Panasonic Communications...

Inhaltsverzeichnis