Herunterladen Inhalt Inhalt Diese Seite drucken
AEG HK654070FB Benutzerinformation
Vorschau ausblenden Andere Handbücher für HK654070FB:
Inhaltsverzeichnis

Werbung

Verfügbare Sprachen

Verfügbare Sprachen

EN
User Manual
Hob
FR
Notice d'utilisation
Table de cuisson
DE
Benutzerinformation
Kochfeld
2
16
33
HK654070FB

Werbung

Inhaltsverzeichnis
loading

Inhaltszusammenfassung für AEG HK654070FB

  • Seite 1 User Manual HK654070FB Notice d'utilisation Table de cuisson Benutzerinformation Kochfeld...
  • Seite 2: Inhaltsverzeichnis

    9. TECHNICAL INFORMATION................. 15 FOR PERFECT RESULTS Thank you for choosing this AEG product. We have created it to give you impeccable performance for many years, with innovative technologies that help make life simpler features you might not find on ordinary appliances. Please spend a few minutes reading to get the very best from it.
  • Seite 3: Safety Information

    ENGLISH SAFETY INFORMATION Before the installation and use of the appliance, carefully read the supplied instructions. The manufacturer is not responsible if an incorrect installation and use causes injuries and damages. Always keep the instructions with the appliance for future reference.
  • Seite 4: Safety Instructions

    Do not store items on the cooking surfaces. • Metallic objects such as knives, forks, spoons and lids • should not be placed on the hob surface since they can get hot. Do not use a steam cleaner to clean the appliance.
  • Seite 5 ENGLISH • Make sure not to cause damage to • Do not use the appliance as a work the mains plug (if applicable) or to the surface or as a storage surface. mains cable. Contact an Authorised • If the surface of the appliance is Service Centre or an electrician to cracked, disconnect immediately the change a damaged mains cable.
  • Seite 6: Product Description

    2.5 Disposal • Deactivate the appliance and let it cool down before you clean it. • Disconnect the appliance from the WARNING! electrical supply before maintenance. Risk of injury or suffocation. • Do not use water spray and steam to •...
  • Seite 7 ENGLISH Sensor Function Comment field STOP+GO To activate and deactivate the function. To activate and deactivate the outer ring. Heat setting display To show the heat setting. Timer indicators of cooking To show for which zone you set the time. zones Timer display To show the time in minutes.
  • Seite 8: Daily Use

    3.4 OptiHeat Control (3 step Residual heat indicator) WARNING! There is a risk of burns from residual heat. The indicator shows the level of the residual heat. 4. DAILY USE 4.3 The heat setting WARNING! Refer to Safety chapters.
  • Seite 9: Automatic Heat Up

    ENGLISH 4.5 Automatic Heat Up When the time comes to an end, the sound operates and If you activate this function you can get a 00 flashes. The cooking necessary heat setting in a shorter time. zone deactivates. The function sets the highest heat setting for some time and then decreases to the To stop the sound: touch correct heat setting.
  • Seite 10: Offsound Control (Deactivation And Activation Of The Sounds)

    When the function operates, you cannot To deactivate the function: activate the change the heat setting. hob with . Do not set the heat setting. The function does not stop the timer Touch for 4 seconds. comes on. functions.
  • Seite 11: Examples Of Cooking Applications

    ENGLISH • Use the residual heat to keep the in the operation time depends on the food warm or to melt it. heat setting level and the length of the • The bottom of the pans and cooking cooking operation. zones must have the same dimension.
  • Seite 12: Cleaning The Hob

    • Use a special scraper for the glass. • Remove when the hob is sufficiently cool: limescale rings, water rings, fat 6.2 Cleaning the hob stains, shiny metallic discoloration. Clean the hob with a moist cloth and • Remove immediately: melted plastic, some detergent.
  • Seite 13 ENGLISH Problem Possible cause Remedy Residual heat indicator does The zone is not hot because If the zone operated suffi- not come on. it operated only for a short ciently long to be hot, speak time. to an Authorised Service Centre.
  • Seite 14: Installation

    8. INSTALLATION units and work surfaces that align to the WARNING! standards. Refer to Safety chapters. 8.3 Connection cable 8.1 Before the installation • The hob is supplied with a connection Before you install the hob, write down cable.
  • Seite 15: Technical Information

    You can not use the protection box if you install the hob above an oven. 9. TECHNICAL INFORMATION 9.1 Rating plate Modell HK654070FB PNC 949 595 012 01 Typ 58 HAD 56 AO 220 - 240 V 50 - 60 Hz Made in Germany Ser.Nr.
  • Seite 16: Service Après-Vente

    9. CARACTÉRISTIQUES TECHNIQUES..............31 POUR DES RÉSULTATS PARFAITS Merci d'avoir choisi ce produit AEG. Nous l'avons conçu pour qu'il vous offre des performances irréprochables pour longtemps, en intégrant des technologies innovantes qui vous simplifient la vie grâce à des caractéristiques que vous ne trouverez pas forcément sur des appareils ordinaires.
  • Seite 17: Consignes De Sécurité

    FRANÇAIS CONSIGNES DE SÉCURITÉ Avant d'installer et d'utiliser cet appareil, lisez soigneusement les instructions fournies. Le fabricant ne peut être tenu pour responsable des dommages et blessures liés à une mauvaise installation ou utilisation. Conservez toujours cette notice avec votre appareil pour vous y référer ultérieurement.
  • Seite 18: Instructions De Sécurité

    Il peut être dangereux de laisser chauffer de la graisse • ou de l'huile sans surveillance sur une table de cuisson car cela pourrait provoquer un incendie. N'essayez jamais d'éteindre un feu avec de l'eau. • Éteignez l'appareil puis couvrez les flammes, par exemple avec un couvercle ou une couverture ignifuge.
  • Seite 19 FRANÇAIS • L'ensemble des branchements • N'utilisez que des systèmes électriques doit être effectué par un d'isolation appropriés : des coupe- technicien qualifié. circuits, des fusibles (les fusibles à • L'appareil doit être relié à la terre. visser doivent être retirés du support), •...
  • Seite 20: Mise Au Rebut

    éloignés des vous devez les déplacer sur la surface graisses et de l'huile lorsque vous de cuisson. vous en servez pour cuisiner. • Cet appareil est exclusivement • Les vapeurs dégagées par l'huile très destiné à un usage culinaire. Ne...
  • Seite 21: Description De L'appareil

    FRANÇAIS 3. DESCRIPTION DE L'APPAREIL 3.1 Description de la table de cuisson Zone de cuisson Panneau de commande 265 mm 265 mm 145 mm 170 mm 170 mm 145 mm 120/175/210 120/175/210 3.2 Description du bandeau de commande Les touches sensitives permettent de faire fonctionner l'appareil. Les affichages, les voyants et les signaux sonores indiquent les fonctions activées.
  • Seite 22 Tou- Fonction Description sensi- tive Affichage du minuteur Pour indiquer la durée, en minutes. Pour activer ou désactiver le circuit extérieur de la zone de cuisson. Pour choisir la zone de cuisson. Pour augmenter ou diminuer la durée. Démarrage automatique Pour activer et désactiver la fonction.
  • Seite 23: Utilisation Quotidienne

    FRANÇAIS 4. UTILISATION QUOTIDIENNE Appuyez sur le niveau de cuisson AVERTISSEMENT! souhaité sur le bandeau de sélection, ou Reportez-vous aux chapitres déplacez votre doigt sur le bandeau de concernant la sécurité. sélection jusqu'à atteindre le niveau de cuisson souhaité. 4.1 Activation et désactivation Appuyez sur pendant 1 seconde pour activer ou désactiver la table de cuisson.
  • Seite 24 Pour activer la fonction, la Lorsque la durée s'est zone de cuisson doit être écoulée, un signal sonore retentit et 00 clignote. La froide zone de cuisson se Pour activer la fonction pour une zone désactive. de cuisson : appuyez sur Pour arrêter le signal sonore : appuyez...
  • Seite 25: Offsound Control (Désactivation Et Activation Des Signaux Sonores)

    FRANÇAIS sélectionnez pas de réglage de niveau Cette fonction est sans effet de cuisson. Appuyez sur pendant sur le fonctionnement des zones de cuisson. 4 secondes. s'allume. Éteignez la table de cuisson en appuyant sur 4.7 STOP+GO Pour désactiver la fonction : allumez la Cette fonction sélectionne le niveau de table de cuisson en appuyant sur .
  • Seite 26: Conseils

    5. CONSEILS • Vous pouvez utiliser la chaleur AVERTISSEMENT! résiduelle pour conserver les aliments Reportez-vous aux chapitres au chaud ou pour faire fondre. concernant la sécurité. • Veillez à ce que le fond des récipients corresponde à la dimension de la 5.1 Ustensiles de cuisson...
  • Seite 27: Entretien Et Nettoyage

    FRANÇAIS Niveau de Utilisation : Durée Conseils cuisson (min) 7 - 9 Cuire de grandes quantités 60 - 150 Ajoutez jusqu’à 3 l de liquide, d'aliments, des ragoûts et des plus les ingrédients. soupes. 9 - 12 Poêler à feu doux : escalopes, au be- Retournez à...
  • Seite 28 7.1 En cas d'anomalie de fonctionnement... Problème Cause probable Solution Vous ne pouvez pas mettre La table de cuisson n'est pas Vérifiez que la table de cuis- en fonctionnement la table connectée à une source son est correctement bran- de cuisson.
  • Seite 29: Installation

    FRANÇAIS Problème Cause probable Solution Impossible d'activer le circuit Activez d'abord le circuit in- extérieur. térieur. Il est normal qu'il y ait un point sombre sur la zone Il y a un point sombre multiple. sur la zone multiple. Les touches sensitives sont Le récipient est trop grand Placez les récipients de chaudes.
  • Seite 30: Câble D'alimentation

    La plaque meubles et sur des plans de travail signalétique se trouve au bas de la table homologués et adaptés. de cuisson. 8.3 Câble d'alimentation Numéro de série ....• La table de cuisson est fournie avec 8.2 Tables de cuisson...
  • Seite 31: Caractéristiques Techniques

    9. CARACTÉRISTIQUES TECHNIQUES 9.1 Plaque de calibrage Modèle HK654070FB PNC 949 595 012 01 Type 58 HAD 56 AO 220 - 240 V 50 - 60 Hz Fabriqué en Allemagne Numéro de série ..
  • Seite 32 Emmenez un tel produit...
  • Seite 33: Reparatur- Und Kundendienst

    8. MONTAGE.......................46 9. TECHNISCHE DATEN.................... 48 FÜR PERFEKTE ERGEBNISSE Danke, dass Sie sich für dieses AEG-Produkt entschieden haben. Wir haben es geschaffen, damit Sie viele Jahre von seiner ausgezeichneten Leistung und den innovativen Technologien, die Ihnen das Leben erleichtern, profitieren können.
  • Seite 34: Sicherheitsinformationen

    SICHERHEITSINFORMATIONEN Lesen Sie vor der Montage und dem Gebrauch des Geräts zuerst die Gebrauchsanleitung. Der Hersteller übernimmt keine Verantwortung für Verletzungen und Beschädigungen durch unsachgemäße Montage. Bewahren Sie die Gebrauchsanleitung griffbereit auf. 1.1 Sicherheit von Kindern und schutzbedürftigen Personen Das Gerät kann von Kindern ab 8 Jahren und...
  • Seite 35: Sicherheitsanweisungen

    DEUTSCH Kochen mit Fett oder Öl auf einem unbeaufsichtigten • Kochfeld ist gefährlich und kann zu einem Brand führen. Versuchen Sie nicht einen Brand mit Wasser zu • löschen, sondern schalten Sie das Gerät aus und bedecken Sie die Flamme mit einem Deckel oder einer Feuerlöschdecke.
  • Seite 36: Elektrischer Anschluss

    2.2 Elektrischer Anschluss • Stecken Sie den Netzstecker erst nach Abschluss der Montage in die WARNUNG! Steckdose. Stellen Sie sicher, dass der Brand- und Netzstecker nach der Montage noch Stromschlaggefahr. zugänglich ist. • Falls die Steckdose lose ist, schließen •...
  • Seite 37: Entsorgung

    DEUTSCH • Hat die Geräteoberfläche einen beschädigten Böden kann die Glas-/ Sprung, trennen Sie das Gerät Glaskeramikoberfläche verkratzen. umgehend von der Heben Sie das Kochgeschirr stets an, Spannungsversorgung. Dies dient zur wenn Sie es auf der Kochfläche Vermeidung eines Stromschlags. umsetzen möchten.
  • Seite 38: Gerätebeschreibung

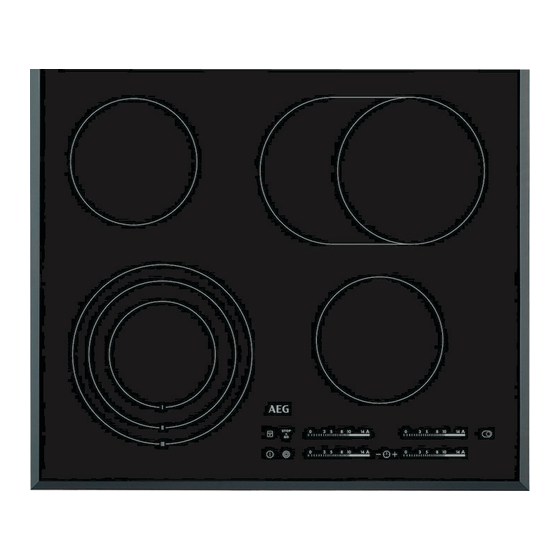
    3. GERÄTEBESCHREIBUNG 3.1 Kochfeldanordnung Kochzone Bedienfeld 265 mm 265 mm 145 mm 170 mm 170 mm 145 mm 120/175/210 120/175/210 3.2 Bedienfeldanordnung Bedienen Sie das Gerät über die Sensorfelder. Die Anzeigen, Kontrolllampen und akustischen Signale informieren Sie über die aktiven Funktionen.
  • Seite 39: Anzeigen Der Kochstufen

    DEUTSCH Sen- Funktion Anmerkung sorfeld Auswählen der Kochzone. Erhöhen oder Verringern der Zeit. Ankochautomatik Ein- und Ausschalten der Funktion. Einstellskala Einstellen der Kochstufe. 3.3 Anzeigen der Kochstufen Display Beschreibung Die Kochzone ist ausgeschaltet. Die Kochzone ist eingeschaltet. Die Funktion STOP+GO ist in Betrieb. Die Funktion Ankochautomatik ist in Betrieb.
  • Seite 40: Ein- Und Ausschalten Der Äußeren Heizkreise

    4.2 Abschaltautomatik 4.4 Ein- und Ausschalten der äußeren Heizkreise Mit dieser Funktion wird das Kochfeld in folgenden Fällen automatisch Die Kochflächen können an die Größe ausgeschaltet: des Kochgeschirrs angepasst werden. • Alle Kochzonen sind ausgeschaltet. Verwenden Sie das Sensorfeld: •...
  • Seite 41 DEUTSCH 4.6 Timer Einschalten der Funktion: Berühren Sie des Timers. leuchtet auf. Wenn die Kurzzeitmesser Kontrolllampe der Kochzone langsamer Mit dieser Funktion stellen Sie ein, wie blinkt, wird die Zeit hochgezählt. Das lange eine Kochzone für einen einzelnen Display schaltet um zwischen und der Kochvorgang eingeschaltet bleiben soll.
  • Seite 42: Tastensperre

    4.8 Tastensperre Vorübergehendes Ausschalten der Funktion für einen einzelnen Sie können das Bedienfeld sperren, Kochvorgang: Schalten Sie das Kochfeld wenn Kochzonen eingeschaltet sind. So ein. Die Kontrolllampe wird verhindert, dass die Kochstufe leuchtet. Berühren Sie 4 Sekunden lang versehentlich geändert wird.
  • Seite 43 DEUTSCH • Nutzen Sie die Restwärme, um die Kurzzeitmessers ab. Die Abschaltzeit Speisen warm zu halten oder zu hängt von der eingestellten Kochstufe schmelzen. und der Gardauer ab. • Kochgeschirrboden und Kochzone 5.4 Anwendungsbeispiele zum sollten gleich groß sein. Kochen 5.3 Öko Timer (Öko-Timer) Bei den Angaben in der Um Energie zu sparen, schaltet sich die...
  • Seite 44: Reinigung Und Pflege

    6. REINIGUNG UND PFLEGE Plastikfolie, zuckerhaltige WARNUNG! Lebensmittel. Andernfalls können die Siehe Kapitel Verschmutzungen das Kochfeld Sicherheitshinweise. beschädigen. Den speziellen Reinigungsschaber schräg zur 6.1 Allgemeine Informationen Glasfläche ansetzen und über die Oberfläche bewegen. • Reinigen Sie das Kochfeld nach •...
  • Seite 45 DEUTSCH Problem Mögliche Ursache Abhilfe Schalten Sie das Kochfeld erneut ein und stellen Sie in- nerhalb von 10 Sekunden die Kochstufe ein. Zwei oder mehr Sensorfelder Berühren Sie nur ein Sensor- wurden gleichzeitig berührt. feld. Die Funktion STOP+GO ist Siehe Kapitel „Täglicher Ge- in Betrieb.
  • Seite 46: Montage

    Problem Mögliche Ursache Abhilfe Es ertönt kein Signalton, Der Signalton ist ausgeschal- Schalten Sie den Signalton wenn Sie die Sensorfelder tet. ein. des Bedienfelds berühren. Siehe Kapitel „Täglicher Ge- brauch“. Abschaltautomatik ist einge- Schalten Sie das Kochfeld leuchtet auf.
  • Seite 47 DEUTSCH Tmax 90°C. Wenden Sie sich an den Kundendienst. 8.4 Montage min. 500mm R 5mm min. 50mm min. 55mm min. 12 mm min. 28 mm min. 20 mm 8.5 Schutzboden Falls Sie einen Schutzboden (optionales Zubehör) verwenden, ist die Schutzmatte direkt unter dem Gerät nicht nötig.
  • Seite 48: Technische Daten

    9. TECHNISCHE DATEN 9.1 Typenschild Modell HK654070FB Produkt-Nummer (PNC) 949 595 012 01 Typ 58 HAD 56 AO 220 - 240 V, 50 - 60 Hz Made in Germany Ser. Nr... 7.1 kW 9.2 Technische Daten der Kochzonen Nennleistung (höchste Koch-...
  • Seite 49 DEUTSCH...
  • Seite 50 www.aeg.com...
  • Seite 51 DEUTSCH...
  • Seite 52 www.aeg.com/shop...

Inhaltsverzeichnis