Herunterladen Inhalt Inhalt Diese Seite drucken

Werbung

Verfügbare Sprachen
  • DE

Verfügbare Sprachen

  • DEUTSCH, seite 37
Our product complies with "The Restriction Of the use of certain Hazardous Substances in electrical
and electronic equipment", and we do not use the 6 hazardous materials- Cadmium (Cd), Lead
(Pb), Mercury (Hg), Hexavalent Chromium (Cr
Diphenyl Ethers (PBDEs)- in our products.
SNC-B5368-ENG-QG.indd 1
Network Camera
Quick Guide
imagine
the possibilities
Thanks you for purchasing this Samsung product.
To receive a more complete service, please visit
our website
www.samsungsecurity.com
RoHS compliant
), Poly Brominated Biphenyls (PBBs), Poly Brominated
+6
SNC-B5368(P)
2009-08-19 오후 8:41:

Werbung

Inhaltsverzeichnis
loading

Inhaltszusammenfassung für Samsung SNC-B5368

  • Seite 1 SNC-B5368(P) Network Camera Quick Guide imagine the possibilities Thanks you for purchasing this Samsung product. To receive a more complete service, please visit our website www.samsungsecurity.com RoHS compliant Our product complies with “The Restriction Of the use of certain Hazardous Substances in electrical and electronic equipment”, and we do not use the 6 hazardous materials- Cadmium (Cd), Lead...
  • Seite 2: What's Included

    Test Monitor Cable Screw The Test Monitor Cable is connected to a portable displayer and used for testing the camera. If you intend to use it for an actual monitoring camera, use the BNC cable instead. SNC-B5368-ENG-QG.indd 2 2009-08-19 오후 8:41:...
  • Seite 3 Network Port Used to connect the PoE or LAN cable. Wipe out a dirty surface of the lens softly with a lens tissue or cloth to which you have applied ethanol. SNC-B5368-ENG-QG.indd 3 2009-08-19 오후 8:41:...
  • Seite 4 Reset Button After resetting the camera, you must run the IP Installer program to change the basic network settings such as IP address, Subnet mask, Gateway, etc., before you can connect to the network. SNC-B5368-ENG-QG.indd 4 2009-08-19 오후 8:42:...
  • Seite 5 Components Lens SNC-B5368-ENG-QG.indd 5 2009-08-19 오후 8:42:...
  • Seite 6 Used to adjust or fix the tilt of the lens. If you want to remove the bracket from the main unit or remove the camera Release Lock from the bracket, push this out and turn the main unit in the <UNLOCK> direction. SNC-B5368-ENG-QG.indd 6 2009-08-19 오후 8:42:...
  • Seite 7: Removing The Covers

    If you want to connect the Alarm I/O connectors, you must remove the dome cover and lens cover beforehand. Turn the dome cover counter-clockwise. Remove the dome cover by lifting it up. Tap on either end of the lens cover to remove it. SNC-B5368-ENG-QG.indd 7 2009-08-19 오후 8:42:...
  • Seite 8: Power Supply

    You can also use a router featuring PoE (Power over Ethernet) to supply power to the camera. Connecting to the monitor Connect the [v_oUT] port of the camera to the video input port of the monitor. Network Connection Connect the Network cable to the local network or to the Internet. SNC-B5368-ENG-QG.indd 8 2009-08-19 오후 8:42:...
  • Seite 9 GND : Used for earth-grounding.  ALARM OUT 1, 2 : Used to connect the alarm output signal.  Alarm I/o Wiring Diagram ALARM IN 1 ALARM IN 2 External Relay ALARM OUT 1 External Relay ALARM OUT 2 SNC-B5368-ENG-QG.indd 9 2009-08-19 오후 8:42:...
  • Seite 10: Precautions Before Installation

    Hold down the bottom lock lever while removing the cover with the other hand. Removing the cover reveals the main unit and inner cover. To fix the camera position, hold down either hook of the inner cover and lift it up. SNC-B5368-ENG-QG.indd 10 2009-08-19 오후 8:42:...
  • Seite 11 Fix the cover to the main unit. Fit the protruding part inside the cover into the corresponding hole of the main unit, and turn the cover to fix it. SNC-B5368-ENG-QG.indd 11 2009-08-19 오후 8:42:...
  • Seite 12 Then, turning the camera to the left or right is referred to as "Panning", while tilting the angle is "Tilting". For panning, the panning limit is 220˚ for the clockwise, and 120˚ for the counter- clockwise, a total of 340˚ enabled; further rotation is stopped by the stopper. SNC-B5368-ENG-QG.indd 12 2009-08-19 오후 8:42:...
  • Seite 13 The default <PASSWoRD> is 4321. In the <ADDRESS> pane, provide the necessary information. MAC (Ethernet) Address : The MAC (Ethernet) address of the applicable camera will be set automatically so you don't need to input it manually. SNC-B5368-ENG-QG.indd 13 2009-08-19 오후 8:42:...
  • Seite 14 This is the login password for the "root" user who accesses the camera. The default password is "4321". Click [oK]. Manual network setup will be completed. When the manual setup including <IP> is completed, the camera will restart. SNC-B5368-ENG-QG.indd 14 2009-08-19 오후 8:42:...
  • Seite 15 This is the login password for the "root" user who accesses the camera. The default password is "4321". Click [oK]. Auto network setup will be completed. The camera will automatically complete the network setting and restart. SNC-B5368-ENG-QG.indd 15 2009-08-19 오후 8:42:...
  • Seite 16 You can check the firmware version, serial number and manufacturer information. Reset Alarm Resets the Alarm icon. (the Alarm and Motion icons disappear.) Capture Saves the snapshot as an image file in the .jpeg or .bmp format. Print Prints out the current image. SNC-B5368-ENG-QG.indd 16 2009-08-19 오후 8:42:...
  • Seite 17 Pulse : Activates the Alarm Out port as much time as specified before deactivating it. Camera OSD Used to retrieve and customize the Camera Setup menu. Viewer Screen Displays the Live video on the screen. SNC-B5368-ENG-QG.indd 17 2009-08-19 오후 8:42:...
  • Seite 18 Business users should contact their supplier and check the terms and conditions of the purchase contract. This product and its electronic accessories should not be mixed with other commercial wastes for disposal. SNC-B5368-ENG-QG.indd 18 2009-08-19 오후 8:42:...
  • Seite 19 SNC-B5368(P) Caméra réseau Guide de prise en main rapide Imaginez les possibilités Nous vous remercions d’avoir choisi ce produit Samsung. Pour avoir accès à davantage de services, veuillez visiter notre site Web. www.samsungsecurity.com Conforme à la directive RoHS Notre produit est conforme à la directive RoHS relative à la “La limitation de l'utilisation de certaines substances dangereuses dans les composants électriques et électroniques”.
  • Seite 20 Le Cable de l'ecran test est connecté à un affichage portable et sert à tester la caméra. Si vous souhaitez l'utiliser pour une caméra de surveillance proprement dite, il vaudra mieux recourir à un câble BNC. SNC-B5368-FRA-QG.indd 2 2009-08-19 오후 9:43:...
  • Seite 21 émis. Utilisé pour connecter l'Alimentation électrique par câble Ethernet ou le câble Port Réseau LAN. Pour nettoyer la surface de l'objectif, essuyez-la soigneusement avec du papier Joseph ou n'importe quel chiffon sec imbibé d’alcool éthylique. SNC-B5368-FRA-QG.indd 3 2009-08-19 오후 9:43:...
  • Seite 22 Après avoir réinitialisé la caméra, vous devez lancer le programme IP reinitialisation Installer pour modifier les réglages réseau de base, tels que l'Adresse IP, le Masque de sous-réseau, la Passerelle, etc. avant de pouvoir vous connecter au réseau. SNC-B5368-FRA-QG.indd 4 2009-08-19 오후 9:43:...
  • Seite 23 Composants Objectif SNC-B5368-FRA-QG.indd 5 2009-08-19 오후 9:43:...
  • Seite 24 Si vous souhaitez retirer le support de l'unité principale ou désengager la Verrou de caméra de son support, appuyez sur ce verrou pour le faire ressortir puis desactivation tournez l'unité principale dans la direction indiquée par <UNLOCK>. SNC-B5368-FRA-QG.indd 6 2009-08-19 오후 9:44:...
  • Seite 25 Tournez le dôme de protection dans le sens contraire des aiguilles d'une montre. Retirez le dôme de protection en le soulevant. Appuyez sur l'une des extrémités du cache de l'objectif pour retirer celui-ci. SNC-B5368-FRA-QG.indd 7 2009-08-19 오후 9:44:...
  • Seite 26 à la caméra. Connexion à l’écran Connectez le port [V_out] de la caméra sur le port d’entrée vidéo de l’écran. Connexion Réseau Connectez le câble Réseau au réseau local ou à Internet. SNC-B5368-FRA-QG.indd 8 2009-08-19 오후 9:44:...
  • Seite 27 ALARM OUT 1, 2 : Utilisé pour la connexion du signal de sortie de l’alarme.  schéma de câblage de l’e/s de l’alarme ALARM IN 1 ALARM IN 2 External Relay ALARM OUT 1 External Relay ALARM OUT 2 SNC-B5368-FRA-QG.indd 9 2009-08-19 오후 9:44:...
  • Seite 28: Précautions À Prendre Avant L'installation

    Le retrait du cache met à nu l'unité principale et le cache interne. Pour fixer la position de la caméra, appuyez longuement sur les deux supports du cache interne puis soulevez celui-ci. SNC-B5368-FRA-QG.indd 10 2009-08-19 오후 9:44:...
  • Seite 29 Fixez le couvercle sur l'unité principale. Alignez la partie saillante située à l'intérieure du couvercle sur le trou correspondant de l'unité principale et tournez le couvercle pour le fixer. SNC-B5368-FRA-QG.indd 11 2009-08-19 오후 9:44:...
  • Seite 30 Pour le panoramique, l'angle limite de rotation est respectivement de 220° degrés dans le sens des aiguilles d'une montre et de 120° dans le sens inverse, ce qui fait au total un angle de rotation activé de 340°. Toute rotation qui dépasserait cette limite est automatiquement arrêtée par la butée. SNC-B5368-FRA-QG.indd 12 2009-08-19 오후 9:44:...
  • Seite 31 Renseignez les informations nécessaires dans la sous-fenêtre <ADDRess>. MAC (Ethernet) Address : L’adresse MAC (Ethernet) de la caméra applicable est réglée automatiquement de sorte que vous n’ayez pas à entrer les informations la concernant manuellement. SNC-B5368-FRA-QG.indd 13 2009-08-19 오후 9:44:...
  • Seite 32 Le mot de passe par défaut est « 4321 ». Cliquez sur [oK]. La confi guration réseau manuelle est ainsi terminée. Lorsque la confi guration manuelle, notamment celle de l’option <ip>, est terminée, la caméra redémarre. SNC-B5368-FRA-QG.indd 14 2009-08-19 오후 9:44:...
  • Seite 33 « root » qui accède à la caméra. Le mot de passe par défaut est « 4321 ». Cliquez sur [oK]. La confi guration réseau automatique est ainsi terminée. La caméra termine automatiquement le réglage réseau et redémarre. SNC-B5368-FRA-QG.indd 15 2009-08-19 오후 9:44:...
  • Seite 34 Vous pouvez vérifier la version du micrologiciel, le numéro de série et les informations A propos de relatives au constructeur. Réinit. al Réinitialise l’icône de l’alarme. (Les icônes Alarme et Mouvement disparaissent.) Prise Enregistre l’instantané comme un fichier image au format .jpeg ou .bmp. Impr Imprime l’image actuelle. SNC-B5368-FRA-QG.indd 16 2009-08-19 오후 9:44:...
  • Seite 35 Impulsion : Active le port d’alarme autant de fois que spécifié avant sa désactivation. OSD caméra Sert à extraire et personnaliser le menu Configuration de la caméra. Ecran du visionneur Afficher la vidéo Direct à l'écran. SNC-B5368-FRA-QG.indd 17 2009-08-19 오후 9:44:...
  • Seite 36 Les entreprises et professionnels sont invités à contacter leurs fournisseurs et à consulter les conditions de leur contrat de vente. Ce produit et ses accessoires ne peuvent être jetés avec les autres déchets professionnels et commerciaux. SNC-B5368-FRA-QG.indd 18 2009-08-19 오후 9:44:...
  • Seite 37 SNC-B5368(P) Netzwerkkamera Kurzanleitung erleben sie die möglichkeiten Danke, dass Sie sich für dieses Produkt von Samsung entschieden haben. Um den vollständigen Service zu erhalten, besuchen Sie bitte unsere Website. www.samsungsecurity.com RoHS-konform Unser Produkt entspricht der RoHS-Richtlinie (RoHS = Restriction of the use of certain Hazardous Substances in electrical and electronic equipment).
  • Seite 38 IP-INSTALLATIONS-CD Monitor-Testkabel Schraube Das Monitor-Testkabel ist mit einem nicht fest installierten Anzeigegerät verbunden und dient dazu, die Kamera zu testen. Für eine Kamera, die für die tatsächliche Überwachung verwendet wird, verwenden Sie das BNC- Kabel. SNC-B5368-GER-QG.indd 2 2009-08-19 오후 11:53:...
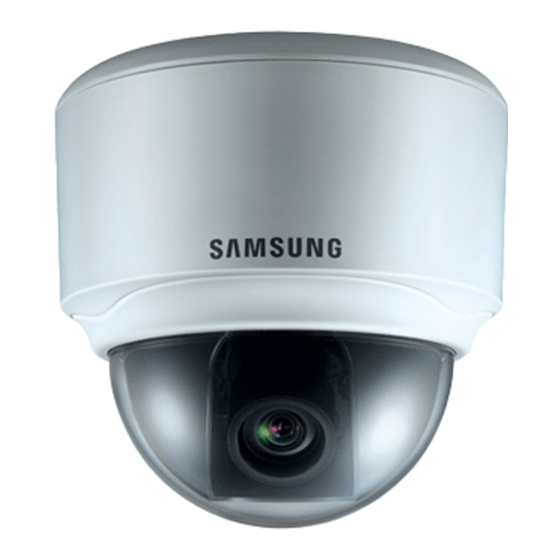
  • Seite 39: Auf Einen Blick

    Zur Verbindung mit dem Videoeingang des Monitors. Das Videosignal der Videoausgang Kamera wird hierüber gesendet. Netzwerkanschluss Zur Verbindung des PoE- oder LAN-Kabels. Falls die Oberfläche des Objektivs verschmutzt sein sollte, reinigen Sie sie sanft mit einem entsprechenden Tuch, auf dem sich etwas Ethanol befindet. SNC-B5368-GER-QG.indd 3 2009-08-19 오후 11:53:...
  • Seite 40 System neu gestartet wird. Reset-Taste Nachdem Sie die Kamera zurückgesetzt haben, müssen Sie das IP- Installationsprogramm ausführen, um grundlegende Netzwerkeinstellungen wie die IP-Adresse, Subnetzmaske, das Gateway usw. vorzunehmen, bevor Sie eine Verbindung mit dem Netzwerk herstellen können. SNC-B5368-GER-QG.indd 4 2009-08-19 오후 11:53:...
  • Seite 41 Objektiv SNC-B5368-GER-QG.indd 5 2009-08-19 오후 11:54:...
  • Seite 42 Zum Einstellen oder Fixieren des Neigungswinkels des Objektivs. Wenn Sie die Halterung vom Hauptgerät oder die Kamera von der Halterung Entriegelungssperre entfernen möchten, drücken Sie die Entriegelungssperre heraus und drehen Sie das Hauptgerät in Richtung <UNLOCK>. SNC-B5368-GER-QG.indd 6 2009-08-19 오후 11:54:...
  • Seite 43: Abdeckungen Entfernen

    Wenn Sie die Stecker mit dem Alarmeingang/Alarmausgang verbinden möchten, müssen Sie zuerst die Kuppelabdeckung und das Objektiv entfernen. Drehen Sie die Kuppelabdeckung linksherum. Entfernen Sie die Kuppelabdeckung, indem Sie sie herauslösen. Drücken Sie auf jedes Ende der Objektivabdeckung, um sie zu entfernen. SNC-B5368-GER-QG.indd 7 2009-08-19 오후 11:54:...
  • Seite 44: Anschluss Des Monitors

    Kamera mit Strom zu versorgen. anschluss des monitors Verbinden Sie den Port für den Videoausgang der Kamera [V_out] mit dem Port für den Videoeingang des Monitors. netzwerk-Verbindung Verbinden Sie das Netzwerkkabel mit dem lokalen Netzwerk oder dem Internet. SNC-B5368-GER-QG.indd 8 2009-08-19 오후 11:54:...
  • Seite 45: Verbindung Der Kabel Für Den Alarmeingang/Alarmausgang

    ALARM OUT 1, 2 : Zur Verbindung des Signals für den Alarmausgang.  Verbindung der kabel für den alarmeingang/alarmausgang ALARM IN 1 ALARM IN 2 External Relay ALARM OUT 1 External Relay ALARM OUT 2 SNC-B5368-GER-QG.indd 9 2009-08-19 오후 11:54:...
  • Seite 46: Bevor Sie Mit Der Installation Beginnen

    Hand entfernen. Durch das Entfernen der Abdeckung wird die Haupteinheit geöffnet und die innere Abdeckung sichtbar. Um die Kameraposition zu fixieren, drücken Sie jeden Haken der inneren Abdeckung nach unten und lösen Sie sie heraus. SNC-B5368-GER-QG.indd 10 2009-08-19 오후 11:54:...
  • Seite 47 Sie sie dann herunter, bis Sie ein Klicken hören. Bringen Sie die Abdeckung an die Haupteinheit an. Führen Sie die hervorstehende Stelle innerhalb der Abdeckung in das entsprechende Loch der Haupteinheit ein und drehen Sie die Abdeckung, um sie zu befestigen. SNC-B5368-GER-QG.indd 11 2009-08-19 오후 11:54:...
  • Seite 48: Überwachungsrichtung Der Kamera Einstellen

    „Neigen“ bezieht sich auf den Neigungswinkel. Beim Schwenken kann die Kamera 220° im Uhrzeigersinn und 120° gegen den Uhrzeigersinn gedreht werden. Dadurch steht ein gesamter Winkel von 340° zur Verfügung; möchten Sie die Kamera über diese Begrenzung hinaus drehen, wird dies von einem Stopper blockiert. SNC-B5368-GER-QG.indd 12 2009-08-19 오후 11:54:...
  • Seite 49: Einstellung Der Statischen Ip

    <HttP Port> werden angezeigt. Das standardmäßige <PaSSWorD> lautet 4321. Geben Sie die nötigen Informationen in dem Fenster <aDDreSS> an. MAC-(Ethernet)Adresse : Die MAC- (Ethernet)Adresse der verwendeten Kamera wird automatisch eingerichtet. Sie müssen sie also nicht manuell eingeben. SNC-B5368-GER-QG.indd 13 2009-08-19 오후 11:54:...
  • Seite 50 Es handelt sich um das Kennwort zum Anmelden des Benutzers „root“, der auf die Kamera zugreift. Das Standardkennwort lautet „4321“. Klicken Sie auf [ok]. Die manuelle Netzwerkeinstellung ist beendet. Wenn die manuelle Einstellung einschließlich <iP> beendet wurde, wird die Kamera neu gestartet. SNC-B5368-GER-QG.indd 14 2009-08-19 오후 11:54:...
  • Seite 51: Automatische Netzwerkeinstellung

    Es handelt sich um das Kennwort zum Anmelden des Benutzers „root“, der auf die Kamera zugreift. Das Standardkennwort lautet „4321“. Klicken Sie auf [ok]. Die automatische Netzwerkeinstellung ist beendet. Die Kamera wird die Netzwerkeinstellungen automatisch beenden und neu starten. SNC-B5368-GER-QG.indd 15 2009-08-19 오후 11:54:...
  • Seite 52: Den Live-Bildschirm Verwenden

    Sie können die Version der Firmware, die Seriennummer und Herstellerinformationen betrachten. Alarm zurücksetzen Das Alarmsymbol wird zurückgesetzt. (Die Symbole für Alarm und Bewegung werden ausgeblendet.) Aufnahme Der Schnappschuss wird in dem Format .jpeg oder .bmp gespeichert. Drucken Druckt das aktuelle Bild aus. SNC-B5368-GER-QG.indd 16 2009-08-19 오후 11:54:...
  • Seite 53 Aus : Der ausgewählte Alarmausgang wird deaktiviert. Impuls : Der Alarmausgang wird so oft aktiviert, wie dies festgelegt wurde, bevor er deaktiviert wird. Kamera-OSD Zum Aufrufen und Anpassen des Menüs zur Kameraeinstellung. Viewer-Bildschirm Das Live-Video wird auf dem Bildschirm angezeigt. SNC-B5368-GER-QG.indd 17 2009-08-19 오후 11:54:...
  • Seite 54: Korrekte Entsorgung Von Altgeräten

    Erfahrung zu bringen, wo Sie das Altgerät bzw. Zubehörteile für eine umweltfreundliche Entsorgung abgeben können. Gewerbliche Nutzer wenden sich an ihren Lieferanten und gehen nach den Bedingungen des Verkaufsvertrags vor. Dieses Produkt und elektronische Zubehörteile dürfen nicht zusammen mit anderem Gewerbemüll entsorgt werden. SNC-B5368-GER-QG.indd 18 2009-08-19 오후 11:54:...
  • Seite 55: Manual De Consulta Rápida

    SNC-B5368(P) Cámara de red Manual de consulta rápida imagine las posibilidades Gracias por adquirir este producto Samsung. Para recibir un servicio más completo, visite nuestro sitio Web. www.samsungsecurity.com Compatibilidad RoHS Nuestro producto cumple con “La restricción de uso de ciertas sustancias peligrosas en equipo eléctrico y electrónico”, y no utilizamos los seis materiales peligrosos: Cadmio Cd), Plomo (Pb), Mercurio (Hg), Cromo...
  • Seite 56 El CABLE DE MONITOR DE PRUEBA está conectado a un visor portátil y se utiliza para probar la cámara. Si intenta utilizado para una cámara de vigilancia real, utilice el cable BNC en su lugar. SNC-B5368-SPA-QG.indd 2 2009-08-20 오전 10:35:...
  • Seite 57 Puerto Red Se utiliza para conectar el cable PoE o LAN. Limpie suavemente con un pañuelo o un paño especial impregnado de etanol la superficie sucia del objetivo. SNC-B5368-SPA-QG.indd 3 2009-08-20 오전 10:35:...
  • Seite 58 Tras reinicializar la cámara, debe ejecutar el programa IP Installer para cambiar los ajustes básicos de red como la dirección IP, la máscara de subred, la puerta de enlace, etc., antes de conectar a la red. SNC-B5368-SPA-QG.indd 4 2009-08-20 오전 10:35:...
  • Seite 59 Componentes Objetivo SNC-B5368-SPA-QG.indd 5 2009-08-20 오전 10:35:...
  • Seite 60 Se utiliza para ajustar o fijar la inclinación de la lente. Inclinación Para retirar el soporte de la unidad principal o retirar la cámara del soporte, Liberar Bloquear extraiga esto y gire la unidad principal en la dirección de <UNLOCK>. SNC-B5368-SPA-QG.indd 6 2009-08-20 오전 10:35:...
  • Seite 61 Para conectar los conectores de E/S de alarma, debe retirar antes la cubierta Domo y la cubierta de la lente. Gire el Domo hacia la izquierda. Retire la cubierta del Domo levantándola. Golpee suavemente un extremo de la cubierta de la lente para retirarla. SNC-B5368-SPA-QG.indd 7 2009-08-20 오전 10:35:...
  • Seite 62: Conexión Con Otros Dispositivos

    Conexión al monitor Conecte el puerto [V_out] de la cámara al puerto de entrada de vídeo del monitor. Conexión Red Conecte el cable Red a la red local o a Internet. SNC-B5368-SPA-QG.indd 8 2009-08-20 오전 10:35:...
  • Seite 63 ALARM OUT 1, 2 : se utiliza para conectar la señal de salida de alarma.  diagrama de cableado de e/s de alarma ALARM IN 1 ALARM IN 2 External Relay ALARM OUT 1 External Relay ALARM OUT 2 SNC-B5368-SPA-QG.indd 9 2009-08-20 오전 10:35:...
  • Seite 64: Precauciones Antes De La Instalación

    Al retirar la cubierta verá la unidad principal y la cubierta interior. Para fijar la posición de la cámara, presione uno de los enganches de la cubierta interior y levántela. SNC-B5368-SPA-QG.indd 10 2009-08-20 오전 10:35:...
  • Seite 65 Fije la cubierta a la unidad principal. Coloque la parte protuberante en el orificio correspondiente de la unidad principal y gire la cubierta para dejarla fija. SNC-B5368-SPA-QG.indd 11 2009-08-20 오전 10:35:...
  • Seite 66 ángulo se denomina "Inclinación". Para la panorámica, el límite de panorámica es de 220° grados para la derecha y de 120° para la izquierda, lo que permite un total de 340°; una rotación mayor queda detenida por el tope. SNC-B5368-SPA-QG.indd 12 2009-08-20 오전 10:35:...
  • Seite 67 La <passWoRd> predeterminada es 4321. En el panel <addRess>, facilite la información necesaria. Dirección MAC(Ethernet): la dirección MAC (Ethernet) de la cámara aplicable se defi nirán automáticamente de forma que no tendrá que introducirla manualmente. SNC-B5368-SPA-QG.indd 13 2009-08-20 오전 10:35:...
  • Seite 68 Es la contraseña de inicio de sesión para el usuario "root" que accede a la cámara. La contraseña predeterminada es "4321". Haga clic en [oK]. La confi guración manual de la red queda completada. Una vez completada la confi guración manual incluido <ip>, la cámara se reiniciará. SNC-B5368-SPA-QG.indd 14 2009-08-20 오전 10:35:...
  • Seite 69 "root" que accede a la cámara. La contraseña predeterminada es "4321". Haga clic en [oK]. La confi guración automática de la red queda completada. La cámara completará automáticamente la confi guración de red y se reiniciará. SNC-B5368-SPA-QG.indd 15 2009-08-20 오전 10:35:...
  • Seite 70 Puede comprobar la versión de firmware, el número de serie y la información del fabricante. Reinicio de alarma Reinicia el icono de Alarma. (Desaparecen los iconos de Alarma y Movimiento.) Capturar Guarda la instantánea como un archivo de imagen en formato .jpeg o .bmp. Imprimir Imprime la imagen actual. SNC-B5368-SPA-QG.indd 16 2009-08-20 오전 10:35:...
  • Seite 71 Pulso: activa el puerto de salida de alarma el tiempo especificado antes de desactivarlo. OSD cámara Se utiliza para recuperar y personalizar el menú de configuración de cámara. Pantalla del visor Muestra en pantalla el vídeo en directo. SNC-B5368-SPA-QG.indd 17 2009-08-20 오전 10:35:...
  • Seite 72: Eliminación Correcta De Este Producto

    Los usuarios comerciales pueden contactar con su proveedor y consultar las condiciones del contrato de compra. Este producto y sus accesorios electrónicos no deben eliminarse junto a otros residuos comerciales. SNC-B5368-SPA-QG.indd 18 2009-08-20 오전 10:35:...
  • Seite 73: Guida Rapida

    Videocamera di rete Guida Rapida immagina le possibilità Grazie per avere acquistato questo prodotto Samsung. Per un servizio più completo, visitare il nostro sito Web. www.samsungsecurity.com Conformità RoHS Il prodotto è conforme con la direttiva RoHS (Restrizione dell’uso di determinate sostanze pericolose...
  • Seite 74: Accessori Forniti

    Cavo test monitor Vite Il Cavo test monitor è collegato ad uno schermo portatile e utilizzato per provare la videocamera. Se si desidera utilizzarlo con una videocamera di monitoraggio vera e propria, utilizzare invece il cavo BNC. SNC-B5368-ITA-QG.indd 2 2009-08-19 오후 9:45:...
  • Seite 75 Porta di uscita video emesso il segnale video della videocamera. Porta Rete Utilizzata per collegare il cavo PoE o LAN. Pulire delicatamente la superficie sporca dell'obiettivo con una cartina per obiettivi o con un panno inumidito con etanolo. SNC-B5368-ITA-QG.indd 3 2009-08-19 오후 9:45:...
  • Seite 76 Tasto reset Dopo avere resettato la videocamera, eseguire il programma IP Installer per cambiare le impostazioni di rete di base come l'indirizzo IP, la subnet mask, il gateway, ecc., prima di collegarsi alla rete. SNC-B5368-ITA-QG.indd 4 2009-08-19 오후 9:45:...
  • Seite 77 Obiettivo SNC-B5368-ITA-QG.indd 5 2009-08-19 오후 9:45:...
  • Seite 78 Vite di inclinazione Utilizzata per regolare o fissare l'inclinazione dell'obiettivo. Per rimuovere la staffa dall'unità principale o la videocamera dalla staffa, Perno di sblocco spingerlo fuori e ruotare l'unità principale in direzione <UNLOCK>. SNC-B5368-ITA-QG.indd 6 2009-08-19 오후 9:45:...
  • Seite 79 Per collegare i connettori di ingresso/uscita allarme, rimuovere prima il coperchio della cupola e il copriobiettivo. Ruotare il coperchio della cupola in senso antiorario. Rimuovere il coperchio della cupola sollevandolo. Per rimuovere il copriobiettivo toccare una delle due estremità. SNC-B5368-ITA-QG.indd 7 2009-08-19 오후 9:45:...
  • Seite 80: Collegamento Con Altri Dispositivi

    Si può anche utilizzare un router PoE (Power over Ethernet) per alimentare la videocamera. collegamento al monitor Collegare la porta [v_out] della videocamera alla porta di ingresso video del monitor. connessione rete Collegare il cavo Rete alla rete locale o a Internet. SNC-B5368-ITA-QG.indd 8 2009-08-19 오후 9:45:...
  • Seite 81 ALARM OUT 1, 2 : È utilizzata per collegare il segnale di uscita allarme.  schema elettrico i/o allarme ALARM IN 1 ALARM IN 2 External Relay ALARM OUT 1 External Relay ALARM OUT 2 SNC-B5368-ITA-QG.indd 9 2009-08-19 오후 9:45:...
  • Seite 82: Precauzioni Prima Dell'installazione

    Tenendo giù la leva di bloccaggio in basso rimuovere il coperchio con l'altra mano. Rimuovendo il coperchio l'unità principale e il coperchio interno vengono scoperti. Per fissare la posizione della videocamera, tenere abbassati entrambi i ganci del coperchio interno e sollevarlo. SNC-B5368-ITA-QG.indd 10 2009-08-19 오후 9:45:...
  • Seite 83 Allineare i due fori dei blocchi lato aletta sul coperchio interno al foro corrispondente dell'unità principale e premerlo finché non si sente un clic. Fissare il coperchio all'unità principale. |Allineare la parte sporgente all'interno del coperchio al foro corrispondente dell'unità principale e ruotare il coperchio per fissarla. SNC-B5368-ITA-QG.indd 11 2009-08-19 오후 9:46:...
  • Seite 84 è definito "Inclinazione". Per la rotazione orizzontale, il limite è 220° gradi in senso orario e 120° in senso antiorario, per un totale consentito di 340°; oltre questi limiti la rotazione è arrestata dal fermo. SNC-B5368-ITA-QG.indd 12 2009-08-19 오후 9:46:...
  • Seite 85 La <pAssWord> predefi nita è 4321. Nel riquadro <Address> inserire le informazioni necessarie. MAC (Ethernet) Address (Indirizzo): L'indirizzo MAC (Ethernet) della videocamera a cui può essere applicato viene impostato automaticamente in modo da non dover essere inserito manualmente. SNC-B5368-ITA-QG.indd 13 2009-08-19 오후 9:46:...
  • Seite 86 Questa è la password di accesso per l'utente "root" che accede alla videocamera. La password predefi nita è "4321". Fare clic su [oK]. La confi gurazione manuale della rete viene completata. Al termine dell'impostazione manuale, compreso l'<ip>, la videocamera viene riavviata. SNC-B5368-ITA-QG.indd 14 2009-08-19 오후 9:46:...
  • Seite 87 "root" che accede alla videocamera. La password predefi nita è "4321". Fare clic su [oK]. La confi gurazione automatica della rete viene completata. La videocamera completa automaticamente la confi gurazione della rete e viene riavviata. SNC-B5368-ITA-QG.indd 15 2009-08-19 오후 9:46:...
  • Seite 88 È possibile controllare la versione del firmware, il numero di serie e le informazioni del costruttore. Reset allarme Ripristina l'icona Allarme (le icone di allarme e movimento scompaiono). Cattura Salva l'istantanea come file immagine in formato .jpeg o .bmp. Stampa Stampa l'immagine corrente. SNC-B5368-ITA-QG.indd 16 2009-08-19 오후 9:46:...
  • Seite 89 Impulso: Attiva la porta di uscita allarme per il tempo specificato prima di disattivarla. OSD videocamera È utilizzata per recuperare e personalizzare il menu di configurazione videocamera. Schermata visualizzatore Visualizza il video live sullo schermo. SNC-B5368-ITA-QG.indd 17 2009-08-19 오후 9:46:...
  • Seite 90: Corretto Smaltimento Del Prodotto

    Gli utenti aziendali sono invitati a contattare il proprio fornitore e verificare i termini e le condizioni del contratto di acquisto. Questo prodotto e i relativi accessori elettronici non devono essere smaltiti unitamente ad altri rifiuti commerciali. SNC-B5368-ITA-QG.indd 18 2009-08-19 오후 9:46:...
  • Seite 91 SNC-B5368(P) ネットワークカメラ 簡易ガイド この可能性を 想像する Samsung製品をご購入いただき、ありがとうございます。 より充実したサービスをご利用いただくために、 弊社のWebサイトにアクセスしてください。 www.samsungsecurity.com RoHS指令準拠 当社の製品は"電気電子機器に含まれる特定有害物質の使用制限"に準拠しており、 6種類 の有害物質 - カドミウム (Cd) 、 鉛 (Pb) 、 水銀 (Hg) 、 六価クロム (Cr ) 、 ポリ臭素化ビフェニ ル (PBB) 、 ポリ臭化ジフェニルエーテル (PBDE) - は使用しておりません。 SNC-B5368-JAP-QG.indd 1 2009-08-20 오전 10:29:...
  • Seite 92 キット内容 製品パッケージに、 カメラと付属品がすべて同梱されていることをご確認ください。 ユーザーマニュアル/ カメラ ユーザーマニュアル IPインストーラCD テストモニターケーブル ネジ テストモニターケーブルはポータブルディスプレイヤーに接続し、カメラテストに使用 します。 実際の監視カメラに使用する場合は、BNCケーブルを使用してください。 SNC-B5368-JAP-QG.indd 2 2009-08-20 오전 10:29:...
  • Seite 93 概観 外観 項目 説明 ドームカバー レンズとメインユニットの保護に使用するケースカバー。 メインユニット レンズ、 スイッチボード、 PCBおよびネジで構成されます。 電源ポート 電源ケーブルの差込みに使用します。 モニターの映像入力コネクタの接続に使用し、 ここからカメラの映像 映像出力ポート 信号が出力されます。 ネットワークポート PoEまたはLANケーブルの接続に使用します。 レンズ表面の汚れは、レンズティッシューまたはエタノールを染み込ませた布でそっと 拭き取ってください。 SNC-B5368-JAP-QG.indd 3 2009-08-20 오전 10:29:...
  • Seite 94 内部 項目 説明 次の2つのポートで構成されます。 : アラーム入出力 - ALARM IN : アラーム入力信号を受信します。 ポート - ALARM OUT : アラーム出力信号を出力します。 - GND : 接地に使用します。 すべてのカメラ設定を工場出荷時のデフォルトに復元します。 約3秒 間押し続けてシステムインジケータをオフにし、 システムを再起動し ます。 リセットボタン カメラをリセットし、 ネットワークに接続する前に、 IPインストーラ プログラムを実行して、 IPアドレス、 サブネットマスク、 ゲートウェ イなどの基本的なネットワーク設定を変更する必要があります。 SNC-B5368-JAP-QG.indd 4 2009-08-20 오전 10:29:...
  • Seite 95 部品 レンズ SNC-B5368-JAP-QG.indd 5 2009-08-20 오전 10:29:...
  • Seite 96 項目 説明 内部カバー メインユニットの保護に使用するカバー。 ウィング側フック 端をたたいて内部カバーを外します。 テストモニターケーブルはポータブルディスプレイヤーに接続し、 カ モニターアウト メラテストに使用します。 ブラケット カメラを壁または天井にネジで取り付けるために使用します。 上部蓋 カメラを天井に取り付ける場合は、 配線のためこの蓋を外します。 ズームレバー レンズのズーム倍率を調整または固定するために使用します。 フォーカスを調整する場合は左右に回し、 フォーカスを固定する場合 フォーカスレバー は時計回りに回します。 チルトネジ レンズのチルトを調整または固定するために使用します。 メインユニットからブラケットを取り外す、 またはブラケットからカ リリースロック メラを取り外す場合は、 これを押してメインユニットを<UNLOCK>方 向に回します。 SNC-B5368-JAP-QG.indd 6 2009-08-20 오전 10:29:...
  • Seite 97 カバーの取外し アラーム入出力コネクタを接続する場合は、 その前にドームカバーとレンズカバーを取り外し ます。 ドームカバーを反時計回りに回します。 ドームカバーを持ち上げて取り外します。 レンズカバーの端をたたいて取り外します。 SNC-B5368-JAP-QG.indd 7 2009-08-20 오전 10:29:...
  • Seite 98 他のデバイスとの接続 電源 モニター ネットワーク 電源 電源アダプタを電源入力ポートに接続します。 電源ケーブルの接続時に、極性を逆にしないようご注意ください。 また、PoE(イーサネットケーブルを利用した電源供給)対応ルーターを使用して、カ メラに電源を供給することもできます。 モニターへの接続 カメラの[V_OUT]ポートを、 モニターの映像入力ポートに接続します。 ネットワーク接続 ネットワークケーブルをローカルネットワークもしくはインターネットに接続します。 SNC-B5368-JAP-QG.indd 8 2009-08-20 오전 10:29:...
  • Seite 99 ALARM IN 1, 2 : アラーム入力信号の接続に使用します。  GND : 接地に使用します。  ALARM OUT 1, 2 : アラーム出力信号の接続に使用します。  アラーム入出力配線図 ALARM IN 1 ALARM IN 2 External Relay ALARM OUT 1 External Relay ALARM OUT 2 SNC-B5368-JAP-QG.indd 9 2009-08-20 오전 10:29:...
  • Seite 100 取付け 取付けに関する注意事項 カメラを取り付ける前に、 以下の指示をよく読んでください。 少なくともカメラ重量の5倍に耐えることができる取付け場所(天井または壁)を選  択します。 引っかかっていたり、はがれたケーブルは製品の損傷または火災の原因となります。  安全のため、設置場所に人を近づけないでください。 また、万が一のため持ち物は取  付け場所には置かないでください。 カメラの取付け 下部のロックレバーを押し下げながら、もう一方の 手でカバーを取り外します。 カバーを取り外すと、メインユニットおよび内部カ バーが見えます。 カメラ位置を固定するには、内部カバーのいずれか のフックを押して持ち上げます。 SNC-B5368-JAP-QG.indd 10 2009-08-20 오전 10:29:...
  • Seite 101 メインユニットを<UNLOCK>方向に回してリリースロック を押し、ブラケットを取り外します。 うまくいかない場合は、ブラケットの下部の穴を使用してブ ラケットを<LOCK>方向に回します。 提供されたネジ(x3)を使用して、ブラケットを所定 の位置(天井または壁)に固定します。 ブラケットの<CAMERA FRONT>ラベルがカメラの監視方 向を向くようにします。 ケーブルをブラケットを通して天井または壁に配置し ます。 上部蓋をしっかり押して取り外してから、ケーブルを 上部蓋 天井に配置します。 カメラを天井に設置しない場合は、<CAMERA FRONT>ラ ベル側と反対の空いているエリアを使用して配線します。 メインユニットをブラケットに取り付けます。 メインユニットのマーキング穴をブラケットの<CAMERA FRONT>ラベルに合わせ て、ユニットを<LOCK>方向に回します。 所定の方向にレンズを調整します。 レンズ方向の調整については、"カメラの監視方向の調整"を参照してください。 内部カバーをメインユニットに固定します。 内部カバーのウィング側ロックの2つの穴をメインユニットの対応する穴に合わ せ、カチッというまでカバーを押し下げます。 カバーをメインユニットに固定します。 カバー内部の突起部をメインユニットの対応する穴に合わせ、カバーを回して固定 します。 SNC-B5368-JAP-QG.indd 11 2009-08-20 오전 10:29:...
  • Seite 102 カメラの監視方向の調整 パンニング チルト レンズの回転 カメラが天井に固定されている場合にのみカメラの方向を調整できます。 カメラを左右に回すことを 「パンニング」 、 角度をつけることを 「チルト」 と言います。 パンニ ングの場合、 パンニング限度は時計回りでは220° 、 反時計回りでは120° で、 合計340° が可能で す。 それ以上はストッパーがあるため回転できません。 SNC-B5368-JAP-QG.indd 12 2009-08-20 오전 10:30:...
  • Seite 103 静的IPの設定 手動ネットワーク設定 <IP Installer.exe>を実行し、 カメラの検索リストを表示します。 最初の起動時には、 [Auto Set]と[Manual Set]は両方グレー表示となります。 IPv6設定のカメラが見つかった場合、カメラがこの機能をサポートしていないため、ボ タンがグレー表示されます。 検索リスト内のカメラを選択します。背面 にMAC(イーサネット)アドレスのラベル が貼付されているカメラを検索します。 [Auto Set]と[Manual Set]の両方のボタン が有効となります。 [Manual Set]をクリックします。 MANUAL SETダイアログが表示されます。 カメラの<IP Address>、<Subnet Mask>、<Gateway>、<HTTP Port>の初期値が表示されます。 <PASSWORD>の初期値は4321です。 <ADDRESS>ペインに必要な情報が表示 されます。 MAC(イーサネット)アドレス: 使用可 能なカメラのMAC(イーサネット)アド レスは自動的に設定されるため、手動で 入力する必要はありません。 SNC-B5368-JAP-QG.indd 13 2009-08-20 오전 10:30:...
  • Seite 104 Device Port : 映像信号の送信の制御に使用され、初期値は60001(TCP)です。  TCP Port : TCPプロトコルで映像信号を送信するためのポートで、初期値は60002  (TCP)です。 UDP Port : UDPユニキャスト方式を使用して映像信号を送信するためのポート  で、初期値は60003(UDP)です。 Upload Port : ソフトウェアのファームウェアのアップグレードに使用され、初期値  は60004(TCP)です。 Multicast Port : UDPマルチキャスト方式を使用して映像信号を送信するためのポ  ートで、初期値は60005(UDP)です。 パスワードを入力してください。 これは、カメラにアクセスする"root"ユーザー用のログイン・パスワードです。パ スワードの初期値は"4321"です。 [OK]をクリックします。 手動でのネットワーク設定が完了しました。 <IP>などの手動での設定完了後、カメラを再起動します。 SNC-B5368-JAP-QG.indd 14 2009-08-20 오전 10:30:...
  • Seite 105 自動ネットワーク設定 <IP Installer.exe>を実行し、 カメラの検索リストを表示します。 最初の起動時には、 [Auto Set]と[Manual Set]は両方グレー表示となります。 IPv6設定のカメラが見つかった場合、カメラがこの機能をサポートしていないため、ボタ ンがグレー表示されます。 検索リスト内のカメラを選択します。 背 面にMAC(イーサネット)アドレスのラベ ルが貼付されているカメラを検索します。 [Auto Set]と[Manual Set]の両方のボタン が有効となります。 [Auto Set]をクリックします。 オートセットのダイアログが表示されま す。<IP Address>、<Subnet Mask>、 <Gateway>が自動的に設定されます。 パスワードを入力してください。 これは、カメラにアクセスする"root"ユ ーザー用のログイン・パスワードです。 パスワードの初期値は"4321"です。 [OK]をクリックします。 自動ネットワーク設定が完了しました。 カメラは自動的にネットワーク設定を完 了し、再起動します。 SNC-B5368-JAP-QG.indd 15 2009-08-20 오전 10:30:...
  • Seite 106 ライブ画面の使用方法 項目 説明 設定画面に移動します。 Setup ファームウェアのバージョン、 シリアル番号、 製造者情報などを確認できます。 About アラームアイコンをリセットします。 (アラームとモーションのアイコ アラームのリセット ンが非表示となります。 ) スナップショットをJPEG形式もしくはBMP形式の画像ファイルとして保存します。 キャプチャ 現在の画像を印刷します。 印刷 SNC-B5368-JAP-QG.indd 16 2009-08-20 오전 10:30:...
  • Seite 107 録画 スナップショットをAVI形式の映像ファイルとして保存します。 ライブ画面を全画面で表示します。 全画面 映像ファイルの映像形式 (MJPEG, H.264/MPEG4) を設定できます。 Video format アクティブなビューワーの<H.264 & MPEG4映像選択>で指定した コーデックによって、 コンテキストメニューの内容が異なります。 On: 指定したアラーム出力ポートを有効化します。 Alarm output Off: 指定したアラーム出力ポートを無効化します。 Pluse: 指定したアラーム出力ポートを無効化する前に、 指定した時間有効化されます。 Camera OSD カメラ設定メニューの取得およびカスタマイズに使用します。 Viewer Screen ライブ映像を画面に表示します。 SNC-B5368-JAP-QG.indd 17 2009-08-20 오전 10:30:...
  • Seite 108 SNC-B5368-JAP-QG.indd 18 2009-08-20 오전 10:30:...
  • Seite 109: Краткое Руководство

    Это устройство соответствует “Ограничению по использованию определенных опасных веществ в электрическом и электронном оборудовании”. В устройстве не используются 6 опасных веществ: кадмий (Cd), свинец (Pb), ртуть (Hg), шестивалентный хром (Cr ), полибромированные бифенилы (PBB), полибромированные полибромированные дифениловые эфиры (PBDE). SNC-B5368-RUS-QG.indd 1 2009-08-19 오후 9:46:...
  • Seite 110: Комплект Поставки

    пользователя/программой IP Руководство пользователя INSTALLER Кабель для проверки на мониторе Винт Кабель для проверки на мониторе подсоединяется к портативному дисплею и используется для проверки камеры. Для камеры, фактически используемой для наблюдения, следует использовать кабель BNC. SNC-B5368-RUS-QG.indd 2 2009-08-19 오후 9:46:...
  • Seite 111: Общий Обзор

    Используется для подключения кабеля питания. Используется для подключения разъема видеовхода монитора и вывода выходного Порт видеовыхода видеосигнала камеры. Порт Сеть Используется для подключения кабеля PoE или сетевого кабеля. Загрязненную поверхность объектива требуется осторожно протереть тканью, смоченной этиловым спиртом. SNC-B5368-RUS-QG.indd 3 2009-08-19 오후 9:46:...
  • Seite 112 погаснет индикатор состояния системы, а затем перезапустите систему. Кнопка reset После сброса параметров камеры необходимо запустить программу IP Installer, чтобы изменить основные настройки сети (IP-адрес, маска подсети, шлюз и проч.), прежде чем подключаться к сети. SNC-B5368-RUS-QG.indd 4 2009-08-19 오후 9:46:...
  • Seite 113 Компоненты Объектив SNC-B5368-RUS-QG.indd 5 2009-08-19 오후 9:46:...
  • Seite 114 фокусировки его следует повернуть по часовой стрелке. Винт наклона Используется для регулировки или фиксации угла наклона объектива. Если требуется отсоединить кронштейн от основного устройства или камеру от Фиксатор кронштейна, отожмите это фиксатор и поверните основное устройство в направлении <UNLOCK>. SNC-B5368-RUS-QG.indd 6 2009-08-19 오후 9:47:...
  • Seite 115 снятие КРышеК Если требуется подсоединить разъемы ввода-вывода тревог, следует предварительно снять крышки купола и объектива. Поверните крышку купола против часовой стрелки. Снимите крышку купола, приподняв ее. Постучите по одному из концов крышки объектива, чтобы снять ее. SNC-B5368-RUS-QG.indd 7 2009-08-19 오후 9:47:...
  • Seite 116 Для подачи питания к камере можно также использовать маршрутизатор с поддержкой PoE (Power over Ethernet). подключение к монитору Подключите порт [V_OUT] камеры к порту видеовхода монитора. подключение к сети сеть Подключите кабель Сеть к локальной сети или к Интернету. SNC-B5368-RUS-QG.indd 8 2009-08-19 오후 9:47:...
  • Seite 117  ALARM OUT 1, 2 : Используется для передачи выходных сигналы тревоги.  монтажная схема сигнальных кабелей ввода-вывода тревог ALARM IN 1 ALARM IN 2 External Relay ALARM OUT 1 External Relay ALARM OUT 2 SNC-B5368-RUS-QG.indd 9 2009-08-19 오후 9:47:...
  • Seite 118 Удерживая одной рукой нижний фиксирующий рычажок нажатым, другой рукой снимите крышку. Под снятой крышкой находится основное устройство и внутренняя крышка. Чтобы зафиксировать положение камеры, нажмите на один из крючков внутренней крышки и, не отпуская его, приподнимите крышку. SNC-B5368-RUS-QG.indd 10 2009-08-19 오후 9:47:...
  • Seite 119 Совместите отверстия на боковых фиксаторах внутренней крышки с соответствующими отверстиями основного устройства и нажмите вниз до щелчка. Прикрепите крышку к основному устройству. Вставьте выступающую часть крышки в соответствующее отверстие основного устройства и поверните крышку, чтобы зафиксировать ее. SNC-B5368-RUS-QG.indd 11 2009-08-19 오후 9:47:...
  • Seite 120 При этом поворот камеры влево или вправо называется "Панорамирование", изменение угла наклона – "Наклон". При панорамировании максимальный угол поворота по часовой стрелке составляет 220°, а против часовой стрелки - 120°. Суммарный угол обзора – 340°. Повороту на больший градус мешает ограничитель. SNC-B5368-RUS-QG.indd 12 2009-08-19 오후 9:47:...
  • Seite 121 SET. Стандартные значения параметров <IP Address>, <Subnet Mask>, <Gateway> и <HTTP Port> не отображаются. Стандартное значение параметра <PASSWORD> - 4321. В разделе <ADDRESS> укажите необходимую информацию. MAC (Ethernet) Address: MAC-адрес (Ethernet) подходящей камеры будет установлен автоматически, поэтому его не потребуется вводить вручную. SNC-B5368-RUS-QG.indd 13 2009-08-19 오후 9:47:...
  • Seite 122 Это пароль для входа в систему с правами "root" пользователя, имеющего доступ к камере. Пароль по умолчанию "4321". Нажмите кнопку [OK]. Ручная настройка сети завершена. После ручной настройки, в том числе и параметра <IP>, камера перезапустится. SNC-B5368-RUS-QG.indd 14 2009-08-19 오후 9:47:...
  • Seite 123 установлены автоматически. Введите пароль. Это пароль для входа в систему с правами "root" пользователя, имеющего доступ к камере. Пароль по умолчанию - "4321". Нажмите кнопку [OK]. Автоматическая настройка сети завершена. После автоматической настройки сети камера перезапустится. SNC-B5368-RUS-QG.indd 15 2009-08-19 오후 9:47:...
  • Seite 124 About Версия микропрограммы, серийный номер и сведения о производителе. Сброс тревоги Сброс значка тревоги. (Скрытие значков тревоги и движения.) Захват Сохранение снимка экрана как файла изображения в формате .jpeg или .bmp. Печать Печать текущего изображения. SNC-B5368-RUS-QG.indd 16 2009-08-19 오후 9:47:...
  • Seite 125 Off : выключение указанного порта выхода тревоги. Alarm output Pulse : включение указанного порта выхода тревоги столько раз, сколько было задано перед отключением. Camera OSD Настройка и перемещение по меню настройки камеры. Экран просмотра Отображение видеотрансляции на экране. SNC-B5368-RUS-QG.indd 17 2009-08-19 오후 9:47:...
  • Seite 126 Промышленным потребителям необходимо обратиться к поставщику, чтобы уточнить сроки и условия договора купли-продажи. Подобные изделия и электронные принадлежности не следует утилизировать вместе с другими производственными отходами. Подлежит использованию по назначению в нормальных условиях Срок службы : 7 лет. SNC-B5368-RUS-QG.indd 18 2009-08-19 오후 9:47:...
  • Seite 127: Skrócona Instrukcja Obsługi

    SNC-B5368(P) Kamera sieciowa Skrócona instrukcja obsługi wyobraź sobie możliwości Dziękujemy za zakup produktu firmy Samsung. W celu uzyskania pełniejszej obsługi odwiedź naszą witrynę. www.samsungsecurity.com Zgodność z przepisami o zakazie użycia substancji niebezpiecznych (RoHs) Nasz produkt spełnia wymagania określone w przepisach „Zakaz użycia niektórych substancji niebezpiecznych w urządzeniach elektrycznych i elektronicznych”...
  • Seite 128: Co Znajduje Się W Opakowaniu

    Płyta CD z instrukcją obsługi/aplikacją Kamera Instrukcja obsługi IP INSTALLER Przewód Sygnału Testowego Śruba Monitora Przewód Sygnału Testowego Monitora używany jest do sprawdzania kamery poprzez podłączenie przenośnego wyświetlacza. Do obsługi kamery monitorującej należy zamiast niego używać przewodu BNC. SNC-B5368-POL-QG.indd 2 2009-08-19 오후 11:54:...
  • Seite 129 Służy do podłączania wtyczki sygnału wejściowego wideo monitora, na którym Wideo wyświetlany jest obraz z kamery. Gniazdo Sieć Służy do podłączania przewodu PoE lub LAN. Zanieczyszczoną powierzchnię obiektywu należy delikatnie przetrzeć chusteczką do czyszczenia obiektywu lub szmatką nasączoną etanolem. SNC-B5368-POL-QG.indd 3 2009-08-19 오후 11:54:...
  • Seite 130 3 sekundy, aby wyłączyć wskaźnik systemu i uruchomić system ponownie. Przycisk Resetowania Po zresetowaniu kamery konieczne jest uruchomienie aplikacji IP Installer i skonfigurowanie podstawowych ustawień sieciowych, takich jak adres IP, maska podsieci, brama, itd., aby połączyć się z siecią. SNC-B5368-POL-QG.indd 4 2009-08-19 오후 11:54:...
  • Seite 131 Components Obiektyw SNC-B5368-POL-QG.indd 5 2009-08-19 오후 11:54:...
  • Seite 132 Śruba Nachylenia Służy do regulacji i ustawiania nachylenia obiektywu. Aby odłączyć wspornik od urządzenia głównego lub zdjąć kamerę ze wspornika, Zaczep Zwalniający wypchnij go i obróć urządzenie główne w kierunku oznaczenia <UNLOCK>. SNC-B5368-POL-QG.indd 6 2009-08-19 오후 11:54:...
  • Seite 133 Aby podłączyć złącza wejścia/wyjścia alarmu, konieczne jest zdjęcie osłony kopułkowej i osłony obiektywu. Obróć osłonę kopułkową przeciwnie do ruchu wskazówek zegara. Unieś osłonę kopułkową i ją zdejmij. Naciśnij dowolną stronę osłony obiektywu, aby ją zdjąć. SNC-B5368-POL-QG.indd 7 2009-08-19 오후 11:54:...
  • Seite 134 Można także użyć rutera z funkcją PoE (Power over Ethernet), aby dostarczyć zasilanie do kamery. podłączanie do monitora Podłącz port [V_ouT] kamery do portu wejściowego wideo monitora. połączenie typu sieć Podłącz kabel Sieć do sieci lokalnej lub do Internetu. SNC-B5368-POL-QG.indd 8 2009-08-19 오후 11:54:...
  • Seite 135 GND : Służy do uziemiania.  ALARM OUT 1, 2 : Służy do podłączania sygnału wyjściowego alarmu.  schemat przewodów wej./wyj. alarmu ALARM IN 1 ALARM IN 2 External Relay ALARM OUT 1 External Relay ALARM OUT 2 SNC-B5368-POL-QG.indd 9 2009-08-19 오후 11:54:...
  • Seite 136 Na wszelki wypadek należy również odsunąć rzeczy osobiste personelu. montaż kamery Przytrzymaj dolną dźwignię blokującą, jednocześnie zdejmując osłonę drugą ręką. Zdjęcie osłony powoduje odsłonięcie urządzenia głównego i osłony wewnętrznej. Aby ustawić pozycję kamery, przytrzymaj dowolny zaczep osłony wewnętrznej i unieś ją. SNC-B5368-POL-QG.indd 10 2009-08-19 오후 11:54:...
  • Seite 137 Dopasuj dwa otwory w zaczepach skrzydłowych osłony wewnętrznej do odpowiedniego otworu w urządzeniu głównym, a następnie wciśnij, aż usłyszysz kliknięcie. Przymocuj osłonę do urządzenia głównego. Umieść wystający element wewnątrz osłony w odpowiednim otworze urządzenia głównego, a następnie obróć osłonę, aby ją przymocować. SNC-B5368-POL-QG.indd 11 2009-08-19 오후 11:54:...
  • Seite 138 — „Przechylanie”. Granica panoramowania to 220 stopni zgodnie z ruchem wskazówek zegara i 120 stopni przeciwnie do ruchu wskazówek zegara. Oznacza to, że dostępny jest łączny zakres 340°. Dalszy ruch jest blokowany przez ogranicznik. SNC-B5368-POL-QG.indd 12 2009-08-19 오후 11:54:...
  • Seite 139 <gateway> oraz <HTTp port> kamery. Domyślna wartość opcji <password> to 4321. W polu <address> podaj niezbędne informacje. MAC (Ethernet) Address: Adres MAC (Ethernet) odpowiedniej kamery zostanie ustawiony automatycznie, nie ma więc potrzeby wpisywania go ręcznie. SNC-B5368-POL-QG.indd 13 2009-08-19 오후 11:54:...
  • Seite 140 Jest to hasło logowania dla użytkownika „root”, który ma dostęp do kamery. Domyślne hasło to „4321”. Kliknij przycisk [ok]. Ręczna konfi guracja sieci zostanie zakończona. Po zakończeniu ręcznej konfi guracji wraz z ustawieniem <ip> kamera zostanie ponownie uruchomiona. SNC-B5368-POL-QG.indd 14 2009-08-19 오후 11:54:...
  • Seite 141 Jest to hasło logowania dla użytkownika „ root”, który ma dostęp do kamery. Domyślne hasło to „4321”. Kliknij przycisk [ok]. Automatyczna konfi guracja sieci zostanie zakończona. Kamera automatycznie zakończy ustawienia sieciowe i uruchomi się ponownie. SNC-B5368-POL-QG.indd 15 2009-08-19 오후 11:54:...
  • Seite 142 Umożliwia sprawdzenie wersji oprogramowania, numeru seryjnego oraz informacji o producencie. Resetuj alarm Resetowanie ikony Alarm. (ikony Alarm i Motion znikają). Przechwyć Zapisuje zrzut w postaci pliku obrazu w formacie .jpeg lub .bmp. Drukuj Drukuje bieżący obraz. SNC-B5368-POL-QG.indd 16 2009-08-19 오후 11:54:...
  • Seite 143 Off: wyłącza określony port wyjściowy alarmu. Pulse: aktywuje port wyjściowy alarmu na określony czas przed jego wyłączeniem. Camera OSD Służy do wyświetlania i dostosowywania menu konfiguracji kamery. Ekran poglądu Wyświetla nagranie wideo na żywo na ekranie. SNC-B5368-POL-QG.indd 17 2009-08-19 오후 11:54:...
  • Seite 144: Prawidłowe Usuwanie Produktu

    Użytkownicy w firmach powinni skontaktować się ze swoim dostawcą i sprawdzić warunki umowy zakupu. Produktu ani jego akcesoriów nie należy usuwać razem z innymi odpadami komercyjnymi. SNC-B5368-POL-QG.indd 18 2009-08-19 오후 11:54:...
  • Seite 145 SNC-B5368(P) Ağ Kamerası Hızlı Kullanma Kılavuzu olasılıkları olasılıkları Bu Samsung ürününü aldığınız için teşekkürler. Daha ayrıntılı bir hizmet için lütfen web sitemizi ziyaret edin. www.samsungsecurity.com RoHS uyumlu Ürünümüz, “Elektrikli ve elektronik ekipmanlarda belirli Tehlikeli Maddelerin Kullanım Kısıtlaması”yla uyumludur ve ürünlerimizde şu 6 tehlikeli maddeyi kullanmamaktayız: Kadmiyum (Cd), Kurşun (Pb), Civa (Hg), Heksavalen Krom (Cr ), Poli Bromine Bifeniller (PBB’ler), Poli Bromine Difenil Eterler (PBDE’ler).
  • Seite 146 Kamera Kullanıcı Kılavuzu IP INSTALLER CD’si Ekran Test Kablosu Vida Ekran Test Kablosu portatif bir ekrana bağlanır ve kamerayı test etmekte kullanılır. Bu kabloyu gerçek bir izleme kamerasıyla kullanmak istiyorsanız, bunun yerine BNC kablosu kullanın. SNC-B5368-TUR-QG.indd 2 2009-08-20 오전 10:04:...
  • Seite 147 Video Çikiş Bağlanti Kameranın video sinyalinin çıktığı monitörün Video Giriş konektörünü bağlamak Noktasi için kullanılır. Ağ Bağlanti Noktasi PoE veya LAN kablosunu bağlamak için kullanılır. Kirli mercek yüzeylerini yumuşak bir mercek bezi veya etanollu kumaşla temizleyin. SNC-B5368-TUR-QG.indd 3 2009-08-20 오전 10:04:...
  • Seite 148 3 saniye basılı tutun. Sifirlama Düğmesi Kamera ayarlarını sıfırladıktan sonra, ağa bağlanabilmek üzere IP adresi, Alt ağ maskesi, Ağ geçidi gibi temel ağ ayarlarını değiştirmek için IP Installer programını çalıştırmanız gerekir. SNC-B5368-TUR-QG.indd 4 2009-08-20 오전 10:04:...
  • Seite 149 Ek Cihazlar Mercek SNC-B5368-TUR-QG.indd 5 2009-08-20 오전 10:04:...
  • Seite 150 Odağı ayarlamak için sola veya sağa, odağı sabitlemek için saat yönünde çevirin. Eğim Vidasi Merceğin eğimini ayarlamak veya sabitlemek için kullanılır. Kelepçeyi ana üniteden veya kamerayı kelepçeden ayırmak istiyorsanız, bu kilidi Açma Kilidi dışarı doğru itin ve ana üniteyi <UNLOCK> yönünde çevirin. SNC-B5368-TUR-QG.indd 6 2009-08-20 오전 10:04:...
  • Seite 151 çikarilmasi Alarm I/O konektörlerini bağlamak istiyorsanız, dome kapağını ve mercek kapağını önceden çıkarmanız gerekir. Dome kapağını saatin aksi yönde çevirin. Dome kapağını yukarı kaldırarak çıkarın. Mercek kapağını çıkarmak için iki ucuna hafifçe bastırın. SNC-B5368-TUR-QG.indd 7 2009-08-20 오전 10:04:...
  • Seite 152 Video kameraya güç beslemesi sağlamak için PoE (Ethernet Üzerinden Güç) özelliğine sahip bir yönlendirici de kullanabilirsiniz. monitöre bağlama Video kameranın [V_OUT] bağlantı noktasını, monitörün video giriş bağlantı noktasına bağlayın. ağ Bağlantısı Ağ kablosunu yerel ağa veya İnternete bağlayın. SNC-B5368-TUR-QG.indd 8 2009-08-20 오전 10:04:...
  • Seite 153 GND : Topraklama için kullanılır.  ALARM OUT 1, 2 : Alarm çıkış sinyalini bağlamak için kullanılır.  alarm i/O kablo Bağlantı şeması ALARM IN 1 ALARM IN 2 External Relay ALARM OUT 1 External Relay ALARM OUT 2 SNC-B5368-TUR-QG.indd 9 2009-08-20 오전 10:04:...
  • Seite 154 özel eşyalarınızı kurulum alanından uzak tutun. kameranın montajı Bir elinizle alt kilit kolunu bastırırken diğer elinizle kapağı çıkarın. Kapak çıkarıldığında ana ünite ve iç kapak ortaya çıkar. Kameranın konumunu sabitlemek için iç kapağın kancalarından birini tutup yukarı kaldırın. SNC-B5368-TUR-QG.indd 10 2009-08-20 오전 10:04:...
  • Seite 155 İç kapak üzerindeki kanat kilitlerindeki iki deliği ana ünitedeki ilgili deliklere yerleştirip klik sesi duyana dek aşağıya doğru bastırın. Kapağı ana üniteye sabitleyin. Kapağın iç kısmındaki çıkıntılı parçayı ana ünitenin ilgili deliğine yerleştirip kapağı sabitlemek için çevirin. SNC-B5368-TUR-QG.indd 11 2009-08-20 오전 10:04:...
  • Seite 156 Bundan sonra, kamerayı sola veya sağa çevirmeye “Pan İşlemi”, açıyı eğmeye ise “Eğme” adı verilir. Pan işlemi için pan sınırı saat yönünde 220° derece, saatin aksi yönde 120° derece olmak üzere toplamda 340° derecedir; daha fazla çevirmek istediğinizde kamera durdurucu tarafından durdurulur. SNC-B5368-TUR-QG.indd 12 2009-08-20 오전 10:04:...
  • Seite 157 <Gateway> ve <hTTp port> için kameranın varsayılan değerleri görüntülenir. Varsayılan <passWOrD> 4321’dir. <aDDrEss> alanına gerekli bilgileri girin. MAC (Ethernet) Address : Geçerli kameranın MAC (Ethernet) adresi otomatik olarak ayarlanır, bu nedenle bu adresi manuel olarak girmeniz gerekmez. SNC-B5368-TUR-QG.indd 13 2009-08-20 오전 10:04:...
  • Seite 158 60005’tir (UDP). Parolayı girin. Bu, kameraya erişen "root" kullanıcı için oturum açma parolasıdır. Varsayılan parola "4321"dir. [Ok] düğmesini tıklatın. Manuel ağ ayarları tamamlanır. <ip> ayarlarını kapsayan manuel ayarlar tamamlandığında, kamera yeniden başlatılır. SNC-B5368-TUR-QG.indd 14 2009-08-20 오전 10:04:...
  • Seite 159 <ip address>, <subnet mask> ve <Gateway> otomatik olarak ayarlanır. Parolayı girin. Bu, kameraya erişen "root" kullanıcı için oturum açma parolasıdır. Varsayılan parola "4321"dir. [Ok] düğmesini tıklatın. Otomatik ağ ayarı tamamlanır. Kamera ağ ayarlarını otomatik olarak tamamlar ve yeniden başlar. SNC-B5368-TUR-QG.indd 15 2009-08-20 오전 10:04:...
  • Seite 160 Firmware sürümünü, seri numarasını ve üretici bilgilerini kontrol edebilirsiniz. Alarmı Sıfırla Alarm simgesini sıfırlar. (Alarm ve Hareket simgeleri kaybolur.) Yakala Ekranın anlık görüntüsünü .jpeg veya .bmp formatında bir resim dosyası olarak kaydeder. Yazdır Mevcut görüntü yazdırılır. SNC-B5368-TUR-QG.indd 16 2009-08-20 오전 10:04:...
  • Seite 161 Off: Belirtilen Alarm Out bağlantı noktasını devre dışı bırakır. Alarm output Pulse: Alarm Out bağlantı noktasını devre dışı bırakmadan önce belirtilen süre kadar etkinleştirir. Camera OSD Kamera Ayarları menüsünü yeniden açmak ve özelleştirmek için kullanılır. Görüntüleyici Ekranı Ekranda canlı videoyu gösterir. SNC-B5368-TUR-QG.indd 17 2009-08-20 오전 10:04:...
  • Seite 162 Üretici: TIANJIN SAMSUNG ELECTRONICS CO., LTD. Adres, Şehir: No.12, 4th Avenue, Dongting Road, TEDA, Tianjin, China. 300457 Ülke: Çin Üretici Tel: 86 22 5981 1234 Türkiye Yetkili Distribütörü: KOYUNCU ELEKTRONİK BİLGİ İŞLEM SİSTEMLERİ San. Ve Tic. A.Ş. Adres, Şehir: Emek Mahallesi Ordu Cad. No:18 SARIGAZİ 34785 / İSTANBUL Distribütör Tel / Faks: 0216 528 88 88 / 0216 313 57 05...

Diese Anleitung auch für:

Snc-b5368p

Inhaltsverzeichnis