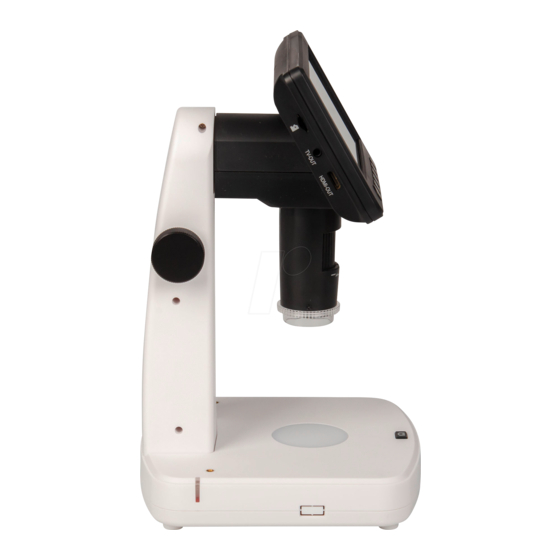
DNT UltraZoom PRO Bedienungsanleitung
Vorschau ausblenden
Andere Handbücher für UltraZoom PRO:
- Bedienungsanleitung (4 Seiten) ,
- Bedienungsanleitung (56 Seiten)
Inhaltsverzeichnis
Digitales Mikroskop UltraZoom PRO
Artikelnummer: DNT000006
Bitte lesen Sie diese Bedienungsanleitung vor der Installation und Inbetriebnahme
komplett durch und bewahren Sie die Bedienungsanleitung für späteres Nachlesen
auf. Wenn Sie das Gerät anderen Personen zur Nutzung überlassen, übergeben Sie
auch diese Bedienungsanleitung.
Bedienungsanleitung
1
Kapitel
Inhaltsverzeichnis

Verwandte Anleitungen für DNT UltraZoom PRO


Inhaltszusammenfassung für DNT UltraZoom PRO
- Seite 1 Digitales Mikroskop UltraZoom PRO Artikelnummer: DNT000006 Bedienungsanleitung Bitte lesen Sie diese Bedienungsanleitung vor der Installation und Inbetriebnahme komplett durch und bewahren Sie die Bedienungsanleitung für späteres Nachlesen auf. Wenn Sie das Gerät anderen Personen zur Nutzung überlassen, übergeben Sie auch diese Bedienungsanleitung.
-
Seite 2: Inhaltsverzeichnis
Inhalt Funktion ......................3 Bestimmungsgemäßer Einsatz, Lieferumfang ..........4 Betriebs-, Wartungs- und Sicherheitshinweise ..........4 Übersicht, Beschreibung ................6 Bedienung ....................7 Inbetriebnahme ...................7 Akku laden ....................7 SD-Karte einlegen ..................7 Displaysymbole ...................8 Ein- und Ausschalten ...................8 Grundeinstellungen/Menüfunktionen ............9 Sprache auswählen ..................9 SD-Karte formatieren ..................9 Datum einstellen ..................10 Einzelbild-Auflösung einstellen ..............10 Video-Auflösung einstellen ................11 Selbstauslöser für Einzelbilder einstellen ...........11... -
Seite 3: Funktion
1. Funktion Das digitale Mikroskop dient mit einem hohen Vergrößerungsfaktor der einfachen Untersuchung bzw. der Handhabung von sehr kleinen bzw. feinen Objekten, so z. B. bei Untersuchungen in der Biologie, in der Feinmechanik oder der Elektronik. Eine integrierte Objektbeleuchtung und ein Polarizer ermöglichen dabei ein gleichmäßig ausgeleuchtetes, blendfreies Beobachtungsfeld. -
Seite 4: Bestimmungsgemäßer Einsatz, Lieferumfang
Jeder andere Einsatz ist nicht bestimmungsgemäß und führt zu Gewährleistungs- und Haftungsausschluss. Dies gilt auch für Umbauten und Veränderungen. Lieferumfang: - Digitales Mikroskop UltraZoom PRO - 5-V-USB-Netzteil - Mini-USB-Kabel für Netzteil- und PC-Anschluss - Videokabel, Klinkenstecker 3,5 mm auf 1 x Cinch/RCA - CD mit PC-Software für MS Windows 7/8/10 und MacOS 10.14 oder höher... - Seite 5 - Verpackungsmaterial nicht achtlos liegen lassen! Plastikfolien/-tüten, Styroporteile etc. könnten für Kinder zu einem gefährlichen Spielzeug werden. - Das Gerät ist kein Spielzeug. Es darf nicht im Zugriffsbereich von Kindern aufbewahrt oder betrieben werden. - Starke mechanische Beanspruchungen wie, Anstoß, Druck oder Vibration sind zu vermeiden.
-
Seite 6: Übersicht, Beschreibung
4. Übersicht, Beschreibung microSD-Kartenslot Videoausgang (FBAS, PAL/NTSC) HDMI-Ausgang Fokus-Einstellung Polarizer Ladeanzeige Objekt-Durchleuchtung Höhenverstellung Aufnahmetaste 10 Display 11 Helligkeitseinstellung für Objekt-Auflicht 12 Digital-Zoom 13 Helligkeitseinstellung für die Objekt-Durchleuchtung 14 Mini-USB-Port für Akku-Laden (5 V/USB) und PC-Verbindung 15 Ein-/Aus-Taste 16 Setup-Taste 17 Taste 18 OK-Taste 19 Taste ... -
Seite 7: Bedienung
5. Bedienung 5.1 Inbetriebnahme Akku laden - Vor der ersten Benutzung laden Sie den internen Akku mit dem mitgelieferten Ladegerät. - Verbinden Sie dazu den USB-Port (14) des Gerätes über das mitgelieferte USB-Kabel mit dem 5-V-USB-Ladeausgang des Ladegerätes und stecken Sie dieses in eine Netzsteckdose. -
Seite 8: Displaysymbole
Displaysymbole Einzelbild-Modus (Foto-Mode) Video-Modus Abspielmodus 00012/01618 Anzahl der Aufnahmen/Verbleibende Einzelbildanzahl 12 M Gewählte Auflösung microSD-Karte erkannt, wenn nicht: durchgestrichen Akku-Ladezustand (3 x blau = voll, leeres Symbol = entladen) Die Symbole im Display werden 10 s nach der letzten Tastenbetätigung abgeschaltet. Ein- und Ausschalten - Drücken Sie die Ein-/Aus-Taste (15) für ca. -
Seite 9: Grundeinstellungen/Menüfunktionen
5.2 Grundeinstellungen/Menüfunktionen - Wählen Sie das Menü des Gerätes mit der Taste an. Jetzt erscheint die erste Menüseite, die per Pfeiltasten anwählbare Option ist blau hinterlegt. - Die zweite und dritte Menüseite erreichen Sie durch mehrmaliges Drücken der Pfeiltasten. - Eine Option öffnen Sie nach Anwahl mit der Taste „OK” Hinweis: Aus allen Unter-Menüs können Sie mit der Taste wieder zurück in den... -
Seite 10: Datum Einstellen
löschen und formatieren, wählen Sie statt „OK” die Option „Cancel/Abbrechen” und bestätigen die Auswahl mit der OK-Taste. Datum einstellen - Wählen Sie mit den Pfeiltasten / die Zeile „Date/Time; Datum/Uhrzeit” an und bestätigen die Auswahl mit der OK-Taste. - Im Einstellmenü wechseln Sie nun mit der OK-Taste die jeweils hinterlegte Anzeigestelle, und stellen jeweils die Stelle mit den Pfeiltasten /... -
Seite 11: Video-Auflösung Einstellen
- Jetzt wählen Sie mit den Pfeiltasten / die gewünschte Videoauflösung an und bestätigen die Auswahl mit der Taste Selbstauslöser für Einzelbilder einstellen Mit dieser Einstellung können Sie eine durch die Aufnahmetaste (9) zu startende Selbstauslöserzeit einstellen, nach deren Ablauf das Gerät jeweils ein Einzelbild automatisch aufnimmt. -
Seite 12: Datumsstempel Einstellen, Datumsstempel Bei Videoaufnahme
- Wählen Sie mit der Taste Videoaufnahme ( ) an. - Wählen Sie dann das Menü des Gerätes mit der Taste - Hier wählen Sie mit den Pfeiltasten / die Zeile „Loop-Recording/Auf- name” an und bestätigen die Auswahl mit der OK-Taste. - Jetzt wählen Sie mit den Pfeiltasten /... -
Seite 13: Tv-Norm Einstellen
TV-Norm einstellen - Wählen Sie das Menü des Gerätes mit der Taste - Hier wählen Sie mit den Pfeiltasten / die Zeile „TV-Out/-Modus” an und bestätigen die Auswahl mit der OK-Taste. - Im Einstellmenü wählen Sie nun mit den Pfeiltasten / die gewünschte Norm je nach angeschlossenem TV-Gerät/ Monitor an und bestätigen die Auswahl mit der OK-Taste. -
Seite 14: Bedienung/Aufnahme/Abspielen
5.3 Bedienung/Aufnahme/Abspielen Bild-Fokussierung, Vergrößerungsstufen - Sie können, je nach Aufgabe, die Vergrößerungsbereich grob mit der Höhenverstel- lung (8) vorwählen und dann das Beobachtungsfeld fein mit der Fokus-Einstellung (4) fokussieren: Geringe Vergrößerung Mittlere Vergrößerung Hohe Vergrößerung Zoomfunktion - Sie können, wenn Sie das Beobachtungsobjekt fokussiert haben, das Bild digital zoomen, und so Details noch feiner darstellen können. -
Seite 15: Einzelbilder/Video Aufzeichnen
Einzelbilder/Video aufzeichnen - Wenn Sie das Bild scharf eingestellt haben, können Sie mit der Taste zwischen Videoaufnahme ) oder Einzelbildaufnahme ( ) wählen. - Mit der Aufnahmetaste (9) starten und stoppen Sie die Aufnahme. Bei der Videoaufzeichnung signalisiert ein blinkender roter Punkt die laufende Aufnahme Aufnahme. - Seite 16 - Wählen Sie mit den Pfeiltasten / die Option „Delete/Löschen” an und drücken anschließend die OK-Taste. - Jetzt erscheint die Abfrage, ob die gewählte Aufnahme („Löschungen z.Z.”) oder alle Aufnahmen auf der Speicherkarte („Alle”) gelöscht werden sollen. Wählen Sie wieder mit den Pfeiltasten /...
-
Seite 17: Aufnahmen Auf Einen Pc Kopieren
Schlüsselsymbol verschwunden. - Jetzt können Sie den Schutzdialog mit der Taste verlassen. Slide Show - Wählen Sie mit den Pfeiltasten / die Option „Slide Show/Diashow” an und drücken anschließend die OK-Taste. - Im folgenden Dialog wählen Sie das Wechse- lintervall aus und starten bzw. beenden später die Diashow mit der OK-Taste. -
Seite 18: Fehlerhinweise
- Schließen Sie das Gerät über das mitgelieferte FBAS-Kabel (Cinch) oder ein HDMI-Kabel an Ihren Monitor/TV-Gerät an und schalten Sie das Gerät ein. - Jetzt agiert der angeschlossene Monitor als Gerätemonitor, das interne Gerätedis- play wird abgeschaltet. 6. Fehlerhinweise Kein Bild auf dem Display - Akku ist leer ->... -
Seite 19: Pflege Und Wartung
7. Pflege und Wartung - Reinigen Sie das Gerät nur mit einem weichen trockenen Leinentuch. Bei starken Verschmutzungen kann dieses leicht angefeuchtet sein. Reinigen Sie das Gerät nicht mit lösungsmittelhaltigen Reinigungsmitteln! Das Gerät ist danach sorgfältig mit einem Tuch zu trocknen. Darauf achten, dass keine Feuchtigkeit in das Geräteinnere gelangt. -
Seite 20: Konformitätserklärung, Entsorgung, Kontakt
9. Konformitätserklärung Hiermit erklärt die dnt Innovation GmbH, Maiburger Straße 29, 26789 Leer, Deutsch- land, dass sich das Gerät „Digitales Mikroskop UltraZoom PRO“ in Übereinstimmung mit den grundlegenden Anforderungen und den übrigen ein- schlägigen Bestimmungen der Richtlinie 2014/30/EU befindet. Die Konformitätserklärung kann unter folgender Adresse gefunden werden: www.dnt.de... -
Seite 21: Pc-Software
12.1 Software installieren - Installieren Sie das für Ihr System passende Programmfile „PortableCapture Plus” von der mitgelieferten CD-ROM. - Kontrollieren Sie ggf. auf „www.dnt.de” das Erscheinen einer neuen Version und laden Sie diese zur Installation herunter. 2. Start Microscope 12.2 Programm starten Connect your Microscope to your PC USB port, start the - Verbinden Sie Ihren Rechner über das USB-Kabel mit dem Mikroskop (Speicher-... -
Seite 22: Programmmenü/Funktionen
12.3 Programmmenü/Funktionen Menü „File/Datei” Main Menu - In diesem Menü können Sie den Speicherort für Einzelbilder und Videos festlegen und einrichten sowie Bilder aus anderen Verzeichnissen oder Quellen in die Ansicht File laden: Import-Option Photos Directory: set the directory to store photos Menü... - Seite 23 3. Software Functions ■ Capture Photo ■ Capture Video Menü „Capture/Erfassen” a. Click ‘Photo’ shortcut icon in the main menu - In diesem Menü können Sie: a. Click ‘Video’ shortcut icon in the main menu bar. · Unter „Photo” ein Einzelbild aufnehmen. bar.
-
Seite 24: Kalibrier- Und Messfunktion, Bearbeitung
■ Timer (Photo / Video) Click ‘Timer’ shortcut icon in the main menu bar. * Under Timer photo, you can set the start time, interval - Im Fenster „Captured Number/Erfasste Anzahl” wird die aktuell erfasste Anzahl time and total picture number. von Aufnahmen angezeigt. - Seite 25 ble-click on the picture to enter into measurement - Laden Sie diese Aufnahme wieder durch einen Doppelklick in der Bilderliste in das Mess- und Bearbeitungs-Interface, das sich in einem zweiten Fenster öffnet: ce as below. Bearbeitetes Bild speichern Bild in Zwischenablage spei- chern Bild kopieren Vorheriges Bild aus Ablage...
- Seite 26 4. Now you can use ‘Any angle Line’ under Measurement - Öffnen Sie nun das Messwerkzeug und wählen Sie dort das Werkzeug „Any Angle Line/Winkel” an. - Markieren Sie dann genau die Strecke erneut, die Sie zuvor für die Kalibrierung icon to measure the value again.
- Seite 27 einige Bilder auf, die Sie wieder durch Doppelklick in der Bilderleiste rechts in das 2. Change the magnification rate and capture several Mess- und Bearbeitungs-Interface. pictures, click on the picture to enter into measurement - Hier öffnen Sie wieder das Kalibrierwerkzeug und wählen dort den Punkt „Set Magnification/Vergrößerung einstellen”...
- Seite 28 Messungen - Öffnen Sie das Messwerkzeug und wählen Sie dort ein Werkzeug an, mit dem Sie messen wollen: · Winkel: Ziehen Sie eine Messstrecke durch Anklicken des Anfangspunkts und Ziehen bis zum Endpunkt. Abschließend Klicken am Endpunkt. · Fortgesetzte Linie: Ziehen Sie eine Messstrecke durch Anklicken des Anfangs- punkts und Ziehen bis zum Endpunkt.
- Seite 29 Texte im Bild platzieren. popup dialogue as below. 1. Ausgabe Deutsch 8/2020 Dokumentation © 2020 dnt Innovation GmbH Alle Rechte vorbehalten. Ohne schriftliche Zustimmung des Herausgebers darf diese Bedienungs- anleitung auch nicht auszugsweise in irgendeiner Form reproduziert oder vervielfältigt werden.
- Seite 30 Digital Microscope UltraZoom PRO Article Number: DNT000006 User Manual Please read the instructions before installing and com- missioning. Ensure that you retain the instructions for later usage. If you hand over the device for usage to other people, hand over the user manual with it.
- Seite 31 Table of Contents 1. Precaution ..............33 2. Preparation ..............35 Package Contents ............35 Part Names & Functions ..........36 3. Key Features ..............37 4. How to use the Microscope ........... 38 Turn on/off the Microscope ..........38 Display Icons and Meanings...........
- Seite 32 8. PC Software Introductions ........... 56 Install the Software ............56 Start Microscope ............57 Software functions ............58 Capture Photo .............. 58 Capture Video ............... 58 Timer ................59 Calibration and Measurement ........60 Calibration ..............60 Measurement ..............64 Change Calibration ............
-
Seite 33: Precaution
Welcome Thank you for purchasing the 5-inch Portable Stand Alone LCD Digital Microscope with polarizer. Please take a moment to read through this manual. Its contents will help you to get the best use of the microscope. 1. Precaution Before using the LCD Digital Microscope, please ensure Before using the LCD Digital Microscope, please ensure that you read and understand the safety precautions that you read and understand the safety precautions... - Seite 34 • LCD Digital Microscope may become slightly warm during use. This does not indicate malfunction. • If the exterior of the LCD Digital Microscope needs cleaning, wipe it with a soft, dry cloth. FCC Notice This equipment has been tested and complies with the limits for a Class B digital device, pursuant to Part 15 of the FCC Rules.
-
Seite 35: Preparation
2. Preparation ■ ■ Package Contents • Digital microscope UltraZoom PRO • 5-V-USB-power supply • Mini-USB-cable • Video-cable, K • CD-ROM with PC-software LCD Digital • Calibration chart AC adaptor USB cable • Object holding clamps Microscope • User Manual... -
Seite 36: Part Names & Functions
■ Parts Names & Functions Functions Functions Micro-SD card slot Height adjustment Video-out Capture HDMI-out 5-inch IPS LCD display Focus tube Dimmer for LEDs in the lens tube Polarizer wheel Digital zoom Charging indicator Dimmer for LEDs in the platform LED light for slice USB/DC-in 15. -
Seite 37: Key Features
Storage: by Micro-SD card (not included) Powered by: built-in rechargeable battery, or power adaptor Measurement: by software on computer Bundle software: PortableCapture Plus for Windows7/8/10, Mac 10.14 or later. Software available on the included CD and www.cameradownload.net. www.dnt.de... -
Seite 38: How To Use The Microscope
4. How to use the Microscope 4.1 Turn on/off the Microscope Press on/off button to turn the microscope on or off. -
Seite 39: Display Icons And Meanings
4.2 Display Icons & Meanings Icon Meaning Photo capture mode Video capture mode Playback mode 001618 Quantity of photos that can be captured Current resolution Micro-SD card inserted Battery capacity Note: The icon displays will be off when there is no key pressed for 10s. -
Seite 40: Focus & Magnifications
4.3 Focus & Magnifications You can get different magnifications by rotating the height adjustment wheel and focus tube. The lower the lens, the higher the magnification will be. Low magnification Rotate the height adjustment wheel to move the lens upward, and then rotate the focus tube toward left to increase the resolution. - Seite 41 Medium magnification Rotate the height adjustment wheel to move the lens downward to stop at a height (see left photo), and then rotate the focus tube toward right to get a fine focus. You can stop at any height and then rotate the focus tube for a better resolution.
-
Seite 42: Observe Specimen Slice
4.4 Observe Specimen Slice At a Hhigh magnification position, turn on the LED at the bottom platform and put a slice on it to see the details of a specimen slice. 4.5 Capture Photo, Video & Playback Press the capture button to take a photo or record video. Press the mode button to switch among photo, video and playback. -
Seite 43: Delete Files
4.6 Delete files 1) At play back mode, press to enter the sub- menu, then confirm delete. 2) Protect At play back mode, press to enter the sub-menu, then confirm protect pictures from delete. -
Seite 44: Use The Polarizer
4.7 Use the Polarizer Polarizer, by removing light reflection, is especially useful for observing objects that have a shiny surface like metal, diamond, jewelry, etc. By rotating the polarizer wheel by 90-degrees, you can activate or deactivate the polarizing effect. -
Seite 45: Download To Computer
4.8 Download to Computer 1) Connect the microscope to a computer with a USB cable. 2) Choose Mass Storage to view stored photos and videos. 4.9 Preview on Computer 1) Take out Micro-SD card from the microscope. 2) Connect the microscope to a computer with a USB cable. 3) Select PC Camera mode 4) Start the PortableCapture Plus software. -
Seite 46: Tv Output
4.10 Output to External Monitor 1. Insert the 1/8-inch plug on the end of the supplied video cable into the microscopes Video port. An HDMI connection is also possible. 2. Insert the RCA plug on the video cable into one of your television’s yellow video input connectors. -
Seite 47: Charge Battery
4.11 Charge Battery Plug the small USB end of the power adaptor into the USB/DC-in port located on the bottom side of the unit. Then plug the other end of the power adaptor into a standard AC outlet. The battery indicator LED at the side of the unit will be in red to show that the battery is charging. -
Seite 48: Menu Introductions
5. Screen Menu Introductions You can press to enter the camera setup, and select the options seen below. 5.1 Photo Resolution At photo mode, press , you can choose to select a resolution for photo taken among 12M/10M/8M/5M/3M. 5.2 Video Resolution At video mode, press , you can choose to select a resolution for video recording between 1080P/720P. -
Seite 49: Capture Mode
5.3 Capture Mode At photo mode, press , you can choose Capture Mode to setup interval capture. For example, configure the microscope to take a photo every 5 seconds. 5.4 Loop Recording At video mode, Press to set up the length of each video clip. -
Seite 50: Date And Time
5.5 Date/Time Press and scroll down to set up system date and time. 5.6 Date Stamp At photo mode, press to select whether to put a date and time mark when capturing photos and videos. -
Seite 51: Tv Out
5.7 TV-out Mode To choose between NTSC and PAL for the TV output of the microscope, press 5.8 Auto Power Off Press and scroll down to choose a time for the microscope to power off automatically without key operation. -
Seite 52: Language
5.9 Language Press to set up OSD language. 5.10 Format SD Press to format the inserted Micro-SD card. -
Seite 53: Default Setting
5.11 Default Setting Press to reset the microscope configuration to default setting. -
Seite 54: Specifications
6. Specifications Magnification Ratio: 10x to 300x, up to 1200x digital LCD Display: 5-inch IPS, 960x540 Photo resolution: 12M/10M/8M/5M/3M/2M Video resolution: 1080p/720p Focus Range: Manual focus from 5mm to70mm Polarizer: Switchable polarizer Storage: Micro-SD card Output to external monitor: HDMI or TV Powered by: Built-in rechargeable battery and power adaptor Light source: LEDs with adjustable brightness... -
Seite 55: Troubleshooting
7. Troubleshooting Problems Solution The unit does not Charge the battery. turn on. Ensure that the power is on. Charge the battery. The screen is blank. Verify that the item you want to magnify is positioned correctly under the lens. Ensure that the television is on. -
Seite 56: Pc Software Introductions
■ PC Software Introduction 8. PC Software Introduction 1. Install the Software on PC (Win/Mac) Insert the CD into the CD-ROM Drive and then open the CD. Double click to install PortableCapture Plus and the installation wizard will guide you through the process. Note The software PortableCapture Plus is available on the included CD and www.cameradownload.net. -
Seite 57: Start Microscope
2. Start Microscope Connect your Microscope to your PC USB port, start the software by clicking the icon generated on the desktop after installation. You will see the following screen pop up. When the microscope is disconnected from your PC USB port, the following message will appear. No Device detected, please connect your microscope directly to your PC USB port. -
Seite 58: Software Functions
3. Software Functions ■ Capture Photo a. Click ‘Photo’ shortcut icon in the main menu bar. b. Click ‘Capture > Photo’. ■ Capture Video a. Click ‘Video’ shortcut icon in the main menu bar. b. Click ‘Capture > Video’. -
Seite 59: Timer
■ Timer (Photo/Video) Click ‘Timer’ shortcut icon in the main menu bar. * Under Timer Photo, you can set the start time, interval time, and total picture number. * Under Timer Video, you can set the start time, interval time, and total video number. -
Seite 60: Calibration And Measurement
■ Calibration and Measurement Please complete calibration before measurement. Calibration Display Crossing from ‘Options>Crossing’. Microscope default at crossing ‘on’ It’s used to check the dial on the calibration ruler. - Seite 61 1. Focus microscope on the attached calibration ruler and adjust the magnification till the picture is clear. Take a picture for the selected area when the dial is parallel to the crossing as shown below. 2. Double-click on the picture to enter the measurement interface as seen below.
- Seite 62 3. Click Calibration icon , then move the mouse to the picture. Then click on the beginning and ending points across a known value. Now a dialogue will pop up where the exact value of the measurement sample into ‘Actual dimension’ needs to be entered. Then the software will automatically calibrate the magnification rate.
- Seite 63 4. Now you can use ‘Any angle Line’ under the measurement icon to measure the value again. If the value you measure by software is nearly the same as the exact value of the dial, it means that the calibration is completed.
-
Seite 64: Measurement
Measurement Double-click on the picture to enter the measurement interface. Under the ‘Measurement’ icon , you can choose any desired option to measure. Available options are: 1. Any Angle Line Measurement Click from one point and drag to the next point, and then release. -
Seite 65: Change Calibration
Change Calibration If you need to change the magnification rate and adjust focus to capture the picture, calibrate the magnification rate again. 1. Double click to open the picture, click ‘ > Reset magnification > Reset picture magnification’ as shown below. And then start calibration again (for calibration details, please refer to p. - Seite 66 2. Change the magnification rate and capture several pictures, click on the picture to enter the measurement interface. Then click ‘ > Set magnification > Set picture magnification’, now a dialogue will show up; enter the magnification rate into the dialogue and click ‘OK’.
- Seite 67 3. If you want to use the same magnification rate to capture pictures, click ‘ > Set magnification > Set capture magnification’. Now all pictures will use the same magnification rate and you can start the measurement process directly.
-
Seite 68: Draw And Text
Draw and Text You can draw or add a text on the picture and save for later analysis. 1. Click the icon to choose any kinds of drawing under the pull-down arrow as shown below. and set the font for the text in 2. -
Seite 69: Software Interface Instructions
Software Interface Instructions Main Interface Icons Capture photo – It’s used to capture photo one by one. Start/Stop record video. Timer for photo/video – Set the start time, interval time, and total photo/video number. Full screen mode Press ESC or double-click to exit. -
Seite 70: Main Menu
Main Menu File Photos Directory: set the directory to store photos; Videos Directory: set the directory to store video;... -
Seite 71: Options
Options Resolution: change preview size Date/Time: set to display system date/time on preview window Language: choose different OSD language Crossing: display cross on preview window Full-screen mode: enter into full screen. Click ESC or double click to exit. -
Seite 72: Capture Photo/Video
Capture Photo: take a photo Video: record a video clip... -
Seite 73: Measurement Interface Instructions
Measurement Interface Instructions Save as Redo Copy to Draw clipboard Copy file Text note Previous Measurement Next Calibration Undo... -
Seite 74: Care And Maintenance
Make sure that no humidity gets inside the device. Do not press the display when cleaning! 10. Declaration of Conformity dnt Innovation GmbH, Maiburger Straße 29, 26789 Leer, Germany, hereby declares that the device „dnt digital microscope UltraZoom PRO“ is in accordance with the essential requirements and other relevant provisions of Directive 2014/30/EU. -
Seite 75: Contact
Email: support@dnt.de 1. Edition English 07/2020 Documentation © 2020 dnt Innovation GmbH All rights reserved. No part of this operating manual may be reproduced in any form without the written permission of the publisher. The ope- rating instructions may have some typographical defects or misprints.