Inhaltsverzeichnis
Werbung
Verfügbare Sprachen
Verfügbare Sprachen
Quicklinks
Werbung
Inhaltsverzeichnis

Verwandte Anleitungen für Roto ZEL STG ZSU 24V


Inhaltszusammenfassung für Roto ZEL STG ZSU 24V
- Seite 1 Zeitschaltuhr 24 V Timer 24 V...
-
Seite 2: Inhaltsverzeichnis
Inhaltsverzeichnis Allgemeines....................4 Gewährleistung..................4 Sicherheitshinweise................... 5 Bestimmungsgemäße.Verwendung............. 5 Anzeigen-.und.Tastenerklärung..............6 Montage/Anschluss................... 7 Erklärungen....................10 Einstellungen....................15 Inbetriebnahme..................18 Werkseinstellung..................18 Programmierung..................19 Batteriewechsel..................34 Reinigung....................34 Technische.Daten..................34 Was.tun,.wenn...?..................35... - Seite 3 Contents General....................36 Warranty....................36 Safety.Information..................37 Intended.use....................37 Explanation.of.displays.and.buttons............38 Assembly/connection................39 Explanations.................... 42 Settings....................47 Initial.operation..................50 Default.setting..................50 Programming....................51 Changing.the.battery................66 Cleaning....................66 Technical.data..................66 What.to.do.if...?..................67...
-
Seite 4: Allgemeines
Allgemeines Die.vom.Werk.mit.aktuellem.Datum.und.Uhrzeit.(MEZ).ausgelieferte.Zeitschalt- uhr.24.V.(TC52),.steuert.den.Antrieb.automatisch.zu.den.Astrozeiten.(Sonnen- auf-.und.Untergangszeiten)..Eine.manuelle.Bedienung.der.Zeitschaltuhr.24.V. (TC52).ist.jederzeit.möglich. Durch.den.Batteriebetrieb.ist.auch.bei.abgezogenen.Bedienteil.eine.Program- mierung.möglich,.da.die.Anzeige.erhalten.bleibt. Gewährleistung Bauliche. Veränderungen. und. unsachgemäße. Installationen. entgegen. dieser. Anleitung. und. unseren. sonstigen. Hinweisen. können. zu. ernsthaften. Verlet- zungen.von.Körper.und.Gesundheit.der.Benutzer,.z.B..Quetschungen,.führen,. so. dass. bauliche. Veränderungen. nur. nach. Absprache. mit. uns. und. unserer. Zustimmung.erfolgen.dürfen.und.unsere.Hinweise,.insbesondere.in.der.vorlie- genden.Montage-.und.Betriebsanleitung,.unbedingt.zu.beachten.sind. Eine.Weiterverarbeitung.der.Produkte.entgegen.deren.bestimmungsgemäßen. Verwendung.ist.nicht.zulässig.. Endproduktehersteller.und.Installateur.haben.darauf.zu.achten,.dass.bei.Ver- wendung. -
Seite 5: Sicherheitshinweise
• Verletzungsgefahr durch Stromschlag. • Anschlüsse an 230 V Netz müssen durch eine Elektrofachkraft erfol- gen. • Schalten Sie vor der Montage die Anschlussleitung spannungsfrei. • Die Vorschriften der örtlichen Energieversorgungsunternehmen so- wie die Bestimmungen für nasse und feuchte Räume nach VDE 100, sind beim Anschluss einzuhalten. • Nur in trockenen Räumen verwenden. • Verwenden Sie nur unveränderte Roto Originalteile. • Halten Sie Personen aus dem Fahrbereich der Anlagen fern. • Halten Sie Kinder von Steuerungen fern. • Beachten Sie Ihre landesspezifischen Bestimmungen. • Verbrauchte Batterien fachgerecht entsorgen. Batterien nur durch identischen Typ (CR 2032) ersetzen. • Wird die Anlage durch ein oder mehrere Geräte gesteuert, muss der Fahrbereich der Anlage während des Betriebes einsehbar sein. • Für den Anschluss von Steuerleitungen (Schutzkleinspannungen) dürfen nur Leitungstypen mit ausreichender Spannungsfestigkeit... -
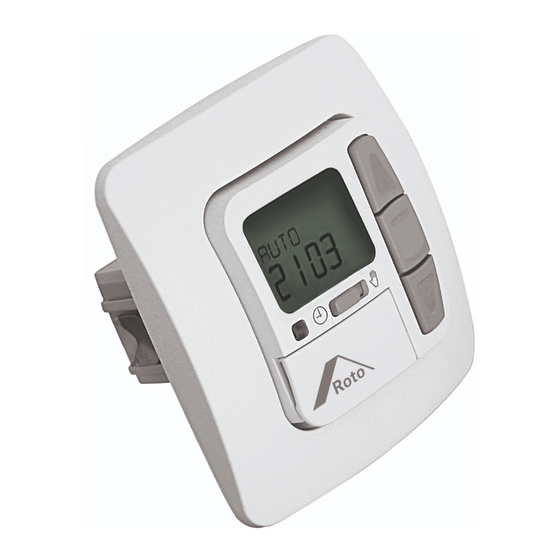
Seite 6: Anzeigen-.Und.tastenerklärung
Anzeigen- und Tastenerklärung 6 Deutsch... -
Seite 7: Montage/Anschluss
Montage/Anschluss Deutsch 7... -
Seite 8: Anschluss Als Antriebssteuergerät
Anschluss als Antriebssteuergerät Vorsicht • Verletzungsgefahr durch Stromschlag. • Anschluss nur durch eine Elektrofachkraft! • Wird mehr als ein Antrieb über die Zeitschaltuhr 24 V (TC52) ange- steuert, müssen die Antriebe durch Relaissteuerungen entkoppelt werden. Diese Entkopplung entfällt bei Roto-Antrieben mit elektro- nischer Endabschaltung. Beachten Sie den Schaltstrom des Gerätes. 1..Schließen.Sie.das.Netzteil.der.Zeitschaltuhr.24.V.(TC52).wie.folgt.an: 2..Setzen.Sie.die.Schutzkappen.wieder.auf.das.Netzteil. 3..Befestigen.Sie.das.Netzteil.in.der.Dose. 4..Setzen.Sie.das.Bedienteil.in.den.Rahmen.und.stecken.Sie.dieses.in.das.Netz- teil.ein. 8 Deutsch... -
Seite 9: Anschluss Als Gruppensteuergerät Zusammen Mit
Anschluss als Gruppensteuergerät zusammen mit NT24V Achtung Wird die Steuerung z.B. als Gruppensteuergerät verwendet, darf keine Brücke zwischen den Klemmen L und C eingelegt sein! 1..Schließen.Sie.das.Netzteil.der.Zeitschaltuhr.24.V.(TC52).wie.folgt.an: 2..Setzen.Sie.die.Schutzkappen.wieder.auf.das.Netzteil. 3..Befestigen.Sie.das.Netzteil.in.der.Dose. 4..Setzen.Sie.das.Bedienteil.in.den.Rahmen.und.stecken.Sie.dieses.in.das.Netz- teil.ein. Deutsch 9... -
Seite 10: Erklärungen
Erklärungen Rollladen-Auswahl Bei.der.Rollladen¬Funktion.fährt.der.Rollladen.nach.Betätigung.einer.Fahrtaste. in.Selbsthaltung. Jalousie-Auswahl Bei. der. Jalousie¬Funktion. fährt. die. Jalousie. im. Tippbetrieb,. um. eine. genaue. Positionierung.der.Lamellen.zu.ermöglichen..Drücken.Sie.eine.Fahrtaste.länger. als.1.Sekunde,.fährt.die.Jalousie.in.Selbsthaltung. Nach.Anfahren.der.programmierten.Zwischen-.und.Endlagenposition.wird.au- tomatisch.eine.Wendung.der.Lamellen.durchgeführt.(wenn.die.Wendeposition. programmiert.wurde). Hand/Auto Schiebeschalter In. der. Schiebeschalterstellung. „ “. werden. nur. manuelle. Fahrbefehle. ausge- führt.(z.B.:.AUF,.STOP,.AB.per.Tastendruck). In.der.Schiebeschalterstellung.„ “.werden.automatische.Fahrbefehle.ausge- führt.(z.B..Beschattungsfunktion,.Dämmerungsfunktion,.Zeit,.Astrofunktion,...) Notsignalkontrollleuchte Ein.Notsignal.wird.durch.das.Aufleuchten.der.Notsignalkontrollleuchte.signali- siert..Von.einem.Notsignal.spricht.man,.wenn.ein.dauerhaftes.Schaltsignal.an. den.Gruppen-.oder.Einzelsteuereingängen.für.länger.als.5.Sekunden.anliegt. Gruppensteuerung Unter. -
Seite 11: Reset-Taste
+/- Tasten Folgende.Bedienungen.sind.über.+.und.- möglich: •. Menü.->.Wert.verändern •. Auto-Betrieb.->.Informationen.abfragen . •. +.Taste.->.Nächste.automatische.Schaltzeit.s . •. -.Taste.->.Nächste.automatische.Schaltzeit.t . •. +.Taste.und OK.Taste.->.Astrozeit.s . •. -.Taste.und OK.Taste.->.Astrozeit.t MENUE-Taste Durch.Drücken.der.MENUE-Taste.gelangen.Sie.in.die.Menüübersicht.oder.in. den.Betriebsmodus. Es.erfolgt.keine.Speicherung.des.aktuell.angezeigten.Wertes. RESET-Taste Durch.Drücken.der.RESET-Taste.(mit.einem.Kugelschreiber.oder.Ähnlichem). wird.die.Zeitschaltuhr.24.V.(TC52).in.die.Werkseinstellung.zurückgesetzt. Ausnahme:.Menüpunkt.Funktion,.Sprachauswahl.und.Stadtauswahl. Uhrzeit/Datum UHR/DAT In.diesem.Menü.stellen.Sie.die.Uhrzeit.und.das.Datum.ein. Programm PROGRAMM Im. Menü. PROGRAMM. haben. Sie. die. Möglichkeit,. verschiedene. Schaltzeiten. einzustellen: 1. PROG1 •. - Seite 12 ASTRO Die.Zeitschaltuhr.24.V.(TC52).steuert.automatisch.den.Rollladen.oder.die.Ja- lousie. zu. den. Sonnenauf-. und. Sonnenuntergangszeiten.. Diese. Zeiten. gelten. als.Richtwerte. ASTRO ABEND Steuert.die.Auffahrt.nach.der.eingestellten.Schaltzeit. Abfahrt.nach.Astrofunktion. INDIVIDUELL Steuert.die.Auf-.und.Abfahrt.nach.den.von.Ihnen.eingestellten.Schaltzeiten. 12 Deutsch...
- Seite 13 WOCHE Mit.dem.Menü.WOCHE.legen.Sie.gleiche.Fahrzeiten.von Montag.-.Sonntag.(1-7).fest. BLOCK Mit.dem.Menü.BLOCK.stellen.Sie.zwei.Blöcke.ein. Block 1:.legt.die.Fahrzeiten.für.Montag.-.Freitag.(1-5).fest. Block 2:.legt.die.Fahrzeiten.für.Samstag.und.Sonntag.(6,7).fest. EINZEL Mit.dem.Menü.EINZEL.stellen.Sie.für.jeden.Tag.der.Woche.Fahrzeiten.separat. ein. SPERRZEIT Verhindert.ein.zu.frühes.Auf-.und.Abfahren.des.Rollladens.durch.die.Astro.Funk- tion. Beispiel: Astrozeit.s:.5:30 Sperrzeit.s:.6:00 Der.Rollladen.fährt.nicht.vor.6:00.auf. Astrozeit.t:.17:00 Sperrzeit.t:.18:00 Der.Rollladen.fährt.nicht.vor.18:00.ab. Deutsch 13...
- Seite 14 SCHALTZEIT Automatische.Auf-.und.Abfahrzeiten.für.Rollladen.und.Jalousie.. Bei. der. Displayanzeige. --:--. (zwischen. der. Uhrzeit. 23:59. und. 00:00). wird. die. Schaltzeit.nicht.ausgeführt. OFFSET Mit.dem.Menü.OFFSET.kann.eine.zusätzliche.Schaltzeit.t programmiert.wer- den..Diese.ist.abhängig.von.der.PROG1.Schaltzeit.t (max..+/-.240.Min.). Beispiel: Astrozeit.t:.20:00 Offset.t:.+60.Min. Der.Rollladen.fährt.um.20.00.Uhr.in.Lüftungsposition.und.um.21.00.Uhr.in.die. untere.Endlage. 14 Deutsch...
-
Seite 15: Einstellungen
Einstellungen EINSTELLUNG Im.Menü.EINSTELLUNG.haben.Sie.folgende.Möglichkeiten: •. URLAUB •. ZWISCHENPOSITION •. LUEFTUNG/WENDUNG •. PROG1.(ENDLAGE,.ZWISCHENPOSITION,.LUEFTUNG/WENDUNG) •. PROG2.(ENDLAGE,.ZWISCHENPOSITION,.LUEFTUNG/WENDUNG) •. Sprachauswahl.(DEUTSCH) •. ASTROVERSCHIEBUNG.s •. ASTROVERSCHIEBUNG.t •. Städteauswahl.(KASSEL) •. LAENGE.(Erscheint.nur.bei.EXPERT-MOD.ON) •. BREITE.(Erscheint.nur.bei.EXPERT-MOD.ON) •. ZEITZONE.(Erscheint.nur.bei.EXPERT-MOD.ON) •. SO/WI.(Automatische.Sommer-/Winterzeitumstellung) Um.Einstellungen.vornehmen.zu.können,.drücken.Sie.die.OK-Taste.so.oft,.bis. Sie.zu.Ihrem.gewünschten.Menüpunkt.kommen. URLAUB Die.Urlaubsfunktion.simuliert.ein.bewohntes.Haus,.während.Sie.im.Urlaub.sind. Ist.die.Funktion.aktiv.(ON),.fährt.der.Rollladen./Jalousie.zeitversetzt.zu.den.pro- grammieren.Zeiten.(max.+.30.Min.). ENDLAGE Als.Endlage.wird.der.Punkt.beschrieben,.an.dem.sich.der.Rollladen/Jalousie.in. der.oberen.oder.unteren.Position.befindet. ZWISCHENPOSITION Die. Zwischenposition. ist. eine. frei. wählbare. Position. des. Rollladens/Jalousie,. zwischen.der.oberen.und.unteren.Endlage..Diese.Position.kann.nach.der.Pro- grammierung.aus.der.oberen.Position.angefahren.werden. - Seite 16 LUEFTUNG/WENDUNG Die. Lüftungs-/Wendeposition. ist. eine. frei. wählbare. Position. des. Rollladens/ Jalousie,.zwischen.der.unteren.und.oberen.Endlage..Mit.dieser.Funktion.kön- nen.Sie.den.Rollladen.aus.der.unteren.Endlage.soweit.wieder.auffahren,.bis.die. Lüftungsschlitze.geöffnet.sind..Bei.der.Jalousie.erfolgt.die.Lamellenwendung. Dazu.drücken.Sie.die.AUF-Taste.zweimal.kurz.nacheinander. Sprachauswahl (DEUTSCH) Hier.können.Sie.Ihre.Landessprache.auswählen. ASTROVERSCHIEBUNG Durch.die.Einstellung.der.Astroverschiebung.kann.die.Astrozeit.s.und.Astro- zeit.t unabhängig.voneinander.verschoben.werden.(max..+/-.120.Min.). Städteauswahl (KASSEL.bei.Spracheinstellung.DEUTSCH) Die.Städteauswahl.ist.wichtig.für.die.Astrofunktion..Wählen.Sie.an.dieser.Stelle. die.Stadt.aus,.die.Ihrem.Standort.am.nächsten.ist. 16 Deutsch...
- Seite 17 LAENGE/BREITE/ZEITZONE (nur bei EXPERTEN MODUS ON) Ihre.Koordinaten.ermitteln.Sie.z.B..mit.Hilfe.eines.Atlas. SO/WI SO/WI. bezeichnet. die. automatische. Sommer-/Winterzeitumschaltung.. Werkseinstellung.ist.ON;.die.Zeitschaltuhr.passt.sich.automatisch.an. FUNKTION Dieser Modus ist nur für ausgebildetes Fachpersonal bestimmt! (Erscheint.nur.bei.abgezogenem.Bedienteil) Im.Menü.FUNKTION.haben.Sie.die.Möglichkeit,.folgende.Funktionen.einzustel- len: •. ROLLLADEN/JALOUSIE.(Auswahl.des.Behanges) •. ANTRIEBSSTEUERGERAET/GRUPPENSTEUERGERAET •. LAUFZEIT •. EXTERN.(SCHALTER/OFF/ON).Schaltung.externer.Gruppeneingänge •. NOTSIGNAL •. EXPERTEN.MODUS •. ERSTINBETRIEBNAHME.(für.Servicezwecke) •. RELAIS.(für.Servicezwecke) •. GES-ZEIT.(für.Servicezwecke) ANTRIEBSSTEUERGERAET Der.Antrieb.wird.direkt.an.die.Zeitschaltuhr.24.V.(TC52).angeschlossen. GRUPPENSTEUERGERAET Die.TC.52.steuert.eine.Gruppe.an. EXTERN OFF/ EXTERN ON/ EXTERN SCHALTER •. EXTERN.OFF.-> Gruppeneingänge.sind.immer.ausgeschaltet. •.
-
Seite 18: Inbetriebnahme
Inbetriebnahme Mit.dem.ersten.Tastendruck.„wecken“.Sie.die.Uhr.auf..Sie.können.nun.mit.den. +/-.Tasten.die.Sprache.wählen.und.diese.mir.der.OK.Taste.übernehmen..Die. Uhr.befindet.sich.im.Automatikmodus. Werkseinstellung UHR/DAT:. aktuelle.MEZ.und.aktuelles.Datum PROGRAMM:. ASTRO.->.BLOCK.->. SPERRZEIT.(1-5) s.06:30.Uhr, t.keine.voreingestellten.Sperrzeiten SPERRZEIT.(6,7) s.08:00.Uhr, t.keine.voreingestellten.Sperrzeiten EINSTELLUNG:.URLAUB.OFF ENDLAGE,.Standort SO/WI.ON FUNKTION:. ROLLLADEN,.ANTRIEBSSTEUERGERAET,.EXTERN.SCHALTER,. NOTSIGNAL.ON,.EXPERTEN.MODUS.OFF Hinweis Durch Drücken der RESET-Taste (mit einem Kugelschreiber oder Ähn- lichem) wird die Zeitschaltuhr 24 V (TC52) in die Werkseinstellung zu- rückgesetzt. Ausnahme: Menü Funktion, Sprachauswahl und Städteauswahl. 18 Deutsch... -
Seite 19: Programmierung
Programmierung Menüübersicht 1..Drücken.Sie.die.MENUE-Taste.UHR/DAT.erscheint. 2..Um.weitere.Menüs.auszuwählen,.drücken.Sie.die.+/-.Tasten. 3..Drücken.Sie.die.MENUE-Taste,.um.in.den.Betriebsmodus.zu.gelangen. UHR/DAT (Uhrzeit und Datum einstellen) 1..Drücken.Sie.die.MENUE-Taste,.UHR/DAT.erscheint. 2..Mit.OK kommen.Sie.in.den.Menüpunkt.Uhrzeit. 3..Stellen.Sie.jetzt.mit.der.+/-.Tasten.die.aktuelle.Uhrzeit.ein. 4..Ist.die.Uhrzeit.eingestellt,.bestätigen.Sie.mit.OK. 5..Verfahren.Sie.mit.der.Einstellung.JAHR,.MONAT.und.TAG.wie.oben.beschrie- ben..UHR/DAT.erscheint. 6..Drücken.Sie.die.MENUE-Taste,.um.in.den.Betriebsmodus.zu.gelangen. Deutsch 19... - Seite 20 PROGRAMM PROG1/ ASTRO WOCHE.(Astrofunktion.für.Woche.+.Sperrzeiten.st) PROG1/ ASTRO BLOCK.(Astrofunktion.für.Block1/2.+.Sperrzeiten.st) PROG1/ ASTRO EINZEL.(Astrofunktion.für.Einzel.+.Sperrzeiten.st) 1..Drücken.Sie.die.MENUE-Taste. 2..Um. das. Menü. PROGAMM. auszuwählen,. drücken. Sie. die. +. Taste. bis. PRO- GAMM.erscheint. 3..Bestätigen.Sie.mit.OK..PROG1.erscheint. 4..Bestätigen.Sie.mit.OK. 5..Drücken.Sie.die.+.Taste,.bis.das.Menü.ASTRO.erscheint. 6..Bestätigen.Sie.mit.OK. 7..Wählen.Sie.jetzt.mit.+/-.Ihre.gewünschte.PROG1.ASTRO.Funktion.aus: ASTRO Woche . Mit.OK.kommen.Sie.in.den.Menüpunkt.WOCHE.(1-7)..Alle.weiteren.Eingaben. beziehen.sich.jetzt.auf.jeden.Tag.der.Woche. ASTRO Block . Mit.OK.kommen.Sie.in.den.Menüpunkt.BLOCK.(BLOCK.1.1-5,.BLOCK.2.6,7).. Alle.weiteren.Eingaben.beziehen.sich.jetzt.auf.BLOCK.1.(1-5).und.BLOCK.2. (6,7). ASTRO Einzel . Mit.OK.kommen.Sie.in.den.Menüpunkt.EINZEL.(1,2,3,4,5,6,7)..Alle.weiteren. Eingaben.beziehen.sich.jetzt.auf.jeden.einzelnen.Tag.der.Woche. 8..Mit.den.+/- Tasten.stellen.Sie.jetzt.die.SPERRZEIT.s und.die.SPERRZEIT.t ein..Bestätigen.Sie.jede.Eingabe.mit.OK. 9..Drücken.Sie.die.MENUE-Taste,.um.in.den.Betriebsmodus.zu.gelangen. 20 Deutsch...
- Seite 21 PROGRAMM PROG1/ ASTRO ABEND WOCHE (Astrofunktion.Abend.für.Woche.+.Schaltzeit.s +.Sperrzeit.t) PROG1/ ASTRO ABEND BLOCK (Astrofunktion.Abend.für.Block1/2.+.Schaltzeit.s.+.Sperrzeit.t) PROG1/ ASTRO ABEND EINZEL (Astrofunktion.Abend.für.Einzel.+.Schaltzeit.s +.Sperrzeit.t) 1.. Drücken.Sie.die.MENUE-Taste. 2.. Um.das.Menü.PROGAMM.auszuwählen,.drücken.Sie.die.+.Taste.bis.PRO- GAMM.erscheint. 3.. Bestätigen.Sie.mit.OK..PROG1.erscheint. 4.. Bestätigen.Sie.mit.OK. 5.. Drücken.Sie.die.+.Taste,.bis.das.Menü.ASTRO.ABEND.erscheint 6.. Bestätigen.Sie.mit.OK. 7.. Wählen.Sie.jetzt.mit.+/-.Ihre.gewünschte.PROG1.ASTRO.ABEND.Funktion. aus: ASTRO ABEND Woche Mit.OK.kommen.Sie.in.den.Menüpunkt.WOCHE.(1-7)..Alle.weiteren.Einga- ben.beziehen.sich.jetzt.auf.jeden.Tag.der.Woche. ASTRO ABEND Block Mit. OK. kommen. Sie. in. den. Menüpunkt. BLOCK. (BLOCK. 1. 1-5,. BLOCK. 2. 6,7)..
- Seite 22 PROGRAMM PROG1/ INDIVIDUELL WOCHE.(Individuelle.Schaltzeit.st für.Woche) PROG1/ INDIVIDUELL BLOCK.(Individuelle.Schaltzeit.st für.Block1/2) PROG1/ INDIVIDUELL EINZEL.(Individuelle.Schaltzeit.st für.Einzel) 1..Drücken.Sie.die.MENUE-Taste. 2..Um. das. Menü. PROGAMM. auszuwählen,. drücken. Sie. die. +. Taste. bis. PRO- GAMM.erscheint. 3..Bestätigen.Sie.mit.OK..PROG1.erscheint. 4..Bestätigen.Sie.mit.OK. 5..Drücken.Sie.die.+.Taste.INDIVIDUELL.erscheint. 6..Bestätigen.Sie.mit.OK. 7..Wählen.Sie.jetzt.mit.+/-.Ihre.gewünschte.PROG1.INDIVIDUELL.Funktion.aus: INDIVIDUELL Woche . Mit.OK.kommen.Sie.in.den.Menüpunkt.WOCHE.(1-7)..Alle.weiteren.Eingaben. beziehen.sich.jetzt.auf.jeden.Tag.der.Woche. INDIVIDUELL Block . Mit.OK.kommen.Sie.in.den.Menüpunkt.BLOCK.(BLOCK.1.1-5,.BLOCK.2.6,7).. Alle.weiteren.Eingaben.beziehen.sich.jetzt.auf.BLOCK.1.(1-5).und.BLOCK.2. (6,7). INDIVIDUELL Einzel . Mit.OK.kommen.Sie.in.den.Menüpunkt.EINZEL.(1,2,3,4,5,6,7)..Alle.weiteren. Eingaben.beziehen.sich.jetzt.auf.jeden.einzelnen.Tag.der.Woche. 8..Mit.den.+/-.Tasten.stellen.Sie.jetzt.die.SCHALTZEIT.s.und.die.SCHALTZEIT. t.ein..Bestätigen.Sie.jede.Eingabe.mit.OK.
- Seite 23 PROGRAMM PROG2/ INDIVIDUELL WOCHE.(Individuelle.Schaltzeit.st.für.Woche) PROG2/ INDIVIDUELL BLOCK.(Individuelle.Schaltzeit.st.für.Block1/2) PROG2/ INDIVIDUELL EINZEL.(Individuelle.Schaltzeit.st.für.Einzel) 1.. Drücken.Sie.die.MENUE-Taste. 2.. Um.das.Menü.PROGAMM.auszuwählen,.drücken.Sie.die.+.Taste.bis.PRO- GAMM.erscheint. 3.. Bestätigen.Sie.mit.OK. 4.. Drücken.Sie.die.+.Taste.PROG2.erscheint. 5.. Bestätigen.Sie.mit.OK. 6.. Drücken.Sie.die.+.Taste.bis.INDIVIDUELL.erscheint. 7.. Bestätigen.Sie.mit.OK. 8.. Wählen. Sie. jetzt. mit. +/-. Ihre. gewünschte. PROG2. INDIVIDUELL. Funktion. aus: INDIVIDUELL Woche: Mit.OK kommen.Sie.in.den.Menüpunkt.WOCHE.(1-7)..Alle.weiteren.Einga- ben.beziehen.sich.jetzt.auf.jeden.Tag.der.Woche. INDIVIDUELL Block: Mit. OK kommen. Sie. in. den. Menüpunkt. BLOCK. (BLOCK. 1. (1-5),. BLOCK. 2.(6,7)..Alle.weiteren.Eingaben.beziehen.sich.jetzt.auf.BLOCK.1.(1-5).und.
- Seite 24 PROGRAMM PROG2/OFFSET.(z.B..Abfahrzeit.Abend.auf.Lüftungsposition) 1..Drücken.Sie.die.MENUE-Taste. 2..Um. das. Menü. PROGAMM. auszuwählen,. drücken. Sie. die. +. Taste. bis. PRO- GAMM.erscheint. 3..Bestätigen.Sie.mit.OK. 4..Drücken.Sie.die.+.Taste.PROG2.erscheint. 5..Bestätigen.Sie.mit.OK. 6..Drücken.Sie.die.+.Taste,.bis.das.Menü.OFFSET.erscheint. 7..Bestätigen.Sie.mit.OK. 8..Mit. der. +/-. Taste. können. sie. die. Abfahrt. separat. einstellen. (max.. +/-. 240. Min.,.abhängig.von.PROG1.SCHALTZEIT.t)..Bestätigen.Sie.Ihre.Eingabe.mit. 9..Drücken.Sie.die.MENUE-Taste,.um.in.den.Betriebsmodus.zu.gelangen. Hinweis Unter dem Menüpunkt EINSTELLUNG, müssen Sie die Fahrzeit der Lüf- tungsposition angeben und bei der Endlagenposition PROG 2 LUEF- TUNG auswählen.
- Seite 25 EINSTELLUNG URLAUB.(Urlaub.OFF/ON) 1.. Drücken.Sie.die.MENUE-Taste. 2.. Um. das. Menü. EINSTELLUNG. auszuwählen,. drücken. Sie. die. +. Taste. bis. EINSTELLUNG.erscheint. 3.. Bestätigen.Sie.mit.OK. 4.. URLAUB.ON./.OFF.erscheint. 5.. Mit.der.+/-.Taste.können.sie.die.Urlaubsfunktion.auf.ON.oder.OFF.stellen. 6.. Bestätigen.Sie.Ihre.Auswahl.mit.OK. 7.. Zur weiteren Programmierung im Menü EINSTELLUNG lesen Sie bitte weiter. Deutsch 25...
- Seite 26 EINSTELLUNG ZWISCHENPOSITION, LUEFTUNG/WENDUNG, Prog1 ENDLAGE (Zeit/Lageprogrammierung) 1..Sie. haben. den. Menüpunkt. URLAUB. bestätigt.. ZWISCHENPOSITION. er- scheint. 2..Mit.der.+/-.Taste.können.Sie.die.Fahrzeit.zur.ZWISCHENPOSITION.einstel- len.. Die. Angabe. der. Fahrzeit. erfolgt. in. Sekunden. oder. Sie. fahren. die. ZWI- SCHENPOSITION.mit.der.AB-/AUF-Taste.aus.der.oberen.Endlage.an. 3..Bestätigen.Sie.mit.OK. 4..Mit.der.+/-.Taste.können.Sie.die.Fahrzeit.zur.LUEFTUNG/WENDUNG.einstel- len..Die.Angabe.der.Fahrzeit.erfolgt.in.Sekunden.oder.Sie.fahren.die.LUEF- TUNG/WENDUNG.mit.der.AUF-/AB.-Taste.aus.der.unteren.Endlage.an..Be- stätigen.Sie.mit.OK. 5..Sie.haben.den.Menüpunkt.LUEFTUNG/WENDUNG.bestätigt..PROG1.END- LAGE/. PROG1. ZWISCHENPOSITION. oder. PROG1. LUEFTUNG/WENDUNG. erscheint. 6..Mit.
- Seite 27 EINSTELLUNG Prog2 ENDLAGE.(Zeit/Lageprogrammierung) Hinweis Nur wenn in PROG2 eine Zeit eingestellt ist, wird Ihnen dieses Dialog- fenster angezeigt. 1..Sie. haben. den. Menüpunkt. PROG1. ENDLAGE. bestätigt.. PROG2. ENDLAGE. erscheint. 2..Mit. der. +/-. Taste. können. Sie. zwischen. PROG. 2. ENDLAGE,. PROG. 2. ZWI- SCHENPOSITION.und.PROG.2.LUEFTUNG/WENDUNG.auswählen. 3..Bestätigen.Sie.Ihre.Auswahl.mit.OK. 4..Die.Funktion.PROG2.ENDLAGE.ist.jetzt.eingestellt. 5..Zur weiteren Programmierung im Menü EINSTELLUNG lesen Sie bitte weiter. Deutsch 27...
- Seite 28 EINSTELLUNG DEUTSCH/ ASTROVERSCHIEBUNG st (Sprachauswahl,.Astroverschiebung) 1.. Sie. haben. den. Menüpunkt. PROG2. ENDLAGE. bestätigt.. DEUTSCH. er- scheint. 2.. Mit.der.+/-.Taste.können.Sie.die.gewünschte.Sprache.einstellen. 3.. Bestätigen.Sie.Ihre.Sprachauswahl.mit.OK. 4.. ASTROVERSCHIEBUNG.s.erscheint. 5.. Mit.der.+/-.Taste.können.Sie.die.gewünschte.Astroverschiebung.s.einstel- len.(max..+/-.120.Min.) 6.. Bestätigen.Sie.mit.OK. 7.. ASTROVERSCHIEBUNG.t.erscheint. 8.. Mit.der.+/-.Taste.können.Sie.die.gewünschte.Astroverschiebung.t.einstel- len.(max..+/-.120.Min.) 9.. Bestätigen.Sie.mit.OK. 10.. Die.Funktion.ASTROVERSCHIEBUNG.t.ist.jetzt.eingestellt. 11.. Zur weiteren Programmierung im Menü EINSTELLUNG lesen Sie bitte weiter. 28 Deutsch...
- Seite 29 EINSTELLUNG (Städteauswahl,.EXPERTEN.MODUS.(LAENGE,.BREITE,.ZEITZONE) 1.. Sie.haben.die.Funktion.ASTROVERSCHIEBUNG.t bestätigt..Stadtauswahl. (KASSEL).erscheint. 2.. Mit.der.+/-.Taste.können.Sie.die.nächstgelegene.Stadt.einstellen. 3.. Betätigen.Sie.mit.OK. Hinweis Diese Dialogfenster werden nur angezeigt, wenn im Funktionsmenü der EXPERTEN MODUS auf ON steht. 4.. LAENGE.erscheint..(Wenn.Sie.eine.genauere.Bestimmung.ihres.Standortes. wünschen,.können.Sie.diesen.über.die.Längen-/.und.Breitengrade.einstel- len.) 5.. Mit.der.+/-.Taste.können.Sie.den.gewünschten.LAENGE-ngrad.einstellen. 6.. Bestätigen.Sie.mit.OK..BREITE.erscheint. 7.. Mit.der.+/-.Taste.können.Sie.den.gewünschten.BREITE-ngrad.einstellen. 8.. Bestätigen.Sie.mit.OK..ZEITZONE.erscheint. 9.. Mit. der. +/-. Taste. können. Sie. die. gewünschte. ZEITZONE. in. der. Sie. sich. befinden.einstellen..Bestätigen.Sie.mit.OK.
- Seite 30 EINSTELLUNG SO/WI.(Automatische.Sommer-/Winterzeitumstellung) 1..Sie.haben.die.Funktion.ZEITZONE.bestätigt..SO/WI.erscheint. 2..Mit.der.+/-.Taste.können.Sie.SO/WI.ein-.oder.ausschalten. 3..Bestätigen.Sie.Ihre.Auswahl.mit.OK. 4..Drücken.Sie.die.MENUE-Taste,.um.in.den.Betriebsmodus.zu.gelangen. 30 Deutsch...
-
Seite 31: Rollladen/Jalousie, Antriebssteuergeraet/Gruppensteuer- Geraet, Laufzeit
FUNKTION (nur bei abgezogenem Bedienteil, nur für Fachpersonal) ROLLLADEN/JALOUSIE, ANTRIEBSSTEUERGERAET/GRUPPENSTEUER- GERAET, LAUFZEIT (Auswahl. des. Behanges,. Auswahl. als. Antriebssteuergerät/Gruppensteuerge- rät,.Laufzeit.des.Rollladens/Jalousie) 1.. Drücken.Sie.die.MENUE-Taste. 2.. Um.das.Menü.FUNKTION.auszuwählen,.drücken.Sie.die.+.Taste.bis.FUNK- TION.erscheint. 3.. Bestätigen.Sie.mit.OK..ROLLLADEN/JALOUSIE.erscheint. 4.. Mit.der.+/-.Taste.können.Sie.zwischen.Rollladen/Jalousie.auswählen. 5.. Bestätigen. Sie. mit. OK.. ANTRIEBSSTEUERGERAET/GRUPPENSTEUER- GERAET.erscheint. 6.. Mit. der. +/-. Taste. können. Sie. das. gewünschte. Steuergerät. (ANTRIEBS- STEUERGERAET/GRUPPENSTEUERGERAET).auswählen. 7.. Bestätigen.Sie.mit.OK..LAUFZEIT.erscheint. 8.. - Seite 32 FUNKTION (nur bei abgezogenem Bedienteil, nur für Fachpersonal) EXTERN ON/OFF/SCHALTER, NOTSIGNAL ON/OFF (Verarbeitung.externer.Signale,.Verarbeitung.von.Notsignalen) 1..Sie.haben.die.Funktion.LAUFZEIT.bestätigt..EXTERN.ON.erscheint..(EXTERN. ON/.OFF/SCHALTER.bezeichnet.die.externen.Steuersignale..Werkseinstel- lung.ist.EXTERN.SCHALTER) 2..Mit.der.+/-.Taste.können.Sie.die.gewünschte.Einstellung.der.Steuereingänge. auswählen. 3..Bestätigen.Sie.Ihre.Auswahl.mit.OK. Hinweis Nur wenn Sie ANTRIEBSSTEUERGERAET ausgewählt haben, wird Ihnen folgendes Dialogfenster angezeigt. 4..NOTSIGNAL.ON.erscheint..(NOTSIGNAL.ON.ist.Werkseinstellung) 5..Mit.der.+/-.Taste.können.Sie.das.NOTSIGNAL.auf.ON.oder.OFF . schalten..Bestätigen.Sie.mit.OK. 6..Die.Funktion.NOTSIGNAL.ON/OFF.ist.jetzt.eingestellt. 7..Zur weiteren Programmierung im Menü FUNKTION lesen Sie bitte wei- ter. 32 Deutsch...
- Seite 33 FUNKTION (nur bei abgezogenem Bedienteil, nur für Fachpersonal) ERSTINBETRIEBNAHME, RELAIS, GES-ZEIT (Datum.der.Erstinbetriebnahme,.Relaisschalthäufigkeit,.Gesamtlaufzeit) 1..Sie.haben.die.Funktion.NOTSIGNAL.ON/OFF.bestätigt.EXPERTEN.MODUS. OFF/ON.erscheint. 2..Mit.der.+/-.Taste.können.Sie.die.gewünschte.Einstellung.auswählen. 3..Bestätigen.Sie.Ihre.Auswahl.mit.OK. 4..ERSTINBETRIEBNAHME.erscheint. 5..Bestätigen. Sie. mit. OK.. RELAIS. erscheint.. (RELAIS. bezeichnet. die. Relais- schalthäufigkeit.) 6..Betätigen. Sie. mit. OK.. GES-ZEIT. erscheint.. (GES-ZEIT. bezeichnet. die. Ge- samtlaufzeit.der.Uhr.) 7..Bestätigen.Sie.Ihre.Auswahl.mit.OK. 8..Drücken.Sie.die.MENUE-Taste,.um.in.den.Betriebsmodus.zu.gelangen. Deutsch 33...
-
Seite 34: Batteriewechsel
Batteriewechsel 1... Z iehen.Sie.das.Bedienteil.ab. 2..Entnehmen.Sie.die.Batterie. 3..Setzen. Sie. die. neue. Batterie. lagerichtig.ein. 4..Stellen.Sie.die.Uhrzeit.neu.ein. Hinweis Die eingestellten Werte bleiben erhalten. Reinigung Reinigen.Sie.das.Gerät.nur.mit.einem.feuchten.Tuch..Verwenden.Sie.kein.Reini- gungsmittel,.da.dieses.den.Kunststoff.angreifen.kann. Technische Daten Nennspannung. 230-240.V.AC./.50-60.Hz Schaltstrom. 5.A./.250.V.AC.bei.cos.ϕ=1 Leistungsaufnahme. 2.VA Batterietyp. CR.2032 Schutzart. IP.20 Schutzklasse (bei.bestimmungsgemäßer.Montage). II Zulässige.Umgebungstemperatur. 0.bis.+55.°C Montageart. Unterputz.Ø.58.mm.Wandeinbau Aufputz.in.entsprechendem. AP-Gehäuse 34 Deutsch... -
Seite 35: Was.tun,.Wenn
Was tun, wenn...? Störung Ursache Abhilfe Antrieb.läuft.nicht. Falscher.Anschluss. Anschluss.prüfen. Antrieb.läuft.in.die. Falscher.Anschluss. Drähte.s.und.t.am. falsche.Richtung. Netzteil.tauschen. Astroprogramm.schaltet. 1..Datum.stimmt.nicht. 1..Richtiges.Datum. nicht.genau. 2..Falsche.Stadt.oder. einstellen. falschen.Breiten-/. 2..Richtige.Stadt.oder. Längengrad.einge- exakten.Breiten-/ stellt. Längengrad.einstel- len. 3..Urlaubsfunktion. 3..Urlaubsfunktion. eingeschaltet. ausschalten. 4..Astroverschiebung. 4..Astroverschiebung. ist.eingestellt. anpassen. Die.Zeitschaltuhr.24.V. Der.Schiebeschalter. Stellen.Sie.den. (TC52).führt.die.einge- steht.auf.Handbetrieb. Schiebeschalter.auf. stellten.Schaltbefehle. Automatikbetrieb. -
Seite 36: General
General The.timer.24.V.(TC52),.delivered.from.the.factory.with.the.current.date.and.time. (GMT),.automatically.controls.the.drive.at.the.astro.times.(sunrise.and.sunset).. It.is.possible.to.manually.operate.the.timer.24.V.(TC52).at.any.time. Battery.operation.makes.it.also.possible.to.programme.the.drive.when.the.oper- ating.device.is.disconnected.since.the.display.is.maintained. Warranty Structural.modifications.and.incorrect.installation.which.are.not.in.accordance. with.these.and.our.other.instructions.can.result.in.serious.injuries,.e.g..crushing. of.limbs..Therefore,.structural.modifications.should.only.be.carried.out.with.our. prior.approval.and.in.accordance.with.our.instructions,.particularly.the.informa- tion.contained.in.these.Assembly.and.Operating.Instructions. Any.further.processing.of.the.products.which.does.not.comply.with.their.intend- ed.use.is.not.permitted. The.end.product.manufacturer.and.fitter.have.to.ensure.that.all.the.current.stat- utory,.official.regulations.and,.in.particular,.EMC.regulations.are.adhered.to.dur- ing.utilisation.of.our.products,.especially.with.regard.to.end.product.assembly,. installation.and.customer.advice. 36 Englisch... -
Seite 37: Safety.information
• Risk of injury through an electric shock. • Terminal connections to a 230 V network must be carried out by an authorised electrician. • Before assembly, disconnect the power lead from the supply. • The provisions of the local public utilities and stipulations for wet and damp rooms in accordance with VDE 100 are to be observed when the system is connected. • Use in dry rooms only. • Use only unmodified Roto original parts. • Keep persons away from the systems guide track. • Keep away from controls. • Please comply with national stipulations. • Dispose of used batteries properly. Replace batteries with an identical type (CR 2032) only. • If the system is controlled by one or several devices, the system guide track must be visible during operation. • Only types of cable with sufficient electric strength can be used for connecting control cables (protective low voltages). -
Seite 38: Explanation.of.displays.and.buttons
Explanation of displays and buttons 38 Englisch... -
Seite 39: Assembly/Connection
Assembly/connection Englisch 39... - Seite 40 Connection as a drive controller Caution • Risk of injury by electric shock. • Terminal connections must be carried out by an authorised electri- cian! • If more than one drive is controlled using the timer 24 V (TC52), the drives must be decoupled by relay controls. This decoupling is not applicable to Roto drives with electronic limit stop. Always observe the switched current of the device. 1..Connect.the.power.supply.unit.to.the.timer.24.V.(TC52).as.follows: 2..Put.the.protective.caps.back.on.the.power.supply.unit. 3..Fix.the.power.supply.unit.in.the.box. 4..Put.the.operating.device.in.the.frame.and.plug.it.into.the.power.supply.unit. 40 Englisch...
- Seite 41 Connection as a group controller in connection with NT24V Attention If the control is used as a group control device, for example, no bridge can be inserted between the L and C terminals! 1..Connect.the.power.supply.unit.to.the.timer.24.V.(TC52).as.follows: 2..Put.the.protective.caps.back.on.the.power.supply.unit. 3..Fix.the.power.supply.unit.in.the.box. 4..Put.the.operating.device.in.the.frame.and.plug.it.into.the.power.supply.unit. Englisch 41...
-
Seite 42: Explanations
Explanations Selecting roller shutter When.the.roller.shutter.function.is.used,.the.roller.shutter.remains.locked.after.a. control.button.has.been.activated. Selecting venetian blind When. the. venetian. blind. function. is. being. used,. the. venetian. blind. moves. in. non¬maintained. command. mode. in. order. to. allow. the. slats. to. be. positioned. more.precisely..If.you.press.and.hold.a.control.button.for.longer.than.1.second,. the.venetian.blind.will.remain.locked. After.the.programmed.intermediate.position.respectively.lower.final.position.has. been.reached,.the.slats.will.be.automatically.adjusted.(provided.the.reverse.po- sition.has.been.programmed). MAN/AUTO sliding switch In.the.“ ”.sliding.switch.setting,.only.manual.command.controls.are.carried.out. (e.g.:.UP,.STOP,.DOWN.by.pressing.the.relevant.buttons). In.the.“ ”.sliding.switch.setting,.automatic.command.controls.are.carried.out. (e.g..shade.function,.twilight.function,.time,.astro.function,...) Alarm signal control light When.the.alarm.signal.control.light.is.illuminated,.this.indicates.an.alarm.signal.. -
Seite 43: Menu Button
+/- buttons The.following.operations.are.possible.using.the.+.and.-.buttons: •. Menu.-> change.value •. Auto mode.-> request.information •. + button.-> next.automatic.switching.time.s •. - button.-> next.automatic.switching.time.t •. +.button.and OK.Taste.-> astro.time.s •. -.button.and OK.Taste.-> astro.time.t MENU button By. pressing. the. MENU button,. you. can. see. an. overview. of. the. menu. or. the. operating.mode. The.currently.displayed.values.are.not saved. RESET button When.the.RESET.button.is.pressed.(with.a.ballpoint.pen.or.similar),.the.timer.24. V.(TC52).reverts.to.the.default.setting. - Seite 44 ASTRO The. timer. 24. V. (TC52). automatically. controls. the. roller. shutters. or. venetian. blinds.at.sunrise.and.sunset..These.times.are.used.as.guidelines. ASTRO EVENING Shutters.are.raised.according.to.the.set.switching.time.. Shutters.are.lowered.according.to.the.astro.function. INDIVIDUAL Triggers.the.UP.and.DOWN.control.commands.according.to.the.switching.times. you.have.set. 44 Englisch...
- Seite 45 WEEK Using.the.WEEK.menu,.you.can.set.the.same.switching.times.from. Monday.-.Sunday.(1-7). BLOCK Using.the.BLOCK.menu,.you.can.set.two.blocks. Block 1:.sets.the.switching.times.for.Monday.-.Friday.(1-5).. Block 2:.sets.the.switching.times.for.Saturday.and.Sunday.(6,7). INDIVIDUAL Using. the. INDIVIDUAL. menu,. you. can. set. separate. switching. times. for. every. day.of.the.week.. IDLE PERIOD Prevents. the. roller. shutter. from. moving. up. or. down. too. early. because. of. the. astro.function. For.example: Astro.time.s:.5:30 Idle.period.s:.6:00. The.roller.shutter.does.not move.up.before.6:00.
- Seite 46 SWITCHING TIME Automatic. switching. times. for. roller. shutters. and. venetian. blinds. to. be. raised. and.lowered. Programming.will.not.take.effect.if.the.sign:.--:--.is.showing.on.your.display. (--:--.is.located.between.23.59.and.00:00).. OFFSET An. additional. switching. time. t (OK). can. be. programmed. using. the. OFFSET. menu..This.depends.on.the.PROG.1.switching.time.t .(max..+/-.240.mins.). For.example:.astro.time.t:.20:00 Offset.t:.+60.mins. The.roller.shutter.moves.to.the.intermediate.position.at.20.00.and.to.the.lower. end.limit.at.21.00. 46 Englisch...
-
Seite 47: Settings
Settings SETTING The.SETTING.menu.gives.you.the.following.options: •. HOLIDAY.SETTING •. INTERMEDIATE.POSITION •. VENTILATION/REVERSE •. PROG.1.(END.LIMIT,.INTERMEDIATE.POSITION,.VENTILATION/REVERSE) •. PROG.2.(END.LIMIT,.INTERMEDIATE.POSITION,.VENTILATION/REVERSE) •. Language.(GB.ENGL) •. ASTRO.SHIFT.s •. ASTRO.SHIFT.t •. City.(LONDON) •. LONGITUDE.(Only.when.EXPERT.MODE.is.ON) •. LATITUDE.(Only.when.EXPERT.MODE.is.ON) •. TIME.ZONE.(Only.when.EXPERT.MODE.is.ON) •. SUMMER/WINTER.(automatic.clock.adjustment.for.daylight.saving.changes) To.set.a.function,.press.the.OK.button.until.you.come.to.the.required.menu.level.. HOLIDAY SETTING The.holiday.setting.simulates.an.occupied.house.while.you.are.on.holiday.. If.the.function.is.activated.(ON),.the.roller.shutter/blind.varies.randomly.from.the. programmed.times.(max.+.30.mins.). END LIMIT The.end.limit.is.the.point.where.the.roller.shutter/blind.is.in.the.upper.or.lower. position.. INTERMEDIATE POSITION The.intermediate.position.is.a.position.of.the.roller.shutter/blind.between.the. upper. and. lower. limits. that. can. be. freely. selected.. This. position. can. also. be. reached.from.the.upper.position.after.programming. - Seite 48 VENTILATION/REVERSE The. ventilation/reversing. position. is. a. position. of. the. roller. shutter/blind. be- tween.the.upper.and.lower.limits.that.can.be.freely.selected..Using.this.func- tion,.you.can.raise.the.shutter.from.the.lower.end.limit.until.the.ventilation.slits. are.open..The.slats.of.the.blind.will.be.turned.. Press.the.UP button.twice in.rapid.succession.to.move.to.the.ventilation/revers- ing.position. Language (GB ENGL) You.can.select.your.national.language. ASTRO SHIFT With.the.astro.shift.setting,.the.astro.time.s.and.astro.time.t.can.be.shifted. independently.of.one.another.(max..+/-.120.mins.).. City (LONDON.when.the.language.is.set.to.GB ENGL It.is.important.to.select.a.city.for.the.astro.function..Select.the.city.nearest.to. where.you.are.located. 48 Englisch...
- Seite 49 LONGITUDE/LATITUDE/TIME ZONE (only when EXPERT MODE is ON) You.can.find.out.your.coordinates,.for.example,.with.the.aid.of.an.atlas. SUMMER/WINTER SUMMER/WINTER.describes.the.automatic.clock.adjustment.for.daylight.sav- ing.changes..If.the.default.setting.is.ON,.the.time.switch.adjusts.automatically. FUNCTION This mode is only intended for qualified electricians! (Will.only.appear.when.the.operating.device.is.disconnected) The.FUNCTION.menu.gives.you.the.option.of.setting.the.following.functions: •. ROLLER.SHUTTER/BLIND.(select.either.shutter.or.blind) •. DRIVE.CONTROLLER/GROUP.CONTROLLER •. RUNNING.TIME •. EXTERNAL.(SWITCH/OFF/ON).Switches.external.group.inputs •. ALARM.SIGNAL •. EXPERT.MODE •. INITIAL.OPERATION.(for.purposes.of.service) •. RELAY.(for.purposes.of.service) •. TOTAL.RUNNING.TIME.(for.purposes.of.service) DRIVE CONTROLLER The.drive.is.connected.directly.to.the.timer.24.V.(TC52). GROUP CONTROLLER The.timer.24.V.(TC52).controls.a.group. EXTERNAL OFF/EXTERNAL ON/EXTERNAL SWITCH •. EXTERNAL.OFF.-> group.inputs.are.always.switched.off. •. EXTERNAL.ON.-> group.inputs.are.always.switched.on. •. EXTERNAL.SWITCH.-> group.inputs.are.switched.on.in.auto.mode,.switched. off.in.manual.mode.
-
Seite 50: Initial.operation
Initial operation Press.the.button.once.to.„wake.up“.the.timer..Now.you.can.select.the.language. with.the.+/-.buttons.and.accept.it.with.the.OK button..The.clock.is.in.automatic. mode.. Default setting TIME/DATE:. current.GMT.and.current.date PROGRAMME:. ASTRO.-> BLOCK.-> IDLE.PERIOD.(1-5) s.06:30, t no.default.idle.period IDLE.PERIOD.(6,7) s.08:00, t.no.default.idle.period SETTING:. HOLIDAY.OFF END.LIMIT,.location SUMMER/WINTER.ON FUNCTION:. ROLLER.SHUTTER,.DRIVE.CONTROLLER,.EXTERNAL.SWITCH,. ALARM.SIGNAL.ON,.EXPERT.MODE.OFF Note When the RESET button is pressed (with a ballpoint pen or similar), the timer 24 V (TC52) reverts to the default setting. Except menu levels of function, language and city. 50 Englisch... -
Seite 51: Programming
Programming Operating mode Overview of the menu 1..Press.the.MENU.button.until.TIME/DATE.appears. 2..To.select.further.menus,.press.the.+/-.buttons. 3..Press.the.MENU button.to.switch.to.operating.mode. TIME/DATE (to set the time and date) 1..Press.the.MENU button.until.TIME/DATE.appears. 2..By.pressing.OK,.you.get.to.the.time.menu.level. 3..Now.set.the.current.time.using.the.+/-.buttons. 4..If.the.time.is.set.correctly,.confirm.by.pressing.OK. 5..Repeat.the.above.procedure.for.the.settings.YEAR,.MONTH.and.DAY..TIME/ DATE.appears. 6..Press.the.MENU button.to.switch.to.operating.mode. Englisch 51... - Seite 52 PROGRAMME PROG1/ ASTRO WEEK.(Astro.function.for.week.+.idle.period.st) PROG1/ ASTRO BLOCK.(Astro.function.for.block1/2.+.idle.period.st) PROG1/ ASTRO INDIVIDUAL.(Astro.function.for.individual.+.idle.period.st) 1..Press.the.MENU button. 2..To.select.the.PROGAMME.menu,.press.the. . +.button.until.PROGAMME.appears. 3..Confirm.by.pressing.OK..PROG1.appears. 4..Confirm.by.pressing.OK. 5..Press.the.+.button.until.the.ASTRO.menu.appears. 6..Confirm.by.pressing.OK. 7..Now.select.the.PROG1.ASTRO.function.you.require.using.the.+/- buttons:. ASTRO week . Press.OK.for.the.WEEK.menu.level.(1-7)..All.further.entries.now.refer.to.every. day.of.the.week. ASTRO block. . Press.OK.for.the.BLOCK.menu.level.(BLOCK.1.1-5,.BLOCK.2.6,7)..All.further. entries.now.refer.to.BLOCK.1.(1-5).and.BLOCK.2.(6,7). ASTRO individual . Press.OK.for.the.INDIVIDUAL.menu.level.(1,2,3,4,5,6,7). . All.further.entries.now.refer.to.each.individual.day.of.the.week. 8..Now.set.the.IDLE.PERIOD.sand.IDLE.PERIOD.t.using.the.+/- buttons..Con- firm.each.entry.by.pressing.OK.. 9..Press.the.MENU button.to.switch.to.operating.mode. 52 Englisch...
- Seite 53 PROGRAMME PROG1/ ASTRO EVENING WEEK (Astro.function.evening.for.week.+.switching.time.s.+.idle.period.t) PROG1/ ASTRO EVENING BLOCK (Astro.function.evening.for.block.1/2.+.switching.time.s.+.idle.period.t) PROG1/ ASTRO EVENING INDIVIDUAL (Astro.function.evening.for.individual.+.switching.time.s+.idle.period.t) 1.. Press.the.MENU button. 2.. To.select.the.PROGAMME.menu,.press.the.+.button.until.PROGAMME.ap- pears. 3.. Confirm.by.pressing.OK..PROG1.appears. 4.. Confirm.by.pressing.OK. 5.. Press.the.+.button.until.the.ASTRO.EVENING.menu.appears. 6.. Confirm.by.pressing.OK. 7.. Now.select.the.PROG1.ASTRO.ABEND.function.you.require.using.+/-.:. ASTRO EVENING week Press. OK. for. the. WEEK. menu. level. (1-7).. All. further. entries. now. refer. to. every.day.of.the.week. ASTRO EVENING block Press.OK.for.the.BLOCK.menu.level.(BLOCK.1.1-5,.BLOCK.2.6,7)..All.fur- ther.entries.now.refer.to.BLOCK.1.(1-5).and.BLOCK.2.(6,7).
- Seite 54 PROGRAMME PROG1/INDIVIDUAL WEEK.(Individual.switching.time.st.for.week) PROG1/INDIVIDUAL BLOCK.(Individual.switching.time.st.for.block1/2) PROG1/INDIVIDUAL INDIVIDUAL.(Individual.switching.time.st.for.individual. day) 1..Press.the.MENU button. 2..To.select.the.PROGAMME.menu,.press.the. +.button.until.PROGAMME.appears. 3..Confirm.by.pressing.OK..PROG1.will.appear. 4..Confirm.by.pressing.OK. 5..Press.the.+.button.until.INDIVIDUAL.appears. 6..Confirm.by.pressing.OK. 7..Now.select.the.PROG1.INDIVIDUAL.function.you.require.using.the.+/- but- tons:. INDIVIDUAL week . Press.OK.for.the.WEEK.menu.level.(1-7)..All.further.entries.now.refer.to.every. day.of.the.week. INDIVIDUAL block . Press.OK.for.the.BLOCK.menu.level.(BLOCK.1.1-5,.BLOCK.2.6,7)..All.further. entries.now.refer.to.BLOCK.1.(1-5).and.BLOCK.2.(6,7). INDIVIDUAL individual . Press.OK.for.the.INDIVIDUAL.menu.level.(1,2,3,4,5,6,7). . All.further.entries.now.refer.to.every.individual.day.of.the.week.. 8..Now.set.the.SWITCHING.TIME.s and.the.SWITCHING.TIME.t.using.the.+/- buttons..Confirm.your.entry.by.pressing.OK. 9..Press.the.MENU button.to.switch.to.operating.mode. 54 Englisch...
- Seite 55 PROGRAMME PROG1/ INDIVIDUAL WEEK.(Individual.switching.time.st.for.week) PROG1/ INDIVIDUAL BLOCK.(Individual.switching.time.st.for.block1/2) PROG1/ INDIVIDUAL INDIVIDUAL. (Individual. switching. time. st. for. indi- vidual.day) 1.. Press.the.MENU button.. 2.. To.select.the.PROGAMME.menu,.press.the.+.button.until.PROGAMME.ap- pears. 3.. Confirm.by.pressing.OK. 4.. Press.the.+.button.until.PROG2.appears. 5.. Confirm.by.pressing.OK. 6.. Press.the.+.button.until.INDIVIDUAL.appears. 7.. Confirm.by.pressing.OK. 8.. Now.select.the.PROG2.INDIVIDUAL.function.you.require.using.the.+/- but- tons:. INDIVIDUAL week Press. OK. for. the. WEEK. menu. level. (1-7).. All. further. entries. now. refer. to. every.day.of.the.week.
- Seite 56 PROGRAMME PROG2/OFFSET.(e.g..Time.shutters.are.lowered.to.ventilation.position.in.the. evening) 1..Press.the.MENU button. 2..To.select.the.PROGAMME.menu,.press.the.+.button.until.PROGAMME.ap- pears. 3..Confirm.by.pressing.OK. 4..Press.the.+.button.until.PROG2.appears. 5..Confirm.by.pressing.OK. 6..Press.the.+.button.until.the.OFFSET.menu.appears. 7..Confirm.by.pressing.OK. 8..You. can. set. the. time. for. the. DOWN. control. command. to. be. triggered. sep- arately. using. the. +/- button. (max.. +/-. 240. mins,. depending. on. PROG1. SWITCHING.TIME.t)..Confirm.your.entry.by.pressing.OK. 9..Press.the.MENU button.to.switch.to.operating.mode. Note Using the SETTING menu level, you must enter the switching time of the intermediate position and select PROG 2 VENTILATION for the position of the end limits.
- Seite 57 SETTING HOLIDAY (Holiday.OFF/ON) 1.. Press.the.MENU button. 2... To.select.the.SETTING.menu,.press.the.+.button.until.SETTING.appears. 3.. Confirm.by.pressing.OK. 4.. HOLIDAY.ON./.OFF.will.appear. 5.. You.can.set.the.holiday.function.to.ON.or.OFF.by.pressing.the.+/- button. 6.. Confirm.your.selection.by.pressing.OK. 7.. Please read on for further programming options using the SETTING menu. Englisch 57...
- Seite 58 SETTING INTERMEDIATE POSITION, VENTILATION/REVERSE, Prog1 END LIMIT (Time/.position.programming) 1..You.have.confirmed.the.HOLIDAY.menu.level..INTERMEDIATE.POSITION.will. appear. 2..You. c an. s et. t he. s witching. t ime. t o. m ove. t o. t he. I NTERMEDIATE. P OSITION. u sing. t he. +/- button..The.switching.time.is.indicated.in.a.few.seconds.or.you.can.move. to.the.INTERMEDIATE.POSITION.from.the.upper.end.limit.using.the.DOWN/ UP.button. 3..Confirm.by.pressing.OK. 4..You.can.set.the.switching.time.to.move.to.VENTILATION/REVERSE.using.the. +/- button..The.switching.time.is.indicated.in.a.few.seconds.or.you.can.move. to.the.VENTILATION/REVERSE.from.the.lower.end.limit.using.the.UP/DOWN. button..Confirm.by.pressing.OK. 5..You.
- Seite 59 SETTING Prog2 END LIMIT (Time/position.programming) Note This dialog window will only be displayed if a time is set in PROG2. 1..You.have.confirmed.the.PROG1.END.LIMIT.menu.level..PROG2.END.LIMIT.will. appear. 2..You.can.select.PROG.2.END.LIMIT,.PROG.2.INTERMEDIATE.POSITION.and. PROG.2.VENTILATION/REVERSE.using.the.+/- button. 3..Confirm.your.selection.by.pressing.OK. 4..The.function.PROG2.POSITION.has.now.been.set.. 5..Please read on for further programming options using the SETTING menu. Englisch 59...
- Seite 60 SETTING GB ENGL/ ASTRO SHIFT st (Language,.astro.shift) 1.. You.have.confirmed.the.PROG2.END.LIMIT.menu.level..GB.ENGL.will.ap- pear. 2.. You.can.set.the.language.required.using.the.+/- button. 3.. Confirm.the.language.selected.by.pressing.OK. 4.. ASTRO.SHIFT.s.will.appear. 5.. You.can.set.the.required.astro.shift.s.(max..+/-.120.mins.).using.the.+/- button. 6.. Confirm.by.pressing.OK. 7.. ASTRO.SHIFT.t.will.appear. 8.. You.can.set.the.required.astro.shift.t.(max..+/-.120.mins.).using.the.+/- button. 9.. Confirm.by.pressing.OK. 10.. The.function.ASTRO.SHIFT.t.has.now.been.set.. 11.. Please read on for further programming options using the SETTING menu. 60 Englisch...
- Seite 61 SETTING (City,.EXPERT.MODE.(LONGITUDE,.LATITUDE,.TIME.ZONE) 1.. You.have.confirmed.the.function.ASTRO.SHIFT.t..The.city.selected.(LON- DON).will.appear. 2.. You.can.set.the.nearest.town.using.the.+/- button. 3.. Confirm.by.pressing.OK. Note These dialog windows are only displayed when the EXPERT MODE in the function menu is ON. 4.. LONGITUDE. will. appear.. (If. you. prefer. to. define. your. location. more. pre- cisely,.you.can.do.so.by.setting.the.degrees.longitude.and.latitude.) 5.. You.can.set.the.degrees.LONGITUDE.using.the.+/- button. 6.. Confirm.by.pressing.OK..LATITUDE.will.appear. 7..
- Seite 62 SETTING SUMMER/WINTER (Automatic.clock.adjustment.for.daylight.saving.changes) 1..You.have.confirmed.the.TIME.ZONE.function..SUMMER/WINTER.will.appear. 2..You.can.switch.SUMMER/WINTER.on.or.off.using.the.+/- button. 3..Confirm.your.selection.by.pressing.OK.. 4..Press.the.MENU button.to.switch.to.operating.mode. 62 Englisch...
- Seite 63 FUNCTION (only when the operating device is discon- nected, only for qualified electricians) ROLLER SHUTTER/BLIND, DRIVE CONTROLLER/ GROUP CONTROLLER, RUNNING TIME (Selection. of. shutter/blind,. selection. of. the. drive. controller/. group. controller,. running.time.of.the.roller.shutter/blind) 1.. Press.the.MENU button. 2.. To. select. the. FUNCTION. menu,. press. the. +. button. until. FUNCTION. ap- pears. 3.. Confirm.by.pressing.OK..ROLLER.SHUTTER/BLIND.will.appear. 4.. You.can.select.either.roller.shutter.or.blind.using.the.+/- button. 5.. Confirm.by.pressing.OK..DRIVE.CONROL.DEVICE/GROUP.CONTROLLER. will.appear. 6.. You. can. select. the. control. device. required. using. the. +/- button. (DRIVE. CONROL.DEVICE/GROUP.CONTROLLER).
- Seite 64 FUNCTION (only when the operating device is discon- nected, only for qualified electricians) EXTERNAL ON/OFF/SWITCH, ALARM SIGNAL ON/OFF (Processing.external.signals,.processing.alarm.signals) 1..You.have.confirmed.the.RUNNING.TIME.function..EXTERNAL.ON.will.appear.. (EXTERNAL.ON/.OFF/.SWITCH.describes.the.external.control.signals..Default. setting.is.EXTERN.SWITCH) 2..You.can.select.the.required.setting.for.the.control.inputs.using.the.+/- button. 3..Confirm.your.selection.by.pressing.OK. Note The following dialog window will only be displayed if you have selected DRIVE CONTROLLER. 4..ALARM.SIGNAL.ON.will.appear..(The.default.setting.is.ALARM.SIGNAL.ON.) 5..You.can.switch.the.ALARM.SIGNAL.to.ON.or.OFF.using.the.+/- button..Con- firm.by.pressing.OK. 6..The.function.ALARM.SIGNAL.ON/OFF.has.now.been.set.. 7..Please read on for further programming options using the FUNCTION menu. 64 Englisch...
- Seite 65 FUNCTION (only when the operating device is discon- nected, only for qualified electricians) INITIAL OPERATION, RELAY, TOTAL RUNNING TIME (Date.of.initial.operation,.relay.switching.rate,.total.running.time) 1..You.have.confirmed.the.ALARM.SIGNAL.ON/OFF..EXPERT.MODE.OFF/ON.will. appear. 2..You.can.select.the.required.setting.using.the.+/- button. 3..Confirm.your.selection.by.pressing.OK. 4..INITIAL.OPERATION.will.appear.. 5..Confirm.by.pressing.OK..RELAY.will.appear..(RELAY.denotes.the.relay.switch- ing.rate.) 6..Confirm. by. pressing. OK.. TOTAL. RUNNING. TIME. will. appear.. (TOTAL. RUN- NING.TIME.denotes.the.overall.running.time.of.the.timer.) 7..Confirm.your.selection.by.pressing.OK. 8..Press.the.MENU button.to.switch.to.operating.mode. Englisch 65...
-
Seite 66: Changing.the.battery
Changing the battery 1..Disconnect.the.operating.device. 2..Remove.the.battery. 3..Insert.the.new.battery.properly. 4..Reset.the.time. Note The values set are still saved Cleaning Clean.the.device.with.a.damp.cloth.only..Do.not.use.a.cleansing.agent.since.this. could.damage.the.plastic. Technical data Nominal.voltage. 230-240.V.AC./.50-60.Hz Switched.current. 5.A./.250.V.AC.bei.cos.ϕ =1 Power.consumption. 2.VA Battery.type. CR.2032 System.of.protection. IP.20 Protection.class (In.accordance.with.the assembly.specifications). Permissible.ambient.temperature. 0.to.+55.°C Type.of.installation. Concealed.Ø.58.mm.wall-mounted Exposed.in.appropriate.exposed.casing 66 Englisch... -
Seite 67: What.to.do.if
What to do if...? Problem Cause Remedy Drive.is.not.functioning. Faulty.connection. Check.the.connection. Blind.or.shutter.moves.in. Faulty.connection. Exchange.s.and.t. the.wrong.direction. wires.in.the.power.sup- ply.unit. Astro.programme.does. 1..Date.is.incorrect. 1..Set.correct.date. not.function.according. 2..Wrong.city.or.wrong. 2..Set.correct.city.or. to.the.switching.times. latitude/longitude. exact.degrees.latitu- set. de/longitude. 3..Holiday.function.is. 3..Switch.holiday.func- switched.on. tion.off. 4..Astro.shift.is.set. 4..Adjust.astro.shift. The.timer.24.V.(TC52). The.sliding.switch.is.on. Move.the.sliding.switch. does.not.carry.out.the. manual. to.automatic. switching.commands. The.timer.24.V.(TC52). Holiday.function.is. Switch.holiday.function. does.not.carry.out.the. - Seite 68 ( +49 (0)1805 905051 * ( +43 2757 21313-0 ( +41 (0)44 267 47 47 ( +33 (0)387 292430 7 +43 2757 21313-50 7 +41 (0)44 267 47 46 7 +49 (0)1805 904051 7 +33 (0)387 914901 www.roto-frank.at www.roto-frank.ch www.roto-frank.com www.roto-frank.fr www.roto-frank.si ( +353 67 50700 ( + 32 (0)89 778090 ( +44 (0) 1788 558600 ( + 32 (0)800 0232114 7 +353 67 34631 7 + 32 (0)89 385788 7 +44 (0) 1788 558606 7 + 32 (0)800 0232116 www.careyglass.com www.roto.be www.roto-frank.com www.roto-frank.nl...