Herunterladen Inhalt Inhalt Diese Seite drucken
Sony VPL-VW790ES Kurzreferenz

Sony VPL-VW790ES Kurzreferenz

Video projector
Vorschau ausblenden Andere Handbücher für VPL-VW790ES:
Inhaltsverzeichnis

Werbung

Verfügbare Sprachen
  • DE

Verfügbare Sprachen

  • DEUTSCH, seite 42
Video Projector
VPL-VW790ES
© 2020 Sony Corporation
5-022-945-22 (1)
Quick Reference Manual ___
GB
Guide de reference rapide _
FR
Manual de referencia rapida _
ES
Kurzreferenz______________
DE
Guida rapida all'uso _______
IT
_____________
CT

Werbung

Inhaltsverzeichnis
loading

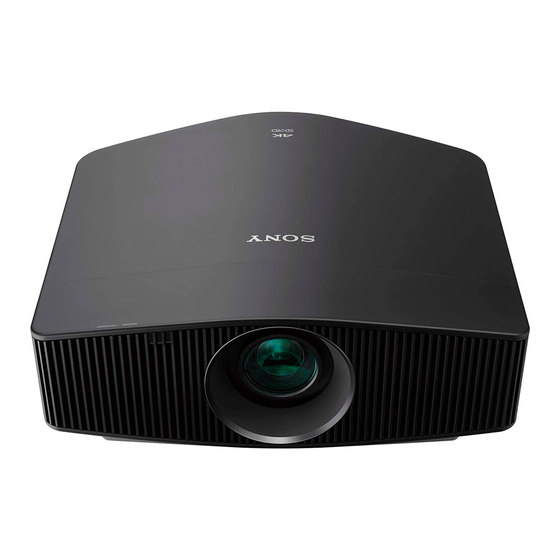
Inhaltszusammenfassung für Sony VPL-VW790ES

  • Seite 1 5-022-945-22 (1) Video Projector Quick Reference Manual ___ Guide de reference rapide _ Manual de referencia rapida _ Kurzreferenz______________ Guida rapida all'uso _______ _____________ VPL-VW790ES © 2020 Sony Corporation...
  • Seite 2 Note If you have lost or damaged the CD-ROM, you can purchase a new one from your Sony dealer or Sony service counter. Adobe and Adobe Reader are trademarks of Adobe Systems Incorporated in the United States and/or other countries.
  • Seite 3 CAUTION If you have any questions about this product, you may call; - Danger of explosion if battery is incorrectly replaced. Sony Customer Information Service Center 1-800-222- Replace only with the same or equivalent type 7669 or http://www.sony.com/ recommended by the manufacturer.
  • Seite 4 or if the device is set to lower output power if such function För kunderna i Sverige is available. IEC 60825-1:2014 LASERPRODUKT AV KLASS 1 For the customers the U.S.A. and Canada Radiated Exposure Statement: Precis som med alla starka ljuskällor The product complies with the US/Canadian portable RF bör man inte titta direkt i strålen, exposure limit set forth for an uncontrolled environment...
  • Seite 5 Beam divergence angle from lens of this unit Zoom maximum: α = 42.5° Zoom minimum: α = 21.3° Laser emission port Do not place any object just in front of the lens that may block the light during projection. Heat from the light may damage the object.
  • Seite 6 Sony Corporation tímto prohlašuje, že toto zařízení je v souladu se směrnicí 2014/53/EU. Úplné znění EU prohlášení o shodě je k dispozici na této internetové adrese: Czech http://www.compliance.sony.eu/ Herved erklærer Sony Corporation, at dette udstyr er i overensstemmelse med direktiv 2014/53 / EU. Den fulde ordlyd af EU-overensstemmelseserklæringen er tilgængelig på følgende internetadresse: Danish http://www.compliance.sony.eu/ Hierbij verklaart Sony Corporation dat deze radioapparatuur conform is met Richtlijn 2014/53/EU.
  • Seite 7 For the customers in the U.S.A. SONY LIMITED WARRANTY - Please visit http:// www.sony.com/psa/warranty for important information and complete terms and conditions of Sony’s limited warranty applicable to this product. For the customers in Canada SONY LIMITED WARRANTY - Please visit http:// www.sonybiz.ca/pro/lang/en/ca/article/resources-...
  • Seite 8 Notes on security button, do not disconnect the unit from the wall outlet while the cooling fan is still running. • SONY WILL NOT BE LIABLE FOR DAMAGES OF ANY KIND RESULTING FROM A FAILURE TO Caution IMPLEMENT PROPER SECURITY MEASURES ON...
  • Seite 9 Notes on Installation and this product if you use any such medical device. Usage SONY WILL NOT BE LIABLE FOR DAMAGES OF ANY KIND RESULTING FROM THE USE OF THIS UNIT FOR PURPOSES OTHER THAN GENERAL HOME USE, EITHER DURING THE WARRANTY...
  • Seite 10 Entrust the installation to an experienced contractor or installer. For dealers • When the projector is mounted on the ceiling, a Sony bracket or recommended equivalent must be used for installation.
  • Seite 11: Checking The Supplied Accessories

    Preparing Step 1 Checking the Supplied Accessories Check the carton to make sure it contains the following items: • Remote control RM-PJ24 (1) • Size AA (R6) batteries (2) • Lens cap (1) When you purchase the projector, a lens cap is on the lens.
  • Seite 12: Installing The Unit

    Installing the Unit Step 2 Position the unit so that the lens is parallel to the Project an image on the screen, then adjust the focus, screen. size, and position. After connecting the AC power cord to the unit, plug the AC power cord into a wall outlet.
  • Seite 13 Lens adjustment window (test pattern) 1.78:1 (16:9) 1.33:1 (4:3) 2.35:1 1.85:1 The dashed lines show the screen sizes of each aspect ratio. For more information, refer to “Connections and Preparations” in the Operating Instructions contained in the supplied CD-ROM. Installing the Unit...
  • Seite 14: Connecting The Unit

    Connecting the Unit Step 3 When making connections, be sure to do the following: • Turn off all equipment before making any connections. • Use the proper cables for each connection. • Insert the cable plugs properly; poor connection at the plugs may cause a malfunction or poor picture quality. When pulling out a cable, be sure to pull it out from the plug, not the cable itself.
  • Seite 15: Projecting The Picture

    Projecting Step 4 Projecting the Picture Selecting the Picture Viewing Mode Press one of the CALIBRATED PRESET buttons. Turn on both the unit and the equipment connected to the unit. Press INPUT to display the input palette on the screen. Select the equipment from which you want to display CALIBRATED PRESET buttons images.
  • Seite 16: Error Handling

    Note If the symptom persists even after carrying out the above methods, consult with qualified Sony personnel. If the indicator starts flashing in a way of other than the above, turn off, and then turn on the power with the ?/1 (On/Standby) button on the remote control or control panel of the unit.
  • Seite 18 Si vous avez perdu ou endommagé le CD-ROM, vous pouvez acheter un CD-ROM de remplacement auprès de votre représentant Sony ou du service clientèle Sony. Adobe et Adobe Reader sont des marques d’Adobe Systems Incorporated aux États-Unis et/ou dans d’autres pays.
  • Seite 19 Français N’utilisez pas ce produit à des fins autres que celles - Ne placez pas la batterie dans un endroit à température décrites dans le manuel d’instructions. élevée, tel qu’à la lumière directe du soleil ou à proximité d’un feu. Elle risque de prendre feu, d’exploser ou de provoquer un incendie.
  • Seite 20 Fabricant : Sony Corporation, 1-7-1 Konan Minato-ku Tokyo, 108-0075 Japon Pour toute question relative à la conformité des produits dans l’UE : Sony Belgium, bijkantoor van Sony Europe Spécifications de la source lumineuse B.V., Da Vincilaan 7-D1, 1930 Zaventem, Belgique Diodes laser 3,75 W ×...
  • Seite 21 Remarques concernant la sécurité À propos du remballage • Sony ne peut être tenue responsable de tout dommage, Conservez le carton d’emballage et le matériel de quelque nature que ce soit, résultant d’une incapacité d’emballage d’origine ; ils vous seront très utiles si vous à...
  • Seite 22 Afin de maintenir les performances et la fiabilité de l’appareil, laisser un dégagement entre les murs et SONY NE PEUT ÊTRE TENUE RESPONSABLE DE l’appareil tel qu’illustré. TOUT DOMMAGE, DE QUELQUE NATURE QUE CE SOIT, RÉSULTANT DE L’UTILISATION DE CET APPAREIL À...
  • Seite 23 • Ne montez jamais le projecteur au plafond et ne le déplacez jamais par vos propres moyens. Veillez à vous adresser à un technicien Sony agréé (service payant). • Pour installer l’appareil au plafond, veillez à utiliser un Endroits très poussiéreux ou enfumés fil de sécurité, etc., pour empêcher la chute de l’appareil.
  • Seite 24: Vérification Des Accessoires Fournis

    Préparation Etape 1 Vérification des accessoires fournis Vérifiez si le carton renferme bien tous les éléments suivants : • Télécommande RM-PJ24 (1) • Piles de format AA (R6) (2) • Capuchon d’objectif (1) Au moment de l’achat, un capuchon recouvre l’objectif du projecteur.
  • Seite 25 Installation de l’appareile Etape 2 Positionnez l’appareil de façon à ce que l’objectif soit Projetez une image sur l’écran, puis réglez la mise au parallèle à l’écran. point, la taille et la position. Après avoir branché le cordon d’alimentation à l’appareil, branchez le cordon d’alimentation secteur à...
  • Seite 26 Fenêtre de réglage de l’objectif (mire d’essai) 1,78:1 (16:9) 1,33:1 (4:3) 2,35:1 1,85:1 Les lignes pointillées indiquent les tailles d’écran de chaque rapport de format. Pour plus d’informations reportez-vous à « Raccordements et préparatifs » dans le Mode d’emploi que vous trouverez sur le CD-ROM fourni.
  • Seite 27: Raccordement De L'appareil

    Raccordement de l’appareil Etape 3 Lors de l’exécution des raccordements, vous devez procéder comme suit : • Mettez tous les appareils hors tension avant tout raccordement. • Utilisez les câbles appropriés pour chaque raccordement. • Insérez correctement les fiches de câble ; le mauvais raccordement des fiches peut entraîner un dysfonctionnement ou une piètre qualité...
  • Seite 28: Mise Hors Tension

    Projection Etape 4 Projection de l’image Sélection du mode d’affichage de l’image Mettez sous tension cet appareil et l’appareil qui y est raccordé. Appuyez sur un des boutons CALIBRATED PRESET. Appuyez sur INPUT pour afficher la palette d’entrée sur l’écran. Sélectionnez le périphérique à...
  • Seite 29: Gestion Des Erreurs

    Remarque Si le symptôme persiste même après avoir suivi les méthodes décrites ci-dessus, consultez le service après-vente Sony. Si l’indicateur se met à clignoter d’une manière qui n’est pas décrite ci-dessus, éteignez et rallumez l’appareil en appuyant sur le bouton [/1 (Marche/Veille) de la télécommande ou du panneau de commande de l’appareil.
  • Seite 30: Inhaltsverzeichnis

    Seleccione y haga clic en el manual que desee leer. Nota Si ha perdido el CD-ROM o se le ha estropeado, podrá adquirir uno de sustitución en su distribuidor Sony o en un punto de asistencia Sony. Adobe y Adobe Reader son marcas comerciales de Adobe Systems Incorporated en Estados Unidos y/u otros países.
  • Seite 31 Español Al utilizar el producto, no lo use con finalidades distintas - No coloque la batería en un lugar donde la temperatura de las especificadas en el Manual de instrucciones. sea elevada; por ejemplo, bajo la luz directa del sol o cerca del fuego.
  • Seite 32: Seguridad

    Fabricante: Sony Corporation, 1-7-1 Konan Minato-ku Tokyo, 108-0075 Japón Embalaje Para la conformidad del producto en la UE: Sony Belgium, Guarde la caja y los materiales de embalaje originales, ya bijkantoor van Sony Europe B.V., Da Vincilaan 7-D1, que resultarán útiles si alguna vez tiene que enviar la 1930 Zaventem, Bélgica...
  • Seite 33 Pida siempre consejo Este producto (incluyendo los accesorios) tiene un imán (o a un técnico de Sony cualificado (servicio de pago). imanes) que puede interferir con marcapasos, válvulas de derivación programables para el tratamiento de la Proyector LCD hidrocefalia, o con otros aparatos médicos.
  • Seite 34 Lugares expuestos directamente al aire frío o Notas sobre la instalación caliente emitido por un equipo de aire acondicionado y el uso Si instala la unidad en un lugar con estas características, es posible que el funcionamiento no sea correcto a causa de la condensación de humedad o del aumento de la temperatura.
  • Seite 35 • Nunca instale el proyector en el techo ni lo desplace sin ayuda. Pida siempre consejo a un técnico de Sony cualificado (servicio de pago). • Si instala la unidad en el techo, utilice un cable de seguridad o un sistema similar para evitar que la unidad se desprenda.
  • Seite 36: Paso 1 Preparación

    Preparación Paso 1 Comprobación de los accesorios suministrados Compruebe que la caja contenga los siguientes elementos: • Mando a distancia RM-PJ24 (1) • Pilas de tamaño AA (R6) (2) • Tapa del objetivo (1) Cuando se adquiere el proyector, el objetivo incluye una tapa.
  • Seite 37: Paso 2 Instalación De La Unidad

    Instalación de la unidad Paso 2 Coloque la unidad de modo que el objetivo quede Proyecte una imagen en la pantalla y, a continuación, paralelo a la pantalla. ajuste el enfoque, el tamaño y la posición. Después de conectar el cable de CA a la unidad, enchufe el cable de CA en una toma mural.
  • Seite 38 Ventana de ajuste del objetivo (patrón de prueba) 1,78:1 (16:9) 1,33:1 (4:3) 2,35:1 1,85:1 Las líneas de puntos indican los tamaños de pantalla de cada relación de aspecto. Para obtener más información, consulte “Conexiones y preparativos” en el Manual de instrucciones que contiene el CD-ROM suministrado.
  • Seite 39: Paso 3 Conexión De La Unidad

    Conexión de la unidad Paso 3 Cuando haga las conexiones, asegúrese de hacer lo siguiente: • Apague todos los equipos antes de realizar cualquier conexión. • Utilice los cables apropiados para cada conexión. • Introduzca los enchufes de los cables correctamente; una mala conexión de las clavijas puede provocar una avería o una mala calidad de imagen.
  • Seite 40: Paso 4 Proyección

    Proyección Paso 4 Proyección de la imagen Selección del modo de visualización de la imagen Encienda la unidad y el equipo conectado a la unidad. Pulse uno de los botones CALIBRATED PRESET. Pulse INPUT para visualizar las diferentes opciones de entradas en la pantalla. Seleccione el equipo cuyas imágenes desea visualizar.
  • Seite 41: Gestión De Errores

    Nota Si los síntomas persisten, incluso después de emplear los métodos mencionados, consulte con personal cualificado de Sony. Si el indicador empieza a parpadear de una forma diferente a la indicada, desconecte y después conecte la alimentación con el botón [/1 (encendido/en espera) del control remoto o del panel de control de la unidad.
  • Seite 42 Sie darauf. Hinweis Wenn Sie die CD-ROM nicht mehr besitzen, oder wenn sie beschädigt ist, können Sie Ersatz bei Ihrem Sony-Händler oder der Sony-Servicevertretung bestellen. Adobe und Adobe Reader sind Marken von Adobe Systems Incorporated in den Vereinigten Staaten und/oder anderen Ländern.
  • Seite 43 Deutsch Verwenden Sie das Produkt ausschließlich zu den in dieser - Setzen Sie den Akku keinen hohen Temperaturen aus Anleitung beschriebenen Zwecken. wie etwa in direkter Sonneneinstrahlung oder in der Nähe von Wärmequellen. Er kann sich entzünden, explodieren oder einen Brand verursachen. Halten Sie den Akku fern von Wasser und Salzwasser.
  • Seite 44: Sicherheitsmaßnahmen

    Tokio, 108-0075 Japan Betrachten von 3D-Videobildern. Für EU Produktkonformität: Sony Belgium, bijkantoor • Wenn Sie Flimmern oder Flackern bemerken, schalten van Sony Europe B.V., Da Vincilaan 7-D1, 1930 Sie die Raumbeleuchtung aus. Zaventem, Belgien • Nicht geeignet für Kinder ohne angemessene Aufsicht durch Erwachsene.
  • Seite 45 Temperatureinstellungen einer Klimaanlage vorsichtig sein.Lassen Sie den Projektor vor der Verwendung ungefähr zwei Stunden eingeschaltet, wenn es zu einer Kondensation gekommen ist. Hinweise zur Sicherheit • SONY KANN KEINE HAFTUNG FÜR SCHÄDEN JEDER ART DURCH UNTERLASSENE GEEIGNETE SICHERHEITSMASSNAHMEN AN ÜBERTRAGUNGSGERÄTEN, DURCH UNVERMEIDBARE DATENPREISGABE AUFGRUND DER ÜBERTRAGUNGSSPEZIFIKATIONEN ODER...
  • Seite 46: Ungeeignete Installationsorte

    Hitze und Feuchtigkeit Hinweise zu Installation und Gebrauch Ungeeignete Installationsorte Orte, die direkt dem kalten oder warmen Stellen Sie das Gerät nicht an Orten auf, an denen es Luftstrom einer Klimaanlage ausgesetzt sind folgenden Bedingungen ausgesetzt ist. Andernfalls kann Wenn Sie das Gerät an einem solchen Ort installieren, es zu Fehlfunktionen oder Schäden am Gerät kommen.
  • Seite 47: Sicherheitshinweise Zur Montage Des Geräts An Der Decke

    • Installieren Sie den Projektor auf keinen Fall selbst an der Decke und transportieren Sie ihn auch nicht alleine. Wenden Sie sich dazu unbedingt an qualifizierte Sony- Fachleute (kostenpflichtig). • Verwenden Sie bei der Montage des Geräts an der Decke unbedingt einen Sicherungsdraht o.
  • Seite 48: Vorbereitung

    Vorbereitung Schritt 1 Überprüfen des mitgelieferten Zubehörs Bitte überprüfen Sie, ob alle folgenden Gegenstände im Lieferkarton enthalten sind: • Fernbedienung RM-PJ24 (1) • Batterien der Größe AA (R6) (2) • Objektivdeckel (1) Im Auslieferungszustand sitzt ein Objektivdeckel auf dem Objektiv. Nehmen Sie den Objektivdeckel vor der Verwendung des Projektors ab.
  • Seite 49: Installieren Des Geräts

    Installieren des Geräts Schritt 2 Positionieren Sie das Gerät so, dass das Objektiv Projizieren Sie ein Bild auf die Projektionsfläche und parallel zur Leinwand ausgerichtet ist. passen Sie Fokus, Format und Position an. Schließen Sie das Netzkabel erst an das Gerät und dann an eine Netzsteckdose an.
  • Seite 50 Objektiv-Einstellfenster (Testmuster) 1,78:1 (16:9) 1,33:1 (4:3) 2,35:1 1,85:1 Die gestrichelten Linien zeigen die Leinwandgröße beim jeweiligen Seitenverhältnis. Weitere Einzelheiten finden Sie unter „Anschlüsse und Vorbereitungen“ in der Bedienungsanleitung auf der mitgelieferten CD-ROM. Installieren des Geräts...
  • Seite 51: Anschließen Des Geräts

    Anschließen des Geräts Schritt 3 Achten Sie bei der Herstellung der Anschlüsse auf Folgendes: • Schalten Sie alle Geräte aus, bevor Sie irgendwelche Anschlüsse vornehmen. • Verwenden Sie die korrekten Kabel für jeden Anschluss. • Stecken Sie die Kabelstecker einwandfrei ein; lockerer Anschluss der Stecker kann eine Funktionsstörung oder schlechte Bildqualität verursachen.
  • Seite 52: Projizieren

    Projizieren Schritt 4 Projizieren des Bildes Auswählen des Bildbetrachtungsmodus Schalten Sie sowohl das Gerät als auch die angeschlossenen Geräte ein. Drücken Sie eine der CALIBRATED PRESET-Tasten. Drücken Sie INPUT, um auf der Leinwand eine Liste der Eingangsgeräte anzuzeigen. Wählen Sie das Gerät, auf dem sich die Bilder befinden, die angezeigt werden sollen.
  • Seite 53 Hinweis Falls die Störung trotz Ausführung der obigen Maßnahmen bestehen bleibt, wenden Sie sich an qualifiziertes Sony-Personal. Falls die Anzeige anders als oben erläutert zu blinken beginnt, schalten Sie das Gerät aus und dann mit der Taste [/1 (Ein/Bereitschaft) auf der Fernbedienung oder am Bedienfeld des Geräts wieder ein.
  • Seite 54 Nota In caso di perdita o di danneggiamento del CD-ROM, è possibile acquistarne uno nuovo da un rivenditore Sony o rivolgendosi all’assistenza Sony. Adobe e Adobe Reader sono marchi di Adobe Systems Incorporated negli Stati Uniti e/o in altri paesi.
  • Seite 55 Italiano Quando si utilizza il prodotto, non utilizzarlo per scopi - Non esporre la batteria ad elevate temperature, come ad diversi da quelli descritti nel manuale di istruzioni. esempio sotto luce solare diretta o in prossimità di fiamme per evitare che possa prendere fuoco, esplodere o causare incendi.
  • Seite 56 Produttore: Sony Corporation, 1-7-1 Konan Minato-ku Tokyo, 108-0075 Giappone Gli occhiali 3D comunicano con il proiettore tramite Per la conformità del prodotto in ambito UE: Sony tecnologia Bluetooth per visualizzare i segnali 3D. Belgium, bijkantoor van Sony Europe B.V., Da Vincilaan...
  • Seite 57 Imballaggio Note sulla sicurezza Conservare la scatola e il materiale di imballaggio • SONY NON SARÀ RESPONSABILE DI DANNI DI originale, poiché potrebbero servire se fosse necessario QUALSIASI TIPO RISULTANTI DALLA MANCATA spedire l’unità. Per ottenere la massima protezione, IMPLEMENTAZIONE DI MISURE DI PROTEZIONE imballare l’unità...
  • Seite 58 5 cm questo prodotto se si fa uso di dispositivi medicali. 5 cm 5 cm SONY NON SARÀ RESPONSABILE DI DANNI DI QUALSIASI TIPO RISULTANTI DALL’UTILIZZO DI QUESTA UNITÀ PER SCOPI DIFFERENTI DA QUELLI DI UTILIZZO DOMESTICO GENERALE, SIA DURANTE IL PERIODO DI GARANZIA, SIA DOPO LA SUA SCADENZA.
  • Seite 59 Potrebbe verificarsi un malfunzionamento del sensore. Precauzioni di sicurezza per l’installazione dell’unità sul soffitto • Non montare mai il proiettore sul soffitto né spostarlo da soli. Per l’installazione rivolgersi a personale Sony Posizioni molto polverose o estremamente qualificato (a pagamento). fumose •...
  • Seite 60: Preparazione

    Preparazione Punto 1 Verifica degli accessori in dotazione Verificare che la confezione contenga tutti gli elementi indicati di seguito: • Telecomando RM-PJ24 (1) • Pile AA (R6) (2) • Copriobiettivo (1) All’acquisto del proiettore, sull’obiettivo è applicato un copriobiettivo. Rimuovere il copriobiettivo prima di utilizzare il proiettore.
  • Seite 61: Punto 2

    Installazione dell’unità Punto 2 Posizionare l’unità in modo che l’obiettivo sia Proiettare un’immagine sullo schermo, quindi parallelo allo schermo. regolare la messa a fuoco, le dimensioni e la posizione. Dopo aver collegato il cavo di alimentazione c.a. all’unità, collegarlo a una presa della rete elettrica. Posteriore dell’unità...
  • Seite 62 Finestra di regolazione obiettivo (modello di prova) 1,78:1 (16:9) 1,33:1 (4:3) 2,35:1 1,85:1 Le linee tratteggiate mostrano le dimensioni dello schermo per ciascun formato. Per i dettagli, consultare “Collegamenti e preparazioni” nelle Istruzioni per l’uso sul CD-ROM in dotazione. Installazione dell’unità...
  • Seite 63: Punto 3

    Connessione dell’unità Punto 3 Effettuare i collegamenti osservando quanto segue: • Spegnere tutte le apparecchiature prima di effettuare qualsiasi collegamento. • Usare cavi adatti a ciascun collegamento. • Inserire correttamente le spine dei cavi; se il collegamento delle spine non è corretto, potrebbe verificarsi un malfunzionamento oppure la qualità...
  • Seite 64: Proiezione

    Proiezione Punto 4 Proiezione dell’immagine Selezione della modalità di visualizzazione dell’immagine Accendere l’unità e l’apparecchiatura ad essa collegata. Premere uno dei pulsanti CALIBRATED PRESET. Premere INPUT per visualizzare sullo schermo gli ingressi disponibili. Selezionare l’apparecchiatura della quale visualizzare le immagini. Pulsanti CALIBRATED PRESET Premere ripetutamente INPUT oppure premere M/m/ (invio) per selezionare l’apparecchiatura di cui...
  • Seite 65: Gestione Degli Errori

    Entrambe le spie lampeggiano Nota Se il problema persiste anche dopo aver effettuato le precedenti operazioni, rivolgersi a personale Sony qualificato. Se le spie lampeggiano in modo differente da quello indicato sopra, spegnere e riaccendere utilizzando il pulsante [/1 (On/Standby) sul telecomando o sul pannello di controllo dell’unità.
  • Seite 66 關於指示燈 ..........第 13 頁 使用 CD-ROM 手冊 您可使用電腦上所安裝的 Adobe Reader 閱讀手冊。 您可免費從 Adobe 網站下載 Adobe Reader。 開啟 CD-ROM 中的 index.html 檔案。 選擇並按一下希望閱讀的手冊。 注意 若您遺失或損壞 CD-ROM,可向 Sony 經銷商或 Sony 服務櫃台 購買新品。 Adobe 和 Adobe Reader 是 Adobe Systems Incorporated 在美 國和 / 或其他國家的商標。 關於快速參考手冊...
  • Seite 67 繁體中文 注意 警告 若不遵從這裡指定的方式使用控制元件、進行調整或 執行程序,可能會導致危險的輻射外洩。 若要避免起火或觸電危險,請勿將本機器曝露在雨中 注意 或潮濕環境中。 使用本產品中的光學儀器將增加對眼睛的傷害。 為避免觸電,切勿擅自打開機殼檢修,必須找合格人 員為您服務。 標籤的位置資訊 警告 光圈標籤 此設備必須接地線。 警告 當安裝本裝置時,請在固定線路中配置一個可方便使 用的斷電裝置,或將電源插頭連接至靠近裝置且可方 便使用的電源插座。如果在裝置運作期間發生故障, 請操作斷電裝置以便將電源關閉,或拔下電源插座。 3R 類 + 1 類標籤 (對於美國) 注意 關於 LAN 接頭 基於安全,如果周邊裝置連線可能具有極高的電壓, 則不可將周邊裝置接頭連接至此連接埠。 光源規格 警告 3.75 W 雷射二極體× 24 1.使用符合各國適行安全法規的核准電源線 (3 接 波長:450 - 460 nm 腳)/ 設備接頭...
  • Seite 68 第十四條 低功率射頻電機之使用不得影響飛航安全及干擾合 法通信;經發現有干擾現象時,應立即停用,並改 善至無干擾時方得繼續使用。 前項合法通信,指依電信法規定作業之無線電通 信。 低功率射頻電機須忍受合法通信或工業、科學及醫 療用電波輻射性電機設備之干擾。 警告...
  • Seite 69 關於觀看 3D 視訊影像 本產品 (含配件)有磁力,可能會干擾心律調節器、 安全注意事項 用於腦積水治療的可調式引流閥或其他醫療器材。請 • 觀看 3D 視訊影像時,只能使用 3D 眼鏡。 勿將本產品放在此類醫療器材使用者的附近。如果您 • 若您發現跳動或閃爍的情形,請關閉室內照明。 使用任何此類醫療器材,請在使用本產品前諮詢您的 • 沒有成人適當監督下的兒童不可使用本產品。 醫生。 • 在彎折鏡框時,請小心不要使 3D 眼鏡的轉軸夾到手 指。 無論在保固期內外,對於將本機用於非一般家庭使 • 請勿改裝 3D 眼鏡或使其掉落。 用所導致的任何損壞,SONY 恕不負責。 • 如果眼鏡破碎,請讓嘴巴或眼睛避開碎片。 關於光源相關部件的檢查 由於本機採用雷射,對光源相關部件執行維護或檢查 時,需要特別留意並確保環境安全。務必洽詢合格的 Sony 人員 (需付費) 。 注意事項...
  • Seite 70 會遭受空調機直接冷風或暖風吹到的位置 關於安裝和使用的注意事項 將本裝置安裝於這種位置,可能會因為濕氣凝結或溫 度上升而導致裝置故障。 不適合的安裝 在下列情況下請勿放置本機,以免造成本機故障或損 壞。 靠近牆壁 靠近熱量或煙霧偵測器 為保持本裝置的性能與可靠度,請在裝置與牆壁之間 偵測器可能會故障。 留下空間,如圖所示。 5 cm 5 cm 5 cm 多塵和多煙的地方 15 cm 5 cm 5 cm 請注意,通風口這一邊的牆壁可能會變熱。 來自於空調機,或本機或其他裝置通風孔的空氣可能 會造成螢幕震動。請勿將本機安裝於空調機或這些裝 不適合的條件 置通風孔送出的空氣會吹到本機正面的區域中。 使用本機時,切勿進行以下任何一項操作。 通風不良的地方 在本機周圍留下 30 cm 以上的空間。 前 / 後和左 / 右傾斜 使用時請勿使本機傾斜,如下圖所示。...
  • Seite 71 在高地安裝本機時 在 1500 m 或更高的海拔使用本機時,將設置 選單 上的 “高海拔高度模式”設定為 “開” 。在高地使 用本機時,若未設定此模式,可能會造成不良影響, 例如降低某些元件的可靠性。 將本機安裝在天花板上的安全注意事項 • 切勿自行將投影機安裝在天花板上或搬運投影機。 務必洽詢合格的 Sony 人員 (需付費) 。 • 將本機安裝在天花板上時,務必使用安全鋼索線等 以防止本機掉落。請將安裝工作委託給有經驗的承 包商或安裝人員。 對於經銷商 • 將投影機安裝在天花板上時,必須使用 Sony 支架或 建議的同等支架進行安裝。 • 牢牢安裝到天花板時,務必牢牢固定機殼蓋。 關於安裝和使用的注意事項...
  • Seite 72 步驟 1 準備 檢查隨附配件 請檢查紙箱,確認含有下列項目: • 遙控器 RM-PJ24 (1) • AA (R6) 電池 (2) • 鏡頭蓋 (1) 購買投影機時,鏡頭蓋在鏡頭上。請在使用投影機 之前取下鏡頭蓋。 • AC 電源線 (1) • 快速參考手冊 (本手冊) (1) • 操作說明 (CD-ROM) (1) 將電池插入遙控器內 推動並滑動以便開啟。 先插入電池的 E 端。 使用遙控器的注意事項 • 請小心使用遙控器。請勿掉落或踩踏遙控器,或向 其噴濺任何種類的液體。 •...
  • Seite 73 安裝本機 步驟 2 放置本機時,要使鏡頭與螢幕平行。 將影像投影在螢幕上,然後調節對焦、大小和位 置。 將 AC 電源線連接至本機後, 將 AC 電源線插入牆壁 電源插座。 本機背面 a 調整對焦。 按下 LENS ADJUSTMENT (FOCUS)按鈕以顯示鏡 頭對焦調整視窗 (測試模式) 。然後按下 M/m/ </, 按鈕調整影像對焦。 b 調整圖像尺寸。 按下 LENS ADJUSTMENT (ZOOM)按鈕以顯示鏡頭 縮放調整視窗 (測試模式) 。然後按下 M/m/ </, 按鈕調整圖像尺寸。 c 調整圖像位置。 本機正面...
  • Seite 74 鏡頭調整視窗 (測試模式) 1.78:1 (16:9) 1.33:1 (4:3) 2.35:1 1.85:1 虛線顯示每一長寬比的螢幕尺寸。 如需詳細資訊,請參閱隨附 CD-ROM 內操作說明中的 “連接 和準備” 。 安裝本機...
  • Seite 75 連接裝置 步驟 3 進行連接時,務必執行以下操作: • 進行任何連接之前,關閉所有設備。 • 為每個連接使用適當的纜線。 • 正確插入纜線插頭;插頭處連接不良可能會造成故障或影像品質差。拉出纜線時,務必從插頭拉出,而不是 拉纜線本身。 • 請參閱相連設備的使用說明書。 電腦 有 HDMI 輸出接頭的設備 本機右側 至 HDMI 輸入 AV 放大器 揚聲器 至 HDMI 輸出 HDMI 纜線 (非附件) 使用有指定纜線類型標誌的高級高速 HDMI :視訊訊號流 纜線。 透過網路監控投影機時,請透過網頁瀏覽器訪問投影機的設定頁 (參閱操作說明中的 “使用網路功能” ) ,然後啟用所需控制 通訊協定。 如需詳細資訊,請參閱隨附...
  • Seite 76 投射 步驟 4 投影影像 選擇影像觀看模式 按下 CALIBRATED PRESET 按鈕之一。 開啟本機和連接本機的設備。 按下 INPUT 在螢幕上顯示輸入面板。 選擇要顯示影像的設備。 反覆按 INPUT 或按 M/m/ (輸入)以選擇要從 其投影的設備。 CALIBRATED PRESET 按鈕 關閉電源 設定項目 說明 按 ?/1 (開 / 待機)按鈕。 CINEMA FILM 1 這種影像品質適用於再現主要正片的高度 出現 “斷電 ?”訊息。 動態和清晰的影像。 CINEMA FILM 2 這種影像品質適用於基於...
  • Seite 77 若畫面上出現任何問題或錯誤訊息,請參閱隨附 CD-ROM 中操作說明內的 “故障處理” 。 ON/STANDBY WARNING 指示燈 指示燈 指示燈閃爍 / 亮起 閃爍次數 原因和解決方法 三次 因為光源與光源電力異常,本機沒有正確亮起。關閉電源,一段時間後再開 啟電源。 如果症狀仍然存在,請洽詢合格的 Sony 人員。 六次 本機偵測到墜落衝擊。 如果本機出現異常,請洽詢合格的 Sony 人員。 如果本機沒有異常,請斷開 AC 電源線的連接,並檢查 ON/STANDBY 指示燈是 (亮紅色)(閃爍紅燈) 否熄滅,然後連接 AC 電源線,並開啟本機電源。 兩次 內部溫度異常高。檢查以確定通風孔沒有受到阻擋,而且不是在高海拔地區 使用本機。 三次 風扇損壞。請洽詢合格的 Sony 人員。...

Inhaltsverzeichnis