Herunterladen Inhalt Inhalt Diese Seite drucken

Cameo ZENIT W300 Bedienungsanleitung

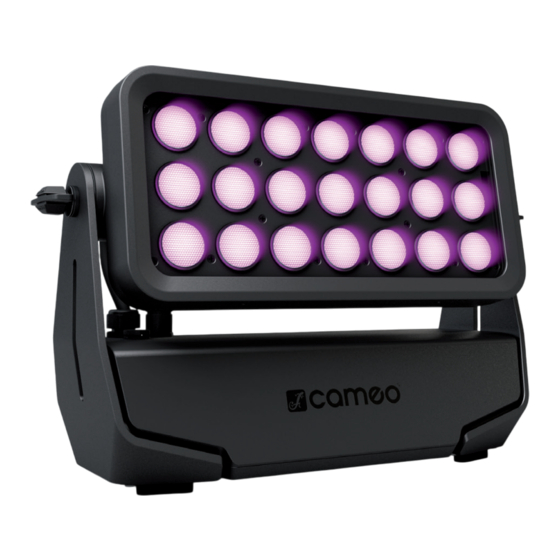
Led outdoor washlight
Vorschau ausblenden Andere Handbücher für ZENIT W300:
Inhaltsverzeichnis

Werbung

Verfügbare Sprachen
  • DE

Verfügbare Sprachen

  • DEUTSCH, seite 18
USER´S MANUAL
BEDIENUNGSANLEITUNG
MANUEL D`UTILISATION
MANUAL DE USUARIO
INSTRUKCJA OBSŁUGI
MANUALE D' USO
MULTIPLE
ANGLES
SNAPMAG
®
TECHNOLOGY
iDMX
APP
®
CONTROL
ZENIT
®
LED OUTDOOR WASHLIGHT
CLZW300
W300

Werbung

Inhaltsverzeichnis
loading

Inhaltszusammenfassung für Cameo ZENIT W300

  • Seite 1 USER´S MANUAL BEDIENUNGSANLEITUNG MANUEL D`UTILISATION MANUAL DE USUARIO INSTRUKCJA OBSŁUGI MANUALE D‘ USO MULTIPLE ANGLES SNAPMAG ® TECHNOLOGY iDMX ® CONTROL ZENIT W300 ® LED OUTDOOR WASHLIGHT CLZW300...
  • Seite 2: Inhaltsverzeichnis

    CONTENTS / INHALTSVERZEICHNIS / CONTENU / CONTENIDO / TREŚĆ / CONTENUTO ENGLISH ESPAÑOL PREVENTIVE MEASURES MEDIDAS DE SEGURIDAD 47-48 INTRODUCTION INTRODUCCIÓN 48-49 CONNECTIONS, OPERATING AND DISPLAY ELEMENTS CONEXIONES, ELEMENTOS DE MANEJO Y ELEMENTOS OPERATION 6-11 DE VISUALIZACIÓN 49-50 IR REMOTE CONTROL FUNCIONAMIENTO 50-55 INSTALLATION...
  • Seite 3: English

    We have designed this product to operate reliably over many years. Please read this User‘s Manual carefully, so that you can begin making optimum use of your Cameo Light product quickly. Learn more about Cameo Light on our website WWW.CAMEOLIGHT.COM.
  • Seite 4: Introduction

    to the power IN connection of an additional device. Make sure that the total current consumption of all connected devices does not exceed the specified value on all connected devices (label on the device). Make sure to keep power cable connections as short as possible. CAUTION: To reduce the risk of electric shock, do not remove cover (or back).
  • Seite 5: Connections, Operating And Display Elements

    POWER OUT IP65 power output socket with rubber sealing cap. Facilitates power supply to other CAMEO lights. Ensure that the total current consumption of all connected devices does not exceed the value specified on the device in amperes (A) (when not in use, always close with the rubber sealing cap).
  • Seite 6: Operation

    PLEASE NOTE • As soon as the spotlight is correctly is connected to the power supply, the following will be displayed in succession: “Welcome to Cameo”, the model name and the software version. After this process, the lamp is ready for operation and starts in the previously enabled mode.
  • Seite 7 W-DMX™ STATUS W-DMX™ W-DMX™ W-DMX™ W-DMX W-DMX™ W-DMX™ and W-DMX™ and deactivated activated as activated as activated and activated as transmission transmission receiver, receiver and is coupled to receiver and mode G3 is mode G4S is not paired is coupled to device, is coupled to enabled...
  • Seite 8 AUTO MODE (programme 1 - programme 6) The 6 different auto-programmes each comprise non-editable colour-change sequences. Brightness and speed are independently adjustable. Select auto mode as per the procedure previously described in SETTING STAND ALONE MODE and confirm with ENTER. Using the UP and DOWN controls, now select one of the 6 auto-programmes (observe arrow) and confirm with ENTER.
  • Seite 9 COLOUR TEMPERATURE (Tunable White) The colour temperature mode enables you to configure the colour temperature from cold white to warm white (CTC) and the brightness (Dim) of the light directly on the device. Select the colour temperature mode as per the procedure previously described in SETTING STAND ALONE MODE and confirm with ENTER.
  • Seite 10 Settings Wireless Setting W-DMX settings W-DMX On/Off On = W-DMX enabled (Wireless-DMX) Off = W-DMX disabled Operating Mode Receive = W-DMX module as receiver Receive = W-DMX module as sender Transmitting Mode G3 = G3 broadcasting standard G4S = G4S broadcasting standard Link Link = pair with W-DMX units.
  • Seite 11 Dimmer curves linear exponential logarithmic S-curve DMX value DMX value DMX value DMX value SYSTEM INFORMATION (System Info) Press MODE to access the selection menu. Using the UP and DOWN controls, select the menu item "System Info" (observe arrow) and confirm with ENTER.
  • Seite 12: Ir Remote Control

    IR REMOTE CONTROL Aim the infrared remote control directly at the infrared sensor on the front of the lamp. The maximum range is approximately 8 metres. In DMX and Slave modes, the remote control is deactivated. Battery for IR remote control = CR2025. The blackout button is used to switch off all LEDs, regard- less of operating mode enabled via the remote control.
  • Seite 13: Installation

    INSTALLATION AND MOUNTING Thanks to its integrated plastic feet, the lamp can be positioned in a suitable location on a level surface. on a traverse is carried out with an Omega bracket, mounted in the centre of the base of the device (A). A Omega bracket is included. Suitable beam clamps are available as an option.
  • Seite 14: Dmx Technology

    CLZW300B200SMLSD6010 60° x 10° diffuser Tool-free installation via SNAPMAG technology ® DMX TECHNOLOGY DMX-512 DMX (Digital Multiplex) is the designation for a universal transmission protocol for communications between corresponding devices and controllers. A DMX controller sends DMX data to the connected DMX device(s). The DMX data is always transmitted as a serial data stream that is forwarded from one connected device to the next via the "DMX IN"...
  • Seite 15: Technical Data

    DMX CABLES When fabricating your own cables, always observe the illustrations on this page. Never connect the shielding of the cable to the ground contact of the plug, and always make certain that the shielding does not come into contact with the housing of the XLR plug. If the shielding is connected to the ground, this can lead to short-circuiting and system malfunctions.
  • Seite 16: Manufacturer's Declarations

    Operating controls: mode, enter, up, down Display elements: OLED display Operating voltage: 100–240 V AC/50–60 Hz Power consumption: 300W Illuminance (@ 1m, 48000lx without diffuser): Luminous flux (RGBW): 10660lm Power connection: Input and output jacks, special IP65 (Max. Output 8A) Ambient temperature (in –15°C to +45°C operation):...
  • Seite 17 NOTE: This equipment has been tested and found to comply with the limits for a Class B digital device, pursuant to Part 15 of the FCC Rules. These limits are designed to provide reasonable protection against harmful interference in a residential installation. This equipment generates, uses and can radiate radio frequency energy and, if not installed and used in accordance with the instructions, may cause harmful interference to radio communications.
  • Seite 18: Deutsch

    Dieses Gerät wurde unter hohen Qualitätsanforderungen entwickelt und gefertigt, um viele Jahre einen reibungslosen Betrieb zu gewähr- leisten. Bitte lesen Sie diese Bedienungsanleitung sorgfältig, damit Sie Ihr neues Produkt von Cameo Light schnell und optimal einsetzen können. Weitere Informationen über Cameo Light erhalten Sie auf unserer Website WWW.CAMEOLIGHT.COM.
  • Seite 19: Einführung

    36. Der Abstand zu brennbaren Materialien muss mindestens 0,5 m betragen. 37. Netzleitungen zur Spannungsversorgung mehrerer Geräte müssen mindestens 1,5 mm² Aderquerschnitt aufweisen. In der EU müssen die Leitungen H05VV-F, oder gleichartig, entsprechen. Geeignete Leitungen werden von Adam Hall angeboten. Mit diesen Leitungen können Sie mehrere Geräte über den Power out Anschluss mit dem Power IN Anschluss eines weiteren Gerätes verbinden.
  • Seite 20: Anschlüsse, Bedien- Und Anzeigeelemente

    Netzkabels (bei Nichtgebrauch stets mit der Gummidichtkappe verschließen). POWER OUT IP65 Netzausgangsbuchse mit Gummidichtkappe. Dient der Netzversorgung weiterer CAMEO Scheinwerfer. Achten Sie darauf, dass die gesamte Stromaufnahme aller angeschlossenen Geräte den auf dem Gerät in Ampere (A) angegebenen Wert nicht überschreitet (bei Nichtgebrauch stets mit der Gummidichtkappe verschließen).
  • Seite 21: Bedienung

    • Sobald der Scheinwerfer korrekt am Stromnetz angeschlossen ist, werden während des Startvorgangs nacheinander, „Welcome to Cameo“, die Modellbezeichnung und die Software Version im Display angezeigt. Nach diesem Vorgang ist der Scheinwerfer betriebsbereit und startet in der Betriebsart, die zuvor aktiviert war.
  • Seite 22: Stand-Alone-Betriebsart Einstellen

    W-DMX™ STATUS W-DMX™ W-DMX™ W-DMX™ als W-DMX W-DMX™ als W-DMX™ W-DMX™ deaktiviert als receiver receiver aktiviert aktiviert und reveicer aktiviert und Übertra- und Übertra- aktiviert, und Gerät Gerät gekoppelt, und Gerät gungs-Modus gungs-Modus nicht gekoppelt gekoppelt, kein DMX-Signal gekoppelt, G3 aktiviert G4S aktiviert Transmitter DMX-Signal...
  • Seite 23: Auto Program

    AUTO-BETRIEBSART (Program 1 - Program 6) Die 6 verschiedenen Auto-Programme bestehen jeweils aus fest programmierten Farbwechselsequenzen, Helligkeit und Laufgeschwindigkeit sind separat einstellbar. Wählen Sie, wie zuvor unter Punkt „STAND-ALONE-BETRIEBSART EINSTELLEN“ beschrieben, die Auto-Betriebsart aus und bestätigen die Eingabe mit ENTER. Wählen Sie nun mit Hilfe von UP und DOWN eines der 6 Auto-Programme aus (Pfeil beachten) und bestätigen mit ENTER.
  • Seite 24: Slave Betriebsart Einstellen

    FARBTEMPERATUR (Tunable White) Der Farbtemperatur Modus ermöglicht es, Licht mit einer Farbtemperatur von Kaltweiß bis Warmweiß (CTC) und die Helligkeit (Dim) direkt am Gerät einzustellen. Wählen Sie, wie zuvor unter Punkt “STAND-ALONE-BETRIEBSART EINSTELLEN” beschrieben, den Farbtemperatur Modus aus und bestätigen die Eingabe mit ENTER. Wählen Sie nun mit Hilfe von UP und DOWN den Menüpunkt aus, den Sie bearbeiten möchten (Pfeil beachten) und bestätigen mit ENTER.
  • Seite 25 Settings Wireless Setting W-DMX Einstellungen W-DMX On/Off On = W-DMX aktiviert (Wireless-DMX) Off = W-DMX deaktiviert Operating Mode Receive = W-DMX-Modul als Empfänger Transmit = W-DMX-Modul als Sender Transmitting Mode G3 = G3 Sendestandard G4S = G4S Sendestandard Link Link = mit W-DMX-Geräten koppeln. W-DMX muss bei allen Geräten aktiviert und die Kopplung mit einem Transmitter aufgehoben sein (Receive Reset).
  • Seite 26: Dmx Mode

    Lüftersteuerung Auto Automatische Regelung der Lüfterleistung anpassen Max Intensity Maximale Lüfterleistung für maximale Helligkeit Low Noise Extra leise Lüfter bei reduzierter Helligkeit Factory Reset Zurücksetzen auf Werk- Reset Now! Zurücksetzen auf Werkseinstellungen: seinstellungen bestätigen mit ENTER, abbrechen mit MODE Dimmerkurven linear exponentiell logarithmisch...
  • Seite 27: Ir Fernbedienung

    IR FERNBEDIENUNG Richten Sie die Infrarot-Fernbedienung in Sichtverbindung direkt auf den auf der Vorderseite des Strahlers verbauten Infrarot-Sensor. Die maximale Reichweite beträgt ca. 8 Meter. In der DMX- und der Slave-Betriebsart sind die Funktionen der Fernbedienung deaktiviert. Batterie für die IR Fernbedienung = CR2025.
  • Seite 28: Aufstellung Und Montage

    AUFSTELLUNG UND MONTAGE Dank der integrierten Kunststofffüße kann der Scheinwerfer an einer geeigneten Stelle auf eine ebene Fläche gestellt werden. Die Montage an einer Traverse erfolgt mit Hilfe eines Omega-Bügels, der in der Mitte der Gerätebasis befestigt wird (A). Ein Omega-Bügel ist im Liefer- umfang enthalten, geeignete Traversenklemmen sind optional erhältlich.
  • Seite 29: Dmx Technik

    CLZW300B200SMLSD6010 60° x 10° Streuscheibe Werkzeuglose Montage durch SNAPMAG Technologie ® DMX TECHNIK DMX-512 DMX (Digital Multiplex) ist die Bezeichnung für ein universelles Übertragungsprotokoll für die Kommunikation zwischen entsprechenden Geräten und Controllern. Ein DMX-Controller sendet DMX-Daten an das/die angeschlossene(n) DMX-Gerät(e). Die DMX-Datenübertragung erfolgt stets als serieller Datenstrom, der über die an jedem DMX-fähigen Gerät vorhandenen DMX IN- und DMX OUT-Anschlüsse (XLR-Steckverbinder) von einem angeschlossenen Gerät an das nächste weitergeleitet wird, wobei die maximale Anzahl der Geräte 32 nicht...
  • Seite 30: Technische Daten

    Steckerbelegung: DMX-Kabel mit 3-Pol XLR-Steckern: DMX-Kabel mit 5-Pol XLR-Steckern (Pin 4 und 5 sind nicht belegt.): Shield Shield DMX-ABSCHLUSSSTECKER (TERMINATOR): Um Systemfehler zu vermeiden, ist das letzte Gerät einer DMX-Kette mit einem Abschlusswiderstand zu bestücken (120 Ohm, 1/4 Watt). 3-Pol XLR-Stecker mit Abschlusswiderstand: K3DMXT3 5-Pol XLR-Stecker mit Abschlusswiderstand: K3DMXT5 Steckerbelegung: 3-Pol XLR-Stecker:...
  • Seite 31: Herstellererklärungen

    Betriebsspannung: 100 - 240V AC / 50 - 60Hz Leistungsaufnahme: 300W Beleuchtungsstärke (@ 48000lx 1m, ohne Streuscheibe): Lichtstrom (RGBW): 10660lm Stromversorgungsan- Ein- und Ausgang, Spezial-Buchsen IP65 (Ausgang max. 8A) schluss: Umgebungstemperatur -15°C - +45°C (in Betrieb): Gehäusematerial: Metall Gehäusefarbe: schwarz Gehäusekühlung: 2x IP65 Lüfter Schutzklasse:...
  • Seite 32: Francais

    Cet appareil a été développé et fabriqué en appliquant des exigences de qualité très élevées: il garantit des années de fonctionnement sans problème.Veuillez lire attentivement ce Manuel Utilisateur : vous apprendrez rapidement à utiliser votre appareil Cameo Light de façon optimale.
  • Seite 33: Introduction

    34. L‘appareil ne doit pas être alimenté lors de son installation (cordon secteur non relié à la prise murale). 35. Poussière et autres dépôts à l‘intérieur de l‘appareil sont susceptibles de l‘endommager. Si les conditions environnementales sont difficiles (présence de poussière, de nicotine, de gouttelettes d‘eau...), il est recommandé de le confier à un personnel spécialisé pour entretien et nettoyage (non pris en charge par la garantie), afin d‘éviter toute surchauffe et défaillance.
  • Seite 34: Raccordements, Éléments De Commande Et D'affichage

    POWER OUT Prise de sortie d’alimentation IP65 avec cache en caoutchouc. Permet d’alimenter d’autres projecteurs CAMEO. S’assurer que la consommation totale de tous les appareils connectés ne dépasse pas la valeur en ampères (A) indiquée sur l’appareil (mettre systématiquement le cache étanche en caoutchouc si raccord non utilisé).
  • Seite 35: Mode D'emploi

    REMARQUES • Dès que le projecteur est correctement raccordé au secteur, un message de bienvenue (« Welcome to Cameo »), la désignation du modèle et la version du logiciel s’affichent successivement à l’écran pendant la phase de démarrage. À l’issue de cette phase, le projecteur est opérationnel et passe au mode précédemment activé.
  • Seite 36 sélectionner « Transmit » (envoyer) dans les paramètres (Settings -> Wireless Setting -> Operating Mode -> Transmit). Dans les paramètres des appareils W-DMX™ devant être pilotés par W-DMX™, sélectionner « Receive » (Recevoir) (Settings -> Wireless Setting -> Operating Mode -> Receive) et lancer la connexion en sélectionnant « Link » dans les paramètres du CLZW300 piloté via un câble DMX, puis en validant (Settings ->...
  • Seite 37 RÉGLAGE DU MODE DE FONCTIONNEMENT STANDALONE Appuyer sur MODE pour accéder au menu de sélection. Utiliser ensuite les touches UP et DOWN pour sélectionner l’option de menu « Stand Alone » (voir flèche) et appuyer sur ENTER pour valider. Ce sous-menu permet de sélectionner les modes de fonctionnement Standalone « Auto », «...
  • Seite 38 MODE STATIQUE (Static) De façon similaire à un dispositif de commande DMX, le mode statique permet de régler le variateur (Dimmer), le stroboscope (Strobe) et les valeurs R, G, B et W directement sur l’appareil, avec des valeurs comprises entre 000 et 255. Il est ainsi possible de créer une scène personnalisée sans avoir à...
  • Seite 39 RÉGLAGE DU MODE DE FONCTIONNEMENT SLAVE Appuyer sur MODE pour accéder au menu de sélection. Utiliser ensuite les touches UP et DOWN pour sélectionner l’option de menu « Slave » (voir flèche) et appuyer sur ENTER pour valider. Relier les unités Slave et Master (même modèle) à l’aide d’un câble DMX. Sur l’unité Master, activer l’un des modes de fonctionnement Standalone (Auto, Color Macro, Static, Tunable White, User Color).
  • Seite 40 Dimmer Curve Courbe de dimmer Linear L’intensité lumineuse augmente de façon linéaire avec la valeur DMX Exponential L’intensité lumineuse peut être réglée de façon précise dans la plage de valeurs DMX inférieure et de façon approximative dans la plage de valeurs DMX supérieure Logarithmic L’intensité...
  • Seite 41: System Info

    INFORMATIONS SUR LE SYSTÈME (System Info) Appuyer sur MODE pour accéder au menu de sélection. Utiliser ensuite les touches UP et DOWN pour sélectionner l’option de menu « System Info » (voir flèche) et appuyer sur ENTER pour valider. ---------------- Menu ---------------- DMX Address DMX Mode Stand Alone...
  • Seite 42: Télécommande Infrarouge

    TÉLÉCOMMANDE INFRAROUGE Diriger la télécommande infrarouge en contact visuel direct vers le capteur infrarouge situé sur la face avant du projecteur. Sa portée maximale est d’environ 8 mètres. En mode DMX et Slave, les fonctions de pilotage par télécommande infrarouge sont désactivées. Pile de la télécommande infrarouge = CR2025.
  • Seite 43: Installation Et Montage

    INSTALLATION ET MONTAGE Grâce aux pieds en plastique intégrés, le projecteur peut être placé à un endroit approprié sur une surface plane. Le montage sur traverse s’effectue à l’aide d’un oméga de fixation à installer au milieu de la base de l’appareil (A). Un oméga de fixation est inclus dans la livraison, des pinces de serrage sur traverse adaptées sont disponibles en option.
  • Seite 44: Technique Dmx

    CLZW300B200SMLSD6010 Diffuseur 60° x 10° Montage sans outil grâce à la technologie SNAPMAG ® TECHNIQUE DMX DMX-512 Le terme DMX (Digital Multiplex) désigne un protocole de transport universel permettant la communication entre des appareils et des contrôleurs à ce format. Un contrôleur DMX envoie des données DMX aux appareils DMX qui lui sont connectés.
  • Seite 45: Caracteristiques Techniques

    Shield Shield Pour éviter tout dysfonctionnement, le dernier appareil d'une chaîne DMX doit être équipé d'une résistance de terminaison (120 Ohms, 1/4 Watt). Connecteur XLR 3 points avec résistance de terminaison : K3DMXT3 Connecteur XLR 5 points avec résistance de terminaison : K3DMXT5 Assignation des contacts Connecteur XLR 3 points Connecteur XLR 5 points...
  • Seite 46: Déclarations Du Fabricant

    Éléments d’affichage : Écran OLED Tension de fonction- 100 - 240 V CA / 50 - 60 Hz nement : Puissance absorbée : 300 W Éclairement lumineux (à 48000 lx 1 m sans diffuseur) : Flux lumineux (RGBW) : 10660 lm Connecteurs d’alimen- Entrée et sortie, prises spéciales IP65 (sortie max. 8 A) tation : Température ambiante -15 °C - +45 °C...
  • Seite 47: Español

    Este equipo está diseñado y fabricado con los estándares de calidad más exigentes, para garantizar un correcto funcionamiento durante muchos años.Lea atentamente este manual de usuario para poder aprovechar rápidamente toda la funcionalidad de su nuevo producto de Cameo Light. Más información sobre Cameo Light en la web WWW.CAMEOLIGHT.COM. MEDIDAS DE SEGURIDAD 1.
  • Seite 48: Introducción

    34. Al montar el equipo, asegúrese de que no está alimentado eléctricamente (el enchufe no debe estar conectado a la red eléctrica). 35. La acumulación de polvo y otras partículas en el interior del equipo puede causar daños. Dependiendo de las condiciones ambientales (polvo, nicotina, niebla, etc.), deberá...
  • Seite 49: Conexiones, Elementos De Manejo Y Elementos De Visualización

    POWER OUT Toma de salida de alimentación IP65 con tapa de sellado de goma. Sirve para suministrar corriente eléctrica a otros focos Cameo. Asegúrese de que el consumo de corriente total de todos los dispositivos conectados no supere el valor indicado en amperios (A) sobre el dispositivo (mientras no se vaya a usar, guardarlo siempre cerrado con la tapa de sellado de goma).
  • Seite 50: Funcionamiento

    • En cuanto el foco esté correctamente conectado a la red eléctrica, durante el proceso de arranque se mostrarán de forma consecutiva en pantalla el mensaje «Welcome to Cameo» (Bienvenidos a Cameo), así como la denominación de modelo y la versión del software.
  • Seite 51 3. Además, mediante W-DMX™ es posible formar un grupo interconectado de equipos W-DMX™ y utilizarlos en modo maestro/esclavo. Para ello, desacople primero todos los equipos que formarán el grupo (Settings -> Wireless Setting -> Receive Reset). Ahora, en los ajustes (Settings -> Wi- reless Setting ->...
  • Seite 52 CONFIGURAR EL MODO OPERATIVO AUTÓNOMO Pulsando MODE accederá al menú de selección. Ahora, utilice los botones UP y DOWN para seleccionar la opción del menú «Stand Alone» (indicada por la flecha) y confirme la selección con ENTER. A continuación, en el submenú seleccione con los botones UP y DOWN el modo operativo autónomo: «Auto», «Color Macro», «Static», «Tunable White»...
  • Seite 53 TEMPERATURA DE COLOR (Tunable White) El modo de temperatura de color permite ajustar la luz directamente en el equipo con una temperatura de color que va del blanco frío al blanco cálido (CTC) y el brillo (Dim). Tal como se describe en el apartado «CONFIGURAR EL MODO OPERATIVO AUTÓNOMO» anterior, seleccione el modo de temperatura de color y confirme con ENTER.
  • Seite 54 Settings Wireless Setting Configuración de W-DMX W-DMX On/Off On = W-DMX activado (Wireless-DMX) Off = W-DMX desactivado Operating Mode Receive = Módulo W-DMX como receptor Transmit = Módulo W-DMX como transmisor Transmitting Mode G3 = Estándar de emisión G3 G4S = Estándar de emisión G4S Link Link = Acoplar con equipos W-DMX.
  • Seite 55: Dmx Mode

    IR Remote Habilitar o desactivar Control con mando a distancia por infrarrojos activado el control mediante Control con mando a distancia por infrarrojos desac- mando a distancia por tivado infrarrojos Adaptar el control de Auto Regulación automática de la potencia de los ventila- ventiladores dores Max Intensity...
  • Seite 56: Mando A Distancia Por Infrarrojos

    MANDO A DISTANCIA POR INFRARROJOS Oriente el mando a distancia por infrarrojos de manera que esté en la línea de visión directa con la parte delantera del sensor de infrarrojos incorporado en el proyector. El rango de alcance máximo es de unos 8 metros.
  • Seite 57: Instalación Y Montaje

    INSTALACIÓN Y MONTAJE Gracias a las patas de plástico integradas, el foco puede instalarse en un lugar adecuado sobre una superficie nivelada. El montaje en travesaño se realiza fijando una percha de montaje Omega en el centro de la base del equipo (A). El volumen de suministro incluye una percha de montaje Omega;...
  • Seite 58: Tecnología Dmx

    CLZW300B200SMLSD6010 Difusor de 60° x 10° Montaje sin herramientas mediante la tecnología SNAPMAG ® TECNOLOGÍA DMX DMX512 DMX (Digital Multiplex) es el nombre de un protocolo universal utilizado como medio de comunicación entre dispositivos y controladores. El controlador DMX envía datos DMX a los equipos DMX conectados.
  • Seite 59: Datos Técnicos

    Asignación de pines: Cable DMX con XLR de 3 pines: Cable DMX con XLR de 5 pines (los pines 4 y 5 no se utilizan): Shield Shield TERMINACIÓN DMX (TERMINADOR): Para evitar errores de sistema, debe conectarse una resistencia de terminación (120 ohmios, 1/4 W) en el último equipo de la cadena DMX. XLR aéreo de 3 pines con resistencia de terminación: K3DMXT3 XLR aéreo de 5 pines con resistencia de terminación: K3DMXT5 Asignación de pines:...
  • Seite 60: Declaraciones Del Fabricante

    Control: DMX-512, W-DMX™, mando a distancia por infrarrojos, habilitado para RDM Elementos de manejo: Mode, Enter, Up, Down (Modo, Intro, Arriba, Abajo) Elementos de visuali- Pantalla OLED zación: Tensión operativa: 100 - 240 V CA / 50 - 60 Hz Consumo de potencia: 300 W Intensidad de ilumina- 48000 lx...
  • Seite 61: Polski

    To urządzenie zostało zaprojektowane i wyprodukowane przy zastosowaniu najwyższych kryteriów jakościowych w celu zapewnienia wieloletniej bezawaryjnej eksploatacji. Proszę starannie przeczytać niniejszą instrukcję obsługi, aby móc jak najszybciej zacząć użytkować ten produkt marki Cameo Light. Więcej informacji na temat Cameo Light znajdą Państwo na naszej stronie internetowej pod adresem WWW.CAMEOLIGHT.COM.
  • Seite 62: Wprowadzenie

    33. W przypadku zagrożenia uderzeniem pioruna lub jeśli urządzenie przez dłuższy czas nie jest używane, należy wyjąć kabel sieciowy i adapter sieciowy z gniazda. 34. Instalacja urządzenia powinna odbywać się, gdy urządzenie nie jest podłączone do źródła zasilania (należy wyjąć wtyczkę z gniazda). 35.
  • Seite 63: Gniazda, Elementy Obsługi I Wskaźniki

    (nieużywane gniazdo zawsze należy zabezpieczać gumową zaślepką). POWER OUT Gniazdo wyjściowe IP65 z gumową zaślepką. Źródło zasilania dla dodatkowych reflektorów CAMEO. Całkowity pobór prądu wszystkich podłączo- nych urządzeń nie może przekroczyć wartości w amperach (A) podanej na urządzeniu (nieużywane gniazdo zawsze należy zabezpieczać gumową...
  • Seite 64: Obsługa

    UWAGI • Po prawidłowym podłączeniu reflektora do sieci zasilania podczas procesu uruchamiania jest wyświetlana następująca sekwencja komunikatów: „Welcome to Cameo”, nazwa modelu i wersja oprogramowania. Po tej procedurze reflektor jest gotowy do pracy i przełącza się na ostatnio wybrany tryb.
  • Seite 65 3. Istnieje możliwość utworzenia grupy urządzeń W-DMX™ połączonej w sieć za pośrednictwem W-DMX™ oraz jej używania w trybie Master/ Slave. W tym celu najpierw anuluj skojarzenie wszystkich urządzeń, które mają tworzyć grupę (Settings -> Wireless Setting -> Receive Reset). Teraz w ustawieniach jednostki Master wybierz (Settings ->...
  • Seite 66 USTAWIANIE TRYBU PRACY STAND ALONE Naciśnięcie przycisku MODE spowoduje przejście do menu wyboru. Przyciskami UP i DOWN wybierz opcję „Stand Alone” (zgodnie ze strzał- ką) i potwierdź wybór przyciskiem ENTER. Przejdziesz do podmenu, w którym przyciskami UP i DOWN możesz wybrać jeden z następują- cych trybów pracy Stand Alone: „Auto”, „Color Macro”, „Static”, „Tunable White”...
  • Seite 67 TEMPERATURA BARWOWA (Tunable White) Tryb temperatury barwowej umożliwia ustawienie światła z temperaturą barwową od zimnej bieli do ciepłej bieli (CTC), a także jasności (Dim) bez- pośrednio na urządzeniu. Najpierw wybierz tryb temperatury barwowej i potwierdź przyciskiem ENTER, zgodnie z opisem w punkcie USTAWIANIE TRYBU PRACY STAND ALONE.
  • Seite 68 Settings Wireless Setting Ustawienia W-DMX W-DMX On/Off On = W-DMX włączone (Wireless-DMX) On = W-DMX wyłączone Operating Mode Receive = moduł W-DMX jako odbiornik Transmit = moduł W-DMX jako nadajnik Transmitting Mode G3 = standard transmisji G3 G4S = standard transmisji G4S Link Link = skojarzenie z urządzeniami W-DMX.
  • Seite 69 dopasowanie sterowania Auto automatyczna regulacja mocy wentylatora wentylatorem Max Intensity Maksymalna moc wentylatora dla maksymalnej jasności Low Noise Bardzo cichy wentylator przy zredukowanej jasności Factory Reset przywracanie ustawień Reset Now? Resetowanie do ustawie fabrycznych: fabrycznych potwierdzić przyciskiem ENTER, przerwać przyciskiem MODE Krzywe ściemniania liniowa...
  • Seite 70: Pilot Na Podczerwień

    PILOT NA PODCZERWIEŃ Skieruj pilot na podczerwień bezpośrednio na czujnik podczerwieni wbudowany we front reflektora. Maksymalny zasięg wynosi ok. 8 metrów. W trybie pracy DMX oraz slave sterowanie pilotem jest nieaktywne. Typ baterii do pilota na podczerwień: CR2025. Przycisk Blackout służy do wyłączenia wszystkich diod LED, niezależnie od włączonego trybu pracy urządzenia Blackout kontrolowanego pilotem.
  • Seite 71: Ustawianie I Montaż

    USTAWIANIE I MONTAŻ Do ustawienia reflektora w odpowiednim miejscu na płaskiej powierzchni służą zamontowane na stałe nóżki z tworzywa sztucznego. Mocowanie do kratownicy odbywa się za pomocą uchwytu Omega, który jest zamocowany na środku podstawy (A). Jeden uchwyt Omega jest ujęty w zestawie, a odpowiednie zaciski do kratownicy są opcjonalne. Zapewnij stałe połączenia i zamocuj reflektor odpowiednią liną zabezpieczającą...
  • Seite 72: Technika Dmx

    CLZW300B200SMLSD6010 Dyfuzor 60° x 10° Montaż bez użycia narzędzi za pomocą technologii SNAPMAG ® TECHNIKA DMX DMX-512 DMX (Digital Multiplex) to nazwa uniwersalnego protokołu transmisji do komunikacji między odpowiednimi urządzeniami a kontrolerami. Kontroler DMX wysyła dane DMX do podłączonych urządzeń DMX. Transmisja danych DMX następuje zawsze w formie szeregowego strumienia danych, który jest przekazywany z jednego urządzenia do następnego przez znajdujące się...
  • Seite 73: Dane Techniczne

    Przyporządkowanie wtyczek: Kabel DMX z 3-stykowymi wtyczkami XLR: Kabel DMX z 5-stykowymi wtyczkami XLR (pin 4 i 5 są niepodłączone): Shield Shield TERMINATOR DMX: Aby zapobiec awariom systemu, należy wyposażyć ostatnie urządzenie w łańcuchu DMX w terminator (120 Ω, 1/4 W). 3-stykowa wtyczka XLR z terminatorem: K3DMXT3 5-stykowa wtyczka XLR z terminatorem: K3DMXT5 Przyporządkowanie wtyczek:...
  • Seite 74: Deklaracje Producenta

    Przyciski: Mode, Enter, Up, Down Wskaźniki: WYŚWIETLACZ OLED Napięcie robocze: 100 V – 240 V AC / 50–60 Hz Pobór mocy: 300 W Natężenie oświetlenia 48000 luks (przy odl. 1 m, bez dyfuzora): Strumień świetlny 10 660 lm (RGBW): Przyłącze zasilania: Wejście i wyjście, gniazda specjalne IP65 (wyjście maks.
  • Seite 75: Italiano

    Questo dispositivo è stato sviluppato e prodotto in conformità con elevati standard qualitativi che ne garantiscono il regolare funzionamento per molti anni. Leggete attentamente questo manuale d‘uso per utilizzare al meglio il vostro nuovo prodotto Cameo Light. Per maggiori informazioni su Cameo Light consultare la nostra pagina Web WWW.CAMEOLIGHT.COM.
  • Seite 76: Introduzione

    nicotina, nebbia ecc.) il dispositivo deve essere sottoposto a regolari interventi di manutenzione e pulizia da parte di personale specializzato (senza garanzia, interventi a carico del proprietario) per evitare surriscaldamento e malfunzionamenti. 36. La distanza dai materiali infiammabili deve essere di almeno 0,5 m 37.
  • Seite 77: Connettori, Elementi Di Comando E Di Visualizzazione

    POWER OUT Presa di uscita IP65 con tappo ermetico in gomma. Serve per l’alimentazione di altri proiettori Cameo. Tenere presente che la corrente assorbita complessiva di tutti i dispositivi collegati non deve superare il valore riportato in ampere (A) sul dispositivo (in caso di mancato utilizzo, chiudere sempre con tappo ermetico in gomma).
  • Seite 78: Utilizzo

    • Non appena il proiettore è correttamente allacciato alla rete elettrica, durante la procedura di avvio, sul display appaiono in successione il messaggio “Welcome to Cameo”, la denominazione del modello e la versione del software. Dopo questa procedura, il proiettore è pronto per l’uso e si avvia nella modalità operativa precedentemente attivata.
  • Seite 79: Dmx Address

    2. Collegare un gruppo di dispositivi W-DMX™ per formare con loro un universo DMX. Anzitutto disaccoppiare tutti i dispositivi che devono formare il gruppo (Settings -> Wireless Setting -> Receive Reset). A questo punto azionare un CLZW600 con un controller DMX via cavo DMX e selezionare "Transmit"...
  • Seite 80 IMPOSTAZIONE DELLA MODALITÀ DI FUNZIONAMENTO STAND-ALONE Premendo MODE si accede al menu di selezione. Con i tasti UP e DOWN, selezionare la voce di menu “Stand-Alone” (prestare attenzione alla freccia) e confermare con ENTER. Sempre con i tasti UP e DOWN, nel sottomenu è possibile selezionare “Auto”, “Color Macro”, “Static”, “Tunable White”...
  • Seite 81 TEMPERATURA DEL COLORE (Tunable White) La modalità Temperatura del colore consente di impostare la luce direttamente sul dispositivo con una temperatura colore che va dal bianco freddo al bianco caldo (CTC) e la luminosità (Dim). Selezionare la modalità Temperatura del colore seguendo la procedura descritta prima in “IMPOSTA- ZIONE DELLA MODALITÀ...
  • Seite 82 Settings Wireless Setting Impostazioni W-DMX W-DMX On/Off On = W-DMX attivato (Wireless-DMX) Off = W-DMX disattivato Operating Mode Receive = modulo W-DMX come ricevitore Transmit = Modulo W-DMX come trasmettitore Transmitting Mode G3 = standard di trasmissione G3 G4S = standard di trasmissione G4S Link Link = accoppiamento con dispositivi W-DMX.
  • Seite 83 IR Remote Consente di attivare o Controllo tramite telecomando a infrarossi attivato disattivare il controllo Controllo tramite telecomando a infrarossi disattivato tramite telecomando a infrarossi Adeguare controllo Auto Regolazione automatica della potenza della ventola ventola Max Intensity Massima potenza della ventola per la massima luminosità...
  • Seite 84: Telecomando A Infrarossi

    TELECOMANDO A INFRAROSSI Indirizzare il telecomando a infrarossi direttamente verso il sensore a infrarossi presente nella parte anteriore del proiettore. La portata massima è pari a ca. 8 metri. Nella modalità di funzionamento DMX e slave, le funzioni del telecomando sono disattivate. Batteria per il telecomando a infrarossi: CR2025. Con il tasto Blackout è...
  • Seite 85: Installazione E Montaggio

    INSTALLAZIONE E MONTAGGIO Grazie ai piedini in plastica integrati, il proiettore può essere collocato in un punto adatto su una superficie piana. Il montaggio a una traversa viene effettuato tramite una staffa a Omega, fissata al centro della base dell'apparecchio (A). Una staffa a Omega è inclusa nella dotazione;...
  • Seite 86: Tecnologia Dmx

    CLZW300B200SMLSD6010 Diffusore 60° x 10° Montaggio senza utensili grazie alla tecnologia SNAPMAG ® TECNOLOGIA DMX DMX512 DMX (Digital Multiplex) è la sigla di un protocollo di trasmissione universale per la comunicazione tra dispositivi e controller. Un controller DMX invia dati DMX ai dispositivi DMX collegati.
  • Seite 87: Dati Tecnici

    Configurazione dei connettori: Cavo DMX con connettori XLR a 3 poli: Cavo DMX con connettori XLR a 5 poli (pin 4 e 5 non assegnati): Shield Shield CONNETTORE TERMINALE DMX (TERMINATORE): Per evitare errori di sistema, l'ultimo dispositivo di una catena DMX deve essere dotato di una resistenza di terminazione (120 ohm, 1/4 W). Connettore XLR a 3 poli con resistenza di terminazione: K3DMXT3 Connettore XLR a 5 poli con resistenza di terminazione: K3DMXT5 Configurazione dei connettori:...
  • Seite 88: Dichiarazioni Del Produttore

    Elementi di visualiz- Display OLED zazione: Tensione di esercizio: 100 - 240 V CA, 50 - 60 Hz Potenza assorbita: 300W Intensità di illumina- 48000 lx zione (a 1 m, senza diffusore): Flusso luminoso 10660 lm (RGBW): Collegamento alimenta- Ingresso e uscita, prese speciali IP65 (uscita max. 8A) zione elettrica: Temperatura ambiente -15°C - +45°C...
  • Seite 89: Dmx Control

    DMX CONTROL / DMX STEUERUNG / PILOTAGE DMX / CONTROL DMX / STEROWANIE DMX / CONTROLLO DMX 2 CH Mode Function Values Sub-Group Dimmer 0% to 100% Dimmer Full White RGBW 8500K - 3200K 3 CH Mode Function Values Sub-Group Dimmer 0% to 100% Dimmer...
  • Seite 90 4 CH Mode Function Values Sub-Group 0% to 100% Green 0% to 100% Green Blue 0% to 100% Blue White 0% to 100% White 8 CH Mode 1 Function Values Sub-Group 0% to 100% Red fine 0% to 100% Green 0% to 100% Green Green fine...
  • Seite 91 Colour off Amber Yellow warm Yellow Green Turquoise Cyan Blue Lavender Colour Macro Colour Macro Mauve (override RGBW) Magenta Pink Warm White White Cold White Colour Jumping Stop Colour Jumping Speed slow -> fast / Colour 1 -> 12 Colour Fading Speed slow -> fast / Colour 1 ->...
  • Seite 92 White 0% to 100% White Colour off Amber Yellow warm Yellow Green Turquoise Cyan Blue Lavender Colour Macro Colour Macro Mauve (override RGBW) Magenta Pink Warm White White Cold White Colour Jumping Stop Colour Jumping Speed slow -> fast / Colour 1 ->...
  • Seite 93 15 CH Mode Function Values Sub-Group Dimmer 0% to 100% Dimmer Dimmer fine 0% to 100% Strobe open Strobe closed Pulse Random, slow -> fast Ramp up Random, slow -> fast Ramp down Random, slow -> fast Strobe functions Multifunctional strobe Random Strobe Effect, slow ->...
  • Seite 94 no function Dimmer Response LED (hold 5s) Dimmer Response Halogen (hold 5s) Fan Auto (hold 5s) Fan Max (hold 5s) Fan Silent (hold 5s) Device Settings LED Frequency 800Hz (hold 5s) Control LED Frequency 1200Hz (hold 5s) LED Frequency 2000Hz (hold 5s) LED Frequency 3600Hz (hold 5s) LED Frequency 12kHz (hold 5s) LED Frequency 25kHz (hold 5s)
  • Seite 96 CAMEOLIGHT.COM Adam Hall GmbH | Adam-Hall-Str. 1 | 61267 Neu-Anspach | Germany Tel. +49(0)6081/9419-0 | Fax +49(0)6081/9419-1000 web : www.adamhall.com | e-mail : mail@adamhall.com REV: 01...

Diese Anleitung auch für:

Clzw300

Inhaltsverzeichnis