Herunterladen Inhalt Inhalt Diese Seite drucken
ELRO PRO PS4910 Anleitungshandbuch
Vorschau ausblenden Andere Handbücher für PRO PS4910:

Werbung

Verfügbare Sprachen

Verfügbare Sprachen

SMOKE ALARM
AUTOMATIC SELF TEST
Home is not a place, it's a feeling
PS4910
Manual PS4910 version: 3

Werbung

Inhaltsverzeichnis
loading

Inhaltszusammenfassung für ELRO PRO PS4910

  • Seite 1 SMOKE ALARM AUTOMATIC SELF TEST Home is not a place, it’s a feeling PS4910 Manual PS4910 version: 3...
  • Seite 2 Table of contents English ............................. - 3 - Deutsch ............................- 10 - Nederlands ............................ - 18 - Français ............................- 25 - - 2 -...
  • Seite 3: Inhaltsverzeichnis

    Service and contact ......................... - 9 - We are constantly improving our products and service. Go to www.elro.eu to download the latest version of this manual! Read this manual carefully and keep it in a safe place for future use.
  • Seite 4: Package Content

    Package content • Smoke alarm • Mounting bracket • Mounting material (2 screws and 2 plugs) • Instruction manual Product description Siren Test/silence button Light ring On/off switch Activate and test Before using the smoke alarm, it is important to activate and test the product. Place the smoke alarm on the mounting plate and turn it clockwise.
  • Seite 5: Install The Device

    For more tips on how to install your smoke alarm, for example in rooms with ceiling beams, go to www.elro.eu. Install the device Use the mounting plate as a guide where the holes should be drilled.
  • Seite 6: Functionality

    Hold the smoke alarm against the mounting plate and turn it clockwise. The smoke alarm now switches on automatically. Test whether the device is functioning correctly by pressing and holding the test/silence button for approx. 3 seconds. If the detector is functioning correctly, the device will flash and beep.
  • Seite 7: Maintenance

    Frequently asked questions (FAQ) Do you have questions about the installation or use of this product? Please visit www.elro.eu go to the page of this product. Here you will find the most recent version of the manual, answers to frequently asked questions (FAQ) and detailed installation videos.
  • Seite 8: Safety

    Refer to local legislation for smoke detectors. • Download the Declaration of Performance (DoP) at www.elro.eu/dop. Het The WEEE symbol indicates that this product and its batteries must be disposed of separately from household waste. When this product reaches the end of its useful life, take it to a designated waste collection point nearby to ensure safe disposal or recycling.
  • Seite 9: Service And Contact

    For questions regarding installation, use or operation of this product: • Go to www.elro.eu to receive a quick answer to your question. Here you will find answers to frequently asked questions, detailed installation videos and the most recent version of a product manual.
  • Seite 10 Service und Kontakt........................- 16 - Wir arbeiten ständig daran, unseren Service und unsere Produkte zu verbessern. Besuchen Sie www.elro.eu, um die aktuellste Version dieses Handbuchs herunterzuladen! Lesen Sie dieses Handbuch sorgfältig durch und bewahren Sie es für späteren Gebrauch an einem sicheren Ort auf.
  • Seite 11: Inhalt Der Verpackung

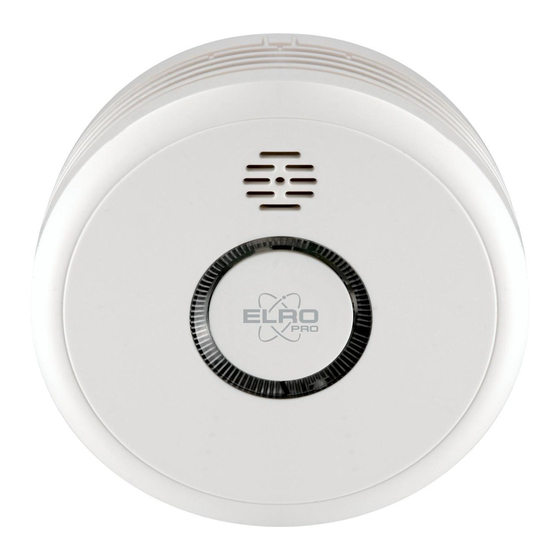
    Inhalt der Verpackung • Rauchwarnmelder • Montageplatte • Montagematerial (2 Schrauben und 2 Dübel) • Anleitungshandbuch Produktbeschreibung Sirene Test-/Mute-Taste Led-Anzeige Ein-/Aus-Schalter Aktivieren und testen Bevor Sie den Rauchwarnmelder in Betrieb nehmen, ist es wichtig, das Produkt zu aktivieren und zu testen. Platzieren Sie den Rauchwarnmelder auf der Montageplatte und drehen Sie ihn nach rechts.
  • Seite 12 Sie den 0,5 m. 0,5 m. Rauchwarnmelder mindestens 0,5 m und höchstens 1 m vom höchsten Punkt entfernt an. Informieren Sie sich für mehr Tipps zur Platzierung Ihres Rauchwarnmelders, z.B. in Räumen mit Deckenbalken, auf www.elro.eu. - 12 -...
  • Seite 13: Anbringen

    Anbringen Nehmen Sie die Montagehalterung und zeichnen Sie die Punkte an, an denen gebohrt werden muss. Bohren Sie 2 Löcher mit einem Durchmesser von 5 Millimeter. Stecken Sie die Dübel in die Löcher. Bringen Sie die Montagehalterung an und befestigen Sie sie mit den Schrauben. Drehen Sie den Rauchwarnmelder auf die Montagehalterung.
  • Seite 14: Wartung

    Häufig gestellte Fragen (FAQ) Haben Sie Fragen zur Installation oder zum Gebrauch dieses Produkts? Besuchen Sie dann www.elro.eu und gehen Sie zur Seite dieses Produkts. Hier finden Sie unter anderem die neueste Version des Handbuchs, Antworten auf häufig gestellte Fragen (FAQ) und detaillierte Installationsvideos.
  • Seite 15: Sicherheit Und Konformität

    Beachten Sie die örtlichen Vorschriften für Rauchwarnmelder. • Laden Sie die Leistungserklärung (DoP) unter www.elro.eu/dop herunter. Das Weee-Symbol bedeutet, dass dieses Produkt und die Batterien getrennt vom Hausmüll entsorgt werden müssen. Wenn das Produkt das Ende seiner Lebensdauer erreicht hat, bringen Sie es zu einer geeigneten Abfallsammelstelle in der Nähe, um sichere Entsorgung...
  • Seite 16: Technische Spezifikationen

    Kommen Sie nicht weiter über die Webseite? Hinterlassen Sie dann eine Frage auf der Produktseite oder schicken Sie eine Mail an info@elro.eu. Wir helfen Ihnen so schnell wie möglich. Für alle anderen Fragen: • Schicken Sie eine Mail an info@elro.eu. Wir melden uns so schnell wie möglich bei Ihnen. - 16 -...
  • Seite 17 Dieses Produkt ist hergestellt durch: ELRO Europe Postbus 9607 - Box E800 1006 GC Amsterdam Niederlande www.elro.eu - 17 -...
  • Seite 18 Service en contact ......................... - 24 - Wij werken constant aan de verbetering van onze producten en service. Ga naar www.elro.eu om de meest recente versie van deze handleiding te downloaden! Lees deze handleiding zorgvuldig en bewaar hem op een veilige plaats voor toekomstig gebruik.
  • Seite 19: Inhoud Van De Verpakking

    Inhoud van de verpakking • Rookmelder • Montagebeugel • Montagemateriaal (2 schroeven and 2 pluggen) • Gebruiksaanwijzing Productbeschrijving Sirene Test-/dempknop Led-indicator Aan-/uitschakelaar Activeren en testen Voordat je de rookmelder in gebruik neemt, is het belangrijk om het product te activeren en te testen.
  • Seite 20: Bevestigen

    0,5 m. en maximaal 1 m. van het hoogste punt. Kijk voor meer tips over de plaatsing van je rookmelder, bijvoorbeeld in ruimtes met plafondbalken, op www.elro.eu. Bevestigen Neem de montagebeugel en teken af op welke plaatsen geboord moet worden.
  • Seite 21: Functionaliteit

    Hang de montagebeugel op de juiste locatie en bevestig hem met de schroeven. Draai de rookmelder op de montagebeugel. De rookmelder schakelt nu automatisch in. Test of het apparaat correct functioneert door de test-/dempknop ca. 3 seconden ingedrukt te houden. Als de melder correct functioneert, geeft hij een piep- en lichtsignaal. Is dit niet het geval, neem het apparaat dan niet in gebruik en neem contact op met de leverancier.
  • Seite 22: Onderhoud

    Dit kan schadelijk zijn voor de sensor. Veelgestelde vragen (FAQ) Heb je vragen over de installatie of het gebruik van dit product? Kijk dan op www.elro.eu en ga naar de pagina van dit product. Hier vind je onder andere de meest recente versie van de handleiding, antwoorden op veelgestelde vragen (FAQ) en gedetailleerde installatievideo’s.
  • Seite 23: Veiligheid

    Raadpleeg lokale wetgeving voor rookmelders. • Download de prestatieverklaring (DoP) op www.elro.eu/dop Het WEEE-symbool betekent dat dit product en de batterijen gescheiden van huishoudelijk afval moeten worden afgevoerd. Als dit product het einde van zijn levensduur bereikt, breng je het naar een aangewezen afvalinzamelpunt in de buurt om een veilige afvoer of recycling te garanderen.
  • Seite 24: Service En Contact

    Kom je er niet uit via de website? Laat dan een vraag achter via de productpagina of mail naar info@elro.eu. Wij helpen je zo snel mogelijk verder. Voor alle overige vragen: • Mail naar info@elro.eu. Wij komen zo spoedig mogelijk bij je terug. ‘ Dit product is geproduceerd door: ELRO Europe...
  • Seite 25 Service et contact .......................... - 31 - Nous travaillons constamment à l'amélioration de nos produits et services. Rendez-vous sur www.elro.eu pour télécharger la dernière version de ce manuel ! Lisez attentivement ce manuel et conservez-le dans un endroit où vous pourrez le consulter à...
  • Seite 26: Contenu De La Boîte

    Contenu de la boîte Arrêt • Détecteur de fumée • Plaque de montage • Matériel de montage Marche ( 2 vis et 2 chevilles ) • Mode d’emploi Description du produit Alarme Bouton de test et de réglage Indicateur LED Interrupteur marche/arrêt Activation et test Il est important d'activer et de tester le détecteur de fumée avant de l'utiliser.
  • Seite 27 Ces détecteurs réagissent à l'augmentation de la température et non à la fumée. Consultez le site www.elro.eu pour découvrir la gamme de détecteurs thermiques. Montage au plafond ou au mur Montage au mur Suspendez le détecteur de fumée au plafond, au...
  • Seite 28: Installation

    Vous trouverez d'autres conseils sur la façon d'installer votre détecteur de fumée, par exemple dans des pièces avec des poutres de plafond, sur le site www.elro.eu. Installation Retirez le support de montage et marquez les endroits à percer. Percez 2 trous d'un diamètre de 5 millimètres.
  • Seite 29: Maintenance

    Foire aux questions (FAQ) Vous avez des questions sur l'installation ou l'utilisation de ce produit ? Veuillez consulter le site www.elro.eu et vous rendre sur la page de ce produit. Vous trouverez ici la version la plus récente du manuel, les réponses aux questions fréquemment posées (FAQ) et des vidéos d'installation détaillées.
  • Seite 30: Sécurité Et Conformité

    Consultez la législation locale sur les détecteurs de fumée. • Téléchargez la déclaration de performance (DoP) à l'adresse www.elro.eu/dop. Le symbole DEEE indique que ce produit et ses piles doivent être éliminés séparément des déchets ménagers. Lorsque ce produit atteint la fin de sa durée de vie utile, amenez-le à un point de collecte de déchets désigné...
  • Seite 31: Fiche Technique

    Vous ne trouvez pas la solution via le site web ? Posez vos questions sur la page du produit ou envoyez un courriel à info@elro.eu. Nous vous assisterons dès que possible. Pour toutes autres questions : • Envoyez un courriel à info@elro.eu. Nous vous répondrons dans les plus brefs délais. - 31 -...
  • Seite 32 Ce produit est fabriqué par : ELRO Europe Boîte postale 9607 - Boîte E800 1006 GC Amsterdam Les Pays-Bas www.elro.eu - 32 -...

Inhaltsverzeichnis