Inhaltsverzeichnis
Werbung
Verfügbare Sprachen
Verfügbare Sprachen
Quicklinks
Werbung
Inhaltsverzeichnis

Verwandte Anleitungen für Qlima FSM 40 TOUCH

Inhaltszusammenfassung für Qlima FSM 40 TOUCH
- Seite 1 FSM 40 TOUCH BEDIENUNGSANLEITUNG INSTRUCCIONES DE USO MANUEL D’UTILISATION OPERATING MANUAL ISTRUZIONI D’USO > GEBRUIKSHANDLEIDING NAVODILA ZA UPORABO man_FSM40 TOUCH ('19) V2.indd 1 man_FSM40 TOUCH ('19) V2.indd 1 26-11-19 14:10 26-11-19 14:10...
- Seite 2 Sehr geehrte Damen und Herren, Glückwunsch zum Kauf Ihres Sprühnebelventilators. Sie haben ein hochwertiges Produkt gekauft, das Ihnen jahrelang Freude bereiten wird, wenn es verantwortungsbewusst genutzt wird. Bitte lesen Sie zuerst die Gebrauchsanleitung, um die optimale Lebensdauer Ihres Sprühnebelventilators sicherzustellen. Im Auftrag des Herstellers bieten wir eine 2-Jahres-Garantie auf Material- und Produktionsmängel.
-
Seite 3: Wichtige Komponenten
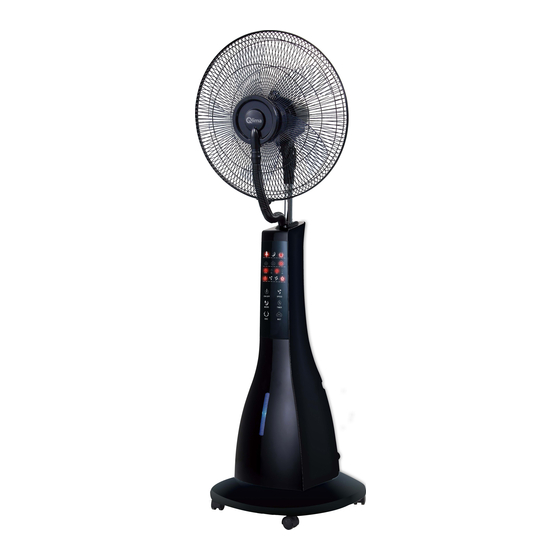
WICHTIGE KOMPONENTEN Nebelelement Frontgitter Sperrschrauben für Nebelelement Rotorkontermutter Rotorblätter Gitterkontermutter Rückgitter Motorwelle Motorabdeckung Gitterring Gitterkontermutter Motorhalterung Anschlusshalterung Haupthalterung Halterungsfixier- schraube Hauptgehäuse Wassertank Wasserauslass- Kontermutter Basis Basis-Verschlussmutter Räder Nebelleitung Bedienfeld Fernbedienung Zierblende Wasseranzeige man_FSM40 TOUCH ('19) V2.indd 3 man_FSM40 TOUCH ('19) V2.indd 3 26-11-19 14:10 26-11-19 14:10... - Seite 4 GEBRAUCHSANLEITUNG (DE) • Bitte lesen Sie die Anleitung sorgfältig durch, bevor Sie das Gerät benutzen, und bewahren Sie sie für den zukünftigen Gebrauch auf. Installieren Sie dieses Gerät nur, wenn es lokalen/nationalen Gesetzen, Verordnungen und Standards entspricht. • Der elektrische Sprühnebelventilator ist für die Nutzung im Innen- und Außenbereich vorgesehen.
- Seite 5 K u r z s c h l ü s s e n , V e r b r e n n u n g e n , Stromschlägen, Lampenexplosionen, Unfällen usw. führen. • Installieren Sie dieses Produkt nur, wenn es lokalen Regelungen, Gesetzen und Standards entspricht.
- Seite 6 • Verwenden Sie keine Verlängerungskabel oder Mehrfachsteckdosen. • Dieses Gerät ist nicht für den Gebrauch durch Personen (einschließlich Kindern) mit verringerten körperlichen, sensorischen oder geistigen Fähigkeiten, oder mit mangelnder Erfahrung und Wissen geeignet, sofern diese nicht von einer für ihre Sicherheit verantwortlichen Person beaufsichtigt oder in die Nutzung des Geräts eingewiesen werden.
- Seite 7 • Die Schutzvorrichtung bietet keinen vollständigen Schutz für kleine Kinder und behinderte Personen. • Dieses Gerät kann von Kindern ab 8 Jahren und Personen mit körperlicher, sensorischer oder geistiger Behinderung oder mangelnder Erfahrung und Wissen bedient werden, wenn sie beaufsichtigt werden, oder in die sichere Nutzung des Geräts eingewiesen wurden und die damit verbundenen Gefahren verstehen.
- Seite 8 • Nutzen Sie das Gerät nicht, wenn die Umgebungstemperatur über 40 °C liegt. • B e i d e r N u t z u n g v o n e l e k t r i s c h e n Geräten befolgen Sie stets grundlegende Sicherheitsvorkehrungen, um die Gefahr von Feuer, Stromschlag und Verletzungen...
- Seite 9 MONTAGE DES SPRÜHNEBELVENTILATORS Der Hersteller haftet nicht für Verletzungen oder Schäden, wenn die oben genannten Punkte nicht beachtet worden sind. Die Verwendung dieses Produkts und der dafür erforderlichen Elemente erfolgt ausschließlich auf eigenes Risiko des Endnutzers. Um das Schutzgitter und die Ventilatorblätter zu montieren, entfernen Sie den Spinner (im Uhrzeigersinn) und anschließend die Sicherungsmutter (im Gegenuhrzeigersinn) von der Motorwelle.
-
Seite 10: Betrieb
Montage des Wassertanks Nehmen Sie zuerst den Wassertank heraus und anschließend den Ventilkörper aus dem Wassertank. Befüllen Sie den Tank dann mit Wasser und ziehen Sie die Ventilabdeckung fest. Setzen Sie den Tank auf den Zerstäuber. Die Wassertemperatur darf nicht über 40 °C liegen. Loosen Tighten Valve body... - Seite 11 Anzeigeleuchte: Tasten: 1. Natural-Modus-Anzeige A. Ein/Aus 2. Sleeping-Modus-Anzeige B. Geschwindigkeit 3. Oscillation C.Modus 4. Nebel-Volume-Anzeige: minimum- D.Timer medium-maximum E.Oscillation 5. TIMER: F. Nebel 6. Geschwindigkeit: low-medium-high 7. Betriebsanzeige Die Fernbedienung wird mit eingesetzter Batterie geliefert. Entfernen Sie die durchsichtige Folie von der Batteriefachabdeckung, bevor Sie die Fernbedienung nutzen.
-
Seite 12: Pflege Und Reinigung
• Wenn das Gerät in Betrieb ist, können Sie den Timer so einstellen, dass der Ventilator nach der angegebenen Zeit automatisch ausgeschaltet wird. Drücken Sie die TIMER-Taste wiederholt, um den gewünschten Zeitraum in Schritte zu je 30 Min. auszuwählen: 0,5 h, 1 h, 1,5 h ... 7,5 h. Die entsprechen- de Anzeigeleuchte (5) leuchtet im Bedienfeld. -
Seite 13: Garantiebedingungen
Um unnötige Kosten zu vermeiden, empfehlen wir Ihnen, zuerst sorgfältig die Gebrauchsanleitung durchzulesen. Bringen Sie das Gerät für Reparaturen zu Ihrem Händler, sollten diese Anweisungen keine Lösung liefern. www.qlima.com UMWELTSCHUTZ Entsorgen Sie nicht biologisch abbaubare Produkte niemals in der Umwelt sondern entsprechend geltenden nationalen Gesetzen. - Seite 14 Estimado cliente, Le felicitamos por la compra de su ventilador nebulizador. Acaba de adquirir un producto de alta calidad, que le proporcionará pleno confort durante muchos años, siempre que lo utilice debidamente. Por lo tanto, le recomendamos que lea primero este manual de instrucciones, para prolongar la vida útil de su ventilador nebulizador.
-
Seite 15: Important Components
IMPORTANT COMPONENTS Dispositivo atomizador Rejilla frontal Tornillos de ajuste del dispositivo atomizador Tuerca de ajuste de hélice Hélice Tuerca de ajuste de rejilla Rejilla posterior Eje del motor Cubierta del motor Anillo dela rejilla Tuerca de ajuste de rejilla Soporte del motor Soporte de conexión Soporte principal Tornillo de fijación... - Seite 16 INSTRUCCIONES DE USO (ES) • Lea detenidamente este manual de usuario antes de usar el aparato y consérvelo para poder consultarlo en el futuro. Instale este dispositivo únicamente si satisface los requisitos de la legislación, las ordenanzas y l a s n o r m a s l o c a l e s y n a c i o n a l e s correspondientes.
- Seite 17 • Utilice este aparato solo para los fines previstos. Cualquier otro uso podría ocasionar cortocircuitos, quemaduras, descargas eléctricas, explosión de la bombilla, estallido, etc. • S ó l o d e b e r á i n s t a l a r l a v e n t i l a d o r nebulizador si cumple con las leyes, regulaciones y normas locales.
- Seite 18 pueda haber presencia de gases, productos o vapores inflamables y/o nocivos (como por ejemplo, gases de escape, vapores de pinturas, cortinas, papeles, ropas). • No use cables de extensión ni tampoco adaptadores múltiples. • Este aparato no deberá ser utilizado por personas (incluyendo niños) con reducida capacidad física, mental o sensorial, o que carezcan de la experiencia y los...
- Seite 19 • No introduzca ningún objeto en las aberturas del aparato. • La pantalla protectora contra quemaduras no garantiza una protección completa para niños pequeños y personas ancianas o discapacitadas. • Este aparato puede ser utilizado por niños a partir de 8 años y por personas con capacidades físicas, psíquicas o sensoriales reducidas, falta de experiencia y conocimientos, siempre que sean...
- Seite 20 • El aparato debe estar desconectado de la red eléctrica durante su instalación y limpieza. • No utilice el aparato con una temperatura ambiente superior a 40 °C. • Al usar aparatos eléctricos, siga siempre las precauciones de seguridad básicas para evitar el riesgo de incendios, descargas eléctricas y lesiones físicas.
- Seite 21 o su entorno según los términos de la garantía. ESAMBLAJE DE LA VENTILADOR NEBULIZADOR Si no se presta atención a los puntos descritos anteriormente, el fabricante no se hace responsable de cualquier daño o perjuicio que pudiese derivar. La utilización de este producto y de los elementos requeridos para su funcio- namiento son del riesgo exclusivo del usuario final.
- Seite 22 Montaje del depósito de agua Primero saque el depósito del agua, quite la cubierta del cuerpo de la válvula del depósito de agua, ponga agua en el depósito y apriete la cubierta del cuerpo de la válvula. Ponga el depósito en el cuerpo principal del atomizador, la temperatura del agua no debe superar los 40°C.
- Seite 23 Luz indicadora: Botones: 1. Indicador de modo natural A. On/Off (Encendido/Apagado) 2. Indicador de modo sueño B Velocidad 3. Oscilación C. Modo 4. Indicador de intensidad de vapor: D. Temporizador mínimo - medio - máximo E. Oscilación 5. Temporizador F. Vapor 6.
-
Seite 24: Cuidados Y Limpieza
Botón de TEMPORIZADOR (D): • Cuando la unidad esté funcionando, podrá configurar el temporizador para apagar el ventilador automáticamente después de la hora establecida. Pulse repetidamente el botón temporizador para seleccionar el período de tiempo deseado en intervalos de media hora: 0,5 h, 1 h, 1,5 h ... 7,5 h. La luz indica- dora correspondiente (5) se iluminará... -
Seite 25: Condiciones De Garantía
Para evitar los gastos innecesarios, le recomendamos leer bien las instruccio- nes antes de usar el aparato. Lleve el aparato al punto de venta donde lo ha comprado, cuando las instrucciones no ofrecen ninguna solución. www.qlima.com man_FSM40 TOUCH ('19) V2.indd 25 man_FSM40 TOUCH ('19) V2.indd 25... -
Seite 26: Protección Ambiental
PROTECCIÓN AMBIENTAL Los productos no biodegradables no deben tirarse a la basura. Elimínelos de acuerdo con la legislación nacional en vigor. No deseche ningún dispositivo electrónico junto a los residuos habituales. Utilice los contenedores e instalaciones adecuadas para la recogida de este tipo de materiales. - Seite 27 man_FSM40 TOUCH ('19) V2.indd 27 man_FSM40 TOUCH ('19) V2.indd 27 26-11-19 14:10 26-11-19 14:10...
- Seite 28 Madame, Monsieur, Nous vous remercions pour l’achat de votre ventilateur brumisateur. Vous avez fait l’acquisition d’un produit de haute qualité avec un rendement supérieur, à condition d'une prise en charge responsable. Veuillez d’abord lire le manuel de l’utilisateur afin que votre ventilateur brumisateur ait une durée de vie optimale.
-
Seite 29: Principaux Composants
PRINCIPAUX COMPOSANTS Planche de brumisation Grille avant Vis de blocage de planche de brumisation Écrou de blocage de lame Lames Écrou de blocage de grille Grille arrière Arbre moteur Capot moteur Anneau de grille Écrou de blocage de grille Support moteur Support de raccordement Support principal... - Seite 30 INSTRUCTIONS D’UTILISATION (FR) • Lisez attentivement ce manuel avant toute utilisation de l’appareil et conservez- le pour toute consultation ultérieure. Installez l’appareil uniquement s’il est conforme aux règlementations locales et nationales, aux ordonnances et aux normes en vigueur. • Le ventilateur brumisateur électrique est conçu pour un usage intérieur et extérieur.
- Seite 31 des explosions de lampes, des collisions, etc. • Installez le produit uniquement s’il est conforme aux règlementations locales, lois et normes. • Vérifiez si la tension indiquée sur la plaque signalétique correspond à la tension principale du réseau local avant de brancher votre appareil.
- Seite 32 • Cet appareil n’a pas été conçu pour une utilisation par des personnes (y compris des enfants) dont les capacités physiques, sensorielles ou mentales sont réduites, ou qui manquent d’expérience et de connaissances, à moins qu’elles n’aient été supervisées ou instruites sur l’utilisation de l’appareil par une personne responsable de leur sécurité.
- Seite 33 de déficiences physiques, sensorielles ou mentales, ayant une expérience et des connaissances insuffisantes, uniquement si ces enfants et personnes sont placés sous la surveillance d'une personne responsable, s’ils comprennent les risques encourus ou ont reçu des instructions pour une utilisation en toute sécurité de l'appareil. •...
- Seite 34 blessures corporelles. Il faut d’autant plus faire attention en utilisant des appareils électriques comprenant un récipient à eau : si l’eau déborde, débrancher immédiatement l’adaptateur de la prise de courant, vérifier que les pièces électriques de l’élément ne sont pas humides, et si c’est le cas les sécher méticuleusement et avec précaution.
- Seite 35 tournant dans le sens inverse des aiguilles d’une montre) de la broche du moteur. Placez la grille de sécurité arrière. S’assurer que la grille de sécurité s’adapte aux pattes de fixation. Si cela est effectué correctement, la poignée de transport de la grille de sécurité se trouvera en haut. Pour assembler la grille de sécurité...
- Seite 36 FONCTIONNEMENT ATTENTION ! • S’assurer que le produit est débranché du secteur avant de remplir ou de remplir à nouveau le réservoir d’eau. • Utiliser seulement de l’eau dans le réservoir d’eau. Ne pas ajouter de produits chimiques, d’huiles ou d’autres additifs. •...
- Seite 37 La commande à distance est fournie avec la pile à l’intérieur ; retirer la feuille transparente du couvercle de pile avant d’utiliser la commande à distance. Lorsque la pile ne fonctionne plus, elle doit être remplacée par le même type suivant le dessin à...
-
Seite 38: Entretien Et Nettoyage
Bouton OSCILLATION (E) : • Appuyer sur le bouton d’oscillation pour activer l’oscillation automatique de droite à gauche. Le témoin lumineux correspondant (3) s’allume dans le pan- neau de commande. • Appuyer à nouveau sur le bouton d’oscillation pour désactiver l’oscillation automatique ;... -
Seite 39: Conditions De Garantie
Amenez l’appareil à votre distributeur pour les réparations si les instructions ne four- nissent pas de solution. www.qlima.com PROTECTION ENVIRONNEMENTALE Ne jamais jeter des produits non biodégradables dans l’environnement, mais les éliminer selon la législation nationale en cours. - Seite 40 Dear Sir, Madam, Congratulations with the purchase of your mist fan. You have acquired a high quality product which will give you many years of pleasure, if you use it responsibly. Please read the user’s manual first in order to ensure the optimum life span of your mist fan. On behalf of the manufacturer, we provide a two-year warranty on material- or manufacturing defects.
-
Seite 41: Important Components
IMPORTANT COMPONENTS Misting Board Front Grill Misting Board Lock Screws Blade Lock Nut Blades Grill Lock Nut Back Grill Motor Shaft Motor Cover Grill Ring Grill Lock Nut Motor Holder Connection Holder Main Holder Holder Fixed Screw Main Body Water Tank Water Outlet Lock Base Base Lock Net... - Seite 42 DIRECTIONS FOR USE (GB) • Read this user manual carefully before using the appliance and keep it for future reference. Install this device only when it complies with local/national legislation, ordinances and standards. • The electric mist fan is designed for indoor and outdoor use.
- Seite 43 • Install the product only if it complies with local regulations, laws and standards; • Make sure that the available voltage does not exceed the voltage stated in the specifications of this manual. • Check if the voltage indicated on the type plate corresponds to the local mains voltage before you connect the appliance.
- Seite 44 • This appliance is not intended for use by persons (including children) with reduced physical, sensory or mental capabilities, or lack of experience and knowledge, unless they have been given supervision or instruction concerning use of the appliance by a person responsible for their safety. •...
- Seite 45 • This appliance can be used by children aged from 8 years and above and persons with reduced physical, sensory or mental capabilities or lack of experience and knowledge if they have been given supervision or instruction concerning use of the appliance in a safe way and understand the hazards involved.
- Seite 46 • When using electrical appliances, always adhere to basic safety precautions to prevent the risk of fire, electric shocks and physical injury. Even more attention and care is required when using electrical appliances incorporating a container of water: should the water overflow, immediately unplug the adaptor from the outlet, check that the electrical parts of the unit are not wet, and if they are, dry them...
- Seite 47 ASSEMBLING THE MIST FAN The manufacturer is not responsible for any harm or damage if attention is not paid to the points described above. The use of this product and the elements required for that purpose is entirely at the end user’s own risk. To assemble the safety grille and blade assembly, remove the spinner (by turning it clockwise), then the locking nut (by turning it anticlockwise) from the motor spindle.
- Seite 48 OPERATION ATTENTION! • Make sure the product is unplugged from the mains before filling or refilling the water tank. • Only use water in the water tank. Do not add any chemicals, oils or other additives. • Only use cold or lukewarm water in the water tank. The water must not be warmer than 40°C.
- Seite 49 Remote control is supplied with battery inside ; remove the transparent sheet from the battery cover before use remote control. When the battery is over, it must be replaced with the same type following the drawing on the back of remote control. ON/OFF Button (A): •...
-
Seite 50: Care And Cleaning
MIST Button (F): • The mist function can be selected on its own or together with fan operation. When the mist function is selected the related indicator light (4) on the control panel will turn on according to the mist volume selected: low- medium-high. -
Seite 51: Environmental Protection
To prevent unnecessary expense, we recommend that you always first carefully consult the instructions for use. Take the appliance to your dealer for repairs if these instructions do not provide a solution. www.qlima.com ENVIRONMENTAL PROTECTION Never dispose of non-biodegradable products in the environment, but dispose of them in accordance with current national legislation. - Seite 52 Per una durata ottimale del suo Qlima, La invitiamo a leggere le presenti istruzioni d’uso. La informiamo inoltre che questo apparecchio è coperto da una garanzia di 2 anni.
- Seite 53 IMPORTANT COMPONENTS Pannello nebulizzatore Griglia anteriore Viti di fissaggio del pannello nebulizzatore Dado di fissaggio delle pale Pale Dado di fissaggio della griglia Griglia posteriore Albero motore Carter del motore Anello della griglia Dado di fissaggio della griglia Supporto del motore Supporto di collegamento Supporto principale...
-
Seite 54: Tenere Il Materiale Di Imballaggio (Sacchetti Di Plastica, Ecc.) Lontano Dai Bambini, In Quanto Potrebbe Causare
ISTRUZIONI PER L’USO (IT) • Prima di usare l’apparecchiatura, leggere attentamente il presente manuale e conservarlo come riferimento futuro. Installare questo dispositivo soltanto quando è conforme con la legislazione, le ordinanze e gli standard locali/nazionali. • Il ventilatore nebulizzatore è stato progettato per uso interno ed esterno. -
Seite 55: Pericolo Di Incendio
cortocircuiti, bruciature, scosse elettriche, esplosione della lampada, collisioni, ecc. • Installare l’apparecchio solo in osservanza ai locali regolamenti, alle leggi e normative applicabili. • Assicurarsi che la tensione disponibile non superi la tensione indicata nelle specifiche di questo manuale. • Controllare che la tensione indicata sulla targhetta corrisponda alla tensione della rete locale prima di collegare l’apparecchio. - Seite 56 • Non utilizzare prolunghe o adattatori multi-presa. • L’utilizzo del presente apparecchio non è previsto per persone (bambini inclusi) con ridotte capacità psicomotorie, mentali o sensoriali, tanto meno deve essere utilizzato da persone inesperte o non dotate di sufficienti cognizioni in materia, tranne nei casi in cui vi è...
- Seite 57 • La griglia di protezione non fornisce completa protezione a bambini o a persone con ridotte capacità fisiche, sensoriali o mentali. • Il dispositivo può essere usato da bambini a partire dagli 8 anni di età e da persone con capacità fisiche, sensoriali o mentali ridotte o con mancanza di esperienza e conoscenze a condizione che siano state fornite istruzioni e supervisione in merito...
- Seite 58 • N o n u t i l i z z a r e l ’ a p p a r e c c h i o c o n temperatura ambiente superiore a 40°C. • Quando si utilizzano apparecchi elettrici, occorre sempre rispettare le precauzioni di sicurezza di base per evitare i rischi di incendio, di scosse elettriche e di lesioni...
- Seite 59 ASSEMBLAGGIO DEL VENTILATORE NEBULIZZATORE Il produttore non è responsabile per eventuali danni o rotture, qualora non vengano rispettate le avvertenze descritte ai punti precedenti. L’uso di questo prodotto e gli elementi necessari per questo scopo sono interamente a rischio dell’utente finale. Per assemblare il gruppo griglia di sicurezza e lama, rimuovere la girante (ruotandola in senso orario), quindi il dado di fissaggio (ruotandolo in senso antiorario) dall’albero motore.
-
Seite 60: Uso Dell'apparecchio
Gruppo serbatoio dell’acqua In primo luogo, estrarre il serbatoio dell’acqua, quindi estrarre il coperchio del corpo valvola dal serbatoio dell’acqua, poi mettere acqua nel serbatoio e serrare il coperchio del corpo della valvola. Appoggiate il serbatoio sul corpo principale dell’atomizzatore, la temperatura dell’acqua non dovrebbe essere superiore a 40 °C. - Seite 61 Spie: Pulsanti: 1. Spia modalità naturale A. Accensione/spegnimento 2. Spia modalità sonno B. Velocità 3. Oscillazione C. Modalità 4. Spia del volume di nebulizzazione: D. Timer minima-media-massima E. Oscillazione 5. Timer: F. Nebulizzazione 6. Velocità: bassa-media-alta. 7. Spia di accensione Il telecomando è...
-
Seite 62: Manutenzione E Pulizia
tamente il pulsante Timer per selezionare il periodo di tempo desiderato in incrementi di mezz’ora: 0,5 h, 1 h, 1,5 h ... 7,5 h. La relativa spia (5) sul pan- nello di controllo si illumina. Quando tutte le spie (5) sono spente significa che il tempo non è... -
Seite 63: Condizioni Di Garanzia
Onde evitare un’inutile spesa consigliamo di leggere innanzitutto le presenti istruzioni per l’uso con accuratezza. Qualora esse non offrano alcun rimedio all’eventuale problema, far riparare l’apparecchio dal punto di vendita. www.qlima.com TUTELA DELL’AMBIENTE Non disperdere mai nell’ambiente prodotti non biodegradabili ma smaltirli in ossequio alle vigenti normative nazionali. - Seite 64 Geachte mevrouw, meneer, Van harte gefeliciteerd met de aankoop van uw mistventilator. U kocht een product van hoge kwaliteit waar u jaren van zal kunnen genieten, als u het op de juiste manier gebruikt. Lees eerst de gebruikshandleiding om een maximale levensduur van uw mistventilator te verzekeren.
- Seite 65 BELANGRIJK ONDERDELEN Vernevelingsbord Rooster vooraan Vergrendelings- schroeven voor vernevelingsplaat Borgmoer blad Bladen Roosterborgmoer Rooster achteraan As van de motor Motordeksel Roosterring Roosterborgmoer Motorhouder Verbindingshouder Hoofdhouder Houder vaste schroef Hoofgedeelte Watertank Borgmoer wateruit- laat Steun Borgmoer basis Wielen Vernevelingsbuis Bedieningspaneel Afstandsbediening Versieringpaneel Waterpeilindicator man_FSM40 TOUCH ('19) V2.indd 65...
-
Seite 66: Waarschuwingen
GEBRUIKSAANWIJZINGEN (NL) • Lees deze handleiding aandachtig voor gebruik van het toestel en bewaar ze voor latere raadpleging. Installeer dit toestel enkel wanneer het voldoet aan de lokale regelgeving, wetten en normen. • De elektrische mistventilator is ontworpen voor gebruik binnen en buitenshuis. •... - Seite 67 • Verzeker dat de beschikbare spanning niet hoger is dan de spanning beschreven in de specificaties van deze handleiding. • Controleer voor het aansluiten van het toestel dat de spanning aangegeven op het typeplaatje overeenkomt met de plaatselijke spanning. • Het toestel is geschikt voor spanningen van 220-240 V.
- Seite 68 • A l s h e t n e t s n o e r b e s c h a d i g d i s , m o e t d i t d o o r d e f a b r i k a n t , d i e n s onderhoudsmonteur of een vergelijkbaar gekwalificeerde persoon vervangen worden om gevaren te vermijden.
- Seite 69 • Het schoonmaken en uitvoeren van ander onderhoud mag niet worden gedaan door kinderen zonder toezicht. • Kinderen jonger dan 3 jaar moeten uit de buurt van het apparaat worden gehouden, tenzij ze voortdurend onder toezicht staan. • Kinderen van 3 jaar en jonger dan 8 jaar zullen het toestel enkel aan/uit schakelen wanneer het geplaatst of geïnstalleerd is in een normale positie, voor normaal...
- Seite 70 elektrische onderdelen van de eenheid niet nat zijn. Indien deze nat zijn moeten ze grondig en voorzichtig afgedroogd worden. Raadpleeg een gekwalificeerd professional bij twijfel. • Laat de eenheid niet blootgesteld aan externe factoren achter (zonlicht, regen, enz.). • Het water moet elke 3-4 dagen ververst worden, zelfs wanneer het niet gebruikt werd.
- Seite 71 De borgmoer niet forceren. Locking nut (Fig. 1) De sleuf in het midden van een ventilatorblad moet worden uitgelijnd met een T-stang op de as van de motor voor de juiste positie. Zet het blad voorzichtig op zijn plaats door het draaimechanisme zachtjes met de hand (Afb.2.) in tegenwijzerzin te draaien om het vast te zetten op het uiteinden van de as van de motor.
- Seite 72 WERKING LET OP! • Zorg ervoor dat het product is losgekoppeld van het lichtnet voordat u het waterreservoir vult of bijvult. • Gebruik alleen water in het waterreservoir. Voeg geen chemicaliën, oliën of andere additieven toe. • Gebruik alleen koud of lauw water in het waterreservoir. Het water mag niet warmer zijn dan 40 °C.
- Seite 73 brandt op het bedieningspaneel. U kunt nu andere functies selecteren (snel- heid, modus, timer, nevel). • Druk op de aan/uitknop wanneer het apparaat is ingeschakeld om het uit te schakelen. Knop SNELHEID (B): • Om de ventilator op lage snelheid te starten, drukt u tweemaal op de aan/ uitknop (A) (wanneer het apparaat uit staat): het apparaat werkt op lage snelheid en het bijbehorende indicatielampje (4) brandt op het bedienings- paneel.
-
Seite 74: Zorg En Reiniging
geselecteerd (26): het is blauw wanneer er water in het waterreservoir is en het wordt rood wanneer het waterreservoir leeg is om aan te geven dat als u de vernevelingsfunctie wilt gebruiken, u het water in het reservoir moet bij- vullen. -
Seite 75: Milieubescherming
Om onnodige kosten te voorkomen, herinneren we eraan de gebruiksaanwij- zing steeds grondig door te nemen. Wanneer deze aanwijzingen geen oplos- sing bieden, breng het toestel dan naar je dealer voor herstelling. www.qlima.com MILIEUBESCHERMING Dump nooit biologisch niet-afbreekbare producten in de natuur, maar ver- wijder ze volgens de huidige nationale wetgeving. - Seite 76 Spoštovani, Čestitamo Vam ob nakupu Vašega Qlima ventilatorja. Je zelo enostaven za uporabo in lahkotno premičen. Kupili ste visoko kakovosten izdelek, ki Vam bo ob pravilni uporabi več let zagotavljal udobje. Slabo prezračevanje je razlog vlažnemu vonju in plesni v omarah, shrambah itd. Qlima razvlaževalec ta problem učinkovito odpravi.
- Seite 77 POMEMBNI DELI Razpršilna plošča Sprednja mreža Pritrdilni vijaki zamegljevalne plošče Protimatica lopatic Lopatice Protimatica mreže Zadnja mreža Gred motorja Pokrov motorja Obroč mreže Protimatica mreže Držalo motorja Držalo spoja Glavno držalo Pritrdilni vijak držala Glavno telo Rezervoar za vodo Protimatica odtoka za vodo Baza Protimatica baze...
- Seite 78 NAVODILA ZA UPORABO (SLO) • Pred uporabo izdelka pazljivo preberite ta navodila za uporabo in jih shranite za nadaljnjo pomoč. Izdelek uporabljajte le, če je skladen z lokalno/nacionalno zakonodajo, predpisi in standardi. • Ventilator z meglico je primeren za notranjo in zunanjo uporabo. •...
- Seite 79 • Preden napravo priključite v električno omrežje se prepričajte, da električna napetost navedena na tipski ploščici naprave odgovarja lokalni napetosti v vtičnicah. • Naprava je primerna za električno napetost 220 – 240 V. • Vedno vključite naprav le takrat, kadar je v vašem vidnem polju.
- Seite 80 • Poškodovan električni kabel lahko zamenja le pooblaščeni serviser. • Otroke imejte pod nadzorom, da se z napravo ne bi igrali. • Kadar je naprava vključena, morata biti vtič in vtičnica enostavno dostopna. • Naprave ne postavljajte direktno pod električno vtičnico. •...
- Seite 81 namenom za katerega je narejena in pod nadzorom ali so jim dana razumljiva navodila za varno uporabo in kadar razumejo z uporabo naprave povezane nevarnosti. • Otroci stari med 3 in 8 let naprave ne smejo vklapljati na električno napajanje, je nastavljat, čistiti, ali opravljati vzdrževalna dela na napravi.
- Seite 82 • Med polnjenjem in čiščenjem morate napravo izklopiti iz vtičnice. Ob neupoštevanju teh navodil veljavnost garancije preneha, proizvajalec pa n več dolžan odpravljati napak ali kriti stroškov povezanih z poškodbami naprave in/ali okolice. SESTAVLJANJE VENTILATORJA Z MEGLICO Proizvajalec ne odgovarja za poškodbe in okvare, do katerih bi prišlo zaradi neupoštevanja zgornjih točk.
- Seite 83 Sklop rezervoarja za vodo Najprej odstranite rezervoar za vodo, nato z rezervoarja za vodo odstrani- te pokrov telesa ventila, nato pa v rezervoar nalijte vodo in privijte pokrov telesa ventila. Rezervoar namestite na telo razprševalca, temperatura vode pa mora biti manj kot 40 Odvijanje Privijanje Pokrov...
- Seite 84 Nadzorna plošča Daljinsko upravljanje Kazalna lučka: Gumbi: 1. Kazalnik naravnega načina A. Vklop/izklop 2. Kazalnik načina spanja B. Hitrost 3. Nihanje C. Način 4. K a z a l n i k p r o s t o r n i n e m e g l i c e : D.
-
Seite 85: Vzdrževanje In Čiščenje
ra rahel vetrič, primeren za uporabo ponoči. Povezana kazalna lučka (2) na upravljalni plošči sveti. • S ponovnim pritiskom gumba Vklop/izklop se ventilator preklopi v običajni način (na upravljalni plošči ni kazalne lučke, ki bi kazala ta način). Ciklična funkcija. Gumb ČASOVNIK (D): •... -
Seite 86: Garancijski Pogoji
Da bi preprečili nepotrebne stroške, vam priporočamo, da najprej pozorno preberete navodila za uporabo. Če ne najdete ustrezne rešitve, odnesite vaš razvlažilec v popravilo k vašemu distributerju. www.qlima.com VAROVANJE OKOLJA Izdelkov, ki niso biološko razgradljivi, nisoli ne odvrzite v okolje, temveč jih odvrzite skladno z veljavno državno zakonodajo. - Seite 87 man_FSM40 TOUCH ('19) V2.indd 87 man_FSM40 TOUCH ('19) V2.indd 87 26-11-19 14:10 26-11-19 14:10...
- Seite 88 Jos haluat huoltoapua, lisätietoja tai laitteen kanssa tulee ongelmia, tutustu verkkosivustoon osoitteessa www.qlima.com tai kysy neuvoa PVG kuluttajapalvelukeskuksesta (www.qlima.com). If you need information or if you have a problem, please visit the our website (www.qlima.com) or contact our sales support (you find its phone number on www.qlima.com) Per informazioni e in caso di problemi, visitate il sito Web www.qlima.com oppure contattate il Centro Assistenza Clienti (per conoscere il...