Inhaltsverzeichnis
Werbung
Montage- und Bedienungsanleitung
Assembly and operating instructions
Notice de montage et d'emploi
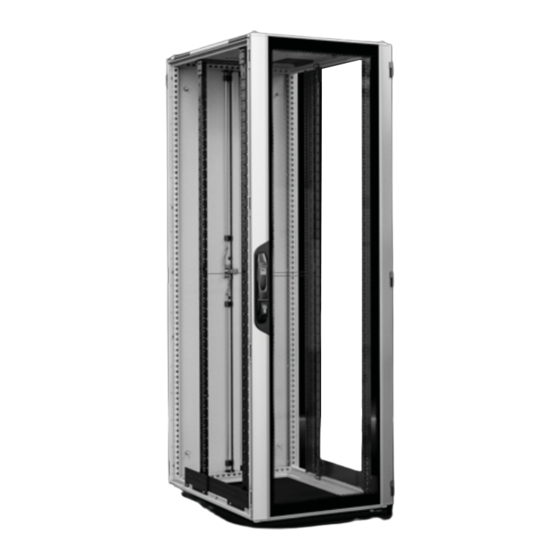
Schranksystem VX IT
VX IT enclosure system
Baies VX IT
VX IT 5303.114
VX IT 5308.190
VX IT 5308.813
VX IT 5303.124
VX IT 5303.134
VX IT 5308.823
VX IT 5303.154
VX IT 5309.116
VX IT 5303.824
VX IT 5309.126
VX IT 5304.116
VX IT 5309.136
VX IT 5304.126
VX IT 5309.156
VX IT 5305.124
VX IT 5309.166
VX IT 5306.122
VX IT 5309.190
VX IT 5306.190
VX IT 5309.816
VX IT 5307.114
VX IT 5309.826
VX IT 5307.124
VX IT 5310.118
VX IT 5307.134
VX IT 5310.128
VX IT 5307.154
VX IT 5310.818
VX IT 5307.157
VX IT 5311.116
VX IT 5307.190
VX IT 5311.126
VX IT 5307.814
VX IT 5311.816
VX IT 5307.824
VX IT 5311.826
VX IT 5308.113
VX IT 5312.114
VX IT 5308.123
VX IT 5312.124
VX IT 5313.113
VX IT 5329.131
VX IT 5313.813
VX IT 5329.190
VX IT 5314.116
VX IT 5330.113
VX IT 5314.126
VX IT 5330.123
VX IT 5314.816
VX IT 5330.133
VX IT 5315.118
VX IT 5330.190
VX IT 5315.818
VX IT 5331.113
VX IT 5316.116
VX IT 5331.190
VX IT 5316.816
VX IT 5332.818
VX IT 5325.121
VX IT 5333.816
VX IT 5325.190
VX IT 5334.813
VX IT 5326.121
VX IT 5335.816
VX IT 5326.131
VX IT 5380.830
VX IT 5326.190
VX IT 5381.830
VX IT 5327.121
VX IT Yxxx.xxx
VX IT 5327.190
VX IT 5328.123
VX IT 5328.190
VX IT 5329.111
VX IT 5329.121
Werbung
Inhaltsverzeichnis

Verwandte Anleitungen für Rittal VX IT Y Serie


Inhaltszusammenfassung für Rittal VX IT Y Serie
- Seite 1 Schranksystem VX IT VX IT enclosure system Baies VX IT VX IT 5303.114 VX IT 5308.190 VX IT 5313.113 VX IT 5329.131 VX IT 5308.813 VX IT 5313.813 VX IT 5303.124 VX IT 5329.190 VX IT 5303.134 VX IT 5308.823 VX IT 5314.116 VX IT 5330.113 VX IT 5303.154...
-
Seite 2: Inhaltsverzeichnis
Inhaltsverzeichnis Seite Seite Seite Hinweise zur Dokumentation 4.3.4 Ggf. lose beiliegendes Entfernte Flachteile Zubehör entfernen wieder montieren 85 – 91 Konformitätserklärungen und Approbationen 4.3.5 Rack von der Palette heben – Rücktüren montieren Aufbewahrung der Unterlagen 4.3.6 Entfernen des Bodenkartons – Rückwand montieren Verwendete Symbole –... - Seite 3 Contents Page Page Page Notes on documentation 4.3.4 Removing any accessories Re-installing the removed supplied loose enclosure panels 85 – 91 Declarations of conformity and approvals 4.3.5 Lifting the rack off of the pallet – Fitting the rear doors Storing the documents 4.3.6 Removing the cardboard –...
- Seite 4 Sommaire Page Page Page Remarques relatives 4.3.4 Ôter les accessoires Remonter à nouveau les à la documentation éventuellement joints pièces plates démontées 85 – 91 Déclarations de conformité et 4.3.5 Lever la baie de la palette – Monter les portes arrière homologations 4.3.6 Ôter le carton inférieur...
- Seite 5 Inhaltsverzeichnis Contents Sommaire 6 – 43, 69 – 77, 92 – 103 90° 54 – 59 60 – 62 81 – 82 83 – 84 88 – 89 Schranksystem VX IT / VX IT enclosure system / Baies VX IT...
-
Seite 6: Hinweise Zur Dokumentation
Homepage von Rittal zur Verfügung. the Rittal website. téléchargement sur le site Internet de Rittal. 1.2 Aufbewahrung der Unterlagen 1.2 Storing the documents 1.2 Conservation des documents... -
Seite 7: Sicherheitshinweise
◾ Nicht als Schaltschrank verwenden, der einen wesentlichen Schutz gegen den Zugang zu spannungsführenden Teilen bietet und als geerdetes Gehäuse Geräten der Klasse 1 dient. Durch Rittal Zubehör kann der VX IT ertüchtigt werden, weiterführende Anforderungen zu erfüllen. Hierbei sind die Vorgaben des Zubehörs zu beachten. -
Seite 8: Safety Instructions
Class 1 devices. Rittal accessories may be used to upgrade the VX IT to meet more stringent requirements. In this regard, the specifi cations for the accessories must be observed. -
Seite 9: Consignes De Sécurité
à des pièces sous tension et qui sert d’armoire mise à la masse pour des appareils de classe 1. La baie VX IT peut être équipée d’accessoires Rittal pour répondre à d’autres exigences. Il faut respecter pour cela les caractéristiques des accessoires. -
Seite 10: Veiligheidsvoorschriften
1. Het VX IT-rack kan met behulp van Rittal-toebehoren geschikt worden gemaakt om aan aanvullende eisen te voldoen. Hierbij moet de technische informatie van de toebehoren in acht worden genomen. -
Seite 11: Säkerhetsinstruktioner
åtkomst till spänningsförande delar och fungera som jordat hölje för aggregat i klass 1. Med hjälp av tillbehör från Rittal kan VX IT uppgraderas till att uppfylla högre krav. I sådana fall måste anvisningarna för tillbehören observeras. 2.2 Användargrupper enligt IEC 62 368 ◾... -
Seite 12: Istruzioni Di Sicurezza
1. Il VX IT è ampliabilie con gli accessori del catalogo Rittal per soddisfare ulteriori esigenze. In tal caso, attenersi alle specifi che dell’accessorio utilizzato. -
Seite 13: Instrucciones De Seguridad
1. Los accesorios de Rittal permiten actualizar el VX IT para adaptarlo a nuevos requisitos. Para ello deben tenerse en cuenta las especifi caciones de los acces- orios. -
Seite 14: Turvallisuusohjeet
2. Turvallisuusohjeet ◾ Huom! Painon epätasainen jakautuminen vaarantaa VX IT -kaapin tukevuuden. Älä koskaan avaa ovia ja ovivasteen puolelle asennettua jaettua, saranoitua sivuseinää samanaikaisesti ilman, että VX IT on 2.1 Tarkoitettu käyttö kiinnitetty lattiaan. VX IT on korkealaatuinen 19˝ laitteille tarkoitettu, teollisuusstandardi EIA 310:n mukainen kotelo. -
Seite 15: Sikkerhedsanvisninger
1. VX IT kan opgraderes til også at opfylde videregående krav ved hjælp af tilbehør fra Rittal. Her skal der tages højde for tilbehørets specifi kationer. 2.2 Brugergrupper iht. IEC 62 368 ◾... -
Seite 16: Wskazówki Dotyczące Bezpieczeństwa
◾ Nie stosować jako szafę sterowniczą, która ma służyć do zasadniczej ochrony przed dostępem do części będących pod napięciem i jako uziemiona obudowa urządzeń klasy 1. Za pomocą akcesoriów Rittal można dostosować VX IT do spełnienia dodatkowych wymogów. Należy również przestrzegać parametrów wyposażenia dodatkowego. -
Seite 17: Bezpečnostní Pokyny
◾ Nepoužívejte skříň VX IT jako rozváděčovou skříň, která poskytuje ochranu proti přístupu k dílům pod napětím a slouží jako uzemněná skříň přístrojů třídy 1. S příslušenstvím od fi rmy Rittal může skříň VX IT splnit další požadavky. Zohledněte přitom zadání k příslušenství. 2.2 Uživatelské skupiny podle normy IEC 62 368 ◾... -
Seite 18: Инструкции За Безопасност
осигурява основна защита срещу достъпа до части под напрежение и служи като заземен шкаф за устройства от клас 1. Чрез аксесоарите на Rittal VX IT може да бъде надстроен, за да отговаря на допълнителни изисквания. В този случай трябва да се... -
Seite 19: Меры Безопасности
обеспечивает значительную защиту от доступа к токоведущим частям и служит в качестве заземленного корпуса для устройств Класса 1. С помощью комплектующих Rittal, шкаф VX IT может быть укреплен, чтобы удовлетворять дополнительным требованиям. При этом обратите внимание на характеристики комплектующих. 2.2 Группы пользователей согл. МЭК 62 368 ◾... -
Seite 20: Υποδείξεις Ασφαλείας
ουσιαστική προστασία από την πρόσβαση σε μέρη που φέρουν τάση, καθώς και ως γειωμένο περίβλημα για συσκευές της κατηγορίας 1. Με τη χρήση πρόσθετου εξοπλισμού Rittal, το VX IT μπορεί να καλύψει επιπρόσθετες απαιτήσεις. Εδώ θα πρέπει να ληφθούν υπόψη οι... -
Seite 21: Instrucțiuni De Siguranță
și care funcționează drept carcasă împământată pentru aparatele din clasa 1. Cu ajutorul accesoriilor Rittal, VX IT poate fi confi gurat astfel încât să îndeplinească cerințe suplimentare. În acest sens, trebuie să fi e respectate specifi cațiile accesoriilor. -
Seite 22: Sigurnosne Upute
1. razreda. VX IT može se nadograditi priborom tvrtke Rittal kako bi se udovoljilo dodatnim zahtjevima. Pritom je važno pridržavati se smjernica za pribor. 2.2 Skupine korisnika u skladu sa standardom IEC 62 368 ◾... -
Seite 23: Biztonsági Tudnivalók
◾ Nem használható olyan kapcsolószekrényként, amelynek a feszültsé- get vezető részekhez való hozzáférés ellen védettséget kell biztosíta- nia, és 1-es osztályú, berendezésekhez földelt szekrényként szolgál. A Rittal tartozékokkal a VX IT a további követelményeknek történő megfelelésre felkészíthető. Ennek során az adott tartozék előírásait kell fi gyelembe venni. -
Seite 24: Saugos Nurodymai
įtampa ir naudojama kaip įžemintas 1 klasės prietaisų korpusas. Naudojant „Rittal“ priedus, VX IT gali būti patobulintas, kad atitiktų papildomus reikalavimus. Turi būti atsižvelgta į priedų specifi kacijas. 2.2 Naudotojų grupės pagal IEC 62 368 ◾... -
Seite 25: Sihtotstarbeline Kasutus
2. Ohutusjuhised ◾ Tähelepanu! Asümmeetriline kaalujaotus ohustab kapi VX IT stabiilsust. Ärge kunagi avage uksi ja ukse hingede poolsele küljele kinnitatud jagatud, liigendatud külgseina samaaegselt, ilma et VX IT 2.1 Sihtotstarbeline kasutus oleks eelnevalt põranda külge kinnitatud. VX IT on kvaliteetne korpus 19˝ riistvara paigaldamiseks vastavalt tööstusstandardile EIA-310, see hõlmab erinevat tüüpi servereid, ◾... -
Seite 26: Drošības Norādījumi
◾ Nelietot kā vadības skapi, kas nodrošina būtisku aizsardzību pret piekļuvi elektrību vadošām detaļām un kalpo kā iezemēts korpuss 1. klases ierīcēm. Izmantojot Rittal piederumus, VX IT var uzlabot, lai izpildītu papildu prasības. Jāievēro piederumu specifi kācijas. 2.2. Lietotāju grupas saskaņā ar IEC 62 368 ◾... -
Seite 27: Varnostni Napotki
◾ Ne uporabljajte kot stikalno omaro, ki nudi pomembno zaščito pred dostopom do delov, ki so pod napetostjo, in služi kot ozemljeno ohišje naprav 1. razreda. Z dodatnim priborom Rittal je mogoče ohišje VX IT prilagoditi v skladu z nadaljnjimi zahtevami. Pri tem je treba upoštevati specifi kacije dodatnega pribora. -
Seite 28: Bezpečnostné Pokyny
častiam pod napätím a slúži ako uzemnená skriňa pre zariadenia triedy 1. S príslušenstvom Rittal možno vylepšiť VX IT tak, aby spĺňala ďalšie požiadavky. Pritom sa musia dodržať špecifi kácie príslušenstva. 2.2 Skupiny používateľov podľa IEC 62 368 ◾... -
Seite 29: Instruções De Segurança
◾ Não utilize o rack como armário que oferece proteção contra o acesso a peças condutoras de tensão ou com aterramento para equipamen- tos da classe 1. Por meio dos acessórios da Rittal, o VX IT pode ser preparado para atender a requisitos adicionais. Nesse caso, siga as instruções dos respectivos acessórios. - Seite 30 2. Sicherheitshinweise 2. Veiligheidsvoorschriften 2. Safety instructions 2. Säkerhetsinstruktioner 2. Consignes de sécurité 2. Istruzioni di sicurezza Warnung vor der Waarschuwing voor Prestare attenzione Warning against Danger dû à la Schließbewegung von de sluitbeweging van Varning för stängnings- alla chiusura delle closing movements for fermeture de pièces mechanischen Teilen...
- Seite 31 2. Sicherheitshinweise 2. Veiligheidsvoorschriften 2. Safety instructions 2. Säkerhetsinstruktioner 2. Consignes de sécurité 2. Istruzioni di sicurezza Aufsteigen auf eine Climbing on surfaces is Il est interdit de marcher Het is verboden het Förbjudet att stå på Divieto di salire sulla Fläche ist verboten prohibited sur toute surface...
-
Seite 32: Bezpečnostní Pokyny
2. Instrucciones de 2. Sikkerhedsanvisninger 2. Bezpečnostní pokyny seguridad 2. Wskazówki dotyczące 2. Инструкции за безопасност 2. Turvallisuusohjeet bezpieczeństwa Atención, movimiento Предупреждение Advarsel mod lukke- de cierre de compo- Varoitus koneen/laitteen Uwaga na zamykające за движение от bevægelse af meka- Výstraha před rizikem nentes mecánicos mekaanisten osien... - Seite 33 2. Instrucciones de 2. Sikkerhedsanvisninger 2. Bezpečnostní pokyny seguridad 2. Wskazówki dotyczące 2. Инструкции за безопасност 2. Turvallisuusohjeet bezpieczeństwa Det er forbudt at Качването върху Prohibido subirse a una Zakaz wchodzenia na Päällenousu on kielletty klatre på maskinens Nešlapat na povrh повърхностите...
- Seite 34 2. Меры безопасности 2. Sigurnosne upute 2. Υποδείξεις ασφαλείας 2. Biztonsági tudnivalók 2. Instrucțiuni de siguranță 2. Saugos nurodymai Προειδοποίηση Предупреждение Avertizare cu privire la πριν από την κίνηση Upozorenje na opas- Gép/berendezés Įspėjimas dėl mašinos / об опасности mișcarea de închidere κλειδώματος...
- Seite 35 2. Меры безопасности 2. Sigurnosne upute 2. Υποδείξεις ασφαλείας 2. Biztonsági tudnivalók 2. Instrucțiuni de siguranță 2. Saugos nurodymai Становиться Απαγορεύεται η Urcarea pe o suprafață Zabranjeno je penjanje Draudžiama lipti ant на поверхность ανάβαση σε μία A felületre lépni tilos este interzisă...
- Seite 36 2. Ohutusjuhised 2. Bezpečnostné pokyny 2. Drošības norādījumi 2. Instruções de segurança 2. Varnostni napotki Hoiatus masina/ Dávajte pozor na Cuidado quando as Uzmanieties iekārtas/ Opozorilo pred seadme mehhaaniliste zatvárací pohyb partes mecânicas mašīnas mehānisko zapiranjem mehanskih osade sulgemisliikumise mechanických častí de uma máquina/ daļu aizvēršanās laikā...
- Seite 37 2. Ohutusjuhised 2. Bezpečnostné pokyny 2. Drošības norādījumi 2. Instruções de segurança 2. Varnostni napotki Pinna peale astumine Aizliegts kāpt uz Vzpenjanje na površino Je zakázané vystupovať É proibido subir para a on keelatud virsmas je prepovedano na plošinu superfície Ärge paigaldage kui Neuzstādiet bērnu Ne postavljajte v bližini...
-
Seite 38: Gerätebeschreibung
◾ 1 front door, one-piece, avec serrure Rittal N° 3524 E, mit Rittal Schließung Nr. 3524 E, vorbereitet with Rittal lock no. 3524 E, prepared for the prévue pour la mise en œuvre d’une serrure für den Einsatz eines Profi lhalbzylinders... -
Seite 39: Kennzeichnung
/ Konfi gurations-ID confi guration ID ID de confi guration #51| Seriennummer #51| Serial number #51| Numéro de série Beispiel: Example: Exemple : http://rittal.com/DE/?5307124 http://rittal.com/EN/?5307124 http://rittal.com/FR/?5307124 Schranksystem VX IT / VX IT enclosure system / Baies VX IT... -
Seite 40: Lieferumfang
3. Gerätebeschreibung 3. Device description 3. Description de la baie 3.3 Lieferumfang Schränke mit 19˝-Profi lschienen standard 3.3 Scope of supply for enclosures with 482.6 mm (19˝) mounting angles, standard 3.3 Composition de la livraison des baies avec montants 19˝ « standard » 1000 1200 1000... - Seite 41 3. Gerätebeschreibung 3. Device description 3. Description de la baie 3.3 Lieferumfang Schränke mit 19˝-Profi lschienen dynamic 3.3 Scope of supply for enclosures with 482.6 mm (19˝) mounting angles, dynamic 3.3 Composition de la livraison des baies avec montants 19˝ « dynamic » 1000 1200 1000...
- Seite 42 3. Gerätebeschreibung 3. Device description 3. Description de la baie 3.3 Lieferumfang Leerschränke 3.3 Scope of supply, empty enclosures 3.3 Composition de la livraison des baies vides 1000 1000 Best.-Nr. VX IT Model No. VX IT 5325.190 Référence VX IT 5326.190 5328.190 5307.190...
-
Seite 43: Anforderungen An Den Aufstellort
4. Montage und Aufstellung 4. Assembly and siting 4. Montage et implantation 4.1 Anforderungen an den Aufstellort 4.1 Site requirements 4.1 Exigences concernant le lieu Achtung: Der VX IT ist nur für die Anwendung Caution: The VX IT is only intended for use d’implantation im Innenbereich bestimmt. -
Seite 44: Montageablauf
4. Montage und Aufstellung 4. Assembly and siting 4. Montage et implantation 4.3.1 Verpackungsbänder lösen, auspacken 4.3.1 Releasing the packing bands and unpacking 4.3.1 Ôter les liens d’emballage, déballer 4. Montage und Aufstellung 4. Assembly and siting 4. Montage et implantation 4.3.2 Anleitung lesen 4.3.2 Reading the instructions 4.3.2 Lire la notice... -
Seite 45: Flachteile Entfernen
4. Montage und Aufstellung 4. Assembly and siting 4. Montage et implantation 4.3.3 Flachteile entfernen 4.3.3 Removing the enclosure panels 4.3.3 Démonter les pièces plates Aluminium-Fronttüren demontieren Dismantling the aluminium front doors Démonter les portes avant en aluminium Mögliche verbaute Fronttüren / Supported front doors / Portes avant possibles Aluminiumtür, belüftet / Sichttür / Glazed door / Porte vitrée... -
Seite 46: Rücktüren Demontieren
4. Montage und Aufstellung 4. Assembly and siting 4. Montage et implantation 4.3.3 Flachteile entfernen 4.3.3 Removing the enclosure panels 4.3.3 Démonter les pièces plates Rücktüren demontieren Dismantling the rear doors Démonter les portes arrière Mögliche verbaute Rücktüren / Supported rear doors / Portes arrière possibles Stahlblechtür, vertikal geteilt / Stahlblechtür, einteilig /... -
Seite 47: Rückwand Demontieren
TX30 4. Montage und Aufstellung 4. Assembly and siting 4. Montage et implantation 4.3.3 Flachteile entfernen 4.3.3 Removing the enclosure panels 4.3.3 Démonter les pièces plates Rückwand demontieren Dismantling the rear panel Démonter le panneau arrière Schranksystem VX IT / VX IT enclosure system / Baies VX IT... -
Seite 48: Seitenwände Demontieren
TX30 4. Montage und Aufstellung 4. Assembly and siting 4. Montage et implantation 4.3.3 Flachteile entfernen 4.3.3 Removing the enclosure panels 4.3.3 Démonter les pièces plates Seitenwände demontieren Dismantling the side panels Démonter les panneaux latéraux Mögliche verbaute Seitenwände / Supported side panels / Panneaux latéraux possibles Seitenwand, vertikal geteilt, scharniert /... -
Seite 49: Ggf. Lose Beiliegendes Zubehör Entfernen
4. Montage und Aufstellung 4. Assembly and siting 4. Montage et implantation 4.3.4 Ggf. lose beiliegendes Zubehör entfernen 4.3.4 Removing any accessories supplied loose 4.3.4 Ôter les accessoires éventuellement joints 4. Montage und Aufstellung 4. Assembly and siting 4. Montage et implantation 4.3.5 Rack von der Palette heben 4.3.5 Lifting the rack off of the pallet 4.3.5 Lever la baie de la palette... -
Seite 50: Entfernen Des Bodenkartons
4. Montage und Aufstellung 4. Assembly and siting 4. Montage et implantation 4.3.6 Entfernen des Bodenkartons 4.3.6 Removing the cardboard from the bottom 4.3.6 Ôter le carton inférieur 4. Montage und Aufstellung 4. Assembly and siting 4. Montage et implantation 4.3.6 Optionale Montage des Sockels Option 4.3.6 Optional installation of the base/plinth... -
Seite 51: Montage Von Rollen Oder Nivellierfüßen
4. Montage et implantation 4.3.6 Montage von Rollen oder Nivellierfüßen Option 4.3.6 Installing castors or levelling feet 4.3.6 Montage des roulettes ou des pieds de nivellement Nur Original-Zubehör von Rittal verwenden Use only original Rittal accessories Utiliser uniquement des accessoires d’origine de Rittal... -
Seite 52: Rack An Den Aufstellort Bewegen
4. Montage und Aufstellung 4. Assembly and siting 4. Montage et implantation 4.3.7 Rack an den Aufstellort bewegen 4.3.7 Moving the rack to the installation site 4.3.7 Déplacer la baie sur le lieu d’implantation ◾ Um den VX IT sicher bewegen zu können, werden mindestens 2 unterwiesene Personen oder Fachkräfte benötigt. -
Seite 53: Aufstellung Vorbereiten
TX30 4. Montage und Aufstellung 4. Assembly and siting 90° 4. Montage et implantation 4.3.8 Aufstellung vorbereiten 4.3.8 Preparing for installation 4.3.8 Préparer la mise en place Die Nivellierfüße müssen gleichmäßig in der Höhe ver- stellt werden. Während des Positionierens sind max. 5 mm Höhenunterschied zulässig. - Seite 54 TX30 4. Montage und Aufstellung 4. Assembly and siting 4. Montage et implantation 4.3.8 Aufstellung vorbereiten 4.3.8 Preparing for installation 4.3.8 Préparer la mise en place Tiefenverstellung der 19˝-Ebene, Rackbreite 600 mm, Racktiefe 600/800/1000 mm Depth adjustment of the 482.6 mm (19˝) level, rack width 600 mm, rack depth 600/800/1000 mm Réglage en profondeur du plan 19˝, largeur de baie 600 mm, profondeur de baie 600/800/1000 mm...
- Seite 55 TX30 4. Montage und Aufstellung 4. Assembly and siting 4. Montage et implantation 4.3.8 Aufstellung vorbereiten 4.3.8 Preparing for installation 4.3.8 Préparer la mise en place Tiefenverstellung der 19˝-Ebene, Rackbreite 600 mm, Racktiefe 1200 mm Depth adjustment of the 482.6 mm (19˝) level, rack width 600 mm, rack depth 1200 mm Réglage en profondeur du plan 19˝, largeur de baie 600 mm, profondeur de baie 1200 mm...
- Seite 56 TX30 4. Montage und Aufstellung 4. Assembly and siting 4. Montage et implantation 4.3.8 Aufstellung vorbereiten 4.3.8 Preparing for installation 4.3.8 Préparer la mise en place Tiefenverstellung der 19˝-Ebene, Rackbreite 600 mm, Racktiefe 1200 mm Depth adjustment of the 482.6 mm (19˝) level, rack width 600 mm, rack depth 1200 mm Réglage en profondeur du plan 19˝, largeur de baie 600 mm, profondeur de baie 1200 mm...
- Seite 57 TX30 4. Montage und Aufstellung 4. Assembly and siting 4. Montage et implantation 4.3.8 Aufstellung vorbereiten 4.3.8 Preparing for installation 4.3.8 Préparer la mise en place Tiefenverstellung der 19˝-Ebene, Rackbreite 800 mm, Racktiefe 600/800 mm Depth adjustment of the 482.6 mm (19˝) level, rack width 800 mm, rack depth 600/800 mm Réglage en profondeur du plan 19˝, largeur de baie 800 mm, profondeur de baie 600/800 mm...
- Seite 58 TX30 4. Montage und Aufstellung 4. Assembly and siting 4. Montage et implantation 4.3.8 Aufstellung vorbereiten 4.3.8 Preparing for installation 4.3.8 Préparer la mise en place Tiefenverstellung der 19˝-Ebene, Rackbreite 800 mm, Racktiefe 1000/1200 mm Depth adjustment of the 482.6 mm (19˝) level, rack width 800 mm, rack depth 1000/1200 mm Réglage en profondeur du plan 19˝, largeur de baie 800 mm, profondeur de baie 1000/1200 mm...
- Seite 59 TX30 4. Montage und Aufstellung 4. Assembly and siting 4. Montage et implantation 4.3.8 Aufstellung vorbereiten 4.3.8 Preparing for installation 4.3.8 Préparer la mise en place Tiefenverstellung der 19˝-Ebene, Rackbreite 800 mm, Racktiefe 1000/1200 mm Depth adjustment of the 482.6 mm (19˝) level, rack width 800 mm, rack depth 1000/1200 mm Réglage en profondeur du plan 19˝, largeur de baie 800 mm, profondeur de baie 1000/1200 mm...
- Seite 60 TX30 4. Montage und Aufstellung 4. Assembly and siting 4. Montage et implantation 4.3.8 Aufstellung vorbereiten 4.3.8 Preparing for installation 4.3.8 Préparer la mise en place Breitenverstellung der 19˝-Ebene, Rackbreite 800 mm, Racktiefe 600/800 mm Width adjustment of the 482.6 mm (19˝) level, rack width 800 mm, rack depth 600/800 mm Réglage en largeur du plan 19˝, largeur de baie 800 mm, profondeur de baie 600/800 mm...
- Seite 61 TX30 4. Montage und Aufstellung 4. Assembly and siting 4. Montage et implantation 4.3.8 Aufstellung vorbereiten 4.3.8 Preparing for installation 4.3.8 Préparer la mise en place Breitenverstellung der 19˝-Ebene, Rackbreite 800 mm, Racktiefe 1000/1200 mm Width adjustment of the 482.6 mm (19˝) level, rack width 800 mm, rack depth 1000/1200 mm Réglage en largeur du plan 19˝, largeur de baie 800 mm, profondeur de baie 1000/1200 mm...
- Seite 62 TX30 4. Montage und Aufstellung 4. Assembly and siting 4. Montage et implantation 4.3.8 Aufstellung vorbereiten 4.3.8 Preparing for installation 4.3.8 Préparer la mise en place Breitenverstellung der 19˝-Ebene, Rackbreite 800 mm, Racktiefe 1000/1200 mm Width adjustment of the 482.6 mm (19˝) level, rack width 800 mm, rack depth 1000/1200 mm Réglage en largeur du plan 19˝, largeur de baie 800 mm, profondeur de baie 1000/1200 mm...
-
Seite 63: Schwenkrahmen Versetzen
TX30 4. Montage und Aufstellung 4. Assembly and siting 4. Montage et implantation 4.3.8 Aufstellung vorbereiten 4.3.8 Preparing for installation 4.3.8 Préparer la mise en place Schwenkrahmen versetzen Moving the swing frame Déplacer le cadre pivotant M8 x 25 = 10 Nm M8 x 25 = 10 Nm = 2,5 Nm... - Seite 64 TX30 4. Montage und Aufstellung 4. Assembly and siting 4. Montage et implantation 4.3.8 Aufstellung vorbereiten 4.3.8 Preparing for installation 4.3.8 Préparer la mise en place Schwenkrahmen – Anschlagwechsel Swing frame – Swapping the hinges Cadre pivotant – changement du sens d’ouverture = 2,5 Nm = 2,5 Nm Schranksystem VX IT / VX IT enclosure system / Baies VX IT...
-
Seite 65: Rack Anreihen (Optional)
3 mm, suitable for the use of one-piece Baying connector for baying VX IT racks baying gap of 1 mm partitions from the Rittal range of accessories and Intended use to TS IT racks. for enabling the easier exchange of individual racks... -
Seite 66: Rack Am Boden Befestigen
TX30 4. Montage und Aufstellung 4. Assembly and siting 4. Montage et implantation 4.3.10 Rack am Boden befestigen 4.3.10 Securing the rack to the fl oor 4.3.10 Fixer la baie au sol = 5 Nm Alternative ◾ Wählen Sie die Verschraubungslösung zum bauseitigen Boden nach den jeweiligen Erfordernissen am Aufstellungs- F = max. -
Seite 67: Bodenbleche Installieren/Anpassen (Optional)
TX30 4. Montage und Aufstellung 4. Assembly and siting 4. Montage et implantation 4.3.11 Bodenbleche installieren/anpassen (optional) 4.3.11 Installing/modifying gland plates (optional) 4.3.11 Installer / adapter les plaques passe-câbles (en option) 10 x 4 2 cm 10 x 4 Nur / Only / Seulement IP 55 Nur / Only / Seulement IP 55 5.5 x 13 Ø... -
Seite 68: Transport
5. Transport 5. Transport 5. Transport Der VX IT muss beim Transport gegen Umkip- The VX IT must be secured to prevent it tip- La baie VX IT doit être bloquée pour éviter tout pen gesichert und darf nur im Leerzustand ping over during transportation and must only basculement lors du transport et ne doit être versendet werden. -
Seite 69: Installation
6. Installation 6. Installation 6. Installation Installationsbeispiele: Installation examples: Exemples d’installation : Gleitschiene für Festeinbau, 19˝-Geräteboden, teleskopiert Schwerlast 482.6 mm (19˝) component shelf, telescopic Slide rail for static installation, heavy-duty Tablette d'appareillage 19˝ télescopique Glissière pour montage fi xe, charges lourdes 6. - Seite 70 6. Installation 6. Installation 6. Installatie 6.1 Installing the customer hardware 6.1 Installation du matériel du client 6.1 Installatie van hardware van de klant Before populating the VX IT with equipment, La baie VX IT doit être fi xée au sol avant Voordat er apparaten in het VX IT-rack worden it must fi...
- Seite 71 6. Installation 6. Installazione 6. Instalación 6.1 Installation av kundens utrustning 6.1. Installazione dell’hardware del cliente 6.1 Instalación del hardware del cliente Innan VX IT förses med utrustning måste den Il VX IT deve essere fi ssato al pavimento prima Antes de instalar los componentes en el VX IT förankras i golvet.
- Seite 72 6. Asennus 6. Installation 6. Instalacja 6.1 Asiakaslaitteiston asennus 6.1 Installation af kundens hardware 6.1 Instalacja sprzętu klienta Ennen kuin VX IT varustetaan laitteilla, se on Før VX IT bestykkes med udstyr, skal det Przed zainstalowaniem sprzętu, VX IT musi kiinnitettävä...
- Seite 73 6. Instalace 6. Инсталация 6. Установка 6.1 Instalace hardwaru od zákazníka 6.1 Инсталация на клиентския хардуер 6.1 Установка оборудования клиента Než osadíte skříň VX IT vybavením, musíte ji Преди VX IT да бъде оборудван, трябва Перед комплектацией VX IT оборудованием připevnit k podlaze.
- Seite 74 6. Εγκατάσταση 6. Instalare 6. Ugradnja 6.1 Εγκατάσταση υλικού του πελάτη 6.1 Instalarea echipamentului hardware 6.1 Ugradnja korisničke opreme Πριν από την τοποθέτηση εξοπλισμού στο al clientului Prije nego što postavite opremu na VX IT, VX IT, αυτό θα πρέπει να στερεωθεί στο δάπεδο. Înainte de montarea echipamentului, produsul pričvrstite ga za tlo.
- Seite 75 6. Telepítés 6. Montavimas 6. Paigaldus 6.1 Az ügyfél hardverének telepítése 6.1 Kliento įrangos montavimas 6.1 Kliendi riistvara paigaldus Mielőtt a VX IT-t a berendezésekkel felszereli, Prieš montuojant įrangą į VX IT, korpusas turi Enne kui VX IT varustatakse seadmetega, rögzíteni kell a szekrényt a padlóra.
- Seite 76 6. Uzstādīšana 6. Namestitev 6. Inštalácia 6.1. Klienta aparatūras uzstādīšana 6.1 Namestitev strojne opreme stranke 6.1 Inštalácia hardvéru zákazníka Pirms VX IT tiek aprīkots ar aprīkojumu, tam Preden opremite ohišje VX IT z opremo, ga Predtým, ako je VX IT osadená technickým jābūt piestiprinātam pie grīdas.
-
Seite 77: Instalação
6. Instalação 6.1 Instalação do hardware do cliente Antes de instalar equipamentos no VX IT, fi xar o rack no piso utilizando o suporte de base 5301.350. Considere o peso dos componentes ins- talados e mantenha a capacidade de carga máxima permitida do VX IT. -
Seite 78: Installation Der Power- Und
6. Installation 6. Installation 6. Installation 6.2 Installation der Power- und Netzwerkverkabelung 6.2 Installing the power and network cables 6.2 Installation du câblage de puissance et de réseau Kabeleinführung im Dach Cable entry in the roof Introduction des câbles dans le toit Schranksystem VX IT / VX IT enclosure system / Baies VX IT... - Seite 79 TX30 6. Installation 6. Installation 6. Installation 6.2 Installation der Power- und Netzwerkverkabelung 6.2 Installing the power and network cables 6.2 Installation du câblage de puissance et de réseau Demontage/Montage Dachblech (optional) Dismantling/assembling of the roof plate (optional) Montage / démontage du toit (en option) M12 x 20 = 20 Nm M6 x 12...
-
Seite 80: Dachblech Belüften (Optional)
TX25 SW10 6. Installation 6. Installation 6. Installation 6.2 Installation der Power- und Netzwerkverkabelung 6.2 Installing the power and network cables 6.2 Installation du câblage de puissance et de réseau 6 x 13 Dachblech (B = 800 mm) belüften (optional) Venting the roof plate (W = 800 mm) (optional) Toit (L = 800 mm) avec aération (en option) 50 mm... -
Seite 81: Kabeleinführung Im Boden
TX30 6. Installation 6. Installation 6. Installation 6.2 Installation der Power- und Netzwerkverkabelung 6.2 Installing the power and network cables 6.2 Installation du câblage de puissance et de réseau Kabeleinführung im Boden Cable entry in the base Introduction des câbles par la base Bodenmodul, zweiteilig, mit Bürstenleiste, hochdicht Bodenmodul, einteilig, mit Bürste... -
Seite 82: Zubehör Kabelführung
6. Installation 19˝-Kabeldurchführungs-Panel Kabelkanal für VX IT 6. Installation 482.6 mm (19˝) cable entry panel Cable duct for VX IT 6. Installation Panneau avec passage de câbles 19˝ Goulotte de câbles pour baies VX IT 6.2 Installation der Power- und Netzwerkverkabelung 6.2 Installing the power and network cables 6.2 Installation du câblage de puissance et de réseau Zubehör Kabelführung... -
Seite 83: Anbindungspunkte, Schutzerdung, Stellungnahme Zur Elektrischen Sicherheit, Zubehör-Kits Für Die Schutzerdung
6. Installation 6. Installation 6. Installation 6.3 Anbindungspunkte, Schutzerdung, Stellungnahme zur Potenzialausgleich-Set Plus Potenzialausgleich-Set Basis-Kit elektrischen Sicherheit, Zubehör-Kits für die Schutzerdung Potential equalisation kit, Potential equalisation kit, 6.3 Connection points, protective earthing, electrical safety, Plus version Basic version accessory kits for protective earthing Kit d’équipotentialité... - Seite 84 6. Installation 6. Installation 6. Installation 6.3 Anbindungspunkte, Schutzerdung, Stellungnahme zur elektrischen Sicherheit, Zubehör-Kits für die Schutzerdung 6.3 Connection points, protective earthing, electrical safety, accessory kits for protective earthing 6.3 Points de connexion, protection par mise à la masse, avis pour la sécurité électrique, kits d’accessoires pour la protection par mise à...
-
Seite 85: Entfernte Flachteile Wieder Montieren
6. Installation 6. Installation 6. Installation 6.4 Entfernte Flachteile wieder montieren 6.4 Re-installing the removed enclosure panels 6.4 Remonter à nouveau les pièces plates démontées Rücktüren montieren Fitting the rear doors Monter les portes arrière Schranksystem VX IT / VX IT enclosure system / Baies VX IT... -
Seite 86: Rückwand Montieren
TX30 6. Installation 6. Installation 6. Installation 6.4 Entfernte Flachteile wieder montieren 6.4 Re-installing the removed enclosure panels 6.4 Remonter à nouveau les pièces plates démontées Rückwand montieren Fitting the rear panel Monter le panneau arrière M6 x 16 = 9 Nm TX30 6. -
Seite 87: Aluminium-Fronttür Montieren - Türanschlag Rechts
6. Installation 6. Installation 6. Installation 6.4 Entfernte Flachteile wieder montieren 6.4 Re-installing the removed enclosure panels 6.4 Remonter à nouveau les pièces plates démontées Aluminium-Fronttür montieren – Türanschlag rechts Fitting the aluminium front door – r/h door hinge Monter la porte avant en aluminium – porte avec charnières à droite Schranksystem VX IT / VX IT enclosure system / Baies VX IT... -
Seite 88: Aluminium-Fronttür Montieren - Türanschlag Links (Türanschlagwechsel)
TX30 3 mm 6. Installation 6. Installation 6. Installation 6.4 Entfernte Flachteile wieder montieren 6.4 Re-installing the removed enclosure panels 6.4 Remonter à nouveau les pièces plates démontées Aluminium-Fronttür montieren – Türanschlag links (Türanschlagwechsel) Fitting the aluminium front door – l/h door hinge (swapping hinge to opposite side) Monter la porte avant en aluminium –... - Seite 89 TX30 6. Installation 6. Installation 6. Installation 6.4 Entfernte Flachteile wieder montieren 6.4 Re-installing the removed enclosure panels 6.4 Remonter à nouveau les pièces plates démontées Aluminium-Fronttür montieren – Türanschlag links (Türanschlagwechsel) Fitting the aluminium front door – l/h door hinge (swapping hinge to opposite side) Monter la porte avant en aluminium –...
-
Seite 90: Stahlblechtür Montieren - Türanschlag Links (Türanschlagwechsel)
TX30 3 mm 6. Installation 6. Installation 6. Installation 6.4 Entfernte Flachteile wieder montieren 6.4 Re-installing the removed enclosure panels 6.4 Remonter à nouveau les pièces plates démontées Stahlblechtür montieren – Türanschlag links (Türanschlagwechsel) Fitting the sheet steel door – l/h door hinge (swapping hinge to opposite side) Monter la porte en tôle d’acier –... -
Seite 91: Weiteres Zubehör
6. Installation 6. Installation 6. Installation 6.5 Weiteres Zubehör 6.5 Other accessories 6.5 Accessoires complémentaires CMC III – Überwachungssystem CMC III – Monitoring system CMC III – Système de supervision Blue e+ Dachaufbau-Kühlgerät Blue e+ Wandanbau-Kühlgerät Liquid Cooling Package (LCP) Liquid Cooling Unit (LCU) Blue e+ roof-mounted cooling unit Blue e+ wall-mounted cooling unit... -
Seite 92: Inbetriebnahme
7. Inbetriebnahme 7. Commissioning 7. Mise en service Vor der Inbetriebnahme muss der VX IT oder Before commissioning, the VX IT or bayed La baie VX IT ou la rangée de baies VX IT die VX IT Anreihung ordnungsgemäß mit den VX IT must be correctly equipped with the doivent être équipées des pièces plates vorab demontierten Flachteilen ausgestattet... -
Seite 93: Störung Und Abhilfe
9. Incident et suppression Bei technischen Störungen wenden Sie sich For technical queries, please contact: Pour tout incident technique, bitte an veuillez vous adresser à Rittal International Service Rittal International Service Auf dem Stützelberg Rittal International Service Auf dem Stützelberg 35745 Herborn Auf dem Stützelberg... -
Seite 94: Inspektion Und Wartung
10. Inspektion und Wartung 10. Inspection and maintenance 10. Inspection et entretien Die Wartung sollte regelmäßig in Abhängigkeit Maintenance must be performed at regular L’entretien doit être réalisé régulièrement der Einsatz- und Umgebungsbedingungen, intervals depending on use and ambient en fonction des conditions d’exploitation et mindestens einmal jährlich durchgeführt und conditions, at least once annually and docu- ambiantes, au minimum une fois par an, et... -
Seite 95: Technische Daten
12. Technische Daten 12. Technical specifi cations 12. Caractéristiques techniques 19˝-Profi lschienen standard, Materialstärke der Profi lschienen: 2,0 mm 482.6 mm (19˝) mounting angles, standard, material thickness of mounting angles: 2.0 mm Montants 19˝ « standard », épaisseur des montants : 2,0 mm Max. - Seite 96 12. Technische Daten 12. Technical specifi cations 12. Caractéristiques techniques 19˝-Profi lschienen standard, Materialstärke der Profi lschienen: 2,0 mm 482.6 mm (19˝) mounting angles, standard, material thickness of mounting angles: 2.0 mm Montants 19˝ « standard », épaisseur des montants : 2,0 mm 100 mm Best.-Nr.
- Seite 97 12. Technische Daten 12. Technical specifi cations 12. Caractéristiques techniques 19˝-Profi lschienen standard, Materialstärke der Profi lschienen: 2,0 mm 482.6 mm (19˝) mounting angles, standard, material thickness of mounting angles: 2.0 mm Montants 19˝ « standard », épaisseur des montants : 2,0 mm Schutzart Protection category...
-
Seite 98: 19˝-Profi Lschienen Dynamic
12. Technische Daten 12. Technical specifi cations 12. Caractéristiques techniques 19˝-Profi lschienen dynamic, Materialstärke der Profi lschienen: 2,5 mm 482.6 mm (19˝) mounting angles, dynamic, material thickness of mounting angles: 2.5 mm Montants 19˝ « dynamic », épaisseur des montants : 2,5 mm Max. - Seite 99 12. Technische Daten 12. Technical specifi cations 12. Caractéristiques techniques 19˝-Profi lschienen dynamic, Materialstärke der Profi lschienen: 2,5 mm 482.6 mm (19˝) mounting angles, dynamic, material thickness of mounting angles: 2.5 mm Montants 19˝ « dynamic », épaisseur des montants : 2,5 mm Best.-Nr.
- Seite 100 12. Technische Daten 12. Technical specifi cations 12. Caractéristiques techniques 19˝-Profi lschienen dynamic, Materialstärke der Profi lschienen: 2,5 mm 482.6 mm (19˝) mounting angles, dynamic, material thickness of mounting angles: 2.5 mm Montants 19˝ « dynamic », épaisseur des montants : 2,5 mm Schutzart Protection category...
-
Seite 101: Leergehäuse
12. Technische Daten 12. Technical specifi cations 12. Caractéristiques techniques Leergehäuse / Empty enclosures / Baies vides Max. zulässige Nennmaße Nutzlast gem. Ebenenabstände Anzahl Nennmaße Schrank Max. admissi- Nominal dimensions Best.-Nr. VX IT 19˝-Ebenen Nominal dimensions of enclosure ble payload to Gewicht Farbe Verschluss... - Seite 102 12. Technische Daten 12. Technical specifi cations 12. Caractéristiques techniques Leergehäuse / Empty enclosures / Baies vides Schutzart Protection category Indice de protection Best.-Nr. VX IT Model No. Dachbleche Bodenbleche VX IT Roof plates Gland plates Type / IP Référence Toits Plaques passe-câbles VX IT...
-
Seite 103: Ersatzteile
Un état actualisé est disponible sur le site www.rittal.de. www.rittal.com. internet www.rittal.fr. Es dürfen nur Original-Ersatzteile von Rittal Only original Rittal spare parts may be used. Seules les pièces de rechange d’origine de verwendet werden. Rittal doivent être utilisées. 14. Garantie 14. - Seite 104 ◾ Climate Control ◾ IT Infrastructure ◾ Software & Services You can fi nd the contact details of all Rittal companies throughout the world here. www.rittal.com/contact RITTAL GmbH & Co. KG Auf dem Stuetzelberg · 35745 Herborn · Germany Phone +49 2772 505-0...