Herunterladen Inhalt Inhalt Diese Seite drucken

Werbung

Verfügbare Sprachen
  • DE

Verfügbare Sprachen

  • DEUTSCH, seite 18
INDEX
I SUPERTECHNE
DESIGNER FABIO REGGIANI
ISTRUZIONI DI MONTAGGIO
SUPERTECHNE . . . . . . . . . . . . . . . . . 2
ASSEMBLY INSTRUCTIONS
SUPERTECHNE . . . . . . . . . . . . . . . . 10
MONTAGEANWEISUNGEN
SUPERTECHNE . . . . . . . . . . . . . . . . 18
INSTRUCTIONS POUR
LE MONTAGE DE SUPERTECHNE. . 26
INSTRUCCIONES DE MONTAJE SUPER-
TECHNE . . . . . . . . . . . . . . . . . . . . . . 34

Werbung

Inhaltsverzeichnis
loading

Inhaltszusammenfassung für Reggiani I SUPERTECHNE

  • Seite 1 INDEX I SUPERTECHNE DESIGNER FABIO REGGIANI ISTRUZIONI DI MONTAGGIO SUPERTECHNE ....2 ASSEMBLY INSTRUCTIONS SUPERTECHNE ....10 MONTAGEANWEISUNGEN SUPERTECHNE .
  • Seite 2: Note Generali

    (Tipo Y) in caso di danneggiamento dovra essere sostituito dalla tanto devono essere accuratamente conservate anche dopo l’installazione, per ogni futu- Reggiani SpA o dal suo servizio di assistenza o da personale qualificato (fig. ra consultazione. • Il numero racchiuso nel simbolo indica -in metri- la distanza minima alla quale va posto l’oggetto da illuminare;...
  • Seite 3 ri in doppio isolamento, bipolari per gli apparecchi in Classe II e tripolari per gli Tabella DIMENSIONAMENTO CAVI apparecchi in Classe I , con caratteristiche non inferiori al tipo H07 RN F e sezione 1.0 mm 1.5 mm 2.5 mm 4.0 mm 6.0 mm compresa tra 1,5 e 2,5mm...
  • Seite 4 • Apparecchi con gruppi di alimentazione dimmerabili, si distinguono in due categorie, PREDISPOSIZIONE E MONTAGGIO APPARECCHI analogici e digitali. Disinserire la tensione di rete e seguire le istruzioni sotto riportate La dimmerazione analogica è caratterizzata da unità di controllo remote, ovvero con integrato l’alimentatore 1..10Vcc, è...
  • Seite 5 Attenzione: Nel collegamento in cascata degli alimentatori indipendenti,”*sono ammes- si un massimo di sei apparecchi”,*qualora si utilizzano i morsetti degli alimentatori stessi. APPARECCHI PER LAMPADE AD ALOGENURI METALLICI E SODIO Eseguito il cablaggio elettrico, per il fissaggio dell’apparecchio al controsoffitto seguire le istruzioni riportate in figura Per cablaggio elettrico alla rete di alimenta- zione (vedi Note Generali), utilizzare la mor-...
  • Seite 6 VETRI IMAGE cod. 6931 CILINDRO DECORATIVO cod. 6980 Per l’applicazione dei vetri image, inserire le Posizionare il cilindro in vetro prima dell’installazione dell’apparecchio. quattro molle (fornite in dotazione con l’ac- cessorio) nella flangia reggi vetro e procede- re all’applicazione del vetro, come riportato in figura.
  • Seite 7 • ALOGENE TENSIONE DI RETE foro d’incasso QT-DE QT-32 150mm 150w 150w — 220mm 300w 250w 100w R7s/HDG ALOGENE BASSA TENSIONE Per gli apparecchi con lampade a scarica e/o con alimentatori elettronici, il gruppo d’ali- Aprire lo sportello lo sportello del vano ottico agendo sulla molla poliblock; mentazione deve essere posto all’esterno del vano d’incasso ( B), in luogo areato, Sollevare la molla ritegno ed estrarre il portalampada.
  • Seite 8 • FLUORESCENTI COMPATTE Profondità d’incasso 100mm* Foro d’incasso TC-D TC-DE TC-D TC-DE TC-D TC-DE TC-TE TC-TE 150mm 1x13w 1x13w 1x18w 1x18w 1x26w 1x26w 220mm 1x13/2x13w 2x13w 1x18/2x18w 1x18/2x18w 1x26/2x26w 1x26/2x26w 1x32w 1x42w G24d-1 G24q-1 G24d-2 G24q-2 G24d-3 G24q-3 GX24q-3 GX24q-4 *negli apparecchi in emergenza la profondità...
  • Seite 9 ALOGENURI METALLICI, VAPORI DI SODIO ED ALOGENE A TENSIONEDI RETE FLUORESCENTI COMPATTE Ì Aprire lo sportello del vano ottico (se presente) agendo sulla molla polyblock; Ì Aprire lo sportello del vano ottico agen- Ì Inserire/sostituire la lampadina (come indicato in figura) con potenza a quella speci- do sulla molla polyblock;...
  • Seite 10: General Notes

    (type Y) is damaged, it should be replaced by Reggiani SpA, its Important: compliance with standards is guaranteed only if the luminaire is powered by a safety transformer, or equivalent, complying with current standards.
  • Seite 11 for Class II luminaire and tripolar for Class I luminaires , rated at no less Table CABLE DIMENSIONING than type H07 RN F, with a cross section of between 1.5 and 2.5 mm , and outer 1.0 mm 1.5 mm 2.5 mm 4.0 mm 6.0 mm...
  • Seite 12 • Luminaires with dimmable control units are divided into two categories, analogue LUMINAIRE PREPARATION AND MOUNTING and digital. Disconnect from the mains and follow the instructions given Analogue dimming involves a remote control unit with built-in 1-10V DC control below gear and can be used to construct simple and economical adjustable systems.
  • Seite 13 LUMINAIRES FOR METAL HALIDE AND SODIUM VAPOUR LAMPS After wiring, fix the luminaire to the false ceiling as shown in the figure below. To connect to the mains power supply (see General Notes), use the three-pole terminal block with quick-fit plug provided. When wiring has been completed, before fixing the luminaire to the false ceiling, the terminal board brackets must be mounted in position ;...
  • Seite 14 IMAGE GLASS ref. 6931 GLASS CYLINDER ref. 6980 To fit image glass, insert the four springs Place the glass cylinder in position before installing the luminaire. provided with the accessory into the glass retainer flange and then attach the glass as shown in the figure.
  • Seite 15 • MAINS VOLTAGE HALOGEN LAMPS Cut-out QT-DE QT-32 150mm 150w 150w — 220mm 300w 250w 100w R7s/HDG LOW VOLTAGE HALOGEN LAMPS For luminaires with discharge lamps and/or HF control gears, the control gear must be Open the access flap of the optical compartment by acting on the Polyblok spring; placed outside the recess ( B), in a well-ventilated, dry and suitably sized place (see Lift the retaining ring and extract the lampholder.
  • Seite 16 • COMPACT FLUORESCENT LAMPS Recess depth 100mm* Cut-out TC-D TC-DE TC-D TC-DE TC-D TC-DE TC-TE TC-TE 150mm 1x13w 1x13w 1x18w 1x18w 1x26w 1x26w 220mm 1x13/2x13w 2x13w 1x18/2x18w 1x18/2x18w 1x26/2x26w 1x26/2x26w 1x32w 1x42w G24d-1 G24q-1 G24d-2 G24q-2 G24d-3 G24q-3 GX24q-3 GX24q-4 *in emergency luminaires, the recess must be 140 mm deep.
  • Seite 17 METAL HALIDE, SODIUM VAPOUR AND MAINS VOLTAGE HALOGEN LAMP COMPACT FLUORESCENT LAMPS Ì Open the access flap of the optical compartment (if present) by acting on the Polyblok Ì Open the access flap of the optical com- spring; Ì Insert/replace with a lamp (as shown in the figure) with the power specified on the partment by acting on the Polyblok spring;...
  • Seite 18: Allgemeine Hinweise

    300mm und mindestens 50mm von den Seitenwänden des Einbauraums befinden; das nach der Installation für eine zukünftige Konsultierung sorgfältig aufbewahrt Kabel des Betriebsgeräts (Typ Y) muss bei Beschädigung von Reggiani SpA oder einem werden. seiner Kundendienststellen oder von qualifiziertem Fachpersonal ausgewechselt werden (Abb.
  • Seite 19: Kabeldimensionierung

    • Wichtig ist auch die Beachtung der vorgegebenen Polungen: Phase-Pol F/L oder Klemme Tabelle KABELDIMENSIONIERUNG 1-, Neutral -Pol N oder Klemme 2- und für Leuchten der Klasse I, Erdung - Pol 1.0 mm 1.5 mm 2.5 mm 4.0 mm 6.0 mm dem gelb-grünen Kabel.
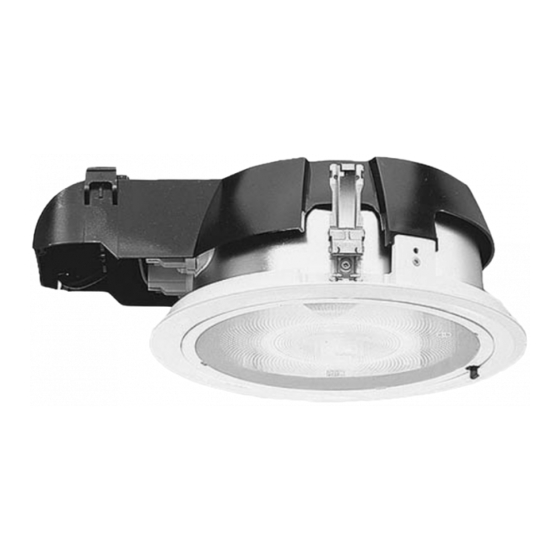
  • Seite 20: Vorbereitung Und Montage Der Leuchten

    mit analoger und digitaler Dimmung:. VORBEREITUNG UND MONTAGE DER LEUCHTEN Die analoge Dimmung erfolgt über Fernsteuereinheiten mit integriertem Vorschaltgerät Schalten Sie die Netzspannung ab und befolgen Sie die nachstehenden 1..10Vcc. Dadurch entstehen einfache wirtschaftliche regelbare Anweisungen. Beleuchtungssysteme. Insbesondere die Steuereinheiten sind in der Lage über eine Länge von 50 m bis zu 50 Die Produktreihe SUPERTECHNE setzt sich aus montagefertigen Leuchten zusammen, die Leuchten zu verwalten.
  • Seite 21 Achtung: Bei Kaskadenschaltung der unabhängigen VG sind * maximal sechs Leuchten zulässig", * wenn die Klemmen der VG verwendet werden. LEUCHTEN FÜR HALOGEN- METALLDAMPFLAMPEN UND Nach erfolgter elektrischer Verkabelung zur Befestigung der Leuchte an der NATRIUMLAMPEN abgehängten Decke den nachfolgenden Anweisungen mit entsprechenden Abbildungen beachten Verwenden Sie für die elektrische Verkabelung (siehe Allgemeine Hinweise)
  • Seite 22 IMAGE DEKORGLÄSER Art. 6931 DEKORATIVER GLASZYLINDER Art. 6980 Um die Image Dekorgläser anzubringen, die Den Glaszylinder vor Installation der Leuchte positionieren. vier mitgelieferten Zusatzfedern wie im Bild gezeigt in den Glashaltering stecken und dann die Glasabdeckung in die 4 Federn einschnappen lassen.
  • Seite 23: Einsetzen/Auswechseln Der Lampe

    • HOCHVOLT-HALOGENLAMPEN Deckenausschnit QT-DE QT-32 150mm 150w 150w — 220mm 300w 250w 100w R7s/HDG NIEDERVOLT-HALOGENLAMPEN Bei Leuchten mit Entladungslampen bzw. elektronischen Vorschaltgeräten muss das Öffnen Sie die Klappe der optischen Einheit durch Betätigung der Polyblok-Feder. Betriebsgerät außerhalb des Einbauraumes ( B) in einem gut belüfteten, trockenen Ziehen Sie die Haltefeder nach oben und entfernen Sie die Lampenfassung.
  • Seite 24 • KOMPAKT-LEUCHTSTOFFLAMPEN Einbautiefe 100mm* Deckenausschnit TC-D TC-DE TC-D TC-DE TC-D TC-DE TC-TE TC-TE 150mm 1x13w 1x13w 1x18w 1x18w 1x26w 1x26w 220mm 1x13/2x13w 2x13w 1x18/2x18w 1x18/2x18w 1x26/2x26w 1x26/2x26w 1x32w 1x42w G24d-1 G24q-1 G24d-2 G24q-2 G24d-3 G24q-3 GX24q-3 GX24q-4 *bei Leuchten für Notbeleuchtung beträgt die Einbautiefe 140mm Einbautiefe 170mm Deckenausschnitt 242mm Deckenausschnit...
  • Seite 25: Halogen-Metalldampflampen, Natriumdampflampen Und Hochvolt-Halogenlampen

    HALOGEN-METALLDAMPFLAMPEN, KOMPAKT-LEUCHTSTOFFLAMPEN Ì Öffnen Sie die Klappe der optischen Einheit (wenn vorhanden) durch Betätigung der NATRIUMDAMPFLAMPEN UND HOCHVOLT-HALOGENLAMPEN Polyblok-Feder; Ì Öffnen Sie die Klappe der optischen Einheit Ì Setzen Sie die Lampe (wie in der Abbildung gezeigt) ein bzw. wechseln Sie sie aus. durch Betätigung der Polyblok-Feder;...
  • Seite 26 . Comme pour l’ensemble des appareils à l’appareil sous tension. Pour ce faire, s’adresser à REGGIANI SPA ILLUMINAZIONE . surfaces normalement inflammables encastrer, il convient notamment de s’assurer qu’ une distance d’au moins 50mm sépare Avertissement : les appareils ne peuvent être utilisés que s’ils sont munis de l’écran...
  • Seite 27 appareils de Classe I , doués de caractéristiques non inférieures au type H07 RN F Tableau DIMENSIONNEMENT CABLES et présentant une section comprise entre 1,5 et 2,5mm , avec gaine extérieure de 1.0 mm 1.5 mm 2.5 mm 4.0 mm 6.0 mm protection de Ø...
  • Seite 28 • Appareils avec platines d’alimentation gradables : ils sont regroupés en deux PREPARATION ET MONTAGE DES APPAREILS catégories, analogiques et numériques. Couper la tension de secteur et suivre les instructions décrites ci- La gradation analogique est caractérisée par des modules de commande à distance après : avec l’alimentateur 1…10Vcc incorporé;...
  • Seite 29 Attention: en cas de raccordement en cascade des platines d’alimentation autonomes,‘’*six appareils maximum sont admis’’,*à condition d’utiliser les bornes de ces mêmes platines d’alimentation. APPAREILS POUR LAMPES A HALOGE- Une fois le câblage électrique terminé, suivre les instructions du schéma pour installer NURES METALLIQUES ET l’appareil dans le faux-plafond.
  • Seite 30 VERRES IMAGE réf. 6931 ACCESSOIRE CYLINDRIQUE DECORATIF réf. 6980 Pour la pose des verres Image, introduire les Positionner le cylindre en verre avant d’installer l’appareil. quatre ressorts (fournis avec l’accessoire) dans la collerette du verre puis appliquer le verre selon les indications du schéma. FILTRES SELECTIFS réf.
  • Seite 31 • HALOGENES TENSION DE SECTEUR trou d’encastrement QT-DE QT-32 150mm 150w 150w — 220mm 300w 250w 100w R7s/HDG LAMPES HALOGENES BASSE TENSION Pour les appareils pourvus de lampes à décharge et/ou d’alimentateurs électroniques, la Ouvrir la porte du compartiment optique en agissant sur le ressort Polyblok; platine d’alimentation doit être placée à...
  • Seite 32 • FLUORESCENTES COMPACTES Profondeur d’encastrement 100mm* trou d’encastrement TC-D TC-DE TC-D TC-DE TC-D TC-DE TC-TE TC-TE 150mm 1x13w 1x13w 1x18w 1x18w 1x26w 1x26w 220mm 1x13/2x13w 2x13w 1x18/2x18w 1x18/2x18w 1x26/2x26w 1x26/2x26w 1x32w 1x42w G24d-1 G24q-1 G24d-2 G24q-2 G24d-3 G24q-3 GX24q-3 GX24q-4 *pour les appareils de secours, la profondeur d’encastrement est de 140mm Profondeur d’encastrement 170mm Trou d’encastrement 242mm...
  • Seite 33 HALOGENURES METALLIQUES, LAMPES FLUORESCENTES COMPACTES Ì Ouvrir la porte du compartiment optique (si présente) en agissant sur le ressort VAPEURS DE SODIUM ET HALOGENES A TENSION DE SECTEUR Polyblok; Ì Ouvrir la porte du compartiment optique Ì Introduire/remplacer la lampe (selon les indications de la figure) par une lampe de en agissant sur le ressort Polyblok;...
  • Seite 34: Notas Generales

    En caso de que se dañe el cable de este último (tipo Y), Por lo tanto, deben guardarse también después de la instalación para eventuales sólo personal de Reggiani SpA, su servicio de asistencia o personal especializado consultaciones futuras.
  • Seite 35 doble aislamiento, bipolares para los aparatos de Clase II y tripolares para los Tabla DIMENSIONAMENTO CABLES aparatos de Clase I , con características no inferiores al tipo H07 RN F, con sección 1.0 mm 1.5 mm 2.5 mm 4.0 mm 6.0 mm entre 1,5 y 2,5 mm _ y vaina externa de protección de 8 mm.
  • Seite 36 • Aparatos con equipos de alimentación regulables: existen dos categorías – analógicos PREPARACIÓN Y MONTAJE DE LOS APARATOS y digitales. Desconecte la tensión de red y siga las instrucciones que se describen • Regulación analógica: usando unidades de control remotas, con el equipo de a continuación : alimentación 1...10Vcc integrado, se realizan sistemas regulables simples y económicos.
  • Seite 37 Atención:Cuando se conectan en cascada los equipos independientes de alimentación, “*los aparatos pueden ser seis, como máximo,” *siempre y cuando se usen los bornes de los mismos equipos. APARATOS PARA LÁMPARAS DE HALOGENUROS METÁLICOS Y SODIO Al finalizar el cableado eléctrico, para fijar el aparato al falso techo, siga las instrucciones de las figuras.
  • Seite 38 CRISTALES IMAGE cód. 6931 CILINDRO DECORATIVO cód. 6980 Para aplicar los cristales Image, inserte los 4 Posicione el cilindro de cristal, antes de instalar el aparato. muelles (suministrados junto con el accesorio) en el aro de sostén del cristal y, luego, aplique el cristal, como muestra la figura.
  • Seite 39 • HALÓGENAS TENSIÓN DE RED agujero de empotramiento QT-DE QT-32 150mm 150w 150w — 220mm 300w 250w 100w R7s/HDG HALÓGENAS DE BAJA TENSIÓN Abra el portillo del vano óptico actuando sobre el muelle Polyblok; En caso de aparatos con lámparas de descarga y/o con equipos de alimentación Levante el muelle de retención y extraiga el portalámparas;...
  • Seite 40 • FLUORESCENTES COMPACTAS Profundidad de empotramiento 100mm* Agujero de empotramiento TC-D TC-DE TC-D TC-DE TC-D TC-DE TC-TE TC-TE 150mm 1x13w 1x13w 1x18w 1x18w 1x26w 1x26w 220mm 1x13/2x13w 2x13w 1x18/2x18w 1x18/2x18w 1x26/2x26w 1x26/2x26w 1x32w 1x42w G24d-1 G24q-1 G24d-2 G24q-2 G24d-3 G24q-3 GX24q-3 GX24q-4 *en los aparatos de emergencia la profundidad de empotramiento es de 140mm...
  • Seite 41 HALOGENUROS METÁLICOS, FLUORESCENTES COMPACTAS Ì Abra el portillo del vano óptico (si se halla presente) actuando sobre el muelle VAPORES DE SODIO Y HALÓGENAS CON TENSIÓN DE RED Polyblok; Ì Abra el portillo del vano óptico actuando Ì Inserte/sustituya la lámpara (como muestra la figura) con una de potencia igual a la sobre el muelle Polyblok;...
  • Seite 42 Daher ist der Nutzer verpflichtet, die gebrauchten Leuchten an den Vertreiber zurückzugegeben, wenn er eine gleichwertige neue Leuchte erwirbt, bzw., in Italien, direkt an den von Reggiani S.p.A. Illuminazione beauftragten Verband Ecolight (Consorzio per lo Smaltimento degli Apparecchi di Illuminazione - Verband für die Beseitigung von gebrauchten Leuchten), der für die kostenlose Rücknahme und die Zustellung an spezialisierte, entsprechend von den öffentlichen Verwaltungen eingerichtete Rücknahmestellen zuständig ist, die in der Lage sind, WEEE zu verwer-...
  • Seite 43 échange de l’achat d’un nouvel appareil équivalent ou bien, mais uniquement sur le territoire italien, directement au Groupement pour l’élimination des appareils d’éclairage – Ecolight – mandaté dans ce sens par la société Reggiani S.p.A. Illuminazione; tous deux se chargeront gratuitement de l’enlèvement et de la remise aux points de collecte spécialisés, dûment mis en place par les collectivités locales, qui sont respon-...
  • Seite 44 Borehamwood Herts WD6 1LT London UK Dubai Airport Free Zone – Dubai U.A.E tel. +44 02082363000 tel. +971 46091257 reggiani @ reggiani.co.uk dubai @ reggiani.net REGGIANI LIGHTING USA, INC. ITG LIGHTING CO.LTD Wallkill NY 12589 Ningbo China 315101 tel. +1 8458958184 tel. +86 57488418655 reggianilighting @ reggiani.net...

Inhaltsverzeichnis