Werbung
Quicklinks
Werbung

Verwandte Anleitungen für Kartell Sundial Nendo


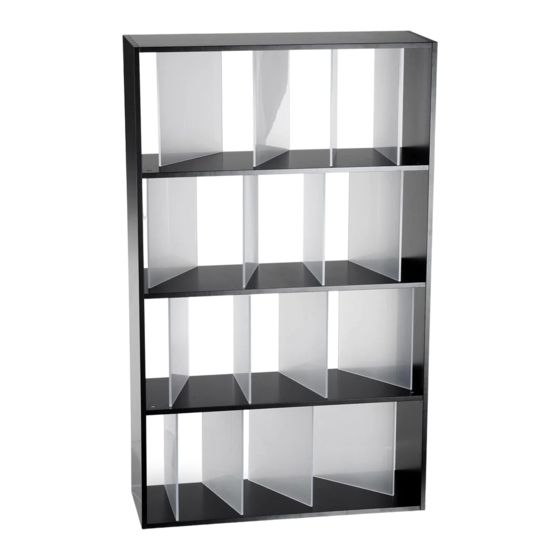
Inhaltszusammenfassung für Kartell Sundial Nendo
- Seite 1 Sundial Sundial Nendo Nendo...
- Seite 2 (or solvents in general). AVOID THE FOLLOWING IMPROPER USE: do not use the product as a ladder. Kartell will accept no liability for any damages caused to property or persons subsequent to incorrect handling of the product. If the assistance of the manufacturer is required to rectify faults arising from incorrect installation or use, this assistance is not covered by the guarantee.
- Seite 3 EVITER LES UTILISATIONS INCORRECTES SUIVANTES : utiliser le produit comme un escabeau. Kartell décline toute responsabilité pour les dommages causés à des choses ou à des personnes suite à une utilisation non conforme du produit. La garantie ne comprend pas toute forme d’assistance ou de réparation du produit ou de ses éléments endommagés suite à...
- Seite 4 Kartell declina toda responsabilidad por daños a personas o cosas derivados del uso incorrecto del producto. La garantía no comprende ningún tipo de asistencia o reparación del producto, ni de partes del mismo, en caso de daños causados por el uso incorrecto.
- Seite 5 다음과 같은 부적절한 사용을 피해 주십시오: 제품 위에 올라 서는 것, 등받이 위에 앉는 것, 제품을 사다 리로 사용하는 것. Kartell은 제품의 부적절한 사용으로 인해 야기된 물건 또는 신체 손상에 대한 책임을 리로 사용하는 것. Kartell은 제품의 부적절한 사용으로 인해 야기된 물건 또는 신체 손상에 대한 책임을...
-
Seite 6: Ненадлежащее Использование
НЕНАДЛЕЖАЩЕЕ ИСПОЛЬЗОВАНИЕ: не следует вставать на сидение, садиться на спинку, НЕНАДЛЕЖАЩЕЕ ИСПОЛЬЗОВАНИЕ: не следует вставать на сидение, садиться на спинку, использовать изделие в качестве лестницы. Kartell снимает с себя любую ответственность использовать изделие в качестве лестницы. Kartell снимает с себя любую ответственность... - Seite 7 Elenco componenti List of components Liste der Bauteile Liste des composants Lista de componentes Lista de componentes 内容一覧 구성 요소 목록 Перечень компонентов...
-
Seite 8: Istruzioni Per Il Montaggio
ISTRUZIONI PER IL MONTAGGIO INSTRUCCIONES DE MONTAJE AVVERTENZE ADVERTENCIAS (A-B-C-D-E)FORI DI RIFERIMENTO (A-B-C-D-E)ORIFICIOS DE REFERENCIA A) 1 foro -base con piedini A) 1 orificio - base con patas B) 2 fori ripiano intermedio B) 2 orificios - estante intermedio C) 3 fori ripiano intermedio C) 3 orificios - estante intermedio D) 4 fori ripiano intermedio D) 4 orificios - estante intermedio... - Seite 9 조립 지침 주의 (A-B-C-D-E) 구멍 구분 A) 밑판과 다리 : 구멍 하나 B) 중간 선반 : 구멍 둘 C) 중간 선반 : 구멍 셋 D) 중간 선반 : 구멍 넷 E) 천장 : 구멍 다섯 주의: 본 상품의 조립 작업에는 두 명이 필요함 ИНСТРУКЦИИ...
- Seite 10 UTILIZZARE LA SCATOLA D’IMBALLO COME SUPERFICIE DI MONTAGGIO DELLA LIBRERIA PER EVITARE DI ROVINARE I PANNELLI TO AVOID SCRATCHING THE PANELS USE PACKING BOX AS SURFACE FOR ASSEMBLING BOOKCASE VERWENDEN SCHUTZ BESCHÄDIGUNG REGALWÄNDE VERPACKUNGSKARTON ALS MONTAGEFLÄCHE POUR EVITER D’ENDOMMAGER LES PANNEAUX, UTILISER LE CARTON DE L’EMBALLAGE COMME SURFACE DE MONTAGE DE LA BIBLIOTHEQUE USAR LA CAJA DE EMBALAJE COMO SUPERFICIE DE MONTAJE DE LA LIBRERÍA CON EL FIN DE NO DAÑAR LOS PANALES...
- Seite 11 Prendere la spalla con i fori di riferimento e avvitare con l’ausilio di un cacciavite i tiranti (F) nelle apposite sedi e preparare in sequenza i pannelli con i fori di riferimento 1-2-3-4-5 fori Ripetere le stese operazioni per i fori rimanenti. Ripetere fase 1 e 2 sulla spalla rimanente take the upright side panel with the reference holes and use a screwdriver to fasten the pull rods (F) into their holes: prepare the panels in sequence with their reference holes 1-2-3-4-5 holes.
- Seite 12 1つ穴~5つ穴の開いている側面パネル (上の図の左から2番目のパネル) に、 ドライバーで本体側ビス (F) を締め付けながら取り付けます。 上の1A~Eの記号を参照して、 1つ穴から5つ穴のある部分の両端 に、 順にビスを取り付けていきます。 残りの穴についても、 同じ作業を繰り返します。 もう一枚の側面パネ ルにも、 ステップ1とステップ2を繰り返して行います。 1-2-3-4-5 지정된 구멍이 있는 패널을 수직으로 놓고 제공된 나사(F)를 드라이버를 이용하여 지정된 곳에 조입니다 : 1-2-3-4-5 구멍의 구분을 참조하여 패널을 순서대로 준비합니다 나머지 구멍에 대해서도 동일한 방법으로...
- Seite 13 prendere il ripiano (A) quello contrassegnato con un foro applicare i piedini autoadesivi nella posizione indicata. A seguire accoppiarlo con la spalla riportante i fori di riferimento take shelf (A) which is marked by one hole, attach the self-adhesive feet in the indicated position. Then attach to the upright side panel with the reference holes Nehmen Sie den Einlegeboden (A) mit einem Loch und applizieren Sie die selbstklebenden Füße an der angezeigten Stelle.
- Seite 14 pegar na prateleira (A) marcada com um orifício e colocar os pés autocolantes na posição indicada. Em seguida, acoplá-la à peça de estrutura que contém o orifício de referência 1つ穴の開いた棚板 (A) を取り出し、 表示された位置に接着式の脚を貼り付けます。 さらに、 基準穴の開 いた側面パネル (最初にビスを取り付けたパネル) と合わせます。 구멍 하나가 있는 선반(A)에 접착제가 있는 다리를 지정된 곳에 붙인 후, 특정 구멍이 있는 수직 패널과 맞춥니다...
- Seite 15 prendere il pannello (B) ripetere le operazioni eseguite in fase 3 e fase 4 rispettando la foratura di corrispondenza. NB le sedi per inserimento minuteria (H) devono essere rivolte verso la base take panel (B) repeat the operations of phases 3 and 4 ensuring that the holes correspond. NB the holes for the fittings (H) must face downwards Nehmen Sie die Platte (B) Wiederholen Sie die Schritte der Phasen 3 und 4 unter Verwendung der entsprechenden Löcher.
- Seite 16 Ruotare la libreria di 90° facendo appoggiare la base al pavimento. Inserire i divisori nelle apposite sedi allargando i 2 ripiani rotate the bookcase 90° and set the base on the floor. Insert the dividers in their intended slots widening the 2 shelves Drehen Sie das Bücherregal um 90°, während die Bodenplatte auf dem Fußboden aufliegt.
- Seite 18 inseriti i divisori mettere in compressione i 2 ripiani con l’ausilio di un elastico (G) dato in dotazione. Ripetere le operazioni eseguite in fase 3-4-5-6-7 per i rimanenti componenti rispettando sempre la foratura di riferimento (C-D-E) once the dividers are inserted compress the 2 shelves using the elastic (G) which is supplied for that purpose.
- Seite 20 montare la spalla di chiusura e ripetere le operazioni in fase 3 e 4 serrare tutti i particolari (H) della libreria compreso i precedentemente serrati. Al termine tagliare gli elastici FACENDO ATTENZIONE AL RITORNO DELLO STESSO. mount the upright side panel to close and repeat the operations of phase 3 and 4 tighten all the screws (H) of the bookcase including those previously fastened.
- Seite 21 установите верхнюю панель и повторите операции 3 и 4 этапов Закрутите все детали (H) книжного шкафа, включая закрученные ранее. По завершению разрежьте шпагат ОСТОРОЖНО ПРИ ВОЗВРАТЕ...
- Seite 22 applicare i dischetti autoadesivi sui fori con inserita minuteria (H) per chiusura apply the self-adhesive diskettes to close the screw holes (H) Applizieren Sie zum Abschluss die selbstklebenden Plättchen auf den Löchern, in denen die Schrauben (H) stecken appliquer les disques autoadhésifs sur les trous dans lesquels la quincaillerie (H) a été insérée pour les fermer pegar los discos adhesivos en los orificios con la minutería (H) introducida para taparlos aplicar os discos autocolantes nos orifícios de introdução das peças de fixação (H) para fechar.
- Seite 24 Divisione Habitat • Via delle Industrie, 1 • 20082 Noviglio MI • 20082 Binasco MI tel. +39 02 90012 1 • fax +39 02 9009 1212 • www.kartell.it • e-mail: kartell@kartell.it...