Tesla 3 Gebrauchsanleitung
Vorschau ausblenden
Andere Handbücher für 3:
- Bedienungsanleitung ,
- Betriebsanleitungen (368 Seiten) ,
- Benutzerhandbuch (254 Seiten)

Verwandte Anleitungen für Tesla 3


Inhaltszusammenfassung für Tesla 3
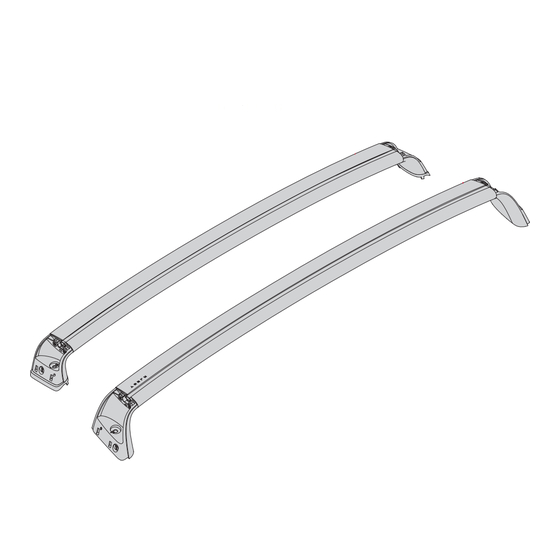
- Seite 1 Model 3 Roof Rack Owner’s Manual Modell –3 Dachträger Gebrauchsanleitung Porte-bagage de toit Modèle 3 Manuel d'utilisation...
- Seite 8 Anleitung (Fortsetzung)/Instructions (Contenu) clip-einführhilfe 10. schlüssel sechskantschlüssel maßband 12. clips 4. hinterer querträger 13. abriebschutz (vordere fahrerseite) vorderer querträger 14. abriebschutz (vordere beifahrerseite) 6. fußhalter für die vordere fahrerseite 15. abriebschutz (hintere fahrerseite) fußhalter für die vordere beifahrerseite 16. abriebschutz (hintere fahrerseite) fußhalter für die hintere fahrerseite 17.
- Seite 9 Anleitung/Instructions Reinigen Sie gründlich das Dach an der Stelle, an der sich quées sur le verre. Anhand der Symbole auf den Fußhaltern (6-9) ordnen Sie die Fußhalter ihrer Position auf dem Dach zu und wählen den passenden Abriebschutz (13-16) für die jeweiligen Fußhalter (6-9) aus.
- Seite 10 Anleitung (Fortsetzung)/Instructions (suite) Die Position der hinteren Pfeile ermitteln Sie, indem Sie 42 mm ab dem hinteren Rand des Glasdachs messen. du bord arrière du toit en verre 42 mm Bringen Sie den Abriebschutz auf der vorderen Fahrerseite des Fahrzeugs an und richten dazu den Pfeil auf dem Abriebschutz (13) an dem Pfeil auf dem Glas und den Rand des Abriebschutzes an der Zierlinie aus.
- Seite 11 Anleitung (Fortsetzung)/Instructions (suite) Ohne die Clip-Einführhilfe zu entfernen, setzen Sie den Clip (12) an der Pfeilposition ein. En conservant l’outil pour crochet en place, insérer un Ziehen Sie die Clip-Einführhilfe heraus und stellen sicher, dass der Clip gut in die Gegenstelle unter dem Glas eingerastet ist.
- Seite 12 Ziehen Sie die Flügelmuttern mit dem Sechskantschlüssel (2) fest, bis der Fuß sicher auf dem Fahrzeug befestigt ist. Wir empfehlen, bis 2.5-3.5 Nm festzuziehen. Um zu prüfen, ob der Fuß richtig installiert ist, ziehen Sie ihn in alle Richtungen und stellen sicher, dass er sich nicht bewegt.
- Seite 13 Anleitung (Fortsetzung)/Instructions (suite) Verriegeln Sie jeden Fuß mit dem Schlüssel (10). Verrouiller chaque pied avec la clé (10). Prüfen Sie, ob der vordere und hintere Querträger fest installiert ist, indem Sie ihn kräftig in alle Richtungen ziehen. solidement installées en tirant vigoureusement dans toutes les directions.
- Seite 14 20 km 50 km...
- Seite 15 CAR WASH AUTOWÄSCHE LAVE-AUTO Maximum Weight 65 kg (150 lbs) Höchstlast für das Fahrzeugdach Charge maximale sur le toit kg/lb kg/lb Maximum Weight Höchstlast für das Fahrzeugdach kg/lb Charge maximale sur le toit...
- Seite 16 DE WICHTIGE WARNHINWEISE EN IMPORTANT WARNINGS Rack Installation Wichtige Warnhinweise Inadequately secured loads and incorrectly mounted roof Unzureichend abgesicherte Ladungen und unsachgemäß montierte racks and accessory racks can come loose during travel and Gepäckträger und Zusatzträger können sich während der Fahrt cause serious accidents! Therefore, installation, handling lockern und schwere Unfälle hervorrufen! Deswegen bei Montage, and use must be carried out in accordance with product and...
- Seite 18 Burgemeester Stramanweg 122 1101 EN, Amsterdam Netherlands Tesla 1498781-00-H Yakima PN 1035908 Rev H Type A per DIN 75-302 DIN 75-302 Type A Model 3 Roof Rack Owner’s Manual Modell –3 Dachträger Gebrauchsanleitung Manuel d'utilisation – Porte-bagage de toit Modèle 3...