
Verwandte Anleitungen für QIMMIQ Blimp


Inhaltszusammenfassung für QIMMIQ Blimp
- Seite 1 Guide de l'utilisateur User guide Manual de usuario Bedienungsanleitung Manuale dell'utente Blimp...
-
Seite 2: Inhaltsverzeichnis
Sommaire PRECAUTIONS EN MATIERE DE SANTE ET DE SECURITE Lésions dues aux mouvements répétitifs et à la fatigue oculaire Aimants Utilisation et entretien Mise en garde concernant le respect de la vie privée Batterie Animaux domestiques POUR VOUS AIDER A DEMARRER Avant de commencer Batterie Connexions... -
Seite 3: Precautions En Matiere De Sante Et De Securite
Le drone Blimp ne doit pas être utilisé par des enfants de moins de 14 ans. Pour faire voler le drone Blimp à l’intérieur, installez la coque avec les anneaux de protection afin de le protéger en cas de collision avec d'autres objets. -
Seite 4: Batterie
Pour plus d'information, contactez les autorités locales de gestion des déchets solides. Animaux domestiques Évitez d’utiliser le drone Blimp tout près des animaux domestiques, en particulier les chiens de compagnie. Le drone Blimp est doté d’un générateur à ultrasons (Fréquence d’émission : 40 kHz). Les ondes ultrasoniques perturbent certains animaux domestiques, plus particulièrement les chiens. -
Seite 5: Pour Vous Aider A Demarrer
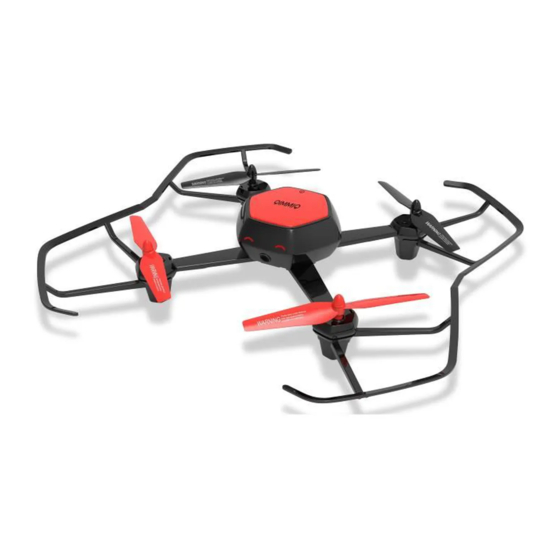
POUR VOUS AIDER A DEMARRER Description Principales données techniques : Dimensions du drone Blimp : L : 40 cm × P : 40 cm × H : 7CM (avec couvercle de protection) Poids du drone Blimp : 120 g ... - Seite 6 Préparation du vol TÉLÉCOMMANDE Utilisez un tournevis pour ouvrir le couvercle du compartiment à piles (figure 1) Placez les piles selon les indications dans le compartiment à piles (figure 2) Remettez le couvercle en le fixant avec une vis (figure 3 Instructions pour charger la batterie : Prise sur le drone Batterie Li-po 3,7V 650mAh...
-
Seite 7: Téléchargement De L'application
Téléchargez l’application pour commencer à voler tout de suite ! Téléchargez et installez l’application à l’aide d’un portable/tablette SYSTÈME ANDROID Recherchez « Qimmiq-BLIMP» dans Google Play, la télécharger et l’installer sur votre portable/tablette SYSTÈME iOS Recherchez « Qimmiq-BLIMP» dans App Store, la télécharger et l’installer sur votre portable/tablette ATTENTION : L’indicateur de vibration sera bloqué... -
Seite 8: Vol
Environnement du vol : Faites beaucoup de pratiques avant de passer au vol proprement dit REMARQUE Le témoin rouge se met à clignoter dès que la batterie devient faible. Vous devez les remplacer par des piles neuves. Distance de 2m Distance de 3m Distance de 2,5m Connecter/Déverrouiller :... - Seite 9 3. Mettez l’interrupteur de l'émetteur sur marche, poussez vers le haut puis tirez vers le bas la manette des gaz, les témoins de l'émetteur et du quadrirotor s’allument, indiquant que la connexion est établie avec succès. 4. Les figures suivantes montrent trois méthodes de déverrouillage. Les quatre hélices tournent lentement lors du déverrouillage du quadrirotor, indiquant que le déverrouillage s'est effectué...
- Seite 10 Tirez la manette des gaz à gauche ou à droite pour que le nez du quadrirotor pointe à gauche ou à droite. Vol latéral Tirez la manette de Profondeur/Ailerons à gauche ou à droite pour que le quadrirotor vole vers le côté gauche ou le côté...
- Seite 11 Retournement avant/arrière/gauche/droite Appuyez sur le bouton de retournement, poussez ensuite la manette de Profondeur vers l'avant ou vers l'arrière pour effectuer un retournement vers l'avant ou vers l'arrière. Réglages fin : Réglage fin avant/arrière avant Haut Bas Lorsque le quadrirotor est en train de voler vers l’avant/arrière, vous pouvez corriger sa position en poussant le bouton de réglage fin vers le bas/vers le haut.
- Seite 12 Gauche Droite Lorsque le quadrirotor est en train de voler sur le côté, vous pouvez corriger sa position en poussant le bouton de réglage fin à gauche/droite. Réglage fin pour tourner à gauche/droite. Sens antihoraire Sens horaire Gauche Droite Lorsque le quadrirotor est en train de se retourner/déplacer à gauche/droite, vous pouvez corrigez sa position en appuyant sur le bouton de réglage fin Bouton de gauche à...
-
Seite 13: Informations Generales
Réinitialisation du quadrirotor : Vous devez réinitialiser le quadrirotor s'il n'arrive plus à voler normalement, même si l'émetteur a déjà été réinitialisé. Méthode de réinitialisation : Placez le quadrirotor au sol, l’allumer, après le réglage de la fréquence, baissez la manette de direction vers la gauche, la maintenir pendant 2-3 secondes, attendez que la lumière du quadrirotor clignotante devienne fixe (Figure droite). -
Seite 14: Modifications
QIMMIQ™ se réserve le droit d’apporter des modifications et améliorations à la conception du produit et à son guide d’utilisation sans aucune restriction et sans obligation d’en avertir les utilisateurs. Dans le cadre de notre objectif permanent d’actualisation et d’amélioration de nos produits, il est possible que le produit que vous avez acheté... - Seite 15 User guide - Blimp Content HEALTH AND SAFETY PRECAUTIONS Repetitive motion injuries and eyes train Magnets Use and maintenance Warning on invasion of privacy Battery Domestic animals GETTING STARTED Before you begin Battery Connection FLIGHT Before you begin Piloting GENERAL INFORMATION...
-
Seite 16: Health And Safety Precautions
Blimp Drone is not suitable for use by children under 14 years of age. To fly the Blimp Drone indoors, install the hull with guard rings in order to protect the Blimp Drone in case of collision with any object. -
Seite 17: Warning On Invasion Of Privacy
Internet or any other medium. Do not circulate a degrading image or one which could undermine the reputation or dignity of an individual. The use of the Blimp Drone for surveillance or espionage is strictly forbidden and could result in your prosecution under the law. Check that your use of the cameras on board the Blimp Drone complies with the legal provisions on the protection of privacy. -
Seite 18: Domestic Animals
Avoid using the Blimp Drone around domestic animals, particularly pet dogs. The Blimp Drone incorporates an ultrasound altimeter (emission frequency: 40kHz). Ultrasonic waves are known to disturb certain domestic animals, most especially dogs. Using the Blimp Drone in the company of a dog may lead to it behaving erratically or perhaps even dangerously. -
Seite 19: Remote Controller
Preparation for Flight REMOTE CONTROLLER Remote control installation instructions: Use screwdriver to open the battery cover (figure 1) Base on the instruction in the battery slot to put battery (figure 2) Tighten the screws in battery cover (figure 3) - Seite 20 Battery charging instructions: Remove the battery from aircraft before charging, place the adopter and battery socket in right way (Figure2). When charge it will have Red light on adopter, after 90 minutes when the charge completed it will be off. During the normal flight, if aircraft light flash rapidly, it means need to replace the battery/re- charge the battery.
-
Seite 21: Flight
Download the APP to start flying today! Download and install the APP by mobile/PAD ANDROID SYSTEM Search ‘QIMMIQ-BLIMP’ in Google Play, download and install it on your mobile/pad iOS SYSTEM Search ‘QIMMIQ-BLIMP’ in APP Store, download and install it on your iphone/ipad. - Seite 22 Connect/Unlock: “Front” “Back” as the right figure, Place quadcopter on level ground, put quadcopter’s head in front. Back aim at transmitter. Press the top power switch, quadcopter’s light flash. Open the transmitter switch, push the throttle stick, pull down the throttle stick, the transmitter’s indicator light will be bright, the quadcopter light also bright, it means frequency connect successfully.
- Seite 23 Push the elevator/aileron up or down, he quadcopter flies forward or backward. Turn left and right Pull the throttle left or right, the quadcopter nose turns to left or right. Sideward fly Pull the elevator/aileron left or right, the quadcopter flies to left side or right side. Flip left flip right...
- Seite 24 Press the flip button, after that push the elevator left or right for left and right flip. Front flip back flip Press the flip button, after that push the elevator front or back for front and back flip. Fine-tuning operation: Forward/Backward fine-tuning...
- Seite 25 When the quadcopter keeps flying forward/backward, you can correct it by pressing fine-tunning button down/up. Sideward fly fine-tuning When the quadcopter keeps flying sideward, you can correct it by pressing fine-tuning button left/right. Turn left/right fine-tuning When the quadcopter keeps rolling/head move left/right, fix it by pressing fine-tuning button left to right/right to left.
-
Seite 26: General Information
Drone. In this respect you should ensure that you always operate the Drone in compliance with this Quick Start Guide and our Safe Use of the Drone instructions. QIMMIQ also reminds you that you should not use the Drone for any unauthorised or unlawful purposes, as you will otherwise be fully liable for any loss or damage caused as a result of such unauthorised use. -
Seite 27: Disposal Of This Product At The End Of Its Life
QIMMIQ™ reserves the right to amend or improve the product design or user guide without any restrictions and without any obligation to notify users. As part of our ongoing objective to upgrade and improve our products, the product that you have purchased may therefore differ slightly from the model described in this guide. - Seite 28 Manual de usuario - Blimp Contenido PRECAUCIONES CONCERNIENTES A LA SALUD Y SEGURIDAD Lesiones por movimientos repetitivos y vista cansada Imanes Utilización y Mantenimiento Advertencia concerniente a la invasión de la privacidad Batería Animales domésticos PRIMEROS PASOS Antes de comenzar Batería...
-
Seite 29: Precauciones Concernientes A La Salud Y Seguridad
Utilización y Mantenimiento El dron Blimp no es apto para niños menores de 14 años. Para pilotar el dron Blimp en interiores, instale el casco con los anillos de protección a fin de protegerlo en caso de colisión con algún objeto. -
Seite 30: Animales Domésticos
(frecuencia de emisión: 40 kHz). Se sabe que las ondas ultrasónicas pueden perturbar a ciertos animales domésticos, muy especialmente a los perros. Utilizar el dron Blimp en compañía de un perro puede ocasionar que este se comporte de forma... -
Seite 31: Primeros Pasos
PRIMEROS PASOS Descripción Características técnicas principales: Tamaño del dron Blimp: 40 cm × 40 cm × 7 cm (cubierta de protección incluida) Peso del dron Blimp: 120 g Distancia de vuelo: de 50 a 100 m ... -
Seite 32: Control Remoto
Preparación para el vuelo CONTROL REMOTO Instrucciones de instalación del control remoto: Utilice el destornillador para abrir el compartimento de las pilas (figura 1). Coloque las pilas en función de las instrucciones en las ranuras del compartimento de las pilas (figura 2). -
Seite 33: Descarga De La Aplicación
SISTEMA iOS Busque la aplicación "QIMMIQ-BLIMP" en App Store, descárguela e instálela en su iPhone o iPad. PRECAUCIÓN : el indicador de vibración se bloquea cuando el modo de vibración está apagado en los ajustes de "Sonidos" de iOS... -
Seite 34: Vuelo
VUELO Entorno para el vuelo: Por favor, tenga en cuenta los procedimientos recomendados antes de empezar a pilotar. ATENCIÓN Si la luz indicadora roja continuase parpadeando, esto sería indicativo de que las pilas ya no tienen carga suficiente. Las deberá reemplazar con pilas nuevas. - Seite 35 8. La figura siguiente muestra tres maneras de desbloquear. Las cuatro paletas rotarán lentamente al desbloquear el cuadricóptero, lo que indica un desbloqueo satisfactorio. Nota: No pulse ningún botón tras desbloquear el dron que va a pilotar inmediatamente. Si debe detener o bloquear el motor, pulse el mismo botón.
- Seite 36 Tire del acelerador hacia la izquierda o derecha y la punta del cuadricóptero girará a la izquierda o derecha. Vuelo lateral Tire del elevador/alerón hacia la izquierda o derecha y el cuadricóptero volará hacia el lado izquierdo o derecho. Volteretas a la izquierda o derecha Volteretas hacia delante/atrás/izquierda/derecha Pulse el botón de voltereta y luego empuje el elevador hacia la izquierda o derecha para hacer volteretas hacia la izquierda y derecha.
- Seite 37 Volteretas hacia delante/atrás/izquierda/derecha Pulse el botón de voltereta y luego empuje el elevador hacia adelante o atrás para hacer volteretas hacia delante y hacia atrás. Procedimiento de ajuste de precisión: Ajuste de precisión adelante/atrás Parte delantera Arriba/abajo Mientras que el cuadricóptero esté volando hacia delante/atrás, pulse el botón de ajuste de precisión hacia arriba/abajo si necesita corregir el vuelo.
- Seite 38 Izquierda/derecha Mientras que el cuadricóptero esté volando lateralmente, pulse el botón de ajuste de precisión hacia la izquierda/derecha si necesita corregir el vuelo. Ajuste de precisión de giro a la izquierda/derecha En sentido contrario a las agujas del reloj En el sentido de las agujas del reloj Izquierda/derecha Pulse el botón de ajuste de precisión de izquierda a derecha o viceversa para solucionar el balanceo/cabeceo o movimientos a la izquierda/derecha persistentes.
-
Seite 39: Informacion General
En lo que a esto respecta, debe asegurarse de pilotar siempre el dron según esta guía de inicio rápido y nuestras instrucciones de utilización segura del dron. QIMMIQ también le recuerda que no debe utilizar el dron para propósitos no autorizados o ilícitos, de lo contrario deberá... -
Seite 40: Modificaciones
QIMMIQ™ se reserva el derecho de modificar o mejorar el diseño del producto o la guía de utilización sin restricción alguna y sin la obligación de informar a los usuarios. Como parte de nuestro objetivo permanente de actualizar y mejorar nuestros productos, el producto que usted ha adquirido podría diferir ligeramente del modelo descrito en esta guía. - Seite 41 Bedienungsanleitung - Blimp Inhalt GESUNDHEITS- UND SICHERHEITSHINWEISE Verletzungen durch wiederholte Bewegungen und Überanstrengung der Augen Magneten Gebrauch und Wartung Warnhinweis zur Verletzung der Privatsphäre Batterien Haustiere ERSTE SCHRITTE Bevor Sie beginnen Batterien Verbindung FLUG Bevor Sie beginnen Steuerung ALLGEMEINE HINWEISE...
-
Seite 42: Gesundheits- Und Sicherheitshinweise
Stillstand gekommen sind, bevor Sie mit der Blimp Drohne hantieren. Achten Sie darauf, dass sich während des Betriebs keine Personen dichter als 1 m der Blimp Drohne nähern und dass jederzeit ein ausreichender Abstand zwischen den Propellern und Personen, Haustieren oder Gegenständen eingehalten wird. -
Seite 43: Batterien
Fliegen Sie die Blimp Drohne nicht in unmittelbarer Nähe von Haustieren, insbesondere Hunden. Die Blimp Drohne ist mit einem Ultraschall-Höhenmesser ausgestattet (Frequenz: 40 kHz). Ultraschall ist dafür bekannt, bestimmte Haustiere, insbesondere Hunde, zu irritieren. Das Fliegen der Blimp Drohne mit einem Hund in unmittelbarer Nähe kann zu dessen erratischem oder gar gefährlichen Verhalten führen. -
Seite 44: Überblick
Überblick Technische Daten: Größe: L: 40 cm × B: 40 cm × H: 7 cm (mit Schutzabdeckung) Gewicht: 120 g Reichweite: 50 - 100 m Ladezeit: 90 Minuten Flugzeit: 8-10 Minuten Batterien: Quadrocopter Akku (integriert): 3,7 V / 650 mAh Lithium-Polymer-Akku ... - Seite 45 Flugvorbereitung FERNSTEUERUNG Batterien in Fernsteuerung einsetzen (Abbildung 1) (Abbildung 2) (Abbildung 3) Schrauben Sie das Batteriefach auf (Abbildung 1). Setzen Sie die Batterien mit korrekter Polarität ein, wie im Batteriefach gekennzeichnet (Abbildung 2). Schrauben Sie das Batteriefach wieder zu (Abbildung 3). Akku des Fluggeräts laden Anschluss Drohne 3,7 V/650 mAh Lithium-Polymer-Akku...
- Seite 46 Nehmen Sie den Akku vor dem Laden aus dem Fluggerät und schließen Sie das Ladekabel an (Abbildung 2). Während des Ladezyklus leuchtet die rote LED. Nach 90 Minuten ist der Ladezyklus beendet und die LED erlischt. Blinkt während des Fluges die LED auf dem Fluggerät schnell, so muss der Akku schnellstmöglich geladen werden.
-
Seite 47: App Herunterladen
Laden Sie die App herunter, um heute noch zu fliegen! Laden Sie die App herunter und installieren Sie sie auf Ihrem Mobilgerät. ANDROID-GERÄT Suchen Sie bei Google Play „QIMMIQ-BLIMP“, laden Sie die App auf Ihr Mobilgerät herunter und installieren Sie sie. iOS-GERÄT Suchen Sie im App Store „QIMMIQ-BLIMP“, laden Sie die App auf Ihr iPhone/iPad herunter und... - Seite 48 Verbinden/Starten: Front Heck Ein-/Ausschalter Gashebel/Seitenruder Seitenruder 1-Tasten-Start/-Landung Stellen Sie den Quadrocopter auf ebenem Boden mit der Front nach vorn auf. Das Heck ist auf die Fernsteuerung ausgerichtet. Drücken Sie den Ein-/Ausschalter oben, die LED auf dem Quadrocopter blinkt. Schalten Sie die Fernsteuerung ein und bewegen Sie den Gashebel-Joystick nach vorn. Dann bewegen Sie den Gashebel-Joystick nach unten.
- Seite 49 Bewegen Sie den Gashebel-Joystick nach vorn oder zurück, um den Quadrocopter steigen oder landen zu lassen. Vorwärts- und Rückwärtsflug Bewegen Sie den Höhenruder-/Querruder-Joystick nach vorn oder zurück, um den Quadrocopter vorwärts oder rückwärts fliegen zu lassen. Links- und Rechtskurve fliegen Bewegen Sie den Gashebel-Joystick nach links oder rechts, damit fliegt der Quadrocopter eine Links- oder Rechtskurve.
- Seite 50 Bewegen Sie den Höhenruder-/Querruder-Joystick nach links oder rechts, um den Quadrocopter seitwärts nach links oder rechts fliegen zu lassen. Rolle nach links oder rechts Überschlag/Looping Drücken Sie die Überschlag-Taste und bewegen Sie danach den Höhenruder-Joystick nach links oder rechts, um eine Rolle links oder rechts auszuführen.
- Seite 51 Feineinstellung : Vorwärts/rückwärts Feineinstellung Front Vorwärts Zurück Wenn der Quadrocopter vorwärts/rückwärts fliegt, können Sie eine Feineinstellung vornehmen, indem Sie den Joystick vorwärts oder zurück bewegen. Seitwärts fliegen Feineinstellung Links Rechts Wenn der Quadrocopter seitwärts fliegt, können Sie eine Feineinstellung vornehmen, indem Sie den Joystick nach links oder rechts bewegen.
-
Seite 52: Allgemeine Hinweise
Wenn sich der Quadrocopter beim Überschlag nach links und rechts neigt, drücken Sie die Feineinstellungs- Taste. Sorglos-Modus Der Sorglos-Modus ist leicht erklärt. Die einzige Bedingung ist, dass vor dem Start die Drohne so aufgestellt sein muss, dass ihre Front Ihrer Blickrichtung entspricht. Da der linke Joystick nichts mit der Ausrichtung zu tun hat (links ist immer links und rechts ist immer rechts, unabhängig von der Ausrichtung Ihrer Drohne), ist die Reaktion der Drohne auf das Seitenruder (rechter Joystick), die sich ändert. -
Seite 53: Warnung
Für weitere Informationen zur Entsorgung von Elektroschrott wenden Sie sich bitte an Ihre örtlichen Behörden. Alternativ wenden Sie sich an Ihren Fachhändler, von dem Sie Ihre Blimp Drohne gekauft haben - er kann Ihnen bei Fragen zum Recycling ebenfalls weiterhelfen. - Seite 54 Manuale dell'utente - Blimp Indice PRECAUZIONI PER LA SALUTE E LA SICUREZZA Lesioni da movimenti ripetitivi e affaticamento degli occhi Magneti Uso e manutenzione Avviso sull'invasione della privacy Batteria Animali domestici PER COMINCIARE Prima di iniziare Batteria Collegamento VOLO Prima di iniziare...
- Seite 55 Blimp Drone quando le eliche stanno ruotando e attendere finché le eliche non si sono completamente arrestate prima di maneggiare Blimp Drone. Occorre accertarsi che nessuno si trovi a meno di 1 metro da Blimp Drone quando in uso e che ci sia sempre una distanza sufficiente tra le eliche e le persone, animali e oggetti.
- Seite 56 Animali domestici Evitare di utilizzare Blimp Drone in presenza di animali domestici, in particolar modo di cani. Blimp Drone integra un altimetro ad ultrasuoni (frequenza di emissione: 40 kHz). Le onde ultrasoniche sono note per arrecare disturbo ad alcuni animali domestici, in...
- Seite 57 PER COMINCIARE Descrizione Contenuto della confezione: Dimensioni: L: 40 cm × P: 40 cm x A: 7 cm (con il coperchio protettivo) Peso: 120 grammi Distanza di volo: 50-100 metri Tempo di carica: 90 minuti Tempo in volo: 8-10 minuti ...
- Seite 58 Preparazione per il volo RADIOCOMANDO Istruzioni per l'installazione del radiocomando Utilizzare il cacciavite per aprire il vano batteria (Figura 1) Inserire la batteria secondo la polarità corretta indicata nel vano batteria (Figura 2) Chiudere il coperchio e stringere le viti (Figura 3) Istruzioni per la carica delle batterie: Presa sul drone Batteria Li-Po 3,7 V 650 mAh...
-
Seite 59: Download Dell'app
DOWNLOAD DELL'APP Scarica l'app per iniziare a volare subito! Scaricare e installare l'app per smartphone/tablet SISTEMA ANDROID Cercare "QIMMIQ-BLIMP" su Google Play, scaricare e installarlo su smartphone/tablet. SISTEMA iOS Cercare "QIMMIQ-BLIMP" sull'App Store, scaricare e installarlo su iPhone/iPad. ATTENZIONE: l'indicatore di vibrazione sarà bloccato quando la vibrazione viene spenta nelle "Impostazione... - Seite 60 VOLO Ambiente di volo: prendere dimestichezza con il velivolo prima di farlo volare. AVVISO Se la spia rossa lampeggia in continuazione, significa che la batteria non ha energia a sufficienza. Occorre sostituire le batterie con altre nuove. Distanza 2 m Distanza 3 m Distanza 2,5 m Collegamento, accensione:...
- Seite 61 Premere l'interruttore sul radiocomando, premere la leva del gas, premere la leva del gas in basso e la spia del radiocomando si illuminerà insieme alla luce del quadricottero, indicando che la connessione è andata a buon fine. La seguente immagine mostra le tre modalità di accensione. Le quattro eliche ruoteranno lentamente quando si accende il quadricottero, indicando che l'accensione è...
- Seite 62 Spostamento laterale Premere la leva di ascesa/alettone a sinistra o a destra per far spostare lateralmente il quadricottero a sinistra o a destra. Capovolgersi a sinistra o a destra Capovolgimento in avanti/indietro/a sinistra/a destra Premere il pulsante di capovolgimento e successivamente premere la leva di ascensione a sinistra o a destra per far capovolgere il drone a sinistra o a destra.
- Seite 63 Capovolgimento in avanti/indietro/a sinistra/a destra Premere il pulsante di capovolgimento e successivamente premere la leva di ascensione in alto o in basso per far capovolgere il drone in avanti o indietro. Calibrazione: Calibrazione in avanti/indietro Parte anteriore Su Giù Quando il quadricottero va alla deriva in avanti/indietro, è possibile correggere la posizione premendo il pulsante di calibrazione giù/su.
- Seite 64 Sinistra destra Quando il quadricottero va alla deriva di lato, è possibile correggere la posizione premendo il pulsante di calibrazione a sinistra/destra. Calibrazione della rotazione a sinistra/destra Senso antiorario Senso orario Sinistra destra Quando il quadricottero continua a ruotare verso sinistra/destra, è possibile correggere il movimento tramite la calibrazione Pulsante da sinistra a destra/da destra a sinistra Modalità...
- Seite 65 Reset del quadricottero Quando il quadricottero non è in grado di volare normalmente anche dopo il reset del radiocomando, è possibile tentare il reset del quadricottero. Per eseguire il reset: posizionare il quadricottero a terra, accenderlo e dopo averlo connesso al radiocomando, premere verso il basso a sinistra le leve mantenendole premute per 2-3 secondi;...
- Seite 66 QIMMIQ™ si riserva il diritto di correggere o migliorare il design del prodotto o il manuale dell'utente senza alcun limite e senza l'obbligo di avvisare l'utente. Come parte di un progetto continuo per aggiornare e migliorare i nostri prodotti, il prodotto acquistato può...