Herunterladen Diese Seite drucken

R&G LP0266BK Montageanleitung

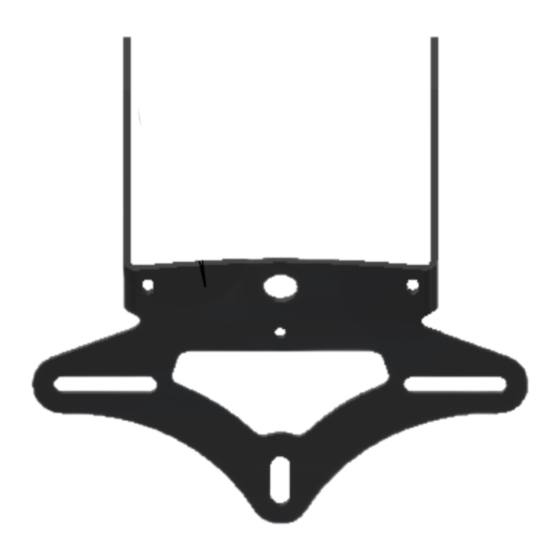
Kennzeichenhalter ktm 690 smc-r 2019

Werbung

Verfügbare Sprachen

Verfügbare Sprachen

Page 1 of 24
FITTING INSTRUCTIONS FOR LP0266BK LICENCE PLATE BRACKET
(FOR USE WITH STANDARD AND R&G MINI INDICATORS (8mm))
THIS KIT CONTAINS THE ITEMS PICTURED AND LABELLED BELOW.
DO NOT PROCEED UNTIL YOU ARE SURE ALL PARTS ARE PRESENT.
Please note that the way the kit is packed does not necessarily represent the way of mounting to the
T
HE PARTS SHOWN MAY BE REPRESENTATIVE ONLY
Digital copies of these instructions are available to download from
Please note that in cases where kits are packed with rubber washers holding the components onto the bolt
Unit 1, Shelley's Lane, East Worldham, Alton, Hampshire, GU34 3AQ
Tel: +44 (0)1420 89007 Fax: +44 (0)1420 87301
KTM 690 SMC-R 2019-
bike
GENERAL TORQUE SETTINGS
M4 BOLT = 8Nm
M5 BOLT = 12Nm
M6 BOLT = 15Nm
M8 BOLT = 20Nm
M10 BOLT = 40Nm
– the rubber washers should be thrown away!
TOOLS REQUIRED
Set of metric Allen keys to include 3 and 4mm A/F .
Socket set to include 8, 12 and 13mm A/F sockets and wrench.
T25 andT30 Torx bit or key.
6 and 13mm Spanners.
Small amount of super glue.
Phillips driver.
Heat gun or hair dryer.
R&G Racing
Email:
info@rg-racing.com
(
FOR CLARITY OF INSTRUCTIONS ONLY
www.rg-racing.com
www.rg-racing.com
LP0266
)

Werbung

loading

Inhaltszusammenfassung für R&G LP0266BK

  • Seite 1 Page 1 of 24 LP0266 FITTING INSTRUCTIONS FOR LP0266BK LICENCE PLATE BRACKET KTM 690 SMC-R 2019- (FOR USE WITH STANDARD AND R&G MINI INDICATORS (8mm)) THIS KIT CONTAINS THE ITEMS PICTURED AND LABELLED BELOW. DO NOT PROCEED UNTIL YOU ARE SURE ALL PARTS ARE PRESENT.
  • Seite 2 Page 2 of 24 LP0266 LEGEND ITEM 1 = LICENCE PLATE BRACKET (TB0266 PART 1) (x1). ITEM 2 = SUPPORT BRACKET (TB0266 PART 2) (x1). ITEM 3 = COVER SEAL BRACKET (TB0266 PART 3) (x1). ITEM 4 = RUBBER WIRING GROMMET (RB0010) (x1). ITEM 5 = M6 WASHERS (x2).
  • Seite 3 Page 3 of 24 LP0266 ITEM 11 = M6 x 16mm LONG BUTTON HEAD BOLTS (x2). ITEM 12 = SIDE MOUNT SPACERS (S0802=3mm THICK) (x2). ITEM 13 = REFLECTOR (REFL 1) (x1). ITEM 14 = BLANKING GROMMETS (RB50-20-00FG) (x2). ITEM 15 = IWC0002 MINI INDICATOR WIRING COVERS (x2). ITEM 16 = REAR LIGHT SHROUD (LA0003 SHROUD) (x1).
  • Seite 4 Page 4 of 24 LP0266 Picture 5 Picture 6 Picture 7 Picture 8 Picture 9 Picture 10 R&G Racing Unit 1, Shelley’s Lane, East Worldham, Alton, Hampshire, GU34 3AQ Tel: +44 (0)1420 89007 Fax: +44 (0)1420 87301 www.rg-racing.com Email: info@rg-racing.com...
  • Seite 5 Page 5 of 24 LP0266 Picture 11 Picture 12 Picture 13 Picture 14 Picture 15 Picture 16 R&G Racing Unit 1, Shelley’s Lane, East Worldham, Alton, Hampshire, GU34 3AQ Tel: +44 (0)1420 89007 Fax: +44 (0)1420 87301 www.rg-racing.com Email: info@rg-racing.com...
  • Seite 6 Page 6 of 24 LP0266 Picture 17 Picture 18 Picture 19 Picture 20 Picture 21 Picture 22 R&G Racing Unit 1, Shelley’s Lane, East Worldham, Alton, Hampshire, GU34 3AQ Tel: +44 (0)1420 89007 Fax: +44 (0)1420 87301 www.rg-racing.com Email: info@rg-racing.com...
  • Seite 7 Page 7 of 24 LP0266 Picture 23 Picture 24 Picture 25 Picture 26 Picture 27 Picture 28 R&G Racing Unit 1, Shelley’s Lane, East Worldham, Alton, Hampshire, GU34 3AQ Tel: +44 (0)1420 89007 Fax: +44 (0)1420 87301 www.rg-racing.com Email: info@rg-racing.com...
  • Seite 8: Fitting Instructions

    Page 8 of 24 LP0266 Picture 29 Picture 30 FITTING INSTRUCTIONS • Remove the seat using the pull cable arrowed in picture 1. • Remove the two bolts and spacers arrowed in picture 2. • Remove the bolt arrowed in picture 3 (this allows easier removal of the fuel cap surround). •...
  • Seite 9 Page 9 of 24 LP0266 If reusing the original indicators • If using the original indicators, please fit to the new licence plate bracket (item 1) as shown in picture 27 ( and then repeat for the opposite indicator). • Cut and fit the rubber U channel (item 18) to the cover/sealing bracket (item 3) as shown in picture 20.
  • Seite 10 Page 10 of 24 LP0266 • Then connect the supplied connector (item 23) to the rear light as shown and detailed below. CON0061 WIRES-----------------------REAR LIGHT WIRES BROWN-------------------------------------BLACK=EARTH/RETURN YELLOW-------------------------------------RED=BRAKE LIGHT GREEN----------------------YELLOW=RUNNING/SIDE LIGHT AND LICENCE PLATE ILLUMINATOR Do not connect the white wire •...
  • Seite 11 Page 11 of 24 LP0266 • IMPORTANT: IF FITTING A FULL-SIZE LICENCE PLATE AND PLACING IT FAR DOWN ON THE LICENCE PLATE HANGER, THERE IS A SMALL CHANCE OF THE LICENCE PLATE HITTING THE BACK WHEEL UNDER HEAVY LOAD AND OVER LARGE BUMPS IN THE ROAD. IT IS YOUR RESPONSIBILITY TO CHECK FOR THIS POSSIBILITY AND TAKE AVOIDING ACTION.
  • Seite 12 Page 12 of 24 LP0266 NOTICE DE MONTAGE POUR LP0266BK SUPPORT DE PLAQUE KTM 690 SMC-R 2019- (MINI CLIGNOTANTS R&G ET CLIGNOTANTS STANDARD (8mm)) Le kit contient les articles exposés ci-dessous, vérifier que toutes les pièces soient présentes avant de procéder au montage.
  • Seite 13: Outils Requis

    Page 13 of 24 LP0266 OUTILS REQUIS • Clés Allen 3 et 4mm. • Clé à cliquet + douilles 8, 12 et 13mm. • T25 andT30 Torx bit or key. • 6 and 13mm Spanners. • Small amount of super glue. •...
  • Seite 14: Notice De Montage

    Page 14 of 24 LP0266 LÉGENDE ARTICLE 1 = SUPPORT DE PLAQUE (TB0266 PARTIE 1) (x1). ARTICLE 2 = SUPPORT DE FIXATION (TB0266 PARTIE 2) (x1). ARTICLE 3 = SUPPORT JOINT D’ÉTANCHÉITÉ (TB0266 PARTIE 3) (x1). ARTICLE 4 = PASSE FIL EN CAOUTCHOUC (RB0010) (x1). ARTICLE 5 = M6 RONDELLES (x2).
  • Seite 15 Page 15 of 24 LP0266 • Couper aux dimensions adéquates et coller la bande de mousse (article 20) sur la face supérieure du carénage. Si vous utilisez les mini clignotants R&G • Si vous utilisez des mini-clignotants, installez ceux de votre choix sur le nouveau support de plaque d'immatriculation (article 1) (code produit du mini-clignotant R&G RG371 pour le type à...
  • Seite 16 Page 16 of 24 LP0266 CONNECTEURS (ARTICLE 7) • Connectez ensuite le connecteur fourni (article23) sur le feu arrière, comme indiqué et détaillé ci- dessous. CON0061 FILS-----------------------FILS DE FEU ARRIERE MARRON-------------------------------------NOIR=TERRE/RETOUR JAUNE-------------------------------------ROUGE= FEU STOP VERT----------------------JAUNE=RUNNING/COTE FEU ET FEU DE PLAQUE •...
  • Seite 17 Page 17 of 24 LP0266 • Vous pouvez également couper et fermer (ou souder) la prise de connexion d'origine du feu arrière d'origine à l'aide des connecteurs (article 7), comme indiqué ci-dessous. FILS D’ORIGINE------------------------FILS R&G VERT------------------- JAUNE= RUNNING/COTE FEU ET FEU DE PLAQUE JAUNE---------------------- ROUGE=FEU STOP MARRON-----------------------NOIR=TERRE/RETOUR •...
  • Seite 18 Page 18 of 24 LP0266 MONTAGEANLEITUNG FÜR LP0266BK KENNZEICHENHALTER KTM 690 SMC-R 2019- (VERWENDUNG MIT STANDARD SOWIE R&G MINIBLINKER (8mm ALLE KIT-TEILE SIND UNTEN ABGEBILDET UND GEKENNZEICHNET. BEVOR SIE MIT DER MONTAGE BEGINNEN, ÜBERPRÜFEN SIE, DASS ALLE TEILE VORHANDEN SIND.
  • Seite 19: Sie Benötigen Folgendes Werkzeug

    Page 19 of 24 LP0266 SIE BENÖTIGEN FOLGENDES WERKZEUG: • Satz Inbusschlüssel inkl. 3 und 4mm A/F Inbusschlüssel • Steckschlüsselsatz inkl. 8, 12 und 13mm A/F Steckschlüssel • T25 undT30 Einsatz oder Schlüssel • 6 und 13mm Schraubenschlüssel • etwas Sekundenkleber •...
  • Seite 20 Page 20 of 24 LP0266 LIEFERUMFANG ARTIKEL 1 = KENNZEICHENHALTER (TB0266 TEIL 1) (x1) ARTIKEL 2 = BEFESTIGUNGSBÜGEL (TB0266 TEIL 2) (x1) ARTIKEL 3 = HALTERUNG ABDICHTUNG (TB0266 TEIL 3) (x1) ARTIKEL 4 = GUMMITÜLLE FÜR DIE KABEL (RB0010) (x1) ARTIKEL 5 = M6 UNTERLEGSCHEIBE (x2) ARTIKEL 6 = VERBINDUNG FÜR DIE BLINKER (CON0014) (x2) ARTIKEL 7 = VERBINDUNG FÜR DIE KENNZEICHENBELEUCHTUNG (CON00040 (x2)
  • Seite 21 Page 21 of 24 LP0266 MONTAGEANLEITUNG • Benutzen Sie den Seilzug, um den Sitz zu entfernen – siehe Abbildung 1. • Entfernen Sie die zwei Schrauben und Distanzhalter, die in Abbildung 2 mit Pfeilen gekennzeichnet sind. • Entfernen Sie die Schraube, die in Abbildung 3 markiert ist (um eine einfachere Entfernung des Verkleidungsteils am Tankdeckel zu ermöglichen).
  • Seite 22 Page 22 of 24 LP0266 Wenn Sie die Originalblinker wiederverwenden • Wenn Sie die Originalblinker wiederverwenden, bitte diese am neuen Kennzeichenhalter (Artikel 1) montieren wie in Abbildung 27 abgebildet (an beiden Seiten). • Den U-Kanal (Artikel 18) scheiden und an der Halterung-Abdeckung (Artikel 3) anbringen wie in Abbildung 20 abgebildet.
  • Seite 23 Page 23 of 24 LP0266 VERBINDUNGEN FÜR DIE KENNZEICHEN- BELEUCHTUNG (ARTIKEL 7) • Dann verbinden Sie die Verbindungen vom Kit (Artikel 23) mit der Rückbeleuchtung wie unten gezeigt und beschrieben: CON0061 KABEL -----------------------KABEL RÜCKBELEUCHTUNG BRAUN-------------------------------------SCHWARZ=ERDE/ZURÜCK GELB-------------------------------------ROT=BREMSLICHT GRÜN------------------GELB=STAND/SEITENLICHT UND KENNZEICHENBELEUCHTUNG Das weiße Kabel nicht verbinden •...
  • Seite 24 Page 24 of 24 LP0266 ORIGINAL KABEL ------R&G KABEL GRÜN---------------------- GELB=TAGES-/SEITENLICHT UND KENNZEICHENBELEUCHTUNG GELB ---------------------- ROT=BREMSLICHT BRAUN------------------ SCHWARZ=ERDE/ZURÜCK • Das weiße Kabel nicht verbinden • Nehmen Sie die original Kennzeichenbeleuchtung mit den Steckverbindern und schneiden Sie die Kabel ca. 4 cm weg vom Steckverbinder. Die drei Kabelenden abisolieren und die drei weiblichen Verbindungen vom Kit anbringen (Artikel 6 –...