Samsung DSB-A200C Gebrauchsanweisung
Inhaltsverzeichnis
Verfügbare Sprachen
Verfügbare Sprachen
Quicklinks
MF68-00316A
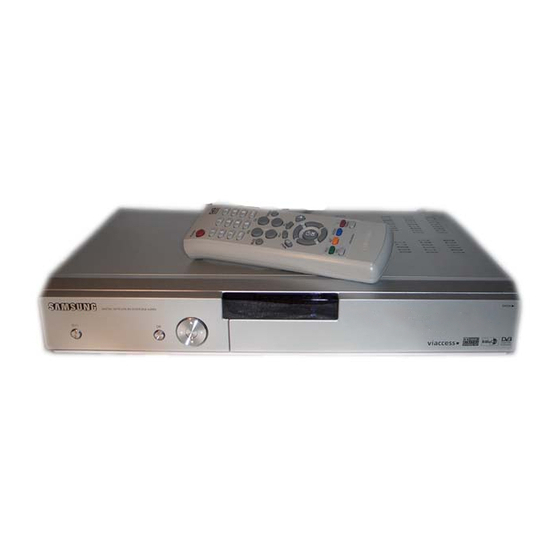
DIGITAL SATELLITE RECEIVER
DSB-A200C / DSB-A300V / DSB-A300W
CI, EM VIA, VIA CI
Instructions for use
Gebrauchsanweisung . . . . . . . . . D
Instructions for use . . . . . . . . . . . GB
Consignes d'utilisation . . . . . . . . F
Istruzioni per l'uso . . . . . . . . . . . . I
Instrucciones de uso . . . . . . . . . . E
DIGITAL SATELLITE RECEIVER
D
GB
F
I
E
REV. 1.0
Kapitel
Inhaltsverzeichnis
Fehlerbehebung

Verwandte Anleitungen für Samsung DSB-A200C


Inhaltszusammenfassung für Samsung DSB-A200C
- Seite 2 Istruzioni per l’uso ....I Instrucciones de uso ... . . E DSB-A200C / DSB-A300V / DSB-A300W CI, EM VIA, VIA CI...
- Seite 3 DSB-A200C / DSB-A300V / DSB-A300W CI, EM VIA, VIA CI Gebrauchsanweisung DIGITALER SATELLITEN RECEIVER...
-
Seite 4: Reinigung
SICHERHEITSANWEISUNGEN Diese Set-Top-Box (STB) wurde entsprechend internationalen Sicherheitsnormen gefertigt. Lesen Sie die folgenden empfohlenen Sicherheitsmaßnahmen sorgfältig durch. ANSCHLUSSWERTE: AC 100-240V ~, 50/60Hz ÜBERLASTUNG: Überlasten Sie keine Wandsteckdosen, Verlängerungskabel oder Adapter. Anderenfalls besteht die Gefahr eines Brands oder elektrischen Schlags. FLÜSSIGKEITEN: Halten Sie Flüssigkeiten von der Set-Top-Box fern. -
Seite 5: Inhaltsverzeichnis
INHALTSVERZEICHNIS ALLGEMEINE FUNKTIONEN Sicherheitsanweisungen ....... . . 1 1. ALLGEMEIN 4000 PROGRAMMIERBARE KANÄLE Allgemeine Funktionen . -
Seite 6: Anschließen Der Set-Top-Box
ANSCHLIESSEN DER SET-TOP BOX ANSCHLIESSEN DER SET-TOP BOX 1. AUFSTELLEN DES RECEIVERS 8. EINSETZEN DES COMMON INTERFACE-ZUGANGSMODULS UND DER SMARTCARD Die STB sollte an einem Ort mit guter Luftzirkulation aufgestellt werden. Die STB unterstützt Common Interface-Zugangsmodule (CI-CAM) gemäß DVB-Spezifikation. Stellen Sie sie nicht in einem vollkommen geschlossenen Schrank auf, in dem keine Luftzirkulation Die CI-CAM-Module enthalten einen integrierten intelligenten Kartenleser. -
Seite 7: Beschreibung
In diesem Steckplatz können Sie ein CA-Modul eines Diensteanbieters 8. VIDEO, AUDIO R/L An diese Cinchbuchsen werden externe Video- und Audiogeräte Ihrer Wahl einsetzen. (Modelle DSB-A200C, DSB-A300W) angeschlossen. H H i i n n w w e e i i s s : CA-Module und Smartcards werden nur von Diensteanbietern und 9. -
Seite 8: Fernbedienung
BESCHREIBUNG BESCHREIBUNG Fernbedienung 10. ALT (GELBE) Mit dieser Taste wird die Soundtrack-Liste für den aktuellen Dienst ausgewählt. 1. POWER Mit dieser Taste wird der Receiver eingeschaltet Diese Taste hat dieselbe Funktion wie die GELBE Schaltfläche im Menü Wenn bzw. in den Standby-Betrieb geschaltet. die Taste einmal gedrückt wird, wird die Soundtrack-Liste angezeigt. -
Seite 9: Grundfunktionen
GRUNDFUNKTIONEN GRUNDFUNKTIONEN 3. Auswählen eines Soundtracks 1. Bildschirmbanner Drücken Sie die GELBE (ALT) Taste, um die Soundtrack-Liste Bevor Sie Fernsehprogramme wiedergeben können, müssen Sie die Installation durchführen. anzuzeigen. Aus diesem Grund werden zu Anfang ausschließlich Menüs angezeigt. Drücken Sie und OK um einen Soundtrack auszuwählen. Sobald die Fernsehkanäle programmiert worden sind, wird das folgende Bild (Banner) angezeigt, wenn Sie von einem Kanal auf einen anderen umschalten: Kanal nummer... -
Seite 10: Programminformationen
GRUNDFUNKTIONEN GRUNDFUNKTIONEN 6.1 Dienstfavoriten 7. Programminformationen Drücken Sie die GRÜNE (TEXT) Taste auf der Fernbedienung, EPG - Programmmanager Electronic Program Guide um die Favoritenliste anzuzeigen. Mit Hilfe des Programmmanagers (Electronic Program Guide) können Sie Programminformationen für einzelne Kanäle anzeigen. Drücken Sie die GRÜNE (TEXT) Taste, um zwischen Gruppen-und Kanalliste umzuschalten. - Seite 11 GRUNDFUNKTIONEN GRUNDFUNKTIONEN 8. Untertitel 11. Audiomodus Wenn das zurzeit ausgestrahlte Programm untertitelt ist, Über die Taste BLAUE (AUDIO) können Sie zwischen links, können Sie die GRÜNE (TEXT) Taste drücken, um die aktuelle rechts oder Stereo auswählen. Liste mit den Sprachen für die Untertitelung anzuzeigen. So ändern Sie den Audiomodus: Wenn für das aktuelle Programm Untertitel verfügbar sind, Wählen Sie über die Taste BLAUE (AUDIO) links,...
-
Seite 12: Bedienen Des Receivers
BEDIENEN DES RECEIVERS BEDIENEN DES RECEIVERS Hauptmenü 1.1 LNB Einstellung In diesem Menü können Sie Satelliten- und LNB-Einstellungen Nachdem Sie das Antennensystem und die STB mit den entsprechenden Anschlüssen installiert für die Kanalsuche auswählen. Darüber hinaus können Sie die haben, gehen Sie wie folgt vor: Einstellungen für den 22-kHz-Ton ändern. -
Seite 13: Benutzermodus Wählen Sie "Antriebsmodus" Aus
BEDIENEN DES RECEIVERS BEDIENEN DES RECEIVERS 1.2.1 Benutzermodus 1.3 Solarsat-Einstellung Wählen Sie “Antriebsmodus” aus: Dieses Menü gilt nur für die Solarsat-Antenne. Sie können die Bewegungsart des Positionierers auswählen: Wenn Sie dieses Menü öffnen, wird die Meldung Kontinuierlich, Schritt oder Zeit. "Dieses Menü... -
Seite 14: Manuelles Scannen
BEDIENEN DES RECEIVERS BEDIENEN DES RECEIVERS 1.5 Manuelles Scannen 1.6 SMATV-Scannen Die Set-Top-Box verfügt über die Funktion Manuelles Scannen, Falls mehrere Parteien die Antenne und den LNB-Konverter um neue Kanäle und schwache Signale auswählen zu können. gemeinsam nutzen, suchen Sie den Dienst im Bereich 950 MHz Benutzer können hier die entsprechenden Kanaldaten eingeben. -
Seite 15: Kanalanordnung
BEDIENEN DES RECEIVERS BEDIENEN DES RECEIVERS 2. Kanalanordnung 2.4 Alle Kanäle löschen Drücken Sie bei eingeblendetem Bestätigungsfenster die Taste OK, Das Menü Kanalanordnung umfasst 7 Funktionen: um alle Kanäle zu löschen, und drücken Sie MENU / EXIT, um In diesem Menü können Sie Kanäle aus der Kanalliste entfernen, das Fenster zu schließen. -
Seite 16: Kanal Verschieben Und Bearbeiten
BEDIENEN DES RECEIVERS BEDIENEN DES RECEIVERS 2.7 Kanal verschieben und bearbeiten 3. Jugendschutz-Sperre Wählen Sie über die Tasten oder TV/RADIO die Liste der Mit der Funktion Jugendschutz-Sperre können Sie mithilfe eines Fernseh- bzw. Radiosender aus. vierstelligen PIN-Codes (Personal Identification Number) Kanäle Wählen Sie über die Tasten / , PG+/PG- oder die sperren und unerwünschte Zugriffe auf die STB unterbinden. -
Seite 17: Pin-Code Ändern
BEDIENEN DES RECEIVERS BEDIENEN DES RECEIVERS 3.2 PIN-Code ändern 4.2 OSD-Einstellung Wählen Sie die zweite Option PIN-Code ändern aus, Hier können Sie Transparenzebene, Anzeigedauer, Farbschema wenn Sie den PIN-Code ändern möchten. und Position der Bildschirmmenüs einstellen. Anschließend wird das folgende Menü angezeigt: Wählen Sie Transparenzebene aus. -
Seite 18: Medieneinstellungen
Position erreicht hat. Das angezeigte Bild wird entsprechend ausgerichtet. H H i i n n w w e e i i s s Externe Modems werden nicht von SAMSUNG, sondern nur von Diensteanbietern und bestimmten Fachgeschäften vertrieben. 4.5 Zeit- und Timer-Einstellung 4.3 Medieneinstellungen... -
Seite 19: Systeminformationen
Falls keine Aktualisierung erforderlich ist, wird die Meldung “Keine Software-Aktualisierung Familienfilters. notwendig.” angezeigt. Falls bekannt wird, dass für Samsung-Software ein Transponder gewechselt H H i i n n w w e e i i s s Dieser Dienst steht nicht auf allen Kanälen wird, wählen Sie über die Taste... -
Seite 20: Entsorgung
FEHLERSUCHE TECHNISCHE DATEN Stromversorgung Problem Mögliche Ursache Problemlösung Typ : SMPS Die LEDs der Frontblende Das Netzkabel ist nicht Schließen Sie das Netzkabel ordnungsgemäß Eingangsspannung : AC 100 - 240V~, 50/60 Hz leuchten nicht. Es liegt keine ordnungsgemäß angeschlossen. Sicherungswerte : 250 V/T1.6 AH Spannung an. - Seite 21 TECHNISCHE DATEN NOTIZEN AV- Ausgänge Scart-Buchse TV : VIDEO (CVBS, RGB) , AUDIO R und L Scart-Buchse VCR : VIDEO (CVBS, RGB) , AUDIO R und L Cinchbuchse : VIDEO (CVBS) , AUDIO R und L SPDIF : Digitaler Audioausgang Komponentenausgang (Y, Pb, Pr) : Ausgangspegel Y : 1Vp-p(75 Ω) Ausgangspegel Pb/Pr : 0.684Vp-p(75 Ω)