Vimar ELVOX 7549 Technisches Handbuch
Vorschau ausblenden
Andere Handbücher für ELVOX 7549:
- Technisches handbuch (41 Seiten) ,
- Installationsanleitung (9 Seiten)
Inhaltsverzeichnis
Werbung
Verfügbare Sprachen
Verfügbare Sprachen
Quicklinks
Manuale installatore - Installer guide
Manuel installateur - Technisches Handbuch
Instrucciones instalador - Manual do instalador
Εγχειρίδιο οδηγιών
TAB
7549
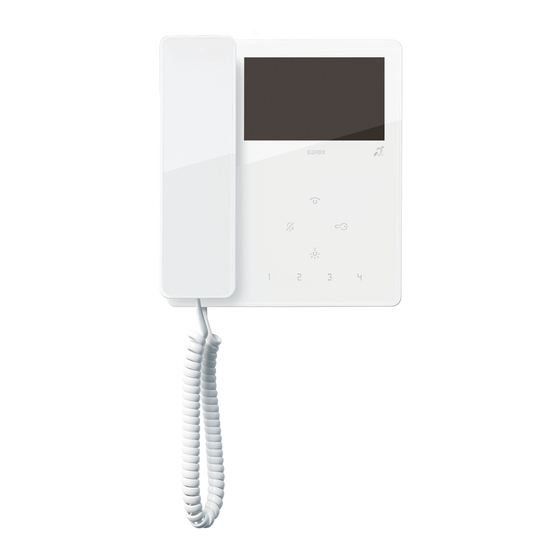
Videocitofono Tab con microtelefono 4,3"
Tab 4.3" monitor with handset
Portier-vidéo Tab avec combiné 4,3"
4,3"-Videohaustelefon Tab mit Hörer
Videoportero Tab con microteléfono 4,3"
Videoporteiro Tab com microtelefone 4,3"
Θυροτηλεόραση Tab με ακουστικό 4,3"
*
Werbung
Inhaltsverzeichnis

Verwandte Anleitungen für Vimar ELVOX 7549


Inhaltszusammenfassung für Vimar ELVOX 7549
- Seite 1 Manuale installatore - Installer guide Manuel installateur - Technisches Handbuch Instrucciones instalador - Manual do instalador Εγχειρίδιο οδηγιών 7549 Videocitofono Tab con microtelefono 4,3” Tab 4.3” monitor with handset Portier-vidéo Tab avec combiné 4,3” 4,3”-Videohaustelefon Tab mit Hörer Videoportero Tab con microteléfono 4,3” Videoporteiro Tab com microtelefone 4,3”...
- Seite 2 753A e la borchia di interconnessione Manutenzione 753B (acquistabili separatamente). Installabile a parete anche su scatole da incasso 8 moduli (Vimar V71318, V71718) tramite Eseguire la pulizia utilizzando un panno morbido. Non versare supporto 753S (acquistabile separatamente).
-
Seite 3: Technical Characteristics
In the event of trouble, call in specialized personnel. • Surface-wall mount or box installation. Can be fitted to the wall with plugs or a 3 modules (Vimar V71303, V71703) or circular 60 mm flush-mounting box (Vimar V71701). • LCD 4.3 in 16:9 display, resolution 480x272 pixels Installation rules •... -
Seite 4: Caractéristiques Techniques
1. Fixer la plaque au mur à l’aide des chevilles ou sur un boîtier 3 modules (Vimar V71303, V71703) ou un boîtier rond de 60 mm (Vimar V71701). 2. Câbler le bornier (fig. 6). 3. Réaliser la terminaison du signal vidéo (fig. 5). -
Seite 5: Wartung
Recyceln der Materialien, aus denen das Gerat besteht. Rechtsvorschriften. 1. Die Platte mit den Dübeln an der Wand oder an einem Ge- Entwicklung dieses Produkt mit der Software FreeRTOS häuse Typ 3 Module (Vimar V71303, V71703) bzw. an einem http://www.freertos.org/... -
Seite 6: Características Técnicas
• Montaje de superficie o en caja. Que se monta en la pared No abra, ni manipule el aparato. con tacos o bien en una caja de empotrar 3 módulos (Vimar En caso de avería, acuda a personal especializado. V71303, V71703) o redonda de 60 mm (Vimar V71701). -
Seite 7: Instalação
753A e da tomada de interligação 753B (adquiri- dos separadamente). Também instalável na parede em caixas Manutenção de embeber de 8 módulos (Vimar V71318, V71718) através do suporte 753S (adquirido separadamente). Faça a limpeza utilizando um pano macio. Não deite água no O artigo 7549 pode ser utilizado por portadores de próteses... -
Seite 8: Εγκατάσταση
1. Στερεώστε την πλάκα στον τοίχο μέσω των ούπα ή σε κουτί έγχρωμη οθόνη LCD 4,3 in, ακουστικό, μεγάφωνο για τις κλήσεις, τύπου 3 μονάδες (Vimar V71303, V71703) ή σε στρογγυλό κουτί χωρητικό πληκτρολόγιο για λειτουργίες θυροτηλέφωνου (άνοιγμα 60 mm (Vimar V71701). -
Seite 9: Inhaltsverzeichnis
TAB: 7549 Fig. 1 Abb. 1 Εικ. 1 1,60 / 1,65 m 1,20 m Fig. 3 Fig. 2 Abb. 2 Abb. 3 Εικ. 3 Εικ. 2... -
Seite 10: Fig. 4
TAB: 7549 Vista frontale • Front view • Vue de face • Frontansicht • Vista frontal • Vista frontal • Μπροστινή πλευρά • Fig. 4 Abb. 4 Εικ. 4 A = Autoaccensione B = Esclusione suoneria / utente assente C = Apertura serratura e segnalazione porta aperta D = Ausiliario 1 (luce scale) G = Regolazione volume, contrasto... - Seite 11 TAB: 7549 Funzione dei tasti • Function of the buttons • Fonction des touches • Tastenfunktionen • Función de las teclas • Função das teclas • Λειτουργία των πλήκτρων • Funzione autoaccensione/visualizzazione telecamere della targa anche in modalità ciclica. • Entrance panel camera self-start/view function also in cyclical mode. •...
- Seite 12 TAB: 7549 Segnalazioni Signals - Lampeggia ad ogni chiamata ricevuta dal posto in- - Blinks with each call received by the indoor station terno (con frequenza diversa tra chiamata interna o (with a different frequency between internal and exter- esterna). nal calls).
-
Seite 13: Videoterminierung
TAB: 7549 Terminazione Video Video Termination Terminaison Vidéo Selezionare Dip switch per la termi- Select DIP switch to terminate the Sélectionner le commutateur pour la nare il segnale video video signal terminaison du signal vidéo A) se il cavo del BUS entra nei morsetti A) if the BUS cable enters terminals 1, 2 A) si le câble du BUS arrive aux bornes 1, 2 e prosegue ad un altro posto in-... -
Seite 14: Fig. 6
TAB: 7549 Morsettiera di collegamento: Connection terminal block: Bornier de connexion : 1, 2 = Linea digitale BUS. 1, 2 = Digital BUS line. 1, 2 = Ligne numérique BUS. FP = Ingresso tasto chiamata fuoriporta FP = Input for landing call button (refer- FP = Entrée touche appel palier (riferimento al morsetto M). - Seite 15 TAB: 7549 Collegamento del posto interno art. 7549 in configurazione entra/esci Connecting the indoor station art. 7549 in the in/out configuration Raccordement du poste intérieur art. 7549 en configuration entrer/sortir Anschluss der Innensprechstelle Art. 7549 in Konfiguration ein/aus Conexión del aparato interno Art. 7549 en configuración entrar/salir Ligação do posto interno art.
-
Seite 16: Operazioni Preliminari
TAB: 7549 Operazioni preliminari 5) Rilasciare i tasti 6) Entro 25s, associare il codice ID del Capogruppo dall’ unità Dopo essere stato installato il dispositivo deve essere program- elettronica, seguendo la procedura descritta sul posto esterno mato, impostandogli un identificativo (pressione di un tasto, inserimento interno da tastiera). -
Seite 17: Regolazioni (In Conversazione)
TAB: 7549 2) Premere il tasto o il posto interno inizierà a riprodurre zione di default tra ( / ) finchè il posto interno l’ultima melodia in memoria. emette un segnale acustico. 3) Premere ripetutamente il tasto o per selezionare il tipo 5) Rilasciare il tasto e ripremere il tasto, il posto interno emette di melodia desiderata. - Seite 18 TAB: 7549 nell’impianto): sollevare il microtelefono e inviare la chiamata pre- Attraverso i tasti (sotto al microtelefono) regolare il mendo il tasto livello desiderato. Raggiunto il livello massimo o minimo si sente un segnale acustico acuto. Si regola durante la conversazione. Configurazione con Software SAVEPROG SaveProg è...
-
Seite 19: Preliminary Procedures
TAB: 7549 Preliminary procedures 6) Within 25s, pair the ID code of the Master from the electron- ic unit, following the procedure described on the speech unit (pushing a button, internal keyboard entry). After having installed the device, it must be programmed, giving it an identification number Note: Use the SaveProg software to program chime activation of (ID), which is unique for each appliance. -
Seite 20: User Configurations
TAB: 7549 emits a signal to confirm that the operation has been success- you want. ful. 4) Press the button to save the tune or wait 15s. At the end of Note: This procedure lets you manually reprogram the buttons ex- configuration, the blinking button goes out. - Seite 21 TAB: 7549 Operation Caution: For the indoor station to work, the ID code must have al- ready been configured. To check this, press a button on the mon- itor (but not the volume and brightness buttons): if an ID has been assigned to the monitor, one beep will sound, if no ID has been assigned or it has been deleted, 3 beeps will sound.
-
Seite 22: Opérations Préliminaires
TAB: 7549 Opérations préliminaires 6) Dans les 25 secondes qui suivent, associer le code ID du poste principal à partir de l'unité électronique extérieure en suivant la procédure décrite sur le poste extérieur (pression sur une Après avoir installé le dispositif, il faut le programmer et définir un identifiant touche, saisie interne par le clavier). - Seite 23 TAB: 7549 gnote et qu'on entende un signal sonore. ) et maintenir la pression jusqu'à ce que le 2) Appuyer sur la touche ou pour que le poste intérieur poste intérieur émette un signal sonore. reproduise la dernière mélodie enregistrée. 5) Relâcher la touche et appuyer à...
- Seite 24 TAB: 7549 térieurs (10 niveaux avec le poste intérieur en Appel à un standard conversation) Pour appeler un standard (selon l'installation), soulever le combi- né et envoyer l'appel en appuyant sur la touche Régler le volume avec les touches sous le combiné. Au minimum et au maximum, on entend un signal sonore aigu.
-
Seite 25: Vorbereitung
TAB: 7549 Vorbereitung beschriebene Vorgang wiederholt werden. 5) Die Tasten loslassen. Nach der Installation muss das Gerät mit einer eindeutigen Kenn- 6) Innerhalb von 25s die ID-Kennnummer des Hauptgeräts von der nummer Elektronikeinheit aus zuweisen, hierbei nach dem für die Au- (ID) programmiert werden. -
Seite 26: Benutzerkonfigurationen
TAB: 7549 Taste zu blinken beginnt und gleichzeitig ein Signalton ertönt. drückt halten, bis die Taste zu blinken beginnt. 2) Die Taste oder bzw. drücken. An der Innenstelle wird die 3) Die Tasten loslassen. zuletzt gespeicherte Melodie abgespielt. 4) Die auf Werkseinstellungen zurückzusetzende Taste ( / 3) Die Taste oder bzw. -
Seite 27: Funktionsweise
TAB: 7549 Ruf (10 Stufen beim Gespräch mit der Innenstel- Anruf an die Pförtnerzentrale Für den Anruf an die Pförtnerzentrale (sofern in der Anlage vorhan- den): Den Hörer abnehmen und den Ruf durch Drücken der Taste Mit den Tasten (unter dem Hörer) die gewünschte ausführen. -
Seite 28: Operaciones Previas
TAB: 7549 Operaciones previas las teclas , deberá repetirse el procedimiento de los apartados 1, 2, 3. Una vez instalado el dispositivo, hay que programarlo configuran- do un código de identificación 5) Suelte las teclas (ID), único por cada aparato. 6) En el plazo de 25 segundos, asocie el código ID del dispositi- Se describen a continuación las programaciones BÁSICAS que vo principal desde la unidad electrónica externa, siguiendo el... -
Seite 29: Ajustes De Usuario
TAB: 7549 hasta que empiece a parpadear la tecla 1) Pulse y mantenga pulsada la tecla durante 2 segundos 3) Suelte las teclas. hasta que la tecla comience a parpadear y se escuche una 4) Pulse y mantenga pulsada la tecla cuya programación por de- señal acústica. - Seite 30 TAB: 7549 Ajuste del volumen de audio de la llamada in- mente la tecla . Descuelgue el microteléfono para activar la terna (10 niveles con aparato interno en conver- comunicación. Cuelgue para finalizar la comunicación. sación) Llamada a la centralita de conserjería Ajuste el nivel deseado con las teclas (debajo del mi- Para realizar una llamada a la centralita de conserjería (si está...
-
Seite 31: Operações Preliminares
TAB: 7549 Operações preliminares deve repetir-se o procedimento dos pontos 1, 2, 3. Depois de ter sido instalado, o dispositivo tem de ser programado, 5) Solte as teclas definindo-lhe um código identificativo 6) No espaço de 25s, associe o código ID do Principal do Grupo a (ID), único para cada aparelho. - Seite 32 TAB: 7549 COMUNICANTE. premidas até a tecla começar a piscar. A tecla 3 permite selecionar a melodia para a CHAMADA DE PA- 3) Solte as teclas. TAMAR (com o módulo eletrónico específico). 4) Prima e mantenha premida a tecla a repor na programação por 1) Prima e mantenha premida a tecla (durante 2 s) até...
- Seite 33 TAB: 7549 Para fazer o autoacendimento para a botoneira master, prima bre- Regula-se durante a conversação. vemente a tecla . Para ativar a comunicação, levante o mi- Regulação do volume do áudio da chamada crotelefone. Para encerrar a comunicação, pouse o microtelefone. interna (10 níveis com o posto interno em con- Chamada para a central de portaria versação)
- Seite 34 TAB: 7549 Προκαταρκτικές διαδικασίες 4) Πατήστε ταυτόχρονα τα πλήκτρα και εντός 5 δευτ. από τη στιγμή που θα αφήσετε τα πλήκτρα και κρατήστε τα πα- Μετά την εγκατάσταση, ο μηχανισμός πρέπει να προγραμματιστεί τημένα μέχρι να ακουστεί ένας τόνος επισήμανσης στον εσωτε- ρυθμίζοντας...
- Seite 35 TAB: 7549 7) Καλέστε τον εσωτερικό σταθμό από την μπουτονιέρα στην στιγμιαία το πλήκτρο οποία θέλετε να πραγματοποιηθεί άμεση αυτόματη ενεργοποί- Στο σημείο αυτό, οι προγραμματισμοί του εσωτερικού σταθμού ηση (πάτημα πλήκτρου, εσωτερική καταχώριση με το πληκτρο- έχουν διαγραφεί. Βεβαιωθείτε ότι η διαγραφή των προγραμ- λόγιο...
-
Seite 36: Λειτουργία
TAB: 7549 και κρατήστε το πατημένο (περίπου 2 δευτ.). Η απενεργοποίη- το ακουστικό. ση επιβεβαιώνεται με την εκπομπή ενός «χαμηλού» τόνου και με Κλήση από εξώπορτα FP/M (βλ. διαγράμματα ενεργοποίηση του πλήκτρου που ανάβει σταθερά. Η εκ νέου ενεργοποίηση του κουδουνιού επισημαίνεται με την εκπομπή ενός σύνδεσης... - Seite 37 TAB: 7549 Διαμόρφωση με λογισμικό SAVEPROG Το SaveProg είναι ένα λογισμικό για Η/Υ που έχει δημιουργηθεί για την προηγμένη διαμόρφωση των συστημάτων Due Fili Plus. Κάντε κλικ στο εικονίδιο και θα ανοίξει το παράθυρο «Configurazione dispositivi» (Διαμόρφωση μηχανισμών) Μπορείτε: να τροποποιήσετε τις διαμορφώσεις των πλήκτρων, να δημιουργήσετε...
- Seite 38 TAB: 7549 Tabella con le corrispondenze ID capogruppo e ID secondari Master ID and secondary ID correspondence table Tableau avec les correspondances id poste principal et ID secondaires Zuordnungstabelle ID Hauptgerät und ID Nebengeräte Tabla de correspondencia del ID del dispositivo principal y el ID de los secundarios Tabela com as correspondências entre o ID principal do grupo e os ID secundários Πίνακας...
- Seite 39 TAB: 7549...
- Seite 40 Viale Vicenza, 14 36063 Marostica VI - Italy 49401339A0 00 1810 www.vimar.com...