Omnimount Professional Serie Benutzerhandbuch
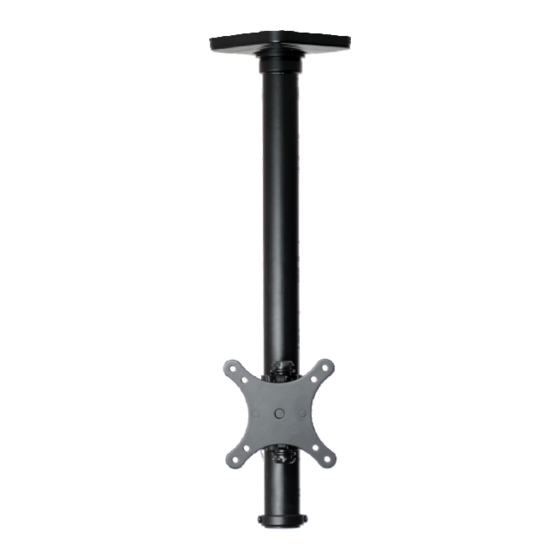
Small ceiling flat panel mount
Vorschau ausblenden
Andere Handbücher für Professional Serie:
- Benutzerhandbuch (28 Seiten) ,
- Benutzerhandbuch (28 Seiten) ,
- Benutzerhandbuch (24 Seiten)
Werbung
Quicklinks
Werbung

Verwandte Anleitungen für Omnimount Professional Serie


Inhaltszusammenfassung für Omnimount Professional Serie
- Seite 1 Потолочный кронштейн Omnimount SCM50: Инструкция пользователя...
- Seite 2 SCM50 SMALL CEILING FLAT PANEL MOUNT OM # OM1100490 Professional Series PN # SCM50 = L27-OM1100490-PRO-052411vA VERSION INSTRUCTION MANUAL MANUAL DE INSTRUCCIONES MANUEL D’INSTRUCTIONS BENUTZERHANDBUCH INSTRUCTIEHANDLEIDING MANUALE DI ISTRUZIONI INSTRUKCJA OBSŁUGI NÁVOD K OBSLUZE KEZELÉSI KÉZIKÖNYV ΕΓΧΕΙΡΙΔΙΟ ΟΔΗΓΙΩΝ MANUAL DE INSTRUÇÕES BRUGERVEJLEDNING ASENNUSOPAS MONTERINGSANVISNING...
- Seite 3 ESPAÑOL Descargo de responsabilidad. OmniMount Systems, Inc. ha puesto el máximo esfuerzo para que este manual sea preciso y completo. No obstante, no garantiza que la información aquí incluida cubra todos los detalles, condiciones o variantes. Tampoco prevé todas las posibles contingencias relacionadas con la instalación o el uso de este producto. La información que contiene este documento queda sujeta a cambio sin previo aviso o compromiso alguno.
- Seite 4 PORTUGUÊS Limitação de responsabilidade – A OmniMount Systems, Inc. pretende que o presente manual seja preciso e completo. No entanto, a OmniMount Systems, Inc. não garante que as informações contidas no presente documento cobrem todos os detalhes, condições ou variações, nem prevêem todas as contingências possíveis relacionadas com a instalação ou utilização deste produto. As informações contidas no presente documento estão sujeitas a alteração sem qualquer tipo de aviso ou obrigação.
- Seite 5 SLOVENSKA Izjava o omejitvi odgovornosti – Podjetje OmniMount Systems, Inc., si je prizadevalo, da bi bil ta priročnik natančen in popoln. Vendar OmniMount Systems, Inc., ne jamči, da informacije v tem priročniku obravnavajo vse podrobnosti, pogoje ali odstopanja. Prav tako ne more predvideti sleherne možne okoliščine v povezavi z namestitvijo ali uporabo tega izdelka. Informacije, ki jih ta dokument vsebuje, se lahko spremenijo brez predhodnega obvestila ali kakršne koli obveznosti.
- Seite 6 WEIGHT CAPACITY MAXIMUM WEIGHT CAPACITY POUNDS (LBS) / KILOGRAMS (KG) MAXIMUM SCREEN SIZE COMPLETE UNIT 50 (LBS) / 22.67 (KG) 37 in. CAUTION! CAUTION! MAXIMUM WEIGHT CAPACITY MAXIMUM SCREEN SIZE 37” 50 lbs 22.67kg USE WITH FLAT PANELS EXCEEDING THE MAXIMUM WEIGHT CAPACITY OF THIS PRODUCT MAY RESULT IN PRODUCT FAILURE CAUSING POSSIBLE INJURY AND OR PROPERTY DAMAGE.
-
Seite 7: Tools Needed
TOOLS NEEDED HARDWARE SCREWS/HARDWARE FOR FLAT PANEL Screws / Hardware for Flat Panel (Monitor Kit M-V-vD) (MONITOR KIT M-V-vD) Part # Description Philips Screws M4 x 12mm Philips Screws M5 x 12mm M5 x 12 M6 x 12 M4 x 12 Philips Screws M6 x 12mm Screws/Hardware for Product (OM1100490vA) SCREWS/HARDWARE FOR PRODUCT... - Seite 8 CONTENTS Contents Part # Description Ceiling Plate Pipe Ceiling Plate Cover Monitor Plate Assembly Tilt Screws Tension Knobs Set Screw Safety Bracket Level Nuts V200A Adapters...
- Seite 9 STEP 1 Separate adapter from mount Separe el adaptador del soporte Séparez l'adaptateur du support Trennen Sie den Adapter von der Halterung Maak de adapter los van de montage Separare l'adattatore della montatura Odłącz adapter od mocowania Odpojte adaptér od držáku Szerelje le az adaptert a tartóról.
- Seite 10 STEP 1 Find stud and mark edge and center locations Wood Stud Ubique el panel y marque las ubicaciones de los bordes y el centro. Panel de madera Poutre de bois Repérez l'emplacement d'une poutre, puis marquez l'emplacement des bords et du centre de cette poutre. Holzbalken Suchen Sie einen Balken und markieren Sie Seiten und Mitte.
- Seite 11 STEP 2 Drill pilot hole Realice el agujero piloto Percez le trou de guidage Bohren Sie die Vorbohrung Boor een montagegat Trapanare il foro pilota Wywierć otwór pilotowy Vyvrtejte vodicí otvor Fúrja ki a vezetőlyukat. Ανοίξτε οπή οδηγό Executar um furo piloto Bor styrehul Poraa ohjausreikä...
- Seite 12 STEP 4 Install Instale Installer Anbringen Installeer Installare Zainstaluj Instalujte Telepítse Εγκαταστήστε Instalar Installér Asenna Montera Instalaţi Инсталиране Paigaldage Uzstādīt Montuoti Pritrditev Nainštalujte Установить Installere رآﺐ 安装 取り付け...
- Seite 13 STEP 5 Attach cover Coloque la cubierta Fixez le cache Befestigen Sie die Abdeckung SNAP Bevestig de bedekking Montare il coperchio Zamontuj pokrywę Připevněte kryt Tegye fel a burkolatot. Τοποθετήστε το καπάκι Prender a cobertura Sæt dækplade på Kiinnitä suojus Sätt fast hölje Ataşaţi capacul Прикрепете...
- Seite 14 STEP 7 Install screws Attach cover Coloque los tornillos Coloque la cubierta Installez les vis Fixez le cache Drehen Sie die Schrauben ein Befestigen Sie die Abdeckung Installeer de schroeven Bevestig de bedekking Installare le viti Montare il coperchio Załóż śruby Zamontuj pokrywę...
- Seite 15 VESA PATTERN OPTIONS 100mm (3-15/16”) 75mm (2-15/16”) 100mm (3-15/16”) 200mm (7-7/8”) 200mm (7-7/8”)
- Seite 16 VESA ADAPTER INSTALLATION Attach extension adapters to the flat panel plate Instale los adaptadores en la placa de sujeción del televisor Fixez les adaptateurs d’extension à la plaque de l’écran plat Befestigen sie erweiterungsadapter an der montageplatte des flachbildschirms Bevestig de verlengadapters aan de plaats voor het vlakke scherm Fissare gli adattatori di prolunga alla piastra del pannello piatto Przymocuj przedłużenia do płyty telewizora Na nástavec pro plochou obrazovku namontujte prodlužovací...
- Seite 17 FLAT BACK - FLAT PANEL Connect adapter to flat panel Conecte el adaptador al monitor Connectez l'adaptateur au moniteur Befestigen Sie den Adapter am Bildschirm Sluit de adapter aan op de monitor Collegare l'adattatore allo schermo Podłącz adapter do monitora Připojte adaptér k monitoru Csatlakoztassa az adaptert a monitorhoz.
- Seite 18 Level Nivel Niveau Wasserwaage Waterpas Livellare Poziomnica Vodováha Szintező Αλφάδι Nível Vaterpas Vesivaaka Pass Nivelă Ниво Lood Līmenis Lygis Vodna tehtnica Vodováha Уровень Aynı Seviyeye Getir Vater ﻣﻴﺰان 水平调整 水平器 Route Cables Tienda los cables Installez les câbles Verlegen Sie die Kabel Plaats de kabels Inserire i cavi Poprowadź...
- Seite 19 Adjust to Desired Location or Tilt Ajuste a la inclinación o ubicación deseada Ajustez à la position désirée ou inclinez An die gewünschte Position anpassen oder neigen Stel in op de gewenste plaats of kantel Regolare la posizione o l'inclinazione come desiderato Dopasuj do żądanego położenia lub nachylenia Upravte polohu tak, abyste dosáhli požadovaného umístění...
-
Seite 20: Warranty Information
Esta garantía se aplica a los residentes de los Estados Unidos que realizaron la compra en un distribuidor autorizado de OmniMount. Esta garantía cubre los productos OmniMount de los defectos de materiales y de mano de obra por un periodo de 5 años. OmniMount, a su exclusivo criterio, reparará o reemplazará el producto o componente defectuoso. En caso de que no se sigan las instrucciones de Omnimount para el cuidado del producto la garantía quedará... - Seite 21 .اﻻﺗﺼﺎل ﻟﻠﻤﺴﺎﻋﺪة، ﻓﺎﻟﺮﺟﺎء ﺑﺤﺎﺟﺔ آﻨﺖ إذا 您需要帮助吗?请致电 ご質問がある場合は、お電話ください Professional Series OmniMount Systems, Inc. 8201 South 48th Street Phoenix, AZ 85044-5355 1-800-MOUNT-IT (1-800-668-6848) www.omnimountpro.com All trademarks are the property of their respective companies. OmniMount is a registered trademark of OmniMount Systems, Inc. © 2010...
- Seite 22 Плееры MP3 и мультимедиа Жесткие диски Беспроводные DECT- Вентиляторы Флешки телефоны Воздухоочистители (мойки Blu-ray и DVD-плееры Телевизионные антенны Ресиверы цифрового воздуха) телевидения...