Connect 23 A Iinstallation, Gebrauch Und Wartung
Vorschau ausblenden
Andere Handbücher für 23 A:
- Installation, gebrauch und wartung (23 Seiten) ,
- Installation, gebrauch und wartung (25 Seiten)
Inhaltsverzeichnis
Installazione, uso e manutenzione
Installation, use and maintenance handbook
Installation, Gebrauch und Wartung
Installation, usage et entretien
Instalación, uso y mantenimiento
(UV) Connect 23 A
(UV) Connect 23 H
(UV) Connect 12 A
(UV) Connect 12 H
(UV) Connect 23 A RI
(UV) Connect 23 H RI
(UV) Connect 12 A RI
(UV) Connect 12 H RI
Co2708-1375
COD:5561269
Rev.4:0514
Inhaltsverzeichnis

Verwandte Anleitungen für Connect 23 A

Inhaltszusammenfassung für Connect 23 A
- Seite 1 Instalación, uso y mantenimiento (UV) Connect 23 A (UV) Connect 23 H (UV) Connect 12 A (UV) Connect 12 H (UV) Connect 23 A RI (UV) Connect 23 H RI (UV) Connect 12 A RI (UV) Connect 12 H RI Co2708-1375 COD:5561269 Rev.4:0514...
- Seite 2 GERÄTEKENNZEICHNUNG Modell Speisespannung Kühlgasmenge MARCATURA Klasse DELL’APPARECCHIO Gesamtaufnahme Modello Frequenz Tensione di alimentazione Matrikelnummer MANUFACTURER Quantità di gas refrigerante Konstruktionsjahr- Monat Classe WATER COOLERS Assorbimento totale PLAQUETTE SIGNALETIQUE Frequenza Modèle Mod....Numero di matricola Tension d’alimentation Anno-mese di costruzione Quantité...
- Seite 3 BEFORE USING THE APPLIANCE • Make sure that installation and electrical wiring are carried out by a qualified WARNINGS technician according to the manufacturer’s instructions and to the local norms in force. The electrical system must be equipped with an effective In order to use your appliance to its best, we advise reading these earth according to the law (46/90).
-
Seite 4: Prima Di Usare L'apparecchio
• Electric power supply • Use a damp cloth to clean the machine. Do not use inflammable solvents • Do not connect or disconnect the machine from the socket with wet han- such as alcohol, benzene or diluents. If inflammable substances come in contact with the electrical components inside the machine, they can cause •... -
Seite 5: Avant D'utiliser L'appareil
AVANT D’UTILISER L’APPAREIL des nœuds. Le non respect de toute norme de sécurité pourrait provoquer • En cas de fumée, odeurs insolites ou bruits étranges provenant de la ma- incendies, secousses électriques ou endommager la machine chine, la débrancher immédiatement de la prise de courant et contacter le distributeur local ou le service d’assistance technique. -
Seite 6: Consigli Per La Salvaguardia Dell'ambiente
GF0312-030 DISIMBALLO • Ponete l’apparecchio nel punto d’installazione (cap. 4- INSTALLAZIONE). • Tagliate le reggette R e sfilate il cartone C e il sacco in plastica esterno S. • Eliminate subito i sacchi in plastica S i quali possono rappresentare pericolo per i bambini. •... -
Seite 7: Removal Of Packaging
REMOVAL OF PACKAGING • Place the appliance in its installation site (chap. 4 - INSTALLATION). • Cut straps R and remove the box C and plastic bag S. • Immediately destroy the plastic bags S as they could be dangerous for children. •... -
Seite 8: Descrizione Dell'apparecchio
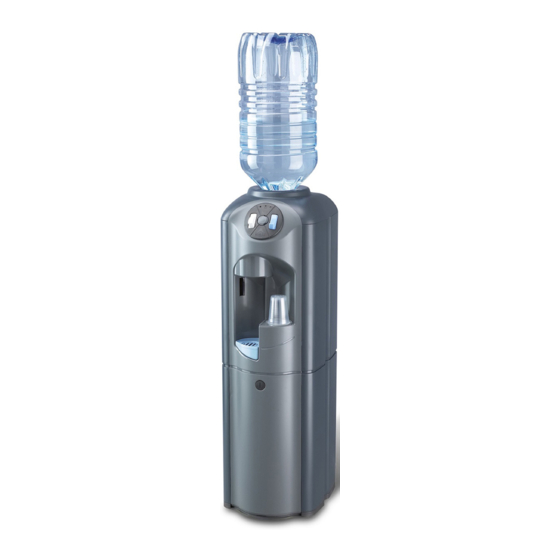
Co2708-1394 Co2708-1395 Co2708-1392 DESCRIZIONE DELL’APPARECCHIO CONNECT è stato studiato per offrire la massima igiene e funzionalità di 1 Struttura utilizzo, unite ad un design innovativo. in acciaio con involucro esterno in materiale plastico antiurto 2 Beccucci di erogazione: posizionati in zona protetta Fornisce acqua fredda e calda in grande quantità. -
Seite 9: Description Of The Appliance
DESCRIPTION OF THE APPLIANCE CONNECT has been designed to offer maximum hygiene and function of use, 1 Stainless steel structure with external packaging in shockproof plastic together with an innovative design. material 2 Supply nozzles placed in protected area He supply large quantities of hot and cold water: 3 UV window. - Seite 10 Abmessungen IN water DImensions Dimensiones Co2708-010 Co2708-020 23 A 23 H 12 A 12 H 23 A RI 23 H RI 12 A RI 12 H RI Produzione acqua Lt/h 22 (8) 18 (5) 22 (8) 12 (8) Water production Trinkwasserproduktion Production d’eau...
-
Seite 11: Installation
INSTALLAZIONE INSTALLAZIONE Ponete l’apparecchio nel punto di installazione, lontano da fonti di calore e protetto dai raggi diretti del sole. POSIZIONAMENTO • Per favorire l’aerazione posizionare il refrigeratore ad una distanza di almeno 6-7 cm dalla parete. INSTALLATION Place the appliance in the desired point of installation, away from heat sources and protected from direct sunrays. - Seite 12 • Predisponete un rubinetto R di arresto sul tubo di ingresso dell’acqua. permanenti al ser batoio dell’acqua calda. Per i modelli “CONNECT RI” • Collegate la macchina alla rete idrica utilizzando il raccordo di ingresso 1 con innesto rapido per tubo diametro 1/4 Per i modelli “CONNECT”...
-
Seite 13: Anschluss An Die Wasserleitung
• Predispose a stop tap R on the water inlet pipe. hot water reservoir. For models “CONNECT RI” • Connect the appliance to the water mains using the water inlet fitting 1 fast coupling provided can be used for the 1/4 diameter pipe. -
Seite 14: Collegamento Elettrico
Co2708-1419 Co2708-1382 COLLEGAMENTO ELETTRICO Attenzione! Acqua calda a circa 90°C (modelli “CONNECT RI”) Il collegamento alla rete elettrica avviene collegando la spina ad una presa Acqua calda a circa 95°C (modelli “CONNECT”) di rete (fig.6). I termostati fanno avviare la macchina. -
Seite 15: Conexión Eléctrica
ELECTRICITY CONNECTION Warning! Hot water at approximately 90°C (“CONNECT RI” models”) Connection to the mains electricity supply is carried out by connecting the plug to a Hot water at approximately 95°C (“CONNECT” models”) mains socket (fig.6). The thermostats make the appliance start. - Seite 16 PULIZIA INTERNA/ IGIENIZZAZIONE NB: le operazioni successive devono essere eseguite da personale MODELLI “CONNECT” qualificato. Preparazione della soluzione igienizzante • Preparate 5 litri di acqua ATTENZIONE! I prodotti usati per la sanificazione, considerando che si tratta di • Aggiungete all’acqua il 5% di “perossido di idrogeno a 100 volumi (Acqua ossigenata sostanze corrosive acide e alcaline, devono essere utilizzati adottando guanti a 100 volumi);...
-
Seite 17: Reinigung Der Inneren Geräteteile/ Hygienische Reinigung
• Using a pump P, connect the appliance water inlet to the container filled with the disinfectant solution. • The operation of higienization/sterilization has to be carried out every time the refrigerator •... - Seite 18 Co2708-1385 Co2708-1389 Co2708-1400 Co2708-1398 MODELLI “CONNECT RI” In questo distributore è possibile sostituire il serbatoio, i tubi, i rubinetti ed Per rimuovere il serbatoio i raccordi rubinetti, con altri sanificati o nuovi. a Scollegate il cavo di alimentazione dalla presa di corrente.
- Seite 19 “CONNECT RI” MODELS In this cooler the reservoir, the pipes and tap fittings can be replaced with How to remove the reservoir other sanitised or new ones. a Unplug the cooler from the mains electricity supply. b Shut the water tap.
- Seite 20 Co2708-1402 Co2708-1401 Co2708-1403 Co2708-1404 Co2708-1398 Co2708-1386 PER RIMONTARE IL SERBATOIO SANIFICATO PER RIMUOVERE I TUBI E I NUOVI TUBI PER LE VERSIONI CON ACQUA CALDA q Indossare guanti monouso r Spingere il serbatoio verso il basso fino a farlo appoggiare sul materiale n Una volta scollegati i tubi C - F dal serbatoio scollegare il tubo C dal isolante (fig.22) lato C1 e il tubo D dal lato D1.
-
Seite 21: Das Entfernen Der Schläuche
(fig.22) nect the tube C from the side C1 and the tube D from the side D1. s Connect the new tubes and pay attention that they are not crushed (fig.20) t Place again the component K pushing it backwards (fig.23) o Unblock the component K and rotate it ahead (fig. - Seite 22 Co2708-1407 Co2708-1405 Co2708-1406 Co2708-1408 COS2301-F442 Co2708-1409 PER RIMUOVERE I FIANCHI ESTERNI Prima di rimuovere i fianchi esterni è necessario aver compiuto le fasi da “a” fino a “g” descritte nel paragrafo 5.2 w Smontare lo sportello frontale (fig. 26) x Rimuovere le seguenti serie di viti: le viti posteriori che fissano la struttura esterna (fig.27) le viti superiori (fig.28) le due viti interne poste alla base (fig.29)
-
Seite 23: Das Entfernen Der Seitenteile
HOW TO REMOVE THE EXTERNAL SIDES Before removing the external side it is necessary to have performed the steps from ‘a’ to ‘g’ described in paragraph 5.2 w disassemble the front door (fig. 26) x remove the following series of screws: back screws fixing the external structure (fig. - Seite 24 • Localizzate il tubo di scarico posto nella parte posteriore (fig.32) (o sotto • Compiere lo smontaggio delle parti descritte nel paragrafo 5.2 da “a” fino la base nel modello Connect 12). a “f”. • Togliete il tappo e vuotate l’intero contenuto.
- Seite 25 • Den Abflussschlauch ausfindig machen, der sich auf der Rückseite befindet befolgen. (Abb.32) (oder beim Modell Connect 12 unter dem Boden). • Die Schraube V (Abb. 37) lösen und den Deckel C (Abb. 38) entfernen. • Den Deckel entfernen und den gesamten Inhalt entleeren •...
- Seite 26 MANUTENZIONE STRAORDINARIA 8.1 INTERVENTO DEL GALLEGGIANTE DI SICUREZZA E RIPRISTINO MANUALE La macchina è dotata di un sistema di sicurezza che interviene in caso • Prelevate almeno 1 litro di acqua fredda di malfunzionamento del galleggiante posto dentro il serbatoio freddo; •...
- Seite 28 Servizio di assistenza - Qualified operator service - Kundendiest - Service d’assistance - Servicio de asistencia Le distributeur / installateur doit apposer son Il distributore / Installatore deve apporre il cachet pour fournir le service d’assistance timbro per fornire il servizio di assistenza El distribuidor / Instalador debe poner The dealer / Installator has to mark this su sello para proporcionar el servicio...