Herunterladen Inhalt Inhalt Diese Seite drucken
Inhaltsverzeichnis

Werbung

Verfügbare Sprachen
  • DE

Verfügbare Sprachen

  • DEUTSCH, seite 22
QP2532, QP2531
QP2530, QP2526
QP2525, QP2522
QP2521, QP2520

Werbung

Inhaltsverzeichnis
loading

Inhaltszusammenfassung für Philips QP2532

  • Seite 1 QP2532, QP2531 QP2530, QP2526 QP2525, QP2522 QP2521, QP2520...
  • Seite 4 empty page before TOC...
  • Seite 5: Inhaltsverzeichnis

    English 6 Deutsch 22 Français 40 Italiano 58 Русский 75...
  • Seite 6: English

    English Introduction Congratulations on your purchase and welcome to Philips! To fully benefit from the support that Philips offers, register your product at www.philips.com/welcome. General description Protection cap 2 Blade 3 Blade release slide 4 On/off button 5 Battery status indicator (QP2532, QP2531,...
  • Seite 7 English Danger - Keep the supply unit dry. Warning - To charge the battery, only use the detachable supply unit provided with the appliance. For the type number of the original supply unit, please see ' General description' in the manual. - The supply unit contains a transformer.
  • Seite 8: Electromagnetic Fields (Emf)

    Electromagnetic fields (EMF) This Philips appliance complies with all applicable standards and regulations regarding exposure to electromagnetic fields. General - This appliance is waterproof. It is suitable for use in the bath or shower and for cleaning under the tap.
  • Seite 9 QP2526, QP2525, QP2522, QP2521, QP2520: Charging normally takes approx. 8 hours. A fully charged appliance has an operating time of up to 60 minutes (QP2532, QP2531, QP2530) or 45 minutes (QP2526, QP2525, QP2522, QP2521, QP2520). Charge the appliance before you use it for the first time and when the battery charge indicator indicates that the battery is almost empty.
  • Seite 10: Charging With The Supply Unit

    Charging with the supply unit 1 Insert the small plug into the appliance and put the supply unit in the wall socket. 2 QP2532, QP2526, QP2525, QP2522, QP2521, QP2520 only: The battery charging indicator on the adapter lights up continuously when the appliance is connected to the wall socket.
  • Seite 11 English Shaving Warning: Before you use the appliance, always check the blade for damage or wear. If the blade is damaged or worn, do not use the appliance, as injury may occur. Replace a damaged blade before you use the appliance (see 'Replacement').
  • Seite 12 Trimming Trimming combs The click-on stubble combs allow you to trim hair to different lengths. - QP2532, QP2531 and QP2530 come with 4 click-on stubble combs: 5 mm, 3 mm, 2 mm and 1 mm. - QP2526, QP2525 and QP2520 come with 3 click-on stubble combs: 5 mm, 3 mm and...
  • Seite 13 English - QP2522 and QP2521 come with 2 click-on stubble combs: 5 mm and 1 mm. Start with the 5 mm comb to acquire practice with this appliance. The indication on each comb corresponds to the hair length in millimeters. Trimming tips - Always make sure that the tips of the click- on stubble comb point in the direction in which you move the appliance.
  • Seite 14: Cleaning And Maintenance

    English 5 To remove the comb, hold it on both sides and pull it off the blade. Cleaning and maintenance Clean the appliance after every use. Caution: Never use compressed air, scouring pads, abrasive cleaning agents or aggressive liquids such as petrol or acetone to clean the appliance.
  • Seite 15 English 3 If a lot of hairs have accumulated on the appliance, first blow them off. 4 Switch on the appliance and rinse the blade with lukewarm water. Caution: Do not dry the blade with a towel or a tissue as this may cause damage. 5 Rinse the combs with lukewarm water.
  • Seite 16: Replacing The Blade

    When it is highly visible, it is recommended to replace your blade for the best OneBlade experience. Always replace the blade with an original Philips blade. Depending on your usage behavior, the exact lifetime of the blade could be longer or shorter.
  • Seite 17: Ordering Accessories

    Ordering accessories To buy accessories or spare parts, visit www.philips.com/parts-and-accessories or go to your Philips dealer. You can also contact the Philips Consumer Care Center in your country (see the international warranty leaflet for contact details).
  • Seite 18 English Before you remove the battery, make sure that the product is disconnected from the wall socket and that the battery is completely empty. Take any necessary safety precautions when you handle tools to open the product and when you dispose of the rechargeable battery.
  • Seite 19: Warranty And Support

    English Warranty and support If you need information or support, please visit www.philips.com/support or read the international warranty leaflet. Warranty restrictions The blade is not covered by the terms of the international warranty because it is subject to wear. Troubleshooting This chapter summarizes the most common problems you could encounter with the appliance.
  • Seite 20 Philips service center. The blade is Switch on the appliance and blocked by dirt. rinse the blade under the tap with warm water.
  • Seite 21 English Problem Possible Solution cause The blade is Remove and reattach the placed onto the blade. Push it onto the handle appliance until you hear a click. incorrectly. The blade is Remove the blade and clean it blocked by dirt. thoroughly.
  • Seite 22: Deutsch

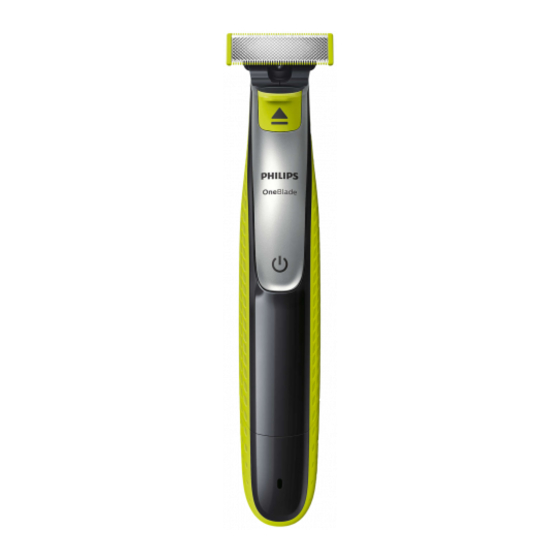
    Deutsch Einführung Herzlichen Glückwunsch zu Ihrem Kauf und willkommen bei Philips! Um die Unterstützung von Philips optimal nutzen zu können, sollten Sie Ihr Produkt unter www.philips.com/welcome registrieren. Allgemeine Beschreibung Schutzkappe 2 Scherblatt 3 Entriegelungsschieber für Klinge 4 Ein-/Ausschalter 5 Akkustandanzeige (nur QP2532, QP2531,...
  • Seite 23: Warnhinweis

    Deutsch spätere Verwendung auf. Das mitgelieferte Zubehör kann für verschiedene Produkte variieren. Gefahr - Halten Sie das Netzteil trocken. Warnhinweis - Verwenden Sie nur das im Lieferumfang des Geräts enthaltene abnehmbare Netzteil, um den Akku aufzuladen. Die Nummer des Original-Netzteils finden Sie unter "Allgemeine Beschreibung"...
  • Seite 24: Elektromagnetische Felder

    - Das Wasser zur Reinigung des Geräts darf nicht heißer als 60 °C sein. - Benutzen Sie zum Reinigen des Geräts keine Druckluft, Scheuerschwämme und -mittel oder aggressive Flüssigkeiten wie Benzin oder Azeton. Elektromagnetische Felder Dieses Philips-Gerät erfüllt alle einschlägigen Normen und Vorschriften zur Exposition gegenüber elektromagnetischen Feldern.
  • Seite 25: Allgemeines

    QP2526, QP2525, QP2522, QP2521, QP2520: Das Laden dauert normalerweise ca. 8 Stunden. Wenn das Gerät vollständig aufgeladen ist, kann es bis zu 60 Minuten (QP2532, QP2531, QP2530) bzw. 45 Minuten (QP2526, QP2525, QP2522, QP2521, QP2520) lang betrieben werden. Laden Sie das Gerät vor dem ersten Gebrauch auf und wenn der Akkuladestands-Anzeiger anzeigt, dass der Akku fast leer ist.
  • Seite 26: Aufladen Mit Der Stromversorgungseinheit

    Aufladen mit der Stromversorgungseinheit 1 Führen Sie den Gerätestecker in das Gerät, und stecken Sie den Adapter in eine Steckdose. 2 nur QP2532, QP2526, QP2525, QP2522, QP2521, QP2520: Wenn das Gerät an eine Steckdose angeschlossen ist, leuchtet die Akkuladestandsanzeige am Adapter dauerhaft.
  • Seite 27 Deutsch Um ein weiches Ergebnis zu erzielen, rasieren Sie. Zum Erreichen einer bestimmten Länge trimmen Sie. Für perfekte Kanten und scharfe Linien konturieren Sie. Dieses Gerät ist nicht zum Rasieren, Konturieren oder Trimmen von Haaren an unteren Körperteilen oder auf dem Kopf vorgesehen.
  • Seite 28: Konturieren

    Deutsch Tipps und Tricks zum Rasieren - Achten Sie darauf, dass die Klinge vollständig in Kontakt mit der Haut ist, indem Sie sie flach auflegen. - Führen Sie das Gerät entgegen der Haarwuchsrichtung, um beste Ergebnisse zu erzielen. - Streichen Sie in langen Bahnen und drücken Sie dabei leicht.
  • Seite 29 Kammaufsätze Mit den Kammaufsätzen für Drei-Tage-Bärte können Sie Haare auf verschiedene Schnittlängen kürzen. - QP2532, QP2531 und QP2530 werden mit 4 Stoppelkämmen zum Anstecken geliefert: 5 mm, 3 mm, 2 mm und 1 mm. - QP2526, QP2525 und QP2520 werden mit 3 Stoppelkämmen zum Anstecken geliefert: 5 mm, 3 mm und 1 mm.
  • Seite 30 Deutsch Beginnen Sie mit dem 5-mm-Kammaufsatz, um Erfahrungen beim Schneiden mit diesem Gerät zu sammeln. Die Angabe auf jedem Kammaufsatz entspricht der Haarlänge in Millimetern. Tipps zum Trimmen - Die Spitzen der Kammaufsätze für Drei- Tage-Bärte müssen in die Richtung zeigen, in die Sie das Gerät bewegen.
  • Seite 31: Reinigung Und Pflege

    Deutsch 4 Schalten Sie das Gerät nach jedem Gebrauch aus und reinigen Sie es (siehe Kapitel „Reinigung und Wartung“). 5 Um den Kammaufsatz zu entfernen, halten Sie ihn auf beiden Seiten und ziehen Sie ihn vom Scherblatt ab. Reinigung und Pflege Reinigen Sie das Gerät nach jedem Gebrauch.
  • Seite 32: Lagerräume

    Deutsch 3 Wenn sich viele Haare auf dem Gerät angesammelt haben, pusten Sie sie erst weg. 4 Schalten Sie das Gerät ein und spülen Sie die Klinge mit lauwarmem Wasser. Achtung: Trocknen Sie das Scherblatt nicht mit einem Handtuch oder Taschentuch ab, da dies das Scherblatt beschädigen kann.
  • Seite 33: Austausch Des Scherblatts

    Scherblatt wechseln, um weiterhin das bestmögliche OneBlade-Erlebnis zu haben. Tauschen Sie die Klinge immer gegen eine Original-Klinge von Philips aus. Je nach Nutzung ist die Lebensdauer der Klinge eventuell länger oder kürzer. Ähnlich wie bei einem Handrasierer wird die Klinge mit der Zeit stumpf.
  • Seite 34: Aufbewahrungstasche (Nur Qp2520)

    Um Zubehör oder Ersatzteile zu kaufen, besuchen Sie www.philips.com/parts-and-accessories, oder suchen Sie Ihren Philips Händler auf. Sie können sich auch an das Philips Consumer Care Center in Ihrem Land wenden. Die Kontaktdaten finden Sie in der internationalen Garantieschrift. Die folgenden Teile sind erhältlich: - QP210 Scherblatt 1 Stück...
  • Seite 35: Entfernen Des Akkus

    Deutsch Recycling - Werfen Sie das Gerät am Ende der Lebensdauer nicht in den normalen Hausmüll. Bringen Sie es zum Recycling zu einer offiziellen Sammelstelle. So helfen Sie, die Umwelt zu schützen. Entfernen des Akkus Bauen Sie den wiederaufladbaren Akku nur zur Entsorgung des Produkts aus.
  • Seite 36: Garantie Und Support

    Sollten Sie ein Problem mithilfe der nachstehenden Informationen nicht beheben können, besuchen Sie unsere Website unter www.philips.com/support, und schauen Sie in der Liste „Häufig gestellte Fragen“ nach, oder wenden Sie sich an das Philips Service-Center in Ihrem Land.
  • Seite 37 überprüfen Sie, ob ein Stromausfall vorliegt oder ob die Steckdose Strom führt. Falls der Strom nicht ausgefallen ist und die Steckdose funktioniert, die Akkuladestands-Anzeige aber immer noch nicht blinkt oder leuchtet, bringen Sie das Gerät zum Händler oder einem Philips Kundendienst.
  • Seite 38 Deutsch Problem Mögliche Lösung Ursache Das Scherblatt Schalten Sie das Gerät ein und ist verstopft. spülen Sie das Scherblatt unter dem Wasserhahn mit warmem Wasser ab. Halten Sie das Scherblatt für ca. 30 Sekunden in eine Tasse mit warmem Wasser (maximal 60 °C).
  • Seite 39 Deutsch Problem Mögliche Lösung Ursache Das Scherblatt Ersetzen Sie das Scherblatt ist ein durch ein (siehe 'Ersatz') neues. zerbrechliches Teil des Geräts und kann leicht beschädigt werden. Wenn das Scherblatt beschädigt ist, arbeitet es möglicherweise nicht mehr optimal.
  • Seite 40: Français

    Capuchon de protection 2 Lame 3 Bouton coulissant de déverrouillage de la lame 4 Bouton marche/arrêt 5 Témoin d'état de la batterie (QP2532, QP2531, QP2530 uniquement) 6 Trousse (QP2520 uniquement) 7 Petite fiche 8 Témoin de charge de la batterie (QP2532,...
  • Seite 41 Français accessoires fournis peuvent varier selon les différents produits. Danger - Gardez le bloc d’alimentation au sec. Avertissement - Pour charger la batterie, veuillez uniquement utiliser le bloc d’alimentation amovible fourni avec l'appareil. Pour la référence du bloc d'alimentation d'origine, veuillez consulter la section « Description générale »...
  • Seite 42: Champs Électromagnétiques (Cem)

    Champs électromagnétiques (CEM) Cet appareil Philips est conforme à toutes les normes et à tous les règlements applicables relatifs à l'exposition aux champs électromagnétiques.
  • Seite 43: Informations D'ordre Général

    Témoin d'état de la batterie QP2532, QP2531, QP2530 : Lorsque le témoin d'état de la batterie clignote en orange, la batterie est presque vide.
  • Seite 44: Charge Avec Le Bloc D'alimentation

    Charge avec le bloc d’alimentation 1 Insérez la petite fiche dans l'appareil et l'adaptateur secteur dans la prise secteur. 2 QP2532, QP2526, QP2525, QP2522, QP2521, QP2520 uniquement : Le témoin de charge de la batterie de l'adaptateur s'allume en continu lorsque l'appareil est branché sur une prise murale.
  • Seite 45: Utilisation De L'appareil

    Français Utilisation de l'appareil Vous pouvez utiliser l'appareil pour tondre, tailler ou raser les poils du visage (barbe, moustache et pattes). Rasez pour un résultat uniforme, tondez pour obtenir une certaine longueur et taillez pour créer des bords parfaits et des lignes nettes. Cet appareil n'a pas été...
  • Seite 46 Français Conseils et astuces de rasage - Assurez-vous que la lame est totalement en contact avec la peau en la posant à plat sur celle-ci. - Pour un résultat optimal, déplacez l'appareil dans le sens inverse de la pousse des poils. - Effectuez de longs mouvements en exerçant une légère pression.
  • Seite 47 Les sabots à clipser pour barbe de 3 jours vous permettent de tondre les poils à différentes longueurs. - Les modèles QP2532, QP2531 et QP2530 sont livrés avec 4 sabots à clipser pour barbe de 3 jours : 5 mm, 3 mm, 2 mm et 1 mm.
  • Seite 48 Français Utilisez le sabot de 5 mm pour vous familiariser avec l'appareil. L'indication sur chaque peigne correspond à la longueur de poils en millimètres. Conseils de coupe - Assurez-vous que les pointes du sabot à clipser pour barbe de 3 jours sont orientées dans le sens de déplacement de l'appareil.
  • Seite 49: Nettoyage Et Entretien

    Français 5 Pour retirer le sabot, maintenez-le sur les deux côtés et retirez-le de la lame. Nettoyage et entretien Nettoyez l'appareil après chaque utilisation. Attention : N'utilisez jamais d'air comprimé, de tampons à récurer, de produits abrasifs ou de détergents agressifs tels que de l'essence ou de l'acétone pour nettoyer l'appareil.
  • Seite 50 Français 3 Si beaucoup de poils se sont accumulés sur l'appareil, retirez-les d'abord en soufflant dessus. 4 Allumez l'appareil et rincez la lame à l'eau tiède. Attention : Ne séchez pas la lame avec une serviette ou un mouchoir afin d'éviter de l'endommager.
  • Seite 51: Remplacement De La Lame

    Lorsqu'elle est très visible, il est recommandé de remplacer la lame pour une expérience OneBlade optimale. Remplacez-la toujours par une lame Philips d'origine. La durée de vie exacte de la lame sera plus ou moins longue selon vos habitudes d'utilisation.
  • Seite 52: Commande D'accessoires

    Web www.philips.com/parts-and-accessories ou rendez-vous chez votre revendeur Philips. Vous pouvez également contacter le Service Consommateurs Philips de votre pays (consultez le dépliant de garantie internationale pour obtenir les coordonnées). Les pièces suivantes sont disponibles : - Lame QP210 1 boîte - Lame QP220 2 boîtes...
  • Seite 53: Retrait De La Batterie Rechargeable

    Français Retrait de la batterie rechargeable Ne retirez la pile rechargeable que lorsque vous mettez le produit au rebut. Avant d'enlever la pile, assurez-vous que le produit est débranché de la prise secteur et que la pile est complètement vide. Respectez toutes les mesures de sécurité...
  • Seite 54: Garantie Et Assistance

    Garantie et assistance Si vous avez besoin d'une assistance ou d'informations supplémentaires, consultez le site Web www.philips.com/support ou lisez le dépliant sur la garantie internationale. Limites de la garantie La lame n'est pas couverte par la garantie internationale, car elle est sujette à...
  • Seite 55 Centre Service Agréé Philips. La lame est Allumez l'appareil et rincez la bloquée par la lame sous le robinet avec de saleté.
  • Seite 56 Français Problème Cause Solution possible Maintenez la lame dans une tasse avec de l'eau chaude (pas plus de 60 °C) pendant environ 30 secondes. L’appareil ne La lame est Appuyez la lame sur l'appareil coupe plus les placée de jusqu'à entendre un clic. poils.
  • Seite 57 Français Problème Cause Solution possible La lame est une Remplacez la lame par une partie délicate nouvelle lame (voir de l'appareil et 'Remplacement'). peut être aisément endommagée. Si la lame est endommagée, il se peut qu'elle ne fonctionne plus de manière optimale.
  • Seite 58: Italiano

    5 Indicatore dello stato della batteria (solo QP2532, QP2531, QP2530) 6 Custodia morbida (solo QP2520) 7 Spinotto 8 Indicatore di carica della batteria (solo QP2532, QP2526, QP2525, QP2522, QP2521, QP2520) 9 Unità di alimentazione (QP2531, QP2530: tipo HQ850. QP2532, QP2526, QP2525, QP2522,...
  • Seite 59 Italiano Pericolo - Tenete l'unità di alimentazione lontano dall'acqua. Avvertenza - Per ricaricare la batteria, utilizzate solo l'unità di alimentazione rimovibile fornita in dotazione con l'apparecchio. Per il codice dell'unità di alimentazione originale, consultare la sezione "Descrizione generale" del manuale. - L'unità...
  • Seite 60: Campi Elettromagnetici (Emf)

    - Non usate aria compressa, prodotti o sostanze abrasive o detergenti aggressivi, come benzina o acetone, per pulire l'apparecchio. Campi elettromagnetici (EMF) Questo apparecchio Philips è conforme a tutti gli standard e alle norme relativi all'esposizione ai campi elettromagnetici. Indicazioni generali - Questo apparecchio è...
  • Seite 61: Come Ricaricare Il Dispositivo

    è quasi scarica. Indicatore dello stato della batteria QP2532, QP2531, QP2530: Quando l'indicatore dello stato della batteria lampeggia in arancione, la batteria è quasi scarica.
  • Seite 62: Modalità D'uso Dell'apparecchio

    Carica tramite unità di alimentazione 1 Inserite lo spinotto nella presa dell'apparecchio e l'adattatore nella presa di corrente. 2 solo QP2532, QP2526, QP2525, QP2522, QP2521, QP2520: quando l'apparecchio viene collegato alla presa di corrente a muro, l'indicatore di ricarica della batteria sull'adattatore emette una luce fissa.
  • Seite 63 Italiano contornare o rifinire i peli di altre zone del corpo o i capelli. La prima volta che utilizzate l'apparecchio procedete con cautela. È necessario acquisire una certa dimestichezza con l'apparecchio. Nota: questo apparecchio può essere utilizzato solo senza filo. Accensione e spegnimento dell'apparecchio 1 Per accendere l'apparecchio, premete il pulsante on/off una volta.
  • Seite 64 Italiano - Potete usare l'apparecchio sia sulla pelle asciutta che bagnata con gel o schiuma. Potete usare l'apparecchio persino nella doccia. - Per ottenere risultati ottimali, assicuratevi che barba e viso siano puliti. Rasatura 1 Accendete l'apparecchio. 2 Appoggiate la lama sulla pelle e muovete l'apparecchio in lunghe passate verso l'alto o nel senso opposto alla crescita dei peli esercitando una leggera pressione.
  • Seite 65 Pettini regola altezza I pettini a scatto per peli corti vi consentono di rifinire i peli su diverse lunghezze. - I modelli QP2532, QP2531 e QP2530 vengono forniti con 4 pettini a scatto: 5 mm, 3 mm, 2 mm e 1 mm. - I modelli QP2526, QP2525 e QP2520 vengono forniti con 3 pettini a scatto: 5 mm, 3 mm e...
  • Seite 66: Pulizia E Manutenzione

    Italiano - Per ottenere una rifinitura uniforme, controllate che la parte piatta del pettine sia sempre perfettamente a contatto con la pelle. - Poiché i peli crescono in diverse direzioni, anche l'apparecchio deve essere passato in più direzioni (verso l'alto, verso il basso e in diagonale).
  • Seite 67: Pulizia Dell'apparecchio

    Italiano Attenzione: Non usate aria compressa, prodotti o sostanze abrasive o detergenti aggressivi, come benzina o acetone, per pulire l'apparecchio. Attenzione: Non battete l'apparecchio su una superficie per rimuovere l'acqua, poiché questo potrebbe danneggiarlo. Sostituite la lama se è danneggiata. Pulizia dell'apparecchio 1 Rimuovete il pettine dalla lama.
  • Seite 68 Italiano 5 Sciacquate i pettini con acqua tiepida. 6 Scuotere per eliminare accuratamente l'acqua in eccesso e lasciare asciugare completamente tutte le parti all'aria. Nota: la lama è fragile. Maneggiatela con cura. Sostituite la lama se è danneggiata. Conservazione Quando portate l'apparecchio in viaggio o lo riponete, inserite sempre il cappuccio di protezione sulla lama per proteggerla.
  • Seite 69: Sostituzione Della Lama

    OneBlade. Sostituite la lama esclusivamente con una lama Philips originale. A seconda della frequenza di utilizzo, la durata della lama potrebbe essere superiore o inferiore. Analogamente a quanto accade con una rasoio...
  • Seite 70: Ordinazione Degli Accessori

    Web www.philips.com/parts-and- accessories o recatevi presso il vostro rivenditore Philips. Potete inoltre contattare il Centro Assistenza Clienti Philips del vostro paese. Per i dettagli, fate riferimento all'opuscolo della garanzia internazionale. Sono disponibili le seguenti parti di ricambio:...
  • Seite 71: Garanzia E Assistenza

    Avvertenza: Attenzione: le estremità delle batterie sono molto affilate. Garanzia e assistenza Per assistenza o informazioni, visitate il sito Web all'indirizzo www.philips.com/support oppure leggete l'opuscolo della garanzia internazionale. Limitazioni della garanzia La lama non è coperta dalla garanzia internazionale perché è un componente soggetto...
  • Seite 72: Risoluzione Dei Problemi

    Questo capitolo riassume i problemi più comuni che potreste riscontrare con il dispositivo. Se non riuscite a risolvere il problema con le informazioni riportate di seguito, visitate il sito www.philips.com/support per un elenco di domande frequenti oppure contattate il Centro Assistenza Clienti del vostro paese. Problema...
  • Seite 73 Philips. La lama è Accendete l'apparecchio e bloccata dallo sciacquate la lama sotto il sporco.
  • Seite 74 Italiano Problema Possibile Soluzione causa La lama è Sostituite la lama con una danneggiata o nuova (vedere 'Sostituzione'). usurata. L'apparecchio La lama è Sostituite la lama con una fa uno strano danneggiata o nuova (vedere 'Sostituzione'). rumore. usurata. La lama è fissata Rimuovetela e reinseritela.
  • Seite 75: Русский

    5 Индикатор состояния аккумулятора (только модели QP2532, QP2531, QP2530) 6 Чехол (только модель QP2520) 7 Маленький штекер 8 Индикатор зарядки аккумулятора (только модели QP2532, QP2526, QP2525, QP2522, QP2521, QP2520) 9 Блок питания (QP2531, QP2530: тип HQ850. QP2532, QP2526, QP2525, QP2522, QP2521, QP2520: тип A00390) 10 Сменное...
  • Seite 76 Русский Важные сведения о безопасности - Дополнение к эксплуатационной документации Перед началом эксплуатации прибора и аксессуаров к нему внимательно ознакомьтесь с этой важной информацией и сохраните ее для дальнейшего использования в качестве справочного материала. Входящие в комплект аксессуары могут различаться в зависимости от вида...
  • Seite 77 Русский - Данным прибором могут пользоваться дети старше 8 лет и лица с ограниченными возможностями сенсорной системы или ограниченными умственными или физическими способностями, а также лица с недостаточным опытом и знаниями, но только под присмотром других лиц или после инструктирования о безопасном использовании...
  • Seite 78: Электромагнитные Поля (Эмп)

    100–240 вольт до безопасного напряжения ниже 24 вольт. - Максимальный уровень шума: Lc = 75 dB(A). Зарядка Примечание. Данный прибор можно использовать, только если шнур не подключен. QP2532, QP2531, QP2530: зарядка аккумулятора занимает приблизительно 4 часа. QP2526, QP2525, QP2522, QP2521, QP2520: зарядка аккумулятора занимает приблизительно 8 часов.
  • Seite 79 Русский Полностью заряженный аккумулятор обеспечивает до 60 минут (в моделях QP2532, QP2531, QP2530) или 45 минут (в моделях QP2526, QP2525, QP2522, QP2521, QP2520) автономной работы. Зарядите прибор перед первым использованием. Впоследствии заряжайте прибор, когда индикатор будет указывать на низкий уровень заряда аккумулятора.
  • Seite 80: Использование Прибора

    производительности прибор необходимо зарядить. Зарядка с помощью блока питания 1 Вставьте маленький штекер в прибор и подключите адаптер к розетке электросети. 2 Только модели QP2532, QP2526, QP2525, QP2522, QP2521, QP2520: если прибор подключен к розетке, индикатор зарядки аккумулятора на адаптере светится непрерывно.
  • Seite 81: Включение И Выключение Прибора

    Русский Включение и выключение прибора 1 Чтобы включить прибор, нажмите кнопку включения/выключения один раз. 2 Чтобы выключить прибор, нажмите один раз на кнопку включения/выключения. Бритье Предупреждение! Перед использованием прибора всегда проверяйте лезвие на наличие повреждений или износа.Не используйте прибор, если его лезвие повреждено...
  • Seite 82 Русский 2 Приложите лезвие к коже и широкими движениями перемещайте прибор вверх или против направления роста волос, слегка прижимая его к коже. Примечание. Плотно прижимайте поверхность лезвия к коже. 3 После каждого использования прибор необходимо выключить и очистить (см. раздел «Очистка и уход»). Придание...
  • Seite 83 раздел «Очистка и уход»). Подравнивание Насадки-триммеры Насадки-гребни для щетины позволяют придать волосам разную длину. - Модели QP2532, QP2531 и QP2530 поставляются в комплекте с 4 насадками- гребнями для щетины: 5 мм, 3 мм, 2 мм и 1 мм. - Модели QP2526, QP2525 и QP2520 поставляются в комплекте с 3 насадками- гребнями...
  • Seite 84: Очистка И Уход

    Русский - Так как волосы на различных участках головы растут в разных направлениях, прибор также необходимо перемещать в разных направлениях (вверх, вниз или поперек). - Подравнивание триммером легче производить, если волосы и кожа сухие. Подравнивание с помощью гребня 1 Установите гребень на лезвие зубцами вверх.
  • Seite 85: Очистка Прибора

    Русский чистящие средства или растворители типа бензина или ацетона. Внимание! Не пытайтесь вытряхнуть воду из прибора путем постукивания о какую-либо поверхность: это может привести к повреждению. В случае повреждения замените лезвие. Очистка прибора 1 Снимите гребень с лезвия. Обязательно выключайте прибор до того, как надеть или снять...
  • Seite 86 Русский 5 Промойте гребни теплой водой. 6 Тщательно стряхните остатки воды и дайте всем деталям время полностью высохнуть на открытом воздухе. Примечание. Лезвие является хрупкой деталью. Обращайтесь с ним бережно. В случае повреждения замените лезвие. Хранение Всегда устанавливайте на лезвие защитный колпачок...
  • Seite 87 она станет явно видимой, рекомендуется заменить лезвие для получения наилучших результатов использования OneBlade. Для замены лезвия всегда выбирайте оригинальные лезвия Philips. Периодичность и способы применения прибора могут увеличить или сократить срок службы лезвия. Как и в случае обычной бритвы, лезвие прибора со временем притупляется, из- за...
  • Seite 88: Утилизация

    Заказ принадлежностей Чтобы приобрести аксессуары или запасные части, посетите веб-сайт www.philips.com/parts-and-accessories или свяжитесь с центром поддержки потребителей Philips в вашей стране (контактная информация приведена на гарантийном талоне). В продаже имеются следующие детали: - Лезвие QP210, 1 шт. - Лезвие QP220, 2 шт.
  • Seite 89 части прибора. 6 Извлеките аккумулятор из внутреннего корпуса с помощью отвертки. Аккумулятор зафиксирован двусторонним скотчем. Предупреждение. Будьте осторожны: контактные полосы аккумулятора очень острые. Гарантия и поддержка Для получения поддержки или информации посетите веб-сайт www.philips.com/support или ознакомьтесь с информацией на гарантийном талоне.
  • Seite 90: Ограничения Гарантии

    Данный раздел посвящен наиболее распространенным проблемам, с которыми вы можете столкнуться при использовании прибора. Если не удается самостоятельно справиться с возникшими проблемами, см. ответы на часто задаваемые вопросы на веб- сайте www.philips.com/support или обратитесь в центр поддержки потребителей в вашей стране.
  • Seite 91 Русский Проблема Возможная Способы решения причина Прибор Во время Выключите прибор. подключен к зарядки сети, но не прибор должен заряжается. быть выключен. Во время Во время Прежде чем использовать подключения к зарядки прибор, отключите его от электросети пользоваться электросети. прибор не прибором...
  • Seite 92 индикатор заряда аккумулятора по-прежнему не светится и не мигает, обратитесь в торговую организацию по месту приобретения или в сервисный центр компании Philips. Лезвие Включите прибор и промойте засорено. лезвие под струей теплой воды. Поместите лезвие в емкость с теплой водой (температура...
  • Seite 93 Русский Проблема Возможная Способы решения причина Прибор Лезвие Наденьте лезвие на прибор перестал неправильно до щелчка. подравнивать установлено на волосы. рукояти. Лезвие Замените лезвие новым (см. повреждено 'Замена'). или изношено. Прибор издает Лезвие Замените лезвие новым (см. странный звук. повреждено 'Замена').
  • Seite 94 Русский Проблема Возможная Способы решения причина Лезвие Замените лезвие новым (см. является 'Замена'). хрупкой деталью, и его легко повредить. Поврежденное лезвие не может обеспечить оптимальный результат.
  • Seite 95 Empty page before back cover...
  • Seite 96 © 2019 Koninklijke Philips N.V. All rights reserved 8888.989.2591.1 (19/9/2019) >75 % recycled paper >75 % papier recyclé...

Inhaltsverzeichnis