Herunterladen Inhalt Inhalt Diese Seite drucken
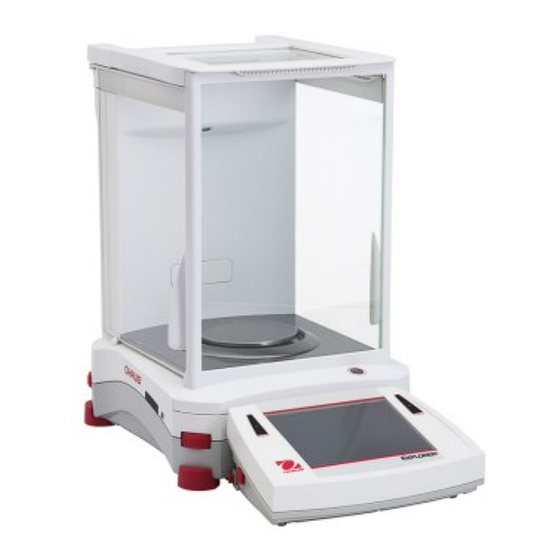
OHAUS EX124 Anleitung
Vorschau ausblenden Andere Handbücher für EX124:

Werbung

Verfügbare Sprachen
  • DE

Verfügbare Sprachen

  • DEUTSCH, seite 27
EN
ES
FR
®
DE
Explorer
Balances
User Guide
IT
PT
SV
DA
PL
NL
CZ
HU

Werbung

Inhaltsverzeichnis
loading

Inhaltszusammenfassung für OHAUS EX124

  • Seite 1 ® Explorer Balances User Guide...
  • Seite 3: Safety Information

    Use the instrument exclusively for weighing as described in the operating instructions. Any other type of use and operation beyond the limits of technical specifications without written consent from OHAUS, is considered as not intended. This instrument complies with current industry standards and the recognized safety regulations; however, it can constitute a hazard in use.
  • Seite 4: Terminal Setup

    However the Terminal needs to be detached temporarily in order to assemble parts of the Draft Shield. Refer to the illustrations and instructions below to identify and assemble your Explorer Balance. Note: The Terminal is identical for all Explorer Balance models. 2.4 Installing the Wind Ring, Weighing Platform on Models EX124 , EX224 and EX324 Note: Assembly instructions also apply to models with the suffix M or N.
  • Seite 5 EN-3 Side Door Installation Unlock Align Clear Lock Position glass door to slide. Open lock tab (top); insert in top groove and slide inside bottom groove. Close lock tab. Front Panel Installation Release terminal Align Push to rear Reconnect terminal Press button to separate Terminal from Base.
  • Seite 6: Operation

    AC Adapter Installation (only certain models) Connect the AC adapter to the instrument's power input connector, and then connect the AC plug to a suitable electrical outlet. Attention: Only use an AC adapter specified by OHAUS. Attention: For optimal weighing performance, allow the balance to warm up for 60 minutes prior to use.
  • Seite 7: Principal Functions And Main Menu

    The exterior surfaces of the instrument may be cleaned with a cloth dampened with water and a mild detergent. 4.2 Troubleshooting For technical issues contact an Authorized Ohaus Service Agent. Please visit our website www.ohaus.com to locate the Ohaus office nearest you.
  • Seite 8: Technical Data

     Mains supply voltage fluctuations: up to ± 10% of the nominal voltage  Installation category II  Pollution degree: 2  TABLE 9-1. SPECIFICATIONS MODEL EX124 EX224 EX324 Capacity 120 g 220 g 320 g Readability d 0.1 mg Repeatability (std.
  • Seite 9 EN-7 MODEL EX224x EX324x EX423x EX1103x 220 g 320 g 420 g 1100 g 0.01 g 0.01 g 0.02 g 0.1 g 0.0001 g 0.0001 g 0.001 g 0.001 g 0.001 g 0.001 g 0.01 g 0.01 g Repeatability (std. 0.0001 g 0.001 g dev.)
  • Seite 10 Standard This product complies with the EU Directives 2014/30/EU (EMC), 2014/35/EU (LVD) and 2014/31/EU (NAWI). The EU Declaration of Conformity is available online at www.ohaus.com/ce. This product complies with the EU Directive 2002/96/EC (WEEE). Please dispose of this product in accordance with local regulations at the collecting point specified for electrical and electronic equipment.
  • Seite 11: Información Sobre Seguridad

    Este equipo cumple con los estándares de la industria y las normas actuales de seguridad reconocidas; sin embargo, puede constituir un peligro en su uso. Si el equipo no se utiliza de acuerdo al manual de instrucciones, su seguridad puede verse afectada, por lo que OHAUS no asume ninguna responsabilidad.
  • Seite 12 Consulte las ilustraciones e instrucciones que aparecen a continuación para identificar y montar su balanza Explorer. Nota: El terminal es idéntico en todos los modelos de la balanza Explorer. 2.4 Instalación del anillo indicador de viento y plataforma de pesaje en los modelos EX124 , EX224 , y EX324 Nota: Las instrucciones de montaje se aplican también a los modelos con el sufijo M o N.
  • Seite 13 ES-3 Instalación de las puertas laterales Desbloquear Alinear Retirar Bloquear Colocar la puerta de cristal a deslizar. Abrir la pestaña de bloqueo (superior), introducirla en la ranura superior y deslizarla hacia la ranura inferior. Cerrar la pestaña de bloqueo. Instalación del panel frontal Liberar el terminal Alinear Empujar hacia...
  • Seite 14: Nivelación Del Aparato

    Conecte el adaptador de corriente alterna al conector de entrada de alimentación del equipo, y luego conecte el enchufe de CA a una toma eléctrica adecuada. Atención: Utilice só lo un adaptador de CA especificado por OHAUS. Atención: Permita que el equipo se caliente durante 60 minutos para obtener un rendimiento de pesaje óptimo.
  • Seite 15: Mantenimiento

    Para la superficie exterior del dispositivo puede utilizar un paño ligeramente humedecido con agua o un detergente suave. 4.2 Solución de problemas Para cuestiones técnicas póngase en contacto con un agente de servicio autorizado de Ohaus. Por favor, visite nuestra página web www.ohaus.com para localizar la oficina de Ohaus más cercana a usted.
  • Seite 16: Datos Técnicos

     Fluctuación de voltaje del suministro: ± 10% del voltaje nominal  Categorí a de instalación: II  Nivel de contaminación: 2 TABLA 9-1. ESPECIFICACIONES MODELO EX124 EX224 EX324 Capacidad 120 g 220 g 320 g Precisión de lectura d 0,1 mg Repetibilidad (desv.
  • Seite 17 ES-7 Nota: M = Tipo Aprobado CE N = Certificación NTEP y aprobación de Measurement Canada MODELO EX4202x EX10202x EX10201x Máx 4200 g 10200 g 10200 g Mí n 0,5 g 10 g 0,01 g 0,01 g 0,1 g 0,1 g 0,1 g 0,1 g Repetibilidad (desv.
  • Seite 18 Este producto cumple con la directiva de la UE 2014/30/UE (EMC), 2014/35/UE (LVD) y 2014/31/UE (NAWI). La Declaración de Conformidad de la UE está disponible en www.ohaus.com/ce. Este producto cumple con la directiva de la UE 2002/96/CE (WEEE). Elimine este producto, según las disposiciones locales, mediante el sistema de recogida selectiva de aparatos eléctricos y electrónicos.
  • Seite 19: Informations De Securite

    écrit de la société OHAUS sera considéré comme non conforme. Cet appareil est conforme aux normes industrielles et aux règles de sécurité en vigueur ; cependant, son utilisation peut engendrer un risque de danger.
  • Seite 20 En revanche, le terminal doit être détaché provisoirement pour monter les pièces de la cage. Consulter les illustrations et les instructions ci-après pour identifier et assembler votre Balance Explorer. Note: Le terminal sera le même dans tous les modèles des balances Explorer. 2.4 Modèles EX124 , EX224 et EX324...
  • Seite 21 FR-3 Installation des portes latérales Déverrouiller Aligner Effacer Verrouiller Enfoncer la porte vitrée. Ouvrir la languette de verrouillage (supérieure), placer dans le sillon supérieur et enfoncer dans le sillon supérieur. Fermer la languette de verrouillage. Installation du panneau avant Dégager le Aligner terminal Pousser en arrière...
  • Seite 22 Brancher l'adaptateur CA à la prise de l'appareil, et puis brancher la fiche CA à une prise d'alimentation adaptée. Attention : N'utiliser que l'adaptateur CA recommandé par OHAUS. Attention : Pour les résultats de pesage optimaux, laisser la balance chauffer pendant 60 minutes avant l'utilisation.
  • Seite 23: Entretien

    Le boî tier peut être nettoyé avec un chiffon humide et un détergent doux. 4.2 Dépannage Pour les questions techniques, contacter un ré parateur agré é Ohaus. Visiter notre site Web www.ohaus.com pour trouver le bureau Ohaus le plus proche de vous.
  • Seite 24: Donnees Techniques

     Alimentation secteur - fluctuations de tension: jusqu'à ± 10% de la tension nominale  Catégorie d'installation II:  Degré de pollution: 2 TABLEAU 9-1. CARACTÉRISTIQUES TECHNIQUES MODÈLE EX124 EX224 EX324 Portée 120 g 220 g 320 g Graduation d 0,1 mg Reproductibilité...
  • Seite 25 FR-7 Note: M = agréé CE par type N = agrée auprès de NTEP et Mesures Canada MODÈLE EX4202x EX10202x EX10201x 4200 g 10200 g 10200 g 0,5 g 10 g 0,01 g 0,01 g 0,1 g 0,1 g 0,1 g 0,1 g Reproductibilité...
  • Seite 26 Norme Ce produit est conforme aux directives europé ennes 2014/30/EU, 2014/35/EU et 2014/31/EU. La déclaration de conformité européenne est disponible en ligne sur www.ohaus.com/ce. Ce produit est conforme à la directive europé enne 2002/96/CE (DEEE). Merci de rejeter ce produit conformément à...
  • Seite 27: Sicherheitsinformationen

    Verwenden Sie das Gerät ausschließlich für <Wiegen/Feuchtigkeitsbestimmung/ usw. entsprechend der Beschreibung in der Bedienungsanleitung. Jede andere Art von Nutzung und Betrieb außerhalb der technischen Spezifikationsgrenzen wird, ohne schriftliche Zustimmung von OHAUS, als nicht bestimmungsgemäßer Gebrauch angesehen. Dieses Gerät entspricht den aktuellen Industriestandards und den anerkannten Sicherheitsregeln, es kann aber eine Gefahr im Einsatz darstellen.
  • Seite 28 DE-2 EXPLORER BALANCE 2.4 Windring und Wägeplattform in Modellen EX1241, EX2241 und EX324 installieren Anmerkung: Die Anweisungen für den Zusammenbau gelten auch für die Modelle mit Suffix M oder N. Den Windring in Position bringen. Die Plattformbaugruppe auf den Montagekegel in der Mitte der Waage aufsetzen.
  • Seite 29: Wägeschale Und Windschutz Installieren - Modell Ohne Zugluftschutz

    DE-3 Installation der seitlichen Tür Entriegeln Ausrichten Freigeben Verriegeln Glastü r zum Hineinschieben positionieren. Verriegelungslaschen (oben) öffnen; in die obere Rille einsetzen und in die untere Rille schieben. Verriegelungslaschen schließen. Installation der Vorderplatte 1. Terminal lösen Ausrichten Nach unten 4. Terminal wieder verbinden drücken Knopf drücken um Terminal von der Wägebrü...
  • Seite 30: Stromversorgung Anschließen

    Netzadapter installieren (nur gewählte Modelle) Verbinden Sie das AC-Adapter mit dem Netzanschluss des Gerätes und schließen Sie den Netzstecker an eine geeignete Steckdose an. Achtung: Benutzen Sie nur einen von OHAUS spezifizierten AC-Adapter. Achtung: Um optimale Effizient sicherzustellen, geben sie 60 Minuten Zeit für die Erwärmung vor dem Betrieb.
  • Seite 31: Hauptfunktionen Und Hauptmenü

    Die Gehäuseflächen dü rfen mit einem fusselfreien, leicht mit Wasser oder einer milden Reinigungslösung geträ nktes Tuch gereinigt werden. 4.2 Fehlerbehebung Bei technischen Fragen wenden Sie sich an den autorisierten Ohaus Service Agenten. Besuchen Sie unsere Webseite unter www.ohaus.com, um eine Ohaus-Niederlassung in Ihrer Nähe zu finden.
  • Seite 32: Technische Daten

    Luftfeuchtigkeit: maximale relative Luftfeuchtigkeit 80 % für Temperaturen bis zu 30° C lineal abnehmend bis 50% relativer Luftfeuchtigkeit bei 40° C  Netzspannungsschwankungen: bis ± 10% der Nennspannung  Installationskategorie II  Verschmutzungsgrad: 2 TABELLE 9-1. SPEZIFIKATIONEN MODELL EX124 EX224 EX324 Kapazitä t 120 g 220 g 320 g Ablesbarkeit d 0.1 mg Wiederholbarkeit 0.0001 g...
  • Seite 33 DE-7 MODEL EX224x EX324x EX423x EX1103x 220 g 320 g 420 g 1100 g 0.01 g 0.01 g 0.02 g 0.1 g 0.0001 g 0.0001 g 0.001 g 0.001 g 0.001 g 0.001 g 0.01 g 0.01 g Wiederholbarkeit 0.0001 g 0.001 g (Stand.abweich (g) Linearität (g)
  • Seite 34: Normenkonformität

    Dieses Produkt entspricht der EU-Richtlinie 2002/96/EC (WEEE). Entsorgen Sie das Produkt gemäß den lokalen Bestimmungen in einer angegebenen Sammelstelle für elektrische und elektronische Geräte. Hinweise zur Entsorgung in Europa finden Sie unter www.ohaus.com/weee. Zugelassene Wä gegerä te Wenn die Waage im Handel oder in gesetzlich kontrollierten Anwendungen verwendet wird, muss sie eingestellt, geeicht und verplombt werden entsprechend der lokalen Regulierungen über Gewichte und Maße.
  • Seite 35: Informazioni Sulla Sicurezza

    Questo strumento è conforme agli standard industriali attuali e alle norme di sicurezza riconosciute; tuttavia, può costituire un pericolo durante l'uso. OHAUS non si assume alcuna responsabilità per l'uso dello strumento non conforme alle presenti istruzioni che può comprometterne la sicurezza.
  • Seite 36 Consultare le immagini e le istruzioni riportate di seguito per individuare e assemblare la bilancia Explorer. Nota: il terminale è identico per tutti i modelli di bilance Explorer. 2.4 Installazione dell'anello per correnti d'aria e della piattaforma di pesa nei modelli EX124 , EX224 e EX324 Nota: le istruzioni di assemblaggio sono applicabili anche ai modelli con i suffissi M o N.
  • Seite 37 IT-3 Installazione delle porte laterali Sbloccare Allineare Liberare Bloccare Posizionare la porta in vetro nella guida. Aprire la linguetta di blocco (superiore), inserire la porta nella scanalatura superiore e farla scorrere all'interno della scanalatura inferiore. Chiudere la linguetta di blocco. Installazione del pannello anteriore 1.
  • Seite 38: Collegamento Dell'alimentazione Elettrica

    Collegare l'adattatore CA al connettore di alimentazione dello strumento, quindi collegare la spina CA ad una presa elettrica. Attenzione: Utilizzare solo l'adattatore CA indicato da OHAUS. Attenzione: Per garantire le migliori prestazioni di pesatura, lasciare riscaldare la bilancia per 60 minuti prima dell'uso.
  • Seite 39: Manutenzione

    Sulle superfici dell'apparecchio può essere utilizzato un panno leggermente inumidito con acqua o con un detergente delicato. 4.2 Risoluzione dei problemi Per problemi tecnici contattare un agente di manutenzione Ohaus autorizzato. Si prega di visitare il nostro sito web www.ohaus.com per individuare l'ufficio Ohaus più vicino.
  • Seite 40: Dati Tecnici

     Fluttuazioni di tensione nell'alimentazione di rete: fino a ± 10% della tensione nominale  Categoria di installazione II  Grado di inquinamento: 2 TABELLA 9-1. SPECIFICHE MODELLO EX124 EX224 EX324 Portata 120 g 220 g 320 g Leggibilità d 0,1 mg Ripetibilità...
  • Seite 41 IT-7 N = coperto da certificato NTEP e da approvazione Measurement Canada MODELLO EX4202x EX10202x EX10201x Max. 4200 g 10200 g 10200 g Min. 0,5 g 10 g 0,01 g 0,01 g 0,1 g 0,1 g 0,1 g 0,1 g Ripetibilità...
  • Seite 42 Questo prodotto è conforme alla direttiva 2002/96/CE (WEEE). Si prega di smaltire questo prodotto in conformità alla normativa vigente presso il punto di raccolta indicato per le apparecchiature elettriche ed elettroniche. Per le norme di smaltimento vigenti in Europa, fare riferimento a www.ohaus.com/weee. Strumenti di pesatura verificati Quando lo strumento viene usato nel commercio o per un'applicazione regolata dalle disposizioni di legge, deve essere impostato, verificato e sigillato in conformità...
  • Seite 43: Informações De Segurança

    ã o. Se o instrumento não for utilizado de acordo com estas instruç ões de funcionamento, a proteç ão pretendida do instrumento pode ficar comprometida e a OHAUS não assume qualquer responsabilidade. 2. INSTALAÇÃO 2.1 Selecionar a localização...
  • Seite 44 PT-2 BALANÇA EXPLORER 2.4 Instalação do anel eólico, plataforma de pesagem nos modelos EX124 , EX224 EX324 Nota: as instruç ões de montagem também se aplicam aos modelos com o sufixo M ou N. Coloque o anel eó lico na posiç ão.
  • Seite 45 PT-3 Instalação da porta lateral Desbloquear linhar Libertar Bloquear Posicione a porta em vidro para deslizar. Abra a patilha de bloqueio (superior), insira na ranhura superior e deslize na ranhura inferior. Feche a patilha de bloqueio. Instalação do painel frontal Libertar terminal Alinhar Empurrar para trás...
  • Seite 46 CA a uma saí da elétrica adequada. Atenção: Utilize apenas um <cabo de alimentaç ão/adaptador> de CA especificado pela OHAUS. Atenção: para um desempenho de pesagem ideal, deixe a balanç a aquecer durante 60 minutos antes da utilizaç...
  • Seite 47 As superfí cies exteriores do instrumento podem ser limpas com um pano humedecido com água e um detergente neutro. 4.2 Resolução de problemas Para problemas técnicos, entre em contacto com um agente de serviç o autorizado da Ohaus. Visite o nosso site Web www.ohaus.com para localizar o estabelecimento Ohaus mais próximo de si.
  • Seite 48: Dados Técnicos

    Flutuaç ões de tensão da fonte de alimentaç ão: até ± 10% da tensão nominal.  Grau de poluiç ão: 2  Categoria de instalaç ã o: II TABLE 9-1. ESPECIFICAÇÕES Modelo EX124 EX224 EX324 Capacidade 120 g 220 g 320 g Legibilidade d 0.1 mg...
  • Seite 49 PT-7 Modelo EX224x EX324x EX423x EX1103x 220 g 320 g 420 g 1100 g 0.01 g 0.01 g 0.02 g 0.1 g 0.0001 g 0.0001 g 0.001 g 0.001 g 0.001 g 0.001 g 0.01 g 0.01 g Repetibilidade (Std. 0.0001 g 0.001 g Dev.) (g)
  • Seite 50 Este produto cumpre com as diretivas da UE 2014/30/UE (EMC), 2014/35/UE (LVD) e 2014/31/UE (NAWI). A Declaraç ão de Conformidade da UE está disponí vel online em www.ohaus.com/ce. Este produto cumpre com a diretiva da UE 2002/96/CE (REEE). Elimine este produto de acordo com os regulamentos locais no ponto de recolha especificado para o equipamento elétrico e eletrónico.
  • Seite 51: Säkerhetsinformation

    OHAUS, betraktas som inte avsedd. Detta instrument uppfyller gä llande branschstandarder och erkända säkerhetsbestämmelser; men det kan utgö ra en fara i bruk. Om instrumentet inte används i enlighet med dessa användarinstruktioner, kan skydd av instrumentet försämras och OHAUS tar inget ansvar. 2. INSTALLATION 2.1 Vä...
  • Seite 52 SV-2 EXPLORER VÅG 2.4 Installera Vind Ringen, Vägnings platformen på modellerna EX124 , EX224 , och EX324 Notera: Monteringsanvisningar gäller även modeller med suffixet M eller N. 1. Placera vind ringen i position. 2. Sätt plattformssammansättningen i monterings konen som ligger i mitten av vågen.
  • Seite 53 SV-3 Sido-Dörr Montering Lås upp Rikta in Skjut igenom Lås Positionera glas dörren fö r att glida. Öppna lå s tappen (toppen); för in i toppspå ret och skjut inuti bottenspåret. Stäng lås tappen. Montering av den främre panelen Frigör Terminalen Rikta in Tryck till bakre Anslut terminalen...
  • Seite 54 AC Adapter Installation (endast för vissa modeller) Anslut AC adapter nätkabeln till instrumentets strömingång, och anslut sedan nätkontakten till ett lämpligt eluttag. Uppmärksamhet: Använd endast en nätadapter som anges av OHAUS. Uppmärksamhet: Fö r optimal vägningsprestanda, låta instrumentet värmas upp i 60 minuter före användning.
  • Seite 55 De yttre ytorna på instrumentet kan rengö ras med en fuktig trasa med vatten och ett milt rengöringsmedel. 4.2 Felsökning För tekniska problem kontakta en godkänd OHAUS service agent. För tekniska frå gor kontakta ett auktoriserat OHAUS serviceombud. Besök gärna vå r hemsida www.ohaus.com för att hitta OHAUS kontoret nä rmast dig.
  • Seite 56: Teknisk Data

    40 ° C.  Nätspännings fluktuationer: upp till ± 10% av nominell spänning Installation category II  Installations kategory II  Föroreningsgrad: 2 SPECIFIKATIONER: MODELL EX124 EX224 EX324 120 g 220 g 320 g Kapacitet 0.1 mg Läsbarhet d 0.0001 g...
  • Seite 57 SV-7 MODEL EX4202x EX10202x EX10201x 4200 g 10200 g 10200 g 0.5 g 10 g 0.01 g 0.01 g 0.1 g 0.1 g 0.1 g 0.1 g Upprepbarhet (Std.Av.) 0.01 g 0.1 g Linearitet +0.02 g +0.2 g AC Adapter Ingående: 100-240 VAC 0.6A 50-60 Hz Ström AC Adapter Utgående: 12 VDC 1.5A Notera:...
  • Seite 58 Standard Denna produkt överensstämmer med EU Direktiv 2014/30/EU (EMC), 2014/35/EU (LVD) och 2014/31/EU (NAWI). EU Deklarationen om överensstämmelse finns tillgänglig på www.ohaus.com/ce. Denna produkt överensstämmer med EU Direktiv 2002/96/EC (WEEE). Vänligen kassera denna produkt i enlighet med lokala föreskrifter vid uppsamlingspunkten angiven för elektrisk och elektronisk utrustning.
  • Seite 59: Sikkerhedsinformationer

    Tilsigtet brug Brug udelukkende instrumentet til<vejning/fugtbestemmelse/etc.>som beskrevet i brugsanvisningen. Enhver anden form for brug og drift, der går ud over græ nserne i de tekniske specifikationer, uden skriftligt samtykke fra OHAUS, betragtes som utilsigtet. Dette instrument er i overensstemmelse med gæ ldende industristandarder og anerkendte sikkerhedsforskrifter; dog kan det udgøre en fare under brug.
  • Seite 60 Tjek illustrationer og anvisninger nedenfor for at identificere og samle din Explorer-væ gt. Bemæ rk: Terminalen er identisk på alle modeller af Explorer-væ gtene. 2.4 Monter beskyttelsesringen og veje-platformen på modellerne EX124 , EX224 , og EX324 Bemæ...
  • Seite 61 DA-3 Montering af sidepaneler Åben Juster Rengør Lås Placer glaspanelet, så den kan glide. Åben lå sestiften (øverst); indsæ t i øverste rille og glid ind i nederste rille. Luk låsestiften. Montering af frontpanel Frigør terminal Juster Skub bagud Forbind terminalen igen Tryk på...
  • Seite 62 AC adapter Installation (kun visse modeller) Tilslut AC ledningen til instrumentets spæ ndings-indgangstik, og tilslut derefter AC-stikket til en egnet stikkontakt. Obs: Brug kun en AC der opfylder OHAUS specifikationer. Bemæ rk:For at opnå væ gtens optimale ydeevne, så lad væ...
  • Seite 63 T Instrumentets udvendige flader kan rengø res med en klud fugtet med vand og et mildt rengø ringsmiddel 4.2 Fejlfinding Kontakt en autoriseret Ohaus servicetekniker mht. tekniske spørgsmål. Besøg vores hjemmeside www.ohaus.com, for at finde det Ohaus kontor, som er tæ ttest på dig.
  • Seite 64: Tekniske Data

    50 % relativ luftfugtighed ved 40 ° C.  Lysnettets spæ ndingsudsving: op til ± 10 % af den nominelle spæ nding  Installationskategori: II  Forureningsgrad: 2 TABLE 9-1. SPECIFIKATIONER MODEL EX124 EX224 EX324 120 g 220 g 320 g Kapacitet 0.1 mg Læ sbarhed 0.0001 g...
  • Seite 65 DA-7 MODEL EX4202x EX10202x EX10201x 4200 g 10200 g 10200 g 0.5 g 10 g 0.01 g 0.01 g 0.1 g 0.1 g 0.1 g 0.1 g Repeterbarhed (std. afv.) 0.01 g 0.1 g Linearitet +0.02 g +0.2 g AC strø mforsyningsadapter indgang: 100-240 VAC 0.6A 50-60 Hz Spæ...
  • Seite 66 Standard Dette produkt er i overensstemmelse med EU-direktiverne 2014/30/EU (EMC), 2014/35/EU (LVD) og 2014/31/EU (NAWI). EU-erklæ ring om overensstemmelse er tilgæ ngelig online på www.ohaus.com/ce Dette produkt er i overensstemmelse med EU-direktiv 2002/96/EF (WEEE). Bortskaf venligst dette produkt i henhold til lokale regler på indsamlingssteder beregnet til elektrisk og elektronisk udstyr. Mht.
  • Seite 67: Środki Bezpieczeństwa

    Używaj tego urządzenia jedynie w celach opisanych w instrukcji. Każde użycie inne niż jest to opisane w instrukcji i opisie technicznym bez pisemnej zgody firmy OHAUS będzie uznawane jako użycie niezgodne z przeznaczeniem. Niniejszy instrument jest zgodny z obecnymi normami branżowymi I przepisami bezpieczeństwa; jednakże może stanowić...
  • Seite 68 Explorer. Ważne: Dla wszystkich modeli wagi Explorer terminal jest jednakowy. 2.4 Instalacja pierścienia przeciwpodmuchowego i platformy ważącej w modelach EX124 , EX224 , oraz EX324 Ważne: Wskazówki montażowe odnoszą się także do modeli, których nazwa zakończona jest sufiksem M lub N.
  • Seite 69 PL-3 Instalacja drzwi bocznych Odblokować Ustawić Wsunąć Zablokować Ustawić drzwi boczne w celu wsunięcia. Otworzyć blokadę (u góry); włóż drzwi w górne wycięcie i wsuń w dolne wycięcie. Zamknąć blokadę. Instalacja panelu przedniego Odłączyć terminal Ustawić Wcisnąć do tyłu Podłączyć terminal Naciśnij przycisk w celu oddzielenia terminalu od podstawy.
  • Seite 70 Podłącz przewód zasilacza napięcia zmiennego do gniazda urządzenia, a następnie podłącz wtyczkę do odpowiedniego gniazdka zasilania. Uwaga: Należy używać wyłącznie zasilacza sieciowego określonego przez OHAUS. Uwaga: Aby uzyskać optymalne wyniki ważenia, pozostaw wagę na 60 minut w celu rozgrzania. 2.10 Podłączenie interfejsu Użyj wbudowanego portu RS-232 (10101) do połączenia wagi z...
  • Seite 71: Rozwiązywanie Problemów

    Powierzchnia obudowy może być czyszczona szmatką lekko zwilżoną wodą lub delikatnym środkiem czyszczącym. 4.2 Rozwiązywanie problemów W celu rozwiązania problemów technicznych skontaktuj się z autoryzowanym dealerem OHAUS. Odwiedź naszą stronę internetową www.ohaus.com w celu znalezienia biura OHAUS w Twojej okolicy...
  • Seite 72: Dane Techniczne

    50% przy 40° C  Wahania napięcia zasilającego: do 10% napięcia znamionowego  Kategoria instalacji: II  Stopień zanieczyszczeń: 2 TABELA 9-1. SPECYFIKACJA MODEL EX124 EX224 EX324 Maksymalne obciążeni 120 g 220 g 320 g Dokładność odczytu d 0,1 mg Powtarzalność...
  • Seite 73 PL-7 MODEL EX224x EX324x EX423x EX1103x 220 g 320 g 420 g 1100 g 0,01 g 0,01 g 0,02 g 0,1 g 0,0001 g 0,0001 g 0,001 g 0,001 g 0,001 g 0,001 g 0,01 g 0,01 g Powtarzalność 0,0001 g 0,001 g (odch.std.) Liniowość...
  • Seite 74: Zgodność Z Normami

    Produkt spełnia wymagania dyrektywy w sprawie kompatybilności elektromagnetycznej 2014/30/UE, dyrektywy niskonapięciowej 2014/35/UE oraz dyrektywy w sprawie wag nieautomatycznych 2014/31/UE. Deklaracja zgodności jest dostępna online na stronie www.ohaus.com/ce. Produkt spełnia wymagania dyrektywy 2002/96/WE (WEEE). Prosimy o przekazywanie zużytego sprzętu zgodnie z lokalnymi przepisami do punktów zbierających zużyty sprzęt elektryczny i elektroniczny.
  • Seite 75: Veiligheidsvoorschriften

    Beoogd gebruik Gebruik het instrument uitsluitend voor het wegen zoals in de handleiding wordt beschreven. Elke andere vorm van gebruik en bediening buiten de grenzen van de technische specificaties zonder schriftelijke toestemming van OHAUS, wordt beschouwd als niet beoogd. Dit instrument voldoet aan de huidige industrienormen en erkende veiligheidsvoorschriften; het gebruik kan echter gevaren opleveren.
  • Seite 76 NL-2 EXPLORER BALANCE 2.4 De windring en het weegplatform installeren op de modellen EX124 , EX224 EX324 Opmerking: De montage-instructies zijn ook van toepassing op modellen met het achtervoegsel M of N. Plaats de windring in de juiste positie. Plaats het gemonteerde platform op de bevestigingskegel in het midden van de weegschaal.
  • Seite 77 NL-3 Installatie van de zijdeur Ontgrendelen: Uitlijnen Deblokkeren Vergrendelen Position glass door to slide. Open lock tab (top); insert in top groove and slide inside bottom groove. Close lock tab. Front Panel Installation De terminal Uitlijnen losmaken De achterzijde De terminal opnieuw naar buiten aansluiten drukken...
  • Seite 78 Sluit het snoer van de netvoedingsadapter aan op de ingangsaansluiting van het instrument en steek daarna de stekker in een geschikt stopcontact. Aandacht: Gebruik alleen een netvoedingsadapter opgegeven door OHAUS. Aandacht: Voor optimale weegprestaties laat u de weegschaal voorafgaand aan het gebruik 60 minuten opwarmen.
  • Seite 79 De buitenkant van het apparaat kan worden gereinigd met een vochtige doek met water en een mild schoonmaakmiddel. 4.2 Problemen oplossen Voor technische problemen neemt u contact op met een erkende onderhoudsvertegenwoordiger van Ohaus. Bezoek onze website www.ohaus.com om het dichtstbijzijnde Ohaus-kantoor te vinden.
  • Seite 80: Technische Gegevens

    50% relative humidity at 40° C  Mains supply voltage fluctuations: up to ± 10% of the nominal voltage  Installation category II  Pollution degree: 2 SPECIFICATIES: MODEL EX124 EX224 EX324 120 g 220 g 320 g Capaciteit 0.1 mg Nauw-keurigheid Herhaal-nauwkeurig-heid 0.0001 g...
  • Seite 81 NL-7 Opmerking: M = EC-type goedgekeurd N = NTEP gecertificeerd en door Measurement Canada goedgekeurd MODEL EX4202x EX10202x EX10201x 4200 g 10200 g 10200 g 0.5 g 10 g 0.01 g 0.01 g 0.1 g 0.1 g 0.1 g 0.1 g Herhaal-nauwkeurig- heid (standaard- 0.01 g...
  • Seite 82 Dit product voldoet aan de EU-richtlijn 2002/96/EC (AEEA). Verwijder dit product in overeenstemming met de plaatselijke regelgeving in het inzamelpunt voor elektrische en elektronische apparatuur. Voor instructies voor het verwijderen in Europa raadpleegt u www.ohaus.com/weee. Geverifieerde weeginstrumenten Wanneer het instrument commercieel wordt verhandeld of gebruikt wordt als een wettelijk gecontroleerde applicatie, moet het ingesteld, geverifieerd en verzegeld worden in overeenstemming met de lokale regelgeving voor gewichten en maten.
  • Seite 83: Bezpečnostní Pokyny

    Tento nástroj je v souladu s platný mi průmyslových standardů a uznávaný ch bezpečnostních pravidel; však může představovat nebezpečí při použití. V případě, že přístroj není používán podle návodu k obsluze, může bý t ochrana přístroje narušena a OHAUS nenese žádnou odpovědnost.
  • Seite 84 CZ-2 EXPLORER BALANCE 2.4 Instalace vážící misky a ochranního kroužku - EX124 , EX224 and EX324 Upozornení : pro technologické a ověřené modely. Položte ochranný kroužek na místo. Vložte vážící misku s kónusem dolu na střed váhy. 2.5 Instalace podpory vážící misky a vážící misky-EX223...
  • Seite 85 CZ-3 2.7 Instalace ochranný ho krytu pro analytické modely Opatrně vyjměte každou ze čtyř ks Skleněné ho krytu z obalu. POZNÁMKA: Před instalací boční dveří , ujistěte se, že nastavení zámku je ve správné poloze, jak je znázorněno zde. ODEMKNUTO: ZAMKNUTO: Postupujte podle postupu .
  • Seite 86 Připojte napájecí kabel AC adaptéru do napájecí ho konektoru vstupu tohoto nástroje, a poté připojte napájecí kabel do vhodné elektrické zásuvky. POZOR: Používejte len originální adaptéry specifikované společností OHAUS UPOZORNENÍ : Nechte váhy min.60 minút zahřívat. 2.10 Komunikační rozhraní Pro propojení váhy s tiskárnou nebo PC používejte zabudované...
  • Seite 87 CZ-5 3. POUŽITÍ 3.1 Přehled Display-u, obrazovky Toto zařízení využívá dotykový displej citlivý. Dotykové plochy a tlačítka pro ovládání funkcí tohoto zařízení jsou nasledovní . Stisknutím otevřete menu nastavení aplikace Stisknutí m Stisknutím si otevřete zmeníte režim knihovnu vážení Nápoveda Instrukce Indikace Stability(*), Net (NET), Gross (G), nuly...
  • Seite 88: Technické Data

    Na tělo váhy používejte lehce navlhčený hadřík vodou nebo jemný m čisticím prostředkem. 4.2 Řešení problémů Pro řešení technických problémů prosí m kontaktujte autorizované ho partnera OHAUS, nebo navštivte naši webovou stránku www.ohaus.com pro pomoc s lokalizací nejbližšího servisní ho bodu. 5. TECHNICKÉ DATA Technické...
  • Seite 89 CZ-7 MODEL EX223 EX423 EX623 EX1103 Váživost 220 g 420 g 620 g 1100 g Odečtelnost d 0.001 g Opakovatelnost 0.001 g (st.odch.) Linearita + 0.002 g AC Adapter Vstup : 100-240 VAC 0.6A 50-60 Hz Napájení AC Adapter Vý stup : 12 VDC 1.5A MODEL EX2202 EX4202...
  • Seite 90 Tento vý robek vyhovuje směrnicím EU 2014/30 / EU (EMC) 2014/35 / EU (LVD) a 2014/31 / EU (NAWI). Prohlášení o shodě EU je k dispozici on-line na www.ohaus.com/ce Tento vý robek vyhovuje směrnicím EU 2014/30 / EU (EMC) 2014/35 / EU (LVD) a 2014/31 / EU (NAWI).
  • Seite 91: Biztonsági Előírások

    Az eszközt kizá ró lag a megadott célra, a kézikönyv előírásainak megfelelően használja. A műszaki előírásokon túli minden más tí pusú használatának és üzemeltetését az OHAUS í rásos engedé lyével tegye. Ez az eszköz megfelel az érvé nyes szabványok és az elismert biztonsá gtechnikai szabá lyoknak.
  • Seite 92 Az Explorer szá llí tása során , a terminál már csatolva (dokkolva) van a mérlegházhoz. Nincs szükség tová bbi beá llí tásra. Amennyiben a terminá lt levá lasztjuk a mérlegházró l, az összeá llí táshoz kérem kövesse a leí rtakat. Megjegyzés: A kijelzőterminál az összes Explorer mérlegmodellnél azonos. 2.4 Védőgyűrű, mérlegtányér beszerelése - EX124 , EX224 és EX324 Megjegyzés: az összeszerelési információk azonosak a technológiai és hitelesí...
  • Seite 93 HU-3 2.7 Analitikai védőbúra bszerelése az analitikai modelleknél Óvatosan bontsa ki a csomagolást és vegye ki az analitikai védőbúra alkotóelemeit.. FIGYELEM: A beszerelés előtt győződjön meg róla, hogy az ajtókon a lakat a megfelelő pozícióban legyen. NYITOTT: ZÁRT: Kövesse az utasításokat az analitikai védőbúra beszereléséhez Oldalsó...
  • Seite 94 Csatlakoztassa az AC-t adaptert a bemeneti konnektorba, és aztán csatlakoztassa a tápellátó kábelt vagy adapter a fali csatlakozóba. Figyelem: cask az OHAUS által előírt adaptert használjon Figyelem: haggyon legalá bb 60 perc bemelegedési időt a mérési pontosság érdekében 2.10 Interfész csatlakozók Használja a beé...
  • Seite 95 HU-5 3. HASZNÁLAT 3.1 Kijelző és alap kijelző Ez az eszköz érintőkijelzővel érkezik. Az érintési felületek és nyomógombok segí tségével lehetséges az eszközt vezé relni. Érintse meg a menübe történő belépéshez Mérési mód Termékkönyvtár választás Információk/ súgó Instrstrukciós üzenetek Stabilitás(*), Net (NET), Gross (G) null érték (>0<) Érintse meg a g-t a kijelzése...
  • Seite 96: M Szaki Adatok

    FELHÍ VÁS: Ne használjon oldószert, agresszí v vegyszereket, ammóniumot és egyéb abrazí v tisztí tószereket. A mérlegházat enyhén nedves tisztí tószeres ronggyal tisztí tsa meg. 4.2 Problé mavadászat Műszaki gondok eseté n forduljon az OHAUS megbí zott szervizpartneréhez. A legközelebbi szerviz partner megtalá lásához látogasson el a www.ohaus.com honlapunkra. 5. MŰSZAKI ADATOK A műszadi adatok a következő...
  • Seite 97 HU-7 MODEL EX223 EX423 EX623 EX1103 Méréshatár 220 g 420 g 620 g 1100 g Osztás d d 0.001 g Ismétlőképesség (st. 0.001 g hiba) Linearitás + 0.002 g AC Adapter Bemenet : 100-240 VAC 0.6A 50-60 Hz Tápellátás AC Adapter Kimenet : 12 VDC 1.5A MODEL EX2202 EX4202...
  • Seite 98 Ez a termék megfelel az uniós irányelveknek 2014/30 / EU (EMC) 2014/35 / EU (LVD) és 2014/31 / EU (NAWI). Az EU megfelelőségi nyilatkozat elérhető online a www.ohaus.com/ce. Ez a termék megfelel az EU 2002/96 / EK irányelv (WEEE). Kérjük, hogy ezt a terméket a helyi előírásoknak megfelelően a kijelölt gyűjtőhelyen az elektromos és elektronikus berendezések.
  • Seite 100 EN-9 Ohaus Corporation 7 Campus Drive Suite 310 Parsippany, NJ 07054 USA Tel: +1 (973) 377-9000 Fax: +1 (973) 944-7177 With offices worldwide. www.ohaus.com * 30283443* P/N 30283443 A © 2015 Ohaus Corporation, all rights reserved.

Inhaltsverzeichnis