
Verwandte Anleitungen für Datalogic OM-DRAGON series


Inhaltszusammenfassung für Datalogic OM-DRAGON series
- Seite 1 OM-DRAGON™ SERIES Quick Reference Guida Rapida Guide Rapide Kurzanleitung Guía Rápida...
- Seite 3 OM-DRAGON™ SERIES QUICK REFERENCE GUIDA RAPIDA GUIDE RAPIDE KURZANLEITUNG GUÍA RÁPIDA...
- Seite 4 Datalogic reserves the right to make modifications and improvements without prior notification. Datalogic shall not be liable for technical or editorial errors or omissions contained herein, bor for incidental or consequential damages resulting from the use of this material. Product names mentioned herein are for identification purposes only and may be trademarks and or registered trademarks of their respective companies.
-
Seite 5: Inhaltsverzeichnis
CONTENTS Using OM-DRAGON™ Radio Cradle ..............2 Installation ......................3 Mounting the Base.................... 3 Portable Desktop Use ............... 3 Fixed Desktop Use................4 Wall Mounting ................... 4 Alignment Plate Installation ................5 System Connections..................6 ConnectinG/DISCONNECTING THE OM-DRAGON™ Interface Cable .... 6 RS232 Connection ................ - Seite 6 SOMMAIRE Utilisation de la Base Radio OM-DRAGON™ ..........34 Installation ...................... 35 Montage du Support ..................35 Installation Horizontale - Usage Mobile ........... 35 Installation Horizontale - Usage Fixe ..........36 Installation Murale ................36 Installation de la Plaque d'Alignement ............37 Connexion Systeme..................
- Seite 7 INDICE Utilización de la Base Radio OM-DRAGON™ ..........66 Instalación ...................... 67 Montaje del Soporte..................67 Instalación Horizontal - Uso Móvil ........... 67 Instalación Horizontal - Uso Fijo............68 Instalación Mural ................68 Instalación de la Placa de Alineación.............. 69 Conexión del Sistema..................
-
Seite 9: Quick Reference
OM-DRAGON™ RADIO CRADLE QUICK REFERENCE... -
Seite 10: Using Om-Dragon™ Radio Cradle
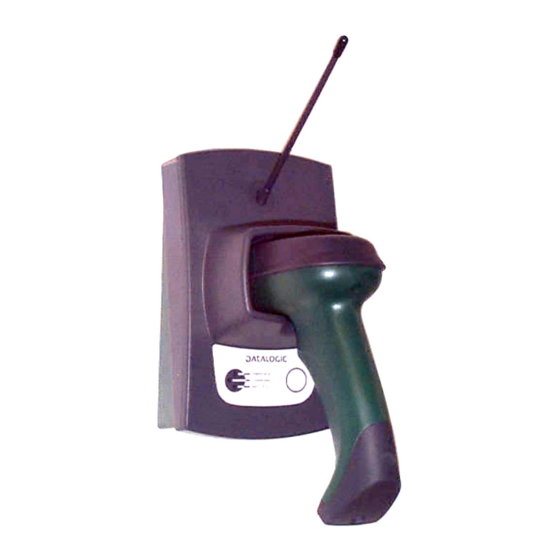
DATALOGIC UK/US USING OM-DRAGON™ RADIO CRADLE The OM-DRAGON™ cradle, paired with one or more DRAGON™ M series laser guns, builds a Cordless Reading System for the collection, decoding and transmission of barcoded data. It can be connected to a Host PC through an RS232, Wedge or Pen cable and is suited for both single-cradle and multi-cradle layouts. -
Seite 11: Installation
OM-DRAGON™ UK/US INSTALLATION The OM-DRAGON™ can be mounted for portable or fixed desktop usage, or it can be fixed to a wall. In all cases, the mounting base must be used. The OM-DRAGON™ package contains the following: OM-DRAGON™ 3 screws This Quick Reference Manual 3 threaded dowels 2 adhesive strips... -
Seite 12: Fixed Desktop Use
DATALOGIC UK/US Fixed Desktop Use For fixed desktop installation use the adhesive strips referring to Figure 1. If you are installing several cradles and you desire to align them, you can use the alignment plate (see Alignment Plate Installation), otherwise continue with step 2. -
Seite 13: Alignment Plate Installation
OM-DRAGON™ UK/US For wall mounting, the cradle is positioned as shown in Figure 3: Figure 3 - OM-DRAGON™ Base If you are installing several cradles and you desire to align them, you can use the alignment plate (see Alignment Plate Installation), otherwise continue with step 2. -
Seite 14: System Connections
DATALOGIC UK/US SYSTEM CONNECTIONS Connections should always be made with power OFF! CAUTION You can connect the OM-DRAGON™ cradle to the Host through the dedicated connector, using the cable corresponding to the desired interface type. CONNECTING/DISCONNECTING THE OM-DRAGON™ INTERFACE CABLE The OM-DRAGON™... -
Seite 15: Rs232 Connection
OM-DRAGON™ UK/US RS232 Connection Wedge Connection Pen Connection... -
Seite 16: C-Box Connection
DATALOGIC UK/US C-Box Connection OM-DRAGON™ CONFIGURATION The OM-DRAGON™ configuration can be performed in three ways: by using the DL Sm@rtSet software configuration program, by sending configuration strings from the Host PC via the RS232 interface or by reading configuration barcodes with the DRAGON™ M reader. - Seite 17 OM-DRAGON™ UK/US Read the OM-DRAGON™ restore default code: Restore OM-DRAGON™ default Among the following interface selection codes, read only the code that suits your application: RS232 Interface Interface WEDGE Interface IBM AT or PS/2 PCs IBM XT PC Notebook...
- Seite 18 DATALOGIC UK/US IBM SURE1 IBM Terminal 3153 IBM Terminals IBM Terminals 31xx, 32xx, 34xx, 37xx: read the correct Key Transmission code: make-only keyboard make-break keyboard read the Keyboard Type code, if necessary: advanced keyboard typewriter keyboard...
- Seite 19 OM-DRAGON™ UK/US The following interface selection allows barcodes sent to the PC to be interpreted correctly independently from the Keyboard Nationality used. You do not need to make a Keyboard Nationality selection. (default = Num Lock Unchanged) Make sure the Num Lock key on your keyboard is ON. IBM AT - ALT mode PC Notebook - ALT mode Wyse Terminals...
-
Seite 20: Wedge Keyboard Nationality
DATALOGIC UK/US Digital Terminals VT2xx/VT3xx/VT4xx APPLE APPLE ADB Bus WEDGE KEYBOARD NATIONALITY If you selected the Wedge interface, you should also read among the following codes the one that matches your Keyboard Nationality: English Deutsch Svenskt Français... - Seite 21 OM-DRAGON™ UK/US Italiano Español Belge The following selections are only valid for IBM AT compatible PCs: Japanese Russian (Latin) Russian (Cyrillic) Hungarian Yugoslavian...
-
Seite 22: Operating Test
DATALOGIC UK/US Romanian Czechoslovakian OPERATING TEST Read the "Test Codes" at the end of this Quick Reference manual. YOUR SYSTEM IS NOW READY TO READ BARCODES ACCORDING TO THE DEFAULT CONFIGURATION OM-DRAGON™ DEFAULT CONFIGURATION RS232 DEFAULT SETTINGS 9600 baud, parity disabled, 8 data bits, 1 stop bit, handshaking disabled, ack/nack protocol disabled, FIFO enabled, delay disabled, 5 sec. -
Seite 23: Compliance
"Class 2", or "LPS" output rated 9-28 V, minimum 0.8 A. Modifications or changes to this equipment without the expressed written approval of Datalogic could void the authority to use the equipment. This device complies with PART 15 of the FCC Rules. -
Seite 24: Technical Features
DATALOGIC UK/US TECHNICAL FEATURES Electrical Features Supply voltage 9..28 Vdc Power consumption max. 8 W (charging) * Indicators Charger on LED (red) Charge completed LED (green) Power / Data LED (yellow) Time of recharge NiMh / NiCd batteries: 2 hours... -
Seite 25: Guida Rapida
OM-DRAGON™ BASE RADIO GUIDA RAPIDA... -
Seite 26: Base Radio Om-Dragon™- Descrizione Euso
DATALOGIC BASE RADIO OM-DRAGON™– DESCRIZIONE E La base radio OM-DRAGON™, accoppiata con uno o più lettori della famiglia DRAGON™ M, forma un sistema radio per la raccolta, la decodifica e la trasmissione di dati contenuti in codici a barre. L’OM-DRAGON™ può comunicare con un Host in modalità RS232, Wedge o Pen e costituisce una unità... -
Seite 27: Installazione
OM-DRAGON™ INSTALLAZIONE L’OM-DRAGON™ può essere montato a banco, per un utilizzo fisso o mobile, o a parete. Nella confezione dell’OM-DRAGON™ trovate i seguenti dispositivi: OM-DRAGON™ Il presente manuale “OM-DRAGON™ - Guida Rapida” 3 viti 3 tasselli 2 strisce adesive 1 piastrina di allineamento 4 piedini di gomma 1 antenna MONTAGGIO DEL SUPPORTO... -
Seite 28: Installazione A Banco Per Utilizzo Fisso
DATALOGIC Installazione a Banco per Utilizzo Fisso Per l’installazione a banco, il supporto è già montato correttamente sotto alla base. Per questo tipo di installazione utilizzate le strisce adesive. Se dovete installare più di un OM-DRAGON™ e desiderate allineare i supporti prima del fissaggio, usate la piastrina di allineamento (vedi oltre per l’installazione), altrimenti proseguite con il punto 2. -
Seite 29: Piastrina Di Allineamento - Installazione
OM-DRAGON™ Per l’installazione a parete, il supporto deve essere orientato come mostra la Figura 3. Figura 3 – Supporto di montaggio visto dall’alto Se dovete installare più di un OM-DRAGON™ e desiderate allineare i supporti prima del fissaggio, usate la piastrina di allineamento (vedi oltre per l’installazione), altrimenti proseguite con il punto 2. -
Seite 30: Sistema Radio - Collegamenti
DATALOGIC SISTEMA RADIO - COLLEGAMENTI Effettuate i collegamenti quando gli apparecchi non sono alimentati. ATTENZIONE Nei sistemi a base radio singola, l’OM-DRAGON™ è collegato all’Host tramite il connettore apposito e il cavo corrispondente al tipo di interfaccia desiderato: RS232, Wedge o Pen. -
Seite 31: Rs232
OM-DRAGON™ RS232 Wedge... -
Seite 32: Connessione C-Box
DATALOGIC Connessione C-Box CONFIGURAZIONE DELL’OM-DRAGON™ Potete configurare l’OM-DRAGON™ in tre modi: utilizzando il programma di configurazione DL Sm@rtSet, inviando le stringhe di configurazione dall'Host PC via interfaccia RS232 oppure leggendo i codici a barre di configurazione con un lettore della famiglia DRAGON™ M già configurato. - Seite 33 OM-DRAGON™ Leggete il codice per ripristinare i default dell’OM-DRAGON™: OM-DRAGON™ - default Tra i codici seguenti, leggete solo il codice corrispondente al modo di comunicazione desiderato: RS232 WEDGE IBM AT or PS/2 PCs IBM XT PC Notebook...
- Seite 34 DATALOGIC IBM SURE1 IBM Terminal 3153 IBM Terminals IBM Terminals 31xx, 32xx, 34xx, 37xx: leggete il codice Key Transmission corretto: make-only keyboard make-break keyboard Leggete, se necessario, il Keyboard Type: advanced keyboard typewriter keyboard...
- Seite 35 OM-DRAGON™ L'impostazione del seguente tipo di interfaccia consente una corretta interpretazione dei codici a barre spediti al PC, indipendentemente dalla nazionalità della tastiera utilizzata. Non è necessario impostare la nazionalità della tastiera. (default = Num Lock Unchanged) Assicuratevi che la funzione Bloc Num sulla Vostra tastiera sia stata attivata.
-
Seite 36: Nazionalita' Della Tastiera
DATALOGIC Digital Terminals VT2xx/VT3xx/VT4xx APPLE APPLE ADB Bus NAZIONALITA' DELLA TASTIERA Se avete impostato l’interfaccia Wedge, dovreste anche leggere, fra i codici che seguono, il codice per la selezione della Nazionalità della Tastiera: English Deutsch Svenskt Français... - Seite 37 OM-DRAGON™ Italiano Español Belge Le seguenti selezioni sono valide solamente per PC compatibili con IBM AT: Japanese Russian (Latin) Russian (Cyrillic) Hungarian Yugoslavian...
-
Seite 38: Test Di Funzionamento
DATALOGIC Romanian Czechoslovakian TEST DI FUNZIONAMENTO Leggere i codici nella sezione "Test Codes" alla fine di questa Guida Rapida. IL SISTEMA È PRONTO A LEGGERE I CODICI SECONDO LA CONFIGURAZIONE DI DEFAULT. OM-DRAGON™ - CONFIGURAZIONE DI DEFAULT CONFIGURAZIONE INTERFACCIA RS232 9600 baud, parità... -
Seite 39: Conformità
OM-DRAGON™ CONFORMITÀ Questo apparecchio deve essere alimentato con un'unità di alimentazione UL Listed Direct Plug-in Classe 2 avente una tensione di alimentazione compresa tra 9..28 V DC, e 0.8 A min. Prendi contatto con l'autorità competente per la gestione degli apparati a radiofrequenza del tuo paese, per verificarne l'eventuale necessità... -
Seite 40: Caratteristiche Tecniche
DATALOGIC CARATTERISTICHE TECNICHE Caratteristiche Elettriche Tensione di alimentazione 9..28 Vdc Potenza assorbita in carica max. 8 W Indicatori In carica (rosso) Carica completa (verde) Spia alimentazione e comunicazioni (giallo) Tempo di ricarica Batterie NiMh/NiCd: 2 ore Caratteristiche Radio Modelli europei... - Seite 41 OM-DRAGON™ BASE RADIO GUIDE RAPIDE...
-
Seite 42: Utilisation De La Base Radio Om-Dragon
DATALOGIC UTILISATION DE LA BASE RADIO OM-DRAGON™ La base OM-DRAGON™, associée à un ou plusieurs pistolets lasers de la série DRAGON™ M, constitue un système radio conçu pour la collecte, le décodage et la transmission de données codes à barres. -
Seite 43: Installation
OM-DRAGON™ INSTALLATION L'OM-DRAGON™ peut être monté sur un plan horizontal pour une utilisation fixe ou mobile, ou être fixé sur un mur. L'ensemble OM-DRAGON™ contient : OM-DRAGON™ Le présent guide de référence rapide OM-DRAGON™ 3 vis 4 pieds en caoutchouc 3 chevilles 2 bandes adhésives 1 plaque d'alignement... -
Seite 44: Installation Horizontale - Usage Fixe
DATALOGIC Installation Horizontale - Usage Fixe Pour une installation horizontale à usage fixe, utiliser les bandes adhésives comme indiqué sur la figure 1. Si vous installez plusieurs bases et que vous désirez les aligner, vous pouvez utiliser la plaque d'alignement (voir Installation de la plaque d'alignement), sinon reportez-vous au paragraphe 2. -
Seite 45: Installation De La Plaque D'alignement
OM-DRAGON™ Pour une fixation murale, la base doit être orientée comme indiqué sur la figure Figure 3 - support OM-DRAGON™ - vue de dessus Si vous installez plusieurs bases et que vous désirez les aligner, vous pouvez utiliser la plaque d'alignement (voir lnstallation de la plaque d'alignement), sinon reportez-vous au paragraphe suivant. -
Seite 46: Connexion Systeme
DATALOGIC CONNEXION SYSTEME Effectuer les connexions uniquement lorsque l'appareil n'est pas sous tension. ATTENTION Vous pouvez connecter la base OM-DRAGON™ au Host au moyen du connecteur adéquat en utilisant le câble correspondant au type d'interface choisie. CONNEXION / DECONNEXION DU CABLE D'INTERFACE POUR OM-DRAGON™... -
Seite 47: Connexion Rs232
OM-DRAGON™ Connexion RS232 Connexion Interclavier Emulation Crayon... -
Seite 48: Connexion C-Box
DATALOGIC Connexion C-Box CONFIGURATION OM-DRAGON™ La configuration de l'OM-DRAGON™ peut être exécutée de trois façons : en utilisant le programme de configuration DL Sm@rtSet, en envoyant les séquences de configuration depuis le Host via l'interface RS232 ou en lisant les codes à... - Seite 49 OM-DRAGON™ Lire le code de restauration OM-DRAGON™ par défaut : Restauration OM-DRAGON™ par défaut Pour les codes suivants, lire uniquement les codes correspondants au mode de communication désiré : RS232 Emulation Crayon Interclavier IBM AT ou PS/2 PCs IBM XT PC Notebook...
- Seite 50 DATALOGIC IBM SURE1 IBM Terminal 3153 IBM Terminals IBM Terminals 31xx, 32xx, 34xx, 37xx: lire le code correct de Key Transmission: make-only keyboard make-break keyboard si nécessaire, lire le code correspondant à votre clavier advanced keyboard typewriter keyboard...
- Seite 51 OM-DRAGON™ La sélection de l’interface suivante permet une interprétation correcte par le PC des codes à barres transmis, indépendamment de la nationalité du clavier. Il n’est pas nécessaire d’effectuer la sélection de la nationalité du clavier. (default = Num Lock Unchanged) Vérifiez que le pavé...
-
Seite 52: Nationalite Du Clavier
DATALOGIC Digital Terminals VT2xx/VT3xx/VT4xx APPLE APPLE ADB Bus NATIONALITE DU CLAVIER Si vous avez sélectionné l'interface interclavier, vous devez également lire parmi les codes suivants, celui de la nationalité de votre clavier: English Deutsch Svenskt Français... - Seite 53 OM-DRAGON™ Italiano Español Belge Les codes suivants sont seulement valides pour IBM AT compatible Japanese Russian (Latin) Russian (Cyrillic) Hungarian Yugoslavian...
-
Seite 54: Test De Fonctionnement
DATALOGIC Romanian Czechoslovakian TEST DE FONCTIONNEMENT Lire les codes dans la section "Test Codes" à la fin de ce guide rapide. VOTRE SYSTEME EST PRET POUR LIRE DES CODES A BARRES SELON LA CONFIGURATION DEFINIE PAR DEFAUT. OM-DRAGON™ - CONFIGURATION PAR DEFAUT CONFIGURATION INTERFACE RS232 9600 baud, parité... -
Seite 55: Conformité
OM-DRAGON™ CONFORMITE Cet appareil doit être connecté à un boîter d’alimentation UL Listed Direct Plug- in de Classe 2 avec une longueur de câble <3 m. La tension est comprise dans la plage de valeurs entre 9 et 28 V DC, 0.8 A minimum. Contactez l'autorité... -
Seite 56: Caracteristiques Techniques
DATALOGIC CARACTERISTIQUES TECHNIQUES Caractéristiques électriques Tension 9..28 Vdc Consommation * max. 8 W (en charge) Indicateurs Chargeur On voyant LED rouge Charge complète voyant LED verte Sous tension / transmission voyant LED jaune Temps de recharge Batteries NiMh / NiCd: 2 heures Caractéristiques Radio... - Seite 57 OM-DRAGON™ FUNK UND LADENSTATION KURZANLEITUNG...
-
Seite 58: Funktion Der Om-Dragon™ Funk- Und Ladestation
DATALOGIC FUNKTION DER OM-DRAGON™ FUNK- UND LADESTATION Die Station OM-DRAGON™ bildet in Verbindung mit einem Leser der DRAGON™ M Serie ein System zur Erfassung, Dekodierung und kabellosen Übertragung von Strichcodedaten. Die Station kann über RS232 - Schnittstelle oder Tastatureinschleifung oder Lesestiftschnittstelle mit dem HOST verbunden werden. -
Seite 59: Installation
OM-DRAGON™ INSTALLATION Die Station entweder lose auf den Tisch gestellt oder verschraubt werden, eine Wandmontage ist ebenfalls möglich. Folgende Komponenten befinden sich im Lieferumfang: OM-DRAGON™ diese Kurzanleitung 3 Schrauben 3 Dübel 2 Klettbänder 1 Verbindungsplatte 4 Gummifüße 1 Antenne MONTAGE Bild 1 - OM-DRAGON™... -
Seite 60: Feste Tischmontage
DATALOGIC Feste Tischmontage Zur festen Tischmontage verwenden Sie bitte die Klettbänder Möchten Sie mehrere Stationen in Reihe montieren, können Sie diese mit der Verbindungsplatte aneinanderreihen (siehe „Reihenmontage“), wenn nicht fahren Sie direkt mit Punkt 2. fort. Bitte reinigen Sie die Aussparungen für die Gummifüße sorgfältig um optimal Haftung zu erreichen. -
Seite 61: Reihenmontage
OM-DRAGON™ Für die Wandmontage wird der Montagefuß wie im Bild 3 dargestellt positioniert: Bild 3 - OM-DRAGON™ Montagefuß Möchten Sie mehrere Stationen in Reihe montieren, können Sie diese mit der Verbindungsplatte aneinanderreihen (siehe „Reihenmontage“), wenn nicht, fahren Sie direkt mit Punkt 2. fort. Nutzen Sie den Montagefuß... -
Seite 62: Systemanschluß
DATALOGIC SYSTEMANSCHLUß Kabel dürfen ausgeschalteten Zustand angeschlossen werden. ACHTUNG Sie können die Station OM-DRAGON™ mit dem Kabel, das zu Ihrer Schnittstelle paßt, mit dem HOST verbinden. EIN- UND AUSSTECKEN DER ANSCHLUßKABEL Die Station OM-DRAGON™ kann über RS232 oder Tastaturschnittstelle oder... -
Seite 63: Rs232 - Schnittstelle
OM-DRAGON™ RS232 - Schnittstelle Tastaturschnittstelle Lesestiftschnittstelle... -
Seite 64: Anschluss Mit C-Box
DATALOGIC Anschluss mit C-Box OM-DRAGON™ KONFIGURATION Die OM-DRAGON™ - Konfiguration kann auf drei Wegen erfolgen: sie wird mit der Software DL Sm@rtSet durchgeführt, die Konfigurationsstrings werden über die serielle Schnittstelle gesendet, oder die Konfigurationscodes werden mit dem Lesegerät DRAGON™ M gelesen. - Seite 65 OM-DRAGON™ Lesen Sie den Code „OM-DRAGON™- Grundeinstellung“: OM-DRAGON™- Grundeinstellung Lesen Sie einen der folgenden Schnittstellencodes: RS232 - Schnittstelle Lesestiftschnittstelle Tastaturschnittstelle IBM AT oder PS/2 PCs IBM XT PC Notebook...
- Seite 66 DATALOGIC IBM SURE1 IBM Terminal 3153 IBM Terminals IBM Terminals 31xx, 32xx, 34xx, 37xx: wählen Sie den korrekten Übertragungsmode: make-only keyboard make-break keyboard falls nötig, lesen Sie den Tastaturtyp-Code: advanced keyboard typewriter keyboard...
- Seite 67 OM-DRAGON™ Die Einstellung der folgenden Schnittstellentypen erlaubt eine korrekte Interpretation der Strichcodes, die zum PC geschickt werden, unabhängig von der Tastaturnationalität. Es ist nicht nötig, die Tastaturnationalität einzustellen. (default = Num Lock Unchanged) Bitte versichern Sie sich, daß numerische Tastaturblock aktiviert ist. IBM AT - ALT mode PC Notebook - ALT mode Wyse Terminals...
-
Seite 68: Tastaturnationalität
DATALOGIC Digital Terminals VT2xx/VT3xx/VT4xx APPLE APPLE ADB Bus TASTATURNATIONALITÄT Wenn Sie die Tastaturschnittstelle gewählt haben, sollten Sie die Tastaturnationalität bestimmen, die Ihrer Tastatur entspricht: English Deutsch Schwedisch Franzosisch... - Seite 69 OM-DRAGON™ Italienisch Spanisch Belgisch Die folgenden Einstellungen sind nur für IBM AT/PS2 kompatible PC’s möglich.: Japanisch Russisch (Latin) Russisch (Cyrillic) Ungarisch Jugoslawisch...
-
Seite 70: Codes Für Testzwecke
DATALOGIC Rumänisch Tschechisch CODES FÜR TESTZWECKE Lesen Sie die Codes, der Ihrem gewünschten Kommunikationsmodus entspricht, im "Test Codes" Abschnitt am Ende dieser Kurzanleitung. LESER BEREIT STRICHCODES ENTSPRECHEND GRUNDEINSTELLUNG ZU LESEN. OM-DRAGON™ GRUNDEINSTELLUNG RS232 - GRUNDEINSTELLUNG 9600 Baud, keine Parität, 8 Datenbits, 1 Stopbit, kein Handshake, kein Ack/Nak protocol, FIFO ein, keine Verzögerungszeit, 5 sek. -
Seite 71: Konformität
OM-DRAGON™ KONFORMITÄT Dieses Gerät muss mit einer Klasse 2 UL listed Direct Plug-in Stroversorgung verbunden werden. Der Wertebereich der Stromversorgung ist zwischen 9 und 28 V DC inbegriffen, 0.8 A minimum. Die Kabelslänge ist <3 m. Um die Notwendigkeit der Verwendungslizenz zu prüfen, wenden Sie sich an die Behörde Ihres Landes, die mit der Vergabe von Radiofrequenzen vertraut ist. -
Seite 72: Technische Daten
DATALOGIC TECHNISCHE DATEN Elektrische Daten Stromversorgung 9..28 Vdc Stromverbrauch * max. 8 W (bei Ladung) Anzeigen rote LED Ladung grüne LED Ladung ok gelbe LED Gerät ein / Datenübertragung Ladedauer NiMh Funkdaten Europäische Modelle USA Modelle Funkfrequenz 433,92 Mhz 910 Mhz... - Seite 73 OM-DRAGON™ BASE RADIO GUÍA RÁPIDA...
-
Seite 74: Utilización De La Base Radio Om-Dragon
DATALOGIC UTILIZACIÓN DE LA BASE RADIO OM-DRAGON™ La base OM-DRAGON™ asociada a una o varias pistolas láser de la serie DRAGON™ M, constituye un sistema radio concebido para la recogida, la descodificación y la transmisión de datos de códigos de barras. -
Seite 75: Instalación
OM-DRAGON™ INSTALACIÓN El OM-DRAGON™ puede montarse sobre un plano horizontal para una utilización fija o móvil, o puede fijarse sobre un pared. El conjunto OM-DRAGON™ incluye: 1 OM-DRAGON™ presente guía referência rápida OM-DRAGON™ 3 tornillos 4 pies de caucho 3 clavijas 2 cintas adhesivas 1 placa de alineación 1 antena... -
Seite 76: Instalación Horizontal - Uso Fijo
DATALOGIC Instalación Horizontal - Uso Fijo Para una instalación horizontal de uso fijo, utilizar las cintas adhesivas como se indica en la figura 1. Si instala varias bases y desea alinearlas, puede utilizar la placa de alineación (ver la Instalación de la placa de alineación), sino continue al párrafo 2. -
Seite 77: Instalación De La Placa De Alineación
OM-DRAGON™ Para una fijación mural, la base debe orientarse como se indica en la figura 3. Figura 3 - soporte OM-DRAGON™ - vista por delante Si instala varias bases y desea alinearlas, puede utilizar la placa de alinea- ción (ver la lnstalación de la placa de alineación), sino continue al párrafo 2. Utilizar los agujeros de montaje del soporte como referencia para poner una marca donde desea montar el OM-DRAGON™... -
Seite 78: Conexión Del Sistema
DATALOGIC CONEXIÓN DEL SISTEMA Efectuar las conexiones solamente cuando el aparato no esté enchufado. CUIDADO Puede conectar la base OM-DRAGON™ al Host por medio del conector adecuado utilizando el cable correspondiente a la interfaz deseada. CONEXIÓN / DESCONEXIÓN DEL CABLE DE INTERFAZ PARA OM-DRAGON™... -
Seite 79: Conexión Rs232
OM-DRAGON™ Conexión RS232 Emulación Teclado Emulación Lápiz... -
Seite 80: Conexión C-Box
DATALOGIC Conexión C-Box CONFIGURACIÓN OM-DRAGON™ La configuración OM-DRAGON™ puede efectuarse de tres maneras: mediante el programa software de configuración de DL Sm@rtSet, enviando las cadenas de configuración desde el PC Host vía el interface RS232 o leyendo los códigos de barras de configuración con el lector DRAGON™ M vía radio. - Seite 81 OM-DRAGON™ Leer el código de restauración OM-DRAGON™ predefinida Restauración OM-DRAGON™ predefinida Por lo que concierne los códigos siguientes, leer unicamente los códigos correspondientes al modo de comunicación deseado: RS232 Emulación Lápiz Emulación Teclado IBM AT o PS/2 PCs IBM XT PC Notebook...
- Seite 82 DATALOGIC IBM SURE1 IBM Terminal 3153 IBM Terminals IBM Terminals 31xx, 32xx, 34xx, 37xx: leer el código correcto de Key Transmission: make-only keyboard make-break keyboard leer el código correcto de Keyboard Type: advanced keyboard typewriter keyboard...
- Seite 83 OM-DRAGON™ La selección de la interfaz siguiente permite una interpretación correcta del PC de los códigos de barras transmitidos, independientemente de la selección de la nacionalidad del teclado. No se necesita efectuar la selección de la nacionalidad del teclado. (default = Num Lock Unchanged) Por favor, verifiquen que el teclado numérico este activado en su teclado.
-
Seite 84: Nacionalidad Del Teclado
DATALOGIC Digital Terminals VT2xx/VT3xx/VT4xx APPLE APPLE ADB Bus NACIONALIDAD DEL TECLADO Si ha seleccionado la interfaz emulación teclado, debe también leer entre los códigos siguientes, el de la nacionalidad de su teclado: English Deutsch Svenskt Français... - Seite 85 OM-DRAGON™ Italiano Español Belge Las siguientes selecciones son válidas solo para ordenadores compatibles con IBM AT. Japanese Russian (Latin) Russian (Cyrillic) Hungarian Yugoslavian...
-
Seite 86: Test Operativo
DATALOGIC Romanian Czechoslovakian TEST OPERATIVO Lea les "Test Codes" al final de esta guía rápida. SU SISTEMA ESTÁ AHORA LISTO PARA LEER CÓDIGOS DE BARRAS SEGÚN LA CONFIGURACIÓN PREDEFINIDA. OM-DRAGON™ - CONFIGURACIÓN PREDEFINIDA CONFIGURACIÓN INTERFAZ RS232 9600 baud, paridad desactivada, 8 bit de datos, 1 bit de stop, "handshaking"... -
Seite 87: Conformidad
OM-DRAGON™ CONFORMIDAD Este aparato debe suministrarse con la unidad de alimentación UL Listed Direct Plug-in Power Unit marcada "Clase 2" com potencia de salida 9-28 V DC, mínimo 0.8 A y con un cable de < 3 m de longitud. Contacta con la autoridad competente para la gestión de los dispositivos de radio frecuencia de tu país, para verificar si es necesario la licencia de uso. -
Seite 88: Características Técnicas
DATALOGIC CARACTERISTICAS TECNICAS Características eléctricas Suministro de energía 9..28 Vdc Consumo* máx. 8 W (en carga) Indicadores Cargador On LED roja Carga completa LED verde Enchufado / transmisión de datos LED amarilla Tiempo de recarga Baterías Nihm / NiCd: 2 horas Características Radio... -
Seite 89: Test Codes
TEST CODES EAN-8 1 2 3 4 5 6 7 0 EAN-13 1 2 3 4 5 6 7 0 0 0 9 9 2 Code 39 (Normal) Code 128 Interleaved 2 of 5 0 1 2 3 4 5 6 7 8 4... -
Seite 90: Om6010-R Compatibility
OM6010-R COMPATIBILITY If it is necessary to use the OM-DRAGON™ cradle in OM6010-R applications, it is possible to configure the cradle by following the given procedure: With one of the readers listed below, DLL6010-R DRAGON™ M configured to be compatible with DLL6000-R applications (refer to the DRAGON™... - Seite 91 DATALOGIC S.p.A., Via Candini, 2 40012 - Lippo di Calderara Bologna - Italy dichiara che declares that the déclare que le bescheinigt, daß das Gerät declare que el OM-DRAGON, RF Base/Charger 433 MHz OM-DRAGON, RF Base/Charger 433 MHz ECHELON e tutti i suoi modelli and all its models et tous ses modèles...