Inhaltsverzeichnis
Werbung
Verfügbare Sprachen
Verfügbare Sprachen
Quicklinks
FlexiDome
Installation Instructions
Varifocal surveillance dome
EN
camera
Manuale d'installation
Caméra anti-vandalisme
FR
Installationshandbuch
Varifokalkamera in
DE
Überwachungskuppel
Manual de instalación
Cámara domo varifocal de
ES
vigilancia
VF
Installatiehandleiding
Varifocale domecamera voor
NL
bewakingstoezicht
Manuale di installazione
Telecamera dome di
IT
sorveglianza con varifocal
Manual de Instalação
Câmara dome varifocal de
PT
vigilância
安装手册
监控用球型变焦摄像机
ZH
Werbung
Inhaltsverzeichnis

Verwandte Anleitungen für Bosch FlexiDome VF VDM- 345V03-10


Inhaltszusammenfassung für Bosch FlexiDome VF VDM- 345V03-10
- Seite 1 FlexiDome Installation Instructions Installatiehandleiding Varifocal surveillance dome Varifocale domecamera voor camera bewakingstoezicht Manuale d’installation Manuale di installazione Caméra anti-vandalisme Telecamera dome di sorveglianza con varifocal Installationshandbuch Manual de Instalação Varifokalkamera in Câmara dome varifocal de Überwachungskuppel vigilância Manual de instalación 安装手册...
-
Seite 3: Safety Precautions
7. Do not block any ventilation openings. Install in accordance with the manufacturer’s instructions. 8. Do not install near any heat sources such as radiators, heat registers, stoves, or other equipment (including amplifiers) that produce heat. Bosch Security Systems | 2005-11 | V1.0... - Seite 4 The Low Voltage power supply unit must comply with EN/UL 60950. The power supply must be a SELV-LPS unit or a SELV - Class 2 unit (Safety Extra Low Voltage - Limited Power Source). Bosch Security Systems | 2005-11 | V1.0...
-
Seite 5: Fcc Information
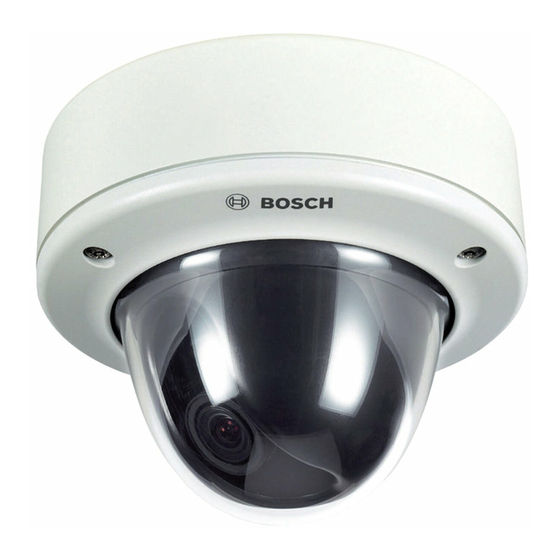
Bosch could void the user's authority to operate the equipment. For additional information or to speak to a representative, please contact the Bosch Security Systems location nearest to you or visit our web site at www.boschsecuritysystems.com Bosch Security Systems | 2005-11 | V1.0... - Seite 6 Features include: • Polycarbonate dome • 540 TVL resolution for color cameras • NightSense™ • On-screen setup menu • Bilinx™ bi-directional coaxial communications The FlexiDome camera is available in color and monochrome versions. Bosch Security Systems | 2005-11 | V1.0...
- Seite 7 Integrated FlexiDome camera • Mounting hardware kit • Installation manual Note If equipment appears to have been damaged during shipment, repack it in the original packaging and notify the shipping agent or supplier. Bosch Security Systems | 2005-11 | V1.0...
- Seite 8 Rotate the trim ring counterclockwise to release it from its bayonet on the camera base. • Remove the trim ring with dome. • Remove the inner liner by pulling it off of the base. Bosch Security Systems | 2005-11 | V1.0...
-
Seite 9: Mounting The Unit
The following figures show the different ways of mounting the unit. Figure 1 Rear connection - hollow surface Wires Strong surface (three pre-drilled 8mm holes) Mounting base Three screws (supplied) Bosch Security Systems | 2005-11 | V1.0... - Seite 10 (not supplied) Figure 3 Surface mounting - side connection Solid surface Conduit (three pre-drilled 8mm holes) Wires Three screws Raised (supplied with mounting base camera) (VDA-445SMB) Three screws Camera unit (M5, supplied) and base Bosch Security Systems | 2005-11 | V1.0...
- Seite 11 With a side connection, remove the cap covering the side entrance. With a rear connection, leave the cap in place. • Attach the conduit to the mounting base. • Make the connection inside the mounting case. Bosch Security Systems | 2005-11 | V1.0...
-
Seite 12: Connection And Set-Up
• Push the connections back through the surface wire hole. • Secure the mounting base to the surface with three screws. Bosch Security Systems | 2005-11 | V1.0... -
Seite 13: Setting Up The Camera
This socket provides a composite video signal (with sync). An optional cable (code number S1460) is available for making this connection. Focus Focal length Navigation switches Monitor jack Thumbwheels Bosch Security Systems | 2005-11 | V1.0... - Seite 14 • Repeat these two adjustments until the desired view is in focus. • Tighten both screws. Verify that the image stays in focus when the dome is held in place. Refocus if necessary. Bosch Security Systems | 2005-11 | V1.0...
- Seite 15 Place the inner liner in position aligning its fin with the bracket on the base. • Place the trim ring with dome onto the base. (If necessary clean its surface with a soft cloth.) • Fix the trim ring onto the camera base by rotating clockwise. Bosch Security Systems | 2005-11 | V1.0...
-
Seite 16: Advanced Setup
You can also set up Bilinx™ so that the camera buttons remain disabled even when Bilinx™ is not actively controlling the camera. This prevents unauthorized change of the camera settings. Bosch Security Systems | 2005-11 | V1.0... -
Seite 17: Menu Structure
Shut/AGC Shutter Color Sync Auto black Vphase NightSense* Exit COLOR* White balance R-gain B-gain * Only for the Color version of the camera. Installer Set focus now Comm Defaults Exit Defaults Restore all? Bosch Security Systems | 2005-11 | V1.0... - Seite 18 When in a menu, quickly pressing the menu/select key twice restores the selected item to its factory default. • To close all menus at once from any menu, select the Exit item and hold down the menu/select key until the menu display disappears. Bosch Security Systems | 2005-11 | V1.0...
- Seite 19 • FL - flickerless mode avoids interference from light sources (recommended for use with video iris or DC iris lenses only) ON/OFF Automatic gain control AUTOBLACK ON/OFF Autoblack automatically increases the visibility of details. Bosch Security Systems | 2005-11 | V1.0...
- Seite 20 Offset factory white point alignment (reducing blue introduces more yellow). EXIT Exit the menu * Only in color version of camera. ** It is only necessary to change the white point offset for special scene conditions. Bosch Security Systems | 2005-11 | V1.0...
- Seite 21 To avoid loss of communication on an installed camera, the Communication ON/OFF selection is not available while using remote control. This function can only be accessed with the camera buttons. Bosch Security Systems | 2005-11 | V1.0...
-
Seite 22: Technical Specification
Automatic 2500 - 9000K (with AWB hold mode) Lens Integrated Varifocal with DC iris Power < 5 W consumption Dimensions 58 x 66 x 122 mm (HxWxL) Weight 550g Operating -10° to 45° C temperature Controls OSD with softkey operation Bosch Security Systems | 2005-11 | V1.0... - Seite 23 FlexiDome | Installation Manual EN | 23 Dimensions (mm/inches) 57.6 57.6 2.27 2.27 6.22 Bosch Security Systems | 2005-11 | V1.0...
- Seite 24 FlexiDome | Installation Manual EN | 24 Dimensions with surface mount box (mm/inch) 53.3 53.3 2. 1 2. 1 6.22 Bosch Security Systems | 2005-11 | V1.0...
- Seite 25 - 24VAC, 30VA • TC120PS 120VAC, 60Hz - 15VDC, 9VA • TC220PSX-24 220-240VAC, 50/60Hz - 24VAC, 30VA • TC220PS 220-240VAC, 50/60Hz - 15VDC, 9VA Interface box: • VP-CFGSFT Bilinx™ communication interface box and software Bosch Security Systems | 2005-11 | V1.0...
- Seite 26 FlexiDome | Installation Manual EN | 26 Bosch Security Systems | 2005-11 | V1.0...
-
Seite 27: Consignes De Sécurité Importantes
8. Évitez d'installer l'appareil à proximité de sources de chaleur telles qu'un radiateur, une bouche d’air chaud, un four ou tout autre dispositif générant de la chaleur (amplificateurs, etc.). Bosch Security Systems | 10-2005 | V 1.0... - Seite 28 Le bloc d'alimentation basse tension doit être conforme à la norme EN/UL 60950. L'alimentation doit être fournie par une unité SELV-LPS ou SELV - classe 2 (Safety Extra Low Voltage - Limited Power Source). Bosch Security Systems | 10-2005 | V 1.0...
- Seite 29 Pour obtenir de plus amples informations ou pour vous entretenir avec un représentant, contactez le bureau Bosch Security Systems le plus proche, ou visitez notre site Web à l'adresse www.boschsecuritysystems.com. Bosch Security Systems | 10-2005 | V 1.0...
- Seite 30 Dôme en polycarbonate • Définition 540 lignes pour les caméras couleur • NightSense™ • Menu de configuration à l'écran • Communication bidirectionnelle Bilinx™ La caméra FlexiDome est disponible en version couleur ou monochrome. Bosch Security Systems | 10-2005 | V 1.0...
-
Seite 31: Versions Disponibles
Une caméra FlexiDome intégrée • Un kit de montage • Un manuel d'installation Remarque Si l'appareil a été endommagé lors du transport, replacez-le dans l'emballage d'origine et avertissez le transporteur ou le fournisseur. Bosch Security Systems | 10-2005 | V 1.0... - Seite 32 Tournez la garniture dans le sens contraire des aiguilles d'une montre afin de la libérer de sa baïonnette sur le socle de la caméra. • Retirez la garniture et la bulle. • Retirez la coque interne de la base. Bosch Security Systems | 10-2005 | V 1.0...
-
Seite 33: Montage De L'unité
Les figures ci-après illustrent les différentes options de montage de l'unité. Figure 1 Connexion arrière - Surface creuse Fils Surface dure (trois trous préforés de 8 mm) Socle de montage Trois vis (fournies) Bosch Security Systems | 10-2005 | V 1.0... - Seite 34 Montage en saillie - Connexion latérale Surface Gaine solide (trois trous préforés de 8 mm) Fils Socle de Trois vis montage en (fournies avec saillie la caméra) (VDA-445SMB) Trois vis Unité caméra et (M5, fournies) socle Bosch Security Systems | 10-2005 | V 1.0...
- Seite 35 Avec connexion arrière : ne retirez pas le capuchon de l'entrée latérale. • Fixez la gaine sur le socle de montage. • Effectuez les branchements nécessaires à l'intérieur du boîtier de montage. Bosch Security Systems | 10-2005 | V 1.0...
-
Seite 36: Connexion Et Installation
éviter les problèmes de synchronisation lors de la commutation. • Repoussez les connexions par le trou de la surface. • Fixez fermement le socle sur la surface à l'aide de trois vis. Bosch Security Systems | 10-2005 | V 1.0... -
Seite 37: Installation De La Caméra
(avec synchronisation). Vous pouvez vous procurer un câble disponible en option (référence S1460) pour réaliser cette connexion. Mise au point Distance focale Commandes de navigation Prise pour moniteur Molettes Bosch Security Systems | 10-2005 | V 1.0... - Seite 38 (l'image est alors défocalisée). • Pour focaliser l'image sur le moniteur, desserrez la vis de commande de la mise au point, puis tournez le dispositif jusqu'à obtention d'une image focalisée. Bosch Security Systems | 10-2005 | V 1.0...
- Seite 39 Placez la garniture et la bulle sur le socle. (Si nécessaire, nettoyez la surface à l'aide d'un chiffon doux.) • Fixez la garniture sur le socle de la caméra en la faisant tourner dans le sens des aiguilles d'une montre. Bosch Security Systems | 10-2005 | V 1.0...
-
Seite 40: Configuration Avancée
Il est possible de paramétrer Bilinx™ de sorte que les touches de la caméra restent désactivées lorsque Bilinx™ ne procède pas au contrôle actif de l'appareil. Ce réglage empêche toute modification non autorisée des paramètres de la caméra. Bosch Security Systems | 10-2005 | V 1.0... -
Seite 41: Structure Des Menus
Menu Main Level Shut/AGC Shut/AGC Shutter Color Sync Auto black Vphase NightSense* Exit COLOR* White balance R-gain B-gain * Versions couleur uniquement. Installer Set focus now Comm Defaults Exit Defaults Restore all? Bosch Security Systems | 10-2005 | V 1.0... - Seite 42 • Pour fermer tous les menus en une seule fois à partir d'un menu quelconque, sélectionnez Exit et maintenez enfoncée la touche menu/sélection jusqu'à disparition de l'affichage du menu. Bosch Security Systems | 10-2005 | V 1.0...
- Seite 43 (recommandé pour objectifs à diaphragme vidéo ou DC iris uniquement). Contrôle ON/OFF Contrôle automatique de gain. automatique de gain (AGC) AUTOBLACK ON/OFF Cette fonction accroît automatiquement la visibilité des détails. Bosch Security Systems | 10-2005 | V 1.0...
- Seite 44 EXIT Sortie du menu. * Version couleur uniquement. ** Il convient de modifier le décalage du point blanc uniquement dans certaines conditions de prise de vue. Bosch Security Systems | 10-2005 | V 1.0...
- Seite 45 Pour éviter toute perte de communication au niveau de la caméra installée, la fonction COMMUNICATION ON/OFF est indisponible lorsque la télécommande est utilisée. Cette fonction est alors uniquement accessible via les touches de la caméra. Bosch Security Systems | 10-2005 | V 1.0...
-
Seite 46: Caractéristiques Techniques
< 5 W Dimensions 58 x 66 x 122 mm (H x l x L) Poids 550 g Température de -10 bis 45 °C fonctionnement Commandes Menus OSD via les touches de la caméra Bosch Security Systems | 10-2005 | V 1.0... - Seite 47 FlexiDome | Guide d’installation FR | 47 Dimensions (mm/pouces) 57.6 57.6 2.27 2.27 6.22 Bosch Security Systems | 10-2005 | V 1.0...
- Seite 48 FlexiDome | Guide d’installation FR | 48 Dimensions avec boîtier de montage en saillie (mm/po) 53.3 53.3 2. 1 2. 1 6.22 Bosch Security Systems | 10-2005 | V 1.0...
-
Seite 49: Blocs D'alimentation
• TC220PSX-24 220-240 Vca, 50/60 Hz - 24 Vca, 30 VA • TC220PS 220-240 Vca, 50/60 Hz - 15 Vcc, 9 VA Interface • VP-CFGSFT Logiciel et interface USB de communication Bilinx™ Bosch Security Systems | 10-2005 | V 1.0... - Seite 50 FlexiDome | Guide d’installation FR | 50 Bosch Security Systems | 10-2005 | V 1.0...
-
Seite 51: Sicherheitshinweise
Bei der Installation sind die Anweisungen des Herstellers zu beachten. 8. Stellen Sie das Gerät nicht in unmittelbarer Nähe von Wärmequellen wie Heizkörpern, Wärmespeichern, Öfen oder anderen Anlagen (einschließlich Verstärkern) auf, die Wärme erzeugen. Bosch Security Systems | Okt. 2005 | V 1.0... - Seite 52 Das Niederspannungs-Netzteil muss EN/UL 60950 entsprechen. Bei dem Netzteil muss es sich um eine Einheit gemäß SELV-LPS oder SELV – Class 2 (Safety Extra Low Voltage - Limited Power Source) handeln. Bosch Security Systems | Okt. 2005 | V 1.0...
-
Seite 53: Fcc-Informationen
Bosch genehmigt wurden, kann die Benutzerautorisierung für den Betrieb des Geräts erlöschen. Um weitere Informationen zu erhalten bzw. persönlichen Kontakt zu einem Vertreter aufzunehmen, wenden Sie sich bitte an die Bosch Security Systems Niederlassung in Ihrer Nähe oder besuchen unsere Website unter www.boschsecuritysystems.com. - Seite 54 Sie bietet u. a. folgende Funktionen: • Polykarbonat-Kuppel • Auflösung von 540 TVL für Farbkameras • NightSense™ • Bildschirmmenü zur Kameraeinrichtung • Bilinx™ bidirektionale Koaxialkommunikation Die FlexiDome Kamera ist als Farb- und Schwarzweißmodell erhältlich. Bosch Security Systems | Okt. 2005 | V 1.0...
-
Seite 55: Überblick - Typennummer
• Integrierte FlexiDome Kamera • Befestigungsteile • Installationshandbuch Hinweis Falls das Gerät während des Transports beschädigt wurde, verpacken Sie es wieder in der Originalverpackung, und benachrichtigen Sie den Lieferdienst bzw. Lieferanten. Bosch Security Systems | Okt. 2005 | V 1.0... - Seite 56 Gehen Sie bei der Demontage folgendermaßen vor: • Drehen Sie den Abdeckring zur Lösung des Bajonettverschlusses nach links. • Nehmen Sie den Abdeckring samt Kuppel ab. • Ziehen Sie den Inneneinsatz vom Befestigungsrahmen ab. Bosch Security Systems | Okt. 2005 | V 1.0...
-
Seite 57: Montage
In den folgenden Abbildungen werden die unterschiedlichen Befestigungsmöglichkeiten der Kamera dargestellt. Abbildung 1 Rückseitiger Anschluss – hohle Montagefläche Kabel Massive Montagefläche (drei vorgebohrte Löcher, 8 mm) Befestigungs- rahmen Drei Schrauben (im Lieferumfang) Bosch Security Systems | Okt. 2005 | V 1.0... - Seite 58 Abbildung 3 Aufputz-Montage – seitlicher Anschluss Massive Kabelkanal Montagefläche (drei vorgebohrte Kabel Löcher, 8 mm) Erhöhter Drei Schrauben Befestigungs- (im Lieferumfang rahmen der Kamera) (VDA-445SMB) Drei Schrauben Kameramodul (M5, im Lieferumfang) und Rahmen Bosch Security Systems | Okt. 2005 | V 1.0...
- Seite 59 Bei seitlichem Anschluss nehmen Sie die Schutzkappe von der seitlichen Öffnung ab. Bei rückseitigem Anschluss belassen Sie die Schutzkappe auf der seitlichen Öffnung. • Befestigen Sie den Kabelkanal am Befestigungsrahmen. • Nehmen Sie die Anschlüsse im Befestigungsrahmen vor. Bosch Security Systems | Okt. 2005 | V 1.0...
-
Seite 60: Anschluss Und Einrichtung
Kameras achten, um Probleme beim Umschalten zwischen den Kameras zu vermeiden. • Schieben Sie die Anschlüsse durch die für die Kabel vorgesehene Bohrung der Montagefläche zurück. • Befestigen Sie den Rahmen mit den drei Schrauben an der Montagefläche. Bosch Security Systems | Okt. 2005 | V 1.0... -
Seite 61: Einrichtung Der Kamera
Kamera einzurichten. Diese Buchse erzeugt ein Composite Video-Signal (mit Sync). Die Verbindung kann über ein optional erhältliches Kabel (Codenummer S1460) hergestellt werden. Brennpunkt Brennweite Navigations- tasten Monitorbuchse Rändelschrauben Bosch Security Systems | Okt. 2005 | V 1.0... -
Seite 62: Kamerapositionierung
• Fokussieren Sie das Bild auf dem Monitor, indem Sie die Brennpunktschraube lösen und den Mechanismus drehen, bis der Bildbrennpunkt exakt eingestellt ist. • Justieren Sie ggf. die Brennweite erneut. Bosch Security Systems | Okt. 2005 | V 1.0... -
Seite 63: Schließen Des Geräts
Wulst am Bügel des Rahmens ausrichten. • Setzen Sie den Abdeckring samt Kuppel auf den Rahmen. (Reinigen Sie die Außenseite ggf. mit einem weichen Tuch.) • Sichern Sie den Abdeckring durch Drehen nach rechts im Befestigungsrahmen. Bosch Security Systems | Okt. 2005 | V 1.0... -
Seite 64: Erweiterte Einrichtung
Wenn die Bilinx™-Kommunikationsverbindung aktiv ist, sind die Tasten deaktiviert. Sie können Bilinx™ auch so einrichten, dass die Tasten auch dann deaktiviert sind, wenn keine aktive Bilinx™-Verbindung besteht. Dadurch können Sie verhindern, dass Unbefugte die Kameraeinstellungen ändern. Bosch Security Systems | Okt. 2005 | V 1.0... - Seite 65 Shut/AGC Shutter Color Sync Auto black Vphase NightSense* Exit COLOR* White balance R-gain B-gain * Nur bei dem Farbmodell der Kamera. Installer Set focus now Comm Defaults Exit Defaults Restore all? Bosch Security Systems | Okt. 2005 | V 1.0...
-
Seite 66: Hinweise Zur Menünavigation
Standardeinstellung zurückgesetzt. • Um von einem beliebigen Menü aus sämtliche Menüs zu schließen, wählen Sie die Option Exit aus, und halten Sie die Menü-/ Auswahltaste gedrückt, bis die Menüanzeige ausgeblendet wird. Bosch Security Systems | Okt. 2005 | V 1.0... - Seite 67 • FL - Flimmerfrei - Vermeidet Beeinträchtigung durch externe Lichtquellen (nur zur Verwendung mit Objektiven mit Video- oder DC-Blenden empfohlen). ON/OFF Automatische Verstärkungsregelung. AUTOBLACK ON/OFF Auto Black verbessert automatisch die Detaildarstellung. Bosch Security Systems | Okt. 2005 | V 1.0...
- Seite 68 (mehr Gelb durch die Reduzierung von Blau). EXIT Beenden des Menüs. * Nur bei dem Farbmodell der Kamera. ** Die Änderung des Offsets der Farbdarstellung ist nur für spezielle Aufnahmesituationen erforderlich. Bosch Security Systems | Okt. 2005 | V 1.0...
-
Seite 69: Untermenü Defaults
Tasten an der Kamera zu deaktivieren. Um zu verhindern, dass die Verbindung zur Kamera abbricht, ist die Option COMM – ON/OFF bei Einsatz der Fernsteuerung nicht verfügbar. Der Zugriff auf diese Option ist ausschließlich über die Kameratasten möglich. Bosch Security Systems | Okt. 2005 | V 1.0... -
Seite 70: Technische Daten
< 5 W aufnahme Abmessungen 58 x 66 x 122 mm (H x B x L) Gewicht 550 g Betriebs- -10 bis 45 °C temperatur Bedienelemente OSD (On-Screen Display) mit Menüführung Bosch Security Systems | Okt. 2005 | V 1.0... - Seite 71 FlexiDome | Installationshandbuch DE | 71 Abmessungen (mm/Zoll) 57.6 57.6 2.27 2.27 6.22 Bosch Security Systems | Okt. 2005 | V 1.0...
-
Seite 72: Abmessungen Mit Befestigungsrahmen Für Aufputz-Montage (Mm/Zoll)
FlexiDome | Installationshandbuch DE | 72 Abmessungen mit Befestigungsrahmen für Aufputz-Montage (mm/Zoll) 53.3 53.3 2. 1 2. 1 6.22 Bosch Security Systems | Okt. 2005 | V 1.0... - Seite 73 - 15 VDC, 9 VA • TC220PSX-24 220-240 VAC, 50/60 Hz - 24 VAC, 30 VA • TC220PS 220-240 VAC, 50/60 Hz - 15 VDC, 9 VA Interface-Box: • VP-CFGSFT Bilinx™ Kommunikations-Interface-Box und -Software Bosch Security Systems | Okt. 2005 | V 1.0...
- Seite 74 FlexiDome | Installationshandbuch DE | 74 Bosch Security Systems | Okt. 2005 | V 1.0...
-
Seite 75: Precauciones De Seguridad
7. No obstruya las aberturas de ventilación. Este equipo se debe instalar de acuerdo con las instrucciones del fabricante. 8. No se debe instalar cerca de fuentes de calor como radiadores, salidas de calor, estufas u otros equipos (incluidos amplificadores) que produzcan calor. Bosch Security Systems | 2005-10 | V1.0... - Seite 76 Para reducir el riesgo de incendio o de descarga eléctrica, evite que este aparato quede expuesto a la lluvia o la humedad y no coloque encima del mismo objetos llenos de líquido, como floreros. Bosch Security Systems | 2005-10 | V1.0...
- Seite 77 Para obtener información adicional o hablar con un representante, póngase en contacto con la oficina de Bosch Security Systems más cercana o visite nuestro sitio Web en www.boschsecuritysystems.es. Bosch Security Systems | 2005-10 | V1.0...
- Seite 78 Resolución de 540 líneas de TV para las cámaras de color • NightSense™ • Menú de configuración en pantalla • Comunicación coaxial bidireccional Bilinx™ La cámara FlexiDome está disponible en versiones color y monocromo. Bosch Security Systems | 2005-10 | V1.0...
- Seite 79 Kit con piezas de montaje • Manual de instalación Nota Si el equipo se ha dañado durante el envío, vuelva a embalarlo en el embalaje original y comuníquelo al agente de transporte o a su distribuidor. Bosch Security Systems | 2005-10 | V1.0...
- Seite 80 Gire el anillo embellecedor hacia la izquierda para liberarlo de la bayoneta de la base de la cámara. • Extraiga el anillo embellecedor con la burbuja. • Extraiga la cubierta interior separándola de la base. Bosch Security Systems | 2005-10 | V1.0...
-
Seite 81: Montaje De La Unidad
Las siguientes figuras muestran las diferentes maneras de montar la unidad. Figura 1 Conexión trasera: superficie con huecos Cables Superficie resistente (tres orificios de 8 mm perforados previamente) Base de montaje Tres tornillos (incluidos) Bosch Security Systems | 2005-10 | V1.0... - Seite 82 Montaje en superficie: conexión lateral Superficie Conducto sólida (tres orificios de 8 mm perforados Cables previamente) Base de Tres tornillos montaje elevado (incluidos con la (VDA-445SMB) cámara) Tres tornillos Unidad de la (M5, incluidos) cámara y base Bosch Security Systems | 2005-10 | V1.0...
- Seite 83 Si la conexión es lateral, extraiga la cubierta de la entrada lateral. Si la conexión es trasera, deje la cubierta en su lugar. • Una el conducto a la base de montaje. • Realice la conexión en el interior de la cubierta de montaje. Bosch Security Systems | 2005-10 | V1.0...
-
Seite 84: Conexión Y Configuración
• Vuelva a pasar las conexiones por el orificio para cables de la superficie. • Fije la base de montaje a la superficie con tres tornillos. Bosch Security Systems | 2005-10 | V1.0... -
Seite 85: Configuración De La Cámara
Este conector proporciona una señal de vídeo compuesto (con sincronización). Existe un cable opcional (código número S1460) para realizar esta conexión. Enfoque Distancia focal Conmutadores de navegación Toma del monitor Ruedecillas Bosch Security Systems | 2005-10 | V1.0... -
Seite 86: Colocación De La Cámara
Repita estos dos ajustes hasta que la imagen deseada esté enfocada. • Apriete ambos tornillos. Verifique que la imagen permanece enfocada cuando se coloca la burbuja en su lugar. Vuelva a enfocar si es necesario. Bosch Security Systems | 2005-10 | V1.0... - Seite 87 Coloque el anillo embellecedor con la burbuja sobre la base. (Si es necesario, limpie la superficie con un paño suave.) • Fije el anillo embellecedor a la base de la cámara girándolo hacia la derecha. Bosch Security Systems | 2005-10 | V1.0...
-
Seite 88: Configuración Avanzada
Asimismo, puede configurar Bilinx™ para que los botones de la cámara permanezcan desactivados aun cuando Bilinx™ no controle la cámara de forma activa. De esta forma, se evita la modificación no autorizada de la configuración de la cámara. Bosch Security Systems | 2005-10 | V1.0... -
Seite 89: Estructura De Menús
Shutter Color Sync Auto black Vphase NightSense* Exit COLOR* White balance R-gain B-gain * Sólo en la versión de color de la cámara. Installer Set focus now Comm Defaults Exit Defaults Restore all? Bosch Security Systems | 2005-10 | V1.0... - Seite 90 • Para cerrar todos los menús a la vez desde cualquiera de ellos, seleccione la opción Exit y mantenga pulsada la tecla de selección de menú hasta que éste desaparezca. Bosch Security Systems | 2005-10 | V1.0...
-
Seite 91: Menú Principal
• FL: modo sin destellos que evita interferencias de fuentes de luz (sólo se recomienda su uso con lentes DC iris o Autoiris). ON/OFF Automatic gain control. AUTOBLACK ON/OFF Autblack incrementa la visibilidad de los detalles automáticamente. Bosch Security Systems | 2005-10 | V1.0... - Seite 92 (la reducción de azul introduce más amarillo). EXIT Permite salir del menú. * Sólo en la versión de color de la cámara. ** Sólo es necesario cambiar el desplazamiento de puntos blancos en escenas con condiciones especiales. Bosch Security Systems | 2005-10 | V1.0...
- Seite 93 Communication ON/OFF no está disponible al utilizar el mando a distancia. Sólo se puede acceder a esta función con los botones de la cámara. Bosch Security Systems | 2005-10 | V1.0...
-
Seite 94: Especificaciones Técnicas
Varifocal con DC-iris integrada Consumo de electricidad < 5 W Dimensiones 58 x 66 x 122 mm Peso 550 g Temperatura de De -10° a 45 °C funcionamiento Controles Visualización en pantalla (OSD) con tecla multifunción Bosch Security Systems | 2005-10 | V1.0... - Seite 95 FlexiDome | Manual de instalación ES | 95 Dimensiones en mm 57.6 57.6 2.27 2.27 6.22 Bosch Security Systems | 2005-10 | V1.0...
- Seite 96 FlexiDome | Manual de instalación ES | 96 Dimensiones con la caja de montaje en superficie (mm) 53.3 53.3 2. 1 2. 1 6.22 Bosch Security Systems | 2005-10 | V1.0...
- Seite 97 220 - 240 VCA, 50/60 Hz - 24 VCA, 30 VA • TC220PS 220 - 240 VCA, 50/60 Hz - 15 VCC, 9 VA Módulo de interfaz: • VP-CFGSFT Módulo de interfaz de comunicaciones Bilinx™ y software Bosch Security Systems | 2005-10 | V1.0...
- Seite 98 FlexiDome | Manual de instalación ES | 98 Bosch Security Systems | 2005-10 | V1.0...
-
Seite 99: Veiligheidsvoorschriften
7. Zorg dat de ventilatieopeningen niet geblokkeerd raken. Installeer dit apparaat zoals beschreven in deze handleiding. 8. Installeer dit apparaat niet in de buurt van warmtebronnen zoals radiatoren, ovens of andere apparaten die hitte voortbrengen (zoals versterkers). Bosch Security Systems | 2005-10 | V1.0... - Seite 100 Waarschuwing De laagspanningsvoeding moet voldoen aan EN/UL 60950. De voedingseenheid moet voldoen aan SELV-LPS of SELV - klasse 2 (Safety Extra Low Voltage - Limited Power Source). Bosch Security Systems | 2005-10 | V1.0...
- Seite 101 Opmerking Elke wijziging of aanpassing van de apparatuur, die niet expliciet door Bosch is goedgekeurd, kan het recht van de gebruiker om de apparatuur te bedienen, tenietdoen. Als u meer wilt weten of een vertegenwoordiger wilt spreken, kunt u contact opnemen met de dichtstbijzijnde vestiging van Bosch Security Systems.
- Seite 102 Enkele productkenmerken: • Dome van polycarbonaat • Resolutie van 540 TVL voor kleurencamera's • NightSense™ • Schermmenu voor instellingen • Bidirectionele Bilinx™-communicatie via coax De FlexiDome -camera is leverbaar in kleur en zwart/wit-uitvoering. Bosch Security Systems | 2005-10 | V1.0...
-
Seite 103: Overzicht Typenummers
Geïntegreerde FlexiDome-camera • Montageset met bevestigingsmiddelen • Installatiehandleiding Opmerking Als apparatuur blijkt te zijn beschadigd tijdens transport, verpak het dan in de oorspronkelijke verpakking en neem contact op met de vervoerder of de leverancier. Bosch Security Systems | 2005-10 | V1.0... - Seite 104 • Draai de sierring linksom om hem van de bajonet op de camerasokkel te verwijderen. • Verwijder de sierring met dome. • Verwijder de binnenbekleding door deze van de sokkel los te trekken. Bosch Security Systems | 2005-10 | V1.0...
-
Seite 105: Montage Van Het Apparaat
De volgende afbeeldingen laten de verschillende manieren zien waarop het apparaat kan worden gemonteerd. Afbeelding 1 Aansluiting aan de achterkant - hol oppervlak Kabels Stevig oppervlak (drie voorgeboorde gaten van 8 mm) Montagesokkel Drie schroeven (meegeleverd) Bosch Security Systems | 2005-10 | V1.0... - Seite 106 (niet meegeleverd) Afbeelding 3 Opbouwmontage - aansluiting aan zijkant Stevig Elektriciteitspijp oppervlak (drie voorgeboorde Kabels gaten van 8 mm) Drie schroeven Verhoogde (met camera montagesokkel meegeleverd) (VDA-445SMB) Drie schroeven Camera en (M5, meegeleverd) sokkel Bosch Security Systems | 2005-10 | V1.0...
- Seite 107 Bij aansluiting aan de achterkant kan het kapje op zijn plaats blijven. • Bevestig de elektriciteitspijp aan de montagesokkel. • Breng de aansluiting tot stand in de montagebehuizing. Bosch Security Systems | 2005-10 | V1.0...
-
Seite 108: Aansluiting En Instelling
Zo voorkomt u lopend beeld bij het omschakelen. • Duw de aansluitingen terug door de opening in het oppervlak. • Maak de montagesokkel met de drie schroeven goed vast aan het oppervlak. Bosch Security Systems | 2005-10 | V1.0... -
Seite 109: De Camera Instellen
2,5 mm op de printplaat. Deze aansluiting geeft een gecombineerd videosignaal (met synchronisatie). Om deze verbinding te maken kunt u een optionele kabel (artikelnummer S1460) gebruiken. Focus Brandpuntsafstand Navigatie- schakelaars Monitoraansluiting Handschroeven Bosch Security Systems | 2005-10 | V1.0... - Seite 110 Herhaal deze twee instellingen totdat het gewenste beeld scherp is. • Draai beide schroeven vast. Controleer of het beeld scherp is als de dome op zijn plaats wordt gehouden. Stel indien nodig opnieuw scherp. Bosch Security Systems | 2005-10 | V1.0...
- Seite 111 • Plaats de sierring met dome op de sokkel. (Reinig indien nodig het oppervlak met een zachte doek.) • Bevestig de sierring op de camerasokkel door deze rechtsom te draaien. Bosch Security Systems | 2005-10 | V1.0...
-
Seite 112: Geavanceerde Instellingen
U kunt Bilinx™ zo instellen dat de cameratoetsen ook zijn geblokkeerd op het moment dat de camera niet door Bilinx™ wordt aangestuurd. Hiermee voorkomt u dat de camera-instellingen door onbevoegden worden gewijzigd. Bosch Security Systems | 2005-10 | V1.0... - Seite 113 Level Shut/AGC Shut/AGC Shutter Kleur Sync Auto black Vphase NightSense* Exit COLOR* White balance R-gain B-gain * Alleen voor kleurenuitvoering van de camera. Installer Set focus now Comm Defaults Exit Defaults Restore all? Bosch Security Systems | 2005-10 | V1.0...
- Seite 114 • Als u in één keer alle menu's wilt afsluiten, selecteert u de optie Exit en houdt u de menu/selectietoets ingedrukt totdat de menu's niet langer worden weergegeven. Bosch Security Systems | 2005-10 | V1.0...
- Seite 115 • FL: in deze stand (flakkervrij) wordt interferentie met lichtbronnen vermeden (alleen gebruiken voor video- iris- of DC-irisobjectieven). ON/OFF Automatische versterkingsregeling. AUTOBLACK ON/OFF Auto Black-compensatie versterkt automatisch de zichtbaarheid van details. Bosch Security Systems | 2005-10 | V1.0...
- Seite 116 BLUE gain** -5 - 0 - +5 Witpuntcompensatie (minder blauw vergroot de hoeveelheid geel). EXIT Het menu sluiten. * Alleen voor kleurenuitvoering van de camera. ** De compensatie van het witpunt hoeft alleen in speciale omgevingen te worden aangepast. Bosch Security Systems | 2005-10 | V1.0...
- Seite 117 Om verlies van communicatie met een geïnstalleerde camera te vermijden, is het niet mogelijk om op afstand de functie Communication ON/OFF aan te sturen. Deze functie is alleen toegankelijk via de cameratoetsen. Bosch Security Systems | 2005-10 | V1.0...
-
Seite 118: Technische Specificatie
Geïntegreerd varifocaal met DC-iris Stroom verbruik < 5 W Afmetingen 58 x 66 x 122 mm (H x B x L) Gewicht 550 g Bedrijfs -10° tot 45° C temperatuur Regeling OSD met tiptoetsbediening Bosch Security Systems | 2005-10 | V1.0... - Seite 119 FlexiDome | Installatiehandleiding NL | 119 Afmetingen (mm) 57.6 57.6 2.27 2.27 6.22 Bosch Security Systems | 2005-10 | V1.0...
- Seite 120 FlexiDome | Installatiehandleiding NL | 120 Afmetingen met doos voor opbouwmontage (mm/inch) 53.3 53.3 2. 1 2. 1 6.22 Bosch Security Systems | 2005-10 | V1.0...
- Seite 121 TC220PSX-24 220-240 V AC, 50/60 Hz - 24 V AC, 30 VA • TC220PS 220-240 V AC, 50/60 Hz - 15 V DC, 9 VA Interfacebox: • VP-CFGSFT Communicatie-interfacebox en software van Bilinx™ Bosch Security Systems | 2005-10 | V1.0...
- Seite 122 FlexiDome | Installatiehandleiding NL | 122 Bosch Security Systems | 2005-10 | V1.0...
-
Seite 123: Precauzioni Per La Sicurezza
7. Non ostruire le aperture di ventilazione. Installare secondo le istruzioni del produttore. 8. Non installare l'unità in prossimità di fonti di calore come radiatori, termoconvettori, fornelli od altri apparecchi (inclusi amplificatori) che producono calore. Bosch Security Systems | 2005-10 | V1.0... - Seite 124 Attenzione L'unità di alimentazione a bassa tensione deve essere conforme allo standard di sicurezza EN/UL 60950. L'alimentazione deve essere un'unità SELV-LPS o SELV di Classe 2 (Safety Extra Low Voltage a corrente limitata). Bosch Security Systems | 2005-10 | V1.0...
- Seite 125 Bosch potrebbero invalidare il diritto dell'utente all'uso della stessa. Per ulteriori informazioni o per parlare direttamente con un agente, rivolgersi alla sede Bosch Security Systems più vicina o visitare il nostro sito Web all'indirizzo www.boschsecuritysystems.com. Bosch Security Systems | 2005-10 | V1.0...
- Seite 126 Risoluzione di 540 TVL per telecamere a colori • NightSense™ • Menu di impostazione su schermo • Gestione Bilinx™ su cavo coassiale La telecamera FlexiDome è disponibile nelle versioni a colori e monocromatica. Bosch Security Systems | 2005-10 | V1.0...
-
Seite 127: Descrizione Codici
• Telecamera FlexiDome integrata • Kit di installazione • Manuale d'installazione Nota Se l'apparecchiatura ha subito danni durante il trasporto, imballarla nuovamente nella confezione originale e contattare il corriere o il rivenditore. Bosch Security Systems | 2005-10 | V1.0... - Seite 128 • Ruotare l'anello di chiusura in senso antiorario per estrarlo dalla baionetta posta sulla base della telecamera. • Rimuovere l'anello di chiusura insieme alla cupola. • Rimuovere il separatore interno estraendolo dalla base. Bosch Security Systems | 2005-10 | V1.0...
-
Seite 129: Montaggio Dell'unità
Le seguenti illustrazioni mostrano le diverse modalità di montaggio dell'unità. Figura 1 Collegamento posteriore - Superficie concava Cavi Superficie rigida (tre fori pre-trapanati da 8 mm) Base di montaggio Tre viti (in dotazione) Bosch Security Systems | 2005-10 | V1.0... - Seite 130 Montaggio su superficie - Collegamento laterale Superficie Condotto solida (tre fori pre-trapanati da 8 mm) Cavi Base di Tre viti montaggio (in dotazione) sollevata (VDA-445SMB) Tre viti Telecamera e (M5, in dotazione) base Bosch Security Systems | 2005-10 | V1.0...
- Seite 131 Se si effettua un collegamento laterale, rimuovere il tappo che copre l'apertura laterale. Se si effettua un collegamento posteriore, lasciare il tappo in posizione. • Collegare il condotto alla base di montaggio. • Effettuare i collegamenti all'interno della struttura di montaggio. Bosch Security Systems | 2005-10 | V1.0...
-
Seite 132: Collegamento E Configurazione
• Spingere i collegamenti attraverso il foro del cavo di superficie. • Assicurare la base di montaggio alla superficie con le tre viti. Bosch Security Systems | 2005-10 | V1.0... -
Seite 133: Configurazione Della Telecamera
2,5 mm sulla scheda del circuito stampato. Questa presa fornisce un segnale video composito (con sincronizzazione). Per stabilire questo collegamento, è disponibile un cavo opzionale (modello S1460). Messa a fuoco Lunghezza focale Pulsanti di navigazione Jack monitor Rotelline Bosch Security Systems | 2005-10 | V1.0... - Seite 134 Ripetere queste regolazioni fino a quando l'inquadratura desiderata non risulta a fuoco. • Avvitare le due viti. Verificare la messa a fuoco dell'immagine quando la cupola è in posizione. Se necessario, regolare la messa a fuoco. Bosch Security Systems | 2005-10 | V1.0...
- Seite 135 • Posizionare sulla base l'anello di chiusura con la cupola. Se necessario, pulire la superficie con un panno morbido. • Fissare l'anello di chiusura sulla base della telecamera ruotando in senso orario. . Bosch Security Systems | 2005-10 | V1.0...
-
Seite 136: Impostazioni Avanzate
È possibile impostare Bilinx™ in modo che i pulsanti della telecamera siano disabilitati anche quando Bilinx™ non sta attivamente controllando la telecamera. In tal modo si prevengono eventuali modifiche non autorizzate alle impostazioni della telecamera. Bosch Security Systems | 2005-10 | V1.0... -
Seite 137: Struttura Dei Menu
Shut/AGC Shutter Color Sync Auto black Vphase NightSense* Exit COLOR* White balance R-gain B-gain * Solo per la versione a colori della telecamera. Installer Set focus now Comm Defaults Exit Defaults Restore all? Bosch Security Systems | 2005-10 | V1.0... - Seite 138 All'interno di un menu, premere 2 volte in rapida successione il tasto menu/selezione per ripristinare i valori predefiniti della voce selezionata. • Per chiudere tutti i menu aperti, selezionare Exit e tenere premuto il tasto menu/selezione finché il menu non viene chiuso. Bosch Security Systems | 2005-10 | V1.0...
- Seite 139 • FL - modalità senza flicker che consente di evitare interferenze da parte di sorgenti di luce (solo per ottiche Video Iris e DC Iris). ON/OFF Controllo guadagno automatico. Autoblack ON/OFF La funzione Autoblack incrementa automaticamente la visibilità dei dettagli. Bosch Security Systems | 2005-10 | V1.0...
- Seite 140 (riducendo il blu si introduce più giallo). EXIT Selezionare per uscire dal menu. * Solo nella versione a colori della telecamera. ** Occorre modificare il bilanciamento del punto bianco solo in condizioni speciali. Bosch Security Systems | 2005-10 | V1.0...
- Seite 141 Per evitare di perdere la comunicazione con una telecamera installata, la selezione Communication ON/OFF non è disponibile quando si usa il controllo remoto. È possibile accedere a questa funzione solo tramite i pulsanti sulla telecamera. Bosch Security Systems | 2005-10 | V1.0...
-
Seite 142: Caratteristiche Tecniche
Varifocal integrato con DC Iris Consumo < 5 W energetico Dimensioni 58 x 66 x 122 mm (AxPxL) Peso 550 g Temperatura -10° a 45° C di esercizio Comandi OSD con operazioni softkey Bosch Security Systems | 2005-10 | V1.0... - Seite 143 FlexiDome | Manuale di installazione IT | 143 Dimensioni in mm 57.6 57.6 2.27 2.27 6.22 Bosch Security Systems | 2005-10 | V1.0...
- Seite 144 FlexiDome | Manuale di installazione IT | 144 Dimensioni con la scatola per il montaggio su superficie (mm/pollici) 53.3 53.3 2. 1 2. 1 6.22 Bosch Security Systems | 2005-10 | V1.0...
- Seite 145 • TC220PSX-24 220-240 VAC, 50/60 Hz - 24 VAC, 30 VA • TC220PS 220-240 VAC, 50/60 Hz - 15 VDC, 9 VA Box interfaccia: • VP-CFGSFT Software e box interfaccia per comunicazioni Bilinx™ Bosch Security Systems | 2005-10 | V1.0...
- Seite 146 FlexiDome | Manuale di installazione IT | 146 Bosch Security Systems | 2005-10 | V1.0...
-
Seite 147: Precauções De Segurança
7. Não obstrua os orifícios de ventilação. Proceda à instalação, de acordo com as instruções do fabricante. 8. Não instale o aparelho junto de fontes de calor como, por exemplo, aquecedores, fogões, nem de outro tipo de equipamento (incluindo amplificadores) que produza calor. Bosch Security Systems | 2005-10 | V1.0... - Seite 148 A fonte de alimentação de baixa tensão tem de estar conforme a norma EN/UL 60950. A fonte de alimentação tem de ser uma unidade SELV-LPS ou SELV - Classe 2 (extra-baixa tensão de segurança - fonte de alimentação limitada). Bosch Security Systems | 2005-10 | V1.0...
- Seite 149 Nota Qualquer alteração ou modificação do equipamento não expressamente aprovada pela Bosch pode anular a autoridade do utilizador para operar o equipamento. Para mais informações ou para contactar um representante, dirija-se ao agente da Bosch Security Systems mais próximo ou visite o nosso sítio de Internet em www.boschsecuritysystems.com...
- Seite 150 Dome de policarbonato • Resolução 540 TVL para câmaras policromáticas • NightSense™ • Menu de configuração no ecrã • Comunicações coaxiais Bilinx™ bidireccionais A câmara FlexiDome está disponível nas versões policromática e monocromática. Bosch Security Systems | 2005-10 | V1.0...
- Seite 151 Câmara FlexiDome integrada • Kit de equipamento de montagem • Manual de instalação Nota Se lhe parecer que o equipamento foi danificado durante o transporte, volte a embalá-lo e avise a transportadora ou o fornecedor. Bosch Security Systems | 2005-10 | V1.0...
- Seite 152 Rode o anel de moldura no sentido contrário ao dos ponteiros do relógio para o retirar do encaixe tipo baioneta na base da câmara. • Retire o aro envolvente junto com a dome. • Retire o revestimento interior puxando-o para fora da base. Bosch Security Systems | 2005-10 | V1.0...
-
Seite 153: Montagem Da Unidade
As figuras seguintes mostram as diferentes formas de montar a unidade. Figura 1 Ligação pela retaguarda - superfície oca Fios Superfície sólida (três orifícios de 8 mm pré-furados) Base de montagem Três parafusos (incluídos) Bosch Security Systems | 2005-10 | V1.0... - Seite 154 Montagem saliente - ligação pela lateral Superfície Tubo eléctrico sólida (três orifícios de 8 mm pré- Fios furados) Base de Três parafusos montagem (fornecido com a elevada câmara) (VDA-445SMB) Três parafusos Câmara e base (M5, incluídos) Bosch Security Systems | 2005-10 | V1.0...
- Seite 155 No caso de ligação pela lateral, remova a tampa que cobre a entrada lateral. No caso de ligação pela retaguarda, deixe a tampa no lugar. • Ligue o tubo eléctrico à base de montagem. • Faça a ligação no interior da caixa de montagem. Bosch Security Systems | 2005-10 | V1.0...
- Seite 156 • Empurre as ligações pelo orifício dos fios da superfície. • Fixe a base de montagem à superfície com três parafusos. Bosch Security Systems | 2005-10 | V1.0...
-
Seite 157: Configuração Da Câmara
Esta tomada proporciona um sinal de vídeo composto (com sincronização). Existe um cabo opcional (código S1460) disponível para fazer esta ligação. Focagem Distância focal Interruptores de navegação Tomada do monitor Parafusos de orelhas Bosch Security Systems | 2005-10 | V1.0... - Seite 158 Repita estes dois ajustes até que a perspectiva pretendida esteja focada. • Aperte ambos os parafusos. Verifique se a imagem se mantém focada quando a dome estiver devidamente posicionada. Se necessário, volte a focar. Bosch Security Systems | 2005-10 | V1.0...
- Seite 159 Encaixe o aro envolvente na base junto com a dome. (Se necessário, limpe a superfície com um pano macio.) • Fixe o aro envolvente na base da câmara rodando-o no sentido dos ponteiros do relógio. Bosch Security Systems | 2005-10 | V1.0...
-
Seite 160: Configuração Avançada
Pode também configurar o Bilinx™ para que os botões da câmara permaneçam inactivos mesmo quando o Bilinx™ não estiver a controlar a câmara. Isto evita a alteração não autorizada das definições da câmara. Bosch Security Systems | 2005-10 | V1.0... -
Seite 161: Estrutura De Menus
Level Shut/AGC Shut/AGC Shutter Color Sync Auto black Vphase NightSense* Exit COLOR* White balance R-gain B-gain * Só na versão policromática da câmara. Installer Set focus now Comm Defaults Exit Defaults Restore all? Bosch Security Systems | 2005-10 | V1.0... - Seite 162 • Para fechar todos os menus em simultâneo a partir de qualquer menu, seleccione o item Exit e mantenha a tecla de menu/selecção premida até o ecrã do menu desaparecer. Bosch Security Systems | 2005-10 | V1.0...
- Seite 163 • FL - o modo anti-cintilação evita a interferência das fontes de luz (recomendado apenas para a utilização com objectivas de diafragma de vídeo ou DC). ON/OFF Controlo de ganho automático AUTOBLACK ON/OFF A opção Autoblack aumenta automaticamente a visibilidade dos detalhes. Bosch Security Systems | 2005-10 | V1.0...
- Seite 164 (a redução de azul é compensada pela introdução de mais amarelo). EXIT Sai do menu * Só na versão policromática da câmara. ** Basta alterar a diferença de pontos brancos para condições do cenário especiais. Bosch Security Systems | 2005-10 | V1.0...
- Seite 165 Para evitar a perda de comunicação com uma câmara instalada, a selecção Communication ON/OFF não está disponível quando se utiliza o controlo remoto. Esta função só pode ser acedida através dos botões da câmara. Bosch Security Systems | 2005-10 | V1.0...
-
Seite 166: Especificações Técnicas
Varifocal integrada com diafragma DC Consumo de < 5 W energia Dimensões 58 x 66 x 122 mm (AxLxP) Peso 550 g Temperatura -10° a 45° C de funcionamento Controlos OSD com funcionamento por teclas de função Bosch Security Systems | 2005-10 | V1.0... - Seite 167 FlexiDome | Manual de instalação PT | 167 Dimensões (mm/polegadas) 57.6 57.6 2.27 2.27 6.22 Bosch Security Systems | 2005-10 | V1.0...
- Seite 168 FlexiDome | Manual de instalação PT | 168 Dimensões com a caixa de montagem saliente (mm/polegadas) 53.3 53.3 2. 1 2. 1 6.22 Bosch Security Systems | 2005-10 | V1.0...
- Seite 169 220-240 Vac, 50/60 Hz - 24 Vac, 30 VA • TC220PS 220-240 Vac, 50/60 Hz - 15 Vac, 9 VA Caixa de interface: • VP-CFGSFT Software e caixa de interface de comunicação Bilinx™ Bosch Security Systems | 2005-10 | V1.0...
- Seite 170 FlexiDome | Manual de instalação PT | 170 Bosch Security Systems | 2005-10 | V1.0...
- Seite 171 | 用户手册 中文 | 171 FlexiDome 安全预防措施 危险 内含闪电 (带箭头)的等边三角形符号用于提醒用户:产品壳 体存在未绝缘的 “危险电压” ,其能量级别足以造成人身伤害。 警告 内含感叹号的等边三角形用于提醒用户:产品随附的文档资料 中介绍了重要的操作和维护 (维修)说明,请仔细阅读。 小心 为避免受到电击,不要拆除护盖 (或后盖) 。用户不得维修里 面的部件。有关维修事项,请咨询合格的维修人员。 重要安全防护信息 1. 仔细阅读这些说明。 2. 保管好这些说明。 3. 遵守所有警告信息。 4. 遵循所有说明。 5. 不要在靠近水源的地方使用本设备。 6. 只能使用干软布清洁。 7. 不要阻塞任何通风孔。遵照制造商的说明进行安装。 8. 不要在靠近热源的地方安装,如散热器、贮热器、火炉或其它生热装 置 (包括放大器)等。 博世安保有限公司...
- Seite 172 | 用户手册 中文 | 172 FlexiDome 9. 不要破坏极化或接地型插头的安全功效。极化插头配有两个接线片, 其中一片比另一片宽。接地型插头配有两个接线片以及一个接地插 针。宽接线片或第三个接地插针均用于保护您的人身安全。如果提供 的插头无法插入插座,请联系电工寻求建议。 10. 不要踩踏或挤压电源线,特别注意保护插头、便捷插座以及设备接出 点位置。 11. 仅用制造商指定的附件/配件。 12. 在雷雨期间或长期不用时,拔下本设备的电源插头。 13. 所有维修事项均应交给合格的维修人员处理。设备发生下列任何一种 损坏情况时,均需进行维修:电源线或插头损坏、液体溅入或有异物 落入设备、设备被雨打湿或受潮、运转不正常或设备掉落等。 14. 在建筑物的电气安装过程中,全极电源开关的引脚触点之间至少应相 隔 3 毫米。 警告 为了降低火灾或电击风险,不要让本设备暴露在雨天或潮湿的 环境中,并且不要将盛有液体的物品 (如花瓶等)放在本设 备上。 小心 低电压电源装置必须符合 EN/UL 60950 。电源必须是 SELV- LPS 装置或 SELV - 2 类装置 (安全超低电压 – 受限制电源) 。 博世安保有限公司...
- Seite 173 | 用户手册 中文 | 173 FlexiDome FCC 信息 本设备经测试符合 FCC 规则第 15 部分中关于 B 类数字设备的限制规 定。这些限制的目的是为了在居住区安装本设备时,可以提供合理的保 护以防止有害干扰。本设备会产生、使用和辐射射频能量。此外,如果 未遵照相关说明进行安装和使用,可能会对无线电通信造成干扰。但是, 这并不能保证在某些特定的安装环境中绝对不会产生干扰。如果本设备 确实对无线电或电视接收造成了有害干扰,并且可以通过关闭和打开本 设备来确定,则鼓励用户采用以下一种或多种方法排除干扰: 重新调整接收天线的方向和位置。 • 增加设备与接收器之间的距离。 • 将本设备的电源插头插至不同电路上的插座,使本设备与接收器使用 • 不同的分支电路。 向供应商或有经验的无线电/电视技术人员查询,获得有关帮助信息。 • 注释 任何未经博世明确许可的改装均可能导致用户失去操作本设备的权利。 若要获取详细信息或向代表咨询,请与最近的博世安保有限公司办事处 联系或访问我们的站点:www.boschsecurity.com.hk 博世安保有限公司 | 2005 年 10 月 | V1.0...
- Seite 174 | 安装手册 中文 | 174 FlexiDome 简介 FlexiDome 是一款精巧细致、时尚典雅的监控球型摄像机,其高性能 1/3 英寸 CCD 摄像头采用了功能完备的变焦镜头。这款一体化装置可以安装在电气接线盒、 墙壁或天花板上。结构坚固的外壳和聚碳球型罩可以保护摄像机模块免受损坏。 此摄像机采用先进的数字信号处理技术,能够在所有照明条件下提供杰 出的图像品质。 FlexiDome 摄像机安装简单方便、随时可投入使用, 即便在苛刻的室内场景条件下也能提供最佳的清晰度。 其特性包括: 聚碳酸酯球型罩 • 彩色摄像机拥有 540 电视线清晰度 • NightSense™ (星光技术) • 屏显设置菜单 • Bilinx™ 双向同轴电缆通信 • 摄像机提供彩色和黑白两种型号。 FlexiDome 博世安保有限公司 | 2005 年 10 月 | V1.0...
- Seite 175 | 安装手册 中文 | 175 FlexiDome 型号概览 黑白 FlexiDome 型号 VDM- VDM- 345V03-10 345V04-10 345V03-20 345V04-20 镜头 变焦 变焦 变焦 变焦 2.6 – 6 毫米 4 – 9 毫米 2.6 – 6 毫米 4 – 9 毫米 F1.4-360 F1.6-360 F1.4-360 F1.6-360 标准...
- Seite 176 | 安装手册 中文 | 176 FlexiDome 小心 安装须由合格的维修人员遵照美国国家电工标准或当地的相关 电气规则进行。 拆卸 摄像机/壳体装置由以下部件组成: 摄像机模块和安装 底座 内部衬板 装饰环 球型罩 小心 摄像机模块是一个非常精密的设备,必须谨慎处理。拆卸装置 时,切勿使其掉落。 要拆卸装置,请执行以下步骤: 逆时针旋转装饰环,使其脱离摄像机底座上的卡口。 • 取下装饰环和球型罩。 • 拉动内部衬板并从底座上取下。 • 博世安保有限公司 | 2005 年 10 月 | V1.0...
- Seite 177 | 安装手册 中文 | 177 FlexiDome 安装装置 装置可以采用多种方式安装,具体取决于安装表面类型、是否使用电气 接线盒以及是从后部还是从侧面 (安装表面)连接导线。 小心 只有合格的维修人员才能进行安装,并且应遵照美国国家电工 标准或适用的当地电气条例。 如果采用表面安装,请使用单独订购的表面安装盒 (VDA-445SMB),并 将装置安装到此底座上。 提示 参考尺寸图以确定螺孔和导线接入孔的具体位置。 • 部分拧入两颗螺丝作为基准孔,并在连接导线时用它们暂时悬挂摄 • 像机。 下图显示了安装装置的各种方法。 图 1 后部连接 – 空心表面 导线 坚固表面 (三个预先钻好的 8 毫米孔) 安装底座 三颗螺丝 (随附) 博世安保有限公司 | 2005 年 10 月 | V1.0...
- Seite 178 | 安装手册 中文 | 178 FlexiDome 图 2 连接到电气接线盒 (4S) S4 电气接线盒 安装底座 两颗螺丝 (不随附) 图 3 表面安装 – 侧面连接 实心表面 导线管 (三个预先钻好的 8 毫米孔) 导线 三颗螺丝 表面安装盒 (随摄像机附带) (VDA-445SMB) 三颗螺丝 摄像机装置和 ( M5 ,随附) 底座 博世安保有限公司 | 2005 年 10 月 | V1.0...
- Seite 179 | 安装手册 中文 | 179 FlexiDome 表面安装 – 后部连接 图 4 导线 导线管 实心表面 (三个预先钻好的 8 毫米孔) 护盖 三颗螺丝 表面安装盒 (随摄像机附带) (VDA-445SMB) 三颗螺丝 摄像机装置和 ( M5 ,随附) 底座 加高安装 使用表面安装盒时: 对于侧面连接,取下保护侧面入口的护盖。 • 对于后部连接,无需取下护盖。 将导线管连接至安装底座。 • 在安装盒内部进行连接。 • 博世安保有限公司 | 2005 年 10 月 | V1.0...
- Seite 180 | 安装手册 中文 | 180 FlexiDome 连接和设置 电源和视频连接 线束配有一个 BNC 连接器,用于连接视频同轴电缆 (带插针式 BNC 连接器);并且配有两根已剥皮的低压电源线,用于连接电源连接器。 (此外, 还提供了 UTP 适配器附件,以便将 UTP 视频电缆连接至 BNC 连接器。 ) 小心 连接之前,请确保断开了要接入装置的电缆的电源。确保装置 的电压类型与所用的线路电源相匹配。 连接低压电源线和视频电缆的最简单方法如下: 将建筑物连接线穿过安装表面导线孔,使其伸出适当的距离。 • 将两颗螺丝部分拧入预先钻好的孔。 • 使用基准孔将安装底座暂时挂在一颗螺丝上,然后稍稍倾斜底座以便 • 进行电缆连接。 将摄像机模块的 BNC 连接器连接至视频同轴电缆。 • 将剥皮的电源线连接至电源连接器。 • 注释...
- Seite 181 | 安装手册 中文 | 181 FlexiDome 设置摄像机 您可以将监视器连接至印刷电路板上的 2.5 毫米微型插孔,以帮助设置 摄像机。此插孔提供复合视频信号 (同步) 。可用可选电缆 (代码为 S1460)进行此连接。 对焦螺丝 焦距螺丝 浏览开关 指轮 监视器插孔 博世安保有限公司 | 2005 年 10 月 | V1.0...
- Seite 182 | 安装手册 中文 | 182 FlexiDome 摄像机定位 摄像机的物理默认位置是确保图像顶部要与指示标记 TOP 相对应。 小心 CCD 图像传感器是一个高度精密的元件,要小心处理以保证 正常的性能和更长的使用寿命。无论在工作还是存放条件下, 都不要让传感器暴露在阳光直射或明亮的聚光灯下。避免强光 进入摄像机的视场。 摄像机模块的位置可以沿着三根轴进行调整。调整摄像机位置时,请确 保监视器上的图像呈水平显示。通过以下步骤将摄像机安装在所需位置: 对于水平调整 (摇摄) ,请在底座上旋转摄像机模块。旋转角度不得 • 超过 360°。 对于垂直调整 (俯仰) ,请松开指旋螺钉,定位摄像机,然后轻轻拧 • 紧指旋螺钉以固定摄像机。 为获得水平图像 (适用于倾斜的天花板或侧壁安装) ,请根据需要旋 • 转镜头基座,以对准监视器上显示的图像。旋转角度不得超过 340°。 焦距和焦点 要设置变焦镜头的视场,请松开焦距螺丝,然后转动机件,直至监视 • 器上显示所需视图。 (图像不清晰。 ) 松开对焦螺丝并转动机件,直至图像处于焦点位置,从而使图像清晰...
- Seite 183 | 安装手册 中文 | 183 FlexiDome 关闭装置 定位摄像机并进行所有调节后,请关闭装置。 将内部衬板固定到位,其边缘应对准底座上的支架。 • 将装饰环和球型罩放置在底座上。 (如果需要,请用软布清洁其表 • 面。 ) 通过顺时针旋转将装饰环固定到摄像机底座上。 • 博世安保有限公司 | 2005 年 10 月 | V1.0...
- Seite 184 | 安装手册 中文 | 184 FlexiDome 先进设置 通常, FlexiDome 摄像机无需进一步调整便可提供优异的图像。然而, 对于特定环境,可以调整先进设置选项以让摄像机提供最佳的图像效果。 有两个菜单:Main 菜单和 Installer 菜单。 Main 菜单允许用户为每个模式选择和设置图像增强功能。如果不满意自 己的更改,可以随时恢复模式的默认值。 摄像机还配有一个 Installer 菜单,用户从中可以设定安装设置。 Main 菜单和 Installer 菜单提供了一些可以直接选择的功能或一些用于 进一步设置的子菜单。 进入和浏览菜单 有五个按键可用于浏览各菜单。要进入设置菜单,请按菜单/选择键 (位于中心位置) 。主菜单会出现在 OSD 上。此时,用户即可使用各个 箭头键进行浏览。 当 Bilinx™ 通信链接处于活动状态时,摄像机上的按钮会被禁用。此外, 用户还可以对 Bilinx™ 进行设置,让摄像机按钮即使在 Bilinx™ 未有效控 制摄像机时也处于禁用状态。这可以防止他人擅自更改摄像机的设置。...
- Seite 185 | 安装手册 中文 | 185 FlexiDome 菜单结构 Main 菜单 Level Shut/AGC Shut/AGC Shutter Color Sync Auto black Vphase NightSense* Exit COLOR* White balance R-gain B-gain * 仅适用于彩色机型摄像机。 Installer Set focus now Comm Defaults Exit Defaults Restore all? 博世安保有限公司 | 2005 年 10 月 | V1.0...
- Seite 186 | 安装手册 中文 | 186 FlexiDome 菜单浏览提示 如何使用 5 个按键 向上箭头键 菜单 / 选择键 摄像机 底座 向右箭头键 向左箭头键 向下箭头键 按菜单/选择键可以进入菜单或移至下一个或上一个菜单。 • 按住菜单/选择键大约 1.5 秒可以打开 Installer 菜单。 • 向上或向下箭头键用于向上或向下滚动菜单。 • 向左或向右箭头键用于在选项之间移动或设置参数。 • 在菜单中时,快速按菜单/选择键两次可以恢复所选项目的厂商默 • 认值。 要从任一菜单中同时关闭所有菜单,请选择 Exit 选项,然后按住菜 • 单/选择键不放,直到菜单消失。 博世安保有限公司 | 2005 年 10 月 | V1.0...
- Seite 187 | 安装手册 中文 | 187 FlexiDome Main 菜单 功能 选项 说明 LEVEL -15 - 0 - +15 调整视频输出级别 SHUT/AGC 选择子菜单 选择以进入 Shutter / Automatic Gain Control 菜单 BLC ON, OFF 当设为 ON 时,摄像机会优化所选图像区域的视 频电平。此区域之外的部分可能未曝光,也可能 过度曝光 (这是正常设置) 。 COLOR* ...
- Seite 188 | 安装手册 中文 | 188 FlexiDome NIGHTSENSE* AUTO Nightsense ™ 技术增强了摄像机在弱光条件下的 FORCED 性能。 • 在 AUTO 模式下,摄像机在弱光条件下自动趋 OFF 向黑白操作。 • 在 FORCED 模式下,摄像机保持高灵敏度的 黑白操作。 EXIT 退出菜单 * 仅适用于彩色机型摄像机。 注释 如果启用 NightSense™ 选项,则图像中可能会出现一些信噪或斑点,这是 正常现象。 如果摄像机处于黑白模式,则所有与色彩相关的菜单项均会被禁用,无法 进入。 Color 子菜单...
- Seite 189 | 安装手册 中文 | 189 FlexiDome Installer 设置 Install 菜单 功能 选项 说明 SET 强制镜头完全打开光圈。立即调节镜头焦距。 FOCUS NOW COMM ON, OFF Bilinx 通信开启 / 关闭 DEFAULTS 选择子菜单 将所有模式的所有设置恢复至厂商默认值 EXIT 退出菜单 DC 光圈镜头调整过程: 松开焦距锁定螺丝。 菜单中会突出显示 “SET BACK FOCUS NOW” 。 根据需要旋转焦距调节环。...
- Seite 190 | 安装手册 中文 | 190 FlexiDome 技术指标 型号 VDC- VDC- VDM- VDM- 445V0x-10 445V0x-20 345V0x-10 345V0x-20 标准 NTSC CCIR 有效画面像素 752x582 768x492 752x582 768x492 最低照度 < 1.0 lux < 0.2 lux < 0.4 lux (星光技术开启) 清晰度 540 电视线 570 电视线...
- Seite 191 | 安装手册 中文 | 191 FlexiDome 尺寸 (毫米 / 英寸) 57.6 57.6 2.27 2.27 6.22 博世安保有限公司 | 2005 年 10 月 | V1.0...
- Seite 192 | 安装手册 中文 | 192 FlexiDome 采用表面安装盒时的尺寸 (毫米 / 英寸) 53.3 53.3 2. 1 2. 1 6.22 博世安保有限公司 | 2005 年 10 月 | V1.0...
- Seite 193 | 安装手册 中文 | 193 FlexiDome 附件 电源变压器 • TC1334 120VAC, 60Hz - 24VAC, 30VA • TC120PS 120VAC, 60Hz - 15VDC, 9VA • TC220PSX-24 220-240VAC, 50/60Hz - 24VAC, 30VA • TC220PS 220-240VAC, 50/60Hz - 15VDC, 9VA 接口盒: Bilinx™ 通信接口盒和软件 • VP-CFGSFT 博世安保有限公司...
- Seite 194 | 安装手册 中文 | 194 FlexiDome 博世安保有限公司 | 2005 年 10 月 | V1.0...
- Seite 196 Bosch Sicherheitssysteme GmbH Bosch Security Systems B.V. Ludwig-Bölkow-Allee P.O. Box 80002 5600 JB Eindhoven 85521 Ottobrunn Germany The Netherlands www.bosch-sicherheitssysteme.de www.boschsecuritysystems.com © 2005 Bosch Security Systems B.V. Subject to change. Printed in Portugal. 3122 165 xxxxx...