Herunterladen Inhalt Inhalt Diese Seite drucken
Inhaltsverzeichnis

Werbung

Verfügbare Sprachen
  • DE

Verfügbare Sprachen

  • DEUTSCH, seite 74
HP Photosmart R725/R727 Digital
Camera
English

Werbung

Inhaltsverzeichnis
loading

Inhaltszusammenfassung für HP Photosmart R725

  • Seite 1 HP Photosmart R725/R727 Digital Camera English...
  • Seite 2 © Copyright 2006 Hewlett-Packard Development Company, L.P. The information contained herein is subject to change without notice. The only warranties for HP products and services are set forth in the express warranty statements accompanying such products and services. Nothing herein should be construed as constituting an additional warranty.
  • Seite 3: Inhaltsverzeichnis

    Contents Getting started.............4 Accessing the electronic User Guide.....4 Camera top and back ..........6 Camera front and bottom........8 Camera dock insert..........8 Setting up your camera........9 Install the battery............9 Charge the battery..........9 Turn on the camera..........9 Choose the language...........10 Set the region............10 Set the date and time...........10 Install and format an optional memory card ................11...
  • Seite 4: Getting Started

    Extending battery life – A description of the power indicator icons ● Troubleshooting ● Getting assistance from ● Camera specifications Accessing the electronic User Guide The electronic User Guide is on the HP Photosmart Software CD. HP Photosmart R725/R727 Digital Camera...
  • Seite 5: Getting Assistance

    To view the User Guide: 1. Insert the HP Photosmart Software CD into the CD drive of your computer. 2. On Windows: Click View User Guide on the main page of the installation screen. On Macintosh: Open the readme file in the docs folder on the CD.
  • Seite 6: Camera Top And Back

    Macro, Infinity. Photosmart Express button—Options are Print, Buy Prints Online, Share Setup. Live View/Playback button—Switches between Live View and Playback (see Live View and Playback on page 18). Shutter button. Video button. Power light. button. HP Photosmart R725/R727 Digital Camera...
  • Seite 7 10 Wrist strap mount. 11 Zoom lever (Digital and Optical)—In Live View, press to zoom in or press to zoom out. In Playback, press to magnify the selected image or press view thumbnails of your images. 12 Mode button—Press to access the Shooting Mode menu while in Live View.
  • Seite 8: Camera Front And Bottom

    USB connector. Power adapter connector. Camera dock insert If you purchase an optional HP Photosmart camera dock, it will come with multiple clear inserts. When setting up the dock for use with this camera, use the dock insert with the round blue tag. See the dock User Guide for instructions.
  • Seite 9: Setting Up Your Camera

    Setting up your camera Install the battery 1. Open the Battery/Memory card door by sliding the door latch as indicated on the Battery/Memory card door. 2. Insert the battery in the larger slot, pushing the battery in until the latch catches. 3.
  • Seite 10: Choose The Language

    2. Use to move to the other selections and repeat Step 1 until the date and time are set correctly. 3. Press when the date, time, and format settings are correct, then press again to confirm. HP Photosmart R725/R727 Digital Camera...
  • Seite 11: Install And Format An Optional Memory Card

    To use internal memory and view images stored there, remove the memory card. Install the software The HP Photosmart Software provides features for transferring images and video clips to your computer, as well as features for modifying stored images (remove red...
  • Seite 12 If you have trouble installing or using the HP Photosmart Software, see the HP Customer Care website for more information: www.hp.com/support. Windows If your Windows computer does not meet the system...
  • Seite 13: Taking Pictures And Recording Video Clips

    Taking pictures and recording video clips Live View allows you to frame pictures and video clips in the Image Display. Take a still picture 1. Press until appears briefly in the upper right corner of the Image Display. This indicates you are in Live View. 2.
  • Seite 14 4. To stop recording video, press and release the Video button again. HP Photosmart R725/R727 Digital Camera...
  • Seite 15: Reviewing And Deleting Images And Video Clips

    Reviewing and deleting images and video clips Review images and video clips You can review and work with images and video clips in Playback. 1. Press until appears in the briefly upper right corner of the Image Display. This indicates you are in Playback.
  • Seite 16: Transferring And Printing Images

    Transferring and printing images Transfer images If you have installed the HP Photosmart Software, use this method to transfer images and video clips to your computer. If you have not installed the HP Photosmart Software, see the electronic User Guide for an alternate method.
  • Seite 17 2. Connect the camera and printer using the USB cable that came with your camera. 3. Turn on the camera. 4. When the camera is connected to the printer, the Print Setup Menu displays on the camera. To change the settings, use on the camera to select a menu option, then use...
  • Seite 18: Camera Quick Reference

    View, you access the tabbed camera menus, as shown in the example screen. to move to the desired menu. Within a menu, use to move to specific selections. To exit the menu, press at any time. HP Photosmart R725/R727 Digital Camera...
  • Seite 19 Menus and options are: Menu Options ● Shooting Modes (Auto Capture allows you to Mode, Landscape, adjust camera settings that Portrait, Theatre, affect the characteristics of Panorama Right, future images and video clips Panorama Left, Action, you capture with your camera. Night Portrait, Night Scenery, Beach, Snow, Sunset, Document)
  • Seite 20 Using Shooting Modes ● Using Design Gallery ● Sharing Images ● Printing Images ● Recording Audio Clips ● Recording Video Clips ● Reviewing Images and Videos ● Extracting Prints from Video ● Deleting Images ● Transferring Images HP Photosmart R725/R727 Digital Camera...
  • Seite 21 Menu Options ● Managing Batteries ● Getting Assistance ● Camera Shortcuts ● About... When you press while in Live View or Playback, you see the Photosmart Express menu. Menu Options ● Print Photosmart Express allows you to share your ● Buy Prints Online photos with friends and ●...
  • Seite 22 HP Photosmart R725/R727 Digital Camera...
  • Seite 23 Appareil photo numérique HP Photosmart R725/R727 Français...
  • Seite 24 Les informations contenues dans le présent document sont sujettes à modification sans préavis. Les seules garanties pour les produits et services HP sont énoncées dans les déclarations de garantie expresse accompagnant lesdits produits et services. Aucun élément du présent document ne saurait être interprété...
  • Seite 25 Veuillez noter les informations suivantes pour référence ultérieure : ● Numéro de modèle (indiqué en façade de l'appareil photo) : _________ ● Numéro de série (sous l'appareil photo) : _________ ● Date d'achat : _________...
  • Seite 26 Revisualisation des images et des clips vidéo ................18 Suppression d'une image........18 Transfert et impression d'images.....20 Transfert d'images..........20 Impression d'images à partir de l'appareil photo..............21 Guide de référence rapide de l'appareil photo..............22 Appareil photo numérique HP Photosmart R725/R727...
  • Seite 27: Prise En Main

    à l'écran ● Des informations relatives à la batterie, notamment : – L'extension de son autonomie – Une description des icônes d'indication de charge ● Résolution des problèmes ● Obtenir une assistance auprès de HP Prise en main...
  • Seite 28: Accéder Au Guide De L'utilisateur Au Format Électronique

    électronique se trouve sur le CD HP Photosmart Software. Pour consulter le Guide de l'utilisateur : 1. Insérez le CD HP Photosmart Software dans le lecteur de CD-ROM de votre ordinateur. 2. Sous Windows : cliquez sur Afficher le Guide de l'utilisateur dans la page principale de l'écran...
  • Seite 29: Dessus Et Arrière De L'appareil Photo

    Obtenir une assistance ● Pour bénéficier de conseils et d'outils pour une utilisation plus efficace de votre appareil photo, consultez le site Web à l'adresse www.hp.com/ photosmart (en anglais uniquement) ou www.hp.com. ● Pour obtenir une assistance produit, des tests de diagnostic et des pilotes à...
  • Seite 30 Mode auto, Paysage, Portrait, Théâtre, Panorama à droite, Panorama à gauche, Action, Portrait nuit, Paysage nuit, Plage, Neige, Coucher de soleil et Document. 13 Boutons — Permettent de parcourir les menus et les images. Appareil photo numérique HP Photosmart R725/R727...
  • Seite 31: Façade Et Dessous De L'appareil Photo

    14 Bouton — Permet d'afficher les menus de l'appareil photo, de sélectionner les options et de confirmer les actions. 15 Voyant de charge de la batterie. Bouton Supprimer — Permet d'accéder à la fonction Supprimer lorsque vous êtes en mode Lecture. 17 Ecran.
  • Seite 32: Kit D'adaptation De La Station D'accueil

    Kit d'adaptation de la station d'accueil Lorsque vous achetez une station d'accueil HP Photosmart (en option), elle vous est fournie avec plusieurs kits d'adaptation transparents. Pour utiliser la station d'accueil avec cet appareil photo, mettez en place le kit d'adaptation comportant une pastille bleue.
  • Seite 33: Préparation De Votre Appareil Photo

    Préparation de votre appareil photo Installation de la batterie 1. Ouvrez le volet du compartiment de la batterie/carte mémoire en faisant glisser le loquet, comme indiqué sur le volet du compartiment. 2. Insérez la batterie dans le logement le plus large, puis enfoncez-la jusqu'à...
  • Seite 34: Mise En Marche De L'appareil Photo

    Région déterminent le format par défaut de la date et du signal vidéo pour l'affichage des images de l'appareil photo sur un téléviseur. Utilisez pour sélectionner la région de votre choix, puis appuyez sur Appareil photo numérique HP Photosmart R725/R727...
  • Seite 35: Réglage De La Date Et De L'heure

    (en option) Cet appareil photo prend en charge les cartes mémoire SD (Secure Digital) de marque HP, de 8 Mo à 2 Go (standard et haute vitesse). 1. Eteignez l'appareil photo et ouvrez le volet du compartiment de la batterie/carte mémoire.
  • Seite 36: Installation Du Logiciel

    Pour utiliser la mémoire interne et visualiser les images qu'elle contient, retirez la carte mémoire. Installation du logiciel Le logiciel HP Photosmart vous permet de transférer des images et des clips vidéo vers votre ordinateur et de modifier des images stockées (suppression des yeux rouges, rotation, recadrage, redimensionnement, amélioration de la qualité...
  • Seite 37 Si votre ordinateur sous Windows ne répond pas à la configuration requise telle qu'elle est indiquée sur l'emballage de votre appareil photo, le logiciel HP Photosmart Essential est installé à la place de la version complète HP Photosmart Premier. 1. Fermez tous les programmes et désactivez temporairement tout logiciel antivirus.
  • Seite 38: Prises De Vue Et Enregistrement De Clips Vidéo

    4. Enfoncez entièrement le déclencheur pour prendre la photo. 5. Pour ajouter un commentaire audio de 60 secondes maximum, maintenez le déclencheur enfoncé, puis relâchez-le lorsque l'enregistrement est terminé. Appareil photo numérique HP Photosmart R725/R727...
  • Seite 39: Enregistrement D'un Clip Vidéo

    Enregistrement d'un clip vidéo 1. Appuyez sur jusqu'à ce que apparaisse brièvement dans l'angle supérieur droit de l'écran. Cela indique que vous êtes en mode Prévisualisation. 2. Cadrez le sujet. 3. Appuyez sur le bouton Vidéo et relâchez-le. 4. Pour arrêter l'enregistrement de la vidéo, appuyez à nouveau sur le bouton Vidéo et relâchez-le.
  • Seite 40: Revisualisation Et Suppression Des Images Et Des Clips Vidéo

    Cela indique que vous êtes en mode Lecture. 2. Utilisez pour sélectionner une image ou un clip vidéo. 3. Appuyez sur pour afficher le sous-menu Supprimer. Appareil photo numérique HP Photosmart R725/R727...
  • Seite 41 4. Utilisez pour sélectionner Cette image, puis appuyez sur Revisualisation et suppression des images et des clips vidéo...
  • Seite 42: Transfert Et Impression D'images

    Transfert et impression d'images Transfert d'images Si vous avez installé le logiciel HP Photosmart, procédez comme suit pour transférer les images et les clips vidéo sur votre ordinateur. Dans le cas contraire, consultez le Guide de l'utilisateur au format électronique pour obtenir une autre méthode.
  • Seite 43: Impression D'images À Partir De L'appareil Photo

    Impression d'images à partir de l'appareil photo Vous pouvez connecter l'appareil photo à n'importe quelle imprimante compatible PictBridge pour imprimer des photos et des images provenant d'un clip vidéo. 1. Vérifiez que l'imprimante est sous tension, qu'elle contient du papier et qu'elle n'affiche aucun message d'erreur.
  • Seite 44: Guide De Référence Rapide De L'appareil Photo

    Menus En appuyant sur à partir du mode Lecture ou du mode Prévisualisation, vous accédez aux onglets de menu de l'appareil photo, comme illustré dans cet exemple. Appareil photo numérique HP Photosmart R725/R727...
  • Seite 45 Utilisez pour atteindre le menu souhaité. Dans le menu, utilisez pour passer d'une sélection à une autre. Pour quitter le menu, appuyez sur Les menus et options sont les suivants : Menu Options ● Modes de prise de vue Capture vous permet de (Mode auto, Paysage, régler différents paramètres Portrait, Théâtre,...
  • Seite 46 ● 10 conseils Aide comporte des descriptions des ● Accessoires de l'appareil fonctionnalités de l'appareil ● Boutons de l'appareil photo et propose des conseils ● Modes de prise de vue pour prendre vos photos. Appareil photo numérique HP Photosmart R725/R727...
  • Seite 47 Menu Options ● Utilisation de la Galerie créative ● Partage d'images ● Impression d'images ● Enreg. comment. audio ● Enreg. de clips vidéo ● Visual. images et vidéos ● Extraction images de clips vidéo ● Suppression d’images ● Transfert d'images ●...
  • Seite 48 Appareil photo numérique HP Photosmart R725/R727...
  • Seite 49 Fotocamera digitale HP Photosmart R725/R727 Italiano...
  • Seite 50 Le informazioni contenute in questo documento sono soggette a modifica senza preavviso. Le uniche garanzie per i prodotti e i servizi HP sono definite nelle dichiarazioni di garanzia esplicita che accompagnano tali prodotti e servizi. Nulla di quanto dichiarato nel presente documento costituisce una garanzia aggiuntiva.
  • Seite 51 Sommario Informazioni preliminari........4 Accesso alla Guida d'uso online......5 Parte superiore e posteriore della fotocamera ................6 Lati anteriore e inferiore della fotocamera.....8 Inserto dell'alloggiamento per la fotocamera ................8 Configurazione della fotocamera.....10 Installazione della batteria........10 Carica della batteria..........10 Accensione della fotocamera.......11 Scelta della lingua..........11 Impostazione della regione........11 Impostazione della data e dell'ora.......11 Installazione e formattazione di una scheda di...
  • Seite 52: Informazioni Preliminari

    LCD ● Informazioni sulla batteria, tra cui: – Ottimizzazione della durata della batteria – Una descrizione delle icone relative all'indicatore di alimentazione ● Soluzione dei problemi ● Informazioni per richiedere l'assistenza ● Specifiche della fotocamera Fotocamera digitale HP Photosmart R725/R727...
  • Seite 53: Accesso Alla Guida D'uso Online

    HP Photosmart (HP Photosmart Software CD). Per visualizzare la Guida d'uso: 1. Inserire il CD del software HP Photosmart nell'unità CD del computer. 2. In Windows: Fare clic su Visualizza la Guida d'uso nella pagina principale della schermata di installazione.
  • Seite 54: Parte Superiore E Posteriore Della Fotocamera

    ● Per assistenza sull'uso del software HP Photosmart, consultare la guida online del software HP Photosmart. Parte superiore e posteriore della fotocamera Altoparlante. Pulsante flash: Le impostazioni sono Auto, Flash On, Flash Off. Pulsante messa a fuoco: Le impostazioni sono Normale, Macro, Auto Macro, Infinito.
  • Seite 55 Riproduzione (vedere Vista dal vivo e Riproduzione a pagina 20). Pulsante otturatore. Pulsante video. Spia di accensione. Pulsante 10 Cinghietta da polso. 11 Leva zoom (digitale e ottico): Nella vista dal vivo, premere per aumentare l'ingrandimento oppure per diminuirlo. Nella modalità Riproduzione, premere per ingrandire l'immagine selezionata oppure...
  • Seite 56: Lati Anteriore E Inferiore Della Fotocamera

    Connettore USB. Connettore dell'adattatore di alimentazione. Inserto dell'alloggiamento per la fotocamera L'alloggiamento opzionale HP Photosmart viene fornito con più inserti. Quando si prepara l'alloggiamento perché possa essere utilizzato con questa fotocamera, utilizzare l'inserto contrassegnato da un'etichetta Fotocamera digitale HP Photosmart R725/R727...
  • Seite 57 circolare blu. Vedere la guida d'uso dell'alloggiamento per le istruzioni. Informazioni preliminari...
  • Seite 58: Configurazione Della Fotocamera

    è completamente carica (l'operazione di ricarica dura circa 2–3 ore). Fotocamera digitale HP Photosmart R725/R727...
  • Seite 59: Accensione Della Fotocamera

    Accensione della fotocamera Per accendere la fotocamera, premere il pulsante Scelta della lingua Usare evidenziare la lingua desiderata e quindi premere Impostazione della regione Insieme all'impostazione della Lingua, quella della Regione determina il formato predefinito per la data e per il segnale video usato per visualizzare le immagini della fotocamera su un televisore.
  • Seite 60: Installazione E Formattazione Di Una Scheda Di Memoria Opzionale

    Installazione e formattazione di una scheda di memoria opzionale Questa fotocamera supporta schede di memoria HP Secure Digital (SD), sia standard che ad alta velocità, da 8 MB a 2 GB. 1. Spegnere la fotocamera e aprire lo sportello del vano batteria/scheda di memoria.
  • Seite 61: Installazione Del Software

    Se durante l'installazione o l'uso del software HP Photosmart si verificano dei problemi, visitare il sito Web per l'assistenza clienti HP per richiedere maggiori informazioni: www.hp.com/support. Windows...
  • Seite 62 3. Terminata l'installazione del software, riattivare il software antivirus. Macintosh 1. Inserire il CD del software HP Photosmart nell'unità 2. Fare doppio clic sull'icona del CD sulla scrivania. 3. Fare doppio clic sull'icona del programma di installazione e seguire le istruzioni visualizzate.
  • Seite 63: Foto E Videoclip

    Foto e videoclip La modalità Vista dal vivo consente di inquadrare le foto e i videoclip sul display LCD. Scatto delle foto 1. Premere fino a quando nell'angolo superiore destro del display LCD non appare . Ciò indica che è attiva la modalità...
  • Seite 64 3. Premere e rilasciare il pulsante video 4. Per interrompere la registrazione, premere e rilasciare di nuovo il pulsante video Fotocamera digitale HP Photosmart R725/R727...
  • Seite 65: Visione E Cancellazione Di Immagini E Videoclip

    Visione e cancellazione di immagini e videoclip Visione di immagini e videoclip In modalità Riproduzione è possibile rivedere e manipolare foto e videoclip. 1. Premere fino a quando nell'angolo superiore destro del display LCD non appare . Ciò indica che è attiva la modalità Riproduzione. 2.
  • Seite 66: Trasferimento E Stampa Delle Immagini

    Trasferimento delle immagini Se è stato installato il software HP Photosmart, utilizzarlo per trasferire immagini e videoclip sul computer. Se non è stato installato il software HP Photosmart, consultare la Guida d'uso online per un metodo alternativo. Suggerimento È possibile eseguire questa...
  • Seite 67: Stampa Delle Immagini Della Fotocamera

    Stampa delle immagini della fotocamera È possibile collegare la fotocamera ad una qualsiasi stampante compatibile PictBridge per stampare foto e inquadrature estratte dai videoclip. 1. Verificare che la stampante sia accesa, che la carta sia caricata e che non siano visualizzati messaggi di errore relativi alla stampante.
  • Seite 68: Riferimento Rapido Per La Fotocamera

    Usare per spostarsi sul menu desiderato. All'interno di un menu, usare per spostarsi sulle opzioni desiderate. Per chiudere il menu, premere in un qualsiasi momento Fotocamera digitale HP Photosmart R725/R727...
  • Seite 69 I menu e le opzioni sono: Menu Opzioni ● Modalità di scatto Cattura consente di (Automatica, Panorama, regolare le impostazioni della Ritratto, Teatro, fotocamera che incidono sulle Panoramica verso caratteristiche di immagini e destra, Panoramica videoclip che si cattureranno verso sinistra, Azione, con la fotocamera.
  • Seite 70 ● Accessori suggerimenti per migliorare ● Pulsanti fotocamera gli scatti. ● Uso delle modalità di scatto ● Utilizzo della galleria degli effetti ● Condivisione immagini ● Stampa immagini ● Registrazione clip audio ● Registrazione videoclip Fotocamera digitale HP Photosmart R725/R727...
  • Seite 71 Menu Opzioni ● Revisione immagini e video ● Estrazione stampe da video ● Cancellazione immagini ● Trasferimento immagini ● Manutenzione batterie ● Assistenza ● Accesso rapido ● Info su... Quando si preme mentre è attiva la modalità Vista dal vivo o Riproduzione, viene visualizzato il menu Photosmart Express.
  • Seite 72 Fotocamera digitale HP Photosmart R725/R727...
  • Seite 73 HP Photosmart R725/R727 Digitalkamera Deutsch...
  • Seite 74: Rechtliche Hinweise

    © Copyright 2006 Hewlett-Packard Development Company, L.P. Die Informationen in diesem Dokument können ohne vorherige Ankündigung geändert werden. Für HP Produkte und Dienste gelten nur die Gewährleistungen, die in den ausdrücklichen Gewährleistungserklärungen des jeweiligen Produkts bzw. Dienstes aufgeführt sind. Dieses Dokument gibt keine weiteren Gewährleistungen.
  • Seite 75 Inhalt Erste Schritte............4 Zugreifen auf das elektronische Benutzerhandbuch..........5 Ober- und Rückseite der Kamera......6 Vorder- und Unterseite der Kamera.......8 Dockingeinsatz für die Kamera......8 Einrichten Ihrer Kamera........10 Einsetzen der Batterie..........10 Aufladen der Batterie...........10 Einschalten der Kamera........11 Auswählen der Sprache........11 Einstellen der Region...........11 Einstellen von Datum und Uhrzeit......12 Einsetzen und Formatieren einer optionalen Speicherkarte............12...
  • Seite 76: Erste Schritte

    ● Beschreibung der ● Vorstellung der Symbole auf der Kamerafunktionen Bildanzeige ● Informationen zu Batterien/Akkus, einschließlich: – Verlängern der Batterielebensdauer – Beschreibung der Stromversorgungss ymbole ● Fehlerbehebung ● Unterstützung durch HP ● Technische Daten der Kamera HP Photosmart R725/R727 Digitalkamera...
  • Seite 77: Zugreifen Auf Das Elektronische Benutzerhandbuch

    Das elektronische Benutzerhandbuch befindet sich auf der HP Photosmart Software So zeigen Sie das Benutzerhandbuch an: 1. Legen Sie die HP Photosmart Software CD in das CD-Laufwerk Ihres Computers ein. 2. Unter Windows: Klicken Sie auf der Hauptseite der Installationsanzeige auf Benutzerhandbuch anzeigen.
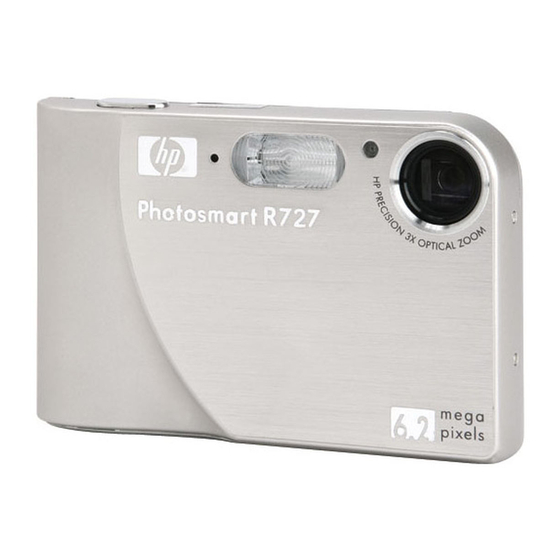
  • Seite 78: Ober- Und Rückseite Der Kamera

    Diagnosefunktionen und Treiber-Downloads erhalten Sie rund um die Uhr (24x7) unter www.hp.com/support. ● Weitere Hilfe zur HP Photosmart-Software finden Sie in der Onlinehilfe für die HP Photosmart- Software. Ober- und Rückseite der Kamera Lautsprecher. Blitz (Taste) – Die möglichen Einstellungen sind "Autom.", "Blitz Ein"...
  • Seite 79 Photosmart Express (Taste) – Die verfügbaren Optionen sind: Drucken, Abzüge online erwerben und "Share" einrichten. Vorschau/Wiedergabe (Taste) – Dient zum Wechseln zwischen Vorschau und Wiedergabe (siehe „Vorschau und Wiedergabe“ auf Seite 21). Auslöser. Video (Taste). Netzkontrollleuchte. (Ein-/Aus-Taste). 10 Befestigung für Halteschlaufe. 11 Zoom-Hebel (digital und optisch) –...
  • Seite 80: Vorder- Und Unterseite Der Kamera

    Vorder- und Unterseite der Kamera Mikrofon Blitz Selbstauslöser/Fokus-Hilfslicht Objektiv Stativhalterung Dockinganschluss Klappe des Batterie-/Speicherkartenfachs USB-Anschluss Netzteilanschluss Dockingeinsatz für die Kamera Wenn Sie eine optionale HP Photosmart Kamera- Dockingstation erwerben, wird diese mit mehreren leeren Einsätzen geliefert. Verwenden Sie zum HP Photosmart R725/R727 Digitalkamera...
  • Seite 81 Einrichten der optionalen Dockingstation für diese Kamera, den Dockingeinsatz mit dem runden blauen Etikett. Die zugehörigen Anweisungen finden Sie im Benutzerhandbuch für die Dockingstation. Erste Schritte...
  • Seite 82: Einrichten Ihrer Kamera

    Über das Netzteil können Sie eine in die Kamera eingesetzte Batterie aufladen. Schließen Sie das Netzteil an der Kamera und anschließend an einer Netzsteckdose an. Während des Ladevorgangs blinkt die Ladekontrollleuchte der Kamera. Die Batterie ist HP Photosmart R725/R727 Digitalkamera...
  • Seite 83: Einschalten Der Kamera

    vollständig aufgeladen, wenn die Kontrollleuchte permanent leuchtet (nach ungefähr 2 bis 3 Stunden). Einschalten der Kamera Drücken Sie zum Einschalten der Kamera die Taste (Ein/Aus). Auswählen der Sprache Mit den Tasten wählen Sie die gewünschte Sprache aus. Drücken Sie anschließend die Taste Einstellen der Region Die Einstellung für die...
  • Seite 84: Einstellen Von Datum Und Uhrzeit

    Einsetzen und Formatieren einer optionalen Speicherkarte Diese Kamera unterstützt Secure Digital (SD) Speicherkarten der Marke HP (Standard und High Speed) mit 8 MB bis hin zu 2 GB. 1. Schalten Sie die Kamera aus, und öffnen Sie die Klappe des Batterie-/ Speicherkartenfachs.
  • Seite 85: Installieren Der Software

    Größe, Anpassen der Bildqualität sowie Hinzufügen von Farben und Spezialeffekten). Sollten bei der Installation oder der Verwendung der HP Photosmart-Software Probleme auftreten, lesen Sie die Informationen auf der Website der HP Kundenunterstützung (HP Customer Care): www.hp.com/support. Einrichten Ihrer Kamera...
  • Seite 86 Version von HP Photosmart Premier installiert. 1. Schließen Sie alle Programme, und deaktivieren Sie vorübergehend sämtliche Virenschutzsoftware. 2. Legen Sie die HP Photosmart Software CD in das CD-Laufwerk ein, und befolgen Sie die angezeigten Anweisungen. Wenn das Installationsfenster nicht angezeigt wird, klicken Sie auf Start und Ausführen.
  • Seite 87: Aufnehmen Von Bildern Und Videoclips

    Aufnehmen von Bildern und Videoclips Die Vorschau ermöglicht das Erfassen von Motiven für Bilder und Videoclips über die Bildanzeige. Aufnehmen eines Einzelbilds 1. Drücken Sie die Taste , bis das Symbol für kurze Zeit rechts oben in der Bildanzeige erscheint. Dadurch wird angezeigt, dass sich die Kamera im Modus Vorschau befindet.
  • Seite 88: Aufnehmen Eines Videoclips

    2. Erfassen Sie das Motiv. 3. Drücken Sie die Taste Video , und lassen Sie diese wieder los. 4. Drücken Sie die Taste Video erneut, und lassen Sie diese wieder los, um die Videoaufnahme zu beenden. HP Photosmart R725/R727 Digitalkamera...
  • Seite 89: Betrachten Und Löschen Von Bildern Und Videoclips

    Betrachten und Löschen von Bildern und Videoclips Betrachten von Bildern und Videoclips Im Modus Wiedergabe können Sie Bilder und Videoclips betrachten und mit diesen arbeiten. 1. Drücken Sie die Taste , bis das Symbol für kurze Zeit rechts oben in der Bildanzeige erscheint.
  • Seite 90 4. Wählen Sie mit den Tasten die Option Dieses Bild aus. Drücken Sie danach die Taste HP Photosmart R725/R727 Digitalkamera...
  • Seite 91: Übertragen Und Drucken Von Bildern

    Wenn die HP Photosmart-Software installiert ist, verwenden Sie die im Folgenden beschriebene Methode, um Bilder und Videoclips auf Ihren Computer zu übertragen. Wenn die HP Photosmart-Software nicht installiert ist, verwenden Sie eine Alternativmethode, die im elektronischen Benutzerhandbuch beschrieben ist. Tipp Sie können diese Aufgabe auch mit einer...
  • Seite 92: Drucken Von Bildern Von Der Kamera Aus

    ändern möchten, wählen Sie mit den Tasten an der Kamera eine Menüoption aus. Ändern Sie dann die jeweilige Einstellung mit den Tasten an der Kamera. 5. Drücken Sie die Taste , um den Druckvorgang zu starten. HP Photosmart R725/R727 Digitalkamera...
  • Seite 93: Kurzreferenz Für Kamerafunktionen

    Kurzreferenz für Kamerafunktionen Das folgende Kapitel dient als Kurzreferenz für die Kamerafunktionen. Weitere Informationen zu diesen Kamerafunktionen finden Sie im elektronischen Benutzerhandbuch. Vorschau und Wiedergabe ● Die Vorschau ermöglicht das Erfassen von Motiven für Bilder und Videoclips über die Bildanzeige. Drücken Sie zum Aktivieren der Vorschau die Taste , bis das Symbol...
  • Seite 94 ● AE-Belichtungsmessung ● ISO-Empfindlichkeit ● Sättigung ● Schärfe ● Kontrast ● Datums-/Zeitstempel ● Bild-Tipp Das Menü Wiedergabe ● Bild-Info dient zum Arbeiten mit Bildern, die auf der Kamera ● Diashow anzeigen gespeichert sind. ● Panorama zusammensetzen HP Photosmart R725/R727 Digitalkamera...
  • Seite 95 Menü Optionen ● Audio aufnehmen ● Bilder auf Karte verschieben ● Kunsteffekte anwenden Das Menü Design- Galerie dient zum Optimieren ● Farbe ändern aufgenommener Bilder. ● Ränder hinzufügen ● Rote Augen entfernen ● Drehen ● Zuschneiden ● Anzeigehelligkeit Das Menü Einrichten dient ●...
  • Seite 96 Wiedergabe drücken, wird das Menü Photosmart Express angezeigt. Menü Optionen ● Drucken Photosmart Express dient zum gemeinsamen ● Abzüge online erwerben Nutzen von Fotos mit ● Alle Bilder gemeinsam Freunden und nutzen Familienangehörigen. ● Menü "Share" einrichten HP Photosmart R725/R727 Digitalkamera...
  • Seite 97 Cámara digital HP Photosmart R725/R727 Español...
  • Seite 98 La información que aparece en este documento está sujeta a cambios sin previo aviso. Las únicas garantías de los productos y servicios de HP se detallan en las declaraciones de garantía expresa que acompañan a dichos productos y servicios. Nada de lo que aquí...
  • Seite 99 Contenido Procedimientos iniciales........4 Acceder a la Guía del usuario electrónica.....5 Cámara, parte superior y posterior .......6 Cámara, parte frontal e inferior......8 Accesorio de la base para la cámara.....8 Instalación de la cámara........10 Instalación de la pila..........10 Carga de la pila............10 Encendido de la cámara........11 Elección del idioma..........11 Selección de la región..........11...
  • Seite 100: Procedimientos Iniciales

    Información sobre la pila, como: – Prolongación de la duración de la pila – Una descripción de los iconos del indicador de alimentación ● Resolución de problemas ● Obtención de asistencia de HP ● Especificaciones de la cámara Cámara digital HP Photosmart R725/R727...
  • Seite 101: Acceder A La Guía Del Usuario Electrónica

    La Guía del usuario electrónica está en el disco HP Photosmart Software CD. Para ver la Guía del usuario: 1. Introduzca el HP Photosmart Software CD en la unidad de CD-ROM del equipo. 2. En Windows: Haga clic en Ver Guía del usuario en la página principal de la pantalla de instalación.
  • Seite 102: Cámara, Parte Superior Y Posterior

    ● Para ayuda con el software HP Photosmart, consulte la ayuda en línea para el software HP Photosmart. Cámara, parte superior y posterior Altavoz. Botón Flash: los ajustes son Automático, Flash encendido, Flash apagado. Botón Enfoque: los ajustes son Normal, Macro, Macro automático e Infinito.
  • Seite 103 Botón Vídeo. Indicador luminoso de alimentación. Botón 10 Soporte para muñequera. 11 Palanca de zoom (digital y óptico): En Vista en directo, pulse para acercar la imagen o pulse para alejar la imagen. En Reproducción, pulse el para ampliar la imagen seleccionada o pulse el para ver viñetas de sus imágenes.
  • Seite 104: Cámara, Parte Frontal E Inferior

    Conector USB. Conector del adaptador de alimentación. Accesorio de la base para la cámara Si adquiere una base de acoplamiento HP Photosmart opcional, vendrá suministrado con varios adaptadores transparentes. Al instalar la base de acoplamiento para utilizarla con esta cámara, utilice el adaptador de la base...
  • Seite 105 con la etiqueta azul redonda. Para obtener más instrucciones, consulte la Guía del usuario de la base. Procedimientos iniciales...
  • Seite 106: Instalación De La Cámara

    Si el indicador luminoso de carga de la pila parpadea, significa que la pila se está cargando; la pila está totalmente cargada cuando el indicador permanece encendido fijamente (aproximadamente 2 y 3 horas). Cámara digital HP Photosmart R725/R727...
  • Seite 107: Encendido De La Cámara

    Encendido de la cámara. Para encender la cámara, pulse el botón Elección del idioma Utilice para elegir el idioma que desea y pulse Selección de la región Los ajustes de Idioma y Región determinan la configuración predeterminada de la fecha y la hora, y el formato de la señal de vídeo para visualizar las imágenes de la cámara en un televisor.
  • Seite 108: Instalación Y Formateo De Una Tarjeta De Memoria Opcional

    Esta cámara admite tarjetas de memoria de alta velocidad y estándar, Secure Digital (SD) de marca HP, de 8 MB a 2 GB. 1. Apague la cámara y abra la tapa de la pila/tarjeta de memoria. 2. Inserte la tarjeta de memoria opcional en la ranura más pequeña como se indica.
  • Seite 109: Instale El Software

    1. Cierre todos los programas y deshabilite temporalmente todo el software de protección contra virus. 2. Inserte HP Photosmart Software CD en la unidad de CD y siga las instrucciones en pantalla. Si no se abre la pantalla de instalación, en el menú Inicio, haga clic en Ejecutar y escriba D:\Setup.exe, donde D...
  • Seite 110 2. Haga doble clic en el icono del CD en el escritorio del equipo. 3. Haga doble clic en el icono del instalador y, a continuación, siga las instrucciones mostradas en la pantalla. Cámara digital HP Photosmart R725/R727...
  • Seite 111: Toma De Imágenes Y Grabación De Videoclips

    Toma de imágenes y grabación de videoclips Vista en directo permite encuadrar imágenes y videoclips desde la Pantalla de imagen. Toma de una imagen fija 1. Pulse hasta que aparezca brevemente en la esquina superior derecha de la Pantalla de imagen. Esto indica que está...
  • Seite 112: Grabación De Un Videoclip

    Pantalla de imagen. Esto indica que está en el modo Vista en directo. 2. Encuadre el sujeto. 3. Pulse y libere el botón Vídeo 4. Para dejar de grabar vídeo, vuelva a pulsar y liberar el botón Vídeo Cámara digital HP Photosmart R725/R727...
  • Seite 113: Revisión Y Eliminación De Imágenes Y Videoclips

    Revisión y eliminación de imágenes y videoclips Revisión de imágenes y videoclips Puede revisar y tratar imágenes y videoclips en el modo Reproducción. 1. Pulse hasta que aparezca brevemente en la esquina superior derecha de la Pantalla de imagen. Esto indica que está en el modo Reproducción.
  • Seite 114 4. Utilice para seleccionar Esta imagen, y pulse Cámara digital HP Photosmart R725/R727...
  • Seite 115: Transferencia E Impresión De Imágenes

    Transferencia e impresión de imágenes Transferencia de imágenes Si ha instalado el software HP Photosmart, utilice este método para transferir imágenes y videoclips a su equipo. Si no ha instalado el software HP Photosmart, consulte la Guía del usuario electrónica como alternativa.
  • Seite 116: Impresión De Imágenes Desde La Cámara

    Configurar impresión en la cámara. Para cambiar los ajustes, utilice de la cámara para seleccionar una opción de menú y utilice de la cámara para cambiar el ajuste. 5. Pulse para iniciar la impresión. Cámara digital HP Photosmart R725/R727...
  • Seite 117: Referencia Rápida De La Cámara

    Referencia rápida de la cámara Utilice este capítulo como referencia rápida para las funciones de la cámara. Para obtener más información sobre estas funciones de la cámara, consulte la Guía del usuario electrónica. Vista en directo y Reproducción ● Vista en directo permite encuadrar imágenes y videoclips desde la Pantalla de imagen.
  • Seite 118 Calidad imagen ● Calidad de vídeo ● Ráfaga ● Equilibrio de blanco ● Área de enfoque automático ● Medición AE ● Velocidad ISO ● Saturación ● Nitidez ● Contraste ● Estampado de fecha y hora Cámara digital HP Photosmart R725/R727...
  • Seite 119 Menú Opciones ● Consejos sobre la Reproducción permite imagen trabajar con imágenes que ● Información de la imagen haya guardado en la cámara. ● Ver presentación ● Solapar panorama ● Grabar audio ● Cómo transferir imágenes a una tarjeta ● Aplicar efectos artísticos Galería de diseño permite mejorar las imágenes que ha...
  • Seite 120 Vista en directo o Reproducción, aparece el menú Photosmart Express. Menú Opciones ● Imprimir Photosmart Express permite compartir imágenes ● Comprar copias en línea con amigos y familiares. ● Compartir toda imagen ● Conf. menú Compartir... Cámara digital HP Photosmart R725/R727...
  • Seite 121 HP Photosmart R725/R727 Digitale camera Nederlands...
  • Seite 122: Wettelijke Kennisgevingen

    De informatie in dit document kan zonder voorafgaande kennisgeving worden gewijzigd. De enige garanties die gelden voor HP producten en diensten zijn de garanties die worden beschreven in de garantievoorwaarden behorende bij deze producten en diensten. Geen enkel onderdeel van dit document mag als extra garantie worden opgevat.
  • Seite 123 Inhoudsopgave Aan de slag............4 De elektronische gebruikershandleiding raadplegen.............5 Bovenkant en achterkant van de camera....6 Voor- en onderzijde van de camera.......8 Dockinzetstuk van de camera........8 De camera instellen...........10 De batterij plaatsen..........10 De batterij opladen..........10 De camera aanzetten...........11 De taal kiezen............11 De regio instellen..........11 Datum en tijd instellen..........11 Een optionele geheugenkaart installeren en formatteren............12...
  • Seite 124: Aan De Slag

    Kennismaken met de LCD-scherm functies van uw camera ● Batterijgegevens, waaronder: – De werkingsduur van batterijen verlengen – Een beschrijving van de batterijstatus- indicators ● Problemen oplossen ● Hulp en ondersteuning van HP ● Cameraspecificaties HP Photosmart R725/R727 Digitale camera...
  • Seite 125: De Elektronische Gebruikershandleiding Raadplegen

    U vindt de elektronische gebruikershandleiding op de HP Photosmart Software CD. Zo kunt u de gebruikershandleiding bekijken: 1. Plaats de HP Photosmart Software CD in het cd- rom-station van uw computer. 2. Windows: Klik op Gebruikershandleiding bekijken op de hoofdpagina van het installatiescherm.
  • Seite 126: Bovenkant En Achterkant Van De Camera

    ● U kunt te allen tijde terecht op www.hp.com/ support voor productassistentie, diagnoseprogramma's en downloadbare stuurprogramma's. ● Zie de online Help-informatie bij de HP Photosmart- software voor hulp bij de HP Photosmart-software. Bovenkant en achterkant van de camera Luidspreker. Knop Flitser—Instellingen zijn Auto, Flitser Aan,...
  • Seite 127 Knop Liveweergave/Weergave—Voor schakelen tussen Liveweergave en Weergave (zie Liveweergave en Weergave op pagina 20). Sluiterknop. Knop Video. Aan/uit-lampje. Knop 10 Bevestigingspunt voor polsbandje. 11 Knop In-/uitzoomen (digitaal en optisch)—In Liveweergave drukt u op om in te zoomen of op om uit te zoomen. In Weergave drukt u op om de geselecteerde opname te vergroten of op om de...
  • Seite 128: Voor- En Onderzijde Van De Camera

    Klepje van vak voor batterij/geheugenkaart. USB-aansluiting. Aansluiting voor netadapter. Dockinzetstuk van de camera Als u een optioneel HP Photosmart cameradock aanschaft, wordt dit geleverd samen met enkele lichtgekleurde inzetstukken. Wanneer u het dock gereedmaakt voor gebruik met deze camera, kunt u het...
  • Seite 129 gebruiken. Zie de gebruikershandleiding van het dock voor instructies. Aan de slag...
  • Seite 130: De Camera Instellen

    De batterijoplaadindicator van de camera knippert, hetgeen aangeeft dat de batterij wordt opgeladen. De batterij is volledig opgeladen wanneer het lampje continu blijft branden (na 2 tot 3 uur). HP Photosmart R725/R727 Digitale camera...
  • Seite 131: De Camera Aanzetten

    De camera aanzetten Zet de camera aan door op de knop te drukken. De taal kiezen Kies de gewenste taal met en druk op De regio instellen Met de instellingen Taal en Regio bepaalt u de standaard datumnotatie en de indeling van het videosignaal voor het weergeven van cameraopnames op een...
  • Seite 132: Een Optionele Geheugenkaart Installeren En Formatteren

    4. Selecteer met de optie Ja en druk op de kaart te formatteren. Wanneer u een geheugenkaart hebt geïnstalleerd, worden alle nieuwe foto's en videoclips op de kaart opgeslagen in plaats van in het interne geheugen. HP Photosmart R725/R727 Digitale camera...
  • Seite 133: De Software Installeren

    HP Photosmart Premier. 1. Sluit alle programma's en schakel eventuele antivirussoftware tijdelijk uit. 2. Plaats de HP Photosmart Software CD in het cd- rom-station en volg de aanwijzingen op het scherm. Als het installatievenster niet verschijnt, doet u het volgende: klik op Start en op Uitvoeren, typ D: \Setup.exe, waarbij D staat voor de letter van het...
  • Seite 134 Macintosh 1. Plaats de HP Photosmart Software CD in het cd- rom-station. 2. Dubbelklik op het pictogram van het cd-rom-station op het bureaublad van de computer. 3. Dubbelklik op het pictogram van het installatieprogramma volg de aanwijzingen op het scherm.
  • Seite 135: Foto's Maken En Videoclips Opnemen

    Foto's maken en videoclips opnemen In de modus Liveweergave kunt u foto's en videoclips op het LCD-scherm inkaderen. Een foto nemen 1. Druk op totdat rechtsboven in de hoek van het LCD-scherm kort wordt weergegeven. Dit geeft aan dat Liveweergave actief is. 2.
  • Seite 136 3. Druk de knop Video in en laat deze los. 4. U stopt de opname van de video door de knop Video nogmaals in te drukken en los te laten. HP Photosmart R725/R727 Digitale camera...
  • Seite 137: Foto's En Videoclips Bekijken En Verwijderen

    Foto's en videoclips bekijken en verwijderen Foto's en videoclips bekijken U kunt foto's en videoclips bekijken en bewerken in de modus Weergave. 1. Druk op totdat rechtsboven in de hoek van het LCD-scherm kort wordt weergegeven. Dit geeft aan dat Weergave actief is. 2.
  • Seite 138: Opnames Overbrengen En Afdrukken

    Opnames overbrengen en afdrukken Opnames overbrengen Als u de HP Photosmart-software hebt geïnstalleerd, kunt met deze methode foto's en videoclips naar uw computer overbrengen. Als u de HP Photosmart- software niet hebt geïnstalleerd, kunt u in de elektronische gebruikershandleiding een andere methode vinden.
  • Seite 139: Opnames Afdrukken Vanaf De Camera

    Opnames afdrukken vanaf de camera U kunt de camera aansluiten op een willekeurige PictBridge-compatibele printer, waarmee u vervolgens foto's en frames uit een videoclip kunt afdrukken. 1. Controleer of de printer aan staat, of er papier in de printer is geplaatst en of er geen foutmelding op de printer wordt weergegeven.
  • Seite 140: Beknopt Overzicht Van De Camera

    In een menu kunt u met naar een bepaalde optie gaan. U kunt het menu op elk moment afsluiten door op te drukken. HP Photosmart R725/R727 Digitale camera...
  • Seite 141 Menu's en bijbehorende opties: Menu Opties ● Opnamemodi (Modus Opname kunt u Auto, Landschap, camera-instellingen wijzigen Portret, Theater, die van invloed zijn op de Panorama Rechts, kenmerken van foto's en Panorama Links, Actie, videoclips die u in het vervolg Nachtportret, met de camera maakt.
  • Seite 142 ● Camera-accessoires en tips voor het gebruik van de ● Cameraknoppen camera. ● Opnamemodi gebruiken ● Ontwerpgalerie gebruiken ● Opnames delen ● Foto's afdrukken ● Audioclips opnemen ● Videoclips opnemen ● Foto's en video bekijken HP Photosmart R725/R727 Digitale camera...
  • Seite 143 Menu Opties ● Afdrukken uit video extraheren ● Opnames verwijderen ● Opnames overbrengen ● Batterijbeheer ● Hulp en ondersteuning ● Camerasneltoetsen ● Info... Als u op drukt in de modus Liveweergave of Weergave, ziet u het Menu Photosmart Express. Menu Opties ●...
  • Seite 144 HP Photosmart R725/R727 Digitale camera...
  • Seite 145 Câmera digital HP Photosmart R725/R727 Português...
  • Seite 146 As informações aqui contidas estão sujeitas a alterações sem aviso prévio. As únicas garantias para produtos e serviços da HP são as estabelecidas nas declarações de garantia expressa que acompanham tais produtos e serviços. Nenhuma informação aqui contida pode ser considerada como uma garantia adicional.
  • Seite 147 Conteúdo Primeiros passos..........4 Acessar a versão eletrônica do Guia do Usuário..............5 Partes superior e traseira da câmera ....6 Partes frontal e inferior da câmera......8 Suporte da estação de acoplamento da câmera..............8 Preparar a câmera..........10 Instalar a bateria..........10 Carregar a bateria..........10 Ligue a câmera............11 Escolher o idioma..........11 Definir a região.............11...
  • Seite 148: Primeiros Passos

    ● Informações sobre baterias, incluindo: – Como prolongar a vida das baterias – Uma descrição dos ícones indicadores de alimentação ● Solução de problemas ● Com obter assistência da ● Especificações da câmera Câmera digital HP Photosmart R725/R727...
  • Seite 149: Acessar A Versão Eletrônica Do Guia Do Usuário

    A versão eletrônica do Guia do Usuário está no HP Photosmart Software CD. Para visualizar o Guia do Usuário: 1. Insira o HP Photosmart Software CD na unidade de CD do computador. 2. Em ambiente Windows: Clique em Ver o Guia do Usuário na página principal da tela de instalação.
  • Seite 150: Partes Superior E Traseira Da Câmera

    Imprimir, Encomendar impressões online e Config. Compartilhar. Botão Exibição ao vivo/Reproduzir — Muda entre Exibição ao vivo e Reproduzir (veja Exibição ao vivo e Reproduzir na página 20). Botão Obturador. Botão Vídeo. Luz de alimentação Câmera digital HP Photosmart R725/R727...
  • Seite 151 Botão 10 Suporte da fita de pulso 11 Controle do Zoom (Digital e Óptico) — Em Exibição ao vivo, pressione para aumentar o zoom ou pressione para diminuir o zoom. Em Reproduzir, pressione para ampliar a imagem selecionada, ou pressione para visualizar miniaturas de suas imagens.
  • Seite 152: Partes Frontal E Inferior Da Câmera

    Suporte da estação de acoplamento da câmera Se você comprar uma estação de acoplamento opcional HP Photosmart, ela virá com vários suportes transparentes. Ao instalar a estação de acoplamento para uso com esta câmera, use o suporte da estação de acoplamento com a etiqueta redonda azul.
  • Seite 153 Guia do Usuário da estação de acoplamento para obter instruções. Primeiros passos...
  • Seite 154: Preparar A Câmera

    A luz piscante de carregamento de bateria da câmera indica que a bateria está sendo carregada; a bateria estará totalmente carregada quando a luz parar de piscar e ficar constantemente acesa (de duas a três horas). Câmera digital HP Photosmart R725/R727...
  • Seite 155: Ligue A Câmera

    Ligue a câmera Para ligar a câmera, pressione o botão (liga/ desliga). Escolher o idioma para escolher o idioma desejado e, a seguir, pressione Definir a região Juntamente com a configuração Idioma, a configuração Região determina o formato padrão de data e o formato de sinal de vídeo para exibir imagens da câmera em uma televisão.
  • Seite 156: Instalar E Formatar Cartão De Memória Opcional

    Uma vez instalado um cartão de memória, todas as novas imagens e clipes de vídeo serão armazenados no cartão e não na memória interna. Para utilizar a memória interna e visualizar imagens nela armazenadas, remova o cartão de memória. Câmera digital HP Photosmart R725/R727...
  • Seite 157: Instalar O Software

    1. Feche todos os programas e desabilite, temporariamente, qualquer software antivírus. 2. Insira o HP Photosmart Software CD na unidade de CD e siga as instruções da tela. Se a janela de instalação não for exibida, clique em Iniciar, a seguir, em Executar, digite D:\Setup.exe, em que...
  • Seite 158 2. Na área de trabalho do computador, clique duas vezes no ícone do CD. 3. Clique duas vezes no ícone do instalador e siga as instruções da tela. Câmera digital HP Photosmart R725/R727...
  • Seite 159: Tirar Fotos E Gravar Clipes De Vídeo

    Tirar fotos e gravar clipes de vídeo A Exibição ao vivo permite enquadrar fotos e clipes de vídeo no Visor de imagens. Tirar uma foto estática 1. Pressione até que seja exibido no canto superior direito do Visor. Isso indica que a câmera está na Exibição ao vivo.
  • Seite 160 3. Pressione e solte o botão Vídeo 4. Para interromper a gravação do vídeo, pressione e solte o botão Vídeo novamente. Câmera digital HP Photosmart R725/R727...
  • Seite 161: Rever E Excluir Imagens E Clipes De Vídeo

    Rever e excluir imagens e clipes de vídeo Rever imagens e clipes de vídeo Você pode rever e trabalhar com imagens e clipes de vídeo em Reproduzir. 1. Pressione até que seja exibido no canto superior direito do Visor de imagens. Isso indica que você...
  • Seite 162: Transferir E Imprimir Imagens

    Transferir e imprimir imagens Transferir imagens Se você tiver instalado o software HP Photosmart, use este método para transferir imagens e clipes de vídeo para o computador. Se você não tiver instalado o software HP Photosmart, consulte a versão eletrônica do Guia do Usuário, para um método alternativo.
  • Seite 163: Imprimir Imagens Diretamente Da Câmera

    Imprimir imagens diretamente da câmera Você pode conectar a câmera a qualquer impressora compatível com PictBridge para imprimir imagens estáticas e quadros salvos a partir de um clipe de vídeo. 1. Verifique se a impressora está ligada, se há papel e se não há...
  • Seite 164: Referência Rápida Da Câmera

    Dentro de um menu, use para ir até as seleções específicas. Para sair do menu, pressione a qualquer hora. Câmera digital HP Photosmart R725/R727...
  • Seite 165 Os menus e as opções são: Menu Opções ● Modos Fotografia (Modo Capturar permite ajustar Automático, Paisagem, as configurações da câmera Retrato, Teatro, que afetam as características Panorama direita, de futuras imagens e clipes de Panorama esquerda, vídeo capturadas com a Ação, Retrato noturno, câmera.
  • Seite 166 Botões da câmera ● Usar modos de fotografia ● Usar a galeria de projetos ● Compartilhar imagens ● Imprimir imagens ● Gravar clipes de áudio ● Gravar clipes de vídeo ● Rever imagens e vídeos Câmera digital HP Photosmart R725/R727...
  • Seite 167 Menu Opções ● Extrair impressões do vídeo ● Excluir imagens ● Transferir imagens ● Gerenciar baterias ● Obter assistência ● Atalhos da câmera ● Sobre... Ao se pressionar em Exibição ao vivo ou em Reproduzir, vê-se o menu Photosmart Express. Menu Opções ●...
  • Seite 168 Câmera digital HP Photosmart R725/R727...
  • Seite 170 Share Menu ● ‫תפריט‬ ‫הגדרות‬ Setup ‫שיתוף‬ HP Photosmart R725/R727 ‫דיגיטלית‬ ‫מצלמה‬...
  • Seite 171 ‫אפשרויות‬ ‫תפריט‬ Recording Audio ● ‫שמע‬ ‫קטעי‬ ‫הקלטת‬ Clips Recording Video ● ‫וידאו‬ ‫קטעי‬ ‫הקלטת‬ Clips Reviewing Images and ● ‫תמונות‬ ‫הצגת‬ Videos ‫וידאו‬ ‫וקטעי‬ Extracting Prints from ● ‫הדפסים‬ ‫חילוץ‬ Video ‫מווידאו‬ ‫מחיקת‬ Deleting Images ● ‫תמונות‬ Transferring ● ‫תמונות‬...
  • Seite 172 ‫למאפייני‬ Camera ● ‫אביזרי‬ Accessories ‫המצלמה‬ ‫לחצני‬ Camera Buttons ● ‫המצלמה‬ Using Shooting ● ‫במצבי‬ ‫שימוש‬ Modes ‫צילום‬ Using Design ● ‫בגלריית‬ ‫שימוש‬ Gallery ‫העיצוב‬ ‫שיתוף‬ Sharing Images ● ‫תמונות‬ ‫הדפסת‬ Printing Images ● ‫תמונות‬ HP Photosmart R725/R727 ‫דיגיטלית‬ ‫מצלמה‬...
  • Seite 173 ‫אפשרויות‬ ‫תפריט‬ ‫חדות‬ Sharpness ● ‫ניגודיות‬ Contrast ● Date & Time ● ‫תאריך‬ ‫הטבעת‬ Imprint ‫ושעה‬ ‫עצה‬ Image Advice ● ‫חוזרת‬ ‫הקרנה‬ Playback ‫לתמונה‬ ‫תמונות‬ ‫עם‬ ‫עבודה‬ ‫מאפשר‬ ‫תמונה‬ ‫פרטי‬ Image Info ● ‫במצלמה‬ ‫שאוחסנו‬ ‫הצגת‬ View Slideshow ● ‫שקופיות‬ ‫תצוגת‬...
  • Seite 174 ‫תמונה‬ ‫וידאו‬ ‫איכות‬ Video Quality ● ‫מתפרץ‬ ‫צילום‬ Burst ● ‫לבן‬ ‫איזון‬ White Balance ● ‫אזור‬ Auto Focus Area ● ‫אוטומטי‬ ‫מיקוד‬ ‫מדידת‬ AE Metering ● ‫אוטומטית‬ ‫חשיפה‬ ‫מהירות‬ ISO Speed ● ‫רוויה‬ Saturation ● HP Photosmart R725/R727 ‫דיגיטלית‬ ‫מצלמה‬...
  • Seite 175: Live View

    ‫במצלמה‬ ‫מהיר‬ ‫עיון‬ ‫מידע‬ ‫לקבלת‬ ‫המצלמה‬ ‫במאפייני‬ ‫מהיר‬ ‫עיון‬ ‫לצורך‬ ‫זה‬ ‫בפרק‬ ‫היעזר‬ ‫למשתמש‬ ‫המקוון‬ ‫במדריך‬ ‫עיין‬ ‫המצלמה‬ ‫מאפייני‬ ‫אודות‬ ‫נוסף‬ ‫חוזרת‬ ‫והקרנה‬ ‫חיה‬ ‫תצוגה‬ ‫וקטעי‬ ‫תמונות‬ ‫לתחום‬ ‫לך‬ ‫מאפשרת‬ ‫חיה‬ ‫תצוגה‬ Live View ● ‫תצוגה‬ Live View ‫מצב‬ ‫להפעלת‬ ‫התמונות‬...
  • Seite 176 ‫המצלמה‬ ‫כאשר‬ ‫במצלמה‬ ‫יוצג‬ ‫למדפסת‬ Print Setup Menu ‫- ב‬ ‫השתמש‬ ‫ההגדרות‬ ‫לשינוי‬ ‫הדפסה‬ ‫הגדרת‬ ‫תפריט‬ ‫מכן‬ ‫לאחר‬ ‫מהתפריט‬ ‫אפשרות‬ ‫לבחירת‬ ‫במצלמה‬ ‫ההגדרות‬ ‫לשינוי‬ ‫במצלמה‬ ‫- ב‬ ‫השתמש‬ ‫להדפיס‬ ‫להתחיל‬ ‫כדי‬ ‫אישור‬ ‫תפריט‬ ‫על‬ ‫לחץ‬ HP Photosmart R725/R727 ‫דיגיטלית‬ ‫מצלמה‬...
  • Seite 177 ‫של‬ ‫והדפסה‬ ‫העברה‬ ‫תמונות‬ ‫תמונות‬ ‫העברת‬ ‫לצורך‬ ‫בה‬ ‫היעזר‬ HP Photosmart ‫תוכנת‬ ‫את‬ ‫התקנת‬ ‫אם‬ ‫תוכנת‬ ‫את‬ ‫התקנת‬ ‫לא‬ ‫אם‬ ‫למחשב‬ ‫וידאו‬ ‫וקטעי‬ ‫תמונות‬ ‫העברת‬ ‫אודות‬ ‫למידע‬ ‫למשתמש‬ ‫המקוון‬ ‫במדריך‬ ‫עיין‬ HP Photosmart ‫אחרות‬ ‫העברה‬ ‫שיטות‬ ‫עגינה‬ ‫תחנת‬ ‫בעזרת‬ ‫זו‬...
  • Seite 178 ‫במצב‬ ‫נמצא‬ ‫וידאו‬ ‫קטע‬ ‫או‬ ‫תמונה‬ ‫לבחירת‬ ‫- ב‬ ‫השתמש‬ ‫מחיקה‬ Delete ‫המשנה‬ ‫תפריט‬ ‫את‬ ‫להציג‬ ‫כדי‬ ‫על‬ ‫לחץ‬ ‫תמונה‬ This Image ‫האפשרות‬ ‫לבחירת‬ ‫- ב‬ ‫השתמש‬ ‫אישור‬ ‫תפריט‬ ‫על‬ ‫לחץ‬ ‫מכן‬ ‫ולאחר‬ ‫( זו‬ HP Photosmart R725/R727 ‫דיגיטלית‬ ‫מצלמה‬...
  • Seite 179 ‫וידאו‬ ‫הלחצן‬ ‫על‬ ‫שנית‬ ‫לחץ‬ ‫וידאו‬ ‫הקלטת‬ ‫להפסקת‬ ‫אותו‬ ‫ושחרר‬...
  • Seite 180 ‫להופעת‬ ‫עד‬ ‫על‬ ‫לחץ‬ ‫קצר‬ ‫זמן‬ ‫פרק‬ ‫למשך‬ ‫הסמל‬ ‫בתצוגת‬ ‫העליונה‬ ‫הימנית‬ ‫בפינה‬ ‫הנך‬ ‫כי‬ ‫מציין‬ ‫זה‬ ‫סמל‬ ‫התמונות‬ ‫תצוגה‬ Live View ‫במצב‬ ‫נמצא‬ ‫חיה‬ ‫הצילום‬ ‫נושא‬ ‫את‬ ‫מסגר‬ ‫אותו‬ ‫ושחרר‬ ‫וידאו‬ ‫הלחצן‬ ‫על‬ ‫לחץ‬ HP Photosmart R725/R727 ‫דיגיטלית‬ ‫מצלמה‬...
  • Seite 181 ‫לקבלת‬ Windows ‫המערכת‬ ‫בדרישות‬ ‫עומד‬ ‫אינו‬ ‫שברשותך‬ Windows ‫- ה‬ ‫מחשב‬ ‫אם‬ HP Photosmart ‫התוכנה‬ ‫תותקן‬ ‫המצלמה‬ ‫באריזת‬ ‫המפורטות‬ HP Photosmart Premier ‫המלאה‬ ‫הגרסה‬ ‫במקום‬ Essential ‫מפני‬ ‫להגנה‬ ‫תוכנות‬ ‫זמני‬ ‫באופן‬ ‫והשבת‬ ‫התוכניות‬ ‫כל‬ ‫את‬ ‫סגור‬ ‫וירוסים‬ ‫לכונן‬ HP Photosmart ‫תוכנת‬...
  • Seite 182: Format Card

    ‫בו‬ ‫המאוחסנות‬ ‫התוכנה‬ ‫התקנת‬ ‫תמונות‬ ‫להעברת‬ ‫מאפיינים‬ ‫מספקת‬ HP Photosmart ‫תוכנת‬ ‫מאוחסנות‬ ‫תמונות‬ ‫לשיפור‬ ‫מאפיינים‬ ‫גם‬ ‫כמו‬ ‫למחשב‬ ‫וידאו‬ ‫וקטעי‬ ‫איכות‬ ‫התאמת‬ ‫גודל‬ ‫שינוי‬ ‫חיתוך‬ ‫סיבוב‬ ‫אדומות‬ ‫עיניים‬ ‫הסרת‬ ‫ועוד‬ ‫מיוחדים‬ ‫אפקטים‬ ‫צבעים‬ ‫הוספת‬ ‫תמונה‬ HP Photosmart R725/R727 ‫דיגיטלית‬ ‫מצלמה‬...
  • Seite 183 ‫שפה‬ ‫בחירת‬ ‫לבחירת‬ ‫- ב‬ ‫השתמש‬ ‫על‬ ‫לחץ‬ ‫מכן‬ ‫לאחר‬ ‫הרצויה‬ ‫השפה‬ ‫אישור‬ ‫תפריט‬ ‫אזור‬ ‫מדינה‬ ‫בחירת‬ Language ‫ההגדרה‬ ‫עם‬ ‫ביחד‬ ‫מדינה‬ Region ‫ההגדרה‬ ‫שפה‬ ‫המחדל‬ ‫ברירת‬ ‫את‬ ‫קובעת‬ ‫אזור‬ ‫שיטת‬ ‫ואת‬ ‫התאריך‬ ‫תבנית‬ ‫עבור‬ ‫להצגת‬ ‫הווידאו‬ ‫אותות‬ ‫של‬ ‫השידור‬ ‫בטלוויזיה‬...
  • Seite 184 ‫למצלמה‬ ‫חשמל‬ ‫לשקע‬ ‫מציינת‬ ‫היא‬ ‫מהבהבת‬ ‫במצלמה‬ ‫הסוללה‬ ‫טעינת‬ ‫נורית‬ ‫כאשר‬ ‫רציף‬ ‫באופן‬ ‫מוארת‬ ‫הסוללה‬ ‫כאשר‬ ‫בטעינה‬ ‫נמצאת‬ ‫שהסוללה‬ ‫שעות‬ ‫עד‬ ) ‫כ‬ ‫במלואה‬ ‫טעונה‬ ‫הסוללה‬ ‫המצלמה‬ ‫הפעלת‬ ‫כיבוי‬ ‫הפעלה‬ ‫לחצן‬ ‫על‬ ‫לחץ‬ ‫המצלמה‬ ‫להפעלת‬ HP Photosmart R725/R727 ‫דיגיטלית‬ ‫מצלמה‬...
  • Seite 185 ‫עדשה‬ ‫חצובה‬ ‫תושבת‬ ‫עגינה‬ ‫לתחנת‬ ‫מחבר‬ ‫זיכרון‬ ‫כרטיס‬ ‫סוללה‬ ‫דלת‬ ‫מחבר‬ ‫מתח‬ ‫מתאם‬ ‫מחבר‬ ‫למצלמה‬ ‫עגינה‬ ‫לתחנת‬ ‫תושבת‬ ‫היא‬ HP Photosmart ‫אופציונלית‬ ‫עגינה‬ ‫תחנת‬ ‫רכישת‬ ‫בעת‬ ‫לשימוש‬ ‫העגינה‬ ‫תחנת‬ ‫התקנת‬ ‫בעת‬ ‫שקופות‬ ‫בתושבות‬ ‫מצוידת‬ ‫התווית‬ ‫בעלת‬ ‫העגינה‬ ‫לתחנת‬ ‫בתושבת‬ ‫השתמש‬...
  • Seite 186 Sunset ‫שלג‬ ‫והתמונות‬ ‫התפריטים‬ ‫בין‬ ‫גלילה‬ ‫- ו‬ ‫אפשרויות‬ ‫בחירת‬ ‫המצלמה‬ ‫תפריטי‬ ‫להצגת‬ ‫אישור‬ ‫תפריט‬ ‫פעולות‬ ‫ואישור‬ ‫סוללה‬ ‫טעינת‬ ‫נורית‬ Delete ‫לפונקציה‬ ‫לגשת‬ ‫כדי‬ —( ‫מחיקה‬ Delete ‫לחצן‬ ‫חוזרת‬ ‫הקרנה‬ Playback ‫במצב‬ ‫מחיקה‬ ‫תמונות‬ ‫תצוגת‬ HP Photosmart R725/R727 ‫דיגיטלית‬ ‫מצלמה‬...
  • Seite 187 ‫המצלמה‬ ‫של‬ ‫והאחורי‬ ‫העליון‬ ‫חלקה‬ ‫רמקול‬ ‫הבזק‬ Flash On ‫אוטומטי‬ Auto ‫הן‬ ‫ההגדרות‬ ‫הבזק‬ ‫לחצן‬ ‫כבוי‬ ‫הבזק‬ Flash Off ‫פועל‬ ‫מאקרו‬ Macro ‫רגיל‬ Normal ‫הן‬ ‫ההגדרות‬ ‫מיקוד‬ ‫לחצן‬ ‫אינסוף‬ Infinity ‫אוטומטי‬ ‫מאקרו‬ Auto Macro ‫הן‬ ‫האפשרויות‬ Photosmart Express ‫לחצן‬ ‫באופן‬ ‫הדפסים‬...
  • Seite 188 ‫בכתובת‬ ‫או‬ ‫בלבד‬ ‫באנגלית‬ ‫המוצר‬ ‫עבור‬ ‫התקן‬ ‫מנהלי‬ ‫והורדות‬ ‫אבחון‬ ‫כלי‬ ‫סיוע‬ ‫לקבלת‬ ● ‫בכתובת‬ ‫בקר‬ ‫ביממה‬ ‫שעות‬ ‫בשבוע‬ ‫ימים‬ www.hp.com/support ‫בעזרה‬ ‫עיין‬ HP Photosmart ‫תוכנת‬ ‫אודות‬ ‫עזרה‬ ‫לקבלת‬ ● HP Photosmart ‫תוכנת‬ ‫עבור‬ ‫המקוונת‬ HP Photosmart R725/R727 ‫דיגיטלית‬ ‫מצלמה‬...
  • Seite 189 ‫תיאורים‬ ● ‫במצלמה‬ ‫להשתמש‬ ‫להתחיל‬ ● ‫המצלמה‬ ‫במהרה‬ ‫תצוגת‬ ‫גבי‬ ‫על‬ ‫סמלים‬ ‫תיאור‬ ● ‫תוכנת‬ ‫את‬ ‫להתקין‬ ● ‫התמונות‬ HP Photosmart ‫המצלמה‬ ‫מאפייני‬ ‫את‬ ‫להכיר‬ ● ‫לרבות‬ ‫סוללות‬ ‫אודות‬ ‫מידע‬ ● ‫הסוללות‬ ‫חיי‬ ‫הארכת‬ – ‫מחווני‬ ‫סמלי‬ ‫של‬ ‫תיאור‬ –...
  • Seite 190 ............ ‫וידאו‬ ‫קטע‬ ‫הקלטת‬ ....... ‫וידאו‬ ‫וקטעי‬ ‫תמונות‬ ‫של‬ ‫ומחיקה‬ ‫הצגה‬ .......... ‫וידאו‬ ‫וקטעי‬ ‫תמונות‬ ‫הצגת‬ ............‫תמונה‬ ‫מחיקת‬ ........‫תמונות‬ ‫של‬ ‫והדפסה‬ ‫העברה‬ ............‫תמונות‬ ‫העברת‬ ......... ‫מהמצלמה‬ ‫תמונות‬ ‫הדפסת‬ ..........‫במצלמה‬ ‫מהיר‬ ‫עיון‬ HP Photosmart R725/R727 ‫דיגיטלית‬ ‫מצלמה‬...
  • Seite 191 ‫והודעות‬ ‫משפטי‬ ‫מידע‬ Copyright 2006 Hewlett-Packard Development Company, © ‫האחריות‬ ‫מוקדמת‬ ‫הודעה‬ ‫ללא‬ ‫לשינויים‬ ‫נתון‬ ‫זה‬ ‫במסמך‬ ‫הכלול‬ ‫המידע‬ ‫האחריות‬ ‫בהצהרת‬ ‫מפורטת‬ ‫של‬ ‫ולשירותים‬ ‫למוצרים‬ ‫הבלעדית‬ ‫האמור‬ ‫מן‬ ‫דבר‬ ‫לפרש‬ ‫אין‬ ‫ושירותים‬ ‫מוצרים‬ ‫לאותם‬ ‫הנלווית‬ ‫המפורשת‬ ‫באחריות‬ ‫תישא‬ ‫לא‬ ‫חברת‬ ‫נוספת‬...
  • Seite 192 ‫דיגיטלית‬ ‫מצלמה‬ HP Photosmart R725/R727 ‫עברית‬...

Diese Anleitung auch für:

Photosmart r727

Inhaltsverzeichnis