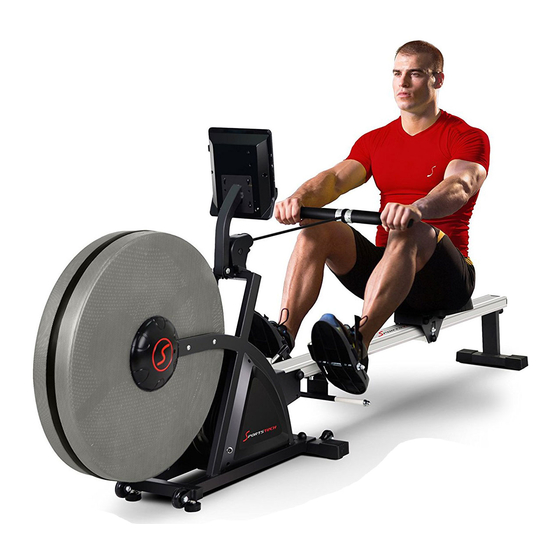
-Um empfindliche Böden, wie Holz, Lamina, Fliesen, etc. zu schonen und vor Beschädigungen wie Kratzern zu schützen, empfiehlt es sich eine Sportstech Bodenschutzmatte dauerhaft unter das Gerät zu legen. Achten Sie darauf, dass die Unterlage gegen ein mögliches Verrutschen gesichert ist.
Seite 6
Montageschritte Schritt 1: Befestigen Sie den vorderen Stabilisator (71) auf dem Hauptrahmen(64) mit dem Bolzen (49), der Unterlegscheibe (36) und der Mutter (47) und drücken Sie dann die Endkappe (46) auf diese...
Seite 7
Schritt 2: Verbinden Sie den Pedalträger (87) mit der Aluminium-Gleitschiene (82) mit der Schraube (38), dem Federring (37) und der Scheibe (36). Legen Sie die langen Schaft für das Pedal (88) und den kurzen Schaft für das Pedal (92) in die Pedalstütze (87), getrennt voneinander.
Seite 8
Schritt 3: Setzen Sie den Sattel (105) in die Aluminium-Gleitschiene (82).
Seite 9
Schritt 4: Φ Befestigen Sie das Fuß-Pad (95) mit der Aluminium-Gleitschiene (82) mit der Schraube (97) und der Unterlegscheibe (96). Setzen Sie das hintere Mutter- Bord(103) in das Innere der Aluminium- Gleitschiene (82). Dann befestigen Sie den hinteren Stabilisator (102) mit der Aluminium-Gleitschiene (82) mit der Schraube (101), dem Federring (37) und der Unterlegscheibe (36).
Seite 10
Schritt 5: ¦ µ ¦ µ Legen Sie den Spacer für die Gleitschiene (83) in die Aluminium-Gleitschiene (82) und schieben Sie dann die Aluminium-Gleitschiene (82) in den Hauptrahmen (64) mit der Mutter (66), der Unterlegscheibe (65) und der Schraube (68). Dann drücken Sie die Endkappe (67) auf diese.
Seite 11
Schritt 6: 1. Falten Sie die Aluminium-Gleitschiene (82) und befestigen Sie diese durch den Knopf (77) und die Unterlegscheibe (118). Hinweis: Sattel kann hinuntergleiten, wenn die Aluminium- Gleitschiene gefaltet wird, achten Sie bitte darauf, sich nicht zu verletzen. 2. Verbinden Sie den Stammdraht (80a) (80b) mit dem Leitungsdraht (43a) (43b). Hinweis: Bitte die Drähte mit den gleichfarbigen Aufklebern verbinden.
Seite 12
Schritt 7: Ziehen Sie den Knopf (77) und die Unterlegscheibe (118) aus und klappen Sie dieAluminium- Gleitschiene (82) langsam aus. Ziehen Sie die Aluminium-Gleitschiene (82) durch den Knopf (77) und die Unterlegscheibe (118) fest. Verbinden Sie den Drahtlink des Computers (1a) (1b) (1c) mit dem Leitungsdraht (43a) (43b) und dem Hauptdraht (63).
Einführung Funktionen Bild A Bitte beachten folgende,wenn Gerät zusammenklappen: 1. Lösen Sie den Knopf (77) und ACHTUNG! Unterlegscheibe (118), Ihr Kopf kann sehr leicht dann ziehen Sie diese heraus, die Gleitschiene ber ü klappen Sie schließlich die hrenund Sie könnten Gleitschiene sich sich verletzen, bitte aufrechte Position in Abbildung...
BEDIENUNG Modus Bewegungen / Anzahl Kalorien Zeit / Zeit 500m Entfernung Puls & H.R.C. (Zielherzfrequenz) ENTER Taste und Knauf 1. Drücken Sie diese Taste um Trainingsdisplay Ihre Auswahl zu bestätigen. 2. + (ERHÖEHEN), Erhöht aktuellen Wert 3. – (VERRINGERN), Verringert den aktuellen ...
Seite 16
Herzfrequen P,30~240 0→30~240 Zeigt Ihre aktuelle Herzfrequenz an. 1. Blinkt, wenn eine Herzfrequenz gemessen wird Herz (schnell oder langsam). ON/OFF blink Symbol 2. Wenn keine Herzfrequenz gemessen wird, verschwindet das Symbol. 1~16 LEVEL MANUELL Wählen Sie einen Widerstandswert (1-16) (±1LEVEL) 1.
Seite 17
4-2 PROGRAMM Wenn Sie ein benutzerdefiniertes Programm P1-P12 wählen, verwenden Sie UP und DOWN auf dem Knauf um die gewünschten Ziele einzustellen (z.B. Zeit, Entfernung, Kalorien, Herzfrequenz). 4-3 BENUTZER Erstellen Sie neue Benutzerdefinierte Profile U1-U4 indem Sie den Widerstandswert für jedes Segment einzeln eingeben.
Seite 18
E. Wählen Sie Programm P1-P12 F. Stellen Sie LEVEL LOAD der MANUELL/PROGRAMM ein. G. Passen Sie Funktionswerte an (z.B. Zeit, Kalorien, Herzfrequenz, Anzahl der Bewegungen etc.) H. Wählen Sie H.R.C. 55%,75%,90%,IND(ZIEL): I. Wählen Sie BENUTZER 2. ENTER Taste: Bestätigen Sie Ihre Auswahl und wählen Sie Funktionen aus. 3.
Seite 20
Klicken Sie anschließend unten im Fenster auf "Scanning equipment". Das verfügbare Gerät wird Ihnen in Kürze in der Liste angezeigt. Klicken Sie auf den Namen des Geräts, um eine Verbindung herzustellen. Eine ausführliche Anleitung zur Verwendung der App finden Sie innerhalb der Produktbeschreibung unter www.sportstech.de...
PFLEGE, REINIGUNG & WARTUNG ACHTUNG Bevor Sie mit Reinigungs-, Wartungs- und/oder Reparaturarbeiten beginnen, muss das Trainingsgerät komplett vom Stromnetz getrennt sein Dies ist erst dann der Fall, wenn das Netzkabel von der Steckdose und dem Trainingsgerät getrennt wurde. Ziehen Sie daher zuerst den Netzstecker aus der Steckdose und trennen Sie dann das Netzkabel vom Trainingsgerät.
Garantie Füllen Sie die nachfolgenden Felder aus, um Ihr Gerät für die Garantie zu registrieren. Geräte-Daten: Sportstech RSX600 Produktname/model: Seriennummer: Kaufdatum: Rechnungsnummer: Persönliche Daten: Vorname/Nachname: Straße : PLZ / Ort: Land: E-Mail: Telefonnummer*: freiwillige Angaben, die restlichen Felder sind Pflichtfelder, die unbedingt ausgefüllt werden müssen.
Seite 23
Europäische Entsorgungsrichtlinie 2002/96/EG Entsorgen Sie Ihr Trainingsgerät in keinem Fall über den normalen Hausmüll. Entsorgen Sie das Gerät ausschließlich über einen kommunalen oder zugelassenen Entsorgungsbetrieb. Beachten Sie hierbei die aktuell geltenden Vorschriften. Erkundigen Sie sich im Zweifelsfall bei Ihrer Stadt- bzw. Gemeindeverwaltung nach einer sach- und umweltgerechten Entsorgungsmöglichkeit.
Seite 24
INSTRUCTION MANUAL PLEASE READ THIS MANUAL CAREFULLY BEFORE USING AND SAVE IT FOR FUTURE REFERENCE.
- To protect delicate floors such as wood, lamina, tiles, etc., and to prevent damage, such as scratches, it is recommended to put a Sportstech floor protection mat under the unit. Make sure that the mat is secured against a possible slippage.
Assembly steps Step 1: Fix the front stabilizer (71) to the mainframe (64) with bolt (49), washer (36) and nut (47) and then press the end cap (46) on them...
Seite 30
Step 2: Connect the pedal support (87) to the aluminum sliding rail (82) with screw (38), spring washer (37) and washer (36). Insert the long shaft for pedal (88) and short shaft for pedal (92) into the pedal support (87) separately.
Seite 31
Step 3: Insert the saddle (105) into the aluminum sliding rail (82).
Seite 32
Step 4: Φ Fix the foot pad (95) to the aluminum sliding rail (82) with screw (97) and washer (96). Put the rear nut board (103) into the inner of the aluminum sliding rail (82). And then fix the rear stabilizer (102) to the aluminum sliding rail (82) with bolt (101), spring washer (37) and washer (36).
Seite 33
Step 5: ¦ µ ¦ µ Insert the spacer for sliding rail (83) into the aluminum sliding rail (82) and then fix the aluminum sliding rail (82) into the main frame (64) with nut (66), washer (65) and bolt (68). And then press the end cap (67) on them.
Seite 34
Step 6: 1. Fold the aluminum sliding rail (82) and fasten it by knob (77) and washer (118). Note: saddle would glide down when fold the aluminum sliding rail, please attention not to get injured. 2. Connect the trunk wire (80a) (80b) with trunk wire (43a) (43b). Note: please connect the wires with same color stickers.
Seite 35
Step 7: Pull the knob (77) and washer (118) out and unfold the aluminum sliding rail (82) slowly . And then fasten the aluminum sliding rail (82) by knob (77) and washer (118) . Connect the link wire of computer (1a) (1b) (1c) with trunk wire (43a) (43b) and trunk wire (63). And then fix the computer (1) to computer bracket (44) by screw (45).
Function Introduction Picture A Please do as the followings when fold it up: 1. Loose the knob (77) and washer (118) , then pull it out, ATTENTION! finally fold the sliding rail up You head would easily until to the upright position as touch the sliding rail and picture A.
OPERATION MODE STROKE / TOTAL STROKE / CALORIES TIME / TIME 500M DISTANCE PULSE & H.R.C. (Target Heart Rate) ENTER KEY & Knob 1. Press key to select function ROWER EXERCISING DISPLAY and confirm setting value. 2. + (INCREASE), Increase function value. ...
Seite 39
HEART P,30~240 0→30~240 i.e. calculating forum D RATE 1. Display with blink as per Heart Rate Hi / Fast & HEART ON/OFF blink Low slow. SYMBOL 2. No Heart-Rate detected SYMBOL will be gone. 1~16 LEVEL MANUAL Set up Resistance-Load from Level 1-16 (±1LEVEL) 1.
Seite 40
If choose Program diagram P1-P12 in dot matrix after pressing ENTER -key to program. After select ideal program diagram to turn KNOB UP +, DOWN -KNOB for adjusting LOAD value, and begin to exercise after finish all functions’ setting (I.e. TIME、DISTANCE、CALORIES、HEART RATE). 4-3 USER Create USER own Program profile through U1~U4 by setting the resistance level for each individual segment.
Seite 41
D. Choose MANUAL、PROGRAM、、USER、HRC、RACE: E. Choose PROGRAM P1-P12: F. Set LEVEL LOAD of MANUAL / PROGRAM: G. Adjust function value (i.e.TIME , DISTANCE , CALORIES ,HEART RATE,STROKES etc): H. Choose H.R.C. 55%,75%,90%,IND(TARGET): I. Choose USER: 2. ENTER KEY: Confirm setting and select function. 3.
CARE, CLEANING & MAINTENANCE ATTENTION Before cleaning, maintenance and / or repair work, the training device must be completely disconnected from the socket. For this disconnect the power cord from the electrical socket and the training device. The power cord may be reconnected to the exercise machine and the socket when all jobs have been fully completed and the proper training status of the device is restored.
Afterhis, in the next window, please click on "Scanning equipment". The available device will be shown to you in the list. Click on the name of the device to pair both devices. A short operation manual for the app can be found inside our product description on: www.sportstech.de...
I have read the warranty conditions and product specific operation/maintance instructions and accept them with my signature. For warratny purposes I agree with the savinng of my personal data. The warranty conditions can be viewed at: www.sportstech.de/garantie date city...
Seite 46
European Disposal Directive 2002/96/EG Never dispose your training device in your regular household waste. Dispose the device only at a local or approved disposal. Take care of the currently applicable regulations. If you have doubts contact your local authorities for information about a correct and environment friendly disposal option.
Pour protéger les sols délicats tels que le bois, lamina, tuiles, etc., et pour prévenir les dommages, tels que les rayures, il est recommandé de mettre un tapis de protection de plancher de Sportstech sous l'unité. Assurez-vous que le tapis est fixé contre un glissement possible.
Seite 50
Part List Description Qté. Description Qté. Ordinateur Vis M5*16 2L/R Couvercle en acier 1 each Rondelle d5*Φ10*1.0 Support de ressort Φ102*26.5 Vis ST4.2*16*Φ8 Couvercle de décoration Vis M5*10 Ecrou M10*1 Grand siège Vis M6*40*Φ10*2.5 Rondelle d8*Φ20*2 Ecrou M10*1 Rondelle d8 Palier 6000ZZ Vis M8*20*S6 Bague en acier Φ550*32.5...
Seite 51
Ressort t0.6*Φ63*15*N14 Balle en caoutchouc SΦ47 couverture de la chaîne Ecrou Φ12*M6 61L/R 335*296*20 pad de pied Φ33*13 fil de tension électronique Trunk wire length 1000 Rondelle d6*Φ16*1.5 Chassis principale Vis M6*16*Φ12 Rondelle d10*Φ20*2.0 Vis ST4.2*16*Φ8 Grommet Φ12*11*Φ3 Ecrou M10*H9.5*S17 Capuchon d’extremité...
Etapes d’assemblage Step 1: Fixer le stabilisateur avant (71) à l'ordinateur central (64) avec un boulon (49), une rondelle (36) et un écrou (47), puis appuyez sur le capuchon d'extrémité (46)
Seite 53
Step 2: Branchez le support de pédale (87) sur le rail coulissant en aluminium (82) avec le vis (38), la rondelle de ressort (37) et la rondelle (36). Insérez la longue tige pour pédale (88) et l’axe court pour pédale (92) dans le support de pédale (87) séparément.
Seite 54
Etape 3 Insérer la selle (105) dans le rail coulissant en aluminium (82).
Seite 55
Etape 4: Φ Fixer le coussin (95) sur le rail coulissant en aluminium (82) avec la vis (97) et la rondelle (96). Placez planche à écrou arrière (103) dans l'intérieur du rail coulissant en aluminium (82). Et puis fixer le stabilisateur arrière (102) sur le rail coulissant en aluminium (82) avec un boulon (101), la rondelle de ressort (37) et la rondelle (36).
Seite 56
Etape 5: ¦ µ ¦ µ Insérez l'entretoise pour le rail coulissant (83) dans le rail coulissant en aluminium (82), puis fixer le rail coulissant en aluminium (82) dans le cadre principal (64) avec l'écrou (66), la rondelle (65) et le boulon (68).
Seite 57
Etape 6: 1. Plier le rail coulissant en aluminium (82) et le fixer par le bouton (77) et la rondelle (118). Remarque: la selle se glissera vers le bas quand le rail coulissant en aluminium sera, veuillez faire attention pour ne pas vous blesser 2.
Seite 58
Etape 7: Retirez sur le bouton (77) et la rondelle (118) et dépliez le rail coulissant en aluminium (82) lentement. Et puis fixer le rail coulissant en aluminium (82) par le bouton (77) et la rondelle (118) Connectez le fil de liaison de l'ordinateur (1a) (1b) (1c) avec un fil de jonction (43a) (43b) et un fil de jonction (63).
Introduction à l’utilisation Image A Veuillez respecter ces étapes lors du pliage de l’appareil : 1. Desserrez le bouton (77) et la rondelle (118), puis retirez-la, ATTENTION! enfin plier le rail coulissant Votre tête pourrait jusqu'à la position verticale facilement toucher le rail comme image (Veuillez coulissant et se blesser,...
Seite 61
OPERATION MODE AVC / TOTAL AVC / CALORIES TEMPS / TEMPS DISTANCE PULSE & H.R.C. (Fréquence cardiaque cible) Touche et bouton ENTRER 1. Cliquez sur la touché pour Affichage exercice séléctionner la fonction et confirmer la valeur de réglage 2. + (Augmenter) ...
Seite 62
Veuillez sélectionner homme ou femme SEXE La valeur initiale de la taille est de 160 CM (60 100-160-200 (CM) ±1 inches) TAILLE 40-60-80 (INCH) 20-50-150 (KG) POIDS ±1 La valeur initiale du poids : 50KG(100LB) 40-100-350 (LB) FREQUENC 0→30~240 P,30~240 i.e.
Seite 63
2. Description des opérations 1. Assurez-vous de brancher l'adaptateur d'alimentation droite (12V 1500mA), il faut faire attention à la broche qui différe d’un pays à l’autre, puis la mise sous tension: BI avec longue tonalité pendant 1 seconde avec affichage LCD complet pendant 2 secondes, 2.
Seite 64
4-5 RECOVERY Lorsque vous aurez terminé votre séance d'entraînement, appuyez sur RÉCUPÉRATION. Pour que la RÉCUPÉRATION fonctionne correctement, la fréquence cardiaque doit être choisie. TEMPS décomptera de 1 minute puis votre niveau sera affiché de F1 à F6. REMARQUEZ: lors de la RÉCUPÉRATION, aucun autre écran ne s’affichera. F 1 ~ F6 = LE NIVEAU DE RECUPERATION DU RYTHME CARDIAQUE ENTRER: L'utilisateur appuie sur le bouton RÉCUPÉRATION...
Seite 65
2. ENTER KEY: Confirmer le réglage et sélectionnez la fonction. 3. START/STOP KEY: Appuyez sur le bouton, le système commencera à calculer, appuyer à nouveau pour arrêter. 4. RECOVERY KEY: la fonction test de récupération après avoir utilisé l’exercice pendant une période. 5.
Seite 66
Profils des programmes P1-P12 PROGRAMMES...
Nettoyage , entretien et maintenance ATTENTION Avant les travaux de nettoyage, d'entretien et / ou de réparation, l’appareil d’entraînement doit être complètement déconnecté de la prise. Pour cela, débranchez le cordon d'alimentation de la prise électrique et du dispositif. Le cordon d'alimentation peut être reconnecté à l’appareil d’entraînement et la prise lorsque tous les travaux ont été...
Seite 68
« Scanning equipment » Le dispositif disponible sera affiché dans la liste Cliquez sur le nom de votre téléphone ou tablette pour l’appairer avec votre appareil d’entraînement. Pour obtenir des instructions détaillées sur l'utilisation de l'application Vous trouverez dans la description du produit ci-dessous: www.sportstech.de...
Seite 69
Directive européenne d‘épuration 2002/96 / EG Ne jetez jamais votre appareil d’entraînement dans vos ordures ménagères. Jeter l‘appareil uniquement dans une disposition locale ou approuvée. Prenez soin de la réglementation en vigueur. Si vous avez des doutes contacter les autorités locales pour obtenir des informations sur une option d’élimination correcte et respectueuse de l’environnement.
Seite 70
Je ai lu les conditions de garantie et d'exploitation / instructions spécifiques maintance produits et de les accepter avec ma signature. Aux fins de warratny Je suis d'accord avec le savinng de mes données personnelles. Les conditions de garantie peuvent être consultés à l'adresse: www.sportstech.de/garantie date signature ville Envoyer la carte de garantie remplie par lettre * à...
- Per roteggere pavimenti delicati come quelli in legno, laminati, piastrelle, ecc., e per evitare di danneggiarli, cioè di graffiarli, si raccomanda di mettere un tappetino Sportstech di protezione per il pavimento sotto il dispositivo di allenamento. - Non posiziona e il dispositivo di allenamento su tappeti bianchi o leggeri e in generale sopra nessun tappeto, perchè il colore potrebbe passare ai piedi.
Lista dei componenti Descrizione Qtà. Descrizione Qtà. Computer vite M5*16 2L/R Copertura d’acciacio rondella d5*Φ10*1.0 Supporto a molla Φ102*26.5 vite ST4.2*16*Φ8 Copertura decorativa vite M5*10 Dado a flangia M10*1 Sedile grande a U Vite regolatrice M6*40*Φ rondella d8*Φ20*2 10*2.5 dado M10*1 Rondella a molle d8 supporto 6000ZZ vite M8*20*S6...
Seite 75
molla t0.6*Φ63*15*N14 Palla di gomma SΦ47 dado Φ12*M6 61L/R Copertura catena 335*296*20 Supporto piedi Φ33*13 Cavo di tensione elettronica Lunghezza cavo struttura rondella d6*Φ16*1.5 1000 Struttura principale vite M6*16*Φ12 rondella d10*Φ20*2.0 vite ST4.2*16*Φ8 Anello di tenuta Φ12*11*Φ3 dado M10*H9.5*S17 cappuccio S16 cinghia Z1295 bullone M10*112*14*S17 Bullone M8*20*S14...
Seite 76
Passaggi per l’assemblaggio passo 1: Fissa lo stabilizzatore frontale (71) alla struttura principale (64) con bullone (49), rondella (36) e dado (47) e poi premi il cappuccio (46) all’estremità...
Seite 77
Passo 2: Collega il supporto del pedale (87) al binario per lo scivolamento in acciaio(82) con vite (38), rondella a molla (37) e rondella (36). Inserisci l’asta lunga per il pedale (88) e l’asta corta per il pedale (92) nel supporto per pedale (87) separatamente.
Seite 78
Passo 3: inserisci la sella (105) sul binario con scivolo in acciaio (82).
Seite 79
Passo 4: Φ Fissa il supporto per piede (95) al binario con scivolo in alluminio (82) con vite (97) e rondella (96). Posiziona la tavola con dado posteriore (103) nella parte interna del binario con scivolo in alluminio (82). E poi fissa lo stabilizzatore frintale (102) al binario con scivolo in alluminio (82) con bullone (101), rondella a molla (37) e rondella (36).
Seite 80
Passo 5: ¦ µ ¦ µ Inserisci lo spaziatore per il binario (83) nel binario con scivolo in alluminio (82) e poi fissa binario con scivolo in alluminio (82) nella struttura principale (64) con dado (66), rondella (65) e bullone (68). E poi premi il cappuccio all’estremità...
Seite 81
Passo 6: 1. Fpiega il binario con scivolo in alluminio(82) e fissalo con pomello (77) e rondella (118). Note: la sella può scivolare giù quando si piega il binario con scivolo in alluminio, attenzione a non farsi male. 2. college il cavo della strutta (80a) (80b) con il cavo della struttura (43a) (43b). Note: si prega di collegare I cavi con gli stessi adesivi colorati.
Seite 82
Passo Premi il pomello (77) e rondella (118) verso l’esterno e piega il binario con scivolo in alluminio (82) lentamente . poi fissa il binario con scivolo in alluminio (82) con pomello (77) e rondella (118) . College I cavi del computer (1a) (1b) (1c) alla cavo della struttura (43a) (43b) e al cavo della struttura (63).
Introduzione alle funzioni Figura A Segui le istruzioni nel riporre l’attrezzo: 1. Svita il pomello (77) e rondella (118) , tiralo in fuori, piega il ATTENZIONE! binario fino alla posizione La testa può facilmente eretta nella figura ( La sella toccare binario, potrebbe...
FUNZIONAMENTO MODALITA’ COLPO / TOTALE COLPO / CALORIE TEMPO / TEMPO DISTANZA BATTITO & H.R.C. (OBIETTIVO BATTITO CARDIACO) PULSANTE ENTER & manovella 1. Premi il pulsante per DISPLAY ALLENAMENTO REMATORE selezionare la funzione e confermare il valore delle modifiche. 2. + (aumenta), ...
Seite 86
BATTITO 0→30~240 P,30~240 Es. Calcolare forum D CARDIACO 1. Il display lampeggia indicando il battito cardiaco SIMBOLO ON/OFF Alto e veloce e basso e lento CUORE lampeggio 2. Se nessun battito viene riscontrato il simbolo scomparirà. 1~16 LIVELLO MANUALE Imposta il carico di resistenza tra il livello 1-16 (±1LIVELLO 1.
Seite 87
4. ACCEDI AL “CONTROL MODE”- MANUALE / PROGRAMMI / UTENTI / H.R.C./ GARA 4-1 Manuale LOAD1 scegli il primo diagramma sullo schermo, premi il tasto ENTER per confermare, gira la rotella UP +, DOWN -per regolare il valore del carico ed ENTER per confermare, gira la rotella di nuovo UP +, DOWN - premi START e inizia l’allenamento dopo aver impostato tutti I dati (I.e.
Seite 88
5.BLUETOOTH 1. durante l’inizializzazione, l’utente può usare l’app Bluetooth per collegare la console, che può controllare dati e trasmissione wireless (Per Android 4.3 o successivi). 2.con I dispositivi IOS e lo sviluppo di app con software EW (e-Heaith) attiva il Bluetooth del dispositivo, l’orologio elettronico deve essere impostato allo stato iniziale, (U0~U4) all’apertura dell’app, clicca sull’icona una volta caricata la barra mostrerà...
CURA, PULIZIA E MANUTENZIONE ATTENZIONE Prima delle operazioni di pulizia, manutenzione e/o riparazione, il dispositivo di allenamento deve essere scollegato dalla presa di corrente. Per questo, scollegare il cavo di alimentazione dalla presa elettrica. Il cavo di alimentazione può essere ricollegato alla macchina e alla corrente solo quando tutti i lavori sono stati completati e la condizione adeguata all’uso dell’apparecchio viene ripristinata.
Seite 91
Dopo di che, nella finestra successive cliccare su "Scanning equipment". Il dispositivo disponibile sarà elencato nella lista. Cliccare sul nome del dispositivo per eseguire l’associazione dei dispositivi. Per le istruzioni dettagliate utilizzando l'applicazione Troverete nella descrizione del prodotto di seguito: www.sportstech.de...
Seite 92
Direttive Europee 2002/96/EG per lo smaltimento Non gettare mai il tuo attrezzo sportivo nell’immondizia normale. Smaltisci l’attrezzo solo tramite un sistema locale o approvato. Tieni in conto le regole applicabili correntemente. Se hai dubbi contatta le autorità locali per informazioni circa le opzioni per uno smaltimento corretto ed ecosostenibile. batterie/batterie ricaricabili In accordo con il regolamento per le batterie, sei obbligato legalmente a ritornare tutte le batterie usate ed esaurite.
Seite 93
He leído las condiciones de garantía y de funcionamiento / instrucciones maintance del producto y aceptarlos con mi firma. Para efectos warratny Acepto la savinng de mis datos personales. Las condiciones de garantía pueden consultarse en: www.sportstech.de/garantie fecha ciudad...
- Para proteger los pisos delicados como laminados en madera, azulejos, etc., y para prevenir daños, tales como rasguños, es recomendable poner una esterilla protectora para piso de Sportstech debajo de la unidad. Asegúrese de que la esterilla esté asegurada contra posibles deslizamientos.
Lista de piezas Descripción Ctd. Descripción Ctd. Ordenador Tornillo M5*16 Arandela d5*Φ10*1.0 2L/R Cubierta de acero 1 c/u Tornillo ST4.2*16*Φ8 Soporte del resorte Φ102*26.5 Cubierta decorativa Tornillo M5*10 Tuerca de brida M10*1 Pieza grande en U Tornillo de ajuste Arandela d8*Φ20*2 M6*40*Φ10*2.5 Tuerca M10*1 Arandela elástica d8...
Seite 98
Resorte t0.6*Φ63*15*N14 Bola de caucho SΦ47 Tuerca Φ12*M6 61L/R Tapa de cadena 335*296*20 Almohadilla base Φ33*13 Cable de tensión electrónica Arandela d6*Φ16*1.5 Cable troncal 1000 Tornillo M6*16*Φ12 Estructura principal Arandela d10*Φ20*2.0 Tornillo ST4.2*16*Φ8 Ojal Φ12*11*Φ3 Tuerca M10*H9.5*S17 Tapa de extremo S16 Correa Z1295 Tornillo M10*112*14*S17 Tornillo M8*20*S14...
Pasos de ensamblaje Paso 1: Fije el estabilizador frontal (71) a la estructura principal (64) con tornillos (49), arandelas (36) y tuercas (47) y luego presione las tapas de extremo en ellos...
Seite 100
Paso 2: Conecte el soporte del pedal (87) al carril de desplazamiento en aluminio (82) con tornillos (38), arandelas planas (37) y arandelas (36). Inserte el eje largo para el pedal (88) y el eje corto para el pedal (92) en el soporte del pedal por separado.
Seite 101
Paso 3: Coloque la silla (105) en el carril de desplazamiento de aluminio (82).
Seite 102
Paso 4: Φ Fije la almohadilla base (95) al carril de desplazamiento de aluminio (82) con tornillos (97) y arandelas (96). Ponga la placa trasera (103) dentro del carril de desplazamiento de aluminio (82). Y luego fije el estabilizador trasero (102) al carril de desplazamiento (82) con tornillos (101), arandelas elásticas (37) y arandelas (36).
Seite 103
Paso 5: ¦ µ ¦ µ Introduzca el espaciador para el carril de desplazamiento (83) en el carril de desplazamiento de aluminio (82) y luego fije el carril de desplazamiento (82) en la estructura principal (64) con tuercas (66), arandelas (65) y tornillos (68). Y luego presione la tapa de extremo (67) en ellos.
Seite 104
Paso 6: 1. Pliegue el carril de desplazamiento de aluminio (82) y apriételo con la perilla (77) y con la arandela (118). Nota: La silla se deslizará hacia abajo al plegar el carril de desplazamiento, por favor tenga cuidado de no lesionarse. 2.
Seite 105
Paso 7: Retire la perilla (77) y la arandela (118) y despliegue el carril de desplazamiento (82) lentamente. Y luego apriete el carril de desplazamiento (82) con la perilla (77) y con la arandela (118). Conecte los cables del ordenador (1a) (1b) (1c) con los cables troncales (43a) (43b) y con el cable troncal (63).
Seite 106
Funcionamiento Imagen A Por favor haga lo siguiente al plegar la máquina: 1. Suelte la perilla (77) y la arandela (118), luego retírela, ATENCIÓN! por ultimo pliegue el carril en cabeza podría posición vertical (imagen A). lesionarse fácilmente si (Por favor preste atención a la entra en contacto con el silla ya que ésta se deslizará...
Seite 108
FUNCIONAMIENTO MODO MOVIMIENTOS/CANTIDAD / CALORIAS TIEMPO / TIEMPO 500M DISTANCIA PULSP & H.R.C. (F.C. objetivo) TECLA ENTER & Perilla 1. Presione la Tecla para PANTALLA DE VISUALIZACIÓN seleccionar la función y confirmar el valor de ajuste. 2. + (AUMENTAR), Aumenta el valor de la función.
Seite 109
Frecuencia 0→30~240 P,30~240 Muestra su frecuencia cardíaca actual cardíaca 1. Parpadea al registra una frecuencia cardíaca Símbolo de Parpadeo (lenta o rápida). corazón ON/OFF 2. Si no se registra ninguna frecuencia desaparece el símbolo. 1~16 LEVEL MANUAL Ajusta la carga de resistencia desde nivel 1-16 (±1LEVEL) 1.
Seite 110
4-2 PROGRAM-Programa Si el usuario elije un programa definido entre P1-P12, mueva UP y DOWN con la perilla para ajustar el valor de la carga y para configurar los valores objetivo deseados (Por ejemplo, TIME、 DISTANCE、 CALORIES、 HEART RATE). 4-3 USER-Usuario Cree un perfil del programa en USER mediante U1-U4 ajustando el nivel de resistencia de cada segmento individual.
Seite 111
6. CARGADOR USB Tensión de carga de 5.0 CC, 500 MA, shortcut y protección de sobrecarga. 3. . FUNCIÓN DE LAS TECLAS: 1. PERILLA UP +, DOWN: A. Ajusta el reloj. B. Elije U0~U4. C. Ajuste de datos del usuario(por ejemplo, género, edad, estatura y peso): D.
Seite 112
PERFILES DE PROGRAMA PROGRAMAS P1-P12...
CUIDADO, LIMPIEZA & MANTENIMIENTO ATENCIÓN Antes de limpiar, realizar trabajos de mantenimiento y / o reparación, el dispositivo debe estar completamente desconectado del tomacorriente. Para esto desconecte el cable de alimentación del tomacorriente y del dispositivo. El cable de alimentación puede conectarse de nuevo a la máquina y al tomacorriente cuando todos los trabajos se hayan completado y cuando el dispositivo esté...
"Scanning equipment". Se le mostrará el dispositivo disponible en la lista. Haga clic en el nombre del dispositivo para conectar ambos dispositivos. Un manual de usuario detallado para el funcionamiento de la aplicación se pueden encontrar dentro de la descripción del producto sobre: www.sportstech.de...
Seite 115
Directiva Europea de Residuos 2002/96/EG Nunca elimine su dispositivo de entrenamiento en su basura doméstica ordinaria. Elimine el dispositivo únicamente en un sitio de eliminación aprobado. Tenga en cuenta las normativas aplicables actualmente. Si tiene dudas contacte a las autoridades locales para conseguir información sobre una opción de eliminación adecuada y ecológica.
Seite 116
He leído las condiciones de garantía y de funcionamiento / instrucciones maintance del producto y aceptarlos con mi firma. Para efectos warratny Acepto la savinng de mis datos personales. Las condiciones de garantía pueden consultarse en: www.sportstech.de/garantie fecha ciudad...