Inhaltsverzeichnis
Werbung
Quicklinks
20PTH.C..
Impuls-Abschaltschrauber
Pulse Shut-Off Nutsetter
Serreuse a déclenchement d'impulsion
Avvitatore pneumo-idraulico a stacco automatico
Aprietatuercas de impulso
max. Kapazität / Rated Capacity
20 - 20Nm
Ausführung / Style
P
- Pistolengriff / Pistol grip
Abschaltung / Torque control
Impulsmechanismus / Hydraulic pulse mechanism
Grifflänge / Grip Length (X)
L
- lang / long
NORTH AMERICA
P.O. Box 1410
Lexington, South Carolina 29071-1410
2
0
P
T
H
L
Parts Manual • Betriebsanleitung
P1783E
C
3
5
X
Q - Schnellwechselfutter/
Quick change 1/4"
3 - 3/8" Vierkant / square
Drehzahl / Speed Code (XX)
35 - 3500 min
¹ / rpm
-
C - Signalanschluß / Signal port
EUROPE
Postfach 30
D-73461 Westhausen
06/04
Abtrieb / Final drive (X)
Ausführung / Vintage (X)
Werbung
Inhaltsverzeichnis

Verwandte Anleitungen für Cleco 20PTH.C Series


Inhaltszusammenfassung für Cleco 20PTH.C Series
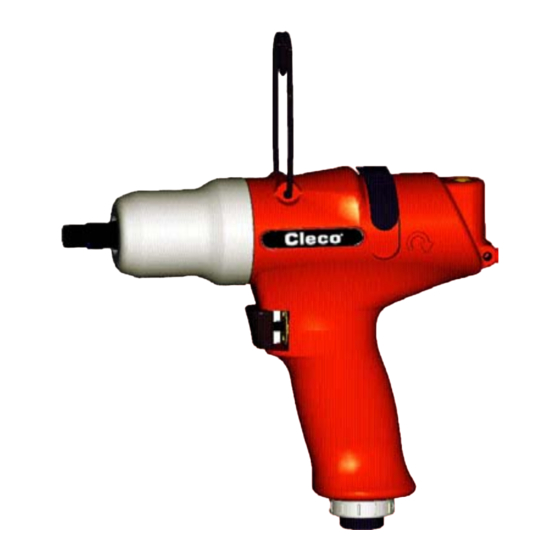
- Seite 1 Parts Manual • Betriebsanleitung P1783E 06/04 20PTH.C.. Impuls-Abschaltschrauber Pulse Shut-Off Nutsetter Serreuse a déclenchement d'impulsion Avvitatore pneumo-idraulico a stacco automatico Aprietatuercas de impulso max. Kapazität / Rated Capacity Abtrieb / Final drive (X) 20 - 20Nm Q - Schnellwechselfutter/ Quick change 1/4" Ausführung / Style 3 - 3/8"...
-
Seite 2: Inhaltsverzeichnis
20PTH.C.. Diese Betriebsanleitung vor dem Auspacken Read and carefully observe these operating Lisez et observez ce manuel d'instructions und vor Inbetriebnahme des Werkzeugs le- instructions before unpacking and operating avant déballage et mise en marche de l'outil. sen und genau beachten! Der Schrauber darf the tool! The tool must be operated, main- Cet outil ne doit être utilisé, entretenu et réparé... - Seite 3 20PTH.C.. Leggere e osservare scrupolosamente le Antes de desembalar y de poner en marcha la istruzioni di utilizzo prima di togliere l’utensile herramienta, ¡léanse cuidadosamente estas dall’imballo. L’utensile deve essere usato, intrucciones!. La herramienta solamente debe revisionato e riparato esclusivamente da per- ser manipulada, mantenida y reparada por sonale che abbia già...
-
Seite 4: Technische Daten
20PTH.C.. 1. Technische Daten · Technical data · Données techniques · Dati tecnici · Datos técnicos Abmessungen Dimensions Dimensions Misure Dimensiones (in mm) (in mm) (en mm) (in mm) (en mm) Luftsignalanschluß Air signal port Prise de signal pneumatique Attacco signal aria 22,5 22,5 16,5... -
Seite 5: Produktbeschreibung
20PTH.C.. 2. Produktbeschreibung 4. Inspektion und Wartung Der Impulsschrauber Eine regelmäßige Inspektion ist unerlässlich, um damit verbundene Betriebsstörungen, hohe Reparaturkosten und lange Stillstandzeiten ist ein Abschaltschrauber des Impulsschraubers zu vermeiden. hat einen alternativen Luftanschluß von oben. Bei Luftanschluß Bei Wartungs- und Inspektionsarbeiten immer Sicherheitshinweise von oben muß... -
Seite 6: Was Tun, Wenn
Alle Teile reinigen. Rotordeckel <42> mit Rillenkugellager <41> auf Rotor <47> mit Achtung! Achtung! Grundsätzlich nur CLECO-Original-Ersatzteile verwen- Vorrichtung <D> aufpressen (8. Montagehinweise, Bild 6 + 7) den. Bei eingebauten, fabrikatfremden Ersatzteilen, ist Luftverteiler <40> montieren der Schrauberhersteller berechtigt, sämtliche Dichtring <34>... -
Seite 7: Ölbefüllung
20PTH.C.. Druckfedern <68>/<113> und Hydr.-Lamellen <69>/<114> einle- 7. Ca. 2 Minuten warten, bis sich die Zahl der Vakuumblasen gen. deutlich verringert hat. Hydr.-Lamelle von Hand gegen Federkraft in Nut drücken und 8. Absperrorgan langsam schließen. Das Manometer zeigt wieder Hydr.-Hülse <63>/<108> aufstecken. (8. Montagehinweise, Bild 2) Atmosphärendruck an, fehlendes Öl wird in die Impuls-Einheit gedrückt. -
Seite 8: Product Description
20PTH.C.. 2. Product Description 4. Inspection and Maintenance The pulse nutsetter features Regular inspection is essential in order to prevent breakdowns, high repair costs and long downtimes associated with the pulse nutsetter torque shut-off, Always follow and use the safety notes P1687S and this type-specific alternative air inlet on top. -
Seite 9: Repair Instructions
Caution! Caution! Always only use original spares from CLECO. Use of Press rotor cover <42> with ball bearing <41> on rotor <47> with foreign spares entitles the manufacturer of the tool to void fixture <D> (8. Assembly Instructions, fig. 6 + 7) the warranty. -
Seite 10: Oil Filling
20PTH.C.. Push the leaf springs <70>/<115> and the control blades <71>/ 9. Repeat steps 6 to 8, if necessary, until the number of bubbles is <116>, <72>/<117> into the narrow groove. negligible. Align the long pin end of the control blade <72>/<117> to the bore 10. -
Seite 11: Description Produit
20PTH.C.. 2. Description produit 4. C ONTRÔLE ET MAINTENANCE Un contrôle régulier est indispensable pour éviter des pannes La visseuse à impulsion associées, des coûts de réparation élevés et des temps d’immobili- est une visseuse d’impulsion sation prolongés de la visseuse à impulsions possède un raccord d’air alternatif par le haut. -
Seite 12: Que Faire Lorsque
Monter le distributeur d’air <40>. Monter la bague d’étanchéité <34> dans le piston à déclenchement Attention! Attention! N’utiliser que les pièces d’origine CLECO. L’utilisation de <33>. pièces d’autres constructeurs peut entraîner le refus de Introduire le poussoir de coupure <37> dans le rotor (aide garantie de CLECO. -
Seite 13: Remplissage D'huile
20PTH.C.. Fixer la rondelle <74>/<119> et la bague filetée <78>/<123> avec 6. Ouvrir la valve d’arrêt lentement jusqu’à ce que le manomètre joint torique <77>/<122> sur le long côté et lisse sur le dispositif indique une dépression d’environ 1 bar (- 1 bar). <C2>. -
Seite 14: Descrizione Del Prodotto
20PTH.C.. 2. Descrizione del prodotto 4. C ONTROLLO E MANUTENZIONE Avvitatore a impulsi Un controllo regolare è indispensabile per evitare anomalie di è un avvitatore a stacco funzionamento, elevati costi di riparazione e lunghi periodi di non utilizzo dell’avvitatore ad impulsi. ha una presa d’aria alternativa dall’alto. -
Seite 15: Istruzioni Per La Riparazione
In linea di massima, utilizzare esclusivamente parti di Introdurre l’astina di arresto <37> nel rotore (ausilio montaggio) ed ricambio originali CLECO. Nel caso di pezzi di ricambio insere completamente nel dispositivo <G> (figura 9). incorporati e di altra marca, il fabbricante dell’avvitatore Montare l’attuatore <36>... -
Seite 16: Riempimento Olio
20PTH.C.. Montare la rondella <74>/<119>, la ghiera filettata <78>/<123> con 7. Aspettare 2 minuti circa fino a che il numero delle bolle a vuoto non l’O-ring <77>/122> sulla parte lunga dell’astina e innestarlo sul si sia molto ridotto. dispositivo <C2>. 8. -
Seite 17: Descripción Del Producto
20PTH.C.. 2. Descripción del producto 4. I NSPECCIÓN Y MANTENIMIENTO El atornillador con parada por calado... Es indispensable una inspección regular para evitar eventuales toma de aire superior opcional. Si esta toma de aire superior es perturbaciones de servicio, altos costos de reparación y largos utilizada, la toma roscada <13>... -
Seite 18: Instrucciones De Reparación
Prensar tapa del rotor <42> con cojinete <41> en el rotor <47> con el dispositivo <D> (8. Instrucciones de montaje, esquema 6 + 7) Solo deben emplearse repuestos originales de CLECO. Montar conjunto distribuidor de aire <40> La utilización de otros repuestos no originales, supondrá... - Seite 19 20PTH.C.. 7. Espere unos 2 minutos hasta que la cantidad de burbujas de vacío La vía de control en el lado plano del disco debe quedar haya disminuido claramente. en dirección de la ranura del rotor 8. Cierre el instrumento de bloqueo lentamente. El manómetro vuelve Inserte los anillos de compresión <68>/<113>...
-
Seite 20: Vue Éclatée
20PTH.C.. 7. E · · RSATZTEIL E I C H N U N G PARE PARTS EXPLODED V I E W UE ÉCLATÉE · SPLOSO ESPIECE DE ECAMBIOS Teil des Motor Service Kits # 542710 · Included in motor service kit # 542710 · Comprise dans le motor service kit # 542710 ·... - Seite 21 20PTH.C.. 7. E · S · L · E · L RSATZTEIL ESTELLISTE PARE ARTS ISTE DE PIÈCES DE RECHANGE LENCO RICAMBI ISTA DE PIEZAS DE RECAMBIO é é f ⊗ ⊗ ⊗ ⊗ ⊗ õ i l o t a l .
- Seite 22 20PTH.C.. 7. E · · RSATZTEIL E I C H N U N G PARE PARTS EXPLODED V I E W UE ÉCLATÉE · SPLOSO ESPIECE DE ECAMBIOS 3/8" V IERKANT USFÜHRUNG QUARE ARRÉ D ETRAÎNEMENT ODELLO QUADRATO ALIDA DE CUADRADILLO Teil des Hydraulik Service Kits # 542711 ·...
- Seite 23 20PTH.C.. 7. E · S · L · E · L RSATZTEIL ESTELLISTE PARE ARTS ISTE DE PIÈCES DE RECHANGE LENCO RICAMBI ISTA DE PIEZAS DE RECAMBIO é é f ⊗ ⊗ ⊗ ⊗ ⊗ õ i p i l é...
- Seite 24 20PTH.C.. 7. E · · RSATZTEIL E I C H N U N G PARE PARTS EXPLODED V I E W UE ÉCLATÉE · SPLOSO ESPIECE DE ECAMBIOS 1/4" S CHNELLWECHSELFUTTER · M · P · C UICK HANGE ANDRIN À CHANGEMENT RAPIDE INZA A CAMBIO RAPIDO AMBIO ÁPIDO...
-
Seite 25: Liste De Pièces De Rechange
20PTH.C.. 7. E · S · L · E · L RSATZTEIL ESTELLISTE PARE ARTS ISTE DE PIÈCES DE RECHANGE LENCO RICAMBI ISTA DE PIEZAS DE RECAMBIO ⊗ ⊗ ⊗ ⊗ ⊗ é é f õ i p i l é... -
Seite 26: Instructions De Montage
20PTH.C.. 8. M · · ONTAGEHINWEISE SSEMBLY INSTRUCTIONS NSTRUCTIONS DE MONTAGE · S T R U Z I O N I PER I L MONTAGGIO NSTRUCCIONES DE ONTAJE Demontage der Impuls-Einheit Dismounting of the pulse unit Démontage de l’unité d’impulsion Smontaggio dell'untià... - Seite 27 20PTH.C.. Anziehen des Lagerrings <78>/ <123> Tightening of the bearing ring <78>/ <123> Serrage de la bague du palier <78>/ <123> Montaggio della ghiera filettata <78>/ <123> Apriete del anillo <78>/ <123> <60>/<105> Anzugsmoment 80 Nm + 10 Nm <63>/<108> Tightening torque 60 lbf.ft + 7 lbf.
- Seite 28 20PTH.C.. Lager-Montage und Demontage Bearing assembly and disassembly Montage du palier et démontage Montaggio e smontaggio cuscinetti Montaje y desmontaje de los rodamiento 1. Lager einpressen - siehe Maß X Pressing in bearing - see dimension X Enfoncer le palier - voir X Piantare i cucinetti - vede X Empujar el rodamiento - ver X <47>...
- Seite 29 20PTH.C.. Montage Abschaltkolben <33> Assembly of shut-off piston <33> Montage de piston à déclenchement <33> <33> <35> Montaggio del pistone di stacco <33> Montaje del émbolo desconexiõn <33> <36> <47> 3x <45> <40> <42> <G> <37> 9. V · · ORRICHTUNGS ESTELLISTE IXTURES ORDER L I S T...
- Seite 30 20PTH.C.. 10. H · · · · INWEISE OTES EMARQUES OTAS ü l é l ö r ß r ö i t a é é é f i t a i t n ° " 4 ± l a i ü...