Bossini L00817 Montage-, Bedienungs- Und Wartungsanleitung
Vorschau ausblenden
Andere Handbücher für L00817:
- Montage-, bedienungs- und wartungsanleitung (20 Seiten) ,
- Montage-, bedienungs- und wartungsanleitung (21 Seiten)
Inhaltsverzeichnis
Quicklinks
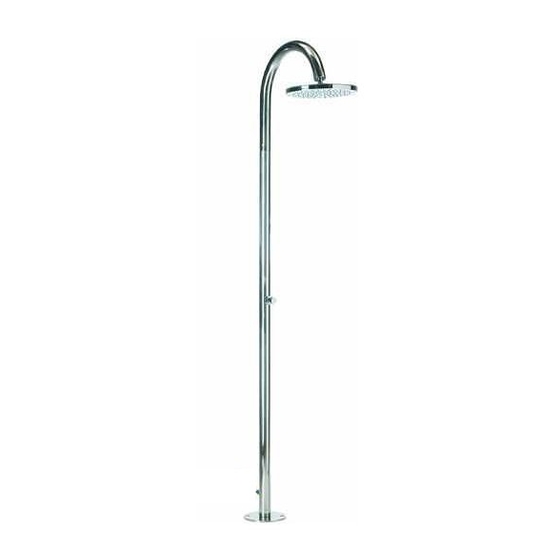
Colonne doccia da esterno
Outdoor Shower Columns
Istruzioni di montaggio, uso e manutenzione
Instructions for installation, operation and maintenance
Instructions de montage, d'utilisation et d'entretien
LEGGERE ATTENTAMENTE IL PRESENTE LIBRETTO DI INSTALLAZIONE E MANUTENZIONE.
READ THIS INSTALLATION AND CARE MANUAL CAREFULLY.
DIE VORLIEGENDE MONTAGE- UND WARTUNGSANLEITUNG AUFMERKSAM DURCHLESEN.
LIRE ATTENTIVEMENT CETTE NOTICE D'INSTALLATION ET D'ENTRETIEN.
LEA ATENTAMENTE ESTE MANUAL DE INSTALACIÓN Y MANTENIMIENTO
ВНИМАТЕЛЬНО ПРОЧИТАТЬ ИНСТРУКЦИЮ ПРЕЖДЕ, ЧЕМ ПРИСТУПАТЬ К УСТАНОВКЕ
INDOSSARE GUANTI DI PROTEZIONE.
WEAR PROTECTIVE GLOVES.
SCHUTZHANDSCHUHE TRAGEN.
UTILISER DES GANTS DE PROTECTION.
UTILICE GUANTES DE PROTECCIÓN.
ИСПОЛЬЗОВАТЬ ЗАЩИТНЫЕ ПЕРЧАТКИ
инструкция по монтажу, использованию и уходу
Rubinetto d'arresto
On-off valve
Rubinetto a tempo
Self closing valve
Montage, bedienungs- und wartungsanleitung
Istrucciones de montaje, uso y mantenimiento
L00817
Oki Floor Ø250
L00820
Oki Floor Ø200
L00814
Dinamic Ø140
L00823
Pool Floor
L00816
Oki Floor Ø250
L00819
Oki Floor Ø200
L00813
Dinamic Ø140
L00822
Pool Floor
Inhaltsverzeichnis

Verwandte Anleitungen für Bossini L00817


Inhaltszusammenfassung für Bossini L00817
- Seite 1 Instructions for installation, operation and maintenance Montage, bedienungs- und wartungsanleitung Instructions de montage, d’utilisation et d’entretien Istrucciones de montaje, uso y mantenimiento инструкция по монтажу, использованию и уходу Rubinetto d’arresto On-off valve L00817 Oki Floor Ø250 L00820 Oki Floor Ø200 L00814 Dinamic Ø140 L00823...
- Seite 2 Componenti - Parst - Composants - Einzelteile - Componentes - Комплектация Ø54...
- Seite 3 Componenti - Parst - Composants - Einzelteile - Componentes - Комплектация Componenti Parts Einzelteile Curved shower pipe Gebogenes Rohr 1. Tubo curvo Straight vertical shower pipe Senkrechtes Rohr Tubo verticale Base Sockel Basamento Viti M8X70 (4 pezzi) M8x70 mm screws (4 Pieces) Schrauben M8X70 (4 Stk) Flessibile di collegamento Supply fl exible hose...
- Seite 4 Raccomandazioni - Recommendations - Conseils - Empfehlungen - Recomendaciones - Рекомендации RACCOMANDAZIONI PER IL CORRETTO UTILIZZO Un corretto utilizzo del prodotto Vi consentirà di evitare possibili danni al vostro ambiente bagno. * Per evitare che impurità o detriti possano giungere all’interno del prodotto dando origine a problemi di funzionamento, spurgare sempre l’impianto prima di collegare i tubi di alimentazione.
- Seite 5 Installazione - Installation - Installation - Installation - Instalación - Установка Fig.A Basamento base vite M8X70 M8x70 mm screw Ø 200 Collegamento soffione Shower head connection...
- Seite 6 Installazione - Installation - Installation - Installation - Instalación - Установка Fig.B...
- Seite 7 Installazione - Installation - Installation - Installation - Instalación - Установка Fig.D Fig.C...
- Seite 8 Installazione - Installation - Installation - Installation - Instalación - Установка Fig.E REGOLAZIONE RUBINETTO A TEMPO Vite di regolazione Adjusting screw...
-
Seite 9: Installation Instructions
Installazione - Installation - Installation - Installation - Instalación - Установка ISTRUZIONI DI MONTAGGIO Avvertenza! Per la corretta installazione della colonna doccia è necessario decidere preventivamente con i progettisti/installatori l’orientamento desiderato del getto d’acqua, poiché la direzione di installazione della colonna è determinata dal fissaggio del basamento (3) come indicato nella Fig. -
Seite 10: Instructions De Montage
Installazione - Installation - Installation - Installation - Instalación - Установка • Align the straight and curved tubes (1 & 2) (an adjustment range ± 5° is allowed) and tighten the M4 adjusting screws (11) • Finally connect water supply pipe to the water inlet (10) as illustrated on Figure E SELF CLOSING VALVE Where outdoor showers are fitted with self-closing on-off valve, the time adjusting screw is set by manufacturer to the limit (continuous water flow). -
Seite 11: Instrucciones De Montaje
Installazione - Installation - Installation - Installation - Instalación - Установка la position et la direction du connecteur à encastrer avant de procéder avec les phases successives. Installation : Marquer au sol les 4 points de fi xation de l'embase (3) en s'assurant qu'ils soient bien positionnés, tel •... -
Seite 12: Инструкция По Монтажу
Installazione - Installation - Installation - Installation - Instalación - Установка VÁLVULA PROGRAMABLE: Para los modelos de columna de ducha dotados con válvula de suministro programable, los tornillos de regulación suministrados están confi gurados en fi nal de carrera (suministro de agua continuo). Girar los tornillos de regulación de manera gradual, en el sentido contrario a las agujas del reloj, hasta alcanzar el tiempo de suministro deseado. - Seite 13 Manutenzione - Maintenance - Entretien - Wartung - Mantenimiento - Эксплуатация Manutenzione Vi consigliamo di seguire le seguenti istruzioni di manutenzione per la corretta conservazione del prodotto durante il periodo invernale: Svuotare l’impianto dell’acqua che alimenta la colonna doccia, alla fi ne della stagione estiva, prima che inizi il freddo.
-
Seite 14: Warranty Terms
The defective parts have to be returned to Bossini carriage free with a report describing the defect. Bossini reserves the right to inspect the part alleged to be faulty or defective and to evaluate the applicability of the warranty terms. -
Seite 15: Conditions De Garantie
A parte, Bossini no responde de los costes de mano de obra y/o daños, aunque accidentales o a consecuencia, ocurridos durante la instalación, reparación, o sustitución del producto. - Seite 16 Garanzia - Warranty - Garantie - Garantiebedingungen - Garantía - Гарантийные Distribuito da / Distributed by www.bossini.it info@bossini.itt Made in Italy...