Herunterladen Inhalt Inhalt Diese Seite drucken

Werbung

Verfügbare Sprachen
  • DE

Verfügbare Sprachen

  • DEUTSCH, seite 11

Werbung

Inhaltsverzeichnis
loading

Inhaltszusammenfassung für Qlima P926

  • Seite 1: Inhaltsverzeichnis

    P926 - P935 GEBRAUCHSANWEISUNG INSTRUCCIONES DE USO MANUEL D’UTILISATION OPERATING MANUAL ISTRUZIONI D’USO > GEBRUIKSAANWIJZING MANUAL DE INSTRUÇÕES NAVODILA ZA UPORABO...
  • Seite 2: Allgemeine Sicherheit

    2 ALLGEMEINE SICHERHEIT Aus Sicherheitsgründen bitten wir Sie, die Bedienungsanleitung vor Inbetriebnahme sorgfältig zu lesen! Personen, die mit der Bedienungsanleitung nicht vertraut sind, dürfen das Gerät nicht bedie- nen. A. Kein beschädigtes Kabel verwenden. B. Kabel nicht zusammendrücken oder knicken. C.
  • Seite 3: Sécurité Générale

    I. Der må ikke stikkes noget ind i apparatet. J. Der må ikke bruges kabeltrommel. K. Bruges uden for børns rækkevidde. L. De må ikke selv reparere apparatet. 5 MEDIDAS DE SEGURIDAD ¡Consulte atentamente el modo de empleo y pres- te atención a las medidas de seguridad! Aquellos que no estén familiarizados con estas medidas de seguridad, no deben utilizar este acondicionador...
  • Seite 4: Yleinen Turvallisuus

    A. Ne pas utiliser de câble endommagé. B. Ne pas serrer ou plier le câble. C. Placer sur une surface plane. D. Ne pas placer devant une fenêtre ouverte. E. Ne pas mettre en contact avec des produits chi- miques. F.
  • Seite 5: General Safety

    4 GENERAL SAFETY For safety reasons, please read this manual careful- ly before operating. Persons who are not familiar with this manual must not use this air conditioner. We strongly recommend keeping this manual in a safe place for future reference. A.
  • Seite 6: Generell Sikkerhet

    G. Non immergerlo nell’acqua. H. Non versare liquidi sull’apparecchio. I. Non inserire alcun oggetto nell’apparecchio. J. Non usare prolunghe. K. Tenere l’apparecchio lontano dalla portata dei bambini. L. Non cercare di riparare l’apparecchio. u GENERELL SIKKERHET Av sikkerhetshensyn ber vi deg lese denne hånd- boken nøye før drift.
  • Seite 7 gebruiksaanwijzing op een veilige plaats te bewa- ren voor latere raadpleging. A. Gebruik geen beschadigde kabel. B. Kabel niet afklemmen of knikken. C. Plaats op een vlakke ondergrond. D. Niet voor een open raam plaatsen. E. Niet met chemicaliën in contact brengen. F.
  • Seite 8: Allmän Säkerhet

    = ALLMÄN SÄKERHET Av säkerhetsskäl, läs noga igenom denna bruksan- visning innan du använder enheten. Personer som inte har satt sig in i denna bruksanvisning får inte använda denna luftkonditioneringsapparat. Vi rekommenderar starkt att denna bruksanvisning förvaras på ett säkert ställe för framtida referens. A.
  • Seite 9 H. Na napravo ne zlivajte vode. I. V napravo ne vstavljajte predmetov. J. Ne uporabljajte električnega podaljška. K. Napravo hranite izven dosega otrok. L. Naprave ne popravljate sami. y GENEL GÜVENL‹K Güvenlik aç›dan çal›flt›rmaya bafllamadan önce lüt- fen kullanma talimat›n› dikkatlice okuyunuz! Kullanma talimat›n›...
  • Seite 10: Bezeichnung

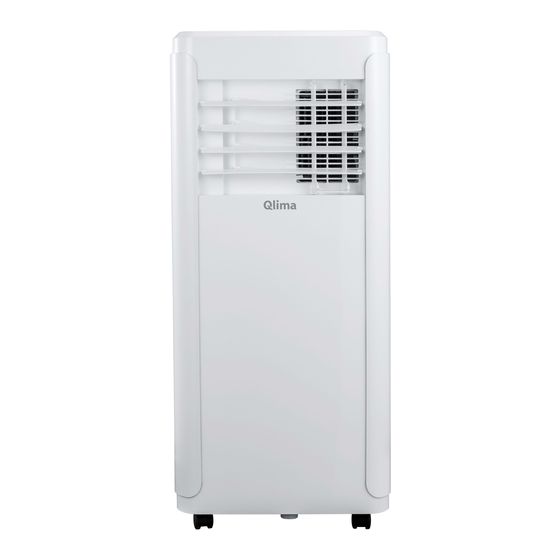
    BEZEICHNUNG Bedienfeld Einlassgitter Luftauslassgitter Netzkabel Griff (beidseitig) 1. LESEN SIE ZUERST DIE BEDIENUNGSANLEITUNG. 2. WENDEN SIE SICH IM ZWEIFELSFALL AN IHREN HÄNDLER.
  • Seite 11 Sehr geehrte Damen und Herren, wir gratulieren Ihnen zum Kauf Ihres Klimageräts. Außer der Luftkühlung hat dieses Klimagerät noch drei weitere Funktionen, nämlich Luftentfeuchtung, Luftumwälzung und Luftfilterung. Das mobile Klimagerät lässt sich sehr einfach bedienen und problemlos an einer anderen Stelle aufstellen. Sie haben ein Qualitätsprodukt gekauft, an dem Sie noch viele Jahre Freude haben werden, wenn Sie das Klimagerät auf sichere und sachgemäße Weise nutzen.
  • Seite 12 SICHERHEITSVORSCHRIFTEN Lesen Sie bitte vor der Anwendung des Geräts sorgfältig die Bedienungsanleitung und bewah- ren Sie sie für eine zukünftige Einsichtnahme auf. Das Gerät nur dann installieren, wenn die örtlich geltenden bzw. nationalen Vorschriften, Verordnungen und Normen erfüllt sind. Dieses Produkt ist für den Gebrauch als Klimagerät in Wohngebäuden bestimmt, und darf nur in trockener Umgebung, unter normalen...
  • Seite 13 WICHTIG! • Der Stecker sollte immer leicht zugänglich sein, wenn das Gerät angeschlossen ist. • Lesen Sie diese Bedienungsanleitung bitte sorgfältig durch und befolgen Sie die Anweisungen. Kontrollieren Sie vor dem Anschließen des Geräts, ob • die Netzspannung mit den Angaben auf dem Typenschild übereinstimmt.
  • Seite 14: Bringen Sie Das Gerät Auf Keinen Fall Mit

    • Bringen Sie das Gerät auf keinen Fall mit Wasser in Berührung. Besprühen Sie das Gerät auf keinen Fall mit Wasser oder tauchen es in Wasser ein: Kurzschlussgefahr! • Ziehen Sie immer erst den Stecker aus der Steckdose, bevor Sie das Gerät oder Teile des Geräts reinigen oder ersetzen.
  • Seite 15 • Kinder sind zu beaufsichtigen, um sicherzuge- hen, dass sie nicht mit dem Gerät spielen. • Dieses Gerät kann von Kindern ab 8 Jahren und Personen mit eingeschränkten physi- schen, sinnlichen oder geistigen Fähigkeiten oder einem Mangel an Erfahrung und Wissen verwendet werden, wenn sie in die sichere Nutzung des Geräts eingewiesen wurden und die damit einhergehenden Gefahren verstan-...
  • Seite 16: Teilebezeichnung

    ZUBEHÖR TEILE TEILEBEZEICHNUNG ANZAHL Klimaanlage-Hauptgerät Heißluft-Ablassschlauch Schlauchanschluss (Fensterende) Schlauchanschluss (Klimaanlage) Fenster-Kit Fernbedienung Abb. 1 Hinweis: Alle Abbildungen in dieser Gebrauchsanleitung dienen lediglich der Erklärung. Ihr Gerät kann geringfügig davon abweichen. AUFSTELLORT • Das Gerät ist auf einem stabilen Untergrund aufzustellen, um Geräusche und Schwingungen zu minimieren.
  • Seite 17: Ablassen Von Heissluft

    INSTALLATIONSANWEISUNGEN ABLASSEN VON HEISSLUFT Im COOL-Modus muss das Gerät in der Nähe eines Fensters oder einer Öffnung aufgestellt werden, damit die warme Abluft nach außen geleitet werden kann Stellen Sie das Gerät zuerst auf einem ebenen Boden auf und achten Sie darauf, einen Abstand von mindestens 30 cm (12”) um das Gerät herum und in der Nähe einer Einfachleitung-Steckdose zu lassen.
  • Seite 18: Beschreibung Der Bedienfeld

    BESCHREIBUNG DER BEDIENFELD Überprüfen Sie, ob der Ablassschlauch ordnungsgemäß montiert wurde. Seien Sie vorsichtig im Kühl- und Luftentfeuchtungsbetrieb: – Wenn Sie die Kühl- oder Luftentfeuchtungsfunktion nutzen, halten Sie ein Intervall von mindestens 3 Minuten zwischen jedem Ein-/Ausschalten ein. – Das Stromnetz entspricht den Anforderungen. –...
  • Seite 19 – Wenn die Klimaanlage ausgeschaltet ist, drücken Sie TIMER und wählen Sie die gewünschte Einschaltzeit anhand der Temperatur- und Zeiteinstellungstasten. – „Preset ON Time“ wird angezeigt. – Die Einschaltzeit kann auf eine beliebige Zeit zwischen 0 und 24 Stunden eingestellt werden. Timer OFF-Einstellung: –...
  • Seite 20: Ehandbuch Zur Fernbedienung

    HANDBUCH ZUR FERNBEDIENUNG 1. POWER ON-/OFF-Taste 2. MODE MODE-Auswahlschalter 3. TIMER Stundenprogrammierung 4. SPEED Lüfter-Geschwindigkeit 5. TEMP+ Temperaturregler auf 6. TEMP- Temperaturregler ab 7. SLEEP Nachtbetriebregler 8. SWING Automatischer Luftflussregler Max. 7 Meter REINIGUNG DER LUFTFILTER Um die effiziente Funktionsweise des Geräts zu gewährleisten, sollte der Filter nach jeder Betriebswoche gereinigt werden.
  • Seite 21: Reinigung Des Gehäuses

    REINIGUNG Schalten Sie das Gerät vor der Reinigung oder der Wartung aus, indem Sie die Taste POWER auf dem Bedienfeld oder der Fernbedienung drücken. Warten Sie einige Minuten und ziehen Sie anschließend den Netzstecker aus der Steckdose. REINIGUNG DES GEHÄUSES Das Gerät sollte mit einem leicht angefeuchteten Tuch gereinigt und anschließend mit einem trockenen Tuch getrocknet werden.
  • Seite 22: Jfehlerbehebung

    FEHLERBEHEBUNG Fehler Mögliche Ursachen Vorgeschlagene Lösung – Die Anzeigeleuchte für den vollen Wassertank blinkt, und Entleeren Sie den Wassertank. der Wassertank ist voll. DAS GERÄT SCHALTET – Raumtemperatur höher als SICH NICHT EIN, Stellen Sie die Temperatur wieder die eingestellte Temperatur. WENN DIE EIN/AUS- ein.
  • Seite 23: Garantiebestimmungen

    Die Versandkosten und das Versandrisiko des Gerätes, oder dessen Teile, gehen immer zu Lasten des Käufers. Schaden, der dadurch verursacht wurde, dass die geeigneten Qlima-Filter nicht benutzt wurden, fällt nicht unter die Garantie. Um unnötige Kosten zu vermeiden, raten wir Ihnen, immer zuerst die Gebrauchsanweisung genau durchzulesen.
  • Seite 24: Ltechnische Daten

    TECHNISCHE DATEN Angegebene Werte sind Richtwerte, Änderungen vorbehalten Model P 926 P 935 Kühlleistung* 2600 3500 Wärmekapazität* EER* EE Class* COP* COP Class* Leistungsaufnahme Kühlen 1000 1345 Leistungsaufnahme Heizen Leistungsaufnahme Kühlen Standby modus Stromverbrauch nom. Spannung V/Hz/F 230/50/1 230/50/1 Luftumwälzvol. max. m3/h Entfeuchtung max.
  • Seite 26 DESCRIPCIÓN COMPONENTES IMPORTANTES Panel de mando Rejilla de toma de aire Panel de mando Rejilla de salida de aire Rejilla salida de aire Cable de alimentación Empuñadura Asa (una a cada lado) Ruedas Filterset Rejilla entrada de aire Salida de aire Botón de cierre Empalmes Tubo salida de aire...
  • Seite 27 Estimado/a señor/a: Le felicitamos por la compra de su acondicionador de aire. Este equipo, además de refrigerar el aire, cuenta con tres funciones adicionales: lo deshumidifica, lo pone en circulación y lo filtra. El acondicionador de aire portátil es sumamente fácil de manejar y transportar.
  • Seite 28: Medidas De Seguridad

    MEDIDAS DE SEGURIDAD Lea detenidamente este manual de usuario antes de usar el aparato y consérvelo para poder consultarlo en el futuro. Instale este dispositivo únicamente si satisface los requisitos de la legislación, las ordenanzas y las normas locales y nacionales correspondientes. Este producto ha sido diseñado para su uso como acondicionador de aire en hogares y sólo es apto para el uso en entornos secos, en condiciones domésticas...
  • Seite 29 Antes de conectar el aparato compruebe si: • el voltaje corresponde a la placa de datos; • el enchufe y el suministro de electricidad son los indicados para el aparato; • la clavija del cable eléctrico es a la medida del enchufe;...
  • Seite 30 • Con miras a la seguridad, y al igual que con todo aparato eléctrico, ponga especial atención cuando niños pequeños se encuentren cerca del aparato. • Las eventuales reparaciones deben ser siempre llevadas a cabo por un técnico de servicio cualificado o por su distribuidor. De otra forma, puede dar lugar a la pérdida de la garantía.
  • Seite 31 ¡ATENCIÓN! • Nunca use el aparato en caso de que el cable o el enchufe esté dañado. Procure que el cable no quede atrapado y que no entre en contacto con objetos cortantes. • No cierre nunca la habitación herméticamente (tampoco en caso de usar dos tubos de aire).
  • Seite 32: Nombre De Los Componentes

    ACCESORIOS NOMBRE DE LOS COMPONENTES CANTIDAD COMPONENTES Unidad de acondicionado principal Tubo salida de aire caliente Conector del tubo (lado de la ventana) Conector del tubo (lado del aire acondicionado) kit de ventana Control remoto Nota: Las imágenes mostradas en este manual son solo para fines ilustrativos. Su aparato puede ser ligeramente diferente.
  • Seite 33 INSTALLATION INSTRUCTIONS SALIDA DEL AIRE CALIENTE En el modo Frío se ha de colocar el aparato junto a una ventana o abertura para que el aire caliente pueda ser conducido al exterior. Primero coloque la unidad sobre un suelo nivelado y asegúrese de que hay al menos 30 cm (12”) de espacio libre alrededor de la unidad, y de que está...
  • Seite 34 DESCRIPCIÓN DE PANEL DE MANDO Compruebe si el tubo salida de aire ha sido instalado correctamente. Precauciones a tener en cuenta en el funcionamiento de refrigeración y deshumidificación: - Al utilizar las funciones de refrigeración y deshumidificación debe esperar al menos durante 3 minutos entre cada encendido y apagado. - La fuente de alimentación cumple con los requisitos.
  • Seite 35 Horario de funcionamiento Ajuste de ENCENDIDO: - C o n e l a i r e a c o n d i c i o n a d o e s t é a p a g a d o , p r e s i o n e e l b o t ó n “Temporizador”...
  • Seite 36 INSTRUCCIONES DEL MANDO A DISTANCIA 1. POWER Interruptor de Encendido/Apagado 2. MODE Selector de MODO 3. TIMER Programación horaria 4. SPEED Selector de velocidad del ventilador Selector de aumento de tempera- 5. TEMP+ tura Selector de disminución de tempe- 6. TEMP- ratura Selector de funcionamiento noctur- 7.
  • Seite 37: Limpieza De La Carcasa

    LIMPIEZA Antes de su limpieza o mantenimiento, apague el aparato presionando el botón POWER en el panel de control o en el mando a distancia. Espere unos minutos y luego desenchufe de la toma de corriente. LIMPIEZA DE LA CARCASA Debe limpiar el aparato con un paño ligeramente humedecido y secarlo después con un paño seco.
  • Seite 38: Jsolución De Problemas

    SOLUCIÓN DE PROBLEMAS Problema Posibles causas Soluciones recomendadas - La luz indicadora de lleno de agua parpadea y el depósito de Vacíe el depósito de agua. agua está lleno. LA UNIDAD NO SE - La temperatura ambiente es ENCIENDE CUANDO más alta que la temperatura del Reajuste la temperatura.
  • Seite 39 Los gastos de envío y los riesgos del envío del acondicionador o piezas de ésto, correrán en todos los casos a cargo del comprador. Los daños, provocados por no usar los filtros adecuados de Qlima, no están cubiertos por la garantía.
  • Seite 40: Datos Técnicos

    DATOS TÉCNICOS Estos valores son a título indicativo, nos reservamos el derecho de hacer modificaciones Modelo P 926 P 935 Capacidad de refrigeración* 2600 3500 Capacidad calefactora* EER* Clase EE* COP* Clase COP* Consumo eléctrico en modo 1000 1345 REFRIGERACIÓN Consumo eléctrico en modo CALEFACCIÓN Consumo eléctrico en modo...
  • Seite 42 BEZEICHNUNG PIÈCES PRINCIPALES Panneau de commande Panneau de Grille d’aspiration commande Grille de sortie d’air Grille de soufflage Câble d’alimentation Poignée (des deux Poignée côtés) Roulettes Filterset Grille d’admission de l’air Évacuation de l’air Bouton de fermeture Raccords Serpentin d’évacu- ation de l’air Raccordement de fenêtre...
  • Seite 43 Madame, Monsieur, Toutes nos félicitations pour l’achat de votre climatiseur. Outre le refroidissement de l’air, ce climatiseur possède trois autres fonctions, à savoir la déshumidification, la circulation et la filtration de l’air. Le climatiseur roulant est très facile à utiliser et à déplacer. Vous venez d’acquérir un produit de qualité...
  • Seite 44: Manuel D'utilisation

    PRESCRIPTIONS DE SÉCURITÉ Lisez attentivement ce manuel d’utilisation avant d’utiliser l’appareil et conservez-le pour toute référence ultérieure. Installez cet appa- reil uniquement s’il est conforme à la législa- tion, aux ordonnances et aux normes locales et nationales. Ce produit a été conçu pour être utilisé...
  • Seite 45 Avant de brancher l’appareil, vérifiez si: • la tension de raccordement est bien la même que celle indiquée sur la plaque signalétique; • la prise et l’approvisionnement en courant sont bien adaptés à l’appareil; • la fiche électrique rentre bien dans la prise de contact;...
  • Seite 46 • Comme avec tous les appareils électriques, soyez prudent et attentif lorsque des enfants se trouvent près de l’appareil. • Si une éventuelle réparation est nécessaire (en dehors des activités d’entretien), faites- la exécuter par un technicien agréé ou par votre distributeur.
  • Seite 47 ATTENTION! • N’utilisez jamais l’appareil avec un cordon ou une fiche électrique endommagé. Ne serrez jamais le cordon électrique et évitez tout contact avec des arêtes tranchantes. • Ne jamais utiliser l’appareil dans une pièce fermée hermétiquement sous risque de créer une sous pression, ce qui peut perturber le fonctionnement et la sécurité...
  • Seite 48 INSTRUCTIONS D’INSTALLATION • L’unité devrait être placée sur une base solide afin de minimiser le bruit et les vibrations. Pour un positionnement sûr et sécurisé, placez l’unité sur un sol lisse et à niveau, suffisamment solide pour supporter l’unité. • L’unité comporte des roulettes pour faciliter son déplacement, mais elle ne devrait être utilisée que sur des surfaces lisses et plates.
  • Seite 49: Description Panneau De Commande

    INSTALLATION DE LA LANGUETTE PLASTIFIÉE 1 Pièces : A) Panneau B) Panneau à un trou 2 Montage Faites glisser les panneaux B dans le panneau A et dimensionnez à la largeur de la fenêtre. Les tailles de fenêtres peuvent varier. Lors du dimensionnement de la largeur de la fenêtre, veillez à...
  • Seite 50 Opération du ventilateur - Appuyer sur le bouton « Mode » jusqu’à ce que l’icône « Ventilateur » apparaisse. - Appuyer sur le bouton « VENT » pou sélectionner la vitesse du vent. Opération de chauffage (cette fonction n’est pas disponible pour une unité à...
  • Seite 51 MANUEL DE LA TÉLÉCOMMANDE 1. POWER Interrupteur Marche/Arrêt 2. MODE Sélecteur de MODE 3. TIMER Programmation à l’heure 4. SPEED Sélecteur de vitesse du ventilateur 5. TEMP+ Sélecteur de température en haut 6. TEMP- Sélecteur de température en bas 7. SLEEP Sélecteur d’opération de nuit 8.
  • Seite 52 MÉTHODE DE DRAINAGE DE L’EAU tuyau de drainage NETTOYAGE Avant le nettoyage ou l’entretien, éteignez l’appareil en appuyant sur le bouton POWER du panneau de commande ou de la télécommande. Attendez quelques minutes, puis débranchez-le de la prise de courant NETTOYAGE DE LA MACHINE Nettoyez de préférence l’appareil à...
  • Seite 53 DÉPANNAGE Problèmes Causes possibles Solutions suggérées - La lampe de l’indicateur de remplissage d’eau clignote, et le Vider l’eau du réservoir d’eau. réservoir d’eau est plein. L’APPAREIL NE - La température de la pièce S’ALLUME PAS est supérieure à la température LORSQUE VOUS Réinitialiser la température.
  • Seite 54: Conditions De Garantie

    à la charge de l’acheteur. Tout dégât causé par l’utilisation du climatiseur sans filtre, ou avec un filtre d’une autre marque que Qlima, n’est pas couvert par la garantie. Pour éviter des dépenses inutiles, nous vous conseillons de toujours consulter en premier le mode d’emploi.
  • Seite 55 les déposer dans les lieux de dépôt prévus à cet effet. Pour tout information concernant le recyclage, merci de vous informer auprès de votre distributeur ou des autorités locales. DONNÉES TECHNIQUES À utiliser à titre indicatif, sous réserve de modifications Modèle P 926 P 935...
  • Seite 56: Important Components

    IMPORTANT COMPONENTS Control panel Intake grille Air outlet grille Power cable Handle (both sides) 1. READ THE DIRECTIONS FOR USE FIRST. 2. IN CASE OF ANY DOUBT, CONTACT YOUR DEALER.
  • Seite 57 Dear Sir, Madam, Congratulations on the purchase of your air conditioner. This air conditioner has three functions in addition to cooling the air, namely, air dehumidification, circulation and filtration. The mobile air conditioner is extremely easy to operate and move. You have acquired a high quality product that will provide you with many years of pleasure, on condition that you use it responsibly.
  • Seite 58 SAFETY INSTRUCTIONS Read this user manual carefully before using the appliance and keep it for future refer- ence. Install this device only when it complies with local/national legislation, ordinanc- es and standards. This product is intended to be used as an air conditioner in residen- tial houses and is only suitable for use in dry locations, in normal household conditions, indoors in living room, kitchen and garage.
  • Seite 59 • The device is on a stable and flat surface. Have the electrical installation checked by a recognised expert if you are not sure that everything is in order. • The airconditioner is a safe device, man- ufactured in accordance with CE safety standards.
  • Seite 60 • A damaged electricity cable may only be replaced by the supplier or an authorised person/service point. • This appliance is not intended for use by persons (including children) with reduced physical, sensory or mental capabilities, or lack of experience and knowledge, unless they have been given supervision or instruction concerning use of the appliance by a person responsible for their safety.
  • Seite 61: Included Parts

    ATTENTION! • Never use the device with a damaged power cord, plug, cabinet or control panel. Never trap the power cord or allow it to come into contact with sharp edges. • Never seal the room - where this device will be used - completely airtight.
  • Seite 62 INSTALLATION • The unit should be placed on a firm foundation to minimize noise and vibration. For safe and secure positioning. place the unit on a smooth, level floor strong enough to support the unit. • The unit has casters to aid placement, but it should only be rolled on smooth, flat surfaces.
  • Seite 63: Description Of The Control Panel

    Slide Panel Band B into Panel A and size to widow width. Windows sizes vary. When sizing the window width, be sure that the window kit assembly is free from gaps from gaps and/or air pockets when taking measurements. DESCRIPTION OF THE CONTROL PANEL Check up whether the exhaust hose has been mounted properly.
  • Seite 64 Timer operation Timer ON setting: - When the air-conditioner is OFF, press the “Timer” button and select a desired ON time through the temperature and time setting buttons. - “Preset ON Time” is displayed on the operation panel. - ON time can be regulated at any time in 0-24 hours. Timer OFF setting - When the air-conditioner ON, press “Timer”...
  • Seite 65: Cleaning The Air Filters

    MANUAL OF REMOTE CONTROL 1. POWER On/Off switch 2. MODE MODE selector 3. TIMER Hourly programming 4. SPEED Fan speed selector 5. TEMP+ Temperature selector up 6. TEMP- Temperature selector down 7. SLEEP Night operation selector 8. SWING Auto air flow selector Max.
  • Seite 66: Cleaning The Cabinet

    CLEANING Before cleaning or maintenance, turn the appliance off by pressing the POWER button on the control panel or remote control, wait for a few minutes then unplug from the mains socket. CLEANING THE CABINET You should clean the appliance with a slightly damp cloth then dry with a dry cloth.
  • Seite 67: Jtrouble Shooting

    TROUBLE SHOOTING Phenomenon Troubleshooting Solution - Water full indicator lamp Dump the water out of the water blinks, and water tank is full. tank. UNIT DOES NOT - Room temperature is higher START WHEN than the setting temperature. Reset the temperature PRESSING ON/OFF (Electric heating mode) BUTTON...
  • Seite 68 Damage caused by not using suitable Qlima filters is not covered by the gua- rantee. To prevent unnecessary expense, we recommend that you always first carefully consult the instructions for use.
  • Seite 69 TECHNICAL DATA To be used as indication, subject to modifications Model P 926 P 935 Cooling capacity* 2600 3500 Heating capacity* EER* EE Class* COP* COP Class* Power consumption in COOLING 1000 1345 mode Power consumption in HEATING mode Power consumption Standby mode Current nom.
  • Seite 70 DESCRIZIONE COMPONENTI PRINCIPALI Pannello di controllo Pannello di controllo Griglia di aspirazione Bocchetta dell’aria Griglia di uscita dell’aria Impugnatura Cavo di alimentazione Rotelle girevoli Maniglia (entrambi i lati) Filterset Presa d’aria Uscita aria di scarico Tappo di gomma Adattatori per il tubo Tubo di scarico Raccordo per finestre Telecomando (P125)
  • Seite 71: Istruzioni D'uso

    Gentile Signore, Signora, Congratulazioni per l’acquisto del condizionatore d’aria, Qlima. Oltre a raffreddare l’aria, il climatizzatore ha una triplice funzione, ovvero deumidificazione, ricircolo e filtraggio dell’aria. Il condizionatore portatile è estremamente facile da usare e da spostare. Lei ha acquistato un prodotto di qualità, che Le offrirà molti anni di comfort, a condizione che venga usato in modo responsabile.
  • Seite 72 ISTRUZIONI PER LA SICUREZZA Prima di usare l’apparecchiatura, leggere atten- tamente il presente manuale e conservarlo come riferimento futuro. Installare questo dispositivo soltanto quando è conforme con la legislazio- ne, le ordinanze e gli standard locali/naziona- li. Questo prodotto è destinato a essere usato come condizionatore d’aria nelle case ad uso residenziale ed è...
  • Seite 73 IMPORTANTE • E’ inoltre opportuno assicurare che l’accesso alla spina elettrica non sia ostacolato in nessun modo. • Si consiglia di leggere accuratamente le presenti istruzioni e di attenersi alle indicazioni fornite. Prima di procedere al collegamento dell’ap- parecchio alla rete elettrica, controllare la rispondenza dei seguenti punti: •...
  • Seite 74 • Evitare il contatto fra l’apparecchio e le sostanze chimiche. • Non introdurre nessun oggetto nelle aper- ture o nelle fessure dell’apparecchio. • Per evitare il cortocircuito, l’apparecchio va tenuto al riparo dall’acqua: evitare gli spruzzi e non immergerlo in acqua. •...
  • Seite 75 ridotte capacità psicomotorie, mentali o sen- soriali, tanto meno deve essere utilizzato da persone inesperte o non dotate di suf- ficienti cognizioni in materia, tranne nei casi in cui vi è sorveglianza e sono impar- tite istruzioni per l’uso dell’apparecchio da parte di persone responsabili della sicurez- za degli utenti.
  • Seite 76 ATTENZIONE! • Il vano/locale in cui si utilizza l’apparecchio non va mai chiuso ermeticamente per evitare che si crei una depressione all’interno del vano (ciò vale anche se si utilizzano due tubi). La pressione negativa (=sottopressione) può pregiudicare la sicurezza di bruciatori, ventilatori aspiratori, forni, ecc.
  • Seite 77 POSIZIONE • L’unità deve essere collocata su fondamenta solide per ridurre al minimo il rumore e le vibrazioni. Per un posizionamento sicuro, posizionare l’unità su una superficie liscia e piana abbastanza robusta per sostenere l’unità. • L’unità è dotata di rotelle per agevolare il posizionamento, ma deve essere fatta rotolare solo su superfici lisce e piane.
  • Seite 78: Modalità Automatica

    INSTALLAZIONE DEL KIT CURSORE FINESTRA 1 Preparazione: A) Pannello B) Pannello con un unico foro 2 Montaggio Far scorrere i pannelli B nel pannello A e adattare la dimensione alla larghezza della finestra. Le dimensioni delle finestre variano. Per si adatta la dimensione alla larghezza della finestra, assicurarsi che il montaggio del kit finestra sia privo di gioco e/o sacche d’aria quando si effettuano le misurazioni .
  • Seite 79 Funzionamento ventola - Premere il tasto “Mode” finché non appare l’icona “Fan”. - Premere il pulsante “WIND” per selezionare la velocità di aerazione. Funzionamento in riscaldamento (questa funzione non è disponibile per un’unità solo freddo) - Premere il tasto “Mode” finché non appare l’icona “Heat”. - Premere il pulsante “DOWN”o “UP”...
  • Seite 80 MANUALE DEL TELECOMANDO Interruttore di accensione/spegni- 1. POWER mento 2. MODE Selettore MODALITÀ 3. TIMER Programmazione oraria Selettore della velocità della ven- 4. SPEED tola Selettore di aumento della tempe- 5. TEMP+ ratura Selettore di diminuzione della tem- 6. TEMP- peratura Selettore di funzionamento nottur- 7.
  • Seite 81 METODO DI SCARICO DELL’ACQUA tubo di scarico PULIZIA Prima di eseguire le operazioni di pulizia o manutenzione, spegnere l’apparecchio premendo il pulsante POWER sul pannello di controllo o sul telecomando. Attendere alcuni minuti e poi scollegarlo dalla presa di rete. PULIRE L’ESTERNO Si consiglia di pulire l’apparecchio con un panno leggermente umido, quindi asciugare con un panno asciutto.
  • Seite 82: Jrisoluzione Dei Problemi

    RISOLUZIONE DEI PROBLEMI Problemi Cause possibili Rimedi suggeriti - La spia di serbatoio dell’acqua Scaricare l'acqua dal serbatoio pieno lampeggia e il serbatoio dell'acqua. dell’acqua è pieno. - La temperatura ambiente L'UNITÀ NON SI è superiore alla temperatura ACCENDE QUANDO SI Resettare la temperatura.
  • Seite 83 Le spese di spedizione ed i rischi che la spedizione del apparecchio o delle parti comporta sono sempre a carico dell’acquirente. I danni derivanti dal non aver utilizzato i filtri raccomandati da Qlima non sono coperti dalla garanzia. Per prevenire costi inutili, si consiglia di consultare dapprima le istruzioni d’uso.
  • Seite 84 DATI TECNICI I valori riportati sono indicativi, dati soggetti a modifiche Modello P 926 P 935 Capacità di cottura* 2600 3500 Capacità di riscaldamento* EER* Classe EE* COP* Classe COP* Potenza assorbita in modalità 1000 1345 RAFFREDDAMENTO Potenza assorbita in modalità RISCALDAMENTO Consumo di energia in modalità...
  • Seite 85 >...
  • Seite 86: Belangrijke Onderdelen

    BELANGRIJKE BELANGRIJKE ONDERDELEN ONDERDELEN Bedieningspaneel Bedieningspaneel Inlaatrooster Luchtuitblaasrooster Luchtuitlaatrooster Handgreep Netsnoer Wielen Handgreep (beide Filterset kanten) Luchtinlaatrooster Luchtafvoer Afsluitdop Verbindingsstukken Luchtafvoerslang Raamdoorvoer Afstandsbediening (P125) Elektriciteitssnoer 1. LEES EERST DE GEBRUIKSAANWIJZING. 1. LEES EERST DE GEBRUIKSAANWIJZING. 2. RAADPLEEG BIJ TWIJFEL UW DEALER. 2.
  • Seite 87 Geachte mevrouw, meneer, Van harte gefeliciteerd met de aankoop van uw airconditioner. Naast het koelen van de lucht heeft deze airconditioner nog een drietal functies, namelijk luchtontvochtiging, -circulatie en luchtfiltratie. De verrijdbare airconditioner is uiterst gemakkelijk te bedienen en te verplaatsen. U heeft een kwaliteitsproduct aangeschaft waar u nog vele jaren plezier van zult hebben, mits u de airconditioner verantwoord gebruikt.
  • Seite 88 VEILIGHEIDSVOORSCHRIFTEN Lees deze gebruikershandleiding aandachtig alvorens het toestel te gebruiken en bewaar het voor later. Installeer dit toestel enkel wanneer het voldoet aan de lokale/nationale wetgeving, regelgeving en normen. Dit pro- duct is bedoeld om gebruikt te worden als een airconditioner in woningen en is alleen geschikt voor gebruik binnenshuis in woon- kamers, keukens en garages op droge plaat- sen, in normale huishoudelijke omstandighe-...
  • Seite 89 Controleer vóór het aansluiten van het appa- raat of: • de aansluitspanning overeenkomt met die op het typeplaatje; • stopcontact en stroomvoorziening geschikt zijn voor het apparaat; • de stekker van het snoer in het stopcontact past; • het apparaat op een stabiele en vlakke ondergrond staat.
  • Seite 90 • Sluit het apparaat NOOIT aan met behulp van een verlengsnoer. Is een geschikt geaard stopcontact niet voorhanden, laat dit dan installeren door een erkend elektricien. • Wees uit veiligheidsoverwegingen altijd voorzichtig met kinderen in de buurt van dit apparaat, zoals met ieder elektrisch apparaat. •...
  • Seite 91 • Zorg ervoor dat kinderen niet met het appa- raat spelen. • Reiniging en onderhoud dient niet te worden uitgevoerd door kinderen waarop geen toe- zicht wordt gehouden. LET OP! • Gebruik het apparaat nooit met een beschadigd snoer of stekker. Klem het snoer nooit af en voorkom contact met scherpe kanten.
  • Seite 92 TOEBEHOREN ONDERDELEN NAAM ONDERDEEL AANTAL Hoofdairconditioningunit Uitlangslang warme lucht Slangaansluiting (kant ven- ster) Slangaansluiting (kant air- conditioner) vensterkit Afstandsbediening Opmerking: Alle afbeeldingen in deze handleiding zijn enkel ter verduidelijking. Uw toestel ziet er mogelijk lichtjes anders uit. INSTALLATIERICHTLIJNEN • De eenheid moet op een stevige ondergrond geplaatst worden om geluid en trillingen te minimaliseren.
  • Seite 93 AFVOEREN VAN WARME LUCHT In de koelmodus moet het apparaat dicht bij een raam of opening geplaatst worden zodat de warme lucht naar buiten kan geleid worden. Plaats de eenheid op een vlakke ondergrond en garandeer dat er een vrije ruimte van 30 cm (12”) rond de eenheid is en dat er een stopcontact in de buurt is.
  • Seite 94: Beschrijving Van Het Bedieningspaneel

    BESCHRIJVING VAN HET BEDIENINGSPANEEL Controleer of de afvoerslang juist werd gemonteerd. Aandachtspunten voor koelen en ontvochtigen: - Wacht bij het gebruiken van de functies voor koelen en ontvochtigen minstens 3 minuten tussen het AAN/UIT zetten. - Voedingsspanning voldoet aan de vereisten. - Het stopcontact biedt wisselspanning.
  • Seite 95 Bediening van de timer Timer AAN zetten: - Druk, als de airconditioner UIT staat, op de toets “Timer” en selecteer de tijd waarop het toestel AAN moet schakelen via de toetsen voor het instellen van temperatuur en tijd. - “Ingesteld tijdstip voor AANSCHAKELEN” wordt weergegeven op het bedieningspaneel.
  • Seite 96 HANDMATIG OF VIA DE AFSTANDSBEDIENING 1. POWER Toets Aan/Uit 2. MODE MODUS-toets 3. TIMER Uurprogrammering 4. SPEED Toets ventilatorsnelheid 5. TEMP+ Toets temperatuur verhogen 6. TEMP- Toets temperatuur verlagen 7. SLEEP Toets nachtstand 8. SWING Toets automatische luchtstroom Max. 7 meter DE LUCHTFILTERS REINIGEN Om uw apparaat effectief te laten werken moet u na elke week van gebruik het filter reinigen.
  • Seite 97 REINIGING Schakel vóór het reinigen of onderhouden het toestel uit door op de toets POWER te drukken op het besturingspaneel of de afstandsbediening. Wacht gedurende enkele minuten en trek de stekker uit het stopcontact DE BEHUIZING REINIGEN U moet het apparaat reinigen met een licht vochtige doek en daarna afdrogen met een droge doek.
  • Seite 98: Garantiebepalingen

    PROBLEMEN OPLOSSEN Problemen Mogelijke oorzaken Voorgestelde oplossingen Het lampje van de Laat het water uit de watertank waterindicator knippert en de lopen. watertank is vol. EENHEID SCHAKELT - De kamertemperatuur is hoger NIET AAN NA HET dan de ingestelde temperatuur. Reset de temperatuur DRUKKEN OP DE (Elektrische verwarmingsmodus)
  • Seite 99 De verzendkosten en het risico van het opsturen van de airconditioner of onder delen daarvan, komen altijd voor rekening van de koper. Schade, veroorzaakt door het niet gebruiken van de geschikte Qlima filters, valt buiten de garantie. Om onnodige kosten te voorkomen, raden wij u aan eerst altijd zorgvuldig de gebruiksaanwijzing te raadplegen.
  • Seite 100 TECHNISCHE SPECIFICATIES Indicatief gebruiken, wijzigingen voorbehouden Model P 926 P 935 Koelcapaciteit* 2600 3500 Verwarmingscapaciteit* EER* EE-klasse* COP* COP-klasse* Verbruik in de modus KOELEN 1000 1345 Verbruik in de modus VERWARMEN Verbruik in de modus Stand-by Nominale stroom V / Hz Voeding 230/50/1 230/50/1...
  • Seite 102: Componentes Importantes

    COMPONENTES IMPORTANTES Painel de controlo Grelha de entrada Grelha de saída do ar Drenagem do condensador Pega (ambos os lados) 1. LEIA AS INSTRUÇÕES DE UTILIZAÇÃO PRIMEIRO. 2. EM CASO DE DÚVIDA, ENTRE EM CONTACTO COM O REVENDEDOR.
  • Seite 103 Caro utilizador, Parabéns pela aquisição do seu ar condicionado. Este ar condicionado tem três funções além da refrigeração de ar, nomeadamente desumidificação, circulação e filtração do ar. O ar condicionado portátil é extremamente fácil de operar e mover. Adquiriu um produto de alta qualidade que lhe proporcionará...
  • Seite 104 INSTRUÇŐES DE SEGURANÇA Leia atentamente este manual do utilizador antes de utilizar o aparelho e guarde-o para referência futura. Instale este dispositivo ape- nas quando estiver em conformidade com a legislação, normas e normas locais/nacionais. Este produto destina-se a ser utilizado como um ar condicionado em casas residenciais e adequado apenas para ser utilizado em locais secos, em condições domésticas normais, no...
  • Seite 105 • A tomada e a fonte de alimentação são adequadas para o dispositivo. • A ficha no cabo encaixa na tomada. • O dispositivo está numa superfície estável e plana. Caso não tenha a certeza de que tudo está em bom estado, a instalação elétrica deve ser verificada por um especialista reconhecido.
  • Seite 106 lar - devem ser sempre realizadas por um engenheiro de serviço reconhecido. O incumprimento desta recomendação pode levar a anulação da garantia. • Desligue sempre a ficha da tomada quando o dispositivo não estiver a ser utilizado. • Um cabo elétrico danificado só pode ser substituído pelo fornecedor ou por uma pessoa autorizada/ponto de serviço.
  • Seite 107: Peças Incluídas

    ATENÇÃO! • Nunca utilize o dispositivo com um cabo de alimentação, ficha, quadro ou painel de controlo danificado. Nunca prenda o cabo de alimentação ou deixe que entre em contacto com extremidades afiadas. • Nunca torne a divisão onde o dispositivo vai ser utilizado totalmente hermética.
  • Seite 108: Instalação

    INSTALAÇÃO • A unidade deve ser colocada numa base firme para minimizar o ruído e a vibração. Para um posicionamento seguro. coloque a unidade num piso liso e plano, resistente o suficiente para suportar a unidade. • A unidade possui rodízios para facilitar a colocação, mas deve ser transportada em superfícies lisas e planas.
  • Seite 109 INSTALAÇÃO DO KIT DESLIZANTE DA JANELA 1 Peças: A) Painel B) Painel com um orifício 2 Montagem: Deslize a fita do painel C no painel A e dimensione de acordo com o tamanho da janela. Os tamanhos das janelas variam. Ao dimensionar a largura da janela, certifique-se de que a montagem do kit da janela está...
  • Seite 110 Operação da ventoinha - Prima o botão “Mode” (modo) até o ícone “Fan” (ventoinha) ser apresentado. - Prima o botão “WIND” (vento) para selecionar a velocidade do vento. Operação de aquecimento (esta função não está disponível para unidades apenas de refrigeração) - Prima o botão “Mode”...
  • Seite 111 MANUAL DO CONTROLO REMOTO 1. POWER Interruptor ligar/desligar 2. MODE Seletor de MODOS 3. TIMER Programação de horas 4. SPEED Seletor da velocidade da ventoinha 5. TEMP+ Seletor de aumento de temperatura 6. TEMP- Seletor de redução de temperatura 7. SLEEP Seletor de funcionamento noturno 8.
  • Seite 112 MÉTODO DE DRENAGEM DE ÁGUA Mangueira de drenagem LIMPEZA Antes da limpeza ou manutenção, desligue o aparelho premindo o botão Q) no painel de controlo ou no controlo remoto, aguarde alguns minutos e, em seguida, desligue da tomada de alimentação. LIMPEZA DO QUADRO Deve limpar o aparelho com um pano ligeiramente húmido e, em seguida, secar com um pano seco.
  • Seite 113: Condições Da Garantia

    RESOLUÇÃO DE PROBLEMAS Problemas Causas possíveis Soluções sugeridas - A luz indicadora de água cheia pisca e o depósito de água está Despeje a água do tanque de água. cheio. - A temperatura ambiente A UNIDADE NÃO é superior à temperatura LIGA AO PREMIR Redefina a temperatura.
  • Seite 114: Manual De Instruções

    Os custos de transporte e os riscos envolvidos durante o transporte do ar condicionado ou os componentes do ar condicionado devem ser sempre suportados pelo comprador. Os danos causados pela não utilização de adequados filtros Qlima não são abrangidos pela garantia. Para evitar gastos desnecessários, recomendamos que consulte sempre primeiro cuidadosamente as instruções de utilização.
  • Seite 115 DADOS TÉCNICOS Para serem utilizados como indicação, sujeitos a modificações Modelo P 926 P 935 Capacidade de refrigeração* 2600 3500 Capacidade de aquecimento* EER* Classe EE* COP* Classe COP* Consumo energético em modo 1000 1345 COOLING (Refrigeração) Consumo energético em modo HEATING (Aquecimento) Consumo energético - modo de espera...
  • Seite 116: Navodila Za Uporabo

    POMEMBNO KOMPONENTE Nadzorna plošča Rešetka na vhodu Mreža odvoda zraka Odtok kondenzatorja Ročaj (obe strani) 1. NAJPREJ PREBERITE NAVODILA ZA UPORABO. 2. V PRIMERU KAKRŠNEGA KOLI DVOMA STOPITE V STIK S SVOJIM TRGOVCEM.
  • Seite 117 Spoštovana gospa, spoštovani gospod, čestitamo vam ob nakupu te klimatske naprave. Klimatska naprava ima tri funkcije poleg hlajenja zraka, tj. razvlaževanje, kroženje in filtracijo zraka. Mobilno klimatsko napravo se upravlja in premika z lahkoto. Kupili ste visoko kakovosten izdelek, ki vam bo dolga leta zagotavljal udobje, če ga boste uporabljali odgovorno.
  • Seite 118 VARNOSTNA NAVODILA Ta priročnik za namestitev pozorno preberite preden namestite izdelek. To napravo name- stite samo, če je skladna s krajevnimi/držav- nimi zakoni, uredbami in standardi. Ta izde- lek je namenjen za uporabo kot klimatska naprava v stanovanjskih hišah in je primeren samo za uporabo na suhih mestih, v vsakda- njih pogojih, v notranjih prostorih v dnevni sobi, kuhinji in garaži.
  • Seite 119 • Vtič na kablu je primeren za vtičnico. • Naprava je na stabilni in ravni površini. Če o tem, ali je vse v redu, niste prepričani, naj električno inštalacijo preveri pooblaščeni električar. • Klimatska naprava je varna naprava, izde- lana v skladu z varnostnimi standardi CE. Kljub temu je treba biti pri njeni uporabi previden, kot pri vseh električnih napravah.
  • Seite 120 nite vtič iz vtičnice. • Poškodovan električni kabel lahko zamenja samo dobavitelj ali pooblaščena oseba/ser- visna točka. • Ta naprava ni namenjena, da bi jo upora- bljale osebe (vključno z otroci) z zmanjša- nimi fizičnimi, čutnimi ali duševnimi spo- sobnostmi ali osebe s pomanjkanjem izku- šenj in znanja, razen če se jih nadzira ali so prejele navodila glede uporabe naprave od osebe, ki je odgovorna za njihovo varnost.
  • Seite 121: Priloženi Deli

    POZOR! • Naprave nikoli ne uporabljajte s poškodovanim električnim kablom, vtičem, omarico ali upravljalno ploščo. Električnega kabla nikoli ne postavite pod druge predmete ali pustite, da bi prišel v stik z ostrimi robovi. • Sobe, kjer boste uporabljali to napravo, nikoli ne zatesnite popolnoma nepredušno za zrak.
  • Seite 122 NAMESTITEV • Enoto je treba namestiti na trden temelj, da se minimizira hrup in vibracije. Za varno in dobro namestitev na položaj morate enoto položiti na gladka, ravna tla, ki so dovolj močna za podporo enote. • Enota ima kolesca, ki pomagajo pri namestitvi enote na položaj, vendar se jih lahko uporablja samo na gladki, ravni površini.
  • Seite 123 2 Sestavljanje: Trak plošče C potisnite v ploščo A in velikost prilagodite širini okna. Velikosti oken so različne. Pri prilagajanju širini okna morate med merjenjem poskrbeti, da bo sklop kompleta za okno brez vrzeli in/ali zračnih žepkov. OPIS PRIKAZOVALNEGA ZASLONA Preverite, ali je cev za izpušni zrak nameščena pravilno.
  • Seite 124 Delovanje časovnika Timer ON setting: - Kadar je klimatska naprava v stanju OFF (izklopljena), pritisnite gumb »Timer« (časovnik) in z gumbi za nastavljanje temperature in časa izberite tisti čas, ko želite, da je enota VKLOPLJENA. - Na upravljalnem zaslonu se prikaže »Preset ON Time«. - Čas VKLOPA lahko regulirate med 0 in 24 urami.
  • Seite 125 PRIROČNIK ZA DALJINSKI UPRAVLJALNIK 1. POWER Stikalo za vklop/izklop 2. MODE Gumb za izbiro načina (MODE) 3. TIMER Urno programiranje 4. SPEED Gumb za izbiro hitrosti ventilatorja 5. TEMP+ Gumb za povišanje temperature 6. TEMP- Gumb za zmanjšanje temperature Gumb za izbiro nočnega načina 7.
  • Seite 126 ČIŠČENJE Pred čiščenjem ali vzdrževanjem izklopite napravo, tako da pritisnete gumb POWER) na upravljalni plošči ali daljinskem upravljalniku, počakajte nekaj minut, nato pa napravo izklopite iz električnega omrežja. ČIŠČENJE OMARICE Napravo očistite z rahlo navlaženo krpo, nato pa jo obrišite s suho krpo. •...
  • Seite 127 ODPRAVLJANJE TEŽAV Težave Morebitni vzroki Predlogi za odpravljanje - Lučka za napolnjenost z vodo utripa, rezervoar za vodo pa je Odlijte vodo iz rezervoarja za vodo. poln. - Temperatura prostora je višja PO PRITISKU GUMBA od nastavljene temperature. Ponastavite temperaturo. ON/OFF SE ENOTA NE (Način električnega ogrevanja) VKLOPI...
  • Seite 128: Pogoji Za Garancijo

    Prevozni stroški in tveganja, povezana s prevozom klimatske naprave ali delov klimatske naprave gre vedno na stroške kupca. Poškodbe, ki jih povzroči uporaba nepravih filtrov Qlima, ni zajeta z garancijo. Za preprečitev nepotrebnih stroškov priporočamo, da si vedno najprej pozorno preberete navodila za uporabo.
  • Seite 129 TEHNIČNI PODATKI Uporabljajte jih kot pomoč, lahko se spremenijo Model P 926 P 935 Kapaciteta hlajenja* 2600 3500 Grelna kapaciteta* EER* Razred EE* COP* Razred COP* Poraba električne energije v nači- 1000 1345 nu HLAJENJA Poraba električne energije v nači- nu OGREVANJA Poraba električne energije v nači- nu pripravljenosti...
  • Seite 130: Garancijski List

    Garancija velja na geografskem območju republike Slovenije Garancija ne izključuje pravi potrošnika, ki izhajajo iz odgovornosti prodajalca za napake na blagu GARANCIJSKI ROK:  model  doba  QLIMA  2 leti                            Proizvajalec: PVG International b.v., Kanaalstraat 12C – 5347 AB Oss, Nizozemska Proizvod (obkroži): Razvlaževalec, prenosna klima, čistilec zraka, električni grelec...
  • Seite 132 Jos haluat huoltoapua, lisätietoja tai laitteen kanssa tulee ongelmia, tutustu verkkosivustoon osoitteessa www.qlima.com tai kysy neuvoa PVG kuluttajapalvelukeskuksesta (www.qlima.com). If you need information or if you have a problem, please visit the our website (www.qlima.com) or contact our sales support (you find its phone number on www.qlima.com) Per informazioni e in caso di problemi, visitate il sito Web www.qlima.com oppure contattate il Centro Assistenza Clienti (per conoscere il...

Inhaltsverzeichnis