Herunterladen Inhalt Inhalt Diese Seite drucken
Inhaltsverzeichnis

Werbung

Verfügbare Sprachen

Verfügbare Sprachen

Multichannel Power Amplifier
Amplificateur de Puissance
Multicanaux
Mehrkanal-Verstärker
Eindversterker voor
Meerdere Kanalen

Werbung

Inhaltsverzeichnis

Fehlerbehebung

loading

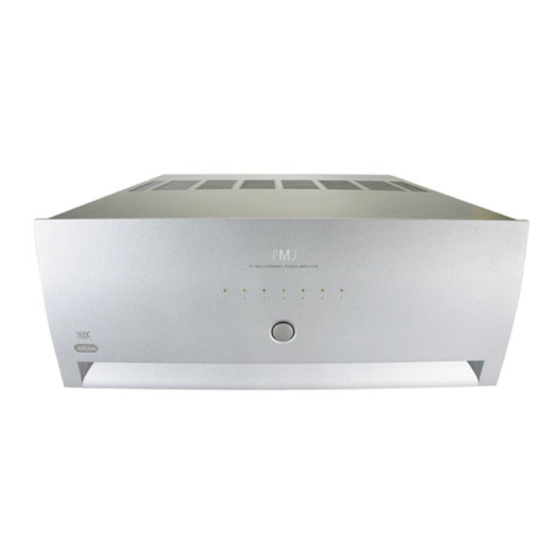
Inhaltszusammenfassung für Arcam FMJ P7

  • Seite 1 Multichannel Power Amplifier Amplificateur de Puissance Multicanaux Mehrkanal-Verstärker Eindversterker voor Meerdere Kanalen...
  • Seite 3: Inhaltsverzeichnis

    This handbook has been designed to give you all the information you CONTENTS need to install, connect, set up and use the Arcam FMJ P7 Multichannel Power Amplifier. It may be that the P7 has been installed and set up as part of your Using this handbook..............
  • Seite 4: Safety Guidelines

    Safety guidelines 8. Cleaning CAUTION ATTENTION Unplug the unit from the mains supply before cleaning. RISK OF ELECTRIC RISQUE DE CHOC ELECTRIQUE SHOCK DO NOT OPEN NE PAS OUVRIR The case should normally only require a wipe with a soft, damp, lint- free cloth.
  • Seite 5: Getting Started With Your P7

    For optimum soundstage imaging, try to keep the right and left speaker cables the same length.You are also advised to route the signal cables, speaker cables and mains power cables away from each other to minimize interference. Contact your Arcam dealer or installer for details of suitable cables.
  • Seite 6: Installation

    Installation AUDIO AUDIO AUDIO AUDIO AUDIO AUDIO AUDIO – – – – – – – 4-16 OHMS 4-16 OHMS 4-16 OHMS 4-16 OHMS 4-16 OHMS 4-16 OHMS 4-16 OHMS 7. RS BACK 6. R SURR 5. R FRONT 4. CENTRE 3.
  • Seite 7: Connecting To Loudspeakers

    230V) indicated on the rear panel of the unit. If your mains supply voltage or mains plug is different, consult your Arcam dealer or Arcam Customer Support on +44 (0)1223 203200. PLUGGING IN Push the plug (high current IEC line socket) of the power cable supplied with the unit into the socket in the back of the unit.
  • Seite 8: Operating Your P7

    Operating your P7 P7 MULTICHANNEL POWER AMPLIFIER FRONT PANEL LAYOUT OPERATING PROCEDURE The P7 front panel has a single control: a centrally located power on/off Once the relevant connections have been made, the P7 can be button. switched on using the central button on the front panel. POWER SWITCHING ON Switches the unit on and off.
  • Seite 9: Beforeyou Start

    NOTE: If you do not remove the shorting links from the speaker terminals, the speakers will still be single-wired! Connect the cables as shown in the diagram below, ensuring correct polarity at all times. Arcam P7 power amplifier Arcam P7 power amplifier – –...
  • Seite 10: Troubleshooting

    Troubleshooting NO LIGHTS ON THE UNIT HUM ON AN AMPLIFIER OUTPUT Check that: Check that:   the power cord is plugged into the P7 and the mains socket all cables are making a good connection. If necessary withdraw outlet it is plugged into is switched on. the cable from the connector and plug it back in again.
  • Seite 11: Fault Status Indicators

    FAULT STATUS INDICATORS The LED patterns below indicate the following fault conditions: LED status Description Amplifier action All LEDs are green This is the normal operating state of the amplifier. None During power up all LEDs stay red The amplifier is waiting for the DC offset fault lines To verify excessive DC offset voltage, remove the for an extended time to clear.
  • Seite 12: Technical Specifications

    E&OE CONTINUAL IMPROVEMENT POLICY RADIO INTERFERENCE Arcam has a policy of continual improvement for its products. This The P7 is an audio device which has been designed to very high means that designs and specifications are subject to change without standards of electromagnetic compatibility.
  • Seite 13: Guarantee

    You can register your Arcam product on line at: Arcam distributor in the country of residence. It should be sent carriage prepaid by a reputable carrier – NOT by post. No responsibility can www.arcam.co.uk...
  • Seite 15: Utilisation De Ce Manuel

    Utilisation de ce manuel............. 15 Il se peut que le P7 ait été installé et mis en place dans le cadre de votre installation Hi-Fi ou home cinéma par un revendeur Arcam agréé. Consignes de sécurité ..............16 Dans ce cas, vous pouvez souhaiter passer les sections de ce manuel Conseils de sécurité...
  • Seite 16: Consignes De Sécurité

    Consignes de sécurité Pour le nettoyage, utilisez un chiffon doux, humide et non pelucheux. CAUTION ATTENTION N’utilisez pas de diluant pour peinture ou de solvant chimique. RISK OF ELECTRIC RISQUE DE CHOC ELECTRIQUE SHOCK DO NOT OPEN NE PAS OUVRIR L’emploi d’aérosols ou de produits de nettoyage pour meubles est déconseillé, car le passage d’un chiffon humide risquerait de laisser des ATTENTION : Pour éviter tout risque de choc électrique, ne pas...
  • Seite 17: Préparation Du P7

    Dolby Digital et DTS, lorsque le signal est émis à partir votre haut-parleur central car c’est lui qui reproduit l’ensemble des d’un processeur de type THX Surround EX, tel que le Arcam AV8. dialogues dans un système de home cinéma.
  • Seite 18: Installation

    Installation AUDIO AUDIO AUDIO AUDIO AUDIO AUDIO AUDIO – – – – – – – 4-16 OHMS 4-16 OHMS 4-16 OHMS 4-16 OHMS 4-16 OHMS 4-16 OHMS 4-16 OHMS 7. RS BACK 6. R SURR 5. R FRONT 4. CENTRE 3.
  • Seite 19: Raccordement Aux Haut-Parleurs

    (100V, 115V ou 230V) indiqué sur le panneau arrière de l’appareil. Si la tension d’alimentation ou la prise principale est différente, consultez votre revendeur Arcam ou le support technique d’Arcam au +44 (0)1223 203200. RACCORDEMENT AU RÉSEAU Introduisez la prise (prise de ligne IEC fort courant) du câble...
  • Seite 20: Fonctionnement De Votre P7

    Fonctionnement de votre P7 P7 MULTICHANNEL POWER AMPLIFIER Les LED deviennent orange par paires les unes après les autres SCHÉMA DU PANNEAU AVANT en partant du centre vers les bords, à un intervalle d’environ une seconde. La LED centrale devient verte et le « clic » du relais se fait Le panneau avant du P7 présente une commande unique : un bouton entendre.
  • Seite 21: Avent De Commencer

    Bi-câblage et bi-amplification des haut-parleurs AVENT DE COMMENCER BI-AMPLIFICATION DEVOTRE SYSTÈME Les performances de votre système peuvent être encore améliorées AVERTISSEMENT : ne pas effectuer de branchement si votre par rapport au niveau obtenu grâce au bi-câblage. Pour cela, il faut amplificateur est sous tension ou connecté...
  • Seite 22: Dépannage

    Dépannage AUCUNE LUMIÈRE SUR L’APPAREIL SOUFFLE SUR UNE SORTIE D’AMPLIFICATEUR Vérifiez que : Vérifiez que :   le cordon d’alimentation est raccordé au P7 et à la prise tous les câbles sont bien branchés. Si nécessaire, retirez le d’alimentation principale (secteur). Si la prise de courant est câble du connecteur et rebranchez-le.
  • Seite 23: Indicateurs D'état D'erreur

    INDICATEURS D’ÉTAT D’ERREUR Les schémas de LED ci-dessous indiquent les conditions d’erreur suivantes : Etat de la LED Description Action de l’amplificateur Toutes les LED sont vertes. Cela correspond à l’état de fonctionnement normal Aucune. de l’amplificateur. Lors de la mise sous tension, toutes L’amplificateur attend que les lignes d’erreur de Pour vérifier que la tension de décalage c.c.
  • Seite 24: Spécifications Techniques

    E&OE POLITIQUE D’AMÉLIORATION CONTINUE INTERFÉRENCES RADIO Arcam a une politique d’amélioration continue de ses produits. Le P7 est un système audio conçu dans le respect de normes de Cela signifie que les schémas et spécifications sont susceptibles de compatibilité électromagnétiques très strictes.
  • Seite 25: Garantie

    Arcam, communiquez avec LA GARANTIE COUVRE : le service à la clientèle Arcam au +44 (0) 1223 203200 ou par écrit, à l’adresse ci-dessus, et nous ferons de notre mieux pour vous aider.
  • Seite 27: Hinweise Zum Handbuch

    Hinweise zum Handbuch Dieses Handbuch enthält Informationen, die Sie zum Installieren, INHALT Anschließen, Einrichten und Betreiben des Arcam FMJ P7 Mehrkanal- Verstärkers benötigen. Hinweise zum Handbuch ............27 Es ist möglich, dass der P7 alsTeil Ihrer Hifi- oder Heimkinoanlage bereits von einem qualifizierten Arcam-Händler installiert und eingestellt...
  • Seite 28: Sicherheitsrichtlinien

    Sollten Sie einen ungewöhnlichen Geruch bemerken oder Rauch am 1. Beachten Sie die Warnungen und Anweisungen Gerät entdecken, schalten Sie es aus und ziehen Sie den Netzstecker. Wenden Sie sich dann sofort an Ihren Arcam-Händler. Vor der Inbetriebnahme dieses Gerätes sollten Sie die entsprechenden 15.Wartung Sicherheits- und Betriebsanweisungen lesen.
  • Seite 29: Einstieg In Ihren P7

    Kabel gleicher Länge, um eine optimale Soundstage- Bildausgabe zu gewährleisten.Außerdem raten wir Ihnen, die Signal-, Lautsprecher- und Netzkabel in einigem Abstand zueinander zu verlegen, um Störungen auf ein Minimum zu halten. Einzelheiten über geeignete Kabel erfahren Sie von Ihrem Arcam- Händler oder Installateur.
  • Seite 30: Installation

    Installation AUDIO AUDIO AUDIO AUDIO AUDIO AUDIO AUDIO – – – – – – – 4-16 OHMS 4-16 OHMS 4-16 OHMS 4-16 OHMS 4-16 OHMS 4-16 OHMS 4-16 OHMS 7. RS BACK 6. R SURR 5. R FRONT 4. CENTRE 3.
  • Seite 31: Anschließen Der Lautsprecher

    (100V, 115V oder 230V) übereinstimmt, bevor Sie das Gerät anschließen. Sollte Ihre Netzspannung nicht übereinstimmen oder Ihr Netzstecker nicht passen, wenden Sie sich bitte an Ihren Arcam-Händler oder an den Arcam-Kundendienst unter +44 (0)1223 203200. ANSCHLIESSEN Drücken Sie den Stecker (IEC- Hochstrombuchse) des mitgelieferten Netzkabels in die Netzbuchse an der Geräterückseite.
  • Seite 32: Bedienung Des P7

    Bedienung des P7 P7 MULTICHANNEL POWER AMPLIFIER STEUERELEMENTE AN DER BETRIEBSABLAUF VORDERSEITE Sobald Sie die entsprechenden Verbindungen hergestellt haben, kann der P7 über den zentral auf der Frontplatte positionierten Knopf Die Frontplatte des P7 besitzt einen einzigen Schalter: ein zentral eingeschaltet werden.
  • Seite 33: Befor Sie Anfangen

    Bi-Wiring und Bi-Amping der Lautsprecher BEFOR SIE ANFANGEN BI-AMPING DER ANLAGE Sie können die Leistung der Anlage weiter verbessern, indem Sie das WARNUNG: Schließen Sie keine Geräte am Verstärker an, Prinzip des Bi-Wiring erweitern und jeweils einen Verstärker für den während dieser eingeschaltet oder mit dem Netz verbunden ist.
  • Seite 34: Fehlersuche

    Fehlersuche KEIN AUFLEUCHTEN AM GERÄT BRUMMEN AN EINEM VERSTÄRKERAUSGANG Prüfen Sie, ob: Prüfen Sie, ob:   das Verbindungskabel angeschlossen alle Kabel richtig eingesteckt wurden. Ziehen Sie die Kabel entsprechende Netzsteckdose an ist. notfalls aus den Anschlüssen und stecken Sie sie erneut ein. (Schalten Sie zuvor jedoch das Gerät aus.) ...
  • Seite 35: Fehlerstatusanzeigen

    FEHLERSTATUSANZEIGEN Die unten angegebenen LED-Muster zeigen folgende Fehlerzustände an: LED-Status Beschreibung Verstärkermaßnahme Alle LEDs blinken grün auf. Der Verstärker befindet sich normalen Keine Betriebszustand. Beim Hochfahren bleiben alle LEDs Der Verstärker wartet, bis DC-Offset- Um festzustellen, ob die DC-Offsetspannung zu längere Zeit rot.
  • Seite 36: Technische Daten

    Gewicht: 31kg netto; 35kg mit Verpackung Irrtümer und Auslassungen vorbehalten LAUFENDE VERBESSERUNGEN STÖRGERÄUSCHE Arcam befolgt eine Politik der ständigen Produktverbesserung. Das Der P7 ist als Audiogerät auf elektromagnetische Störfreiheit von Design und die technischen Daten können sich deshalb ohne weiteren höchstem Niveau ausgelegt.
  • Seite 37: Garantie

    Reparaturen entstehen. Außerdem wird keinerlei Verantwortung PROBLEME? für Schäden oder Verlust des Gerätes während des Transports zum Wenn Ihr Händler Ihre Fragen zu diesem oder einem anderen Arcam- oder vom Garantienehmer übernommen. Produkt nicht beantworten kann, wenden Sie sich an:...
  • Seite 39: Gebruik Van Deze Handleiding

    Gebruik van deze handleiding Deze handleiding is bedoeld om u alle informatie te verstrekken die INHOUDSOPGAVE u nodig hebt om de Arcam FMJ P7 Eindversterker voor meerdere kanalen te installeren, aan te sluiten en in te stellen. Gebruik van deze handleiding........... 39 Mogelijk is de P7 door een gekwalificeerde Arcam-dealer geïnstalleerd...
  • Seite 40: Veiligheidsrichtlijnen

    Veiligheidsrichtlijnen 8. Reiniging CAUTION ATTENTION Ontkoppel de eenheid van het lichtnet voordat reiniging plaatsvindt. RISK OF ELECTRIC RISQUE DE CHOC ELECTRIQUE SHOCK DO NOT OPEN NE PAS OUVRIR De kast hoeft normaal alleen met een zachte, vochtige, lintvrije doek afgeveegd te worden. Gebruik geen verfverdunners of andere WAARSCHUWING:Verwijder de behuizing (of achterkant) niet om chemische oplosmiddelen om de apparatuur te reinigen.
  • Seite 41: Aan De Slag Met De P7

    De P7 Eindversterker voor meerdere kanalen is geproduceerd op basis Op de P7 kunnen maximaal zeven luidsprekers worden aangesloten. van de hoge eisen die Arcam stelt op het vlak van ontwerp en fabricage. Alle luidsprekers, met uitzondering van de subwoofer, dienen rond Het is een zeer krachtige eindversterker voor meerdere kanalen, die uw normale kijk-/luisterpositie te worden opgesteld (zie tekening).
  • Seite 42: Installatie

    Installatie AUDIO AUDIO AUDIO AUDIO AUDIO AUDIO AUDIO – – – – – – – 4-16 OHMS 4-16 OHMS 4-16 OHMS 4-16 OHMS 4-16 OHMS 4-16 OHMS 4-16 OHMS 7. RS BACK 6. R SURR 5. R FRONT 4. CENTRE 3.
  • Seite 43: Verbinding Met Luidsprekers Tot Stand Brengen

    Als uw netspanning of uw stroomstekker niet geschikt is, neemt u zeggen rood (+) op rood en zwart (–) op zwart). contact op met uw Arcam-dealer of met de Klantenservice van Arcam op het nummer + 44 (0)1223 203200. Als u uw luidsprekers wilt voorzien van dubbele bedrading of ze dubbel...
  • Seite 44: De P7 Gebruiken

    De P7 gebruiken P7 MULTICHANNEL POWER AMPLIFIER INDELINGVOORPANEEL GEBRUIKSPROCEDURE Het voorpaneel van de P7 heeft één knop: een aan/uit-knop die zich Wanneer de benodigde aansluitingen tot stand zijn gebracht, kan de P7 midden op het paneel bevindt. worden aangezet met de centrale knop op het voorpaneel. AAN/UIT -KNOP AANZETTEN Hiermee zet u het apparaat aan en uit.
  • Seite 45: Voordat U Begint

    Bi-wiring en bi-amping van luidsprekers VOORDAT U BEGINT BI-AMPINGVAN UW SYSTEEM U kunt de prestaties van uw systeem nog beter maken dan bij het WAARSCHUWING: Niets op uw versterker aansluiten terwijl hij gebruik van dubbele bedrading het geval is. U kunt het principe namelijk aanstaat of op het lichtnet aangesloten is.
  • Seite 46: Storingen Verhelpen

    Storingen verhelpen LAMPJES OP HET APPARAAT BRANDEN NIET VAN VERSTERKER AFKOMSTIG GELUID BROMT Controleer of: Controleer of:   de stroomkabel op de P7 is aangesloten en of de netspanning alle kabels goed zijn aangesloten.Trek indien nodig de stekker uit is ingeschakeld op het stopcontact waarop het apparaat is het stopcontact en steek hem er weer in.
  • Seite 47: Foutstatusaanduidingen

    FOUTSTATUSAANDUIDINGEN De onderstaande patronen van de controlelampjes geven de volgende foutsituaties aan: Status controlelampjes Beschrijving Wat gebeurt met de versterker Alle controlelampjes zijn groen. Dit is de normale status van de versterker in Niets bedrijf. aanzetten blijven alle De versterker wacht totdat de gelijstroomoffs Om te controleren of er sprake is van een te hoge controlelampjes gedurende lange tijd etstoringen zijn verdwenen.
  • Seite 48: Technische Specificaties

    De P7 is een audioapparaat dat is ontworpen volgens zeer hoge standaarden op het vlak van elektromagnetische compatibiliteit. Het Arcam stelt zich ten doel haar producten voortdurend te verbeteren. apparaat kan RF (radiofrequentie)-energie uitstralen. Soms kan dit Dit betekent dat ontwerpen en specificaties zonder kennisgeving storing veroorzaken in de ontvangst van FM- en AM-radiosignalen.
  • Seite 49: Garantie

    Arcam-product te beantwoorden, neemt u contact op met de claimt. klantendienst van Arcam op +44 (0) 1223 203200. U kunt ons ook op het bovenstaande adres bereiken. We zullen ons best doen u te DE GARANTIE DEKT: helpen.
  • Seite 52 PEMBROKE AVENUE, WATERBEACH, CAMBRIDGE CB5 9QR, ENGLAND telephone +44 (0)1223 203200 fax +44 (0)1223 863384 email support@arcam.co.uk website www.arcam.co.uk The paper used in this handbook is produced from sustainable forests and recycled materials (up to 20%) using a chlorine-free process. Printed in the U.K.

Inhaltsverzeichnis