Silvercrest HG00783A Montage-, Bedienungs- Und Sicherheitshinweise
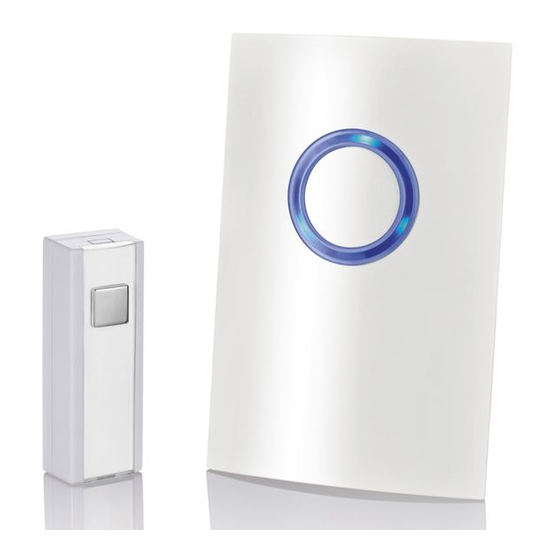
Design-funktürklingel
Vorschau ausblenden
Andere Handbücher für HG00783A:
- Montage-, bedienungs- und sicherheitshinweise (103 Seiten) ,
- Montage-, bedienungs- und sicherheitshinweise (101 Seiten) ,
- Montage-, bedienungs- und sicherheitshinweise (101 Seiten)
Inhaltsverzeichnis
Werbung
Verfügbare Sprachen
Verfügbare Sprachen
TIMBRE INALÁMBRICO /
CAMPANELLO SENZA FILI
TIMBRE INALÁMBRICO
Instrucciones de montaje, de uso y de seguridad
CAMPAINHA DE PORTA
DE DESIGN SEM FIOS
Indicações de montagem, utilização e segurança
DESIGN-FUNKTÜRKLINGEL
Montage-, Bedienungs- und Sicherheitshinweise
IAN 284941
CAMPANELLO SENZA FILI
Istruzioni di montaggio, d'uso e di sicurezza
PREMIUM WIRELESS DOORBELL
Assembly, operating and safety instructions
Werbung
Kapitel
Inhaltsverzeichnis

Verwandte Anleitungen für Silvercrest HG00783A


Inhaltszusammenfassung für Silvercrest HG00783A
- Seite 1 TIMBRE INALÁMBRICO / CAMPANELLO SENZA FILI TIMBRE INALÁMBRICO CAMPANELLO SENZA FILI Instrucciones de montaje, de uso y de seguridad Istruzioni di montaggio, d’uso e di sicurezza CAMPAINHA DE PORTA PREMIUM WIRELESS DOORBELL DE DESIGN SEM FIOS Assembly, operating and safety instructions Indicações de montagem, utilização e segurança DESIGN-FUNKTÜRKLINGEL Montage-, Bedienungs- und Sicherheitshinweise...
- Seite 2 Instrucciones de montaje, de uso y de seguridad Página IT / MT Istruzioni di montaggio, d’uso e di sicurezza Pagina Indicações de montagem, utilização e segurança Página GB / MT Assembly, operating and safety instructions Page DE / AT / CH Montage-, Bedienungs- und Sicherheitshinweise Seite...
- Seite 3 Necesita ø 6 mm Vi servono Necessita de You need Sie benötigen: HG00783A HG00783B...
- Seite 7 12 18 C B A...
- Seite 8 4 - 12V, AC/ 4 - 12V, DC...
-
Seite 9: Inhaltsverzeichnis
Introducción ................Página Uso conforme a su finalidad ............Página Descripción de piezas ..............Página Volumen de suministro ..............Página Datos técnicos .................Página Seguridad ...................Página Indicaciones generales de seguridad ...........Página Indicaciones de seguridad sobre las pilas / baterías ....Página Montaje ..................Página 11 Puesta en funcionamiento ...........Página 11 Colocar / quitar las pilas ..............Página 11 Sincronizar emisor / receptor ............Página 12... -
Seite 10: Introducción
Timbre inalámbrico Introducción Enhorabuena por la adquisición de su nuevo producto. Ha optado por un producto de alta calidad. El manual de instrucciones forma parte de este producto. Contiene importantes indicaciones sobre se- guridad, uso y eliminación. Antes de usar el producto, familiarícese con todas las indicaciones de manejo y de seguridad. -
Seite 11: Volumen De Suministro
Botón de selección del tipo de señal (acústica, visual, óptica y visual) Botón de selección del tono de aviso Botón de volumen/sincronización Tapa del compartimento para pilas Colgador Compartimento para pilas Emisor Timbre Placa para el nombre Bloqueo Soporte (para montaje en pared) Compartimento para pila Cubierta interior Montaje... -
Seite 12: Datos Técnicos
3 pilas 1,5 V (corriente continua), tipo AA (receptor) 1 pila 3 V (corriente continua), tipo CR2032 (transmisor) 3 tornillos (para el emisor y para el montaje en la pared del transmisor) 3 tacos 5 placas para nombre (para el timbre de la puerta) 1 manual de instrucciones Datos técnicos Alcance:... -
Seite 13: Indicaciones Generales De Seguridad
¡CONSERVE TODAS LAS INDICACIONES DE SEGURIDAD Y AD- VERTENCIAS POR SI NECESITA CONSULTARLAS MÁS ADELANTE! Indicaciones generales de seguridad Este producto puede ser utilizado por niños mayores de 8 años, así como por personas con capacidades físicas, sensoriales o mentales reducidas o que cuenten con poca experiencia y/o falta de conocimientos, siempre y cuando se les haya enseñado cómo utilizar el producto de forma segura y hayan comprendido los peligros que pueden resultar de un mal uso del mismo. - Seite 14 cortocircuito ni tampoco las abra. Estas podrían recalentarse, ex- plotar o provocar un incendio. Nunca arroje pilas / baterías al fuego o al agua. No aplique cargas mecánicas sobre las pilas / baterías. Riesgo de sulfatación de las pilas / baterías Evite condiciones y temperaturas extremas que puedan influir en el funcionamiento de las pilas / baterías, por ejemplo, acercarlas a un radiador o exponerlas directamente a la luz solar.
-
Seite 15: Montaje
Introduzca las pilas / baterías teniendo en cuenta la polaridad marcada con (+) y (-) tanto en las pilas / baterías como en el producto. ¡Limpie los contactos de las pilas / baterías y del compartimento para pilas antes de colocarlas! Retire inmediatamente las pilas / baterías agotadas del producto. -
Seite 16: Sincronizar Emisor/Receptor
Receptor (véase fig. B): Retire la tapa del compartimento para pilas de la parte posterior del receptor. Retire las pilas gastadas si fuese necesario. Introduzca 3 pilas (1,5 V (corriente continua), tipo AA). Nota: Compruebe la polaridad correcta. Esta se indica en el compartimento de las pilas Cierre la tapa del compartimento de las pilas Emisor:... -
Seite 17: Configurar El Tipo De Señal
Para sincronizar el emisor y el receptor, siga los siguientes pasos: En cuanto coloque las pilas, el receptor activará el modo de sin- cronización durante unos 2 minutos. El indicador de señal receptor se ilumina fijo en color azul durante el modo de sincroni- zación. -
Seite 18: Configurar El Volumen
pulsar el botón de selección del tipo de señal . Sonará una se- ñal. El receptor reproducirá la señal acústica. Vuelva a pulsar el botón de selección del tipo de señal . El receptor mostrará la señal visual. Configurar el volumen Pulse el botón del volumen hasta alcanzar el nivel de volumen deseado. -
Seite 19: Conectar El Emisor A Un Sistema De Timbre Existente/Timbre Existente
Conectar el emisor a un sistema de timbre existente/timbre existente Retire el soporte de la parte trasera del emisor pulsando el bloqueo y quite la cubierta de goma (véase fig. C1). Abra la cubierta interior utilizando un destornillador de estrella (véase fig. F). Con un destornillador, retire el clip de plástico de la salida del cable (véase fig. -
Seite 20: Conectar A Un Timbre Existente
del timbre en el contacto C del emisor y el polo negativo del con- tacto A del emisor deberán estar conectados. ¡IMPORTANTE! Nunca intercambie la polaridad. De lo contrario, el producto podría resultar dañado (para obtener más detalles consulte la fig. I). Los terminales de conexión A y C que se muestran en la fig. -
Seite 21: Limpieza Y Conservación
caso, retire las pilas del emisor y del receptor durante al menos 2 minutos. A continuación, proceda tal y como se describe en „Sincronizar emisor/receptor“. Las descargas electroestáticas pueden provocar perturbaciones en el funcionamiento. Si se producen tales fallos, retire las pilas brevemente y colóquelas de nuevo. - Seite 22 El producto y el material de embalaje son reciclables. Separe los materiales para un mejor tratamiento de los residuos. El logotipo Triman se aplica solo para Francia. Para obtener información sobre las posibilidades de dese- cho del producto al final de su vida útil, acuda a la admi- nistración de su comunidad o ciudad.
-
Seite 23: Informaciones
Nosotros OWIM GmbH & Co. KG, Stiftsbergstraße 1, DE-74167 Neckarsulm, ALEMANIA, declaramos en responsabilidad única que el producto: Timbre inalámbrico, modelo n.° HG00783A / HG00783B, versión: 03 / 2017, al que esta declaración hace referencia, cumple con todas las normas / y la normativa de los documentos de 1999/5/CE. - Seite 24 Este producto dispone de una garantía de 3 años desde la fecha de compra. El plazo de garantía comienza a partir de la fecha de com- pra. Por favor, conserve adecuadamente el justificante de compra ori- ginal. Este documento se requerirá como prueba de que se realizó la compra.
- Seite 25 Introduzione ................Pagina 22 Scopo d’impiego ................Pagina 22 Quadro sinottico dei componenti ..........Pagina 22 Dotazione ..................Pagina 23 Dati tecnici ..................Pagina 24 Sicurezza ..................Pagina 24 Avvisi di sicurezza generali ............Pagina 25 Avvertenze di sicurezza per batterie / accumulatori ....Pagina 25 Montaggio .................Pagina 27 Avvio ....................Pagina 27 Inserimento / sostituzione delle batterie ........Pagina 27...
-
Seite 26: Scopo D'impiego
Campanello senza fili Introduzione Congratulazioni per l‘acquisto del vostro nuovo prodotto. Avete optato per un prodotto di alta qualità. Le istruzioni d‘uso sono parte integrante di questo prodotto. Esse contengono importanti avvertenze sulla sicurezza, l‘impiego e lo smaltimento. Prima dell‘utilizzo del pro- dotto, prendere conoscenza di tutte le istruzioni d‘uso e delle avver- tenze di sicurezza. -
Seite 27: Dotazione
Tasto volume/Tasto sincronizzazione Coperchio vano portabatterie Dispositivo di sospensione Vano portabatterie Trasmettitore Tasto del campanello Targhetta per il nome Dispositivo di blocco Sostegno (per montaggio a parete) Vano portabatterie Copertura interiore Montaggio Copertura in gomma Vite Tassello Uscita per il cavo Supporto per il cavo Dotazione 1 Trasmettitore... -
Seite 28: Dati Tecnici
3 Tasselli 5 Targhette nome (per il campanello) 1 Manuale di istruzioni Dati tecnici Portata: 150 m (zona aperta) Frequenza di trasmissione: 434 MHz Tipi di batteria: Ricevitore: 3 x 1,5 V (corrente continua) (Tipo AA / LR6), Emettitore: 1 x 3 V (corrente continua) (Tipo CR2032) Ricevitore:... -
Seite 29: Avvisi Di Sicurezza Generali
CONSERVI TUTTE LE ISTRUZIONI E GLI AVVISI DI SICUREZZA PER CONSULTARLI IN FUTURO! Avvisi di sicurezza generali Questo prodotto può essere usato da bambini a partire dagli 8 anni di età e da persone con capacità fisiche, sensoriali o mentali limitate, oppure senza esperienza e conoscenza in me- rito, qualora sorvegliati o istruiti circa un uso sicuro del prodotto, comprendendo i pericoli ad esso connessi. - Seite 30 Non gettare mai le batterie / gli accumulatori nel fuoco o in acqua. Non esercitare alcuna pressione meccanica sulle batterie / sugli accumulatori. Rischio di perdita di liquido dalle batterie / dagli accumulatori Evitare condizioni e temperature estreme che possano ripercuo- tersi sulle batterie / sugli accumulatori, quali ad esempio la vicinanza a termosifoni o l‘irraggiamento solare diretto.
-
Seite 31: Montaggio
Inserire le batterie / gli accumulatori secondo il contrassegno della polarità (+) e (-) sulla batteria / sull‘accumulatore del prodotto. Pulire i contatti della batteria / dell‘accumulatore e del vano portabatterie prima dell‘inserimento! Rimuovere immediatamente le batterie / gli accumulatori esausti dal prodotto. -
Seite 32: Sincronizzazione Trasmettitore / Ricevitore
Ricevitore (vedere fig. B): Rimuovere il coperchio del vano portabatterie situato sulla parte posteriore del ricevitore. Rimuovere eventualmente le batterie scariche. Inserire le 3 batterie (da 1,5 V (corrente continua), tipo AA). Nota: Inserendo le batterie, fare attenzione a che sia rispettata la corretta polarità. -
Seite 33: Impostazione Del Tipo Di Segnale
Sincronizzare trasmettitore e ricevitore come segue: Appena le batterie verranno inserite, il ricevitore entrerà in moda- lità di sincronizzazione per ca. 2 minuti. L‘indicatore del segnale sul ricevitore rimane illuminato costantemente di blu durante la modalità di sincronizzazione. Potete passare alla modalità sincronizzazione anche manual- mente, tenendo premuto il tasto di sincronizzazione per ca. -
Seite 34: Impostazione Del Volume
il ricevitore riprodurrà un segnale acustico. Premere nuovamente il tasto per la scelta del tipo di segnale . Adesso il ricevitore indicherà la segnalazione ottica. Impostazione del volume Premere il tasto del volume , fino a raggiungere il volume desiderato. Ci sono 4 possibilità di impostazione del volume to- tali: molto alto, alto, medio, basso. -
Seite 35: Collegare Il Trasmettitore Al Sistema Per Campanello / Campanello Esistente
Collegare il trasmettitore al sistema per campanello / campanello esistente Rimuovere il supporto dal retro del trasmettitore premendo sul dispositivo di blocco e togliere la copertura in gomma (vedere figura C1). Aprire la copertura interiore con un cacciavite a stella (vedere figura F). -
Seite 36: Collegare A Un Tasto Del Campanello Esistente
continua, il polo positivo deve essere collegato al contatto C del trasmettitore e il polo negativo al contatto A del trasmettitore. IMPORTANTE! Non scambiare mai la polarità. Il prodotto po- trebbe danneggiarsi (per dettagli osservare la fig. I). I morsetti di collegamento A e C, posti sul retro del trasmettitore come indicato in fig. -
Seite 37: Pulizia E Manutenzione
trasmettitore e dal ricevitore per ca. 2 minuti. Procedete infine come descritto sotto “Sincronizzazione dell’emettitore / ricevitore“. Scariche elettrostatiche possono portare a disturbi nella funzione. Togliete in caso di tali disturbi per breve tempo le pile e inseritele nuovamente. Procedete infine come descritto sotto “Sincronizzazione dell’emettitore / ricevitore”. - Seite 38 Il prodotto e il materiale da imballaggio sono riciclabili. Smaltire separatamente per un ottimale trattamento dei rifiuti. Il logo Triman è valido solamente per la Francia. E’ possibile informarsi circa le possibilità di smaltimento del prodotto usato presso l’amministrazione comunale o cittadina.
-
Seite 39: Dichiarazione Di Conformità
Neckarsulm, GERMANIA, dichiariamo sotto la nostra esclusiva responsabilità che il prodotto: Campanello senza fili, modelli n° HG00783A / HG00783B, Versione: 03 / 2017, alla quale si riferi- sce questa dichiarazione, è conforme alle norme / documenti norma- tivi di cui alla Direttiva 1999/5/EC. - Seite 40 acquisto. Conservare lo scontrino di acquisto originale in buone con- dizioni. Questo documento servirà a documentare l‘avvenuto acquisto. Il prodotto da Lei acquistato dà diritto ad una garanzia di 3 anni a partire dalla data di acquisto. La presente garanzia decade nel caso di danneggiamento del prodotto, di utilizzo o di manutenzione inadeguati.
- Seite 41 Introdução .................Página 38 Utilização adequada ..............Página 38 Vista geral das peças ..............Página 38 Material fornecido ................Página 39 Dados técnicos ................Página 40 Segurança ..................Página 40 Indicações gerais de segurança ...........Página 41 Indicações de segurança relativas às pilhas / baterias ....Página 41 Montagem .................Página 43 Colocação em funcionamento...
-
Seite 42: Introdução
Campainha de porta de design sem fios Introdução Damos-lhe os parabéns pela aquisição do seu novo produto. Acabou de adquirir um produto de grande qualidade. O manual de instru- ções é parte integrante deste produto. Contém indicações importan- tes referentes à segurança, utilização e eliminação. Familiarize-se com todas as indicações de utilização e de segurança do produto. -
Seite 43: Material Fornecido
Botão do volume/botão de sincronização Tampa do compartimento das pilhas Dispositivo de suspensão Compartimento das pilhas Emissor Botão da campainha Placa de identificação Bloqueio Suporte (para montagem na parede) Compartimento das pilhas Cobertura interior Montagem Cobertura de borracha Parafuso Bucha Saída do cabo Suporte do cabo Material fornecido... -
Seite 44: Dados Técnicos
3 buchas 5 placas de identificação (para a campainha) 1 manual de instruções Dados técnicos Alcance: 150 m (espaço aberto) Frequência de emissão: 434 MHz Tipos de pilhas: Recetor: 3 x 1,5 V (corrente contínua) (tipo AA / LR6), emissor: 1 x 3 V (corrente contínua) (tipo CR2032) Recetor:... -
Seite 45: Indicações Gerais De Segurança
Indicações gerais de segurança Esse produto pode ser utilizado por crianças a partir dos 8 anos, assim como por pessoas com capacidades físicas, sensoriais ou mentais reduzidas ou deficiências na experiência e conhecimento, se forem vigiadas ou instruídas em relação ao uso seguro do pro- duto e se compreenderem os perigos que daí... - Seite 46 Risco de derrame das pilhas / baterias Evite condições e temperaturas extremas que possam ter efeito sobre as pilhas ou baterias, por ex. elementos de aquecimento / radiação solar direta. Evite o contacto com a pele, olhos e mucosas! Em caso de con- tacto com o ácido das pilhas, lave imediatamente as zonas afe- tadas com água limpa e consulte um médico logo que possível! UTILIZAR LUVAS DE PROTECÇÃO! As pilhas ou...
-
Seite 47: Montagem
Montagem Nota: Para a montagem do produto precisas de uma chave de fenda e um berbequim. Nota: Utilize para a montagem apenas os parafusos e buchas fornecidos. Aplicar o recetor (ver fig. D) Aplicar o emissor (ver fig. E) Colocação em funcionamento Colocar/substituir as pilhas Antes do inicio da operação do produto, insira baterias para o fornecimento de energia. -
Seite 48: Sincronizar O Emissor / Recetor
Emissor: Remova o suporte na parte traseira do emissor ao pressionar na trava e retire a cobertura em borracha (ver fig. C1). Retire as pilhas usadas, se necessário (ver fig. C2). Insira uma pilha (3 V (corrente contínua), tipo CR 2032). O lado assinalado com „+“... -
Seite 49: Configurar O Tipo De Sinal
O indicador de sinal do recetor acende-se constantemente durante cerca de 1 minuto e mostra assim que o recetor se encontra em modo de sincronização. Prima o botão da campainha do emissor durante que o rece- tor se encontra no modo de sincronização. Assim que o recetor recebeu o sinal, a luz azul do indicador de sinal começa a piscar 6 vezes para assinalar que a sincronização foi bem suce-... -
Seite 50: Regular O Volume
Regular o volume Prima o botão do volume até atingir o volume desejado. Existe no total 4 configurações possíveis de volume: muito alto, alto, médio, baixo, muito baixo. Selecionar o sinal sonoro Nota: O produto dispões de 16 diferentes tons de sinalização. Prima o botão de seleção do toque da campainha . -
Seite 51: Ligar O Emissor A Um Sistema De Campainha Existente
Passe o cabo pelo suporte do cabo e pela saída do cabo (ver fig. H). Ligue o cabo com uma chave de fendas às ligações A e C (para um sistema de campainha já existente) ou às ligações B e C (para uma campainha já existente) (ver fig. H). Ligar o emissor a um sistema de campainha existente (ver fig. -
Seite 52: Ligar A Um Botão De Campainha Existente
Nota: Caso tenha dificuldades na instalação, consulte um técnico eletricista especializado. Ligar a um botão de campainha existente (ver fig. J) O botão da campainha não pode estar ligado com o sistema de campainha existente. As pilhas devem permanecer no emissor. Para isso, os terminais de ligação B e C são ligados com uma linha de dois fios ao botão da campainha. -
Seite 53: Limpeza E Conservação
Limpeza e conservação Nunca utilize líquidos e detergentes, pois estes danificam o produto. Limpe o produto somente na parte exterior com um pano seco e macio. Eliminação A embalagem é feita de materiais não poluentes que po- dem ser eliminados nos contentores de reciclagem locais. O ponto verde não vale para a Alemanha. -
Seite 54: Declaração De Conformidade
Neckarsulm, ALEMANHA, declaramos com o presente que o produto: Campainha de porta de design sem fios, n° do modelo: HG00783A / HG00783B, versão: 03 / 2017, no que se refere esta declaração, corresponde às normas/aos documentos normativos da diretiva 1999/5/CE. -
Seite 55: Garantia
Se necessário, pode efetuar o download desta documentação em www.owim.com. Garantia O producto foi cuidadosamente fabricado segundo rigorosas directi- vas de qualidade e meticulosamente testado antes da sua distribuição. Em caso de falhas deste producto, possui direitos legais relativamente ao vendedor do producto. Os seus direitos legais não estão limitados pela garantia representada de seguida. - Seite 56 A garantia é válida em caso de defeitos de material ou de fabrico. Esta garantia não é extensível a componentes do produto que se desgastam com o uso e que, por isso, podem ser consideradas peças de desgaste (por ex.º pilhas) ou a danos em peças frágeis, por ex.º interruptores, baterias ou peças de vidro.
- Seite 57 Introduction ..................Page 54 Intended use ..................Page 54 Parts and features ................Page 54 Included items ..................Page 55 Technical data ..................Page 56 Safety ....................Page 56 General safety information ..............Page 57 Safety instructions for batteries / rechargeable batteries ....Page 57 Assembly ..................Page 59 Preparing for use ..............Page 59 Inserting / replacing the batteries ............Page 59...
-
Seite 58: Introduction
Premium Wireless Doorbell Introduction We congratulate you on the purchase of your new product. You have chosen a high quality product. The instructions for use are part of the product. They contain important information concerning safety, use and disposal. Before using the product, please familiarise yourself with all of the safety information and instructions for use. -
Seite 59: Included Items
Volume / Synchronisation button Battery compartment cover Hanger Battery compartment Transmitter Chime button Name plate Lock Holder (for wall mounting) Battery compartment Inner cover Mounting Rubber cover Screw Dowel Cable exit hole Cable holder Included items 1 Transmitter 1 Receiver 3 Batteries 1.5 V (direct current), type AA (receiver) 1 Battery 3 V... -
Seite 60: Technical Data
3 Dowels 5 Name plates (for the doorbell) 1 Operating instructions Technical data Range: 150 m (unobstructed area) Transmission frequency: 434 MHz Battery types: Receiver: 3 x 1.5 V (direct current) (type AA / LR6), Transmitter: 1 x 3 V (direct current) (type CR2032) Receiver:... -
Seite 61: General Safety Information
General safety information This product can be used by children aged from 8 years and above and persons with reduced physical, sensory or mental ca- pabilities or lack of experience and knowledge if they have been given supervision or instruction concerning use of the product in a safe way and understand the hazards involved. - Seite 62 Risk of leakage of batteries / rechargeable batteries Avoid extreme environmental conditions and temperatures, which could affect batteries / rechargeable batteries, e.g. radiators / direct sunlight. Avoid contact with the skin, eyes and mucous membranes. In the event of contact with battery acid, thoroughly flush the affected area with plenty of clean water and seek immediate medical attention.
-
Seite 63: Assembly
Assembly Note: You will need a screwdriver and a drill to assemble the product. Note: Only use the screws and dowels supplied for the assembly of the product. Mount the receiver (see Fig. D) Mount the transmitter (see Fig. E) Preparing for use Inserting / replacing the batteries Insert the batteries to provide power to the product before pre-... -
Seite 64: Synchronising Transmitter / Receiver
Transmitter: Remove the holder by pressing the lock from the back of the transmitter and remove the rubber cover (see fig. C1). Remove the used batteries, if present (see fig. C2). Insert a battery (3 V (direct current), type CR 2032). The side marked “+”... -
Seite 65: Setting The Signal Type
Press the chime button of the transmitter, while the receiver is in synchronise mode. If the receiver receives the signal, the steady blue light of the signal indicator flickers 6 times to indicate that the synchronization is successful. Setting the signal type The receiver can indicate the reception of a door signal either both optically and acoustically, acoustically or optically. -
Seite 66: Setting The Volume
Setting the volume Press the volume button until the desired volume is reached. There are a total of 4 possible volume settings: very loud, loud, medium, soft. Selecting the chime Note: The product has 16 different chimes. Press the melody selection button . -
Seite 67: Connecting The Transmitter To A Existing Bell System
Insert the cable through cable holder and cable exit hole (see fig. H). Connect cable to the terminals A and C (for connecting to exist- ing doorbell) or the terminals B and C (for connecting to existing door bell button) by using screw driver (see fig. H). Connecting the transmitter to a existing bell system (see Fig. -
Seite 68: Connecting A Existing Doorbell Button
Connecting a existing doorbell button (see Fig. J) The separate bell button must not be connected to the existing door- bell system. The battery must remain in the transmitter. The B and C terminals are to this purpose with a two-core cable connected to the bell push. -
Seite 69: Disposal
The product should only be cleaned on the outside with a soft dry cloth. Disposal The packaging is made entirely of recyclable materials, which you may dispose of at local recycling facilities. The Green Dot is not valid for Germany. Observe the marking of the packaging materials for waste separation, which are marked with abbreviations (a) and numbers (b) with following meaning: 1–7: plastics / 20–22:... -
Seite 70: Declaration Of Conformity
We, OWIM GmbH & Co. KG, Stiftsbergstraße 1, DE-74167 Neckar- sulm, GERMANY, hereby declare under our sole responsibility that the product: Premium Wireless Doorbell, Model No.: HG00783A / HG00783B, Version: 03 / 2017, to which this declaration refers, complies with the standards / normative documents of 1999 / 5 / EC. -
Seite 71: Warranty
The complete declaration of conformity can be viewed at: www.owim.com. Warranty The product has been manufactured to strict quality guidelines and meticulously examined before delivery. In the event of product defects you have legal rights against the retailer of this product. Your legal rights are not limited in any way by our warranty detailed below. - Seite 72 Einleitung ..................Seite 69 Bestimmungsgemäße Verwendung ...........Seite 69 Teileübersicht ..................Seite 69 Lieferumfang ..................Seite 70 Technische Daten................Seite 71 Sicherheit ..................Seite 71 Allgemeine Sicherheitshinweise ............Seite 72 Sicherheitshinweise für Batterien / Akkus ..........Seite 72 Montage ..................Seite 74 Inbetriebnahme ................Seite 74 Batterien einsetzen / wechseln ............Seite 74 Sender / Empfänger synchronisieren ..........Seite 75 Signalart einstellen ................Seite 76 Lautstärke einstellen ................Seite 77...
-
Seite 73: Einleitung
Design-Funktürklingel Einleitung Wir beglückwünschen Sie zum Kauf Ihres neuen Produkts. Sie haben sich damit für ein hochwertiges Produkt entschieden. Die Bedienungs- anleitung ist Teil dieses Produkts. Sie enthält wichtige Hinweise für Sicherheit, Gebrauch und Entsorgung. Machen Sie sich vor der Benut- zung des Produkts mit allen Bedien- und Sicherheitshinweisen vertraut. -
Seite 74: Lieferumfang
Klingelton-Auswahltaste Lautstärketaste / Synchronisationstaste Batteriefachdeckel Aufhängevorrichtung Batteriefach Sender Klingeltaste Namensschild Sperre Halterung (für Wandmontage) Batteriefach Innenabdeckung Montage Gummiabdeckung Schraube Dübel Kabelausgang Kabelhalterung Lieferumfang 1 Sender 1 Empfänger 3 Batterien 1,5 V (Gleichstrom), Typ AA (Empfänger) 1 Batterie 3 V (Gleichstrom), Typ CR2032 (Sender) 70 DE/AT/CH... -
Seite 75: Technische Daten
3 Schrauben (für Sender und für Wandmontage des Empfängers) 3 Dübel 5 Namensschilder (für die Türklingel) 1 Bedienungsanleitung Technische Daten Reichweite: 150 m (offener Bereich) Sendefrequenz: 434 MHz Batterietypen: Empfänger: 3 x 1,5 V (Gleichstrom) (Typ AA / LR6), Sender: 1 x 3 V (Gleichstrom) (Typ CR2032) Empfänger:... -
Seite 76: Allgemeine Sicherheitshinweise
Allgemeine Sicherheitshinweise Dieses Produkt kann von Kindern ab 8 Jahren und darüber sowie von Personen mit verringerten physischen, sensorischen oder men- talen Fähigkeiten oder Mangel an Erfahrung und Wissen benutzt werden, wenn sie beaufsichtigt oder bezüglich des sicheren Ge- brauchs des Produkts unterwiesen wurden und die daraus resul- tierenden Gefahren verstehen. -
Seite 77: Risiko Der Beschädigung Des Produkts
Risiko des Auslaufens von Batterien / Akkus Vermeiden Sie extreme Bedingungen und Temperaturen, die auf Batterien / Akkus einwirken können z. B. auf Heizkörpern / direkte Sonneneinstrahlung. Vermeiden Sie den Kontakt mit Haut, Augen und Schleimhäuten! Spülen Sie bei Kontakt mit Batteriesäure die betroffenen Stellen sofort mit klarem Wasser und suchen Sie umgehend einen Arzt auf! SCHUTZHANDSCHUHE TRAGEN! Ausgelaufene oder beschädigte Batterien / Akkus können bei Berüh-... -
Seite 78: Montage
Montage Hinweis: Für die Montage des Produkts benötigen Sie einen Schraubendreher und eine Bohrmaschine. Hinweis: Verwenden Sie für die Montage nur die mitgelieferten Schrauben und Dübel. Empfänger anbringen (siehe Abb. D) Sender anbringen (siehe Abb. E) Inbetriebnahme Batterien einsetzen / wechseln Legen Sie vor der Inbetriebnahme des Produkts Batterien zur Energieversorgung ein. -
Seite 79: Sender / Empfänger Synchronisieren
Sender: Entfernen Sie die Halterung auf der Rückseite des Senders, indem Sie auf die Sperre drücken, und entfernen Sie die Gummiabdeckung (siehe Abb. C1). Entfernen Sie ggf. verbrauchte Batterien (siehe Abb. C2). Legen Sie eine Batterie (3 V (Gleichstrom), Typ CR 2032) ein. Die mit „+“... -
Seite 80: Signalart Einstellen
Die Signalanzeige am Empfänger leuchtet für ca. 1 Minute konstant auf und zeigt dadurch, dass der Empfänger im Synchro- nisationsmodus ist. Drücken Sie die Klingeltaste des Senders, während der Empfänger im Synchronisationsmodus ist. Sobald der Empfänger das Signal empfangen hat, flackert das blaue Licht der Signalan- zeige 6-mal auf, um zu signalisieren, dass die Synchronisation erfolgreich war. -
Seite 81: Lautstärke Einstellen
Lautstärke einstellen Drücken Sie die Lautstärketaste , bis die gewünschte Lautstärke er- reicht ist. Es gibt insgesamt 4 mögliche Lautstärkeeinstellungen: sehr laut, laut, mittel, leise. Signalton auswählen Hinweis: Das Produkt verfügt über 16 unterschiedliche Signaltöne. Drücken Sie die Klingelton-Auswahltaste . Der erste Signalton erklingt. -
Seite 82: Sender An Eine Vorhandene Klingelanlage Anschließen
Entfernen Sie mittels eines Schraubendrehers den Kunststoffclip am Kabelausgang (siehe Abb. G). Stecken Sie das Kabel durch Kabelhalterung und Kabelaus- gang (siehe Abb. H). Schließen Sie das Kabel mittels eines Schraubendrehers an den An- schlüssen A und C (für bestehendes Türklingelsystem) oder an den Anschlüssen B und C (für bestehende Türklingel) an (siehe Abb. -
Seite 83: An Eine Vorhandene Klingeltaste Anschließen
Hinweis: Wenden Sie sich an eine Elektrofachkraft, falls Sie bei der Installation Schwierigkeiten haben sollten. An eine vorhandene Klingeltaste anschließen (siehe Abb. J) Die Klingeltaste darf nicht mit der vorhandenen Klingelanlage verbun- den sein. Die Batterie muss im Sender bleiben. Die Anschlussklemmen B und C werden zu diesem Zweck mit einer zweiadrigen Leitung an der Klingeltaste angeschlossen. -
Seite 84: Reinigung Und Pflege
Reinigung und Pflege Verwenden Sie in keinem Fall Flüssigkeiten und keine Reinigungs- mittel, da diese das Produkt beschädigen. Reinigen Sie das Produkt nur äußerlich mit einem weichen, trocke- nen Tuch. Entsorgung Die Verpackung besteht aus umweltfreundlichen Materia- lien, die Sie über die örtlichen Recyclingstellen entsorgen können. -
Seite 85: Konformitätserklärung
Wir, OWIM GmbH & Co. KG, Stiftsbergstraße 1, DE-74167 Neckar- sulm, DEUTSCHLAND, erklären in alleiniger Verantwortung, dass das Produkt: Design-Funktürklingel, Modell-Nr.: HG00783A / HG00783B, Version: 03 / 2017, auf das sich diese Erklärung bezieht, mit den Normen / normativen Dokumenten der 1999/5/EG übereinstimmt. -
Seite 86: Garantie
Die komplette Konformitätserklärung finden Sie unter: www.owim.com. Garantie Das Produkt wurde nach strengen Qualitätsrichtlinien sorgfältig produ- ziert und vor Anlieferung gewissenhaft geprüft. Im Falle von Mängeln dieses Produkts stehen Ihnen gegen den Verkäufer des Produkts gesetz- liche Rechte zu. Diese gesetzlichen Rechte werden durch unsere im Fol- genden dargestellte Garantie nicht eingeschränkt. - Seite 87 Die Garantieleistung gilt für Material- oder Fabrikationsfehler. Diese Garantie erstreckt sich nicht auf Produktteile, die normaler Abnutzung ausgesetzt sind (z. B. Batterien) und daher als Verschleißteile angese- hen werden können oder für Beschädigungen an zerbrechlichen Teilen, z. B. Schalter, Akkus oder die aus Glas gefertigt sind. DE/AT/CH...
- Seite 88 Stiftsbergstraße 1 DE-74167 Neckarsulm GERMANY Model no.: HG00783A/HG00783B Version: 03 / 2017 Estado de las informaciones · Versione delle informazioni · Estado das informações · Last Information Update · Stand der Informationen: 03 / 2017 · Ident.-No.: HG00783A/B032017-5 IAN 284941...