Herunterladen Inhalt Inhalt Diese Seite drucken
Powerfix Profi HG03064C Bedienungs- Und Sicherheitshinweise

Powerfix Profi HG03064C Bedienungs- Und Sicherheitshinweise

Bau- und holzfeuchtemessgerät
Inhaltsverzeichnis

Werbung

Verfügbare Sprachen
  • DE

Verfügbare Sprachen

  • DEUTSCH, seite 1
BAU- UND HOLZFEUCHTEMESSGERÄT /
MOISTURE METER / HUMIDIMÈTRE
BAU- UND HOLZFEUCHTEMESSGERÄT
Bedienungs- und Sicherheitshinweise
MOISTURE METER
Operation and Safety Notes
HUMIDIMÈTRE
Instructions d'utilisation et consignes de sécurité
BOUW- EN HOUTVOCHTIGHEIDSMETER
Bedienings- en veiligheidsinstructies
MĚŘIČ VLHKOSTI DŘEVA A STAVEBNÍCH
MATERIÁLŮ
Pokyny pro obsluhu a bezpečnostní pokyny
MEDIDOR DE HUMEDAD PARA MADERA
Y MATERIALES DE CONSTRUCCIÓN
Instrucciones de utilización y de seguridad
APARELHO DE MEDIÇÃO DA HUMIDADE
DA PEDRA E DA MADEIRA
Instruções de utilização e de segurança
IAN 288019

Werbung

Inhaltsverzeichnis
loading

Inhaltszusammenfassung für Powerfix Profi HG03064C

  • Seite 1 BAU- UND HOLZFEUCHTEMESSGERÄT / MOISTURE METER / HUMIDIMÈTRE BAU- UND HOLZFEUCHTEMESSGERÄT Bedienungs- und Sicherheitshinweise MOISTURE METER Operation and Safety Notes HUMIDIMÈTRE Instructions d‘utilisation et consignes de sécurité BOUW- EN HOUTVOCHTIGHEIDSMETER Bedienings- en veiligheidsinstructies MĚŘIČ VLHKOSTI DŘEVA A STAVEBNÍCH MATERIÁLŮ Pokyny pro obsluhu a bezpečnostní pokyny MEDIDOR DE HUMEDAD PARA MADERA Y MATERIALES DE CONSTRUCCIÓN Instrucciones de utilización y de seguridad...
  • Seite 2 DE / AT / CH Bedienungs- und Sicherheitshinweise Seite GB / IE Operation and Safety Notes Page FR / BE Instructions d‘utilisation et consignes de sécurité Page NL / BE Bedienings- en veiligheidsinstructies Pagina Pokyny pro obsluhu a bezpečnostní pokyny Strana Instrucciones de utilización y de seguridad...
  • Seite 5: Inhaltsverzeichnis

    Einleitung ...........Seite Bestimmungsgemäße Verwendung ..Seite Teilebeschreibung .........Seite Technische Daten ........Seite Lieferumfang ..........Seite Allgemeine Sicherheitshinweise ....Seite Sicherheitshinweise für Batterien / Akkus............Seite Vor der Inbetriebnahme ..Seite 10 Batterien einlegen / wechseln ..........Seite 10 Inbetriebnahme ......Seite 11 Bevor Sie eine Messung durchführen ...Seite 11 Messung durchführen ......Seite 12 Batterieanzeige ........Seite 14 Temperaturanzeige .......Seite 14...
  • Seite 6: Bau- Und Holzfeuchtemessgerät

    Bau- und Holzfeuchtemessgerät Einleitung Wir beglückwünschen Sie zum Kauf Ihres neuen Produkts. Sie haben sich damit für ein hochwertiges Produkt entschieden. Die Bedienungsanleitung ist Teil dieses Produkts. Sie enthält wichtige Hinweise für Sicherheit, Gebrauch und Entsorgung. Machen Sie sich vor der Benutzung des Produkts mit allen Bedien- und Sicherheitshinweisen vertraut.
  • Seite 7: Technische Daten

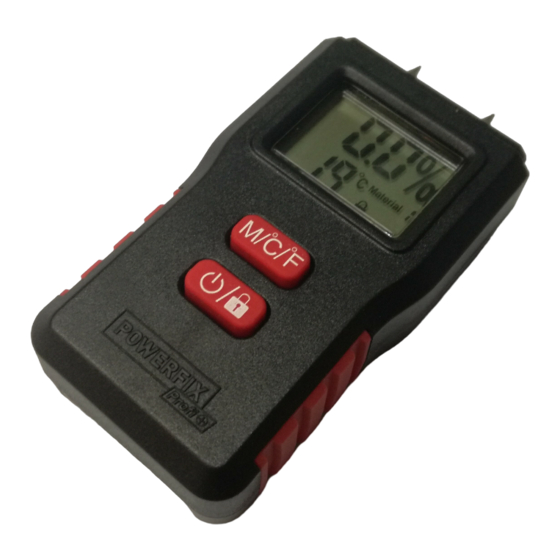
    RESET -Taste Batteriefachdeckel Batteriefach Display Feuchtigkeitsanzeige in % Materialnummer Anzeige für niedrigen Batteriezustand Schlosssymbol (Messwert eingefroren) Temperaturanzeige (°C oder °F) Technische Daten Betriebsspannung: (Gleichstrom) Batterietyp: 2 x LR03/AAA Temperaturgenauigkeit: + / - 1 °C Feuchtigkeitsgenauigkeit: A: Baumaterial unter 1,4%: +/- 0,3% über 1,4%: +/- 0,5% B: Holzmaterial unter 30 %: +/-2 %...
  • Seite 8: Allgemeine Sicherheitshinweise

    1 Bau- und Holzfeuchtemessgerät 2 LR03/AAA Batterien 1 Bedienungsanleitung Allgemeine Sicherheitshinweise Machen Sie sich vor der Benutzung des Produkts mit allen Bedien- und Sicherheitshinweisen vertraut. Händigen Sie alle Unterlagen bei Weitergabe des Produkts mit aus. Kontrollieren Sie das Produkt vor der Inbe- triebnahme auf Beschädigungen.
  • Seite 9: Sicherheitshinweise Für Batterien / Akkus

    Sicherheitshinweise für Batterien / Akkus LEBENSGEFAHR! Halten Sie Batterien / Ak- kus außer Reichweite von Kindern. Suchen Sie im Falle eines Verschluckens sofort einen Arzt auf! EXPLOSIONSGEFAHR! Laden Sie nicht aufladbare Batterien nie- mals wieder auf. Schließen Sie Batterien / Akkus nicht kurz und / oder öffnen Sie diese nicht.
  • Seite 10: Risiko Der Beschädigung Des Produkts

    Im Falle eines Auslaufens der Batterien / Akkus entfernen Sie diese sofort aus dem Produkt, um Beschädigungen zu vermeiden. Verwenden Sie nur Batterien / Akkus des gleichen Typs. Mischen Sie nicht alte Batte- rien / Akkus mit neuen! Entfernen Sie die Batterien / Akkus, wenn das Produkt längere Zeit nicht verwendet wird.
  • Seite 11: Inbetriebnahme

    Gehen Sie zum Einlegen der Batterien wie folgt vor: Öffnen Sie den Batteriefachdeckel auf der Rückseite des Produkts. Entnehmen Sie ggf. die alten Batterien. Setzen Sie 2 Batterien LR03 / AAA ein. Beach- ten Sie die richtige Polarität. Legen Sie die Batterien in das Batteriefach und schließen Sie den Deckel wieder, so dass er hörbar einrastet.
  • Seite 12: Messung Durchführen

    Faserrichtung an verschiedenen Stellen in das Holz ein. Messung durchführen Drücken Sie die -Taste , bis das Display eingeschaltet wird. Im Display erscheint „0,0 %“, die Umgebungstempera- tur in °C und das zuvor gewählte Material (1–6). Halten Sie die M-/ °C-/ °F -Taste ca.
  • Seite 13 nicht zum Verfeuern und muss erst weiter getrock- net werden. Hinweis: Bei Messungen, die unterhalb des Messbereichs liegen, zeigt das Display „0,0 %“ oder „Lo“ an. Bei Messungen, die oberhalb des Messbereichs liegen, zeigt das Display „Hi“ an. Entfernen Sie die Schutzkappe DE/AT/CH...
  • Seite 14: Batterieanzeige

    Drücken Sie beide Messstifte gleichzeitig gegen die Oberfläche. Nach ca. 1–2 Sekun- den können Sie den Prozentwert ablesen. Wenn Sie in einem Bereich messen, in dem Sie das Display nicht ablesen können, drücken Sie -Taste , um die Anzeige im Display einzufrieren.
  • Seite 15: Reset-Funktion

    RESET-Funktion Eine Kalibrierung kann durchgeführt werden, wenn direkt nach dem Einschalten des Produkts nicht 0,0 % auf dem Display angezeigt wird. Öffnen Sie hierzu das Batteriefach und drücken Sie mit- tels eines spitzen Gegenstandes die Reset-Taste auf der Rückseite des Produkts. Wenn der ange- zeigte Messwert noch nicht stimmt, drücken Sie erneut die Reset-Taste, um erneut zu kalibrieren.
  • Seite 16: Reinigung Und Pflege

    Elektrostatische Entladungen können zu Funktions- störungen führen. Entfernen Sie bei solchen Funk- tionsstörungen kurzzeitig die Batterien und setzen Sie sie erneut ein. Reinigung und Pflege Achten Sie darauf, dass keine Flüssigkeit in das Produkt eindringt. Andernfalls besteht Gefahr der Sachbeschädigung. Reinigen Sie das Produkt nur mit einem leicht angefeuchteten Tuch und einem milden Spül- mittel.
  • Seite 17: Entsorgung

    Entsorgung Die Verpackung besteht aus umwelt- freundlichen Materialien, die Sie über die örtlichen Recyclingstellen entsor- gen können. Der Grüne Punkt gilt nicht für Deutschland. Beachten Sie die Kennzeichnung der Verpackungsmaterialien bei der Abfall- trennung, diese sind gekennzeichnet mit Abkürzungen (a) und Nummern (b) mit folgender Bedeutung: 1–7: Kunststoffe / 20–22: Papier und Pappe / 80–98: Verbundstoffe.
  • Seite 18: Garantie

    Defekte oder verbrauchte Batterien / Akkus müs- sen gemäß Richtlinie 2006/66/EG und deren Änderungen recycelt werden. Geben Sie Batte- rien / Akkus und / oder das Produkt über die an- gebotenen Sammeleinrichtungen zurück. Umweltschäden durch falsche Entsorgung der Batterien / Akkus! Batterien / Akkus dürfen nicht über den Hausmüll entsorgt werden.
  • Seite 19 Fabrikationsfehler auf, wird das Produkt von uns – nach unserer Wahl – für Sie kostenlos repariert oder ersetzt. Diese Garantie verfällt, wenn das Produkt beschädigt, nicht sachgemäß benutzt oder gewartet wurde. Die Garantieleistung gilt für Material- oder Fabri- kationsfehler. Diese Garantie erstreckt sich nicht auf Produktteile, die normaler Abnutzung ausgesetzt sind (z.
  • Seite 20 Introduction ........Page 21 Intended use ..........Page 21 Parts description ........Page 21 Technical Data ........Page 22 Scope of delivery ........Page 22 General safety instructions ........Page 23 Safety instructions for batteries / rechargeable batteries......Page 23 Before using ........Page 25 Inserting / changing the batteries ..........Page 25 Start-up...
  • Seite 21: Introduction

    Moisture Meter Introduction We congratulate you on the purchase of your new product. You have chosen a high quality product. The instructions for use are part of the product. They contain important information concerning safety, use and disposal. Before using the product, please famil- iarise yourself with all of the safety information and instructions for use.
  • Seite 22: Technical Data

    Display Moisture indicator in % Material number Low battery indicator Lock symbol (Measured value frozen) Temperature display (°C or °F) Technical Data Operating voltage: (Direct Current) Battery type: 2 x LR03/AAA Temperature accuracy: + / - 1°C Humidity accuracy: A: building material below 1.4%: +/- 0.3% over 1.4%: +/- 0.5% B: wood material...
  • Seite 23: General Safety Instructions

    General safety instructions Before using the product, please familiarise your- self with all the operating and safety instructions. Please include all documentation when passing this product on to others. Check the product for damage before use. If the product is damaged do not use it. Do not expose the product to moisture.
  • Seite 24 DANGER OF EXPLOSION! Never recharge non-rechargeable batteries. Do not short-circuit bat- teries / rechargeable batteries and / or open them. Overheating, fire or bursting can be the result. Never throw batteries / rechargeable batter- ies into fire or water. Do not exert mechanical loads to batteries / rechargeable batteries.
  • Seite 25: Before Using

    Risk of damage of the product Only use the specified type of battery / rechargeable battery! Insert batteries / rechargeable batteries ac- cording to polarity marks (+) and (-) on the battery / rechargeable battery and the product. Clean the contacts on the battery / recharge- able battery and in the battery compartment before inserting! Remove exhausted batteries / rechargeable...
  • Seite 26: Start-Up

    Insert the batteries in the battery compart- ment and close the cover again, so that it audibly latches into place. Note: No button should be pressed while inserting the batteries. Start-up Before you take a measurement Ensure that both measuring pins touch the surface of the material at the same time.
  • Seite 27 the surrounding temperature in °C and the previously selected material (1–6) appears. Press the M / °C / °F button and hold it down for approximately 5 seconds to switch the temperature display between °C and °F. Press the M / °C / °F button to select the material number of which you wish to meas- ure the moisture level.
  • Seite 28 Note: When measuring under the measure- ment range, the display shows ‚0.0%‘ or ‚Lo‘. For measurements above the measure- ment range, the display shows ‚Hi‘. Remove the protective cap Press both measuring pins against the surface at the same time. After 1–2 seconds you can read the percentage value.
  • Seite 29: Battery Display

    button to freeze the result on the display. The display will then also show the lock symbol. Press the button again to take an- other measurement. If you have completed your measurement, switch the moisture measuring product off by pressing holding the button for more than 5 seconds.
  • Seite 30: Troubleshooting

    and press the reset button situated on the back- side of the product using a sharp object. If the dis- played reading is still not right, press the reset button again to calibrate again. Note: Do not remove the batteries while using RESET function.
  • Seite 31: Cleaning And Care

    Cleaning and Care Do not allow liquids to enter the product. Otherwise the product may be damaged. Only clean the product with a slightly damp- ened cloth and mild washing-up liquid. Clean the measuring pins with a slightly dampened cloth and dry it afterwards. Check the product for visible external dam- age before every use.
  • Seite 32 The product and packaging materials are recyclable, dispose of it separately for better waste treatment. The Triman logo is valid in France only. Contact your local refuse disposal authority for more details of how to dispose of your worn-out product. To help protect the environment, please dispose of the product properly when it has reached the end of its use-...
  • Seite 33: Warranty

    Warranty The product has been manufactured to strict qua- lity guidelines and meticulously examined before delivery. In the event of product defects you have legal rights against the retailer of this product. Your legal rights are not limited in any way by our warranty detailed below.
  • Seite 34 Introduction ........Page 35 Utilisation conforme ......Page 35 Descriptif des pièces ......Page 35 Caractéristiques techniques ....Page 36 Contenu de la livraison ......Page 37 Instructions générales de sécurité ..........Page 37 Consignes de sécurité relatives aux piles / aux piles rechargeables ....Page 38 Avant la mise en service ..Page 40 Insérer / remplacer les...
  • Seite 35: Introduction

    Humidimètre Introduction Nous vous félicitons pour l‘achat de votre nouveau produit. Vous avez opté pour un produit de grande qualité. Le mode d‘emploi fait partie intégrante de ce produit. Il contient des indications impor- tantes pour la sécurité, l’utilisation et la mise au rebut.
  • Seite 36: Caractéristiques Techniques

    Touche RESET Couvercle du compartiment à piles Compartiment à piles Écran Affichage de l‘humidité en % Numéro de matériau Affichage pour un niveau de batterie faible Symbole cadenas (valeur de mesure gelée) Affichage de la température (°C ou °F) Caractéristiques techniques Tension de service : (courant continu)
  • Seite 37: Contenu De La Livraison

    Contenu de la livraison Après avoir déballé le contenu de livraison, contrô- lez immédiatement son intégralité ainsi que l‘état irréprochable du produit et de toutes ses pièces. 1 Humidimètre 2 Piles LR03/AAA 1 Mode d‘emploi Instructions générales de sécurité Avant d‘utiliser le produit, veuillez prendre connaissance de toutes les instructions d’utilisa- tion et de sécurité.
  • Seite 38: Consignes De Sécurité Relatives Aux Piles / Aux Piles Rechargeables

    doivent pas être effectués par des enfants laissés sans surveillance. Les broches sont très pointues. Soyez toujours prudent lorsque vous travaillez avec ce produit. Remettez toujours le cache de protection sur le produit lorsque vous ne l‘utilisez plus. Vous risquez autrement de vous blesser ! Consignes de sécurité...
  • Seite 39: Risque D'endommagement Du Produit

    Évitez tout contact avec la peau, les yeux ou les muqueuses ! En cas de contact avec l’acide d’une pile, rincez la zone touchée à l’eau claire et consultez immédiatement un médecin ! PORTER DES GANTS DE PRO- TECTION ! Les piles / piles re- chargeables endommagées ou sujettes à...
  • Seite 40: Avant La Mise En Service

    Avant la mise en service Avant la mise en service, retirez le film de protection de l‘écran du produit et insérez les piles fournies. Insérer / remplacer les piles Lorsque l‘affichage pour un niveau de batterie faible apparaît sur l‘écran , les piles insé- rées sont presque épuisées, et doivent être rem- placées.
  • Seite 41: Opération De Mesure

    En cas de surface sensible, réalisez la mesure à un endroit qui n‘est pas dans le champ de vision. Remarque : Les broches sont pointues et peuvent s‘incruster dans la surface ou l‘en- dommager. Avant toute mesure, séchez la surface en ta- potant les résidus humides pouvant s‘y trouver.
  • Seite 42 Chaleur limitée – 16– Valeur combustible 20 % faible Ne convient pas 21– au chauffage – autre séchage né- 44 % cessaire Remarque : Le tableau présenté au préalable sert à mesurer le bois de chauffage. Lorsque l‘hu- midité mesurée est de 15% ou moins, le bois est idéal pour être brûlé.
  • Seite 43 Remarque : Lors de mesures qui se situent en-dessous de la plage de mesure, l‘écran af- fiche „0,0 %“ ou „Lo“. Remarque : Lors de mesures qui se situent au-dessus de la plage de mesure, l‘écran affiche „Hi“. Retirez le capuchon de protection Appliquez simultanément les deux broches contre la surface.
  • Seite 44: Affichage De L'usure De La Pile

    Si vous effectuez la mesure dans un environ- nement où vous ne pouvez pas consulter l‘écran, appuyez sur la touche , afin de geler l‘affichage sur l‘écran. L‘écran affiche ensuite le symbole supplémentaire du cadenas. Rappuyez une nouvelle fois sur la touche , afin de pouvoir opérer une nouvelle mesure.
  • Seite 45: Fonction Reset

    Fonction RESET Un calibrage peut être exécuté lorsque 0,0 % n‘apparaît pas directement sur l‘écran après l‘al- lumage du produit. Ouvrez alors le compartiment à piles, et en vous aidant d‘un objet pointu, appuyez sur la touche Reset située à l‘arrière du produit. Lorsque la valeur de mesure affichée ne concorde pas, appuyez de nouveau sur la touche Reset, afin d‘effectuer un nouveau calibrage.
  • Seite 46: Nettoyage Et Entretien

    Les décharges électrostatiques peuvent occasion- ner des dysfonctionnements. En cas de dysfonc- tionnements, enlevez les piles puis les réinsérer. Nettoyage et entretien Veillez à ce qu‘aucun liquide ne pénètre dans le produit. Sinon, il existe un risque de dommages matériels. Nettoyez le produit avec un chiffon légèrement humidifié...
  • Seite 47 Veuillez respecter l‘identification des matériaux d‘emballage pour le tri sé- lectif, ils sont identifiés avec des abbré- viations (a) et des chiffres (b) ayant la signification suivante : 1–7 : plastiques / 20–22 : papiers et cartons / 80–98 : matériaux composite.
  • Seite 48: Garantie

    Les piles / piles rechargeables ne doivent pas être mises au rebut avec les ordures ménagères. Elles peuvent contenir des métaux lourds toxiques et doivent être considérées comme des déchets spé- ciaux. Les symboles chimiques des métaux lourds sont les suivants : Cd = cadmium, Hg = mercure, Pb = plomb.
  • Seite 49 piles) et qui, par conséquent, peuvent être consi- dérées comme des pièces d’usure, ni aux dom- mages sur des composants fragiles, comme des interrupteurs, des batteries ou des éléments fabri- qués en verre. FR/BE...
  • Seite 50 Inleiding ......... Pagina 51 Correct gebruik ......... Pagina 51 Beschrijving van de onderdelen ..Pagina 51 Technische gegevens ......Pagina 52 Omvang van de levering ....Pagina 53 Algemene veiligheidsinstructies ... Pagina 53 Veiligheidsinstructies voor batterijen / accu‘s ......Pagina 54 Voor de ingebruikname ...
  • Seite 51: Inleiding

    Bouw- en houtvochtigheidsmeter Inleiding Hartelijk gefeliciteerd met de aankoop van uw nieuwe product. U heeft voor een hoogwaardig product gekozen. De gebruiksaanwijzing is een deel van het product. Deze bevat belangrijke aanwijzingen voor veiligheid, gebruik en verwij- dering. Maakt U zich voor de ingebruikname van het product met alle bedienings- en veiligheids- voorschriften vertrouwd.
  • Seite 52: Technische Gegevens

    RESET-knop Deksel voor batterijvak Batterijvak Display Vochtweergave in % Materiaalnummer Weergave voor lage batterijspanning Slotsymbool (meetwaarde vastgezet) Temperatuurindicatie (°C of °F) Technische gegevens Voedingsspanning: (gelijkstroom) Batterijtype: 2 x LR03/AAA Temperatuur- nauwkeurigheid: + / - 1 °C Vochtigheid- nauwkeurigheid: A: bouwmateriaal onder 1,4%: +/- 0,3% boven 1,4%: +/- 0,5% B: houtmateriaal onder...
  • Seite 53: Omvang Van De Levering

    Omvang van de levering Controleer direct na het uitpakken de omvang van de levering op volledigheid alsook de onbe- rispelijke staat van het product en alle onderdelen. 1 bouw- en houtvochtmeter 2 LR03/AAA batterijen 1 gebruiksaanwijzing Algemene veiligheidsinstructies Maak u voor de ingebruikname van het product vertrouwd met alle bedienings- en veiligheidsvoor- schriften! Geef alle documenten mee wanneer u het product aan derden geeft!
  • Seite 54: Veiligheidsinstructies Voor Batterijen / Accu's

    het product werkt. Plaats altijd de bescherm- kap op het product als u het niet gebruikt. An- ders is er kans op verwonding! Veiligheidsinstructies voor batterijen / accu‘s LEVENSGEVAAR! Houd batterijen / accu‘s buiten het bereik van kinderen. Raadpleeg bij inslikken onmiddellijk een arts! EXPLOSIEGEVAAR! Laad niet oplaadbare batterijen nooit op.
  • Seite 55: Voor De Ingebruikname

    brandwonden veroorzaken. Draag daarom in dit geval geschikte veiligheidshandschoenen. Als de batterijen / accu‘s lekken, dient u deze direct uit het product te halen om beschadi- gingen te vermijden. Gebruik alleen batterijen / accu‘s van hetzelfde type. Gebruik nooit nieuwe en oude batterijen / accu‘s door elkaar! Verwijder de batterijen / accu‘s, als u het product gedurende een langere periode niet...
  • Seite 56: Ingebruikname

    vervangen. Lege batterijen kunnen de meetresul- taten beïnvloeden. Ga voor het plaatsen van de batterijen als volgt te werk: Open het deksel van het batterijvak aan de achterkant van het product. Verwijder indien nodig de oude batterijen. Plaats 2 batterijen van het type LR03 / AAA. Let op de juiste polariteit.
  • Seite 57: Meting Uitvoeren

    Let erop, dat zouten het geleidingsvermogen van water verhogen. Hierdoor kan de meting niet correct zijn en te hoog uitvallen. Verwijder bij open haard-hout, indien nodig, de bast. Druk de meetpinnen dwars op de ve- zelrichting op verschillende plekken in het hout.
  • Seite 58 vochtigheid 15 % of minder bedraagt, is het hout ideaal als brandhout. Bij een vochtigheid tussen de 16 en 20% is het hout nog net geschikt. Bij meer dan 20 % vochtigheid is het hout niet ge- schikt als brandhout en moet het eerst nog langer drogen.
  • Seite 59: Batterij-Weergave

    of „Lo“. Bij metingen, die boven het meetbe- reik liggen, verschijnt „Hi“ op het display. Verwijder de beschermkap Druk de beide meetpinnen gelijktijdig tegen het oppervlak. Na ca. 1–2 seconden kunt u de procentuele waarde aflezen. Als u op een plek meet waar u het display niet kunt aflezen, druk dan op de -knop ,, om de waarde op het display vast te...
  • Seite 60: Temperatuur-Weergave

    Temperatuur-weergave U kunt de temperatuur-weergave instellen op °C of °F door de M / °C / °F -knop ca. 5 se- conden lang ingedrukt te houden. RESET-functie Er kan een kalibratie worden gedaan als er met- een na het inschakelen van het product niet 0,0 % op het display wordt weergegeven.
  • Seite 61: Reiniging En Onderhoud

    Storing Mogelijke oorzaak en oplossing De weergave Wordt het slot-symbool op het display weergegeven op het display? reageert niet. Druk op de -knop De weergave De batterijen zijn bijna leeg. op het display Zie hiervoor het hoofdstuk „Bat- terijen plaatsen / vervangen“. kan nauwelijks worden herk- end.
  • Seite 62: Afvoer

    Verwijder altijd de batterijen als u het product langere tijd niet nodig heeft. Bewaar het product in een droge omgeving. Afvoer De verpakking bestaat uit milieuvrien- delijke grondstoffen die u via de plaatselijke recyclingcontainers kunt afvoeren. De Grüne Punkt geldt niet voor Duitsland.
  • Seite 63: Garantie

    openingstijden kunt u zich bij uw aan- gewezen instantie informeren. Defecte of verbruikte batterijen / accu‘s moeten volgens de richtlijn 2006/66/EG en veranderin- gen daarop worden gerecycled. Geef batterijen / accu‘s en / of het product af bij de daarvoor be- stemde verzamelstations.
  • Seite 64 Wanneer binnen 3 jaar na de aankoopdatum van dit product een materiaal- of productiefout optreedt, dan wordt het product door ons – naar onze keuze – gratis voor u gerepareerd of ver- vangen. Deze garantie komt te vervallen als het product beschadigd wordt, niet correct gebruikt of onderhouden wordt.
  • Seite 65 Úvod ...........Strana 66 Použití ke stanovenému účelu....Strana 66 Popis dílů ..........Strana 66 Technické údaje .........Strana 67 Obsah dodávky .........Strana 67 Všeobecná bezpečnostní upozornění ........Strana 68 Bezpečnostní pokyny pro baterie a akumulátory ........Strana 68 Před uvedením do provozu ...........Strana 70 Vložení a výměna baterií ..Strana 70 Uvedení...
  • Seite 66: Úvod

    Měřič vlhkosti dřeva a stavebních materiálů Úvod Blahopřejeme Vám ke koupi nového výrobku. Rozhodli jste se pro kvalitní produkt. Návod k obsluze je součástí tohoto výrobku. Obsahuje důležité pokyny pro bezpečnost, použití a likvi- daci. Před použitím výrobku se seznamte se všemi pokyny k obsluze a bezpečnostními pokyny.
  • Seite 67: Technické Údaje

    Přihrádka na baterie Displej Zobrazení vlhkosti v % Číslo materiálu Ukazatel nízké kapacity baterie Symbol zámku (měřená hodnota zafixována) Zobrazení teploty (°C nebo °F) Technické údaje Provozní napětí: (stejnosměrný proud) Typ baterie: 2 x LR03/AAA Přesnost teploty: + / - 1 °C Přesnost vlhkosti: A: stavební...
  • Seite 68: Všeobecná Bezpečnostní Upozornění

    2 baterie LR03/AAA 1 návod k obsluze Všeobecná bezpečnostní upozornění Před prvním použitím výrobku se seznamte se všemi pokyny k obsluze a bezpečnostními upozorněními! Při předávání výrobku třetí osobě předávejte současně i všechny jeho podklady! Před uvedením do provozu zkontrolujte výrobek, jestli není...
  • Seite 69 dětí. V případě spolknutí okamžitě vyhledejte lékařskou pomoc! NEBEZPEČÍ VÝBUCHU! Nena- bíjecí baterie nikdy znovu nenabí- jejte. Baterie nebo akumulátory nezkratujte ani je neotevírejte. Hrozí přehřátí, nebezpečí požáru nebo jejich prasknutí. Nikdy neházejte baterie nebo akumulátory do ohně ani do vody. Nevystavujte baterie nebo akumulátory mechanickému zatížení.
  • Seite 70: Před Uvedením Do Provozu

    Nebezpečí poškození výrobku Používejte jen udaný typ baterie nebo akumulátoru! Nasazujte baterie nebo akumulátory podle označení polarity (+) a (-) na bateriích nebo akumulátorech a na výrobku. Vyčistěte před vložením kontakty baterie nebo akumulátoru a kontakty v přihrádce na baterie! Vybité...
  • Seite 71: Uvedení Do Provozu

    Uvedení do provozu Před měřením Dávejte pozor, aby se vždy oba měřící hroty dotýkaly povrchu materiálu. U hrubých povrchů popřípadě více přitlačte na měřící hroty. Na choulostivém povrchu měřte na skrytém místě. Upozornění: Měřící hroty jsou ostré, mohou proniknout do materiálu resp. ho poškodit.
  • Seite 72 Orientační hodnoty vlhkosti palivového dřeva Optimální na 6– topení - vysoké 15 % spalné teplo Omezeně vhodné 16– na topení – nízké 20 % spalné teplo Nevhodné na 21– topení – další 44 % sušení zapotřebí Poznámka: Předtím zobrazená tabulka slouží k měření...
  • Seite 73 Poznámka: při naměřených hodnotách, které leží pod dolní hranicí rozsahu měření ukazuje displej „0,0 %“ nebo „Lo“. Při na- měřených hodnotách, které leží nad horní hranicí rozsahu měření ukazuje displej „Hi“. Odstraňte krytku...
  • Seite 74: Zobrazení Stavu Baterie

    Přitlačte oba měřící hroty současně na po- vrch. Po cca 1 až 2 vteřinách můžete odečíst hodnotu v procentech. Jestliže měříte v prostředí, kde nemůžete dis- plej odečíst, stiskněte tlačítko záznam zobrazení displeje. Displej ukazuje přídavně symbol zámku. Pro nové měření stiskněte ještě jednou tlačítko Po měření...
  • Seite 75: Odstranění Poruch

    otevřete přihrádku na baterie a stiskněte špičatým předmětem tlačítko Reset na zadní straně vý- robku. Jestliže není zobrazení ještě správné, stisk- něte znovu tlačítko Reset pro novou kalibraci. Upozornění: Během používání funkce RESET nevyjímejte baterie. Odstranění poruch Chyba Možná příčina a řešení Naměřená...
  • Seite 76: Čistění A Ošetřování

    Čistění a ošetřování Dbejte na to, aby do výrobku nevnikla žádná tekutina. V opačném případě hrozí nebezpečí poškození věcí. Výrobek čistěte mírně navlhčeným hadrem a slabým mycím prostředkem! Měřící hroty čistěte mírně navlhčeným had- rem a nakonec je vysušte. Před každým použitím výrobek kontrolujte, jestli nemá...
  • Seite 77 Výrobek a obalové materiály jsou recyklovatelné, zlikvidujte je odděleně pro lepší odstranění odpadu. Logo Triman platí jen pro Francii. O možnostech likvidace vysloužilých zařízení se informujte u správy vaší obce nebo města. V zájmu ochrany životního prostředí vysloužilý výrobek nevyhazujte do domovního odpadu, ale předejte k odborné...
  • Seite 78: Záruka

    Záruka Výrobek byl vyroben s nejvyšší pečlivostí podle přísných kvalitativních směrnic a před odesláním prošel výstupní kontrolou. V případě závad máte možnost uplatnění zákonných práv vůči prodejci. Vaše práva ze zákona nejsou omezena naší níže uvedenou zárukou. Na tento artikl platí 3 záruka od data zakoupení. Záruční...
  • Seite 79 Introducción ........ Página 80 Uso adecuado ........Página 80 Descripción de las piezas ....Página 80 Características técnicas ....Página 81 Contenido .......... Página 82 Indicaciones generales de seguridad ......Página 82 Indicaciones de seguridad sobre las pilas / baterías ......Página 83 Antes de la puesta en marcha ..........
  • Seite 80: Introducción

    Medidor de humedad para madera y materiales de construcción Introducción Enhorabuena por la adquisición de su nuevo producto. Ha optado por un producto de alta calidad. El manual de instrucciones forma parte de este producto. Contiene importantes indicacio- nes sobre seguridad, uso y eliminación. Antes de usar el producto, familiarícese con todas las indi- caciones de manejo y de seguridad.
  • Seite 81: Características Técnicas

    Botón (ENCENDIDO / APAGADO, resultado de medición en pantalla) Botón RESET Tapa del compartimento de las pilas Compartimento de las pilas Pantalla Indicador de humedad en % Número del material Visualización de estado de batería bajo Candado (valor registrado congelado) Indicador de temperatura (°C o °F) Características técnicas Tensión de servicio:...
  • Seite 82: Contenido

    Contenido Compruebe inmediatamente después del desembalaje que el volumen de suministro esté completo, así como el buen estado del producto y de todas las piezas. 1 medidor de humedad para madera y materiales 2 pilas LR03/AAA 1 manual de instrucciones Indicaciones generales de seguridad Antes de usar el producto, familiarícese con todas...
  • Seite 83: Indicaciones De Seguridad Sobre Las Pilas / Baterías

    jueguen con el producto. La limpieza y el mantenimiento nunca deben llevarse a cabo por niños sin la vigilancia de un adulto. Los sensores de medición son muy puntiagudos. Proceda siempre con precaución cuando utilice el producto. Si no va a utilizar más el producto, coloque la tapa protectora.
  • Seite 84 ¡Evite el contacto con la piel, ojos y mucosas! En caso de que se produzca un contacto con el ácido de las pilas, ¡lave las zonas afectadas y póngase inmediatamente en contacto con un médico! ¡UTILICE GUANTES DE SEGU- RIDAD! Las pilas / baterías sulfa- tadas o dañadas pueden provocar abrasiones al entrar en contacto con la piel.
  • Seite 85: Antes De La Puesta En Marcha

    Antes de la puesta en marcha Antes de poner en funcionamiento el producto retire la lámina de plástico de la pantalla e inserte la pila suministrada. Colocar / cambiar las pilas Cuando en la pantalla aparezca el indicador de estado de batería bajo , las pilas insertadas estarán casi agotadas y deberán cambiarse.
  • Seite 86: Realizar Medición

    En las superficies ásperas aumente la presión sobre el sensor si fuese necesario. Si va a realizar la medición sobre una super- ficie sensible, coloque el sensor en una zona no visible de la misma. Nota: Los sensores son puntiagudos y po- drían ejercer presión o dañar las superficies.
  • Seite 87 Medidor de humedad para madera Óptimo para 6– calentar – poder 15 % calorífico alto Limitado para 16– calentar – poder 20 % calorífico bajo Sin efecto para ca- 21– lentar – se requiere 44 % secado adicional Nota: la tabla anteriormente representada sirve para la medición de leña.
  • Seite 88 Nota: La pantalla muestra „0,0 %“ o „Lo“ si las medidas se encuentran por debajo del rango de medición. La pantalla muestra „Hi“ si las medidas se encuentran por encima del rango de medición. Retire la tapa de protección Presione los dos sensores de medición simultáneamente contra la superficie.
  • Seite 89: Indicación De Estado De La Pila

    Si se encuentra en un lugar en el que no puede leer la pantalla, pulse el botón para congelar el indicador de la pantalla. Entonces en la pantalla aparecerá el símbolo del candado. Vuelva a pulsar el botón para reali- zar otra medición.
  • Seite 90: Función De Reinicio (Reset)

    Función de reinicio (RESET) Es posible realizar un calibrado si justo al encender el producto no aparece la indicación 0,0% en la pantalla. Para ello, abra el compartimento de las pilas y pulse el botón Reset de la parte trasera del producto utilizando un objeto puntiaguado.
  • Seite 91: Limpieza Y Cuidados

    Las descargas electroestáticas pueden provocar perturbaciones en el funcionamiento. Si se producen tales fallos, retire las pilas brevemente y colóquelas de nuevo. Limpieza y cuidados Asegúrese de que no entra ningún líquido en el producto. De lo contrario, podrían produ- cirse daños materiales.
  • Seite 92: Eliminación

    Eliminación El embalaje está compuesto por materiales no contaminantes que pueden ser desechados en el centro de reciclaje local. El punto verde no se aplica en Alemania. Tenga en cuenta el distintivo del emba- laje para la separación de residuos. Está...
  • Seite 93: Garantía

    2006/66/CE y en sus modificaciones. Recicle las pilas / baterías y / o el producto en los puntos de recogida adecuados. ¡Daños en el medio ambiente por un reciclaje indebido de las pilas / baterías! Las pilas / baterías no deben eliminarse junto con los residuos domésticos.
  • Seite 94 fabricación en este producto, repararemos el pro- ducto o lo sustituiremos gratuitamente por un pro- ducto nuevo (según nuestra elección). La garantía quedará anulada si el producto resulta dañado o es utilizado o mantenido de forma inadecuada. La garantía cubre defectos de materiales o de fabricación.
  • Seite 95 Introdução ........Página 96 Utilização adequada ...... Página 96 Descrição das peças ...... Página 96 Dados técnicos ........ Página 97 Material fornecido ......Página 98 Indicações gerais de segurança ........Página 98 Indicações de segurança relativas às pilhas / baterias ......Página 99 Antes da utilização .....
  • Seite 96: Introdução

    Aparelho de medição da humidade da pedra e da madeira Introdução Damos-lhe os parabéns pela aquisição do seu novo produto. Acabou de adquirir um produto de grande qualidade. O manual de instruções é parte integrante deste produto. Contém indica- ções importantes referentes à segurança, utiliza- ção e eliminação.
  • Seite 97: Dados Técnicos

    Tampa do compartimento das pilhas Compartimento de pilhas Visor Indicador de humidade em % Número do material Indicador de baixo estado da bateria Símbolo de cadeado (valor de medição congelado) Indicador de temperatura (°C ou °F) Dados técnicos Tensão de serviço: (Corrente contínua) Tipo de pilha:...
  • Seite 98: Material Fornecido

    Material fornecido Verifique o material fornecido ao desembalar, para averiguar se este se encontra completo e se o ar- tigo e todas as peças se encontram em bom estado. 1 medidor d humidade da construção e da madeira 2 pilhas LR03/AAA 1 manual de instruções Indicações gerais de segurança...
  • Seite 99: Indicações De Segurança Relativas Às Pilhas / Baterias

    bicudos. Proceda sempre com prudência quando trabalhar com o produto. Coloque sempre a tampa de proteção no produto, se não for utilizado. Caso contrário, existe pe- rigo de ferimentos! Indicações de segurança relativas às pilhas / baterias PERIGO DE MORTE! Mantenha as pilhas e baterias fora do alcance das crianças.
  • Seite 100: Antes Da Utilização

    UTILIZAR LUVAS DE PROTEC- ÇÃO! As pilhas ou baterias gastas ou danificadas podem provocar queimaduras ao entrarem em contacto com a pele. Por isso, nestes casos use sempre luvas adequadas. Caso a pilha / bateria vaze, remova ela ime- diatamente do produto para evitar danos. Utilize apenas pilhas ou baterias do mesmo tipo.
  • Seite 101: Inserir / Substituir As Pilhas

    Inserir / Substituir as pilhas Quando aparece no visor a indicação da baixo estado da pilha , as pilhas inseridas es- tão quase vazias e precisam ser trocadas. Pilhas vazias podem corromper o resultado da medição. Para inserir as pilhas, proceda como segue: Abra a tampa do compartimento das pilhas na parte traseira do produto.
  • Seite 102: Fazer A Medição

    Faça medições em locais diferentes e calcule o valor médio. Esteja atento para o fato de que sais aumen- tam a condutibilidade da água. A medição pode ser afetada devido a isso e ser alta demais. No caso de madeira para chaminés, retire a casca caso necessário.
  • Seite 103 Não apropriado 21– para aquecer - Se- cagem adicional 44 % necessária Aviso: A tabela mostrada anteriormente serve para medir madeira de combustão. Quando a umidade medida for de 15 % ou menos, a madeira é ideal para queimar. Quando a umidade medida for de 16 a 20% ela está...
  • Seite 104: Indicação Das Pilhas

    Aviso: Medições abaixo do espectro de medição mostram „0,0 %“ ou „Lo“ no visualizador. Medições acima do espectro de medição mostram „Hi“ no visualizador. Retire a tampa de protecção Pressione ambos os pinos de medição mesmo tempo contra a superfície. Após cerca de 1–2 segundos podes ler o valor percentual.
  • Seite 105: Indicação Da Temperatura

    Indicação da temperatura Podes mudar a indicação de temperatura entre C e F pressionando o botão M / °C / °F cerca de 5 segundos. Função RESET Uma calibração pode ser feita, se logo após ligar o produto não aparecer 0,0 % no visor. Para isso, abra o compartimento de pilhas e prima com um objecto pontudo o botão Reset no lado de trás do produto.
  • Seite 106: Limpeza E Conservação

    Erro Possíveis causas e soluções O ecrá no O símbolo de cadeado é visualizador mostrado no ecrã? não reage. Pressione o botão A visuali- As pilhas estão gastas. zação no Para isso, veja o capítulo “Inserir /trocar pilha “. ecrã não pode ser reconhecida.
  • Seite 107: Eliminação

    Retire sempre as pilhas se o produto não for utilizado por um longo período de tempo. Armazene o produto num ambiente seco. Eliminação A embalagem é feita de materiais não poluentes que podem ser eliminados nos contentores de reciclagem locais. O ponto verde não vale para a Alemanha.
  • Seite 108: Garantia

    As pilhas ou baterias avariadas ou gastas têm de ser recicladas de acordo com a diretiva 2006/66/CE e as suas alterações. Devolva as pilhas ou baterias e / ou o produto nos locais específicos destinados à sua recolha. Danos ambientais devido à eliminação incorreta das pilhas / baterias! As pilhas / baterias não podem ser eliminadas no...
  • Seite 109 Caso num espaço de tempo de 3 anos a partir da data da compra deste producto surja um erro de material ou de fabrico, o producto será reparado ou substituído por nós – segundo a nossa escolha – e sem qualquer custo. Esta garantia expira se o producto estiver danificado, se não for devida- mente utilizado ou se não for efectuada a devida manutenção.
  • Seite 110 OWIM GmbH & Co. KG Stiftsbergstraße 1 DE-74167 Neckarsulm GERMANY Model-No.: HG03064C Version: 09 / 2017 Stand der Informationen · Last Information Update · Version des informations · Stand van de informatie · Stav informací Estado de las informaciones Estado das informações: 10 / 2017 Ident.-No.: HG03064C102017-8...

Diese Anleitung auch für:

288019

Inhaltsverzeichnis