Harken MKIII Unit 00AL Anleitung
Jib reefing & furling

Verwandte Anleitungen für Harken MKIII Unit 00AL


Inhaltszusammenfassung für Harken MKIII Unit 00AL
- Seite 1 MKIII Jib Reefing & Furling Installation Manual Unit 00AL WARNING! Strictly follow all instructions to avoid an accident, damage to your vessel, personal injury or death. See www.harken.com for additional safety information.
- Seite 2 Thanks for buying a Harken Jib Reefing and Furling System. It will give you reliable service with minimal maintenance, but does require proper assembly and basic care. This manual is an important part of the total reefing system. Please take the time to read it carefully before assembling or using your furling system.
- Seite 3 Parts 6 - 9 Pièces Die Komponenten Parti Sailmaker Instructions 10 - 11 Instructions pour le Voilier An den Segelmacher Instruzioni per il velaio Preparation for Assembly 12 – 23 This section tells how to measure the headstay, prepare the wire and cut foil to length if they have not been supplied ready to assemble.
- Seite 4 Terminals. Bei Verwendung eines Norseman oder Sta- du bas du câble. Harken ne fourni aucun embout à a seconda delle necessità. La Harken non fornisce i Lok Auges kann die Installation an Bord erfolgen, ohne sertir ou manuel dans ce but.
- Seite 5 WARNING! Harken does not recommend drilling boat's chainplate or toggle as this may result in rig failure which will cause an accident, damage to your vessel, personal injury or death. See www.harken.com for additional safety information. WARNING! Headstay condition should be checked by a professional rigger before reusing. Wire that is old or damaged may break suddenly causing an accident, damage to your vessel, personal injury or death.
- Seite 6 Pièces Teile Parti Vous devriez avoir au moins deux boites: une boite Sie haben mindestens zwei Kartons: Einen langen Nella confezione si trovano almeno due scatole: una longue contenant les profils et une boite carrée con- Karton mit den Profilen und einen kleinen Karton mit lunga contenente i vari pezzi di estruso, e una rettan- tenant le tambour et ses divers accessoires.
-
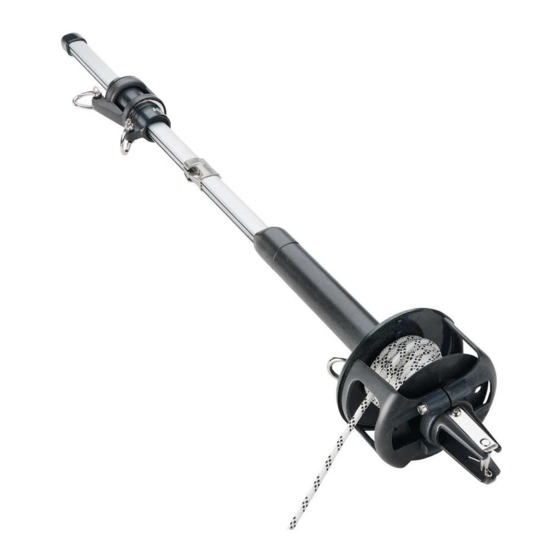
Seite 7: Main Components
Parts You should have two boxes: a long box with foils and a rectangular box containing the drum and miscellaneous components. You may also have a third box containing the headstay. ■ The foil box contains: 4 7' (2.13 m) Foil Extrusions. A standard kit has four foils, but one may have been pre-cut for use as your top foil. If your headstay is longer than 31'6"... - Seite 8 Pièces Teile Parti Pièces Prisonnieres De L'étai Teile für Vor-Montage Componenti Dell’attrezzatura Réf. Désignation ArtNr Beschreibung Num. Descrizione Vis de profil Schrauben für Profile Viti per l’estruso Cales plastiques de connecteurs Verbinder-Keile Plastrine di Bloccaggio Connettori Engageur et vis HFG214 Einfädler mit Schraube HFG214 Feeder con vite HFG214 Capuchon plastique supérieur...
- Seite 9 Parts HFG889 HFG641 HFG642 Miscellaneous Parts Part Description HFG641 4 mm Allen Wrench HFG642 5 mm Allen Wrench HFG889 Torque Tube Foil Key Prefeeder Super Glue ® 1112 HFG858 1106 1107 1108 1109 Foil and Feeder Parts Clevis Pin Sets Part Description Foil screws...
- Seite 10 ■ Vele L'enrouleur Harken fonctionnera avec des voiles Harken Anlagen funktionieren mit konventionellen Gli avvolgifiocco Harken funzionano con tutte le vele conventionnelles ou comportant de la mousse Segeln ebenso wie mit Schaum Vorliek. realizzate in modo tradizionale o con caratteristiche sur le guindant.
- Seite 11 Sailmaker Instructions ■ Sail Type The Harken furler will work with conventional sails or ones built with a foam luff. ■ Luff Length Halyard Shackle Manille de Drisse Note offsets above and below the sail. Fall-Schäkel Grillo Drizza A shorter luff may be required if a halyard restrainer is necessary (page 44 - 45) or a toggle or link plates are used (page 14 - 15) below the furler to raise the drum.
- Seite 12 Un primaire Loctite est disponible catalizzatore Loctite per usi a temperature inferiore è pour des températures extrêmement basses, disponibile presso i rivenditori Loctite o alla Harken Rotes Loctite bindet nur ab unter Sauerstoff- demandez à votre vendeur ou à Harken.
- Seite 13 5 minutes after assembly. Loctite primer is available for lower temperatures, ask your local Loctite dealer or Harken. Red Loctite only cures when no oxygen is present. Excess adhesive on the surface of the foils will remain sticky and will not cure.
- Seite 14 Vorstag zu tare non è necessario ma può essere usato se Votre enrouleur Harken possède un cardan à la partie kurz ist oder mehr Platz für einen Anker gewünscht il cavo dello strallo è troppo corto o se si desidera inférieure du ridoir.
- Seite 15 44 - 45 of the manual. Furling units should not be mounted above turnbuckles or long link plates. If you are considering this, discuss your installation carefully with Harken before proceeding. ■ T-Ball Fittings Upper Some boats have T-ball swage fittings as the upper terminal. They do not require...
- Seite 16 Combien de Anzahl der Profile Quanti estrusi e quanti Préparation Vorbereitung Premontaggio connecteurs und Verbinder, Avant Montage et de profils Aufschieben der Verbinder dei connettori ■ Combien de connecteurs ? ■ Wieviele Verbinder? ■ Quanti connettori? Utilisez le tableau pour déterminer le bon nombre Aus der nebenstehenden Tabelle geht die richtige Usare la tabella qui a sinistra per determinare il giusto de connecteurs de 152 mm pour votre étai.
- Seite 17 Preassembly ■ How Many Connectors? Pin-to-Pin Headstay Length (See Pg 8) Number 6" (152 mm) Connectors Use the chart at left to determine the proper number Longueur axe à axe de l’étai (Voir Pg 8) Nombre de connecteurs de 152 mm utilisée Bolzen-Bolzen-Mass Anzahl des Vorstages (s.S.
- Seite 18 Istruzioni sulla Préparation Longueur des Ablängen der Vorbereitung Premontaggio lunghezza Avant Montage profils Profile dell’estruso ■ Mise à longueur du train de profils ■ Ablängen der profile ■ Adattamento della lunghezza dell'estruso La longueur totale de l'ensemble des profils est fonc- Die Länge des Systems wird der Vorstag-Länge La lunghezza del sistema di avvolgimento viene fatta tion de la longueur de l'étai et comprend un certain...
- Seite 19 Preassembly Foil Length Instructions ■ Adjusting Foil Length The length of the furling system is matched to the headstay length by adjusting the number of 7' (2.13 m) foil extrusions used and by cutting the top foil to length from one of the 7' (2.13 m) foils provided.
- Seite 20 Préparation Avant Montage Longueur des profils Vorbereitung Ablängen der Profil Premontaggio Istruzioni sulla lunghezza dell’estruso ■ Si votre longueur d'étai est dans le tableau ci-dessous, votre enrouleur n'a pas besoin d'une longueur spéciale de profil supérieur. Utilisez un profil entier de 2.13 m. ■...
- Seite 21 Preassembly Foil Length Instruction ■ If your pin-to-pin headstay length is one of the dimensions shown below, no special length top foil is needed. A full length 7' (2.13 m) foil is used as the top foil. 17'6" (5.334 m) 24'6"...
- Seite 22 ■ Si votre longueur d'étai est dans le tableau ci-dessous. utilisez une scie à métaux pour coupez votre profil supérieur dans une longueur standard Coupez votre profil supérieur à cette longueur de 2.13 m ou 1.067 m. Interpolez pour des mesures intermédiaires. Schneiden Sie das Top Profil ■...
- Seite 23 Preassembly Foil Length Instruction Cut Top Foil to ■ If your pin-to-pin headstay length is shown below use a hacksaw to cut a special This Length length top foil from a 7' (2.13 m) or 3 ' (1.067 m) foil. Interpolate between numbers. 18' 6"...
- Seite 24 Montage Montage Montaggio A cette étape, on vous indique comment monter Bei diesem Schritt wird der oberste Verbinder als In questo passaggio, il connettore superiore è en retrait dans le profil supérieur le connecteur Lager in das Top Profil versenkt. Die Top Kappe infilato nell'estruso superiore in modo che svolga supérieur ainsi que le capuchon plastique wird montiert.
- Seite 25 Assembly In this step, the top connector is recessed into the top foil to serve as a bushing and the trim cap is attached. Lay the wire out straight on a clean work area such as a dock. Slide the trim cap and one connector to the top of the headstay.
- Seite 26 Montage Montage Montaggio Voir détails page 18 - 23 pour la coupe à longueur Nehmen Sie das nach Seiten 18 - 23 abgelängte Leggere i dettagli alle pagine 18 - 23 per tagliare du profil supérieur. Ne confondez pas le profil Top Profil.
- Seite 27 Assembly See details on pages 18 - 23 for cutting the top foil to length. Do not confuse the top foil with the special bottom foil. Check the top foil for burrs or shavings at the cut end. Slide the top foil extrusion over the threaded stud and connectors, to the top of the stay.
- Seite 28 Montage Montage Montaggio A cette étape le premier connecteur de jonction va Es wird der erste Verbinder ins Top Profil einge- In questo passaggio il primo connettore viene être fixé dans le profil supérieur en utilisant colle, schoben und mittels Keil, Klebstoff und Schrauben inserito nell'estruso superiore e bloccato usando cale et vis.
- Seite 29 Assembly In this step, the first foil connector is inserted into the top foil and secured using wedges, adhesive and screws. Free one connector and slide it towards the top of the stay. Completely remove the tape. Tape can jam or damage the unit if left on the wire.
- Seite 30 Montage Montage Montaggio A cette étape, la première longueur entière de Bei diesem Schritt wird das erste ganze Profil auf A questo punto il primo pezzo di estruso viene profil est à poste sûr l'étai et fixée au connecteur das Vorstag geschoben und mit dem Top Profil fatto scivolare sullo strallo e "collegato"...
- Seite 31 Assembly In this step, the first main foil extrusion is slipped onto the headstay and connected to the top foil. Select a 7' (2.13 m) foil and slide it onto the headstay over the threaded stud and connectors and up to the top foil piece.
- Seite 32 Montage Montage Montaggio A cette étape vous achèverez le montage du train Bei diesem Schritt wird das komplette Vorstag In questo passaggio viene completato il montag- de profil en utilisant les techniques apprises aux Profil montiert, gemäss den Schritten 2 und 3. gio dell'estruso usando le medesime tecniche étapes 2 et 3.
- Seite 33 Assembly In this step, you complete assembly of the main body of the headstay foil using the techniques learned in Steps 2 and 3. Free one connector and slide it towards the top of the headstay. Attach this connector to the foil above using red Loctite , a plastic wedge, and screw as described ®...
- Seite 34 Montage Montage Montaggio A cette étape l'émerillon de drisse, l'engageur, et Bei diesem Schritt wird der Fallwirbel, der In questo passaggio la girella superiore, il tubo di le tube de torsion vont être montés sûr les profils. Einfädler und die Mitnehmerhülse am Vorstag torsione e il feeder sono montati sull'estruso.
- Seite 35 Assembly In this step, the halyard swivel, feeder and torque tube are attached to the foil. Slip the halyard swivel onto the foil and up past the 1 " (41 mm) gap in the foils. The halyard swivel has a “top” and a “bottom” and must be placed on the foil with the long hooked tang facing up.
- Seite 36 Montage Montage Montaggio Vissez la cage du ridoir sur son embout fileté. Schrauben Sie (Kontermutter) und Spanner wieder auf Avvitare il corpo principale dell'arridatoio al perno filet- das Terminal. tato impiombato. ■ Matage - Réglage du ridoir ■ Mast setzen - Spanner einstellen ■...
- Seite 37 Assembly Thread the main body of the turnbuckle onto the threaded stud. ■ Stepping the Mast; Adjusting Turnbuckle Make sure you have the special clevis pin set to match your chainplate pin hole size. See page 10 - 11. Use line to make sure the turnbuckle does not slip into the drum assembly when stepping the mast.
- Seite 38 Montage Montage Montaggio Descendez l'ensemble tambour pour faire passer les Feder-Flansch im Bolzen einrasten. Fare scattare le piastre a molla al loro posto sul perno. lames élastiques à leurs places par dessus les extrêmi- tés de l'axe. Montez le profil jusqu'à l'apparition du logement de Schieben Sie das Profil nach oben bis die Aussparung Issare l'estruso finché...
- Seite 39 Assembly Stepping the Mast Snap the spring tangs in place over the clevis pin. Raise the foils until the notch in the foil lines up with the window in the torque tube. Place the key in the notch with the rounded side out. Slip the torque tube cap over the top and push down completely.
-
Seite 40: Mise En Fonctionnement
Renvoi de la drosse Führung der Allineamento della cima Mise en Inbetriebnahme Installazione de manoeuvre Reffleine di avvolgimento fonctionnement au cockpit ins Cockpit con il pozzetto Die Reffleine ist bereits mit einem Ende an der La scotta di avvolgimento viene fornita con La drosse de manoeuvre est livrée avec une des Trommel befestigt. - Seite 41 Commissioning Leading the Furling Line to the Cockpit The furling line is shipped with one end attached to the furling drum. Charge the system by turning the foils to wrap line on the drum. when replacing line, pass it through enclosed opening in guard.
- Seite 42 Höhe des Mise en Hauteur de l’emerillon Altezza della girella superiore Inbetriebnahme Installazione Fallwirbels fonctionnement Angle de la drisse Angolo di lavoro della drizza Fallwinkel ■ Das Vermeiden von Wicklern: ■ Per evitare i giri della drizza: ■ Pour éviter l'enroulement de la drisse: Der Fallwirbel sollte höchstens 76 mm vom oberen La girella superiore deve essere a 76 mm dalla fine L'émerillon de drisse doit être à...
- Seite 43 WARNING! In severe cases, a halyard wrap can cause loss of control of boat and/or headstay can break suddenly which can cause an accident, damage to your vessel, personal injury or death. See www.harken.com for additional safety information. If a halyard wraps, do not force the unit to turn. Attempt to open the sail by alternately pulling the sheets and the furling line.
- Seite 44 Der Fallabweiser sollte so hoch wie möglich auf der Se la propria barca necessita di una guida per drizza prenez la référence: #944. usate un Harken 944. Mast-Vorderseite montiert werden; und zwar so, Le guide drisse doit être monté le plus haut possible dass das Profilstag ihn nicht berührt.
- Seite 45 Restrainers tend to limit sail luff length and may cause problems if not properly installed. If your boat needs a halyard restrainer, use Harken part 944. The restrainer should be mounted as high as possible on the face of the mast. Position the restrainer so that the foils will not hit it when under load.
-
Seite 46: Betrieb
équipant votre pataras d'un réglage sous forme d'un Spannern: eine Talje aus Blöcken, mechanische considerazione la possibilità di installare un tendipaterazzo ridoir, d'une cascade plus un palan comme Harken Spanner, wie sie von der Firma HARKEN angeboten sia esso un paranco o uno meccanico come quelli forniti vous le propose ou d'un ridoir hydraulique, vous werden, oder hydraulische. - Seite 47 Commissioning ■ Spinnaker Halyards Spinnaker halyards occasionally cause problems with furling. On many boats it will not be possible to attach the spinnaker halyard to the bow pulpit or it may be "sucked" into the jib when you are furling. On some boats the spinnaker halyard lays across the headstay and will catch on the halyard swivel, foils or jib halyard.
- Seite 48 Sia i fiocchi da tempo duro che le tormentine possono gréés sûr nos enrouleurs. Ces voiles n'ont besoin que Profil-Nut gesetzt werden können. essere usate con questo avvolgifiocco Harken. E' nec- d'avoir la bande de ralingue voulue pour pouvoir être essario, se queste vele sono munite di garrocci, aggi- Diese Segel müssen normalerweise mit einer...
-
Seite 49: Commissioning, Operation
Commissioning/Operation ■ Raising Sails 1) Install the prefeeder by securely tying the end of the line to a deck fitting or to the toggle below the furler so it is 1 ' (457 mm) below the feeder. 2) Shackle the tack of the sail to the drum. 3) Secure the genoa sheets to the clew. - Seite 50 Votre enrouleur comporte un système de verrouillage gerüstet. Damit kann das eingerollte Segel blockiert Gli avvolgifiocco Harken sono dotati di un'opzione di qui peut être utilisé après une réduction ou quand vous werden, entweder als Sicherung des Reffs oder wenn "bloccaggio"...
-
Seite 51: Operation
Operation ■ Reefing A sail may be partially furled before you resume sailing. This is known as reefing. Many sailors find it helpful to place marks on the foot of the sail so that they can reef to a variety of predetermined jib sizes. This allows marks to be placed on the jib lead tracks or toe rail so that lead block position can be changed to correspond to the reefed jib. - Seite 52 ■ Conversione da regata Pour la transformation, descendez l'émerillon de drisse Zum Regattieren bleibt der Fallwirbel unterhalb des Per usare gli avvolgifiocco Harken durante le regate sous l'engageur et démontez le guide anti-usure de Einfädlers, Korb und Trommel werden entfernt. So si deve abbassare la girella superiore sotto il feeder, drosse, le capot en inox, et le tambour.
- Seite 53 Operation Conversion to Racing ■ Conversion to Racing For racing, lower the halyard swivel below the feeder and remove the line guard assembly and drum from the headstay. This allows use of both grooves for sail changes and to tack genoas on the deck for maximum luff length.
- Seite 54 ■ Pulizia e lubrificazione Gardez votre enrouleur propre. Quand vous lavez le Spülmittel. Tenere l'avvolgifiocco Harken sempre pulito. Quando si bateau, n'hésitez pas à asperger l'enrouleur de savon Mindestens zweimal im Jahr sollte die Anlage durch lava la barca, risciacquare anche l'unità con sapone e et d'eau claire.
- Seite 55 Failure to inspect can cause an accident, damage to your vessel, personal injury or death. Flush Here See www.harken.com for additional safety information. ■ Inspection Unit for chafe, wear or damage. Spring tangs on bottom of unit are secured to ends of clevis pin.
-
Seite 56: Troubleshooting Guide
Piece was not secured at stud and was carried up inside Check for missing connector inside of foil extrusions. If connector is of a foil. not inside extrusion call Harken for a special split top connector. Too many connectors Too many strung on wire. -
Seite 57: Montage
Causes de Dysfonctionnement Montage Problème Cause Probable Solution Manque un connecteur. Il était mal arrêté par le scotch et il est resté dans un profil. Chercher le connecteur manquant dans un profil. Trop de connecteurs. Erreur de choix dans le tableau. Laissez libre le connecteur supplémentaire à... -
Seite 58: Störungen Und Deren Behebung
Störungen und deren Behebung Bei der Montage Problem Mögliche Ursache Vorgehen Fehlendee Verbinder. Verbinder war nicht gesichert und steckt in einem Profil. Prüfen Sie ob der Verbinder lose in einem Profil sitzt. Falls Sie den Verbinder nicht finden, müssen Sie einem geteilten Verbinder bestellen. Zu viele Verbinder. - Seite 59 ® La scotta di avvolgimento si è incattivata all'interno del Il modo migliore per prevenire accavallamenti è usare un bozzello Harken 7402 come bozzello più tamburo. a poppa per assicurare il giusto sforzo sulla scotta quando si svolge la vela.
- Seite 60 Warranty — Online at www.harken.com or call, write, email or fax Harken, Inc., Pewaukee, WI USA Garantie — Conditions de garantie disponibles en ligne à l'adresse www.harken.com ou sur appel téléphonique, par écrit, courriel ou télécopie à Harken, Inc., Pewaukee, WI USA Garantie —...