Herunterladen Inhalt Inhalt Diese Seite drucken
Klarstein 10005400 Bedienungsanleitung
Vorschau ausblenden Andere Handbücher für 10005400:

Werbung

Verfügbare Sprachen

Verfügbare Sprachen

MKS / Brooklyn
Kühlschrank
Fridge
Frigorífico
Réfrigérateur
Frigorifero
10005399 10005400 10005439 10005440 10032778 10032779

Werbung

Inhaltsverzeichnis
loading

Inhaltszusammenfassung für Klarstein 10005400

  • Seite 1 MKS / Brooklyn Kühlschrank Fridge Frigorífico Réfrigérateur Frigorifero 10005399 10005400 10005439 10005440 10032778 10032779...
  • Seite 3: Inhaltsverzeichnis

    Français 23 Geräteübersicht 6 Bedienhinweise 7 Aufbau 8 Einbau des Zugscharniers 9 Seite des Türanschlages ändern 10 Einbau des Schlosses 10 Reinigung und Pflege 10 Fehlerbehebung 1 1 Hinweise zur Entsorgung 12 Konformitätserklärung 12 TECHNISCHE DATEN 10005399, 10005439, 10005400 Artikelnummer 10005440, 10032778, 10032779 Stromversorgung 220-240 V ~ 50/60 Hz...
  • Seite 4: Sicherheitshinweise

    SICHERHEITSHINWEISE • Prüfen Sie vor der Benutzung die Spannung auf der Geräteplakette. Schließen Sie das Gerät nur an Steckdosen an, die der Spannung des Geräts entsprechen. • Kinder ab 8 Jahren, physisch und körperlich eingeschränkte Menschen dürfen das Gerät nur benutzen, wenn sie vorher von einer für Sie verantwortlichen Aufsichtsperson ausführlich mit den Funktionen und den Sicherheitsvorkehrungen vertraut gemacht wurden.
  • Seite 5 Dieses Gerät enthält das Kältemittel Isobutan (R600a), ein Naturgas mit hoher Umweltverträglichkeit, aber brennbar. Obwohl es brennbar ist, schädigt es nicht die Ozonschicht und verstärkt nicht den Treibhauseffekt. Die Verwendung dieses Kältemittels führt zu einer etwas höheren Geräuschentwicklung des Gerätes. Zusätzlich zum Kompressorgeräusch können Sie den Fluss des Kältemittels hören.
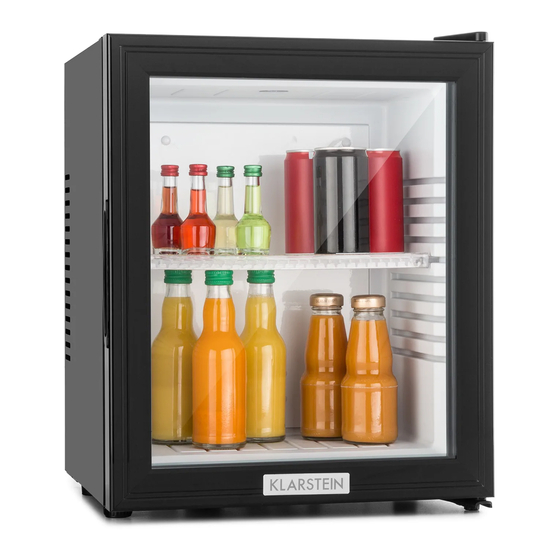
  • Seite 6: Geräteübersicht

    GERÄTEÜBERSICHT Modelle mit Glastür:...
  • Seite 7: Bedienhinweise

    BEDIENHINWEISE • Stellen Sie den Kühlschrank so auf, dass Sie immer den Netzstecker erreichen können. • Stellen Sie das Gerät nicht ins direkte Sonnenlicht. • Stellen Sie das Gerät fern von Heizquellen auf. • Um einen sicheren Stand zu garantieren, muss das Gerät auf einer ebenen Oberfläche aufgestellt werden.
  • Seite 8: Aufbau

    AUFBAU Beim Aufstellen sollten Sie folgende Punkte beachten: • Es sollte ein Raumvolumen von 200 cm um das Gerät vorhanden sein. • Der Abstand von den Außenwänden des Gerätes zu umliegenden Wänden o.ä. sollte mindestens 20 mm betragen. • Der Abstand zum Boden muss zur Belüftung 50 mm sein. •...
  • Seite 9: Einbau Des Zugscharniers

    EINBAU DES ZUGSCHARNIERS • Befestigen Sie das Zugscharnier mit 2 Schrauben. • Nachdem Sie den Abstand geprüft haben, befestigen Sie es mit 2 Schrauben am Bodenfuß. • Wenn der Kühlschrank geschlossen ist, muss noch ein Abstand von ca. 1-2 mm zwischen Schranktür und Schrank sein. •...
  • Seite 10: Seite Des Türanschlages Ändern

    SEITE DES TÜRANSCHLAGES ÄNDERN Lösen Sie die Schrauben des rechten Scharniers. Entfernen Sie das obere und untere Scharnier. Folgende Teile befinden sich im Karton: 1x Abdeckung linkes Scharnier 2x Scharniere (oben und unten) 3x Schrauben Befestigen Sie die Tür an der passenden Position auf der linken Seite mit Hilfe der Scharniere und Schrauben.
  • Seite 11: Fehlerbehebung

    FEHLERBEHEBUNG Problem Mögliche Ursache Lösungsansatz Das Gerät läuft nicht. Der Stecker ist nicht Stecken Sie den Stecker eingesteckt oder lose. fest in die Steckdose. Die Sicherung ist raus oder Prüfen Sie die Sicherung. Kaputt. Das Essen ist warm. Die Temperatur ist nicht Stellen Sie die Temperatur richtig eingestellt auf eine kühlere Stufe.
  • Seite 12: Hinweise Zur Entsorgung

    HINWEISE ZUR ENTSORGUNG Befindet sich die linke Abbildung (durchgestrichene Mülltonne auf Rädern) auf dem Produkt, gilt die Europäische Richtlinie 2012/19/EU. Diese Produkte dürfen nicht mit dem normalen Hausmüll entsorgt werden. Informieren Sie sich über die örtlichen Regelungen zur getrennten Sammlung elektrischer und elektronischer Gerätschaften.
  • Seite 13 Changing the Side of the Door Hinge 20 Installation of Lock and Key  20 Care and Maintenance 20 Troubleshooting 21 Hints on Disposal 22 Declaration of Conformity 22 TECHNICAL DATA 10005399, 10005439, 10005400 Item number 10005440, 10032778, 10032779 Power supply 220-240 V ~ 50/60 Hz...
  • Seite 14: Safety Instructions

    SAFETY INSTRUCTIONS • Check that the voltage of the power supply in your home is the same as the voltage shown on the rating label of this product. • This appliance can be used by children aged from 8 years and above and persons with reduced physical, sensory or mental capabilities or lack of experience and knowledge if they have been given supervision or instruction concerning use of the appliance in a safe way and understand the hazards involved.
  • Seite 15 This appliance contains the coolant isobutane (R600a), a natural gas which is environmentally friendly. Although it is fl ammable, it does not damage the ozone layer and does not increase the greenhouse effect. The use of this coolant has,however,led to a slight increase in the noise level of the appliance. In addition to the noise of the compressor,you might be able to hear the coolant fl owing around the system.
  • Seite 16: Product Overview

    PRODUCT OVERVIEW Model with glass door:...
  • Seite 17: Operating Instructions

    OPERATING INSTRUCTIONS • Position your refrigerator so that the plug is accessible. • Keep your refrigerator out of direct sunlight. • Do not place next to heat generating appliance. • Do not place directly on the ground. Provide suitable stand. •...
  • Seite 18: Installation

    INSTALLATION When install a Heat pipe Refrigerator, ventilation should be considered seriously, please refer to the following: • There should be left at least 200 cm³ for ventilation • The distance between wall and refrigerator side should be at least 20mm •...
  • Seite 19: Installation Of The Sliding Hinge

    INSTALLATION OF THE SLIDING HINGE • Use two self-screws to fix the sliding hinge. • After checking the suitable distance, use two self-screws to fix the bottom feet respectively. • If the refrigerator is closed, there should be have a distance of 1-2 mm between the wooden cabinet door and the surrounding.
  • Seite 20: Changing The Side Of The Door Hinge

    CHANGING THE SIDE OF THE DOOR HINGE Loosen the screws of the right hinge. Remove the upper and lower hinges. The following parts are in the box: 1x Left hinge cover 2x hinges (top and bottom) 3x screws Fasten the door to the appropriate position on the left side using the hinges and screws. At the end, place the cover on the hinge.
  • Seite 21: Troubleshooting

    TROUBLESHOOTING Problem Possible cause Solution Appliance does not work. Mains plug is not plugged Insert mains plug. in or is loose Fuse has blown or is Check fuse, replace if defective necessary. The food is too warm. Temperature is not properly Please look in the initial adjusted.
  • Seite 22: Hints On Disposal

    HINTS ON DISPOSAL According to the European waste regulation 2012/19/EU this symbol on the product or on its packaging indicates that this product may not be treated as household waste. Instead it should be taken to the appropriate collection point for the recycling of electrical and electronic equipment.
  • Seite 23 Changement du côté d’ouverture de la porte 30 Montage de la serrure  30 Nettoyage et entretien 30 Résolution des problèmes 31 Conseils pour le recyclage 32 Déclaration de conformité 32 FICHE TECHNIQUE 10005399, 10005439, 10005400 Numéro d’article 10005440, 10032778, 10032779 Alimentation électrique 220-240 V ~ 50/60 Hz...
  • Seite 24: Consignes De Sécurité

    CONSIGNES DE SÉCURITÉ • Avant d‘utiliser l‘appareil vérifiez la tension sur la plaque signalétique. Branchez l‘appareil sur des prises de tension correspondante uniquement. • Les enfants à partir de 8 ans ainsi que les personnes dont les capacités physiques, mentales ou sensorielles sont réduites peuvent utiliser l’appareil à condition d’avoir assimilé...
  • Seite 25 Cet appareil contient du liquide réfrigérant Isobutane (R600a), un gaz naturel très respectueux de l’environnement mais infl ammable. Bien qu’il soit infl ammable, il ne détruit pas la couche d’ozone et ne renforce pas l’effet de serre. L’utilisation de ce liquide réfrigérant provoque toutefois un niveau sonore de l’appareil légèrement plus élevé.
  • Seite 26: Aperçu De L'appareil

    APERÇU DE L’ APPAREIL Modèle avec porte vitrée:...
  • Seite 27: Consignes D'utilisation

    CONSIGNES D’UTILISATION • Installer le réfrigérateur de manière à ce que la prise de courant soit facilement accessible. • Ne pas installer l’appareil à un endroit exposé à la lumière directe du soleil. • Installer l’appareil à l’écart des sources de chaleur. •...
  • Seite 28: Montage

    MONTAGE Respecter les points suivants pendant l’installation : • Il est nécessaire que l’appareil dispose d’un volume libre de 200 cm³ autour de lui. • La distance entre les parois externes de l’appareil et les murs environnements ou autres objets doit être d’au moins 20 mm. •...
  • Seite 29: Explications Sur Le Montage Des Charnières

    EXPLICATIONS SUR LE MONTAGE DES CHARNIÈRES • Fixer la charnière avec 2 vis. • Après avoir vérifié l’écart, la fixer avec 2 vis au niveau des pieds. • Lorsque le réfrigérateur est fermé, un écart d’environ 1-2 mm est nécessaire entre la porte de l’armoire d’encastrement et le réfrigérateur.
  • Seite 30: Changement Du Côté D'ouverture De La Porte

    CHANGEMENT DU CÔTÉ D’OUVERTURE DE LA PORTE Dévisser les vis de la charnière de droite. Enlever la charnière du haut et du bas. Les pièces suivantes sont présentes dans le carton : 1x cache de charnière gauche 2x charnières (haut et bas) 3x vis Fixer la porte à...
  • Seite 31: Résolution Des Problèmes

    RÉSOLUTION DES PROBLÈMES Problème Cause possible Solution L‘appareil ne fonctionne La fiche n'est pas branchée Branchez correctement la pas. ou mal branchée. fiche dans la prise. Le fusible s'est déclenché Contrôlez le fusible. ou est endommagé. Les aliments sont chauds. La température est mal Réglez une température réglée...
  • Seite 32: Conseils Pour Le Recyclage

    CONSEILS POUR LE RECYCLAGE Le pictogramme ci-contre apposé sur le produit signifie que la directive européenne 2012/19/UE s‘applique (poubelle à roues barrée d’une croix). Ces produits ne peuvent être jetés dans les poubelles domestiques courantes. Renseignez- vous concernant les règles appliquées pour la collecte d’appareils électriques et électroniques.

Diese Anleitung auch für:

1000543910005399100327781003277910005440

Inhaltsverzeichnis