Herunterladen Inhalt Inhalt Diese Seite drucken
Hama M630 Bedienungsanleitung
Vorschau ausblenden Andere Handbücher für M630:

Werbung

Verfügbare Sprachen

Verfügbare Sprachen

www.hama.com
Hama GmbH & Co KG
Postfach 80
86651 Monheim/Germany
Tel. + 49 (0) 90 91 / 5 02-0
Fax + 49 (0) 90 91 / 5 02-2 74
hama@hama.de
www.hama.com
85052472-05.07

Werbung

Inhaltsverzeichnis
loading

Inhaltszusammenfassung für Hama M630

  • Seite 1 Hama GmbH & Co KG Postfach 80 86651 Monheim/Germany Tel. + 49 (0) 90 91 / 5 02-0 Fax + 49 (0) 90 91 / 5 02-2 74 hama@hama.de www.hama.com 85052472-05.07...
  • Seite 2 85052472 M630 Wireless Optical Mouse...
  • Seite 3: Einlegen Der Batterien

    l Bedienungsanleitung 1. Hardware Installation 1.1 Einlegen der Batterien • Entfernen Sie den Batteriedeckel auf der Rückseite der Maus und legen die Batterien polrichtig in das Batteriefach (Abb.1). Die richtige Polarität ist dort aufgezeichnet. • Schießen Sie das Batteriefach wieder Verbindungstaste Abb.1 1.2 Anschließen des Empfängers...
  • Seite 4: Maus Und Empfänger Verbinden

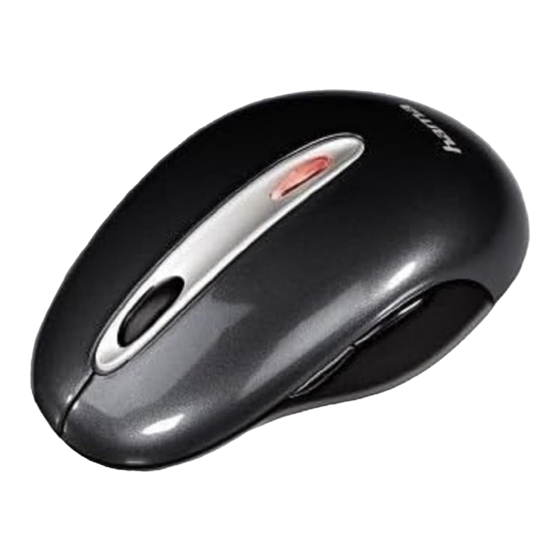
    1.3 Maus und Empfänger verbinden • Betätigen Sie die Verbindungstaste am Empfänger, die Statusanzeige beginnt zu blinken. • Betätigen Sie anschließend die Verbindungstaste auf der Unterseite der Maus. (Abb.1) Verbindungstaste/ Statusanzeige Abb.4 1.4 Batteriekontrollleuchte Schwache Batterien in der Maus werden durch das rote Aufleuchten der Batteriekontrollleuchte auf der Oberseite der Maus signalisiert.
  • Seite 5 2. Software Installation • Deinstallieren Sie zunächst eventuell bereits vorhandene Maussoftware. • Die Software unterstützt Windows 98SE/ME/2000/XP/Vista. a) Legen Sie die beigelegte CD in Ihr CD-ROM oder DVD-ROM Laufwerk. Warten Sie einen Moment, und die Installation wird automatisch gestartet. Sollte dies nicht geschehen, klicken Sie auf Start =>Ausführen, geben "X:\Setup"...
  • Seite 6: Inserting Batteries

    L Operating Instructions 1. Installing the hardware 1.1 Inserting batteries • Remove the battery cover at the rear of the mouse and insert the batteries the right way around in the battery compartment (Fig. 1). The poles are indicated there. •...
  • Seite 7: Low-Battery Indicator

    1.3 Connecting the mouse and receiver • Press the connect button on the receiver. The status indicator starts to flash. • Then press the connect button at the bottom of the mouse. Connect button Status indicator Fig.4 1.4 Low-battery indicator If the batteries in the mouse are weak, the low-battery indicator on the upper side of the mouse lights up (red).
  • Seite 8 2. Installing the software • Uninstall any mouse software already installed. • The software supports Windows 98SE/2000/ME/XP/Vista. a) Place the enclosed CD in your CD-ROM or DVD-ROM drive. Wait a moment, installation is started automatically. If it does not start automatically, click Start => Run, enter “X:\Setup” (where "X”...
  • Seite 9: Mise En Place Des Batteries

    ¬ ¬ Mode d’emploi 1. Installation du matériel 1.1 Mise en place des batteries • Retirez le couvercle du compartiment des batteries sur la face arrière de la souris, puis insérez les batteries conformément à leur polarité dans le compartiment (ill. 1). La bonne polarité...
  • Seite 10 1.3 Couplage de la souris au récepteur • Appuyez sur la touche de connexion du récepteur; l’affichage d’état commence à clignoter • Appuyez ensuite sur la touche de connexion située sur la face inférieure de la souris Touche de connexion Affichage d’état ill.4 1.4 Témoin de contrôle de la batterie...
  • Seite 11 2. Installation du logiciel • Désinstallez éventuellement le logiciel de souris existant. • Le logiciel supporte Windows 98SE/ME/2000XP/Vista. a) Insérez le CD fourni dans votre lecteur de CD-ROM ou de DVD-ROM. Patientez jusqu’à ce que le programme d’installation démarre automatiquement. Si l'installation n’est pas lancée, cliquez sur Démarrer =>...

Inhaltsverzeichnis