Werbung
Verfügbare Sprachen
Verfügbare Sprachen
Die Konformitätserklärung nach der R&TTE Richtlinie 99/5/EG fi nden Sie unter www.hama.com
See www.hama.com for declaration of conformity according to R&TTE Directive 99/5/EC guidelines
La déclaration de conformité à la directive R&TTE 99/5/CE se trouve sur www.hama.com
De verklaring van overeenstemming conform de R&TTE-richtlijn 99/5/EG vindt u onder www.hama.com
La dichiarazione di conformità secondo la direttiva R&TTE 99/5/CE è disponibile sul sito www.hama.com
La declaración de conformidad según la directiva R&TTE 99/5/CE la encontrará en www.hama.com
Konformitetserklæringen ifl g. R & TTE-retningslinierne 99/5/EC fi nder du under www.hama.com
Deklaracja zgodności według dyrektywy R&TTE 99/5/EG dostępna na stronie internetowej www.hama.com
A megfelelőségi követelmények megegyeznek az R&TTE Irányelvek 99/5/EG ajánlásaival www.hama.com
A megfelelőségi követelmények megegyeznek az R&TTE Irányelvek 99/5/EG ajánlásaival www.hama.com
Prohlášení, o shodě podle směrnice R&TTE 99/5/EG, naleznete na www.hama.com
Prehlásenie o zhode podμa R&TTE smernice 99/5/EG nájdete na www.hama.com
(D)
Dieses Gerät darf nur in den folgenden Ländern betrieben werden:
(GB) This operation of this device is only allowed in the following countries:
(F)
Cet appareil ne peut être utilisé que dans les pays suivants:
(E)
Este aparato se puede utilizar sólo en los países siguientes:
(I)
L'uso di questo apparecchio è ammesso soltanto nei seguenti Paesi:
(NL) Dit apparaat mag alleen gebruikt worden in de volgende landen:
(DK) Dette apparat må kun benyttes i følgende lande:
(PL) Urządzenie sprzedawane jest tylko w następujących krajach:
(H)
Ez a készülék a következő országokban üzemeltethető:
(CZ) Tento přístroj se smí používat pouze v následujících zemích:
(SK) Toto zariadenie sa môže používať len v týchto krajinách:
(D) (A) (CH) (GB) (F) (NL) (E) (DK) (H) (PL) (CZ) (SK) (I) (B)
www.hama.com
00052495-07.06
Hama GmbH & Co KG
Postfach 80
86651 Monheim/Germany
Tel. +49 (0)9091/502-0
Fax +49 (0)9091/502-274
hama@hama.de
www.hama.com
e
!
Werbung
Inhaltsverzeichnis

Inhaltszusammenfassung für Hama M620
- Seite 1 La déclaration de conformité à la directive R&TTE 99/5/CE se trouve sur www.hama.com De verklaring van overeenstemming conform de R&TTE-richtlijn 99/5/EG vindt u onder www.hama.com La dichiarazione di conformità secondo la direttiva R&TTE 99/5/CE è disponibile sul sito www.hama.com La declaración de conformidad según la directiva R&TTE 99/5/CE la encontrará en www.hama.com Konformitetserklæringen ifl...
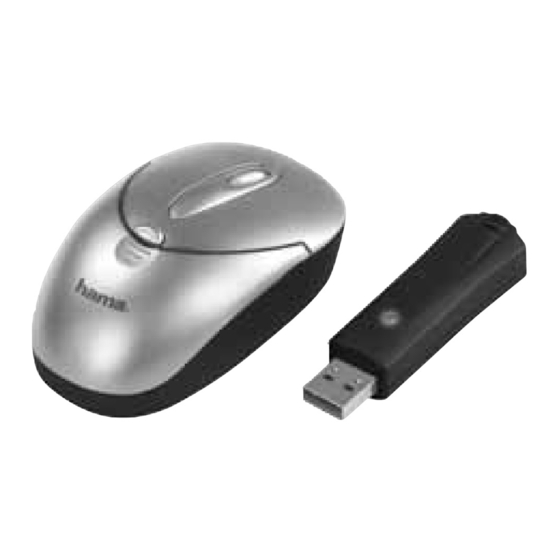
- Seite 2 00052495 00052496 00052497 Wireless Optical Mouse »M620 - M622 - M624«...
-
Seite 3: Einlegen Der Batterien
l Bedienungsanleitung 1. Verpackungsinhalt · Kabellose, optische Notebook-Maus · USB Empfänger · Zwei AAA Batterien · Kurzanleitung 2. Hardware Installation 2.1 Einlegen der Batterien a) Drücken Sie auf die Batteriefach-Taste und ziehen gleichzeitig den Batteriedeckel nach hinten (Abb.1) b) Legen Sie die beiden AAA-Batterien polrichtig in das Batteriefach. Die richtige Polarität ist dort aufgezeichnet. - Seite 4 3. Maus und Empfänger verbinden/Inbetriebnahme a) Betätigen Sie die Verbindungstaste am Empfänger, die Status-LED blinkt (Abb.3). Der Empfänger ist zur Syncronisation mit der Maus bereit. b) Betätigen Sie anschließend innerhalb von 10 Sekunden die Verbindungs- taste mit einem spitzen Gegenstand (z.B. einem Sift) auf der Unterseite der Maus (Abb.2).
-
Seite 5: Inserting Batteries
L Operating Instruction 1. Package contents · Wireless optical notebook mouse · USB receiver · Two AAA batteries · Instructions 2. Installing the hardware 2.1 Inserting Batteries a) Press the battery compartment button and pull the battery cover back at the same time (Fig. - Seite 6 3. Connecting the mouse / getting started a) Press the connect button on the receiver; the status LED starts to blink (Fig. 3). The receiver is now ready to synchronise the mouse automatically. b) Within 10 seconds, press the connect button with a pointed object (for instance a pen) on the base of the mouse (Fig.
-
Seite 7: Mise En Place Des Piles
¬ Mode d‘emploi 1. Contenu de l‘emballage - Souris sans fi l optique d’ordinateur portable · Récepteur USB · Deux piles LR03/AAA · Notice d’utilisation 2. Installation du matériel 2.1 Mise en place des piles a) Appuyez sur le poussoir du compartiment des piles et faites glisser simultanément le couvercle vers l‘arrière (fi... - Seite 8 3. Synchronisation / mise en service de la souris a) Appuyez sur la touche de connexion du récepteur ; la DEL d’affi chage d’état commence à clignoter (fi g. 3). Le récepteur est alors prêt pour la synchronisation avec la souris. b) Appuyez dans les 10 secondes sur la touche de connexion de la face inférieure de votre souris (fi...


