Herunterladen Inhalt Inhalt Diese Seite drucken
Philips PicoPix PPX5110 Bedienungsanleitung

Philips PicoPix PPX5110 Bedienungsanleitung

Vorschau ausblenden Andere Handbücher für PicoPix PPX5110:
Inhaltsverzeichnis

Werbung

Verfügbare Sprachen
  • DE

Verfügbare Sprachen

  • DEUTSCH, seite 25
Pocket Projector
PPX5110
Register your product and get support at
www.philips.com/welcome
EN User Manual
DE Bedienungsanleitung
ES Manual de usuario
FR Manuel utilisateur
HU Kezelési útmutató
IT Manuale d´uso
NL Handleiding
PL Instrukcja obsługi
PT Manual de instruções
SV Bruksanvisning

Werbung

Inhaltsverzeichnis
loading

Inhaltszusammenfassung für Philips PicoPix PPX5110

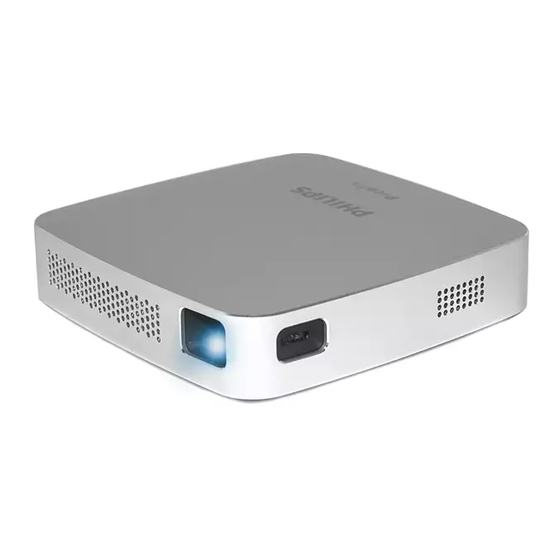
  • Seite 1 EN User Manual DE Bedienungsanleitung ES Manual de usuario FR Manuel utilisateur Pocket Projector HU Kezelési útmutató PPX5110 IT Manuale d´uso NL Handleiding PL Instrukcja obsługi PT Manual de instruções SV Bruksanvisning Register your product and get support at www.philips.com/welcome...
  • Seite 2 User Manual Pocket Projector PPX5110 Register your product and get support at www.philips.com/welcome...
  • Seite 3: Inhaltsverzeichnis

    Table of contents Introduction ..........3 Dear customer ............3 About this user manual ..........3 What's in the box ............3 Product highlights ............3 1 General safety information ....4 Setting up the device ..........4 Repairs ................4 Power supply ..............5 2 Overview ...........6 Back and bottom view ..........6 Side view ...............6 Front and side view ...........6...
  • Seite 4: Introduction

    Introduction Dear customer What's in the box 1 – Pico Projector (PPX 5110) Thank you for purchasing this projector. 2 – A/C Power adapter We hope you enjoy your device and its many functions! 3 – Power plugs (EU, UK, US) 4 –...
  • Seite 5: General Safety Information

    The battery is integrated with the device. Do not dissemble and modify. The battery should be replaced by qualified service staff only. DANGER! Risk of explosion with incorrect type of batteries! Do not try to replace the battery your- self. Philips · PPX5110...
  • Seite 6: Power Supply

    Power supply Use only a power adapter which is certified for this product (see Technical data, page 19). Check whether the mains voltage of the power supply matches the mains voltage available at the setup location. This device complies with the voltage type specified on the device.
  • Seite 7: Overview

    2 – B Power / Mode To turn on and off the device, press the B button for eight seconds. To switch between iOS and Android mode press the B button for one second. 3 – Vents Philips · PPX5110...
  • Seite 8: Initial Operation

    3 Initial operation Setting up the device DANGER! Place the projector on a flat surface in front of Risk of explosion with incorrect type of the projection surface. batteries! Do not try to replace the battery your- Connecting power supply self.
  • Seite 9: Connect To Playback Device

    1 Connect the external speakers or head- phones to the projector's Audio out socket. The device speakers deactivate automatically when the external speakers or headphones are connected. 2 Connect the HDMI plug to the HDMI socket of the playback device. Philips · PPX5110...
  • Seite 10: Wireless Projection With Miracast- Compatible Android Devices

    5 Wireless projection with Miracast- compatible Android devices 3 Select Other connections, then press Wire- Notice less display. In order to allow Screen Mirroring, your device must support Miracast. Not all Android phones have this function. Very often it's also hidden under differ- ent names such as Screencast, Screen Sharing, WiFi Direct, Wireless Display etc.
  • Seite 11: Projection With Ios Devices

    1 Switch the projector to iOS mode. To switch between iOS and Android mode press the B button for one second. iOS mode 3 Open the Control Centre by sliding up on the screen, then select Screen Mirroring. Philips · PPX5110...
  • Seite 12: Usb Screen Mirroring (Ios)

    4 Select PPX5110-xxx. 2 In the Settings of your iPhone select Per- sonal Hotspot. USB Screen Mirroring (iOS) 3 Switch the Personal Hotspot to On. 1 Switch the projector to iOS mode. To switch between iOS and Android mode press the B button for one second.
  • Seite 13 4 Connect the Lightning cable to the projec- 6 Open the Control Centre by sliding up on the tor's USB port and the other end to the screen, then select Screen Mirroring. iPhone. 7 Select PPX5110-xxx. 5 Confirm the pop-up message on your iPhone. Philips · PPX5110...
  • Seite 14: Connecting The Phone To The Wi-Fi Network Created By The Projector

    7 Connecting the phone to the Wi-Fi network created by the projector Enter the IP address 192.168.49.1 in the browser 5 Select Scan. address of your smartphone to set up the wire- less environment. This will enable smartphone internet browsing with wireless projection. 1 Switch to iOS mode by pressing the B button for one second.
  • Seite 15 7 Enter a password and press Submit. Philips · PPX5110...
  • Seite 16: Service

    8 Service Care instructions for the Cleaning the lens Use a soft brush or lens cleaning paper for battery cleaning the lens of the projector. The capacity of the built-in battery diminishes DANGER! with time. You can prolong the life of the battery if you observe the following points: Do not use any liquid cleaning agents! Do not use any liquid cleaning agents...
  • Seite 17: Wireless Firmware Update

    USB cable. 1 Connect the projector to the Internet (see Connecting the phone to the Wi-Fi network created by the projector, page 13). 2 Select Advanced. 3 Press Submit. below the OTA host. Philips · PPX5110...
  • Seite 18: Troubleshooting

    3 Turn on the device by pressing the B button Troubleshooting for eight seconds. 4 Use a small pin and push it gently in the small Power cycling Reset hole. 5 Turn on the device by pressing the B button If a problem occurs that cannot be corrected for eight seconds.
  • Seite 19 What to do if the projector does not work when • Check that the HDMI cable is plugged connecting to a notebook PC? correctly. • Make sure that the notebook PC has been switched to projector display. Philips · PPX5110...
  • Seite 20: Appendix

    9 Appendix Technical data Technology / optical Optical technology ........... DLP® Light source ..........RGB LED Resolution ......854 × 480 pixel (WVGA) LED lifetime ........up to 20,000 h Contrast .............. 1000:1 Aspect ratio............. 16:9 Brightness........up to 100 lumen Projection image size (diagonal)......
  • Seite 21 This device should be installed and operated The declaration of compliance can be consulted with a minimum distance of 20 centimetres on the site www.picopix.philips.com. between the device and your body. Canada Regulatory Compliance Preservation of the environment as part of a...
  • Seite 22 X-GEM SAS shall not be liable for any damages or problems arising from the use of any options or any consumable materials other than those designated as original X-GEM SAS / PHILIPS products or X-GEM SAS / PHILIPS approved products.
  • Seite 23 PHILIPS and the PHILIPS’ Shield Emblem are registered trademarks of Koninklijke Philips N.V. used under license. This product was brought to the market by X-GEM SAS, further referred to in this document as X-GEM SAS, and is the manufacturer of the product.
  • Seite 24 Bedienungs- anleitung Taschenprojektor PPX5110 Register your product and get support at www.philips.com/welcome...
  • Seite 25 Inhaltsverzeichnis Einleitung ............3 Sehr geehrter Kunde, ..........3 Über diese Bedienungsanleitung ......3 Inhalt der Verpackung ..........3 Produkthighlights ............3 1 Allgemeine Sicherheitshinweise ..4 Gerät aufstellen ............4 Reparaturen ..............4 Stromversorgung ............5 2 Übersicht ...........6 Rückseite und Unterseite des Gerätes ....6 Seitenansicht des Gerätes ........6 Frontansicht und Seitenansicht des Gerätes ...6 3 Erste Inbetriebnahme ......
  • Seite 26: Einleitung

    Einleitung Sehr geehrter Kunde, Inhalt der Verpackung 1 – Pico Projektor (PPX 5110) vielen Dank, dass Sie sich für diesen Projektor entschieden haben. 2 – AC-Netzteiladapter Viel Spaß mit Ihrem Gerät und seinen vielfälti- 3 – Netzstecker (EU, UK, US) gen Funktionen! 4 –...
  • Seite 27: Allgemeine Sicherheitshinweise

    Sie es vom Stromnetz. Lassen Sie Ihr vicestelle reparieren. Gerät von einer autorisierten Servicestelle untersuchen. Halten Sie das Gerät fern von Details zu autorisierten Servicestellen können Feuer. Sie der Garantiekarte entnehmen. Entfernen Sie nicht das Typenschild von Ihrem Gerät, anderenfalls erlischt die Garantie. Philips · PPX5110...
  • Seite 28: Stromversorgung

    Stromversorgung Verwenden Sie nur Netzteiladapter, die für die- ses Produkt zertifiziert sind (siehe Technische Daten, Seite 20). Prüfen Sie, ob die Netzspan- nung des Netzteils mit der vorhandenen Netz- spannung am Aufstellungsort übereinstimmt. Das Gerät entspricht dem auf dem Gerät ange- gebenen Spannungstyp.
  • Seite 29: Übersicht

    2 – B Ein-/Ausschalter / Modusauswahl Um das Gerät ein- und auszuschalten, drü- cken Sie die B-Taste für acht Sekunden. Um zwischen den Betriebssystemen iOS und Android zu wechseln, drücken Sie die B- Taste für eine Sekunde. 3 – Belüftungsöffnungen Philips · PPX5110...
  • Seite 30: Erste Inbetriebnahme

    3 Erste Inbetriebnahme Während das Gerät lädt, blinkt die blaue Lade- Gerät aufstellen LED. Wenn der Projektor voll aufgeladen ist, hört die LED auf zu blinken. Stellen Sie das Gerät auf einer ebenen Oberflä- che vor die Projektionsfläche auf. GEFAHR! Explosionsgefahr bei falschem Batterie- Netzteil anschließen typ!
  • Seite 31: An Das Wiedergabegerät Anschließen

    1 Schließen Sie externe Lautsprecher oder Kopfhörer an den Audio out-Ausgang an. Der Gerätelautsprecher deaktiviert sich automa- tisch, wenn externe Lautsprecher oder Kopf- hörer angeschlossen werden. 2 Schließen Sie das andere Ende des Kabels an den HDMI-Eingang des Wiedergabegerätes Philips · PPX5110...
  • Seite 32: Drahtlose Projektion Mit Miracast- Kompatiblen Android-Geräten

    5 Drahtlose Projektion mit Miracast- kompatiblen Android-Geräten 3 Wählen Sie Other connections und drücken Hinweis Sie dann Wireless display. Für Screen Mirroring muss Ihr Gerät Miracast unterstützen. Nicht alle And- roid-Handys unterstützen diese Funk- tion. Oft ist diese Funktion auch unter anderen Namen, Screencast,...
  • Seite 33: Projektion Mit Ios-Geräten

    Android zu wechseln, drücken Sie die B-Taste für eine Sekunde. iOS mode 3 Rufen Sie das Control Centre (Kontrollzen- trum) auf, indem Sie vom unteren Bild- schirmrand nach oben streichen und wählen Sie dann Screen Mirroring (AirPlay). Philips · PPX5110...
  • Seite 34: Usb Screen Mirroring (Ios)

    4 Wählen Sie PPX5110-xxx. 2 In den Settings (Einstellungen) Ihres iPhones wählen Sie Personal Hotspot (Persönlicher Hotspot). USB Screen Mirroring (iOS) 3 Stellen Sie den Schieberegler Personal Hots- 1 Schalten Sie den Projektor in den iOS- pot (Persönlicher Hotspot) auf On (Ein). Modus.
  • Seite 35 Kabels mit dem USB-Port am Projektor und trum) auf, indem Sie vom unteren Bild- das andere Ende mit dem iPhone. schirmrand nach oben streichen und wählen wählen Sie dann Screen Mirroring (AirPlay). 7 Wählen Sie PPX5110-xxx. 5 Bestätigen Sie das Pop-up-Fenster. Philips · PPX5110...
  • Seite 36: Handy Mit Dem Wi-Fi-Netzwerk Des Projektors Verbinden

    7 Handy mit dem Wi-Fi-Netzwerk des Projektors verbinden Geben Sie im Browser Ihres iPhones die IP- 5 Wählen Sie Scan. Adresse 192.168.49.1 ein, um das drahtlose Netzwerk einzurichten. Dadurch können Sie Internet-Inhalte Ihres iPhones drahtlos an den Projektor übertragen. 1 Um in das Betriebssystemen iOS zu wech- seln, drücken Sie die B-Taste für eine Sekunde.
  • Seite 37 7 Geben Sie ein Passwort ein und drücken Sie Submit. Philips · PPX5110...
  • Seite 38: Service

    8 Service Pflegehinweise für die Reinigung Batterie GEFAHR! Hinweise für die Reinigung! Die Kapazität der eingebauten Batterie lässt mit der Zeit nach. Sie können die Lebensdauer der Verwenden Sie ein weiches, fusselfreies Batterie verlängern, wenn Sie die folgenden Tuch. Verwenden Sie auf keinen Fall Punkte beachten: flüssige, gasförmige oder leicht ent- flammbare Reinigungsmittel (Sprays,...
  • Seite 39: Drahtloses Firmware-Update

    (siehe Handy mit dem Wi-Fi-Netzwerk des Projektors verbinden, Seite 13). 2 Wählen Sie Advanced. Der Projektor wird automatisch neu gestar- tet und mit dem Update-Server verbunden. Hinweis Wenn am Update-Server eine neue Firmware-Version vorhanden ist, wird diese automatisch heruntergeladen und installiert. Philips · PPX5110...
  • Seite 40: Probleme Und Lösungen

    9 Probleme und Lösungen 3 Schalten Sie das Gerät ein, indem Sie die B- Schnellhilfe Taste für acht Sekunden drücken. Sollte ein Problem auftreten, das sich mit den 4 Drücken Sie mit einem spitzen Gegenstand Beschreibungen in dieser Bedienungsanleitung (z.B. einem Kugelschreiber) vorsichtig in die nicht lösen lässt, können die nachstehenden Reset-Öffnung.
  • Seite 41 Kann ich eine Power-Bank an den Projektor • Die Power-Bank kann über den Mikro-USB- anschließen? Port mit dem Projektor verbunden werden. • Für den einwandfreien Betrieb sind 3 A bei 5 V erforderlich. • Betreiben Sie den Projektor nicht unter dieser Mindestanforderung. Philips · PPX5110...
  • Seite 42 Probleme Lösungen Die Geräteoberfläche wird heiß. • Es ist normal, dass der Projektor eine gewisse Wärme erreicht, wenn er in Betrieb ist. Der Projektor zeigt nichts an, wenn ein Notebook • Prüfen Sie, ob das HDMI-Kabel richtig angeschlossen ist. angesteckt ist. •...
  • Seite 43: Anhang

    Android ........Miracast-kompatibel iOS ............7/8/9/10/11 Produktinformationen Abmessungen (L × B × H) ..98 × 98 × 27,5 mm ..........3,86" × 3,86" × 1,08" Gewicht ..............215 g Verpackungsinhalt PPX5110, AC-Netzteiladapter, Schnellstartanlei- tung, Tragetasche, Netzstecker (EU, UK, US) Philips · PPX5110...
  • Seite 44 Nähe von anderen Antennen oder Sendern Die Einhaltungserklärung können Sie auf der betrieben werden. Dieses Gerät entspricht den Internetseite: www.picopix.philips.com. FCC-Grenzwerten für Hochfrequenzstrahlung in einer unkontrollierten Umgebung. Die Erhaltung der Umwelt im Rahmen eines Dieses Gerät sollte mit einem Mindestabstand Konzepts nachhaltiger Entwicklung liegt X-GEM von 20 cm zu Ihrem Körper aufgestellt und...
  • Seite 45 Probleme in Folge der Verwendung jeglicher Optionen oder Ver- brauchsmaterialien, die nicht als Originalpro- dukte von X-GEM SAS bzw. PHILIPS oder von X- Verpackung: Das Logo (Grüner Punkt) drückt GEM SAS bzw. PHILIPS genehmigte Produkte aus, dass eine anerkannte nationale Organisa- gekennzeichnet sind.
  • Seite 46 Philips and the Philips Shield Emblem are registered trademarks of Koninklijke Philips N.V. used under license. This product was brought to the market by X-GEM SAS, further referred to in this document as X-GEM SAS, and is the manufacturer of the product.
  • Seite 47 Manual de usuario Proyector de bolsillo PPX5110 Register your product and get support at www.philips.com/welcome...
  • Seite 48 Índice Introducción ..........3 Estimado cliente ............3 Sobre este manual de usuario ......3 Contenido del embalaje .......... 3 Características destacadas ........3 1 Información general de seguridad ..4 Instalación del aparato ..........4 Reparaciones ..............4 Alimentación de corriente ........5 2 Descripción general .......6 Vista trasera e inferior ..........6 Vista lateral ..............6 Vista frontal y lateral ..........6...
  • Seite 49: Introducción

    Introducción Estimado cliente Contenido del embalaje 1 – Proyector Pico (PPX 5110) Gracias por comprar este proyector. 2 – Adaptador de corriente alterna ¡Deseamos que disfrute de su aparato y sus múltiples funciones! 3 – Conectores eléctricos (EU, UK, US) 4 –...
  • Seite 50: Información General De Seguridad

    La batería está integrada en el aparato. No lo desmonte o modifique. La batería sólo debe ser sustituida por personal de servicio cualificado. ¡PELIGRO! ¡Hay riesgo de explosión con baterías del tipo incorrecto! No intente sustituir la batería Vd. mismo. Philips · PPX5110...
  • Seite 51: Alimentación De Corriente

    Alimentación de corriente Sólo utilice un adaptador de corriente certifi- cado para este producto (vea Datos técnicos, página 19). Compruebe si el voltaje de la ali- mentación se corresponde con el voltaje dispo- nible en el lugar de la instalación. Este aparato cumple con el tipo de voltaje especificado en el aparato.
  • Seite 52: Descripción General

    2 – B Encendido / Modo Para encender y apagar el aparato, pulse el botón B durante ocho segundos. Para cambiar entre modo iOS y Android, pul- se el botón B durante un segundo. 3 – Aireación Philips · PPX5110...
  • Seite 53: Operación Inicial

    3 Operación inicial Instalación del aparato Antes de su primer uso, cargue el proyector durante cinco horas. Coloque el aparato en una superficie lisa El LED azul de carga parpadea durante la carga. delante de la superficie de proyección. Si el proyector está completamente cargado, el LED deja de parpadear.
  • Seite 54: Conexión A Dispositivo Reproductor

    Conecte los altavoces externos o auriculares al conector Audio out (salida de audio) del proyector. Los altavoces del aparato se des- conectan automáticamente cuando conectan los altavoces externos o auricula- res. 2 Conecte el enchufe HMI al conector HDMI del dispositivo reproductor. Philips · PPX5110...
  • Seite 55: Proyección Inalámbrica Con Dispositivos Android Compatibles Con Miracast

    5 Proyección inalámbrica con dispositivos Android compatibles con Miracast 3 Seleccione Otras conexiones, luego pulse Nota Visualización inalámbrica. A fin de permitir la reproducción de la pantalla, su móvil inteligente debe soportar Miracast. No todo los teléfo- nos Android tienen esta función. A menudo está...
  • Seite 56: Proyección Con Dispositivos Ios

    1 Ponga el proyector en modo iOS. Para cam- biar entre el modo iOS y Android, pulse el botón B durante un segundo. iOS mode 3 Abra el Centro de Control deslizando la pan- talla hacia arriba, luego seleccione Duplicar pantalla. Philips · PPX5110...
  • Seite 57: Reproducción De Pantalla Por Usb (Ios)

    4 Seleccione PPX5110-xxx. 2 En los Ajustes de su iPhone seleccione Punto inalámbrico personal. Reproducción de pantalla 3 Ponga el Punto inalámbrico personal en Encendido. por USB (iOS) 1 Ponga el proyector en modo iOS. Para cam- biar entre el modo iOS y Android, pulse el botón B durante un segundo.
  • Seite 58 4 Conecte el cable de encendido al puerto USB 6 Abra el Centro de Control deslizando la pan- del proyector y el otro extremo al iPhone. talla hacia arriba, luego seleccione Duplicar pantalla. 7 Seleccione PPX5110-xxx. 5 Confirme el mensaje emergente en su iPhone. Philips · PPX5110...
  • Seite 59: Conectar El Proyector A Internet

    7 Conectar el proyector a Internet Introduzca la dirección IP 192.168.49.1 en la 5 SeleccioneScan (Escanear). dirección del navegador de su móvil inteligente para configurar el entorno inalámbrico. Esto activará la navegación por Internet de su móvil inteligente con una proyección inalámbrica. 1 Cambie al modo iOS pulsando el botón B durante un segundo.
  • Seite 60 7 Introduzca una clave y pulse Submit (Enviar). Philips · PPX5110...
  • Seite 61: Servicio

    8 Servicio Instrucciones de cuidado de Limpieza de la lente Utilice una brocha suave o papel de limpieza de la batería lentes para limpiar la lente del proyector. La capacidad de la batería disminuye con el ¡PELIGRO! tiempo. Puede prolongar la vida de la batería si observa los siguientes puntos: ¡No utilice agentes limpiadores líquidos! No utilice ningún agente limpiador...
  • Seite 62: Actualización Inalámbrica Del Firmware

    2 Seleccione Advanced (Avanzado). El proyector se reiniciará de forma automá- tica y se conectará al servidor de actualiza- ciones. Nota Si el servidor de actualizaciones tiene un nuevo firmware, se descargará e ins- talará de forma automática. Philips · PPX5110...
  • Seite 63: Identificación De Averías

    Identificación de averías 3 Encienda el aparato pulsando el botón B durante ocho segundos. 4 Pulse el botón de Reinicio. Ayuda rápida 5 Encienda el aparato pulsando el botón B durante ocho segundos. Si ocurre un problema que no se puede corregir con las instrucciones en este manual de usuario, 6 Si el problema persiste, por favor contacte siga las instrucciones que se dan aquí.
  • Seite 64 ¿Qué hacer si el proyector no funciona al • Compruebe que el cable HDMI está conectarse a un ordenador portátil? conectado correctamente. • Asegúrese que el ordenador portátil se ha puesto en modo de pantalla externa. Philips · PPX5110...
  • Seite 65: Apéndice

    9 Apéndice Datos técnicos Tecnología / óptica Tecnología óptica ..........DLP® Fuente luminosa ........LED RGB Resolución ....854 × 480 píxeles (WVGA) Vida del LED ........hasta 20.000 h Contraste ............1000:1 Relación de aspecto ..........16:9 Luminosidad........hasta 100 lumen Tamaño de imagen proyectada (diagonal) ..
  • Seite 66 La declaración de cumplimiento se puede con- con ninguna otra antena o transmisor. Este apa- sultar en el sitio www.picopix.philips.com. rato respeta los límites de exposición a la radia- ción de radiofrecuencia establecidos por la FCC para un entorno no controlado.
  • Seite 67 X-GEM SAS / PHILIPS o como productos Embalaje: La presencia del logotipo (punto autorizados por X-GEM SAS / PHILIPS. verde) significa que se paga una contribución a X-GEM SAS no se responsabiliza de daños pro-...
  • Seite 68 PHILIPS and the PHILIPS’ Shield Emblem are registered trademarks of Koninklijke Philips N.V. used under license. This product was brought to the market by X-GEM SAS, further referred to in this document as X-GEM SAS, and is the manufacturer of the product.
  • Seite 69 Manuel  utilisateur Projecteur de poche PPX5110 Register your product and get support at www.philips.com/welcome...
  • Seite 70 Table des matières Introduction ..........3 Cher client ..............3 À propos du manuel utilisateur ......3 Contenu de la boîte ..........3 Points forts du produit ..........3 1 Informations générales sur la  sécurité ............4 Installation de l’appareil ..........4 Réparations ..............4 Alimentation électrique ...........5 2 Aperçu ............6...
  • Seite 71: Introduction

    Introduction Cher client Contenu de la boîte 1 – Projecteur Pico (PPX 5110) Nous vous remercions d’avoir choisi ce projec- teur. 2 – Adaptateur CA Nous vous souhaitons beaucoup de satisfaction 3 – Fiches secteur (EU, UK, US) avec votre appareil et ses multiples fonctions ! 4 –...
  • Seite 72: Informations Générales Sur La Sécurité

    La batterie doit être remplacée par du personnel de main- tenance qualifié uniquement. DANGER ! Risque d’explosion en cas d’utilisation d’un type de batterie non approprié ! N’essayez pas de remplacer vous- même la batterie. Philips · PPX5110...
  • Seite 73: Alimentation Électrique

    Alimentation électrique Utilisez uniquement un adaptateur certifié pour cet appareil (voir Caractéristiques techniques, page 19). Vérifiez si la tension de réseau du bloc d’alimentation correspond à la tension de réseau du lieu d’installation. Cet appareil est conforme au type de tension spécifié sur l’appareil.
  • Seite 74: Aperçu

    5 – Port USB pour permettre la recopie de l’écran par câble avec iOS. 6 – Entrée HDMI 1 – Aérations 2 – Lentille de projection 3 – Molette de mise au point pour ajuster la netteté de l’image. 4– Haut-parleurs Philips · PPX5110...
  • Seite 75: Première Mise En Service

    3 Première mise en service Installation de l’appareil Avant la première utilisation, chargez le projec- teur pendant cinq heures. Placez le projecteur sur une surface plane face à La LED de chargement bleue clignote au cours la surface de projection. de la charge.
  • Seite 76: Branchement À Un Appareil De Lecture

    1 Branchez les écouteurs externes à la prise de Audio out du projecteur. Les haut-parleurs de l’appareil se désactivent automatique- ment lors du branchement des écouteurs. 2 Branchez la prise HDMI à la fiche HDMI de l’appareil de lecture. Philips · PPX5110...
  • Seite 77: Projection Sans Fil Avec Des Appareils Android Compatibles Avec Miracast

    5 Projection sans fil avec des appareils Android compatibles avec Miracast 3 Sélectionnez Other connections (Autres Notice connexions), puis pressez Wireless display (Affichage sans fil). Pour permettre la recopie de l’écran, votre appareil doit prendre en charge Miracast. Tous les téléphones Android ne sont pas dotés de cette fonction.
  • Seite 78: Projection À L'aide D'appareils Ios

    à Android et inversement, pressez le bouton B pendant une seconde. iOS mode 3 Ouvrez Control Centre (Centre contrôle) en faisant glisser l’écran vers le haut avec votre doigt, puis sélectionnez Screen Mirroring (Recopie de l’écran). Philips · PPX5110...
  • Seite 79: Recopie De L'écran Usb (Ios)

    4 Sélectionnez PPX5110-xxx. 2 Dans les Settings (Réglages) de votre iPhone, sélectionnez Personal Hotspot (Par- tage de connexion). Recopie de l’écran USB (iOS) 3 Passez Personal Hotspot (Partage 1 Passez le projecteur en mode iOS. Pour pas- connexion) sur On. ser du mode iOS à...
  • Seite 80 Centre (Centre jecteur et l’autre extrémité à l’iPhone. contrôle) en faisant glisser l’écran vers le haut avec votre doigt, puis sélectionnez Screen Mirroring (Recopie de l’écran). 7 Sélectionnez PPX5110-xxx. 5 Confirmez le message pop-up sur votre iPhone. Philips · PPX5110...
  • Seite 81: Connexion Du Projecteur À Internet

    7 Connexion du projecteur à Internet Entrez l’adresse IP 192.168.49.1 dans l’adresse 5 Sélectionnez Scan. du navigateur de votre smartphone pour confi- gurer l’environnement sans fil. Ceci permet au smartphone de naviguer sur Internet sans pro- jection sans fil. 1 Passez au mode iOS en pressant le bouton B pendant une seconde.
  • Seite 82 7 Entrez un mot de passe et pressez Submit. Philips · PPX5110...
  • Seite 83: Service

    8 Service Instructions d’entretien de la Nettoyage batterie DANGER ! Instructions de nettoyage ! La capacité de la batterie diminue avec le temps. Vous pouvez prolonger la durée de vie Utilisez un chiffon doux et non pelu- de la batterie si vous respectez les points cheux.
  • Seite 84: Mise À Jour Du Firmware Sans Fil

    Connexion du projecteur à Internet, page 13). 2 Sélectionnez Advanced. Le projecteur redémarrera et se connectera automatiquement au serveur de mise à jour. Notice Si le serveur de mise à jour possède un nouveau firmware, il sera automatique- ment téléchargé et installé. Philips · PPX5110...
  • Seite 85: Dépannage

    3 Allumez l’appareil en pressant le bouton B Dépannage pendant huit secondes. 4 Pressez le bouton Reset. Mise sous tension 5 Allumez l’appareil en pressant le bouton B pendant huit secondes. S’il se produit un problème ne pouvant être cor- rigé...
  • Seite 86 Que faire si le projecteur ne fonctionne pas • Vérifiez que le câble HDMI est branché lorsqu’il est connecté à un PC portable ? correctement. • Assurez-vous que le PC portable a été commuté sur l’écran du projecteur. Philips · PPX5110...
  • Seite 87: Annexe

    9 Annexe Caractéristiques techniques Technologie / optique Technologie optique ........DLP® Source lumineuse ........RGB LED Résolution ...... 854 × 480 pixels (WVGA) Durée de vie LED ......jusqu’à 20.000 h Contraste ............1000:1 Rapport d’aspect ..........16:9 Luminosité ........jusqu’à 100 lumen Taille d’image de projection (diagonale) .....
  • Seite 88 RF : Cet émetteur ne doit pas être placé avec un La déclaration de conformité peut être consul- autre émetteur ou fonctionner conjointement à tée sur le site www.picopix.philips.com. une autre antenne ou un émetteur. Cet appareil satisfait aux limites de la FCC sur l’exposition aux rayonnements établies pour un environne-...
  • Seite 89 X-GEM SAS ou PHILIPS ou des produits agréés par X-GEM SAS ou PHILIPS. X-GEM SAS n’assume aucune responsabilité pour les demandes de dommages et intérêts à la suite d’interférences électromagnétiques Emballage : La présence du logo (point vert) dues à...
  • Seite 90 PHILIPS and the PHILIPS’ Shield Emblem are registered trademarks of Koninklijke Philips N.V. used under license. This product was brought to the market by X-GEM SAS, further referred to in this document as X-GEM SAS, and is the manufacturer of the product.
  • Seite 91: Kezelési Útmutató

    Kezelési  útmutató Miniprojektor PPX5110 Register your product and get support at www.philips.com/welcome...
  • Seite 92 Tartalomjegyzék Áttekintés ............3 Tisztelt Vásárló! ............3 A kezelési útmutatóról ..........3 A doboz tartalma ............3 A termék fő jellemzői ..........3 1 Általános biztonsági információk ..4 A készülék elhelyezése ..........4 A készülék javítása .............4 Tápfeszültség ..............5 2 Áttekintés ..........6 Hátul- és alulnézet ............6 Oldalnézet ..............6 Elöl- és oldalnézet ............6...
  • Seite 93: Áttekintés

    Áttekintés Tisztelt Vásárló! A doboz tartalma 1 – Pico kivetítő (PPX 5110) Köszönjük, hogy ezt a kivetítőt vásárolta meg. 2 – Hálózati adapter Reméljük, hogy örömmel használja majd új készülékét és annak sok funkcióját! 3 – Hálózati csatlakozók (EU, UK, US) 4 –...
  • Seite 94: Általános Biztonsági Információk

    Tartsa távol a készüléket a tűztől. A készülék beépített akkumulátort tartalmaz. Ne szerelje szét és ne módosítsa azt. Az akkumulá- tort csak képzett szervizszemélyzet cserélheti. VESZÉLY! Robbanásveszély hibás akkumulátortípus esetén! Ne próbálkozzon az akkumulátor cse- réjével. Philips · PPX5110...
  • Seite 95: Tápfeszültség

    Tápfeszültség Csak olyan hálózati adaptert használjon, amely hitelesített termékhez (lásd Műszaki adatok, 19 oldal). Ellenőrizze, hogy a hálózati tápegység hálózati feszültsége megegyezik-e használat helyszínén érvényes hálózati feszült- séggel. A készülék a rajta feltüntetett feszültség- gel használható. Az akkumulátor kapacitása idővel csökken. Ha a készülék csak a hálózati tápellátással működik, akkor az akkumulátor hibás.
  • Seite 96: Áttekintés

    1 – Reset gomb 2 – B tápfeszültség / üzemmód A készülék be- és kikapcsolásához nyomja meg a B gombot nyolc másodpercig. Az iOS- és az Android-üzemmód közötti át- kapcsoláshoz nyomja meg a B gombot egy másodpercig. 3 – Szellőzőnyílások Philips · PPX5110...
  • Seite 97: Első Üzembe Vétel

    3 Első üzembe vétel A készülék elhelyezése A kék töltés LED villog a töltés közben. Amikor a kivetítő teljesen fel van töltve, a LED villogása megszűnik. Helyezze a kivetítőt sima felületre a vetítőfelü- lettel szemben. VESZÉLY! Robbanásveszély hibás akkumulátortípus A hálózati tápegység esetén! csatlakoztatása Ne próbálkozzon az akkumulátor cse-...
  • Seite 98: Csatlakoztatás Lejátszókészülékre

    Ekkor ugyanis halláskárosodás alakulhat ki. 1 Csatlakoztassa a külső hangszórót vagy fej- hallgatót a kivetítő Audio out aljzatára. A készülék hangszórója automatikusan kikap- csolódik a külső hangszóró vagy fejhallgató bedugásakor. 2 Csatlakoztassa a HDMI-dugaszt a lejátszóké- szülék HDMI-aljzatára. Philips · PPX5110...
  • Seite 99: Vezeték Nélküli Kivetítés Miracast- Kompatibilis Android-Eszközökkel

    5 Vezeték nélküli kivetítés Miracast- kompatibilis Android-eszközökkel 3 Válassza az Other connections pontot, majd Megjegyzés nyomja meg: Wireless display. A képernyőtükrözés engedélyezéséhez okostelefonjának támogatnia kell a Miracast funkciót. Nem mindegyik And- roid-telefon kínálja ezt a funkciót. A funkció nagyon gyakran más néven, pl. Screencast, Screen Sharing, WiFi Direct, Wireless Display stb.
  • Seite 100: Kivetítés Ios-Eszközzel

    1 Kapcsolja a kivetítőt iOS-üzemmódba. Az iOS- és az Android-üzemmód közötti átkap- csoláshoz nyomja meg a B gombot egy másodpercig. iOS mode 3 Nyissa meg a Control Centre pontot felfelé csúsztatással a képernyőn, majd válassza ki a Screen Mirroring pontot. Philips · PPX5110...
  • Seite 101: Usb Képernyőtükrözés (Ios)

    4 Válassza ezután: PPX5110-xxx. 2 Az iPhone Settings menüjében válassza: Per- sonal Hotspot. USB képernyőtükrözés (iOS) 3 Kapcsolja a Personal Hotspot-ot az On állásba. 1 Kapcsolja a kivetítőt iOS-üzemmódba. Az iOS- és az Android-üzemmód közötti átkap- csoláshoz nyomja meg a B gombot egy másodpercig.
  • Seite 102 4 a Lightning kábelt a kivetítő USB portjára, a 6 Nyissa meg a Control Centre pontot felfelé másik végét az iPhone-ra. csúsztatással a képernyőn, majd válassza ki a Screen Mirroring pontot. 7 Válassza ezután: PPX5110-xxx. 5 Nyugtázza az előugró üzenetet az iPhone- Philips · PPX5110...
  • Seite 103: Kivetítő Csatlakoztatása Az Internetre

    7 A kivetítő csatlakoztatása az internetre Adja meg a 192.168.49.1 IP-címet okostelefonja 5 Válassza ki: Scan. böngésző címébe a vezeték nélküli környezet beállításához. Ezzel engedélyezi az okostelefo- non az internet-böngészést vezeték nélküli kivetítéssel. 1 Kapcsoljon iOS-üzemmódba a B gomb egy másodperces megnyomásával.
  • Seite 104 7 Adja meg a jelszót és nyomja meg a Submit gombot. Philips · PPX5110...
  • Seite 105: Szerviz

    8 Szerviz Az akkumulátor ápolása Az objektív tisztítása A projektor objektívjének tisztításához ecsetet, Az akkumulátor kapacitása idővel csökken. A vagy lencsetisztító papírt használjon. következő tanácsokat megfogadva meghos- szabbíthatja az akkumulátor élettartamát: VESZÉLY! • Áramellátás nélkül a készülék a beépített Ne használjon semmilyen folyékony tisz- akkumulátorról működik.
  • Seite 106: A Firmver Vezeték Nélküli Frissítése

    1 Csatlakoztassa a kivetítőt az internetre (lásd A kivetítő csatlakoztatása az internetre, 13 oldal). 2 Válassza az Advanced pontot. A kivetítő automatikusan újraindul és csat- lakozik az update-szerverhez. Megjegyzés Ha van új firmver az update-szerveren, akkor azt a kivetítő automatikusan letölti és telepíti. Philips · PPX5110...
  • Seite 107: Hibakeresés

    3 Kapcsolja be a készüléket a B gomb nyolc Hibakeresés másodperces megnyomásával. 4 Nyomja meg a Reset gombot. Hardver-reset 5 Kapcsolja be a készüléket a B gomb nyolc másodperces megnyomásával. Ha probléma jelentkezik és azt ezen használati útmutató alapján nem lehet elhárítani, akkor 6 Ha a probléma továbbra is fennáll, kérjük, kövesse az alábbi lépéseket.
  • Seite 108 Ennél a kivetítőnél működés közben mérsékelt hő termelése normális. Mi a teendő, ha a kivetítő nem működik • Ellenőrizze, hogy a HDMI-kábel szabályosan notebook PC-re csatlakoztatva? van.e dugaszolva. • Győződjön meg arról, hogy a notebook PC a kivetítő kijelzőre lett kapcsolva. Philips · PPX5110...
  • Seite 109: Függelék

    9 Függelék Műszaki adatok Technológia / optikai Optikai technológia .......... DLP® Fényforrás ............RGB LED Felbontás ......854 × 480 pixel (WVGA) LED élettartama ......akár 20.000 óra Kontraszt............. 1000:1 Méretarány.............. 16:9 Fényerő ..........akár 100 lumen Kivetített kép mérete (átló)....51 … 305 cm Kivetítés távolsága .........53 …...
  • Seite 110 A készülék megfelel megfelelőségi nyilatkozatot az FCC nem ellenőrzött környezetben történő www.picopix.philips.com honlapon lehet meg- sugárterhelésre vonatkozó határértékeinek. tekinteni. A készüléket úgy kell elhelyezni és használni, hogy az antenna és az emberi test között lega- A fenntartható fejlődés elvének keretében az X- lább 20 cm távolság legyen.
  • Seite 111 X-GEM SAS üzemeltetési és karbantartási előírásainak be nem tartása okoz. Az X-GEM SAS nem vállal felelősséget a nem eredeti X-GEM SAS / PHILIPS termékként vagy nem az X-GEM SAS / PHILIPS által engedélye- Függelék...
  • Seite 112 PHILIPS and the PHILIPS’ Shield Emblem are registered trademarks of Koninklijke Philips N.V. used under license. This product was brought to the market by X-GEM SAS, further referred to in this document as X-GEM SAS, and is the manufacturer of the product.
  • Seite 113 Manuale d’uso Miniprojektor PPX5110 Register your product and get support at www.philips.com/welcome...
  • Seite 114 Sommario Introduzione ..........3 Caro cliente ..............3 A proposito del presente manuale d’uso ..3 Contenuto dell’imballaggio ........3 Caratteristiche del prodotto ........3 1 Indicazioni generali di sicurezza ..4 Posizionamento dell’apparecchio .......4 Riparazioni ..............4 Alimentazione elettrica ..........5 2 Panoramica ..........6 Vista posteriore e inferiore ........6 Vista laterale ..............6 Vista frontale e laterale ..........6...
  • Seite 115: Introduzione

    Introduzione Caro cliente Contenuto dell’imballaggio 1 – Proiettore Pico (PPX 5110) Grazie per avere acquistato questo proiettore. 2 – Alimentatore C/A Speriamo che il nuovo apparecchio e le sue numerose funzioni le piacciano! 3 – Spine di alimentazione (EU, UK, US) 4 –...
  • Seite 116: Indicazioni Generali Di Sicurezza

    La batteria è integrata nell’apparecchio. Non smontarla o modificarla. La batteria deve essere sostituita esclusivamente da tecnici qualificati. PERICOLO! Rischio di esplosione in caso di utilizzo di un tipo di batteria non idoneo! Non cercare di sostituire la batteria autonomamente. Philips · PPX5110...
  • Seite 117: Alimentazione Elettrica

    Alimentazione elettrica Utilizzare solo un alimentatore certificato per questo prodotto (vedere Dati tecnici, pagina 19). Verificare sulla targhetta che la tensione di rete dell’alimentatore coincida con la tensione di rete disponibile nel luogo di installazione. Il pre- sente prodotto è compatibile con il tipo di vol- taggio indicato.
  • Seite 118: Panoramica

    2 – B Modalità di alimentazione Per accendere e spegnere l’apparecchio, premere il tasto B per otto secondi. Per alternare la modalità iOS e Android, pre- mere il tasto B per un secondo. 3 – Aperture per aerazione Philips · PPX5110...
  • Seite 119: Prima Messa In Funzione

    3 Prima messa in funzione Prima installazione Prima di utilizzare il proiettore per la prima volta, caricarlo per cinque ore. Posizionare il proiettore su una superficie piana Il LED di carica blu lampeggia durante la ricarica. davanti alla superficie di proiezione. Quando il proiettore è...
  • Seite 120: Collegamento Al Dispositivo Di Riproduzione

    1 Collegare gli altoparlanti esterni o le cuffie all’uscita Audio out del proiettore. Gli alto- parlanti del proiettore si disattivano automa- ticamente quando vengono collegati gli alto- parlanti esterni o le cuffie. 2 Collegare il connettore HDMI alla presa HDMI dell’apparecchio di riproduzione. Philips · PPX5110...
  • Seite 121: Proiezione Senza Cavi Con Dispositivi Android Compatibili Con Miracast

    5 Proiezione senza cavi con dispositivi Android compatibili con Miracast 3 Selezionare Other connections, quindi pre- Nota mere Wireless display. Per utilizzare la duplicazione dello schermo è necessario che il dispositivo supporti Miracast. Non tutti i telefoni Android dispongono di questa fun- zione.
  • Seite 122: Proiezione Con Dispositivi Ios

    1 Attivare la modalità iOS sul proiettore. Per alternare la modalità iOS e Android, premere il tasto B per un secondo. iOS mode 3 Aprire il Control Centre scorrendo il dito verso l’alto sullo schermo, quindi selezionare Screen Mirroring. Philips · PPX5110...
  • Seite 123: Duplicazione Usb Dello Schermo (Ios)

    4 Selezionare PPX5110-xxx. 2 In Settings dell’iPhone selezionare Personal Hotspot. Duplicazione USB dello 3 Impostare Personal Hotspot su On. schermo (iOS) 1 Attivare la modalità iOS sul proiettore. Per alternare la modalità iOS e Android, premere il tasto B per un secondo. Proiezione con dispositivi iOS...
  • Seite 124 4 Collegare il cavo Lightning alla porta USB del 6 Aprire il Control Centre scorrendo il dito proiettore e l’altra estremità all’iPhone. verso l’alto sullo schermo, quindi selezionare Screen Mirroring. 7 Selezionare PPX5110-xxx. 5 Confermare il messaggio pop-up sull’iPhone. Philips · PPX5110...
  • Seite 125: Collegamento Del Proiettore A Internet

    7 Collegamento del proiettore a Internet Inserire l’indirizzo IP 192.168.49.1 nella barra 5 Selezionare Scan. degli indirizzi del browser per impostare l’ambiente wireless. Questo renderà possibile la navigazione in Internet tramite smartphone con la proiezione wireless. 1 Passare alla modalità iOS premendo il tasto B per un secondo.
  • Seite 126 7 Inserire una password e premere Submit. Philips · PPX5110...
  • Seite 127: Assistenza

    8 Assistenza Indicazioni per la cura della Pulizia batteria PERICOLO! Istruzioni per la pulizia! La capacità della batteria diminuisce con il tempo. Osservando le seguenti indicazioni è Utilizzare un panno morbido, non sfi- possibile prolungare la durata della batteria: lacciato. utilizzare detergenti liquidi o facilmente infiammabili, quali...
  • Seite 128: Aggiornamento Wireless Del Firmware

    1 Collegare il proiettore a Internet (vedere Col- legamento proiettore Internet, pagina 13). 2 Selezionare Advanced. Il proiettore si riavvierà automaticamente e si collegherà al server di aggiornamento. Nota Se qui è disponibile un nuovo firmware, verrà scaricato e installato automatica- mente. Philips · PPX5110...
  • Seite 129: Risoluzione Dei Problemi

    Risoluzione dei problemi 3 Accendere l’apparecchio premendo il tasto B per otto secondi. 4 Premere il tasto Reset. Ciclo di alimentazione 5 Accendere l’apparecchio premendo il tasto B per otto secondi. Qualora si riscontrasse un problema che non può essere risolto con le istruzioni di questo 6 Se il problema persiste, contattare il nostro manuale, procedere come segue.
  • Seite 130 Cosa fare se il proiettore non funziona quando è • Controllare che il cavo HDMI sia inserito collegato a un notebook? correttamente. • Assicurarsi che sul notebook sia stata attivata la visualizzazione tramite proiettore. Philips · PPX5110...
  • Seite 131: Appendice

    9 Appendice Dati tecnici Tecnologia / ottica Tecnologia ottica ..........DLP® Fonte di luce ..........RGB LED Risoluzione ...... 854 × 480 pixel (WVGA) Durata LED ........fino a 20.000 h Contrasto............1000:1 Proporzioni ............. 16:9 Luminosità ........fino a 100 lumen Dimensioni dell’immagine proiettata  (diagonale) ........
  • Seite 132 La dichiarazione di conformità può essere visio- Dichiarazione FCC sull'esposizione alle radia- nata all'indirizzo www.picopix.philips.com. zioni RF: Questo trasmettitore non deve essere posizionato insieme o fatto funzionare in con- La tutela dell’ambiente come parte di un pro- giunzione con qualsiasi altra antenna o trasmet- cesso di sviluppo sostenibile è...
  • Seite 133 X- GEM SAS / PHILIPS o prodotti approvati da X- Imballaggio: La presenza del logo (punto verde) GEM SAS / PHILIPS.
  • Seite 134 PHILIPS and the PHILIPS’ Shield Emblem are registered trademarks of Koninklijke Philips N.V. used under license. This product was brought to the market by X-GEM SAS, further referred to in this document as X-GEM SAS, and is the manufacturer of the product.
  • Seite 135 Handleiding Pocket Projector PPX5110 Register your product and get support at www.philips.com/welcome...
  • Seite 136 Inhoudsopgave Welkom ............3 Beste klant, ..............3 Over deze handleiding ..........3 Inhoud verpakking ............. 3 Productkenmerken ............ 3 1 Algemene veiligheidsinstructies ..4 Toestel opstellen ............4 Reparaties ..............4 Netvoeding ..............5 2 Overzicht ...........6 Achter- en onderzijde ..........6 Zijaanzicht ..............6 Voorzijde en zijaanzicht ..........6 3 Eerste ingebruikneming ......
  • Seite 137: Welkom

    Welkom Beste klant, Inhoud verpakking 1 – Pico Projector (PPX 5110) Hartelijk dank dat u voor deze projector geko- zen hebt. 2 – AC-netadapter Veel plezier met uw projector en zijn vele func- 3 – Netstekkers (EU, UK, US) ties! 4 –...
  • Seite 138: Algemene Veiligheidsinstructies

    De accu is geïntegreerd in het toestel. De accu niet demonteren en niet veranderen. De accu mag uitsluitend door een gekwalificeerde vak- kundige servicedienst vervangen worden. GEVAAR! Ontploffingsgevaar als onjuist accutype wordt gebruikt! Probeer niet zelf de accu te vervangen. Philips · PPX5110...
  • Seite 139: Netvoeding

    Netvoeding Gebruik uitsluitend een stroomadapter die voor dit product gecertificeerd is (zie Technische specificaties, pagina 19). Controleer of de nets- panning van de adapter overeenkomt met de netspanning die op de opstelplaats beschikbaar is. Het juiste voltage is op het toestel vermeld. De accu presteert na verloop van tijd langzaam minder.
  • Seite 140: Overzicht

    2 – B Aan-en-uit-knop / Modus Om de projector aan en uit te zetten, acht seconden op de B knopdrukken. Om te schakelen tussen iOS- en Android- modus, één seconde op deB knop ondruk- ken. 3 – Ventilatieopeningen Philips · PPX5110...
  • Seite 141: Eerste Ingebruikneming

    3 Eerste ingebruikneming Toestel opstellen De blauwe indicatie-led knippert tijdens het opladen. Als de accu van de projector volledig opgeladen is, stopt de led met knipperen. Plaats de projector op een vlak oppervlak voor het projectieoppervlak. GEVAAR! Ontploffingsgevaar als onjuist accutype Netvoeding aansluiten wordt gebruikt! Probeer niet zelf de accu te vervangen.
  • Seite 142: Weergavetoestel Aansluiten

    Audio out van de projector. De luidsprekers van de projector worden automatisch gedeactiveerd als externe spea- kers of hoofdtelefoon aangesloten zijn. 2 Sluit de HDMI-stekker aan op de HDMI-con- tactbus van het weergaveapparaat. Philips · PPX5110...
  • Seite 143: Draadloze Projectie Met Miracast- Compatibele Android-Apparaten

    5 Draadloze projectie met Miracast- compatibele Android-apparaten 3 Kies Overige verbindingen, en druk op Opmerking Draadloze display Om screen mirroring te kunnen gebrui- ken, moet uw smartphone Miracast of Airplay ondersteunen. Niet alle Android-telefoons hebben deze func- tionaliteit. Ook is deze functie vaak ver- borgen onder een andere naam, bij- voorbeeld Screencast, Screen Sharing, WiFi Direct, Wireless Display etc.
  • Seite 144: Projectie Met Ios-Apparaten

    1 Zet de projector in iOS-modus. Om te scha- kelen tussen iOS en Android, één seconde op de B knop drukken. iOS mode 3 3 Activeer het bedieningspaneel (Control Centre) door naar boven te vegen en selec- teer dan Screen Mirroring. Philips · PPX5110...
  • Seite 145: Usb Screen Mirroring (Ios)

    4 Kies PPX5110-xxx. 2 Ga naar de Instellingen van uw iPhone en kies Persoonlijke Hotspot. USB Screen Mirroring (iOS) 3 Zet Persoonlijke Hotspot aan. 1 Zet de projector in iOS-modus. Om te scha- kelen tussen iOS en Android, één seconde op de B knop drukken.
  • Seite 146 6 Activeer het bedieningspaneel (Control Cen- poort van de projector en het andere uit- tre) door naar boven te vegen en selecteer einde op de iPhone. dan Screen Mirroring. 7 Kies PPX5110-xxx. 5 Bevestig de pop-up-boodschap op uw iPhone. Philips · PPX5110...
  • Seite 147: De Projector Verbinden Met Het Internet

    7 De projector verbinden met het internet Om de draadloze omgeving op te zetten, IP- 5 Kies Scan. adres 192.168.49.1 ingeven in het browser-adres van uw smartphone. Dat stelt de smartphone in staat tot browsen op het internet met draadloze projectie.
  • Seite 148 7 Geef wachtwoord in en druk op Verzenden (Submit). Philips · PPX5110...
  • Seite 149: Service

    8 Service Instructies voor behoud van De lens schoonmaken Gebruik een zacht borsteltje/penseeltje of spe- de accu ciaal lenspapier om de lens van de projector schoon te maken. De accu presteert na verloop van tijd langzaam minder. U kunt de levensduur van de accu ver- GEVAAR! lengen door de volgende punten in acht te nemen:...
  • Seite 150: Draadloze Firmware-Update

    De projector verbinden met het internet, pagina 13). 2 Kies Advanced. The projector start automatisch opnieuw op en maakt verbinding met de update- server. Opmerking Als de update-server nieuwe firmware heeft, dan wordt deze automatisch gedownload en geïnstalleerd. Philips · PPX5110...
  • Seite 151: Problemen En Oplossingen

    Problemen en oplossingen 3 Zet de projector aan door acht seconden op de B knopte drukken. 4 Druk op de Reset-knop. Uitzetten en weer aanzetten 5 Zet de projector aan door acht seconden op de B knop te drukken. Als er een probleem optreedt dat niet kan wor- den opgelost aan de hand van de instructies in 6 Als het probleem blijft bestaan, neem dan deze handleiding, volg dan deze stappen.
  • Seite 152 Wat moet ik doen als de projector niet werkt als • Controleer of de HDMI-kabel correct ik hem aansluit op een laptop? aangesloten is. • Controleer of de laptop op 'projector display' staat. Philips · PPX5110...
  • Seite 153: Bijlage

    9 Bijlage Technische specificaties Technologie / optisch Displaytechnologie..........DLP® Lichtbron ............RGB LED Resolutie......854 × 480 pixel (WVGA) Levensduur led........ tot 20.000 uur Contrast .............. 1000:1 Beeldverhouding........... 16:9 Lichtsterkte ......... tot 100 lumen Geprojecteerde beeldgrootte (diagonaal) ..............51 tot 305 cm Afstand tot projectievlak ....53 tot 319 cm Verbinding Draadloos standaard ......
  • Seite 154 • Heroriënteer of verplaats de ontvangstan- tenne. • Vergroot de afstand tussen de apparatuur en de ontvanger. • Sluit de apparatuur aan op een stopcon- tact in een ander circuit dan waarop de ontvanger is aangesloten. Philips · PPX5110...
  • Seite 155 X-GEM SAS / Verpakking: Het logo met de groene stip (Grüne PHILIPS of als door X-GEM SAS / PHILIPS goed- Punkt) geeft aan dat er een bijdrage aan een gekeurde producten zijn gekenmerkt.
  • Seite 156 PHILIPS and the PHILIPS’ Shield Emblem are registered trademarks of Koninklijke Philips N.V. used under license. This product was brought to the market by X-GEM SAS, further referred to in this document as X-GEM SAS, and is the manufacturer of the product.
  • Seite 157: Instrukcja Obsługi

    Instrukcja obsługi Kieszonkowy projektor PPX5110 Register your product and get support at www.philips.com/welcome...
  • Seite 158 Spis treści Przegląd ............3 Szanowny Kliencie, ........... 3 O instrukcji obsługi ............ 3 Zawartość opakowania ..........3 Najważniejsze cechy produktu ......3 1 Ogólne informacje dotyczące  bezpieczeństwa ........4 Przygotowanie urządzenia do pracy ....4 Naprawy ................4 Zasilanie ................5 2 Przegląd ............6 Widok od tyłu i spodu ..........6 Widok z boku ..............6 Widok z przodu i z boku ..........6...
  • Seite 159: Przegląd

    Przegląd Szanowny Kliencie, Zawartość opakowania 1 – Projektor (PPX 5110) Dziękujemy za zakup produktu. 2 – Zasilacz sieciowy Mamy nadzieję, że będą Państwo zadowoleni z zakupionego urządzenia i jego funkcji! 3 – Wtyczki sieciowe (UE, Wlk. Bryt., USA) 4 – Skrócona instrukcja O instrukcji obsługi 5 –...
  • Seite 160: Ogólne Informacje Dotyczące Bezpieczeństwa

    Następnie urządzenie należy przekazać nych serwisów technicznych zamieszczone do serwisu technicznego w celu jego sprawdze- zostały w karcie gwarancyjnej. nia. Chronić urządzenie przed kontaktem Nie usuwać tabliczki znamionowej z urządzenia z ogniem. – spowoduje to unieważnienie gwarancji. Philips · PPX5110...
  • Seite 161: Zasilanie

    Zasilanie Zastosowany zasilacz sieciowy musi posiadać certyfikat zgodności z produktem (patrz Dane techniczne, strona 20). Sprawdzić, czy napięcie zasilania sieciowego w miejscu instalacji jest zgodne z wymaganymi parametrami zasilania urządzenia. Urządzenie jest przystosowane do napięcia podanego na obudowie. Pojemność akumulatora zmniejsza się w miarę upływu czasu.
  • Seite 162: Przegląd

    4 – Gniazdo Audio out (wyjścia audio) (słu- chawek) 5 – Port USB do dublowania ekranu w systemie iOS 6 – Wejście HDMI 1 – Otwory wentylacyjne 2 – Obiektyw projekcyjny 3 – Pokrętło regulacji ostrości obrazu 4 – Głośnik Philips · PPX5110...
  • Seite 163: Pierwsze Czynności

    3 Pierwsze czynności Przygotowanie urządzenia W czasie ładowania pulsuje niebieska dioda LED ładowania. Gdy akumulator projektora jest do pracy w pełni naładowany, dioda LED przestaje pul- sować. Ustawić projektor na płaskiej powierzchni NIEBEZPIECZEŃSTWO! naprzeciwko powierzchni projekcyjnej. Ryzyko wybuchu w przypadku użycia nieprawidłowego akumulatora! Podłączanie zasilania Nie próbować...
  • Seite 164: Podłączanie Do Urządzenia Odtwarzającego

    1 Głośniki zewnętrzne lub słuchawki należy podłączyć do projektora za pomocą gniazda Audio out. podłączeniu głośników zewnętrznych lub słuchawek dochodzi do automatycznej dezaktywacji głośników urzą- dzenia. 2 Wtyk HDMI podłączyć do gniazda HDMI w urządzeniu odtwarzającym. Philips · PPX5110...
  • Seite 165: Bezprzewodowe Wyświetlanie Ekranu Z Urządzeń Na Platformie Android Obsługujących Technologię Miracast

    5 Bezprzewodowe wyświetlanie ekranu z urządzeń na platformie Android obsługujących technologię Miracast Wskazówka Aby móc skorzystać z funkcji dublowa- nia ekranu, urządzenie musi obsługi- wać technologię Miracast. Nie wszyst- kie urządzenia z systemem Android oferują taką funkcję. Często też jest ona ukryta pod różnymi nazwami, takimi jak: Screencast, Screen Sharing, WiFi Direct, Wireless Display itp.
  • Seite 166: Projekcja Z Urządzeń Na Platformie Ios

    B i pozostawić go wciśniętym nia) poprzez przesunięcie palcem w górę na przez 1 sekundę. ekranie, a następnie wybrać Screen Mirroring iOS mode (dublowanie ekranu). 2 W menu Settings (ustawienia) urządzenia iPhone wybrać PPX5110-xxx, a w razie Philips · PPX5110...
  • Seite 167: Dublowanie Ekranu Przez Usb (Ios)

    4 Wybrać PPX5110-xxx. 2 W menu Settings (ustawienia) urządzenia iPhone wybrać Personal Hotspot (hotspot osobisty). Dublowanie ekranu przez 3 Ustawić przełącznik Personal Hotspot (hot- USB (iOS) spot osobisty) w położeniu On (włączone). 1 Przełączyć projektor na tryb iOS. Aby przełą- czyć...
  • Seite 168 6 Otworzyć Control Centre (centrum sterowa- jektora oraz odpowiedniego gniazda nia) poprzez przesunięcie palcem w górę na w urządzeniu iPhone. ekranie, a następnie wybrać Screen Mirroring (dublowanie ekranu). 7 Wybrać PPX5110-xxx. 5 Potwierdzić komunikat wyświetlony na ekra- nie. Philips · PPX5110...
  • Seite 169: Łączenie Projektora Z Internetem

    7 Łączenie projektora z Internetem W polu adresu wyszukiwarki internetowej 5 Wybrać Scan (skanuj). smartfona wprowadzić adres IP 192.168.49.1, aby skonfigurować środowisko bezprzewo- dowe. Pozwoli to na przeszukiwanie Internetu w smartfonie przy jednoczesnym bezprzewo- dowym wyświetlaniu ekranu. 1 Aby przełączyć urządzenie na tryb iOS, naci- snąć...
  • Seite 170 7 Wprowadzić hasło i nacisnąć Submit (wyślij). Philips · PPX5110...
  • Seite 171: Serwis

    8 Serwis Instrukcje dotyczące Czyszczenie postępowania NIEBEZPIECZEŃSTWO! z akumulatorem Instrukcje dotyczące czyszczenia! Używać miękkiej, niepylącej ściereczki. Pojemność akumulatora zmniejsza się w miarę W żadnym wypadku nie używać płyn- upływu czasu. Czas pracy akumulatora można nych lub łatwopalnych środków czysz- przedłużyć, przestrzegając poniższych punk- czących (aerozoli, środków ściernych, tów: zwiększających połysk, alkoholu itp.).
  • Seite 172: Bezprzewodowa Aktualizacja Oprogramowania Wbudowanego

    Łączenie projektora z Internetem, strona 13). 2 Wybrać Advanced (zaawansowane). Projektor automatycznie uruchomi się ponownie i połączy z serwerem aktualiza- cji. Wskazówka Jeżeli na serwerze aktualizacji znajduje się nowa wersja oprogramowania wbu- dowanego, zostanie ona automatycz- nie pobrana i zainstalowana. Philips · PPX5110...
  • Seite 173: Rozwiązywanie Problemów

    Rozwiązywanie problemów 3 Aby włączyć urządzenie, nacisnąć przycisk B i pozostawić go wciśniętym przez 8 sekund. Naprawa przez wyłączenie 4 Wcisnąć przycisk Reset. i włączenie zasilania 5 Aby włączyć urządzenie, nacisnąć przycisk B i pozostawić go wciśniętym przez 8 Jeżeli występują problemy, których nie można sekund.
  • Seite 174 Sprawdzić, czy smartfon jest urządzeniem na platformie iOS. Funkcja nie jest obsługiwana przez system Android. • Sprawdzić, czy wybrano tryb iOS. • Upewnić się, że przełącznik funkcji Hotspot w urządzeniu iPhone jest ustawiony w położeniu „On” (włączone). Philips · PPX5110...
  • Seite 175 Problemy Rozwiązania Czy do projektora można podłączyć • Powerbank można podłączyć do projektora powerbank? za pomocą portu micro USB. • Minimalne parametry zasilania wymaganego do zapewnienia prawidłowego działania urządzenia to: 3 A/5 V. • Nie uruchamiać projektora, jeżeli parametry zasilania są niższe od wymaganych. Powierzchnia obudowy projektora jest ciepła.
  • Seite 176: Aneks

    Android ........z obsługą Miracast iOS ............7/8/9/10/11 Parametry produktu Wymiary (dł. × szer. × wys.) ..98 × 98 × 27,5 mm Waga ............... 215 g Zawartość opakowania Projektor PPX5110, zasilacz sieciowy, skrócona instrukcja, etui, wtyczki sieciowe (UE, Wlk. Bryt., USA) Philips · PPX5110...
  • Seite 177 Deklaracja dotycząca narażenia na promienio- Deklaracja zgodności jest dostępna pod adre- wanie radiowe zgodnie z przepisami FCC: sem www.picopix.philips.com. nadajnik nie może znajdować się ani pracować w pobliżu innej anteny lub innego nadajnika. Ochrona środowiska w ramach zrównoważo- Niniejsze urządzenie spełnia przepisy FCC nego rozwoju jest główną...
  • Seite 178 X-GEM Opakowanie: obecność logo (zielonej kropki) SAS / PHILIPS lub jako produkty zatwierdzone oznacza, że dokonano wpłaty na rachunek przez X-GEM SAS / PHILIPS. zatwierdzonej krajowej organizacji na rzecz roz-...
  • Seite 179 PHILIPS and the PHILIPS’ Shield Emblem are registered trademarks of Koninklijke Philips N.V. used under license. This product was brought to the market by X-GEM SAS, further referred to in this document as X-GEM SAS, and is the manufacturer of the product.
  • Seite 180 Manual de instruções Projetor de bolso PPX5110 Register your product and get support at www.philips.com/welcome...
  • Seite 181 Índice Introdução .............3 Estimado cliente ............3 Acerca deste manual de utilizador ...... 3 O que vem na caixa ..........3 Destaques do produto ..........3 1 Informação geral de segurança ...4 Instalação do aparelho ..........4 Reparações ..............4 Fonte de alimentação ..........5 2 Descrição geral ........6 Vista posterior e inferior ..........6 Vista lateral ..............6...
  • Seite 182: Introdução

    Introdução Estimado cliente O que vem na caixa 1 – Projetor Pico (PPX 5110) Obrigado por adquirir este projetor. 2 – Fonte de alimentação CA Esperamos que aprecie o seu aparelho e as suas múltiplas funções! 3 – Fichas elétricas (UE, RU, EUA) 4 –...
  • Seite 183: Informação Geral De Segurança

    Mantenha o aparelho afastado de chamas. Pode obter informações sobre um centro de assistência autorizado no cartão de garantia. Não remova a placa de características do apare- lho, caso contrário a garantia perde a validade. Philips · PPX5110...
  • Seite 184: Fonte De Alimentação

    Fonte de alimentação Utilize apenas uma fonte de alimentação certi- ficada para este produto (consultar Dados téc- nicos, página 19). Certifique-se de que a tensão de rede elétrica requerida para a fonte de ali- mentação coincide com a tensão da rede elé- trica disponível no local onde o aparelho vai ser usado.
  • Seite 185: Descrição Geral

    2 – B Energia / Modo Para ligar ou desligar o aparelho prima o bo- tão B durante oito segundos. Para mudar entre os modos de iOS e Android prima o botão B durante um segundo. 3 – Aberturas de ventilação Philips · PPX5110...
  • Seite 186: Primeira Utilização

    3 Primeira utilização Instalar o aparelho O LED azul pisca durante o carregamento. Se a bateria do projetor estiver totalmente carre- gada, o LED para de piscar. Coloque o aparelho numa superfície plana em frente da superfície de projeção. PERIGO! Risco de explosão se a bateria for substi- Ligar a fonte de alimentação tuída por outra de tipo incorreto!
  • Seite 187: Ligação Ao Aparelho De Reprodução

    à tomada Audio out do projetor. Os altifa- lantes do aparelho desativam-se de forma automática ao ligar os auscultadores ou alti- falantes externos. 2 Ligue a ficha HDMI à tomada HDMI no apare- lho de reprodução. Philips · PPX5110...
  • Seite 188: Projeção Sem Fios Usando Dispositivos Android Compatíveis Com Miracast

    5 Projeção sem fios usando dispositivos Android compatíveis com Miracast 3 Selecione Other connections (outras liga- Indicação ções), depois prima Wireless display (ima- gem sem fios). Para ser possível a utilização da função de espelho de ecrã, o seu dispositivo tem de suportar Miracast.
  • Seite 189: Projeção Com Dispositivos Ios

    Android prima o botão B durante um segundo. iOS mode 3 Abra o Control Centre (centro de controlo) deslizando o ecrã para cima, depois sele- cione Screen Mirroring (espelho de ecrã). Philips · PPX5110...
  • Seite 190: Espelho De Ecrã Via Usb (Ios)

    4 Selecione PPX5110-xxx. 2 Nas Settings (definições) do seu iPhone sele- cione Personal Hotspot (hotspot pessoal). Espelho de ecrã via USB 3 Mude o Personal Hotspot para On (ligado). (iOS) 1 Mudar o projetor para o modo iOS. Para mudar entre os modos de iOS e Android prima o botão B durante um segundo.
  • Seite 191 6 Abra o Control Centre (centro de controlo) deslizando o ecrã para cima, depois sele- cione Screen Mirroring (espelho de ecrã). 7 Selecione PPX5110-xxx. 5 Confirme a mensagem que surge no seu iPhone. Philips · PPX5110...
  • Seite 192: Ligar O Projetor À Internet

    7 Ligar o projetor à Internet Introduza o endereço IP 192.168.49.1 na linha de 5 Selecione Scan (procurar). endereço do browser do seu smartphone para configurar o ambiente sem fios. Isto irá permitir a navegação do smartphone na internet com projeção sem fios.
  • Seite 193 7 Insira uma palavra-passe e prima Submit (enviar). Philips · PPX5110...
  • Seite 194: Assistência

    8 Assistência Indicações sobre a Limpeza manutenção da bateria PERIGO! Instruções de limpeza! A capacidade da bateria reduz-se com o decor- rer do tempo. Pode prolongar a vida útil da Utilize um pano macio e que não largue bateria se respeitar os seguintes pontos: pelo.
  • Seite 195: Atualização De Firmware Sem Fios

    à Internet, página 13). 2 Selecione Advanced (avançadas). O projetor irá reiniciar-se automatica- mente e ligar-se ao servidor de atualiza- ções. Indicação Se o servidor de atualizações tiver novo firmware, este será automaticamente descarregado e instalado. Philips · PPX5110...
  • Seite 196: Resolução De Problemas

    Resolução de problemas 3 Ligue aparelho premindo botão B durante oito segundos. 4 Prima o botão de Reset. Desligar e voltar a ligar 5 Ligue aparelho premindo botão B durante oito segundos. Se surgir um problema que não possa ser corri- gido mesmo seguindo as instruções neste 6 Se o problema persistir, contacte o nosso manual, siga os passos a seguir descritos.
  • Seite 197 O que fazer se o projetor não funcionar quando • Verifique se o cabo HDMI está bem ligado. ligado a um PC portátil? • Certifique-se de que o PC portátil foi configurado para apresentação através do projetor. Philips · PPX5110...
  • Seite 198: Dados Técnicos

    9 Anexo Dados técnicos Tecnologia / ótica Tecnologia ótica..........DLP® Fonte de luz ..........LED RGB Resolução....... 854 × 480 píxeis (WVGA) Duração do LED ......até 20 000 horas Contraste ............1000:1 Relação de aspeto..........16:9 Brilho ..........até 100 lúmenes Dimensão da imagem projetada (diagonal)..
  • Seite 199 Pode ler a declaração de conformidade na Declaração de exposição à radiação de RF da Internet em www.picopix.philips.com. FCC: Este transmissor não pode ser colocado perto ou funcionar em conjunto com qualquer A preservação do ambiente enquanto parte outra antena ou transmissor.
  • Seite 200: Anexo

    Embalagem: A presença do logótipo (ponto estejam identificados como produtos originais verde) significa que é feita uma contribuição da X-GEM SAS ou da PHILIPS ou como produ- para uma organização nacional devidamente tos autorizados pela X-GEM SAS ou pela PHI- aprovada, com o fim de melhorar a recuperação...
  • Seite 201 PHILIPS and the PHILIPS’ Shield Emblem are registered trademarks of Koninklijke Philips N.V. used under license. This product was brought to the market by X-GEM SAS, further referred to in this document as X-GEM SAS, and is the manufacturer of the product.
  • Seite 202 Bruksan- visning Fickprojektor PPX5110 Register your product and get support at www.philips.com/welcome...
  • Seite 203 Innehållsförteckning Översikt ............3 Kära kund ..............3 Om den här bruksanvisningen ....... 3 Förpackningens innehåll ......... 3 Projektorns egenskaper ........... 3 1 Allmänna säkerhetsanvisningar ..4 Inställning av projektorn ..........4 Reparation ..............4 Strömförsörjning ............5 2 Översikt .............6 Vy från baksidan och undersidan ......6 Vy från sidan ..............6 Vy framifrån och från sidan ........6 3 Första idrifttagningen ......
  • Seite 204: Översikt

    Översikt Kära kund Förpackningens innehåll 1 – Pico-projektor (PPX 5110) Tack för att du har köpt den här projektorn. 2 – A/C-nätadapter Vi önskar dig mycket nöje med din nya projektor och de många funktionerna! 3 – Nätkontakter (EU, UK, USA) 4 –...
  • Seite 205: Allmänna Säkerhetsanvisningar

    Batteriet är inbyggt i projektorn. Det får inte demonteras och modifieras. Batteriet får endast bytas av kvalificerad servicepersonal. FARA! Om fel typ av batteri används finns risk för explosion! Försök inte byta batteriet själv. Philips · PPX5110...
  • Seite 206: Strömförsörjning

    Strömförsörjning Använd endast en nätadapter som är certifierad för den här produkten (se Teknisk information, sidan 18). Kontrollera att nätadapterns nätspän- ning stämmer överens med nätspänningen på platsen. Projektorn uppfyller de angivna spän- ningstyperna. Batteriets kapacitet avtar med tiden. Om pro- jektorn endast fungerar när den är ansluten till elnätet, är batteriet defekt.
  • Seite 207: Översikt

    1 – Reset (Återställningsknapp) 2 – B Strömbrytare/lägesväljare För att slå av och på projektorn, tryck på knappen B i åtta sekunder. För att växla mellan iOS och Android, tryck på knappen B i en sekund. 3 – Ventilationsöppningar Philips · PPX5110...
  • Seite 208: Första Idrifttagningen

    3 Första idrifttagningen Inställning av projektorn Den blå lysdioden blinkar vid laddning. När pro- jektorn är helt laddad upphör lysdioden att blinka. Placera projektorn på en plan yta framför pro- jektionsytan. FARA! Om fel typ av batteri används finns risk för Anslutning av explosion! strömförsörjningen...
  • Seite 209: Anslutning Till Uppspelningsenhet

    Det kan leda till hörselskada. 1 Anslut de externa högtalarna eller hörluren till utgången Audio out på projektorn. Projek- torns högtalare inaktiveras automatiskt när en externa högtalare eller en hörlurar ansluts. 2 Anslut HDMI-kontakten till HDMI-ingången på uppspelningsenheten. Philips · PPX5110...
  • Seite 210: Trådlös Projektion Med Miracast- Kompatibla Android-Enheter

    5 Trådlös projektion med Miracast- kompatibla Android-enheter 3 Välj Other connections, och tryck sedan på Anvisning Wireless display. För att skärmspegling ska fungera måste din enhet stödja Miracast. Alla Android-telefoner har inte den här funktionen. Ofta är funktionen gömd under ett annat namn såsom Screen- cast, Screen Sharing, WiFi Direct, Wire- less Display osv.
  • Seite 211: Projektering Via Ios-Enheter

    1 Sätt projektorn i iOS-läge. För att växla mel- lan iOS- och Android-läge, tryck på knappen B i en sekund. iOS mode 3 Öppna Control Centre genom att gå uppåt på skärmen och välj sedan Screen Mirroring. Philips · PPX5110...
  • Seite 212: Usb-Skärmspegling (Ios)

    4 Välj PPX5110-xxx. 2 I Settings på din iPhone, välj Personal Hots- pot. USB-skärmspegling (iOS) 3 Växla Personal Hotspot till On. 1 Sätt projektorn i iOS-läge. För att växla mel- lan iOS- och Android-läge, tryck på knappen B i en sekund. Projektering via iOS-enheter...
  • Seite 213 4 Anslut Lightning-kabeln till projektorns USB- 6 Öppna Control Centre genom att gå uppåt på port och den andra änden till din iPhone. skärmen och välj sedan Screen Mirroring. 7 Välj PPX5110-xxx. 5 Bekräfta snabbmeddelandet på din iPhone. Philips · PPX5110...
  • Seite 214: Anslutning Av Projektorn Till Internet

    7 Anslutning av projektorn till internet Ange IP-adressen 192.168.49.1 i webbläsaren på 6 Välj ditt trådlösa nätverk. din iPhone för att aktivera den trådlösa miljön. Du har nu aktiverat surfning på din smarttelefon med trådlös projektion. 1 Växla till iOS-läget genom att trycka på knap- pen B i en sekund.
  • Seite 215: Service

    (sprayer, slipmedel, poler- medel, alkohol osv.). Låt inte fukt tränga in i projektorn. Spraya inga rengörings- vätskor på projektorn. Torka av ytorna försiktigt. Var försiktig så att du inte repar ytorna. Philips · PPX5110...
  • Seite 216: Trådlös Uppdatering Av Den Inbyggda Programvaran

    Trådlös uppdatering av den 3 Tryck på Submit. under OTA host. inbyggda programvaran OBSERVER! Risk för dataförlust! Avbryt inte uppdateringen. Anvisning Se till att projektorn är ansluten till en strömkälla micro-USB-kabeln innan du påbörjar uppdateringen. 1 Anslut projektorn till internet (se Anslutning av projektorn till internet, sidan 13).
  • Seite 217: Felsökning

    Ofta är funktionen gömd under ett annat namn såsom Screencast, Screen Sharing, WiFi Direct, Wireless Display osv. • Se bruksanvisningen för din Android-telefon för att kontrollera om den här funktionen stöds och hur den kan aktiveras. Philips · PPX5110...
  • Seite 218 Problem Lösningar När jag ser på filmer är ljudet eller bilden ibland • Den tillgängliga WiFi-bandbredden är förvrängt eller ljudet är inte synkroniserat med otillräcklig för att skicka filmen i perfekt bilden. kvalitet från smarttelefonen till projektorn. Detta kan hända om en eller två WiFi-nätverk använder samma frekvensområde i närheten.
  • Seite 219: Bilaga

    Batteriets livstid ... upp till 70 min vid projektion Kompatibla enheter Android ........Miracast-stöd krävs iOS ............7/8/9/10/11 Produktinformation Mått (L × B × H)......98 × 98 × 27,5 mm Vikt ................. 215 g Förpackningens innehåll PPX5110,nätadapter, snabbstartsguide, bär- påse, Nätkontakter (EU, UK, USA) Philips · PPX5110...
  • Seite 220 Deklarationen om överensstämmelse kan läsas användas tillsammans någon annan på webbplatsen www.picopix.philips.com. antenn eller sändare. Den här enheten överens- stämmer med FCC RF-strålningsexponerings- gränser som anges för en okontrollerad miljö. Bevarandet av miljön som en del av en plan för hållbar utveckling är en viktig angelägenhet för...
  • Seite 221 ändringar av denna produkt eller underlåtenhet att strikt följa X-GEM SAS drifts- och underhåll- sinstruktioner. X-GEM SAS ansvarar inte för några skador eller problem som uppstår vid användning av andra alternativ eller andra förbrukningsmaterial än de som anges som original X-GEM SAS/PHILIPS- Philips · PPX5110...
  • Seite 222 PHILIPS and the PHILIPS’ Shield Emblem are registered trademarks of Koninklijke Philips N.V. used under license. This product was brought to the market by X-GEM SAS, further referred to in this document as X-GEM SAS, and is the manufacturer of the product.

Inhaltsverzeichnis