Nordpeis Atlanta Montageanleitung
Inhaltsverzeichnis
Verfügbare Sprachen
Verfügbare Sprachen
Quicklinks
GB
Installation manual
DE
Montageanleitung
FR
Manuel d'installation
IT
Manuale d'installazione
Art.no: CC-ATL00-1X0, CC-ATL00-2X0, CC-ATL01-1X0, CC-ATL01-2X0,
CC-ATL01-3X0, CC-ATL01-4X0, CC-ATL03-1X0, CC-ATL03-2X0
Last updated: 26.02.2019
Test Report No: RRF 40 14 3687
2
10
21
30
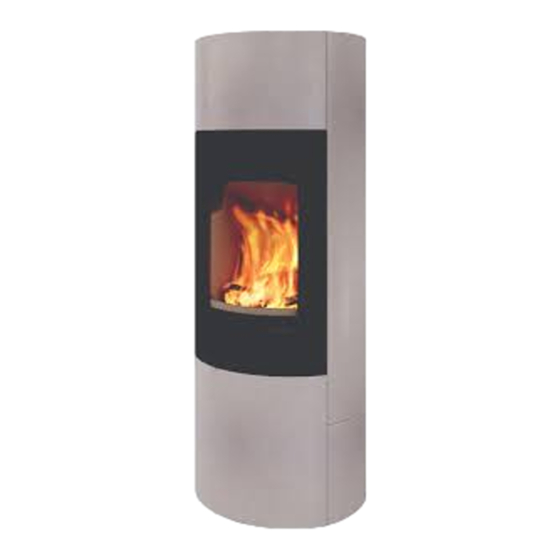
Atlanta / Atlanta High
!kg
Kapitel
Inhaltsverzeichnis

Verwandte Anleitungen für Nordpeis Atlanta


Inhaltszusammenfassung für Nordpeis Atlanta
-
Seite 10: Gewicht
INHALTSVERZEICHNIS WICHTIGE SICHERHEITSHINWEISE: 1. Allgemeine Information Gewicht 1. Befolgen Sie beim Anschluss Ihres Kaminofens bzw. Anschluss an den Schornstein Kamins an den Schornstein bzw. das Rauchgasrohr Akrylkleber die Installationsanleitung. Wenn Sie von den Kleinere Schäden Anschlussanweisungen abweichen, beachten Sie die Risse Wärmestrahlung vom Rauchgasrohr, die auf die Marmorbehandlung... -
Seite 11: Akrylkleber
Unebenheiten können aufgefüllt werden. Bei tiefer Bestimmungen des Landes, in dem die Kaminanlage installiert wird, erfolgen. gehenden Beschädigungen oder im Falle von Nordpeis AS übernimmt für falsch montierte Kaminanlagen keine erheblichen Schäden wird empfohlen, die Verantwortung. Beschädigung wiederholt mit Fliesenkleber oder Wir übernehmen keinerlei Haftung für Druckfehler und... -
Seite 12: Der Zug
Befeuerung nur geringste Mengen Feinstaub und Kohlenstoff (CO) ab. Sauber brennende Feuerstätten verbrauchen weniger Holz. Ihr Nordpeis-Gerät arbeitet mit Primär- und Sekundärverbrennung; das geschieht auf zwei Etappen: zuerst brennt das Holz, dann die sich daraus entwickelten, erwärmten Gase. -
Seite 13: Sicherheitsabstand Zu Brennbarem Material
4. Sicherheitsabstand zu brennbarem Rauchstutzen Material S-26R kommt in der Standardausführung mit Anschluß “oben”. Vergewissern Sie sich, dass alle Sicherheitsabstände eingehalten werden. (FIG 2). So rüsten Sie zu einem Rauchgasauslass an der Falls Sie einen Schornstein aus Stahlelementen mit Rückseite um: Anschluss „oben“... -
Seite 14: Erstbefeuerung
In aufrechter Position des Heizeinsatzes und vor der Befeuerung Montage der Kaminverkleidung kontrollieren Sie, Legen Sie kleines Schnittholz ein und zünden Sie es daß alle Funktionen leicht und einfach zu handhaben sind. an. Schließen Sie die Feuerraumtür erst nachdem die Flammen gut gegriffen haben und nachdem das Sekundärluftventil (Regler für Verbrennungsluft) Sekundärluftventil –... -
Seite 15: Thermotte™ Platten
Beitrag zur Umwelt dar, feuerfestes Glas nicht Die Verschleißzeit hängt von der individuellen Nutzung mit dem Altglas zu entsorgen, sondern als Sondermüll Ihres Produktes ab. Nordpeis gibt auf diese Teile 1 Jahr an Ihrer Entsorgungsstelle. Garantie. Danach können Ersatzteile gekauft werden. -
Seite 16: Grundsätzliche Anforderungen
9. Grundsätzliche Anforderungen werden und die Gase entweichen unverbrannt durch den Schornstein. Für die Installation der gesamten Feuerungsanlage sind Ihr Nordpeis-Gerät ist nur für Verbrennung von alle örtlichen Gesetzte, Baubestimmungen und Verord- Schnittholz konstruiert und zugelassen. nungen zu beachten. Überhitzen Sie niemals Ihr Gerät; es können irreparable Insbesondere sind die folgenden Normen und Gesetze Schäden verursacht werden, die von der Garantie nicht... - Seite 17 Verbrennungsluft Der Betrieb von der Feuerstätte wird nicht gefährdet, wenn Wenn Kamineinsätze raumluftabhängige Feuerstätten - die Anlagen nur Luft innerhalb eines Raumes sind, die Ihre Verbrennungsluft aus dem Aufstellraum umwälzen, entnehmen, muss der Betreiber für ausreichende - die Anlagen Sicherheitseinrichtungen haben, die Verbrennungsluft sorgen.
- Seite 18 Tragende Bauteile aus Beton oder Stahlbeton Zulässige Brennstoffe Die Feuerstätten sind so aufzustellen, daß sich seitlich Es darf nur lufttrockenes Scheitholz verwendet der Austrittsstellen für die Warmluft innerhalb eines Ab- werden. Die Verfeuerung von Abfällen und standes von 50 cm bis zu einer Höhe von 50 cm über insbesondere Kunststoff ist laut den Austrittsstellen keine tragenden Bauteile aus Beton Bundesimmissionsschutzgesetz verboten.
-
Seite 19: Hilfe Bei Problemen Mit Der Verbrennung
Hilfe bei Problemen mit der Verbrennung FEHLER ERKLÄRUNG BEHEBUNG Zu wenig Zug Rauchrohr verstopft. Schornsteinfeger/Fachhändler kontaktieren oder Rau- chrohr und Brennkammer reinigen. Rauchrohr verrußt oder Rußverstopfung an der Rau- chgasprallplatte. Rauchgasprallplatte falsch angebracht. Kontrollieren Sie die Position der Rauchgasprallplatte. Siehe Montageanleitung. Das Gerät gibt Unterdruck im Raum. - Seite 20 FEHLER ERKLÄRUNG BEHEBUNG Glasscheibe ver- Feuchtes Holz. Nur trockenes Holz mit höchstens 20% Feuchtigkeit russt verwenden. Sekundärluftventil/Regler für die Verbrennungsluft zu Sekundärluftventil/Regler für die Verbrennungsluft für weit geschlossen. bessere Luftzufuhr mehr öffnen. Beim Nachlegen soll das Ventil immer voll geöffnet sein oder die Feuerraum- tür nur angelehnt sein, um die Flammen gut zu entfac- hen.
- Seite 38 GB You need the following tools Folgende Werkzeuge sind notwendig Vous avez besoin des outils suivants Attrezzi ed utensili necessari 10 mm 13 mm GB: Cutting blade with diamonds DE: Schneidmesser mit Diamanten FR: Lame de coupe de diamants IT: Lama di taglio con diamanti 24 mm...
- Seite 39 FIG 1a - Atlanta / S-26R=mm (253) FIG 1a - Atlanta High / S-26R = mm...
- Seite 41 FIG 2 =Firewall/ Hitzenschutzwand / Mur parfeu / Parete non combustibile / Palomuuri =Combustible material / Brennbarem Material / Matières combustibles/ Parete combustibile / Tulenarka materiaali Atlanta - Atlanta High / S-26R 90 ⁰ 45 ⁰ >380 mm >50 mm >1000 mm...
- Seite 42 FIG 3 Gjellebekkstubben 11, N-3420 Lierskogen, Norway Garantiprogram Karta Gwarancyjna Warranty card Garantijas karte Garanti Garantijos kortelė Garantiprogram Garantiileht Гарантийная карта Takuukortti Carte de garantie Fişă de garanţie Κάρτα Εγγύησης Garantiekarte Serienummer/Serial number/Serienummer/Sarjanumero/Numéro de série/ Numero di serie/Seriennumer/Numer seryjny/Sērijas numurs/ Serijinis numeris/Seerianumber/Номер...
- Seite 43 FIG 4 FIG 5 ATLANTA: X = 23mm ATLANTA HIGH: X = 24mm FIG 17...
- Seite 44 FIG 6 FIG 7 FIG 6B FIG 8 FIG 9 FIG 10 FIG 10B...
- Seite 46 Atlanta High / S-26R FIG 15 CC-ATL03-180 - 1x 21-30080-3ZD - 1x 21-00000-008 - 2x 21-50000-022 - 2x 13 mm Antlanta / S-26R FIG 15B CC-ATL03-110 - 1x 21-30080-3ZD - 1x 21-00000-008 - 2x 21-50000-022 - 2x 13 mm...
- Seite 47 Atlanta - Atlanta High / S-26R FIG 16 >405 mm Atlanta - Atlanta High / S-26R FIG 16B 236 mm ⁰ >75 mm...
- Seite 48 Atlanta - Atlanta High / S-26R - AIR FIG 17 Atlanta High / S-26R - AIR FIG 17B...
- Seite 49 Atlanta / S-26R - AIR FIG 17C Atlanta - Atlanta High / S-26R FIG 18 ATLANTA: X = 23mm ATLANTA HIGH: X = 24mm 24 mm...
- Seite 50 Atlanta - Atlanta High / S-26R FIG 19 Atlanta - Atlanta High / S-26R FIG 20 0 mm...
- Seite 51 Atlanta - Atlanta High / S-26R FIG 21 Atlanta - Atlanta High / S-26R FIG 22...
- Seite 52 Atlanta High / S-26R FIG 23 Atlanta High / S-26R FIG 24 10 mm 22-ATL00-020 - 1x 21-50001-018 - 2x 21-30006-016 - 2x...
- Seite 53 Atlanta - Atlanta High / S-26R FIG 25 Atlanta - Atlanta High / S-26R FIG 26 21-50001-018 - 1x 21-30004-016 - 1x 22-ATL00-060 - 1x...
- Seite 54 Atlanta - Atlanta High / S-26R FIG 27 Atlanta - Atlanta High / S-26R FIG 28 22-ATL00-020 - 1x 10 mm 21-50001-018 - 2x 21-30004-016 - 2x...
- Seite 55 Atlanta - Atlanta High / S-26R FIG 29 10 mm 21-50001-018 - 1x 21-30004-016 - 1x Atlanta High / S-26R FIG 30 10 mm 22-ATL00-030 - 4x 21-50001-018 - 4x 21-30004-016 - 4x...
- Seite 56 Atlanta / S-26R FIG 30B 10 mm 21-50001-018 - 4x 22-ATL00-030 - 4x 21-30004-016 - 4x Atlanta / S-26R FIG 31 22-ATL00-080 - 1x ≈15⁰...
- Seite 57 Atlanta High / S-26R FIG 31B 22-ATL00-070 - 1x ≈15⁰ Atlanta High / S-26R FIG 32 21-50001-018 - 4x 10 mm 21-30004-016 - 4x...
- Seite 58 Atlanta High / S-26R FIG 33 Atlanta High / S-26R FIG 34 FIG Z...
- Seite 59 Atlanta High / S-26R FIG 35 22-ATL00-010 - 1x Atlanta High / S-26R FIG 36 236 mm...
- Seite 60 Mehrfachbelegung des Schornsteins ist zulässig Enspricht folgenden Standards: Prüfbericht Nr : Complies with / Test report / NS 30 58 / 59 RRF- 40 14 3687 BImSchV 1, 2 LRV of Switzerland Nordpeis AS, Gjellebekkstubben 11, N-3420 LIERSKOGEN, Norway www.nordpeis.no...