Herunterladen Inhalt Inhalt Diese Seite drucken

Werbung

Verfügbare Sprachen

Verfügbare Sprachen

USER
MANUAL
Brave 6 Action Camera

Werbung

Inhaltsverzeichnis
loading

Inhaltszusammenfassung für AKASO BRAVE 6

  • Seite 1 USER MANUAL Brave 6 Action Camera...
  • Seite 2 CONTENTS 01 - 21 22 - 43 44 - 65 66 - 87...
  • Seite 3 English YOUR BRAVE 6 14 6 1. Shutter / Select Button 7. Micro USB Port 2. Power / Mode / Exit Button 8. Micro HDMI Port 3. Up / WiFi Button 9. Screen 4. Down Button 10. Battery Door 5. Speaker 11.
  • Seite 4: Getting Started

    GETTING STARTED To turn on Wi-Fi Welcome to your AKASO Brave 6. To capture video and photos, you need a micro SD card Turn on camera, press Up button to turn on Wi-Fi. You can also enter Camera Setting to (sold separately).
  • Seite 5 Photo Mode Photo Setting Mode Press Mode button once to switch to Photo Mode after you turn on camera. Press Mode button several times to switch to Photo Setting Mode. In Photo Mode, press Shutter button, the camera takes a photo. Press and hold Up or Down button to adjust the zoom level.
  • Seite 6 CUSTOMIZING YOUR BRAVE 6 Motion detection is the process of detecting a change in the position of an object relative to its surroundings or a change in the surroundings relative to an object. There are 7 modes: Video, Photo, Video Playback, Photo Playback, Video Setting, Photo Turn on Motion Detection and camera, the camera records video automatically when it Setting and Camera Setting.
  • Seite 7 1. Voice Control: Off / On Default setting is English. Default setting is Off. This option can let you control your Brave 6 with your voice using a set of specific commands. 9. Beep: Off / On Default setting is on.
  • Seite 8 By default, your camera uses the entire image to determine the appropriate exposure level. You can control your Brave 6 with your voice using a set of specific commands (see list However, Exposure lets you select an area that you want the camera to prioritize when below).
  • Seite 9: Offloading Your Content

    Transferring also frees up space on your micro SD card for new content. 1. Download AKASO DV app to your mobile device from the Apple App Store or Google To offload files to a computer using a card reader (sold separately) and your computer’s Play.
  • Seite 10 1. Press and hold Mode button for 3 seconds to turn on Brave 6. Do not dry the camera or battery with an external heat source such as a microwave oven or 2.
  • Seite 11 Do not make any unauthorized alterations to the camera. Doing so may compromise safety, PHOTO regulatory compliance, performance, and may void the warranty. To capture a photo, verify the camera is in Photo mode. To take a photo: WARNING: Do not drop, disassemble, open, crush, bend, deform, puncture, shred, Press the Red Photo Button.
  • Seite 12: Mounting Your Camera

    3. Lift the PCB board and slide out the battery, as shown in the picture. MOUNTING YOUR CAMERA Note: Do NOT rotate the PCB board to avoid reversing the camera and video button functions. Attach your camera to helmets, gear and equipment. 4.
  • Seite 13 English CONTACT US For any inquiries, issues or comments concerining our products, please send E-mail to the address below or call us. We will respond as soon as possible. E-mail: cs@akasotech.com US customer service line: (301)670-7335...
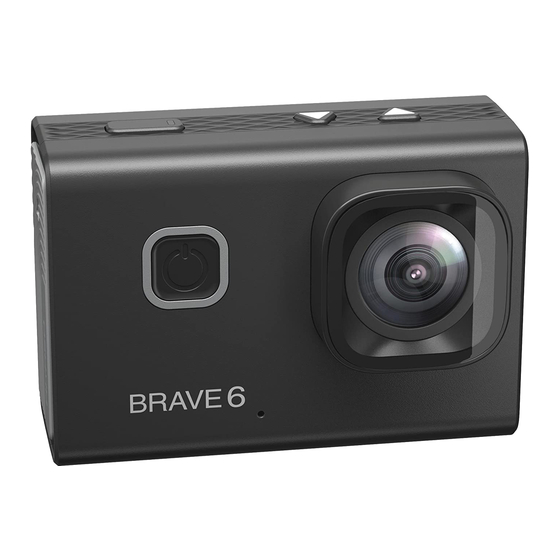
  • Seite 14 Deutsch DIE BRAVE 6 14 6 1. Auslöser- / Wi-Fi / Auswahltaste 7. Micro USB Anschluss 2. Einschalt- / Modus- / Exittaste 8. Micro HDMI Anschluss 3. Hoch / WiFi Taste 9. Screen 4. Runter Taste 10. Akkuklappe 5. Speaker 11.
  • Seite 15 EINFÜHRUNG Wi-Fi EIN- UND AUSSCHALTEN Willkommen zu Ihrer AKASO Brave 6. Um Videos und Fotos aufnehmen zu können, Wi-Fi einschalten: brauchen Sie eine micro SD Karte (nicht enthalten). Schalten Sie die Kamera ein, drücken Sie die Hoch Taste, um Wi-Fi einzuschalten. Sie können Wi-Fi auch in den Kameraeinstellungen einschalten.
  • Seite 16: Fotoeinstellungen Modus

    FOTOMODUS FOTOEINSTELLUNGEN MODUS Drücken Sie, nachdem Sie die Kamera eingeschaltet haben, einmal die Modustaste, um Drücken Sie die Modustaste ein paar Mal, um zum Fotoeinstellungen Modus zu wechseln. zum Fotomodus zu wechseln. Drücken Sie im Fotomodus den Auslöser, um ein Foto aufzunehmen. Drücken und halten Sie die Hoch oder Runter Taste, um den Zoom anzupassen.
  • Seite 17: Videoeinstellungen

    5. Bewegungserkennung: Aus / An INDIVIDUELLE EINRICHTUNG IHRER BRAVE 6 Standardeinstellung ist Aus. VIDEOEINSTELLUNGEN Bewegungserkennung ist ein Verfahren zu Erkennung von Veränderungen der Position von 1. Videoeinstellungen: 4K / 24FPS, 2K / 30FPS, 1080P / 60FPS, 1080P / 30FPS, Objekten relative zu der Umgebung oder der Veränderung in der Umgebung relative zu 720P / 120FPS, 720P / 60FPS, 720P / 30FPS bestimmten Objekten.
  • Seite 18: Kameraeinstellungen

    8. Sprache: English / French / Germany / Spanish / Italian / 日本語 / 简体中文 1. Sprachsteuerung: Aus / An Standardeinstellung ist English. Standardeinstellung ist An. Diese Option lässt Sie Ihre Brave 6 mit spezifischen Befehlen durch Ihre Stimme steuern. 9. Piepen: Aus / An Standardeinstellung ist An. 2. Wi-Fi: Aus / An Bestimmt die Lautstärke der Bedienung Ihrer Brave 6.
  • Seite 19 Diese Option setzt alle Einstellungen auf die Werkseinstellungen zurück. Bildschirm angezeigt. 21. Version: Model / Version / Datum 15. Belichtungswert: +0.7, +0.3, 0, -0.3, -0.7, -1.0, -1.3, -1.7, -2.0 Sie können das Model, die Version und die aktualisierte Zeit Ihrer Brave 6 nachsehen. Standardeinstellung ist 0.
  • Seite 20: Mit Der Akaso Dv App Verbinden

    Features sind die volle Kontrolle der Kamera, Live Vorschau, Wiedergabe, Herunterladen, Teilen von Inhalten und Kameraeinstellungen. IHRE INHALTE ÜBERTRAGEN 1. Laden Sie die AKASO DV App auf Ihr mobiles Gerät über den Apple App Store oder IHRE INHALTE AUF EINEN COMPUTER ÜBERTRAGEN den Google Play Store herunter.
  • Seite 21: Die Zoomstufe Anpassen

    Ihre Fotos und Videos auf ein externes Speichermedium. 4. Tippen Sie auf die Dateien, die Sie speichern möchten. 1. Drücken und halten Sie die Modustaste für 3 Sekunden, um die Brave 6 einzuschalten. 5. Tippen Sie auf ‘Speichern’ in der rechten unteren Ecke des Bildschirms. Der Bildschirm 2.
  • Seite 22: Lebensdauer Der Batterie Maximieren

    LEBENSDAUER DER BATTERIE MAXIMIEREN DIE FERNBEDIENUNG Wenn die Batterie 0% während einer Aufnahme erreicht, speichert die Kamera die Datei und schaltet sich aus. Um die Lebensdauer der Batterie zu maximieren, beachten Sie die folgenden Foto-Taste Anweisungen, wenn möglich: • Schalten Sie kabellose Verbindungen aus. •...
  • Seite 23 CR2032 Batterie Ersatz für AKASO Action Kamera Fernbedienung 4. Installieren Sie die neue Batterie und halten Sie dabei den Pol "+" nach oben. 5. Montieren Sie alle 4 Schrauben wieder auf der Platine. 1. Verwenden Sie einen 1,8 mm Kreuzschlitzschraubendreher, um die 4 Schrauben an der Rückseite der Fernbedienung zu entfernen, damit Sie sie öffnen können.
  • Seite 24: Kontaktieren Uns

    Deutsch KONTAKTIEREN UNS Bei Anfragen, Problemen oder Kommentaren zu unseren Produkten senden Sie bitte eine E-Mail an die unten angegebene Adresse. Wir werden Ihnen so schnel wie möglich antworten. E-mail: cs@akasotech.com...
  • Seite 25 Español SU BRAVE 6 14 6 1. Botón de Obturador / Selección 7. Puerto de Micro USB 2. Botón de Encendido / Modo / Salida 8. Puerto Micro HDMI 3. Botón Arriba / WiFi 9. Pantalla 4. Botón Abajo 10. Tapa de Batería 5.
  • Seite 26: Cómo Comenzar

    ENCENDIDO / APAGADO Wi-Fi CÓMO COMENZAR Para encender Wi-Fi Bienvenido a su AKASO Brave 6. Para capturar video y fotos, necesita una tarjeta de micro Encienda la cámara, presione y mantenga presionado el botón Arriba para encender el SD (vendida por separado).
  • Seite 27 MODO DE FOTO Modo de configuración de foto Presione el botón Modo una vez para cambiar al Modo de Foto después de encender la Presione el botón Modo varias veces para cambiar al Modo de configuración de foto. cámara. En el modo de foto, presione el botón de obturador, la cámara toma una foto. Foto 00263 Temporizador...
  • Seite 28 La detección de movimiento es el proceso de detectar un cambio en la posición de un PERSONALIZAR SU EK7000 PRO objeto en relación con su entorno o un cambio en el entorno en relación con un objeto. CONFIGURACIÓN DEL VIDEO Al activar la detección de movimiento y la cámara, la cámara graba el video 1.
  • Seite 29 8. Idioma: inglés / francés / Alemania / español / italiano / 日本語 / 简体 中文 La configuración predeterminada es encendido. Esta opción puede permitirle controlar su Brave 6 con su voz usando un conjunto de La configuración predeterminada es inglés.
  • Seite 30 El balance de blancos le permite ajustar la temperatura del color de los videos y las fotos aplicación AKASO DV. Sin embargo, puede cambiar manualmente esta configuración, si es para optimizar las condiciones de iluminación cálidas o frescas. Cuando cambia esta necesario.
  • Seite 31 CONTROLANDO TU BRAVE 6 CON VOZ 4. Introduzca la contraseña: 1234567890. Puede controlar su Brave 6 con su voz usando un conjunto de comandos específicos (vea 5. Abra la APP AKASO DV. la lista a continuación). Vaya a Configuración de la cámara para activar el control de voz si desea utilizar la función de control de voz.
  • Seite 32: Formatear Su Tarjeta Microsd

    3. Toque ‘Editar’ en la esquina derecha de la pantalla superior. 1. Mantenga presionado el botón Modo durante 3 segundos para encender Brave 6. 4. Toque los archivos que desea guardar. 2. Presione el botón Modo dos veces y luego el botón ARRIBA / ABAJO para ingresar a la 5.
  • Seite 33: Maximizar La Vida Útil De La Batería

    CONTROL REMOTO MAXIMIZAR LA VIDA ÚTIL DE LA BATERÍA Si la batería alcanza el 0% durante la grabación, la cámara guardará el archivo y se apagará. Para maximizar la vida útil de batería, siga las siguientes reglas si es posible: Botón Foto •...
  • Seite 34: Montaje De La Camara

    Reemplazo de la batería CR2032 para el Control Remoto de la Cámara 4. Instalar la batería nueva, manteniendo el polo '+' hacia arriba. de Acción AKASO 5. Reemplazar los 4 tornillos en la placa PCB. 1. Utilizar un destornillador Phillips de 1,8 mm para quitar los 4 tornillos de la tapa posterior del control remoto, lo que permite que se abra.
  • Seite 35 Español CONTÁCTENOS Para cualquier consulta, problema o comentario sobre nuestros productos, envíe un correo electrónico a la siguiente dirección, y le responderemos lo antes posible. E-mail: cs@akasotech.com...
  • Seite 36 Italiano TUA NERA BRAVE 6 14 6 1. Pulsante di scatto / Selezione 7. Porta Micro USB 2. Tasto accensione / Modalità / Uscita 8. Porta Micro HDMI 3. Pulsante Su / WiFi 9. Screen 4. Pulsante Giù 10. Porta della batteria 5.
  • Seite 37 ACCENSIONE / SPEGNIMENTO Wi-Fi Per attivare il Wi-Fi: Benvenuti in AKASO Brave 6. Per acquisire video e foto, è necessaria una scheda micro SD Accendi la fotocamera, premi il pulsante Su per attivare il Wi-Fi. Puoi anche accedere a (venduta separatamente).
  • Seite 38 Modalità foto Modalità impostazioni foto Premere una volta il pulsante Modalità per passare alla modalità Foto dopo aver acceso la Premere più volte il pulsante Modalità per passare alla modalità Impostazioni foto. fotocamera. In modalità Foto, premere il pulsante Otturatore, la fotocamera scatta una foto. Premere e Foto tenere premuto il pulsante Su o Giù...
  • Seite 39: Impostazioni Video

    PERSONALIZZAZIONE DEL TUO BRAVE 6 Attiva Motion Detection e videocamera, la videocamera registra automaticamente il video IMPOSTAZIONI VIDEO quando rileva una modifica della posizione di un oggetto rispetto a ciò che lo circonda. 1. Risoluzione: 4K / 24FPS, 2K / 30FPS, 1080P / 60FPS, 1080P / 30FPS, 720P / 120FPS, 720P / 60FPS, 720P / 30FPS 6.
  • Seite 40: Impostazione Della Fotocamera

    1. Controllo vocale: Spento / Acceso L'impostazione predefinita è attiva. L'impostazione predefinita è l'inglese. Questa opzione ti consente di controllare il tuo Brave 6 con la tua voce usando una serie di comandi specifici. 9. Bip: Spento / Acceso L'impostazione predefinita è attiva.
  • Seite 41 21. Versione: modello / versione / data livello di esposizione appropriato. Tuttavia, l'esposizione consente di selezionare un'area Puoi controllare il modello, la versione e l'ora aggiornata di Brave 6. che si desidera assegnare alla fotocamera la priorità per determinare l'esposizione. Questa impostazione è...
  • Seite 42 CONTROLLARE IL TUO BRAVE 6 CON LA TUA VOCE 4. Immettere la password: 1234567890. Puoi controllare il tuo Brave 6 con la tua voce usando una serie di comandi specifici (vedi 5. Apri l'app AKASO DV. elenco sotto). Andare su Camera Setting per attivare Voice Control se si desidera utilizzare la funzione di controllo vocale.
  • Seite 43 4. Toccare i file che si desidera salvare. 1. Tenere premuto il pulsante Mode per 3 secondi per accendere Brave 6. 5. Tocca "Salva" nell'angolo destro dello schermo inferiore. Lo schermo mostra 'Conferma 2. Premere il pulsante Mode due volte quindi il pulsante UP / Down per accedere a download'.
  • Seite 44 MANUTENZIONE DELLA TUA FOTOCAMERA TELECOMANDO Se la batteria raggiunge lo 0% durante la registrazione, la fotocamera salva il file e si spegne. Per ottimizzare la durata della batteria, segui queste linee guida quando possibile: Pulsante Foto • Disattiva le connessioni wireless. •...
  • Seite 45: Montaggio Della Telecamera

    Sostituzione Batteria CR2032 per Telecomando della Fotocamera D’Azione AKASO 4. Installare la nuova batteria, mantenendo il polo '+' rivolto verso l'alto. 1. Usare un cacciavite a punta Phillips da 1,8 mm per rimuovere le 4 viti sul coperchio 5. Rimontare tutte e 4 le viti sulla scheda PCB.
  • Seite 46 Italiano CONTATTI Per qualsiasi domanda, problema o commento riguardanti il nostro prodotto, inviare un’email all’indirizzo sotto riportato e risponderemo il più presto possibile. E-mail: cs@akasotech.com...

Inhaltsverzeichnis