Herunterladen Inhalt Inhalt Diese Seite drucken
Intermec PW50 Installationsanleitung

Intermec PW50 Installationsanleitung

Installationsanleitung für fahrzeugbefestigung
Vorschau ausblenden Andere Handbücher für PW50:

Werbung

Verfügbare Sprachen
  • DE

Verfügbare Sprachen

  • DEUTSCH, seite 21
PW 50
Vehicle Mount
AV11
Installation Guide
Guide d'installation du socle de véhicule
Installationsanleitung für Fahrzeugbefestigung
Guia de Instalação do Suporte do Veículo
Èíñòðóêöèÿ ïî óñòàíîâêå àâòîìîáèëüíîé ñòîéêè
Guía de instalación del montaje para vehículos

Werbung

Inhaltsverzeichnis
loading

Inhaltszusammenfassung für Intermec PW50

  • Seite 1 PW 50 Vehicle Mount AV11 Installation Guide Guide d’installation du socle de véhicule Installationsanleitung für Fahrzeugbefestigung Guia de Instalação do Suporte do Veículo Èíñòðóêöèÿ ïî óñòàíîâêå àâòîìîáèëüíîé ñòîéêè Guía de instalación del montaje para vehículos...
  • Seite 2: Inhaltsverzeichnis

    PW50.........
  • Seite 3: Pw50 Vehicle Mount Installation Guide

    PW50 Vehicle Mount Installation Guide The PW50 Vehicle Mount (Model AV11) provides you with a convenient way to mount the PW50 Workboard Printer to your vehicle for charging or printing. This installation guide describes how to install these vehicle mounts: •...
  • Seite 4 Items Not Provided • Power cord. You need to purchase the appropriate power cord separately. For help, contact your Intermec sales representative. • Common hand tools. Electric drill and drill bits. • Installing the Vehicle Mount 1 Use the four hex screws and the hex key to attach the RAM vehicle mount base to the vehicle mount.
  • Seite 5 Make sure the RAM vehicle mount base is at a slight angle to the mounting arm. RAM vehicle mount base vehicle base Vehicle Mounting arm mount 4 Remove the two screws from the connector cover on the back of the PW50.
  • Seite 6 5 Insert the PW50 into the vehicle mount until you hear a click and the PW50 is firmly connected to the vehicle mount. 6 Lock the mobile computer in place. • For the CN3, CN3e, and CN70 versions, turn the lever.
  • Seite 7 • For the CK61 and CN70e versions, pull the lever over the computer. 7 Attach the power cord to the connector on the bottom of the vehicle mount. 8 Connect the other end of the power cord to your vehicle.
  • Seite 8 Using the Vehicle Mount With Fanfold Media 1 Position the box that contains the fanfold media in a convenient location. 2 Press the media cover release button to open the media door. 3 Route the media through the slot in the bottom of the printer and pull a few inches through the printer.
  • Seite 9 Removing the PW50 From the Vehicle Mount 1 Unlock the mobile computer. • For the CN3, CN3e, and CN70 version, turn the lever. • For the CK61 and CN70e version, press the button and pull the lever.
  • Seite 10 2 Pull the release lever, pull the PW50 forward, and lift the PW50 out of the vehicle mount. Vehicle Mount Pinouts Pin 3 no connect Pin 2 12 volts Pin 1 This illustration describes the pinouts for the vehicle mount power...
  • Seite 11: Where To Find More Information

    Where to Find More Information To download manuals, go to the Intermec website at www.intermec.com. For product support, go to intermec.custhelp.com or call 1-800-755-5505 (U.S.A. and Canada). Outside the U.S.A. and Canada, go to www.intermec.com and click Contact to find your local Intermec representative.
  • Seite 12: Guide D'installation Du Socle De Véhicule Pw50

    Guide d’installation du socle de véhicule PW50 Le socle de véhicule PW50 (modèle AV11) procure une méthode pratique de fixer l’imprimante Workboard PW50 à votre véhicule pour une mise en charge ou une impression. Le présent guide d’installation décrit comment installer ces socles de véhicule: Socle de véhicule PW50 pour le CN3 (No/P 225-765-xxx)
  • Seite 13 Articles non fournis • Cordon d’alimentation. Il est nécessaire d’acheter le cordon d’alimentation approprié séparément. Pour de l’assistance, contacter votre représentant commercial Intermec. • Outils à main standards. • Perceuse électrique et mèches. Installation du socle de véhicule 1 À l’aide des quatre vis à tête hexagonale et la clé hexagonale, fixer la base de socle RAM au socle de véhicule.
  • Seite 14 RAM est à un petit angle par rapport au bras de fixation. Socle de véhicule Base de véhicule RAM Base de fixation Bras de fixation de véhicule RAM 4 Retirer les deux vis du couvercle de connecteur à l’arrière du PW50.
  • Seite 15 5 Insérer le PW50 dans le socle de véhicule et appuyer jusqu'à ce qu’un clic soit entendu et que le PW50 soit fermement en place dans le socle de véhicule. 6 Verrouiller l’ordinateur mobile en place. Pour la version CN3, CN3e et CN70, tourner le levier.
  • Seite 16 • Pour la version CK61 et CN70e, tirer le levier par-dessus le mobile. 7 Fixer le cordon d’alimentation au connecteur sur le fond du socle de véhicule. 8 Brancher l’autre bout du cordon d’alimentation sur votre véhicule.
  • Seite 17 Utilisation du socle de véhicule avec le papier accordéon 1 Placer la boîte contenant le papier accordéon à un endroit pratique. 2 Appuyer sur le bouton d’ouverture du couvercle de papier pour ouvrir la porte du papier. 3 Insérer le papier dans la fente au bas de l’imprimante et tirer quelques pouces à...
  • Seite 18 Retirer le PW50 du socle de véhicule 1 Déverrouiller l’ordinateur mobile. • Pour la version CN3, CN3e et CN70, tourner le levier. • Pour la version CK61 et CN70e, appuyer sur le bouton et tirer le levier.
  • Seite 19 2 Tirer le levier de dégagement, tirer le PW50 vers l’avant et soulever le PW50 hors du socle de véhicule. Brochage du socle de véhicule Broche 3, aucune connexion Broche 2, 12 volts Broche 1, terre Cette illustration décrit le brochage du connecteur d’alimentation...
  • Seite 20: Où Trouver Plus D'informations

    Où trouver plus d’informations Pour télécharger des manuels, visiter le site Web Intermec sur www.intermec.com. Pour les pièces de rechange, visiter intermec.custhelp.com ou appeler 1-800-755-5505 (Canada et États-Unis). Ailleurs qu’au Canada et aux États-Unis, visiter www.intermec.com et cliquer sur Contact pour trouver le représentant Intermec de votre région.
  • Seite 21: Installationsanleitung Für Fahrzeugbefestigung

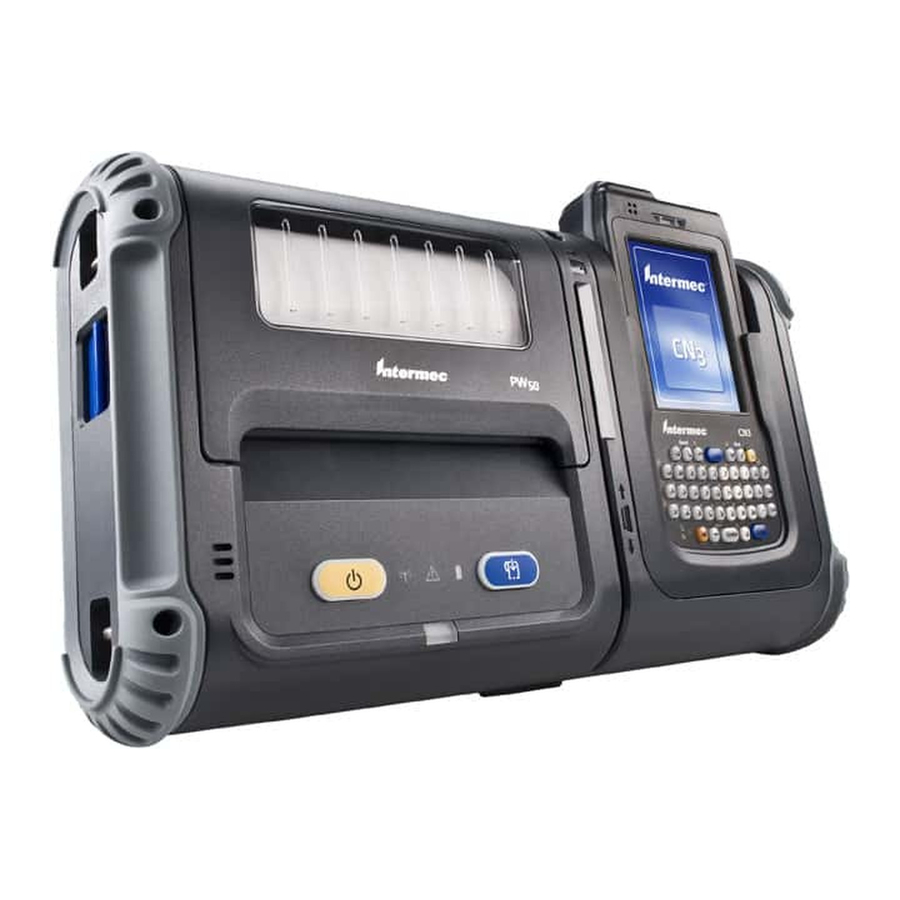
    Installationsanleitung für Fahrzeugbefestigung PW50 Die Fahrzeugbefestigung PW50 (Modell AV11) bietet eine praktische Montagemöglichkeit für die Befestigung des Workboard-Druckers am Fahrzeug – zum Laden oder Drucken. Diese Einbauanleitung erläutert den Einbau und Gebrauch dieser Fahrzeugbefestigungen: • PW50 Fahrzeugbefestigung für CN3 (Bestellnr. 225-765-xxx) •...
  • Seite 22: Nicht Mitgelieferte Teile

    Fahrzeugbefestigung RAM- Fahrzeugbefesti- gungssockel Befestigungsarm RAM- Fahrzeugsockel Dokumentation Befestigungsteile Inhalt des Verpackungskartons mit Fahrzeugbefestigung PW50 Nicht mitgelieferte Teile • Netzkabel. Ein für Ihren Standort geeignetes Netzkabel muss separat gekauft werden. Hilfestellungen erhalten Sie von Ihrem Intermec-Vertreter. • Übliche Handwerkzeuge. •...
  • Seite 23: Einbau Der Fahrzeugbefestigung

    Sechskantschrauben und Muttern am Fahrzeug befestigen. Sicherstellen, dass die Fahrzeugbefestigung an einer Stelle montiert wird, die ein einfaches Erreichen und Entfernen des Workboard-Druckers PW50 ermöglicht. 3 Den Befestigungsarm über die beiden Sockel setzen und anschließend den Befestigungsarm festziehen. Sicherstellen, dass der RAM-Fahrzeugbefestigungssockel leicht gegen den Befestigungsarm angewinkelt ist.
  • Seite 24 4 Zwei Schrauben von der Anschlussabdeckung an der Rückseite des Modells PW50 entfernen. 5 Das Modell PW50 in die Fahrzeugbefestigung drücken, bis ein Klickgeräusch zu hören und das Modell PW50 fest mit der Fahrzeugbefestigung verbunden ist.
  • Seite 25 6 Den Mobilcomputer fixieren. • Bei den Versionen CN3, CN3e und CN70 den Hebel verdrehen. • Bei der Version CK61 und CN70e den Hebel über das Mobilcomputer ziehen.
  • Seite 26: Verwendung Der Fahrzeugbefestigung Mit Drucker-Faltpapier

    7 Das Netzkabel an den Anschluss an der Unterseite der Fahrzeugbefestigung anschließen. 8 Das andere Ende des Netzkabels an das Fahrzeug anschließen. Verwendung der Fahrzeugbefestigung mit Drucker- Faltpapier 1 Den Behälter mit dem Faltpapier an einer geeigneten Stelle absetzen. 2 Die Freigabetaste des Mediendeckels drücken, um den Mediendeckel zu öffnen.
  • Seite 27: Ausbauen Des Modells Pw50 Aus Der Fahrzeugbefestigung

    3 Das Papier durch den Schlitz an der Druckerunterseite führen und einige Zentimeter Papier durch den Drucker ziehen. 4 Die Medientür schließen. Ausbauen des Modells PW50 aus der Fahrzeugbefestigung 1 Den Mobilcomputer lösen. • Bei den Versionen CN3, CN3e und CN70 den Hebel...
  • Seite 28 • Bei der Version CK61 und CN70e den Knopf drücken und den Hebel ziehen. 2 Am Freigabehebel ziehen, das Modell PW50 nach vorne ziehen und aus der Fahrzeugbefestigung heben.
  • Seite 29: Stiftbelegung Der Fahrzeugbefestigung

    Diese Abbildung zeigt die Stiftbelegung für den Fahrzeugbefestigungsanschluss. Verweise zu weiteren Informationen Zum Herunterladen von Handbüchern besuchen Sie die Intermec Website unter www.intermec.com. Produktunterstützung erhalten Sie unter intermec.custhelp.com oder rufen Sie 1-800-755-5505 an (USA und Kanada). Außerhalb der USA und Kanada rufen Sie www.intermec.com...
  • Seite 30: Guia De Instalação Do Suporte Do Veículo Pw50

    Suporte do veículo PW50 para CN70 (N/P 225-777-xxx) • Suporte do veículo PW50 para CN70e (N/P 225-778-xxx) Nota: O suporte do veículo PW50 não é recomendado para uso com CK61ex. Os procedimentos são os mesmos para todo suporte de veículo.
  • Seite 31 Componentes não fornecidos • Cabo de alimentação. O usuário deve adquirir o cabo apropriado de alimentação separadamente. Para obter ajuda, entre em contato com o representante de vendas da Intermec. • Ferramentas manuais comuns. • Furadeira elétrica e brocas de perfuração.
  • Seite 32 Verifique se há um leve ângulo entre a base do conjunto do veículo RAM e o braço de montagem. Suporte do veículo Base para veículo RAM Base do suporte Braço de conexão para veículo RAM 4 Retire os dois parafusos da cobertura do conector na parte traseira da PW50.
  • Seite 33 5 Insira a PW50 no suporte do veículo até ouvir um clique e até que o PW50 esteja firmemente fixado no suporte do veículo. 6 Prenda o computador móvel na posição adequada. • Para as versões CN3, CN3e e CN70, gire a alavanca.
  • Seite 34 • Para a versão CK61 e CN70e, levante a alavanca para a parte superior do computador. 7 Fixe o cabo de alimentação no conector na parte inferior do suporte do veículo.
  • Seite 35 8 Conecte a outra extremidade do cabo de alimentação ao veículo. Como usar o suporte do veículo com papel sanfonado 1 Coloque a caixa com o papel sanfonado em um local conveniente. 2 Pressione o botão de liberação da tampa do papel para abrir a abertura de alimentação do papel.
  • Seite 36 4 Feche a abertura de alimentação do papel. Remoção da PW50 do suporte do veículo 1 Destrave o computador móvel. • Para as versões CN3, CN3e e CN70, gire a alavanca.
  • Seite 37 • Para a versão CK61 e CN70e, pressione o botão e empurre a alavanca. 2 Empurre a alavanca de liberação, empurre a PW50 para frente e retire do suporte do veículo.
  • Seite 38 Essa ilustração descreve as pinagens para o conector de alimentação do suporte do veículo. Onde obter mais informações Para baixar manuais, visite o site da Intermec em www.intermec.com. Para obter suporte ao produto, visite intermec.custhelp.com ou ligue para 1-800-755-5505 (EUA e Canadá).
  • Seite 39: Инструкция По Установке Автомобильной Стойки

    Инструкция по установке автомобильной стойки PW50 Автомобильная стойка PW50 (модель AV11) обеспечивает возможность удобного монтажа принтера PW50 Workboard в автомобиле для зарядки или печати. В этой инструкции по установке описывается установка следующих автомобильных стоек: автомобильная стойка PW50 для CN3 (P/N 225-765-xxx) •...
  • Seite 40 Шестигранные винты (4 шт.) Установите автомобильную шаровую опору в своем автомобиле при помощи четырех 1/4-дюймовых винтов с плоской головкой под шестигранный ключ и гаек. Обязательно установите автомобильную стойку в таком месте, чтобы рабочий чековый принтер PW50 можно было легко устанавливать и снимать.
  • Seite 41 Наденьте установочную рукоятку на обе шаровые опоры и затяните установочную рукоятку. Проследите за тем, чтобы основание автомобильной стойки RAM находилось под небольшим углом к несущему рычагу. Автомобильная стойка Автомобильная шаровая опора Автомобильная Установочная рукоятка шаровая опора стойки Снимите два винта с крышки разъема сзади PW50.
  • Seite 42 Вдавливайте PW50 в автомобильную стойку, пока не услышите щелчок, означающий, что PW50 плотно сел в стойку. Закрепите мобильный компьютер на месте. Для вариантов CN3, CN3e и CN70 поверните рычаг. •...
  • Seite 43 Для варианта CK61 и CN70e потяните рычаг над • мобильный компьютер. Подключите шнур питания к разъему под автомобильной стойкой. Вставьте второй конец шнура в разъем вашего автомобиля.
  • Seite 44 Использование автомобильной стойки с фальцованным носителем Установите коробку с фальцованным носителем в удобном месте. Нажмите на кнопку освобождения крышки и откройте дверцу носителя. Вставьте носитель в щель внизу принтера и вытяните через принтер несколько сантиметров носителя. Закройте дверцу носителя.
  • Seite 45 Снятие PW50 савтомобильной стойки Освободите мобильный компьютер. Для вариантов CN3, CN3e и CN70 поверните рычаг. • Для варианта CK61 и CN70e нажмите кнопку и потяните • рычаг.
  • Seite 46 Потяните рычажок собачки, вытяните PW50 вперед и снимите его с автомобильной стойки. Разводка контактов автомобильной стойки Вывод 3, не подключается Вывод 2, 12 В Вывод 1, заземление На этой иллюстрации показана разводка контактов разъема питания автомобильной стойки.
  • Seite 47 Где найти дополнительную информацию Для загрузки справочных руководств обратитесь на веб-сайт компании Intermec по адресу www.intermec.com. Вы можете также обратиться на сайт поддержки продуктов intermec.custhelp.com или позвонить по тел. 1-800-755-5505 (США и Канада). Если вы находитесь за пределами США и...
  • Seite 48: Pw50

    La caja de envío del montaje para vehículos contiene estos artículos: Montaje para vehículos Base RAM del montaje para vehículos Base RAM del vehículo Brazo de montaje Documentación Herraje Contenido de la caja de envío del montaje para vehículos PW50...
  • Seite 49 2 Use los cuatro tornillos hexagonales de cabeza plana de ¼ de pulgada (6.4 mm) y tuerca para instalar la base para vehículos RAM en su vehículo. Asegúrese de instalar el montaje para vehículo en un lugar que quede fácilmente al alcance para acceder y retirar la impresora PW50 Workboard Printer.
  • Seite 50 RAM quede ligeramente en ángulo con respecto al brazo de montaje. Montaje para vehículos Base RAM del vehículo Base RAM del montaje Brazo de montaje para vehículos 4 Retire los dos tornillos de la cubierta del conector en la parte posterior del PW50.
  • Seite 51 5 Inserte el PW50 en el montaje para vehículos hasta que se escuche un chasquido y el PW50 quede firmemente conectado en el montaje para vehículos. 6 Trabe en su sitio la computadora móvil. • Para las versiones CN3, CN3e y CN70, gire la palanca.
  • Seite 52 • Para la versión CK61 y CN70e mueva la palanca encima del computadora. 7 Instale el cable de alimentación en el conector en la parte inferior del montaje para vehículos. 8 Conecte el otro extremo del cable de alimentación al vehículo.
  • Seite 53 Uso del montaje para vehículos con papel continuo 1 Ponga la caja que contiene el papel continuo en un lugar conveniente. 2 Oprima el botón de liberación de la cubierta del papel para abrir la puerta del papel. 3 Guíe el papel por la ranura en la parte inferior de la impresora y pase unos centímetros por la impresora.
  • Seite 54 Retirada del PW50 del montaje para vehículos 1 Destrabe la computadora móvil. • Para las versiones CN3, CN3e y CN70, gire la palanca. • Para la versión CK61 y CN70e, presione el botón y mueva la palanca.
  • Seite 55 2 Accione la palanca de liberación, mueva el PW50 hacia delante, y levante el PW50 del montaje para vehículos. Asignaciones de patillas del montaje para vehículos Patilla 3, sin conexión Patilla 2, 12 voltios Patilla 1, tierra Esta ilustración describe las asignaciones de patillas para...
  • Seite 56: Pw50

    Dónde obtener más información Para descargar manuales, visite el sitio Web de Intermec en www.intermec.com. Para obtener asistencia con productos, visite intermec.custhelp.com o llame al 1-800-755-5505 (EE.UU. y Canadá). Fuera de los EE.UU. y Canadá, visite www.intermec.com y haga clic en Contacto para encontrar un representante local de Intermec.

Inhaltsverzeichnis