Herunterladen Inhalt Inhalt Diese Seite drucken
Klarstein 10030038 Bedienungsanleitung

Klarstein 10030038 Bedienungsanleitung

Mit kochfunktion

Werbung

Verfügbare Sprachen
  • DE

Verfügbare Sprachen

  • DEUTSCH, seite 1
Mixer mit Kochfunktion
10030038
10030039

Werbung

Inhaltsverzeichnis
loading

Inhaltszusammenfassung für Klarstein 10030038

  • Seite 1 Mixer mit Kochfunktion 10030038 10030039...
  • Seite 2: Inhaltsverzeichnis

    Technische Daten Sicherheitshinweise Übersicht über das Gerät Benutzung Reinigung Fehlerbehebung Hinweise zur Entsorgung Konformitätserklärung Technische Daten Artikelnummer 10030038 10030039 Stromversorgung 220-240 V~ 50 Hz Motorleistung 1300 W Heizleistung 800 W Sicherheitshinweise • Die Nichtbeachtung der Hinweise kann eine Gefahr darstellen.
  • Seite 3 Besondere Sicherheitshinweise • Lesen Sie die Sicherheitshinweise vor der Benutzung durch. Wenn es Unklarheiten in dieser Bedienungsanleitung gibt, wenden Sie sich an den Klarstein-Kundendienst. • Beachten Sie die Wahl der richtigen Funktion für verschiedene Gerichte, wie sie hier beschrieben wird.
  • Seite 4: Übersicht Über Das Gerät

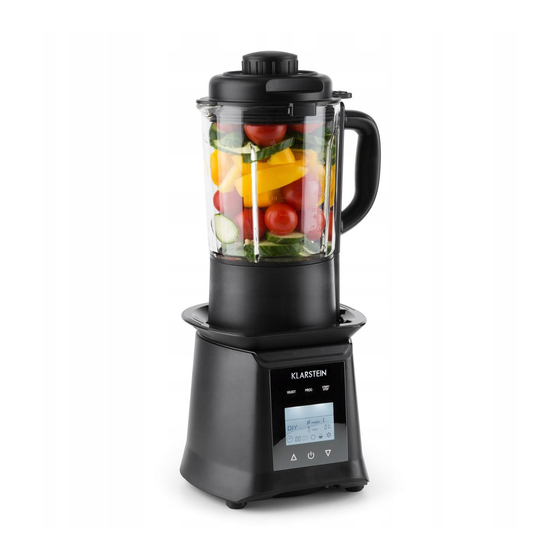
    • Das Gerät ist nur für den Hausgebrauch geeignet. • Falls das Gerät plötzlich aufhört zu funktionieren, kann dies durch den Überhitzungschutz für den Motor ausgelöst worden sein. Warten Sie in dem Fall 20-30 Minuten. • Die Kupplungsmechanik des Mixbehälters und des Mixers darf Wasser nicht ausgesetzt werden. Nach der Befüllung des Mixbehälters muss die Kupplungsmechanik getrocknet werden.
  • Seite 5 • Bedienfeld: Einstellungen und Funktionen wählen. • Basis: Der Hauptteil des Gerätes, enthält den Motor und die Steuereinheit. • Schlagmesser: Material aus Edelstahl, hoher Härtegrad, zerkleinert alle Arten von Lebensmitteln. • Mixbehälter aus Glas: hitzebeständiges Material, mit Heizplatte; Hauptbehälter für Lebensmittel. •...
  • Seite 6: Benutzung

    Drücken Sie die Hoch/Runter-Taste, um die Stufe einzustellen. Durch erneutes Drücken auf „PROG“ gelan- gen Sie zur Einstellung der Zeit. Die letzten beiden Stellen im Display „00:00“ blinken. Wieder auf „PROG“ drücken und anschließend die Tasten /, um die Minuten einzustellen. Durch ein weiteres Drücken auf „PROG“...
  • Seite 7 Lndicating arrow Richtungspfeil Menü + „▼▲“ x 2 Julce z. B. „Juice“ Function Funktionsanzeige display Start the Start/Stopp- Display leuchtet auf “ON/OFF” Display lights up Taste zum Starten...
  • Seite 8 Hinweise • Wählen Sie die entsprechende Funktionstaste, wenn Sie Brei, Teig, Suppe usw. herstellen, sonst wird dies nicht zu dem gewünschten Geschmackserlebnis führen oder die Nahrungsmittel laufen über oder bleiben am Boden des Mixbehälters haften. • Wenn Ihnen vor der Verwendung Funktionsstörungen auffallen, müssen Sie die Funktion wechseln. Drücken Sie die Ein-/Aus-Taste, brechen Sie dann die gegenwärtige Funktion ab.
  • Seite 9: Reinigung

    Reinigung Reinigungsanleitung Sicherheitshinweise zur Reinigung • Ziehen Sie immer erst den Netzstecker und lassen Sie das Gerät abkühlen, wenn Sie es nicht gebrauchen oder reinigen. • Die Klingen sind nicht abnehmbar und sie sind sehr scharf. Seien Sie bei der Reinigung des Innenbehälters äußerst vorsichtig.
  • Seite 10: Fehlerbehebung

    Fehlerbehebung Problem Ursache Lösung Die Betriebsleuchte brennt nicht. Das Netzkabel ist nicht richtig Überprüfen Sie das Netzkabel angeschlossen. und verbinden Sie es korrekt. Der Deckel sitzt nicht in der Überprüfen Sie den Deckel und richtigen Position. decken Sie ihn erneut ab. Wenn der Deckel in der richtigen Posi- tion ist, hören Sie einen kurzen Signalton.
  • Seite 11: Hinweise Zur Entsorgung

    Hinweise zur Entsorgung Befindet sich die linke Abbildung (durchgestrichene Mülltonne auf Rädern) auf dem Produkt, gilt die Europäische Richtlinie 2012/19/EU. Diese Produkte dürfen nicht mit dem normalen Hausmüll entsorgt werden. Informieren Sie sich über die örtlichen Regelungen zur getrenn- ten Sammlung elektrischer und elektronischer Gerätschaften. Richten Sie sich nach den örtli- chen Regelungen und entsorgen Sie Altgeräte nicht über den Hausmüll.
  • Seite 12: Technical Data

    Declaration of Conformity ......... 21 Technical Data Item number 10030038 10030039 Power supply 220-240 V...
  • Seite 13 • Place the machine on a flat hard place, and keep a distance from the wall or other valuables • Do not use near fire or in places where temperature above 40 degrees . • Before you take the Jug or into the main body, please cancel the current function or cut off power supply •...
  • Seite 14: Product Overview

    Product Overview Steam cap Handle Steamer Glass jug Measuring cup Blades Coupler 2 Stirring rod Coupler 1 Brake Power cord Main body Control panel Brush Base...
  • Seite 15 • Control panel: to set up and choose functions • Main body: main part of device, include motor, PCB,ETC. • Blades: Stainless steel material, high hardness, cutting smash all kinds of food • Measuring cup: measuring ingredients. Do not Excess the max line. •...
  • Seite 16: Use

    “PROG”process(The longest setting time is 5mins): Press the PROG key then enter into the PROG program,the “Speed”will be flashed. Pressing the / key for regulating the speed and press the PROG key then enter into regulating “Time”,the last two digitals of the 00:00 will be flashed.
  • Seite 17 Lndicating arrow Julce Function display Start the “ON/OFF” Display lights up...
  • Seite 18 Notes on use • When making porridge, paste, soup, etc, you must select the corresponding function keys, otherwise it will make bad taste, not cooked well and so on. What’ s worse,Food will overflow or paste on the bottom of jug. •...
  • Seite 19: Cleaning

    Cleaning Cleaning Safety guidelines • When not in use or before cleaning, always disconnect the appliance from the mains supply and allow it to cool before handling. • The blades are not removable and are very sharp; extreme caution should be taken when cleaning the inside of the jug.
  • Seite 20: Troubleshooting

    Troubleshooting Problem Reason Solution Power cord not be well plugged. Check power cord and make it well The operation light does not light. Lid not put in the right position. Check the lid and re-cover it. When cover is in the right posi- tion, you can hear a short alarm.
  • Seite 21: Disposal Considerations

    Disposal Considerations According to the European waste regulation 2012/19/EU this symbol on the product or on its packaging indicates that this product may not be treated as household waste. Instead it should be taken to the appropriate collection point for the recycling of electrical and electronic equip- ment.
  • Seite 22: Fiche Technique

    Déclaration de conformité ......... 31 Fiche technique Numéro d’article 10030038 10030039 Alimentation électrique 220-240 V~...
  • Seite 23 • Lire les consignes de sécurité avant l’utilisation de l’ a ppareil. En cas d’incompréhension des consignes de ce mode d’ e mploi, contacter le service client de Klarstein. • Veiller à sélectionner la bonne fonction pour les différents plats, comme indiqué dans ce mode d’ e mploi.
  • Seite 24: Aperçu De L'appareil

    Aperçu de l’appareil Steam cap Couvercle vapeur Couvercle Handle Steamer Poignée Marguerite Glass jug Carafe de mixage Measuring cup Blades Couteau de mixage Verre doseur Coupler 2 Socle Stirring rod Mécanisme d’ e nclenchement Coupler 1 Pilon Brake Arbre d’ e ntrainement Power cord Fiche d’...
  • Seite 25 • Panneau de commande : sélectionner les paramètres et les fonctions. • Socle : partie principale de l’ a ppareil, contient le moteur et l’unité de commande. • Couteau : matériau en acier inoxydable, haute résistance à la dureté, broie toutes sortes d’ a liments. •...
  • Seite 26: Utilisation

    réglage de la vitesse. Les deux derniers endroits de l’ é cran «00:00» clignotent. Appuyer de nouveau sur « PROG » puis enfin sur les touches /, pour régler les heures. Appuyer de nouveau sur « PROG » pour démarrer le programme. Utilisation 1.
  • Seite 27 Lndicating arrow Sens de la flèche Menu + „▼▲“ x 2 Julce par ex. „Juice“ Affichage des fonctions Function display Marche/arrêt Start the Touche de “ON/OFF” L’ a ffichage s’ a llume Display lights up démarrage...
  • Seite 28 Remarques • Sélectionner la touche de sélection appropriée pour la préparation de purée, pâte, soupe, faute de quoi le résultat gustatif souhaité peut ne pas être atteint, les aliments peuvent déborder ou rester coller au fond de la carafe de mixage. •...
  • Seite 29: Nettoyage

    Nettoyage Consignes de nettoyage Consignes de sécurité pour le nettoyage • Toujours débrancher l’ a ppareil et le laisser refroidir après utilisation ou avant de le nettoyer. • Les lames ne sont pas amovibles et sont très tranchantes. Toujours nettoyer les parois internes du récipient avec une extrême prudence.
  • Seite 30: Résolution Des Problèmes

    Résolution des problèmes Problème Cause possible Solution Le témoin lumineux de marche ne Le cordon d’ a limentation n’ e st Vérifier le cordon d’ a limentation s’ a llume pas. pas correctement branché. et le brancher correctement. Le couvercle n’ e st pas positionné Contrôler le couvercle et le correctement.
  • Seite 31: Information Sur Le Recyclage

    Information sur le recyclage Vous trouverez sur le produit l’image ci-contre (une poubelle sur roues, barrée d‘une croix), ce qui indique que le produit se trouve soumis à la directive européenne 2012/19/UE. Ren- seignez-vous sur les dispositions en vigueur dans votre région concernant la collecte séparée des appareils électriques et électroniques.
  • Seite 32: Dati Tecnici

    Dichiarazione di conformità ........31 Dati tecnici Articolo numero 10030038 10030039 Alimentazione 220-240 V ~ 50 Hz...
  • Seite 33 • Utilizzare il dispositivo esclusivamente con il cavo di alimentazione incluso nella consegna. Se il cavo è danneggiato, rivolgersi al servizio clienti per la sostituzione. • Non lavare con acqua la base del dispositivo e non immergerla mai in acqua. •...
  • Seite 34: Descrizione Del Prodotto

    Descrizione del prodotto Steam cap Coperchio vapore Coperchio Handle Steamer Impugnatura Accessorio cottura a Glass jug Contenitore vapore Measuring cup Blades Lama Misurino Coupler 2 Accoppiatore contenitore Stirring rod Accoppiatore base Coupler 1 Mortaio Brake Albero motore Spina Power cord Main body Base Control panel...
  • Seite 35 • Pannello dei comandi: selezionare le impostazioni e le funzioni. • Base: unità principale contenente il motore e l’unità dei comandi. • Lama: in acciaio inossidabile, resistente, trita tutti i tipi di alimenti. • Contenitore in vetro: materiale resistente al calore con piastra riscaldante; contenitore principale degli ali- menti.
  • Seite 36: Utilizzo

    minuti. Premere di nuovo “PROG” per mettere in funzione il programma. Utilizzo 1. Tagliare gli ingredienti a pezzi grandi 2 cm (lavare la carne e tagliarla) (vedere la figura 1). 2. Utilizzare il misurino per introdurre la giusta quantità di ingredienti. (vedere la figura 2). 3.
  • Seite 37 Freccia direzionale Lndicating arrow Menü + „▼▲“ x 2 Julce „Juice“ Function Spia funzione display Start the Start/Stopp- Il display si accende “ON/OFF” Display lights up Tasto di avvio...
  • Seite 38 Note • Selezionare il tasto funzione corrispondente (per preparare il purè, l’impasto, la zuppa ecc.) ed ottenere il risultato desiderato, altrimenti gli alimenti possono traboccare o incollarsi sul fondo del contenitore. • Se prima di iniziare a frullare ci si accorge che la funzione selezionata è errata, è necessario cambiarla. Premere il tasto on/off e interrompere la funzione attuale.
  • Seite 39: Pulizia

    Pulizia Istruzioni per la pulizia Avvertenze di sicurezza per la pulizia • Prima di qualsiasi operazione di pulizia del dispositivo, o in caso di inutilizzo, staccare la spina dalla presa e farlo raffreddare. • Le lame non sono rimovibili e sono molto affilate. Pulire con la massima cautela la parte interna del con- tenitore.
  • Seite 40: Risoluzione Dei Problemi

    Risoluzione dei problemi Problema Causa Soluzione La spia di operatività non si cavo di alimentazione non è Controllare il cavo di alimenta- accende. collegato correttamente. zione e collegarlo correttamente. Il coperchio non è inserito corret- Controllare il coperchio e coprirlo tamente di nuovo.
  • Seite 41: Smaltimento

    Smaltimento Se sul prodotto è presente la figura a sinistra (il cassonetto dei rifiuti mobile sbarrato), si ap- plica la direttiva europea 2012/19/UE. Questi prodotti non possono essere smaltiti con i ri- fiuti normali. Informarsi sulle disposizioni vigenti in merito alla raccolta separata di dispositivi elettrici ed elettronici.
  • Seite 42: Datos Técnicos

    Declaración de conformidad ........51 Datos técnicos Número de artículo 10030038 10030039 Suministro eléctrico 220-240 V~...
  • Seite 43 • Lea atentamente estas indicaciones de seguridad antes de utilizar el aparato. Si no comprende alguna de las indicaciones de este manual, contacte con el servicio de atención al cliente de Klarstein. • Escoja la función correcta para distintos platos como se describe en este manual.
  • Seite 44: Descripción Del Aparato

    Descripción del aparato Steam cap Tapa para función al vapor Tapa Handle Steamer Accesorio para cocción Glass jug Recipiente al vapor Measuring cup Blades Cuchilla Vaso medidor Coupler 2 Dispositivo de acoplamiento Stirring rod Dispositivo de acoplamiento Coupler 1 Brake Tapón Motor Enchufe...
  • Seite 45 • Panel de control: seleccionar ajustes y funciones • Base: estructura principal del aparato, contiene el motor y la unidad de control • Cuchilla: material de acero inoxidable, grado de dureza alto, tritura todo tipo de alimentos • Recipiente de cristal: material resistente al calor con placa calefactora; recipiente principal para alimentos •...
  • Seite 46: Utilización

    ajustes de tiempo. Los últimos números de «00:00» parpadean en el display. Pulse de nuevo «PROG» y a continuación los botones / para configurar los minutos. Si pulsa de nuevo «PROG» se pondrá en marcha el programa. Utilización 1. Corte los ingredientes en trozos de 2 cm de grosor (limpie la carne y córtela en tiras) (consulte imagen 1). 2.
  • Seite 47 Lndicating arrow Flechas de dirección Menü + „▼▲“ x 2 Julce p. ej. «Juice» Function Indicador de funcionamiento display Start the Botón start/stop El display se ilumina “ON/OFF” Display lights up para iniciar...
  • Seite 48 Advertencias • Elija el botón de función correspondiente cuando quiera preparar papilla, masa, sopa, etc.; de lo contrario, no conseguirá el sabor deseado o los alimentos rebosarán o quedarán en el fondo del recipiente. • Si detecta fallos en la utilización de una función, deberá elegir otra. Pulse el botón on/off para interrumpir la función actual.
  • Seite 49: Limpieza

    Limpieza Instrucciones de limpieza Indicaciones de seguridad para la limpieza • Desconecte siempre el enchufe y deje que el aparato se enfríe si no lo utiliza ni lo limpia. • Las cuchillas son muy afiladas y no pueden extraerse. Tenga cuidado cuando limpie el interior del reci- piente.
  • Seite 50: Resolución De Problema

    Resolución de problema Problema Causa Solución El indicador de funcionamiento no El cable de alimentación no se ha Compruebe el cable de alimen- se ilumina. conectado correctamente. tación y conéctelo de nuevo. La tapa no está en su posición Compruebe la tapa y tape el correcta.
  • Seite 51: Indicaciones Para La Retirada Del Aparato

    Indicaciones para la retirada del aparato Si el aparato lleva adherida la ilustración de la izquierda (el contenedor de basura tachado) entonces rige la normativa europea, directiva 2012/19/UE. Este producto no debe arrojarse a un contenedor de basura común. Infórmese sobre las leyes territoriales que regulan la recogida separada de aparatos eléctricos y electrónicos.

Diese Anleitung auch für:

10030039

Inhaltsverzeichnis