Herunterladen Inhalt Inhalt Diese Seite drucken
Klarstein 10031822 Hinweise
Vorschau ausblenden Andere Handbücher für 10031822:

Werbung

Verfügbare Sprachen
  • DE

Verfügbare Sprachen

  • DEUTSCH, seite 1
Luftbefeuchter
10031822 10031823

Werbung

Inhaltsverzeichnis
loading

Inhaltszusammenfassung für Klarstein 10031822

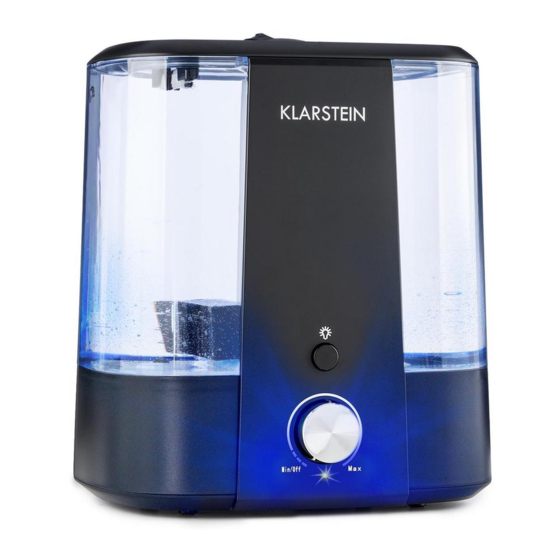
  • Seite 1 Luftbefeuchter 10031822 10031823...
  • Seite 2: Inhaltsverzeichnis

    Sicherheitshinweise 2 Geräteübersicht 3 Inbetriebnahme und Bedienung 4 Reinigung und Pflege 5 Fehlersuche und Fehlerbehebung 5 Entsorgung und Konformitätserklärung 6 Technische Daten Artikelnummer 10031822, 10031823 Stromversorgung 220-240 V ~ 50-60 Hz Leistung 24 W ≥ 300 ml/h Nebelvolumen Wassertankvolumen Sicherheitshinweise Allgemeine Hinweise •...
  • Seite 3: Geräteübersicht

    Hinweise zum Standort und zur Bedienung • Stellen Sie das Gerät auf einen stabilen, flachen Untergrund. Der Luftbefeuchter sollte während dem Betrieb sicher und waagerecht stehen. • Stellen Sie das Gerät in ausreichender Entfernung zu Wärmequellen auf. Dazu zählen beispielsweise Öfen, Heizungen, Herde oder Kamine.
  • Seite 4: Inbetriebnahme Und Bedienung

    Inbetriebnahme und Bedienung Allgemeine Bedienung Öffnen Sie die obere Abdeckung. Füllen Sie Wasser in den Tank. Achten Sie darauf, dass sich das Wasser unterhalb der MAX-Markierung befindet. WICHTIG: Gießen Sie kein Wasser in das Luftrohr. Falls sie aus Versehen Wasser in das Luft- rohr gegossen haben, entleeren Sie das Wasser komplett und befüllen Sie den Tank dann erneut.
  • Seite 5: Reinigung Und Pflege

    Reinigung und Pflege • Reinigen Sie das Gerät wöchentlich. Entfernen Sie vor der Reinigung das Luftrohr und gießen Sie das über- schüssige Wasser aus, wie auf dem folgenden Bild dargestellt. Wischen sie das Gerät mit einem trockenen Lappen ab und stellen Sie es an einen schattigen Platz. Ventil und Luftrohr können zur Reinigung ausein- ander genommen werden.
  • Seite 6: Entsorgung Und Konformitätserklärung

    Problem Mögliche Ursache Lösung Es kommt keine Luft Der Dichtungsring des Luftrohrs Nehmen Sie das Luftrohr ab, gießen Sie das und kein Nebel aus dem wurde beim Entfernen beschädigt. Wasser aus und reinigen Sie das Luftrohr. Gerät. Bringen Sie Ventil und Dichtungsring an Das Luftrohr wurde nicht fest an und achten Sie darauf, dass keines der Teile der Basis angebracht.
  • Seite 7: Technical Data

    Product Description 8 Use and Operation 9 Cleaning and Care 10 Troubleshooting 10 Disposal and Declaration of Conformity 11 Technical Data Item number 10031822, 10031823 Power supply 220-240 V ~ 50-60 Hz Power consumtion 24 W ≥ 300 ml/h Mist volume...
  • Seite 8: Product Description

    Hints on Environment and Operation • Set it at the firm, flat place. The humidifier should be placed at horizontal place and keep it steady. • Set it far away from the heat source. The humidifier should be far away from the heat source, such as the stoves or fire place.
  • Seite 9: Use And Operation

    Use and Operation General Operation Open the top cover Fill the water into the water tank. The water can’t be over the MAX level. Don’t add the water into the air flue. If there is too much water pouring into the air flue to make the device stop working, please pour out the water and then re-fill the water tank, and then the device will be back to normal.
  • Seite 10: Cleaning And Care

    Cleaning and Care • Clean the device every week. Please disassemble the air flue before cleanness and pour out the water accor- ding to the below picture instruction. And then wipe the device by the dry cloth. Put the device in a shady and cool place.
  • Seite 11: Disposal And Declaration Of Conformity

    Problem Possible Cause Solution No wind and no steam. The sealing ring on the air flue was Disassemble the air flue, pour out the water disassembled with distortion. and clean the air flue. And then assemble the valve body and sealing ring to the air The air flue was not locked tight.
  • Seite 12: Datos Técnicos

    Puesta en marcha y uso 14 Limpieza y cuidado 15 Detección y resolución de problemas 15 Retirada del aparato y declaración de conformidad 16 Datos técnicos Número de artículo 10031822, 10031823 Suministro eléctrico 220-240 V ~ 50-60 Hz Potencia 24 W ≥ 300 ml/h Volumen de nebulización...
  • Seite 13: Descripción Del Aparato

    Indicaciones para la ubicación y utilización • Coloque el aparato en una superficie plana y estable. El humidificador debe estar seguro y en posición hori- zontal durante su funcionamiento. • Coloque el aparato a suficiente distancia de fuentes de calor. Entre ellas se encuentran hornos, radiadores, hornillos o chimeneas.
  • Seite 14: Puesta En Marcha Y Uso

    Puesta en marcha y uso Utilización general Abra la cubierta superior. Llene de agua el depósito de agua. Tenga en cuenta que el nivel del agua debe encontrarse por debajo de la marca MAX. IMPORTANTE: no vierta agua en el conducto de aire. Si por accidente esto sucede, vacíe todo el agua vuelva a rellenar de nuevo el depósito.
  • Seite 15: Limpieza Y Cuidado

    Limpieza y cuidado • Limpie el aparato semanalmente. Retire el conducto de aire antes de la limpieza y vierta el agua sobrante como se representa en la siguiente imagen. Limpie el aparato con un paño seco y póngalo en un sitio a la sombra.
  • Seite 16: Retirada Del Aparato Y Declaración De Conformidad

    Problema Posible causa Solución No sale aire ni vapor del La junta de sellado del conducto Extraiga el conducto de aire, vierta el agua aparato. de aire se ha dañado al retirarla y limpie todo el conducto. Monte la válvula y la junta de sellado y asegúrese de que El conducto de agua no se ha ninguna de las piezas están dañadas.
  • Seite 17: Fiche Technique

    Mise en service et utilisation 19 Nettoyage et entretien 20 Identification et résolution des problèmes 10 Recyclage et déclaration de conformité 21 Fiche technique Numéro d’ a rticle 10031822, 10031823 Alimentation 220-240 V ~ 50-60 Hz Puissance 24 W ≥ 300 ml/h Débit de brumisation...
  • Seite 18: Aperçu De L' A Ppareil

    Consignes pour l’emplacement et l’utilisation • Placez l’ a ppareil sur une surface plane et stable. L’humidificateur d’ a ir doit être posé à l’horizontale et de façon stable pendant l’utilisation. • Placez l’ a ppareil à distance suffisante des sources de chaleur, notamment des fours, radiateurs, plaques de cuisson ou cheminées.
  • Seite 19: Mise En Service Et Utilisation

    Mise en service et utilisation Utilisation courante Ouvrez le couvercle supérieur Remplissez le réservoir d’ e au. Veillez à ce que le niveau d’ e au reste en-dessous de la marque MAX. IMPORTANT : Ne versez pas d’ e au dans le tuyau d’ a ir. Si vous avez versé de l’ e au dans le tuyau d’ a ir ac- cidentellement, videz-la complètement et remplissez à...
  • Seite 20: Nettoyage Et Entretien

    Nettoyage et entretien • Nettoyez l’ a ppareil une fois par semaine. Avant le nettoyage, retirez le tuyau d’ a ir et videz le reste d’ e au comme illustré sur le schéma ci-dessous. Essuyez l’ a ppareil avec un chiffon sec et placez-le à l’ o mbre. Pour le séchage, la vanne et le tuyau d’...
  • Seite 21: Recyclage Et Déclaration De Conformité

    Problème Cause possible Solution Aucun air ni aucune Le joint d’ é tanchéité du tuyau Retirez le tuyau d’ a ir, videz l’ e au et nettoyez brume ne sort de d’ a ir a été endommagé lors d’une le tuyau d’ a ir. Montez la vanne et le joint l’...
  • Seite 22: Dati Tecnici

    Messa in funzione e utilizzo 24 Pulizia e manutenzione 25 Ricerca e risoluzione dei problemi 25 Smaltimento e dichiarazione di conformità 26 Technische Daten Articolo numero 10031822, 10031823 Alimentazione 220-240 V ~ 50-60 Hz Potenza 24 W ≥ 300 ml/h...
  • Seite 23: Descrizione Del Prodotto

    Note per l´installazione e per l´utilizzo • Collocare il dispositivo su una superficie stabile e piana. Durante l´uso il dispositivo deve essere in posizione orizzontale. • Collocare il dispositivo lontano da fonti di calore come ad esempio forni, stufe, fornelli o camini. •...
  • Seite 24: Messa In Funzione E Utilizzo

    Messa in funzione e utilizzo Utilizzo generale Aprire il coperchio superiore. Versare l´acqua nel serbatoio. Prestare attenzione che l´acqua si trovi sotto il segno MAX. IMPORTAN- TE: non versare acqua nel tubo dell´aria. Se viene versata inavvertitamente acqua nel tubo dell´aria, gettare l´acqua e riempire di nuovo il serbatoio.
  • Seite 25: Pulizia E Manutenzione

    Pulizia e manutenzione • Pulire il dispositivo una volta a settimana. Prima della pulizia rimuovere il tubo dell´aria e gettare l´acqua in eccesso come rappresentato nella figura in basso. Lavare il dispositivo con un panno asciutto e metterlo in un posto all´ombra. La valvola e il tubo dell´aria possono essere smontati. Rimuovere lo sporco e la polvere e assemblare di nuovo i componenti.
  • Seite 26: Smaltimento E Dichiarazione Di Conformità

    Problema Causa possibile Soluzione Nessuna fuoriuscita La guarnizione del tubo dell´aria Rimuovere il tubo dell´aria, gettare l´acqua e di aria e nebbia dal si è danneggiata durante la pulire il tubo dell´aria. Assemblare la valvola dispositivo. rimozione. e la guarnizione e assicurarsi che nessuno dei componenti sia danneggiato.

Diese Anleitung auch für:

10031823

Inhaltsverzeichnis