Herunterladen Inhalt Inhalt Diese Seite drucken
auna Pure Precision Box Bedienungsanleitung

auna Pure Precision Box Bedienungsanleitung

Aktiver lautsprecherset

Werbung

Verfügbare Sprachen
  • DE

Verfügbare Sprachen

  • DEUTSCH, seite 1

Werbung

Inhaltsverzeichnis
loading

Inhaltszusammenfassung für auna Pure Precision Box

  • Seite 3: Inhaltsverzeichnis

    Sehr geehrter Kunde, wir gratulieren Ihnen zum Erwerb Ihres Gerätes. Lesen Sie die folgenden Hinweise sorgfältig durch und befolgen Sie diese, um möglichen Schäden vorzubeugen. Für Schäden, die durch Missachtung der Hinweise und unsachgemäßen Gebrauch entstehen, übernehmen wir keine Haftung. INHALT Technische Daten 4 Lieferumfang 4...
  • Seite 4: Technische Daten

    TECHNISCHE DATEN Artikelnummer 10032939 Stromversorgung Eingang 100-240 V~ 50/60 Hz Netzgerät Ausgang 15 V / 3 A Lautsprecher 2-Wege-System Impedanz 6 Ω Frequenzbereich 70 Hz - 20 kHz 10,5 kg Gewicht LIEFERUMFANG Teile Anzahl Lautsprecher Netzstromadapter Bedienungsanleitung...
  • Seite 5: Sicherheitshinweise

    SICHERHEITSHINWEISE • Setzen Sie das Gerät keiner direkten Sonneneinstrahlung aus und stellen Sie es nicht in der Nähe von Hitzequellen oder in heißer Umgebung auf. Stellen Sie das Gerät nicht auf einem Verstärker oder anderen wärmeerzeugenden Geräten ab, welche die Betriebstemperatur der Lautsprecher übersteigen könnte.
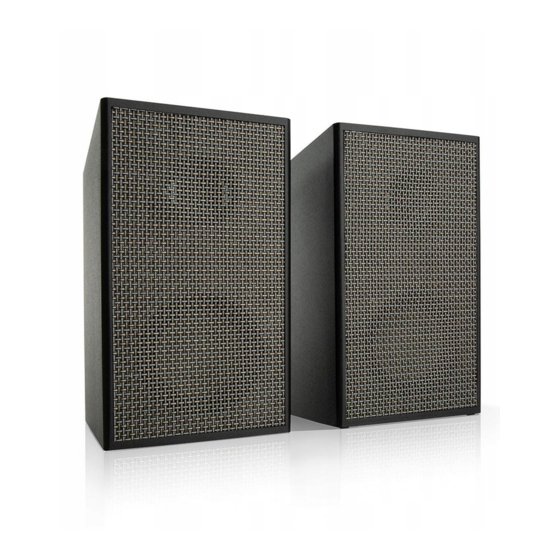
  • Seite 6: Geräteübersicht

    GERÄTEÜBERSICHT VOLUME Die Lautstärke erhöhen/senken. FUNCTION Auswahl von PHONO oder AUX PHONO IN PHONO-Verbindung, RCA, Stereo AUX IN Anschluss an externer Quelle (Stereo-Cinch) Lautsprecher L Anschluss linker Lautsprecher DC IN 15 V, 3000 mA Power-LED Einschaltanzeige Erdung Power Netzstromanschluss...
  • Seite 7: Inbetriebnahme Und Bedienung

    INBETRIEBNAHME UND BEDIENUNG • Verbinden Sie das Verbindungskabel der passiven Lautsprecher mit dem Anschluss der Hauptlautsprecher (Position 5). • Stecken Sie den Netzstromadapter in den Anschluss der Hauptlautsprecher (Position 9) und stecken Sie den Netzstromstecker in eine 100 – 240 V-Steckdose •...
  • Seite 8: Aux In

    AUX IN • Stellen Sie am Schalter des Hauptlautsprecher „AUX IN“ ein. • Verwenden Sie ein Doppel-Cinch-Kabel, um den Lautsprecher mit dem Plattenspieler zu verbinden. Ein Kabelende kommt in den AUX IN Anschluss (R&L) des Hauptlautsprechers und das andere Kabelende wird mit dem RCA-Anschluss des Plattenspielers verbunden.
  • Seite 9: Hinweise Zur Entsorgung

    HINWEISE ZUR ENTSORGUNG Befindet sich die linke Abbildung (durchgestrichene Mülltonne auf Rädern) auf dem Produkt, gilt die Europäische Richtlinie 2012/19/EU. Diese Produkte dürfen nicht mit dem normalen Hausmüll entsorgt werden. Informieren Sie sich über die örtlichen Regelungen zur getrennten Sammlung elektrischer und elektronischer Gerätschaften.
  • Seite 11 Dear Customer, Congratulations purchasing this equipment. Please read this manual carefully and take care of the following hints to avoid damages. Any failure caused by ignoring the items and cautions mentioned in the instruction manual are not covered by our warranty and any liability.
  • Seite 12: Technical Data

    TECHNICAL DATA Item number 10032939 Power supply Input 100-240 V~ 50/60 Hz Net adaptor Output 15 V / 3 A Speakers 2-way system Impedance 6 Ω Frequency range 70 Hz - 20 kHz 10.5 kg Weight INCLUDED ITEMS Part Speakers AC adapter Owner manual...
  • Seite 13: Safety Instructions

    SAFETY INSTRUCTIONS • Avoid placing the unit in direct sunlight, close to a source of heat or in other similar conditions. Do not place the unit on top of an amplifier or other equipment that might generate heat the exceeds the operating temperature range of this unit.
  • Seite 14: Product Description

    PRODUCT DESCRIPTION VOLUME: Increase/decrease volume FUNCTION: Selection function: PHONO, AUX PHONO IN: PHONO connection, RCA, stereo AUX IN: Connection external source, RCA, stereo Speaker L: Connection loudspeaker L DC IN: 15V, 3000mA Power-LED GND: Ground Power: DC jack in...
  • Seite 15: Getting Started And Basic Operation

    GETTING STARTED AND BASIC OPERATION • Passive loudspeaker connecting cable insets to port of master loudspeaker (position 5); • Put power adapter jack into master loudspeaker (position 9), and place adapter insets in a 100-240V wall socket; • Power LED is lighting; •...
  • Seite 16: Aux In

    AUX IN • Turn switch into AUX IN position on master loudspeaker; • Using dual RCA to dual RCA audio cable connects speaker and turntable, one connects AUX IN(R&L) on master loudspeaker, the other inserts RCA connector from turntable, please make sure that turntable is on line out position;...
  • Seite 17: Disposal Considerations

    DISPOSAL CONSIDERATIONS According to the European waste regulation 2012/19/EU this symbol on the product or on its packaging indicates that this product may not be treated as household waste. Instead it should be taken to the appropriate collection point for the recycling of electrical and electronic equipment.
  • Seite 19 Chère cliente, cher client, Toutes nos félicitations pour l’acquisition de ce nouvel appareil. Veuillez lire attentivement et respecter les instructions de ce mode d’emploi afin d’éviter d’éventuels dommages. Nous ne saurions être tenus pour responsables des dommages dus au non-respect des consignes et à...
  • Seite 20: Fiche Technique

    FICHE TECHNIQUE Numéro d'article 10032939 Alimentation Entrée 100-240 V~ 50/60 Hz Adaptateur secteur Sortie 15 V / 3 A Enceintes système 2 voies Impédance 6 Ω Plage de 70 Hz - 20 kHz fréquences 10,5 kg Poids CONTENU DE L'EMBALLAGE Pièces quantité...
  • Seite 21: Consignes De Sécurité

    CONSIGNES DE SÉCURITÉ • N'exposez pas l'appareil à la lumière directe du soleil et ne le placez pas près de sources de chaleur ou dans un environnement chaud. Ne placez pas l'appareil sur un amplificateur ou tout autre appareil générateur de chaleur pouvant dépasser la température de fonctionnement des enceintes.
  • Seite 22: Aperçu De L'appareil

    APERÇU DE L'APPAREIL VOLUME augmenter/diminuer le volume. FUNCTION sélecteur pour PHONO ou AUX PHONO IN connexion PHONO, RCA, Stéréo AUX IN branchement à une source externe (RCA stéréo) Enceinte L connexion de l'enceinte gauche DC IN 15 V, 3000 mA Power-LED témoin de marche mise à...
  • Seite 23: Mise En Marche Et Utilisation

    MISE EN MARCHE ET UTILISATION • Branchez le câble de connexion des enceintes passives à la prise des enceintes principales (position 5). • Branchez l’adaptateur secteur sur la prise de l'enceinte principale (position 9) et branchez la fiche secteur dans une prise 100-240V •...
  • Seite 24: Aux In

    AUX IN • Réglez "AUX IN" sur le commutateur de l'enceinte principale. • Utilisez un câble RCA double pour brancher l'enceinte à la platine. Une extrémité du câble se connecte au connecteur AUX IN (R & L) de l'enceinte principale et l'autre extrémité du câble se connecte à la prise RCA de la platine vinyle.
  • Seite 25: Informations Sur Le Recyclage

    INFORMATIONS SUR LE RECYCLAGE Vous trouverez sur le produit l’image ci-contre (une poubelle sur roues, barrée d‘une croix), ce qui indique que le produit se trouve soumis à la directive européenne 2012/19/ UE. Renseignez-vous sur les dispositions en vigueur dans votre région concernant la collecte séparée des appareils électriques et électroniques.
  • Seite 27 Estimado cliente: Le felicitamos por la adquisición de este producto. Lea atentamente el siguiente manual y siga cuidadosamente las instrucciones de uso con el fin de evitar posibles daños. La empresa no se responsabiliza de los daños ocasionados por un uso indebido del producto o por haber desatendido las indicaciones de seguridad.
  • Seite 28: Datos Técnicos

    DATOS TÉCNICOS Número de 10032939 artículo Suministro eléctrico Entrada 100-240 V~ 50/60 Hz Fuente de Salida 15 V / 3 A alimentación Sistema de 2 vías Altavoz Impedancia 6 Ω Rango de 70 Hz - 20 kHz frecuencia 10,5 kg Peso PARTES SUMINISTRADAS Componentes...
  • Seite 29: Indicaciones De Seguridad

    INDICACIONES DE SEGURIDAD • No coloque el aparato bajo la luz directa del sol ni cerca de fuentes de calor o entornos calientes. No coloque el aparato sobre amplificadores u otros aparatos que pueda generar calor y aumentar la temperatura de funcionamiento del altavoz.
  • Seite 30: Visión General Del Aparato

    VISIÓN GENERAL DEL APARATO VOLUME Aumentar/reducir el volumen. FUNCTION Selección de PHONO o AUX PHONO IN Conexión PHONO, RCA, estéreo AUX IN Conexión a fuente externa (cable RCA estéreo) Altavoz L Conexión izquierda del altavoz DC IN 15 V, 3000 mA LED de encendido indicador de encendido Toma a tierra Power...
  • Seite 31: Puesta En Marcha Y Uso

    PUESTA EN MARCHA Y USO • Una el cable de conexión del altavoz pasivo a la conexión del altavoz principal (posición 5). • Conecte el adaptador de red a la conexión del altavoz principal (posición 9) y encaje el enchufe en una toma de corriente 100 - 240 V. •...
  • Seite 32: Aux In

    AUX IN • Coloque el interruptor del altavoz principal en "AUX IN". • Utilice un cable de doble clavija para conectar el altavoz al tocadiscos. Un extremo del cable de conecta a la toma AUX IN (R&L) del altavoz principal y el otro extremo del cable se conecta a la toma RCA del tocadiscos.
  • Seite 33: Retirada Del Aparato

    RETIRADA DEL APARATO Si el aparato lleva adherida la ilustración de la izquierda (el contenedor de basura tachado) entonces rige la normativa europea, directiva 2012/19/UE. Estos productos no pueden depositarse en los contenedores destinados a la basura común. Infórmese sobre las leyes territoriales que regulan la recogida separada de aparatos eléctricos y electrónicos.
  • Seite 35 Gentile Cliente, ringraziamo aver acquistato dispositivo. preghiamo leggere attentamente le seguenti istruzioni per l’uso e di seguirle per evitare possibili danni tecnici. Non ci assumiamo alcuna responsabilità per danni scaturiti da una mancata osservazione delle avvertenze di sicurezza e da un uso improprio del dispositivo.
  • Seite 36: Dati Tecnici

    DATI TECNICI Numero articolo 10032939 Alimentazione Ingresso 100-240 V~ 50/60 Hz Trasformatore Uscita 15 V / 3 A Sistema a 2 vie Altoparlanti Impedenza 6 Ω Intervallo di 70 Hz - 20 kHz frequenza 10,5 kg Peso VOLUME DI CONSEGNA Componente Quantità...
  • Seite 37: Avvertenze Di Sicurezza

    AVVERTENZE DI SICUREZZA • Non esporre il dispositivo a luce solare diretta, vicino a fonti di calore o in ambienti estremamente caldi. Non posizionare il dispositivo su amplificatori o altri dispositivi che producono calore e che superano la temperatura operativa del dispositivo. In caso contrario possono verificarsi cambi di colore, deformazioni o malfunzionamenti.
  • Seite 38: Descrizione Del Dispositivo

    DESCRIZIONE DEL DISPOSITIVO VOLUME Alzare/abbassare il volume FUNCTION Selezionare PHONO o AUX PHONO IN Connessione PHONO, RCA, Stereo AUX IN Connessione a fonti esterne (RCA Stereo) Altoparlante L Connessione altoparlante sinistro DC IN 15 V, 3000 mA Power-LED Spia di accensione Messa a terra Power Connessione alla rete elettrica...
  • Seite 39: Messa In Funzione E Utilizzo

    MESSA IN FUNZIONE E UTILIZZO • Collegare il cavo degli altoparlanti passivi con la connessione dell’altoparlante principale (posizione 5). • Collegare l’adattatore alla connessione dell’altoparlante principale (posizione 9) e a una presa elettrica da 100-240 V. • La spia di accensione si illumina. •...
  • Seite 40: Aux In

    AUX IN • Impostare sull’altoparlante principale “AUX IN”. • Utilizzare un doppio cavo RCA per collegare l’altoparlante al giradischi. Un’estremità del cavo viene collegata alla connessione AUX IN (R&L) dell’altoparlante principale e l’altra alla connessione RCA del giradischi. Assicurarsi che il giradischi sia impostato su “Line Out”. In alternativa, è possibile utilizzare un cavo da 3,5 mm per collegare gli altoparlanti con un dispositivo esterno (smartphone, lettore MP3, ecc.).
  • Seite 41: Smaltimento

    SMALTIMENTO Se sul prodotto è presente la figura a sinistra (il bidone dei rifiuti con le ruote), si applica la direttiva europea 2012/19/ UE. Questi prodotti non possono essere smaltiti con i rifiuti normali. Informarsi sulle disposizioni vigenti per la raccolta di dispositivi elettrici ed elettronici.

Inhaltsverzeichnis