Hobby Biotherm pro Gebrauchsanweisung
Vorschau ausblenden
Andere Handbücher für Biotherm pro:
- Gebrauchsanweisung (96 Seiten) ,
- Gebrauchsanleitung (16 Seiten) ,
- Gebrauchsanweisung (16 Seiten)
Inhaltsverzeichnis
Verfügbare Sprachen
Verfügbare Sprachen
Kapitel
Inhaltsverzeichnis

Verwandte Anleitungen für Hobby Biotherm pro


Inhaltszusammenfassung für Hobby Biotherm pro
- Seite 1 Gebrauchsanweisung HOBBY Biotherm Art. Nr. 10892 Stand: 02/2011...
-
Seite 2: Inhaltsverzeichnis
Inhaltsverzeichnis 1. Einleitung ..........3 Bedienteil und Schaltplatzleiste . -
Seite 3: Einleitung
1. Einleitung 1.1 Bedienteil und Schaltplat Schaltplat Schaltplat Anschlusskabel Befestigungsschiene Schraubenset für Befestigungsschiene Kabelbinder Sauger zur Sensorbefestigung Bedienteil Temperatursensor 1 Temperatursensor 2... -
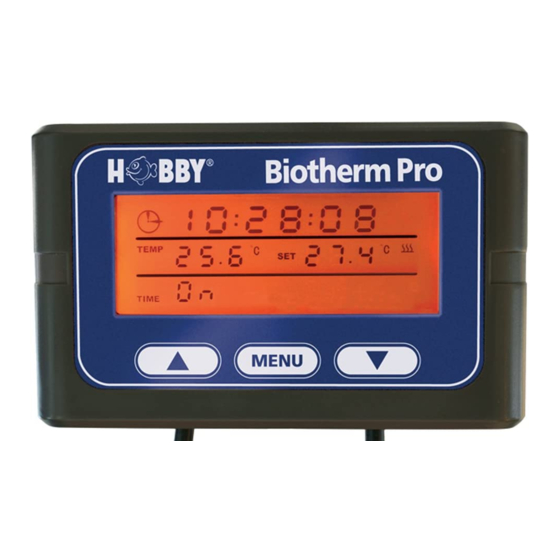
Seite 4: Display
= Grad Celsius, Einheit der Temperaturregelung 1.3 Sicherheitshinweise Der Biotherm pro ist ausschließlich für die Verwendung in geschlossenen Räumen vorgesehen. Alle elektronischen Komponenten des Biotherms pro dürfen nur in einwandfreiem Zustand betrieben werden. Bei Beschädigungen an der Netzzuleitung lassen Sie diese bitte vom Fachmann austauschen oder schicken uns das Gerät zur Reparatur ein. Ein Weiterbetrieb kann lebensgefährliche Stromschläge verursachen. -
Seite 5: Grundfunktionen
Durch den Eintritt in den Programmiermodus werden zur Sicherheit beide Steckplätze ( ) abgeschaltet. 2.2 Rückkehrfunktion Wird im Programmiermodus 90 Sekunden lang keine Taste gedrückt, wechselt der Biotherm pro automatisch in den Betriebsmodus zurück. 2.3 Funktionsüberwachung externer Geräte Die Schaltplatzleiste ist mit LEDs ( ) ausgestattet, deren Leuchten die aktive Regelung externer Geräte anzeigt. -
Seite 6: Programmierbare Funktionen
Int (Intervall-Modus) können externe Geräte im Intervall mit mindestens 1 Sekunde Dauer bei mindestens 30 Minuten Schaltabstand betrieben werden. Achtung: Der Biotherm pro kann wahlweise in Kombination Steuerung von Temperatur 1 (Schaltplatz 1) + Tempera- tur 2 (Schaltplatz 2) oder Temperatur (Schaltplatz 1) + Zeitschaltuhr (Schaltplatz 2) betrieben werden. Die Programmie- rung Temperatur Schaltplatz 2 ( ) löscht die Programmierung Zeitschaltuhr Schaltplatz 2 (... -
Seite 7: Kurzanleitung Programmierung
4. Kurzanleitung Programmierung Wechseln in Programmiermodus: Durch Drücken der Taste gelangt man während des Betriebs- in den Programmiermodus. Wechseln in Betriebsmodus: Im Programmiermodus können Sie nach Beendigung der Einstellung durch Drücken der Taste von 3 Sekunden in den Betriebsmodus zurückkehren. Nach 90 Sekunden ohne Drücken einer Taste erfolgt die automatische Rückkehr vom Programmier- in den Betriebsmodus. -
Seite 8: Anleitung Programmierung
Hinweis: Wurde die Uhrzeit bereits einmal gestellt, können Sie durch die Tasten ▲ oder ▼ direkt in die Einstellung „TEMP1“ , „TEMP2“ oder „TIME“ springen. Achtung: Der Biotherm pro verfügt nicht über eine automatische Sommer-/Winterzeitumschaltung. Dies muss manuell vorgenommen werden. -
Seite 9: Regelung Temperatur 1 Für Schaltplatz 1
5.2 Regelung Temperatur 1 für Schaltplatz 1 5.2.1 Einstellung der Solltemperatur 1 „P01“ blinkt, Taste drücken, um Programmplatz 1 zu programmieren. (mit ▲ und ▼ P01 bis P08 anwählbar) „CHA“ blinkt, mit den Tasten ▲ und ▼ kann zwischen ‘CHA’ (ändern) oder ‘dEL’ (löschen) gewählt werden. Wird „CHA“’... -
Seite 10: De-/Aktivierung Akustischer Temperaturalarm 1
5.2.3 De-/Aktivierung akustischer Temperaturalarm 1 „OFF“ blinkt, mit den Tasten ▲ und ▼ den akustischen Alarm mit „ON“ ein- und „OFF“ ausschalten. Taste drücken. „TEMP 2“ blinkt. 5.3 Programmierung der Temperatur 2 für Schaltplatz 2 5.3.1 Wahl des Modus HEAT /COOL drücken. -
Seite 11: Alarmeinstellung Temperatur 2
nur P01 eingestellt, werden die Werte über 24 Stunden gemäß Programmierung gleich geregelt. Es empfiehlt sich mindestens zwei Zeitblöcke zu programmieren, um zwischen Tages- und Nachtwerten zu differenzieren. Achtung: Wenn Sie zwei oder mehr Zeitpunkte des Beginns der Temperatursteuerung gleich wählen, wird der Fehler E5 im Display angezeigt. -
Seite 12: Programmierung Der Schaltzeiten (Alternativ Zu 5.3)
5.4 Programmierung der Schaltzeiten (alternativ zu 5.3) 5.4.1 Einstellung des Betriebsmodus Wollen Sie die Zeitsteuerung programmieren, bei blinkender Anzeige „TIME“ die Taste drücken, „ “ (Automatik) blinkt. Wenn der Steckplatz 2 ( ) mit programmierten Ein- und Ausschaltzeiten betrieben werden soll, bei Blinken von „... -
Seite 13: Programmierung Ein- Und Ausschaltzeiten
5.4.2 Programmierung Ein- und Ausschaltzeiten „ “ blinkt, Taste drücken, um Programmplatz 1 zu programmieren. (mit ▲ und ▼ P01 bis P08 anwählbar) „CHA“ blinkt, mit den Tasten ▲ und ▼ kann zwischen ‘CHA’ (ändern) oder ‘dEL’ (löschen) gewählt werden. Wird „CHA“’... -
Seite 14: Programmierung Intervallsteuerung
5.4.3 Programmierung Intervallsteuerung Anzeige „00:“ blinkt. Zur Einstellung der eingeschalteten Intervallzeiten, mit den Tasten ▲ und ▼ die Stunden zwischen 0 und 23 einstellen. drücken, die Minutenanzeige „00“ blinkt. Taste Mit den Tasten ▲ und ▼ die Minuten zwischen 0 und 59 einstellen. drücken, die Sekundenanzeige „00“... -
Seite 15: Fehlerursachen
3 Taste loslassen Achtung: Alle programmierten Einstellungen mit Ausnahme der eingestellten Uhrzeit gehen verloren. Der Biotherm pro regelt die Temperatur gemäß der Werkseinstellung (Temperatur 1: 25° C / Temperatur 2: Tempera- turmodus Heizen, 25° C). 7. Fehlerursachen Im Reklamationsfall führen Sie bitte zunächst ein Reset auf die Werkseinstellungen durch. Lässt sich das Problem nicht... -
Seite 16: Eg Konformitätserklärung
9. EG Konformitätserklärung Der Hersteller erklärt, dass die Geräte mit den Anforderungen der entsprechenden EMV- und LVD Normen überein- stimmen und damit den Bestimmungen der EG-Richtlinien 2004/108/EG und 2006/95/EG gerecht werden.