Herunterladen Inhalt Inhalt Diese Seite drucken

Werbung

Verfügbare Sprachen
  • DE

Verfügbare Sprachen

  • DEUTSCH, seite 45
INSTALLATION GUIDE
AXIS M11 Network Camera Series
AXIS M1124 Network Camera
AXIS M1125 Network Camera
Installation Guide

Werbung

Inhaltsverzeichnis
loading

Inhaltszusammenfassung für Axis M1124

  • Seite 1 INSTALLATION GUIDE AXIS M11 Network Camera Series AXIS M1124 Network Camera AXIS M1125 Network Camera Installation Guide...
  • Seite 2 CE marking directives and harmonized standards: Every care has been taken in the preparation of this • Electromagnetic Compatibility (EMC) document. Please inform your local Axis office of Directive 2004/108/EC. See Electromagnetic any inaccuracies or omissions. Axis Communications Compatibility (EMC) on page 2.
  • Seite 3: Contact Information

    적으로 합니다. 적절히 접지된 STP (shielded Should you require any technical assistance, please twisted pair) 케이블을 사용하여 제품을 연 contact your Axis reseller. If your questions cannot 결 하십시오. be answered immediately, your reseller will forward your queries through the appropriate channels to Safety ensure a rapid response.
  • Seite 5: Hazard Levels

    AXIS M11 Network Camera Series Safety Information Read through this Installation Guide carefully before installing the product. Keep the Installation Guide for future reference. Hazard Levels Indicates a hazardous situation which, if not DANGER avoided, will result in death or serious injury.
  • Seite 6 Safety Instructions NO TICE TICE TICE • The Axis product shall be used in compliance with local laws and regulations. • To use the Axis product outdoors, or in similar environments, it shall be installed in an approved outdoor housing.
  • Seite 7 AXIS M11 Network Camera Series Battery The Axis product uses a 3.0 V BR/CR2032 lithium battery as the power supply for its internal real-time clock (RTC). Under normal conditions this battery will last for a minimum of five years. Low battery power affects the operation of the RTC, causing it to reset at every power-up.
  • Seite 9: Installation Steps

    AXIS M11 Network Camera Series Installation Guide This Installation Guide provides instructions for installing AXIS M1124/M1125 Network Camera on your network. For other aspects of using the product, see the User Manual available at www.axis.com Installation Steps Make sure the package contents, tools and other materials necessary for the installation are in order.
  • Seite 10: Hardware Overview

    AXIS M11 Network Camera Series Hardware Overview Zoom puller Focus ring...
  • Seite 11 AXIS M11 Network Camera Series Power connector Control button Network connector Power LED Status LED Network LED microSD card slot Iris connector I/O connector ² ¼ Screw mount LED Indicators Note • The Status LED can be configured to be unlit during normal operation.
  • Seite 12 AXIS M11 Network Camera Series Network LED Indication Green Steady for connection to a 100 Mbit/s network. Flashes for network activity. Amber Steady for connection to a 10 Mbit/s network. Flashes for network activity. Unlit No network connection. Note The Power LED can be configured to be unlit during normal operation.
  • Seite 13 2-pin terminal block for power input. Use a Safety Extra Low Voltage (SELV) compliant limited power source (LPS) with either a rated output power limited to ≤100 W or a rated output current limited to ≤5 A. SD Card Slot For SD card recommendations, see www.axis.com...
  • Seite 14: Specifications

    The control button is used for: • Resetting the product to factory default settings. See page 21. • Connecting to an AXIS Video Hosting System service or AXIS Internet Dynamic DNS Service. For more information about these services, see the User Manual. Specifications Operating Conditions The Axis product is intended for indoor use.
  • Seite 15 AXIS M11 Network Camera Series Connectors I/O Connector 4–pin terminal block For an example diagram, see Connection Diagrams on page 17. Func- Notes Specifications tion 0 V DC (-) 1 0 V DC Can be used to power auxiliary 12 V DC output equipment.
  • Seite 16 AXIS M11 Network Camera Series Digital Connect to pin 1 to activate, or 0 to max 30 V DC Input leave floating (unconnected) to deactivate. Digital Connected to pin 1 0 to max 30 V DC, Output when activated, floating...
  • Seite 17 AXIS M11 Network Camera Series Connection Diagrams I/O Connector 0 V DC (-) DC output 12 V, max 15 mA I/O configured as input I/O configured as output...
  • Seite 18: Install The Hardware

    AXIS M11 Network Camera Series Install the Hardware Important AXIS M11 Series is designed for indoor and outdoor use. To use the camera outdoors, install in an approved outdoor housing. See www.axis.com for more information about outdoor housings. If using a microSD card for local storage, insert the card into the camera’s SD card slot, see Hardware Overview on page 10.
  • Seite 19: Access The Product

    Network cable Access the Product AXIS IP Utility and AXIS Camera Management are recommended methods for finding Axis products on the network and assigning them IP addresses in Windows®. Both applications are free and can be downloaded from www.axis.com/techsup The product can be used with most operating systems and browsers. The recommended browsers are ®...
  • Seite 20 AXIS M11 Network Camera Series ® ® • Safari with OS X ® • Chrome or Firefox with other operating systems. For more information about using the product, see the User Manual available at www.axis.com Adjust Focus and Zoom Loosen the lock screw for the focus ring.
  • Seite 21: Reset To Factory Default Settings

    Go to Setup > System Options > Maintenance. Further Information The User Manual is available at www.axis.com Visit www.axis.com/techsup to check if there is updated firmware available for your network product. To see the currently installed firmware version, go to Setup > About.
  • Seite 22: Warranty Information

    AXIS M11 Network Camera Series Visit Axis learning center www.axis.com/academy for useful trainings, webinars, tutorials and guides. Warranty Information For information about Axis’ product warranty and thereto related information, see www.axis.com/warranty/...
  • Seite 23: Niveaux De Risques

    AXIS M11 Network Camera Series Informations sur la sécurité Lisez attentivement ce guide d'installation avant d'installer l'appareil. Conservez le guide d'installation pour toute référence ultérieure. Niveaux de risques Indique une situation dangereuse qui, si elle n'est DANGER pas évitée, entraînera le décès ou des blessures graves.
  • Seite 24 être installé dans un boîtier d'extérieur homologué. • Conserver ce produit Axis dans un environnement sec et ventilé. • Ne pas exposer ce produit Axis aux chocs ou aux fortes pressions. • Ne pas installer ce produit sur des supports, surfaces ou murs instables.
  • Seite 25 AXIS M11 Network Camera Series Batterie Le produit Axis utilise une batterie au lithium BR/CR2032 3,0 V comme alimentation de son horloge en temps réel interne (RTC). Dans des conditions normales, cette batterie a une durée de vie minimale de cinq ans.
  • Seite 27: Procédures D'installation

    AXIS M11 Network Camera Series Guide d'installation Ce guide d'installation vous explique comment installer la caméra réseau AXIS M1124/M1125 sur votre réseau. Pour toute autre information relative à l’utilisation du produit, consultez le manuel de l’utilisateur disponible sur le site www.axis.com Procédures d’installation...
  • Seite 28: Aperçu Du Matériel

    AXIS M11 Network Camera Series Aperçu du matériel Commande de zoom Bague de mise au point...
  • Seite 29 AXIS M11 Network Camera Series Connecteur d'alimentation Bouton de commande Connecteur réseau Voyant d’alimentation Voyant d'état Voyant DEL réseau Logement de carte microSD Connecteur de l'iris Connecteur d'E/S Monture à vis 1/4 pouce Voyants Note • Le voyant d'état peut être éteint pendant le fonctionnement normal.
  • Seite 30 AXIS M11 Network Camera Series Note Le voyant de réseau peut être désactivé afin qu'il ne clignote pas en cas de trafic réseau. Pour ce faire, rendez-vous dans Setup > System Options > Ports & Devices > LED (Configuration >...
  • Seite 31 AXIS M11 Network Camera Series Connecteurs et boutons Pour les caractéristiques et les conditions d'utilisation, consultez page 33. Connecteur réseau Connecteur Ethernet RJ45 avec l'alimentation par Ethernet (PoE). A A A VIS Le produit doit être connecté à l'aide d'un câble réseau blindé...
  • Seite 32 Carte SD) et cliquez sur Unmount (Démonter). Cet appareil est compatible avec des cartes microSD/microSDHC/microSDXC (cartes non fournie). Pour obtenir des conseils sur la carte SD, rendez-vous sur www.axis.com Bouton de commande Pour connaître l'emplacement du bouton de commande, consultez Aperçu du matériel page 28.
  • Seite 33: Caractéristiques Techniques

    Connexion au service du Système d'hébergement vidéo AXIS ou au service AXIS Internet Dynamic DNS. Pour plus d'informations sur ces services, reportez-vous au Manuel de l'utilisateur. Caractéristiques techniques Conditions d'utilisation Le produit Axis est uniquement destiné à une utilisation en intérieur. Produit Classification Température Humidité...
  • Seite 34 AXIS M11 Network Camera Series Connecteurs Connecteur d'E/S Bloc terminal à 4 broches pour : • Alimentation auxiliaire (sortie • Entrée numérique • Sortie numérique • 0 V CC (-) Fonc- Bro- Notes Caractéristiques tion 0 V CC (-) 1 0 V CC Peut servir à...
  • Seite 35 AXIS M11 Network Camera Series Entrée Connectez-la à la broche 1 0 à 30 V CC numéri- pour l’activer ou laissez-la flotter (déconnectée) pour la désactiver. Sortie Connectée à la broche 1 0 à 30 V CC max., numéri- lorsqu'elle est activée, collecteur ouvert, flotte (déconnectée)
  • Seite 36 AXIS M11 Network Camera Series 12 V max 15 mA...
  • Seite 37 AXIS M11 Network Camera Series Connecteur d’alimentation Bloc terminal à 2 broches pour l'alimentation CC. Utilisez une source d'alimentation limitée (LPS) conforme aux exigences de Très basse tension de sécurité (TBTS) dont la puissance de sortie nominale est limitée à ≤100 W ou dont le courant de sortie...
  • Seite 38 AXIS M11 Network Camera Series Schémas de connexion Connecteur d'E/S 0 V CC (-) Sortie CC 12 V, maxi. 15 mA Entrée/sortie configurée comme entrée Entrée/sortie configurée comme sortie...
  • Seite 39: Installation Du Matériel

    AXIS M11 Network Camera Series Installation du matériel Important La série de caméras AXIS M11 est conçue pour une utilisation intérieure et extérieure. Pour une utilisation en extérieur, la caméra doit être placée dans un boîtier d’extérieur homologué. Consultez le site www.axis.com pour obtenir plus d’informations sur les boîtiers d’extérieur.
  • Seite 40: Utilisez Le Produit

    Socle Câble réseau Utilisez le produit Si vous souhaitez rechercher des produits Axis sur le réseau ou leur affecter des adresses IP sous Windows®, nous recommandons l’utilisation des applications AXIS IP Utility et AXIS Camera Management. Ces deux applications sont gratuites et peuvent être téléchargées depuis www.axis.com/techsup...
  • Seite 41: Réglage De La Mise Au Point Et Du Zoom

    Pour plus d’informations concernant l’utilisation du produit, consultez le manuel de l’utilisateur disponible sur le site www.axis.com Réglage de la mise au point et du zoom Desserrez la vis de verrouillage de la bague de mise au point.
  • Seite 42 AXIS M11 Network Camera Series Note Après le réglage du zoom et de la mise au point, si la mise au point n’est pas parfaite jusque dans les coins, tournez l’objectif pour revenir aux paramètres par défaut comme indiqué dans l’illustration ci-dessus.
  • Seite 43: Informations Sur La Garantie

    Le Manuel de l’utilisateur est disponible à l’adresse suivante : www.axis.com Consultez le site www.axis.com/techsup pour vérifier si une mise à jour du microprogramme est disponible pour votre appareil réseau. Pour connaître la version du microprogramme actuellement installée, reportez-vous à la page Setup >...
  • Seite 45: Gefährdungsstufen

    AXIS M11 Network Camera Series Sicherheitsinformation Lesen Sie das Installationshandbuch sorgfältig durch bevor sie das Produkt installieren. Bewahren Sie das Installationshandbuch für zukünftige Zwecke auf. Gefährdungsstufen GEFAHR Weist auf eine gefährliche Situation hin, die, falls nicht verhindert, zu Tod oder schweren Verletzungen führt.
  • Seite 46 • Bei der Anwendung von Axis Produkten im Außenbereich oder ähnlichen Umgebungen, müssen diese in zugelassenen Außengehäusen installiert werden. • Lagern Sie das Axis Produkt in einer trockenen und belüfteten Umgebung. • Achten Sie darauf, dass das Axis Produkt weder Stößen noch starkem Druck ausgesetzt ist.
  • Seite 47 AXIS M11 Network Camera Series Transport HINWEIS HINWEIS HINWEIS • Bei Bedarf transportieren Sie das Axis Produkt in der Originalverpackung oder einer entsprechenden Verpackung, so dass Schäden vermieden werden. Batterie Das Axis-Produkt ist mit einer 3,0 V-BR/CR2032-Lithium-Batterie ausgestattet, mit der die interne Echtzeituhr (RTC) versorgt wird. Unter normalen Bedingungen hat die Batterie eine Lebensdauer von mindestens fünf Jahren.
  • Seite 49: Installationsschritte

    AXIS M11 Network Camera Series Installationsanleitung In dieser Anleitung wird die Installation der AXIS M1124/M1125 Netzwerk-Kamera in Ihrem Netzwerk beschrieben. Weitere Informationen zur Nutzung dieses Produkts finden Sie im Benutzerhandbuch unter www.axis.com. Installationsschritte Stellen Sie sicher, dass die Packungsinhalte, Werkzeuge und andere notwendige Materialien für die Installation in Ordnung...
  • Seite 50: Übersicht Über Die Hardware

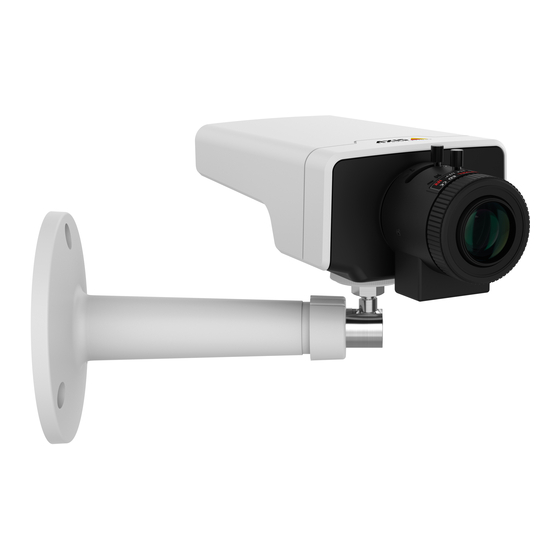
    AXIS M11 Network Camera Series Übersicht über die Hardware Zoomregler Fokusring...
  • Seite 51 AXIS M11 Network Camera Series Netzanschluss Steuertaste Netzwerkanschluss Netz-LED Status-LED Netzwerk-LED microSD-Karteneinschub Blendenanschluss E/A-Anschluss 1/4-Zoll-Schraubenloch LEDs Beachten • Die Status-LED kann so eingestellt werden, dass sie während des Normalbetriebs nicht leuchtet. Diese Konfiguration können Sie unter Setup > System Options > Ports & Devices > LED (Setup >...
  • Seite 52 AXIS M11 Network Camera Series Beachten Die Netzwerk-LED kann deaktiviert werden, sodass Sie bei Datenverkehr über das Netzwerk nicht blinkt. Diese Konfiguration können Sie unter Setup > System Options > Ports & Devices > LED (Setup > Systemoptionen > Ports und Geräte > LED) einstellen.
  • Seite 53 AXIS M11 Network Camera Series Anschlüsse und Tasten Für die technischen Daten und Betriebsbedingungen siehe Seite 55. Netzwerkanschluss RJ-45-Ethernetanschluss mit Power over Ethernet (PoE). HINWEIS HINWEIS HINWEIS Das Produkt muss mit einem abgeschirmten Netzwerkkabel (STP) angeschlossen werden. Alle Kabel, die das Produkt mit dem Netzwerkswitch verbinden, müssen hierfür ausgelegt sein.
  • Seite 54 Systemoptionen > Speicher > SD-Karte) auf und klicken Sie auf Unmount (Trennen). Dieses Produkt unterstützt microSD-/microSDHC-/microSDXC-Karten (separat erhältlich). Empfehlungen zu SD-Karten finden Sie unter www.axis.com. Steuertaste Die Position der Steuertaste finden Sie unter: Übersicht über die Hardware auf Seite 50.
  • Seite 55: Technische Daten

    Verbinden mit einem AXIS Video Hosting System-Service oder einem AXIS Internet Dynamic DNS-Service. Weitere Informationen zu diesen Diensten finden Sie in der Bedienungsanleitung. Technische Daten Betriebsbedingungen Das Axis Produkt ist für die Verwendung in Innenräumen konzipiert. Produkt Klassifikation Temperatur Luft- feuchtigkeit...
  • Seite 56 AXIS M11 Network Camera Series Anschlüsse E/A-Anschluss 4-poliger Anschlussblock Ein Beispielschaltbild finden Sie unter Anschlussschaltbilder auf Seite Funktion Kon- Hinweise Technische Daten takt 0 V DC 0 V (-) DC Kann für die Gleich- 12 V DC Stromversorgung von strom- Max.
  • Seite 57 AXIS M11 Network Camera Series Digi- Zum Aktivieren mit 0 bis max. 30 V DC talein- Pin 1 verbinden; zum gang Deaktivieren nicht anschließen. Digita- Bei Aktivierung mit 0 bis max. 30 V DC, lausgang Pin 1 verbunden; Open Drain,...
  • Seite 58 AXIS M11 Network Camera Series Anschlussschaltbilder E/A-Anschluss 0 V (-) DC DC-Ausgang 12 V, max. 15 mA E/A als Eingang konfiguriert E/A als Ausgang konfiguriert...
  • Seite 59: Installieren Der Hardware

    AXIS M11 Network Camera Series Installieren der Hardware Wichtig Die AXIS M11-Serie ist sowohl für die Verwendung in Innenräumen als auch für den Außeneinsatz geeignet. Wenn Sie die Kamera im Freien verwenden möchten, installieren Sie sie in einem zugelassenen Gehäuse für den Außenbereich. Weitere Informationen über Gehäuse für den Außenbereich finden Sie...
  • Seite 60: Zugriff Auf Das Produkt

    Schrauben Netzwerkkabel Zugriff auf das Produkt Für die Suche nach Axis Produkten im Netzwerk und zur Zuweisung einer IP-Adresse unter Windows® werden AXIS IP Utility und AXIS Camera Management empfohlen. Beide Anwendungen sind kostenlos und können von unserer Website unter www.axis.com/techsup heruntergeladen werden.
  • Seite 61: Einstellen Von Fokus Und Zoom

    AXIS M11 Network Camera Series ® ® • Internet Explorer unter Windows ® ® • Safari unter OS X ® • Chrome oder Firefox unter anderen Betriebssystemen. Weitere Informationen zur Nutzung dieses Produkts finden Sie im Benutzerhandbuch unter www.axis.com. Einstellen von Fokus und Zoom Lösen Sie die Feststellschraube für den Fokusring.
  • Seite 62: Zurücksetzen Auf Werkseinstellungen

    Videostream zuzugreifen. Die Parameter können auch über die Weboberfläche auf die Werkseinstellungen zurückgesetzt werden. Rufen Sie Setup > System Options > Maintenance (Setup > Systemoptionen > Wartung) auf. Weitere Informationen Das Benutzerhandbuch finden Sie unter www.axis.com.
  • Seite 63: Gewährleistung

    Ihre Netzwerkprodukte. Um die aktuell installierte Firmware-Version zu sehen, gehen Sie auf Einrichten > Über. Besuchen Sie das Axis-Schulungszentrum www.axis.com/academy für anregende Schulungen, Webinare, Lernprogramme und Anleitungen. Gewährleistung Informationen zur Gewährleistung der Axis Produkte und hierzu verbundene Informationen, finden Sie unter www.axis.com/warranty/...
  • Seite 65: Livelli Di Pericolo

    AXIS M11 Network Camera Series Informazioni di sicurezza Leggere con attenzione questa guida all'installazione prima di installare il dispositivo. Conservare questo documento per usi futuri. Livelli di pericolo Indica una situazione pericolosa che, se non PERICOLO evitata, provoca morte o lesioni gravi.
  • Seite 66 • Conservare il dispositivo Axis in un ambiente asciutto e ventilato. • Evitare di esporre il dispositivo Axis a urti o pressioni eccessive. • Non installare il dispositivo su supporti, superfici o pareti instabili.
  • Seite 67 AXIS M11 Network Camera Series Batteria Il prodotto Axis utilizza una batteria al litio da 3,0 V BR/CR2032 come alimentazione per il suo real-time clock (RTC) interno. In condizioni normali questa batteria avrà una durata minima di cinque anni. Una bassa carica della batteria influisce sul funzionamento del RTC, facendolo resettare a ogni accensione.
  • Seite 69: Procedure Di Installazione

    AXIS M11 Network Camera Series Guida all'installazione La presente guida all'installazione fornisce le istruzioni necessarie per installare la telecamera di rete AXIS M1124/M1125 nella rete in uso. Per ulteriori informazioni sull'utilizzo del dispositivo, consultare la Guida per l'utente disponibile all'indirizzo www.axis.com...
  • Seite 70: Panoramica Dell'hardware

    AXIS M11 Network Camera Series Panoramica dell'hardware Levetta zoom Ghiera di messa a fuoco...
  • Seite 71 AXIS M11 Network Camera Series Connettore di alimentazione Pulsante di comando Connettore di rete LED di alimentazione LED di stato LED di rete Slot per scheda microSD Connettore del diaframma Connettore I/O Foro filettato da ¼" Indicatori LED Nota • Lo stato del LED può essere configurato per essere spento durante il normale funzionamento.
  • Seite 72 AXIS M11 Network Camera Series Nota Il LED di rete può essere disattivato in modo da non lampeggiare in caso di traffico di rete. Per configurarlo, selezionare Setup > System Options > Ports & Devices > LED (Configurazione > Opzioni di sistema > Porte & Dispositivi > LED). Per ulteriori informazioni, consultare l'aiuto in linea.
  • Seite 73 AXIS M11 Network Camera Series Connettori e pulsanti Per le specifiche e le condizioni di funzionamento, consultare pagina 75. Connettore di rete Connettore Ethernet RJ45 con Power over Ethernet (PoE+). A A A VVISO VVISO VVISO Collegare il dispositivo con un cavo di rete schermato (STP). Tutti i cavi che collegano il dispositivo alla rete sono destinati al loro uso specifico.
  • Seite 74 > Scheda SD) e fare clic su Unmount (Smonta). Questo dispositivo supporta schede microSD/microSDHC/microSDXC (scheda di memoria non inclusa). Per i consigli sulla scheda SD, visitare il sito Web www.axis.com. Pulsante di comando Per l'ubicazione del pulsante di comando, vedere Panoramica dell'hardware alla pagina 70.
  • Seite 75: Dati Tecnici

    AXIS M11 Network Camera Series Dati tecnici Condizioni di funzionamento Il dispositivo Axis è destinato all'uso in ambienti interni. Disposi- Temperatura Classificazione Umidità tivo 10 - 85% AXIS IEC 60721-4-3 Da -20 °C a (umidità relativa M1124 Classe 3M4 50 °C...
  • Seite 76 AXIS M11 Network Camera Series Connettori Connettore I/O Morsettiera a 4 pin Per un esempio di schema, consultare Schema delle connessioni alla pagina 78. Fun- Note Specifiche zione 0 V CC (-) 1 0 V CC Uscita Può essere utilizzato anche...
  • Seite 77 AXIS M11 Network Camera Series Ingresso Collegare al pin 1 per attivarlo Da 0 a max 30 V CC digitale oppure lasciarlo isolato (scollegato) per disattivarlo. Uscita Collegare al pin 1 quando Da 0 a max 30 V CC, digitale...
  • Seite 78 AXIS M11 Network Camera Series Schema delle connessioni Connettore I/O 0 V CC (-) Uscita CC 12 V, max 15 mA I/O configurato come ingresso I/O configurato come uscita...
  • Seite 79: Installazione Dell'hardware

    AXIS M11 Network Camera Series Installazione dell'Hardware Importante La serie AXIS M11 è stata progettata per l'uso in ambienti interni ed esterni. Per utilizzare la telecamera all'esterno, installarla in una custodia per esterni approvata. Andare su www.axis.com per ulteriori informazioni sulle custodie da esterni.
  • Seite 80 Accedere al dispositivo AXIS IP Utility e AXIS Camera Management sono i metodi consigliati per trovare i dispositivi Axis in rete e assegnare loro un indirizzo IP in Windows®. Queste applicazioni sono entrambe gratuite e possono essere scaricate da www.axis.com/techsup Il dispositivo può...
  • Seite 81 AXIS M11 Network Camera Series ® ® • Safari con OS X ® • Chrome o Firefox con altri sistemi operativi. Per ulteriori informazioni sull'utilizzo del dispositivo, consultare la Guida per l'utente disponibile all'indirizzo www.axis.com Regolazione della messa a fuoco e dello zoom Allentare la vite di arresto della ghiera di messa fuoco.
  • Seite 82: Ripristino Dei Valori Predefiniti Di Fabbrica

    AXIS M11 Network Camera Series Ripristino dei valori predefiniti di fabbrica Importante Il ripristino delle impostazioni di fabbrica deve essere usato con cautela. Un ripristino delle impostazioni di fabbrica consentirà di ripristinare le impostazioni di fabbrica per tutti i parametri, incluso l'indirizzo IP.
  • Seite 83: Ulteriori Informazioni

    (Impostazioni) > About (Informazioni su). Visitare il centro di apprendimento Axis alla pagina www.axis.com/academy per servizi di formazione utili, webinar, tutorial e guide. Informazioni sulla garanzia Per informazioni sulla garanzia del dispositivo Axis e informazioni ad esso relative, consultare la pagina www.axis.com/warranty/...
  • Seite 85 AXIS M11 Network Camera Series Información de seguridad Lea esta Guía de instalación con atención antes de instalar el producto. Guarde la Guía de instalación para poder consultarla en otro momento. Niveles de peligrosidad Indica una situación peligrosa que, si no se evita, PELIGRO provocará...
  • Seite 86 • Almacene el producto de Axis en un entorno seco y ventilado. • Evite la exposición del producto de Axis a choques o a una fuerte presión. • No instale el producto en soportes, superficies o paredes inestables.
  • Seite 87 AXIS M11 Network Camera Series Batería Este producto de Axis utiliza una batería de litio BR/CR2032 de 3,0 V como fuente de alimentación del reloj interno en tiempo real. En condiciones normales, esta batería durará un mínimo de cinco años.
  • Seite 89: Contenido Del Paquete

    AXIS M11 Network Camera Series Guía de instalación Esta Guía de instalación incluye las instrucciones necesarias para instalar las cámaras de red AXIS M1124/M1125 en su red. Para conocer otros aspectos de uso del producto, consulte el Manual del usuario disponible en www.axis.com.
  • Seite 90: Información General Del Hardware

    AXIS M11 Network Camera Series Información general del hardware Palanca de zoom Anillo de enfoque...
  • Seite 91 AXIS M11 Network Camera Series Conector de alimentación Botón de control Conector de red LED de alimentación LED de estado LED de red Ranura para tarjetas microSD Conector de iris Conector de E/S Receptáculo de tornillo de ¼" Indicadores LED Nota •...
  • Seite 92 AXIS M11 Network Camera Series Nota El LED de red puede desactivarse para que no parpadee cuando exista tráfico de red. Para ello, vaya a Setup > System Options > Ports & Devices > LED (Configuración > Opciones del sistema >...
  • Seite 93 AXIS M11 Network Camera Series Conectores y botones Para conocer las especificaciones y las condiciones de funcionamiento, vea página 95. Conector de red Conector Ethernet RJ45 con alimentación a través de Ethernet (PoE). A A A VISO VISO VISO El producto se conectará mediante un cable de red blindado (STP).
  • Seite 94 > Almacenamiento > Tarjeta SD) y haga clic en Unmount (Desmontar). Este producto admite tarjetas microSD/microSDHC/microSDXC (no incluidas). Para conocer las recomendaciones de tarjeta SD, consulte www.axis.com. Botón de control Para conocer la ubicación del botón de control, vea Información general del hardware en la página 90.
  • Seite 95: Especificaciones

    Servicio de DNS dinámico de Internet de AXIS. Para obtener más información sobre estos servicios, consulte el Manual del usuario. Especificaciones Condiciones de funcionamiento El producto de Axis se ha creado para su uso en interiores. Producto Temperatura Humedad Clasificación...
  • Seite 96 AXIS M11 Network Camera Series Conectores Conector de E/S Bloque de terminales de 4 pines Para ver un ejemplo del diagrama, consulte Diagramas de conexión en la página 98. Notas Función Especificaciones 0 V CC (-) 1 0 V CC...
  • Seite 97 AXIS M11 Network Camera Series Entrada Conéctela al pin 1 para 0 a 30 V CC máx. digital activarla, o bien déjela suelta (desconectada) para desactivarla. Salida Conectada al pin 1 0 a 30 V CC máx., digital cuando se activa y suelta...
  • Seite 98 AXIS M11 Network Camera Series Diagramas de conexión Conector de E/S 0 V CC (-) Salida de CC 12 V, 15 mA máx. E/S configurada como entrada E/S configurada como salida...
  • Seite 99: Instalación Del Hardware

    AXIS M11 Network Camera Series Instalación del hardware Importante La serie de cámaras AXIS M11 está diseñada para su uso en interiores y en exteriores. Para usar la cámara en exteriores, instálela en una carcasa para exteriores aprobada. Veawww.axis.com para obtener más información sobre carcasas para exteriores.
  • Seite 100: Acceso Al Producto

    Cable de red Acceso al producto Se recomiendan AXIS IP Utility y AXIS Camera Management como métodos para buscar los productos de Axis en la red y asignarles direcciones IP en Windows®. Ambas aplicaciones son gratuitas y pueden descargase de www.axis.com/techsup El producto se puede utilizar con la mayoría de los sistemas operativos y...
  • Seite 101 Firefox con otros sistemas operativos. Para obtener más información sobre el uso del producto, consulte el Manual del usuario, disponible en www.axis.com. Ajuste del enfoque y del zoom Afloje el tornillo de bloqueo del anillo de enfoque. Ajuste el enfoque y el zoom según lo indicado en Setup > Focus (Configuración >...
  • Seite 102: Restablecimiento A La Configuración Predeterminada De Fábrica

    AXIS M11 Network Camera Series Restablecimiento a la configuración predeterminada de fábrica Importante Hay que tener cuidado al restablecer la configuración predeterminada de fábrica. Todos los valores, incluida la dirección IP, se restablecerán a la configuración predeterminada de fábrica. Nota Las herramientas del software de instalación y gestión...
  • Seite 103: Más Información

    Visite el centro de aprendizaje de www.axis.com/academy para consultar guías, tutoriales, seminarios web y cursos que pueden resultarle útiles. Información de garantía Para obtener más detalles sobre la garantía del producto Axis y la información relacionada con ella, consulte www.axis.com/warranty/...
  • Seite 105 AXIS M11 Network Camera Series 安 安 安 全 全 全 情 情 情 報 報 報 本製品を設置する前に、このインストールガイドをよくお読 みください。 インストールガイドは、後で参照できるよう に保管しておいてください。 危 危 危 険 険 険 レ レ レ ベ ベ ベ ル ル ル 回避しない場合、死亡または重傷につな 危 危 危 険 険 険...
  • Seite 106 AXIS M11 Network Camera Series 安 安 安 全 全 全 手 手 手 順 順 順 注 注 注 記 記 記 • 本製品は、お使いになる地域の法律や規制に準拠して 使用してください。 • 本製品を屋外またはそれに準じる環境で使用する場 合は、認定済みの屋外用筐体に収納して設置する必 要があります。 • 本製品は乾燥した換気のよい環境に保管してくださ い。 • 本製品に衝撃または強い圧力を加えないでください。 • 本製品を不安定なブラケット、表面、または壁に設置 しないでください。 • 本製品を設置する際には、適切な工具のみを使用して...
  • Seite 107 AXIS M11 Network Camera Series 輸 輸 輸 送 送 送 注 注 注 記 記 記 • 本製品を運搬する際は、製品が損傷しないよう、元の 梱包か同等の梱包を使用してください。 バ バ バ ッ ッ ッ テ テ テ リ リ リ ー ー ー 本製品は、内部リアルタイムクロック (RTC) 用電源とし て、3.0 V BR/CR2032リチウムバッテリーを使用します。 この...
  • Seite 109 AXIS M11 Network Camera Series イ イ イ ン ン ン ス ス ス ト ト ト ー ー ー ル ル ル ガ ガ ガ イ イ イ ド ド ド このインストールガイドでは、AXIS M1124/M1125ネットワーク カメラをお使いのネットワークにインストールする手順につい て説明します。 製品の使用の詳細については、Axisのホームペー www.axis.com ジ ( ) でユーザーズマニュアルを参照してください...
  • Seite 110 AXIS M11 Network Camera Series www.axis.com 利用可能なアクセサリーについては、 を参照し てください。...
  • Seite 111 AXIS M11 Network Camera Series ハ ハ ハ ー ー ー ド ド ド ウ ウ ウ ェ ェ ェ ア ア ア の の の 概 概 概 要 要 要 ズーム調節レバー フォーカスリング...
  • Seite 112 AXIS M11 Network Camera Series 電源コネクタ コントロールボタン ネットワークコネクタ 電源LED ステータスLED ネットワークLED microSDカードスロット 10 アイリスコネクタ 11 I/Oコネクタ 12 ¼″ネジ穴 LED イ イ イ ン ン ン ジ ジ ジ ケ ケ ケ ー ー ー タ タ タ ー ー ー...
  • Seite 113 AXIS M11 Network Camera Series 注意 ネットワークLEDは、ネットワークトラフィックがある ときに点滅しないように無効にすることができます。 設定は、[Setup [Setup [Setup ‑ ‑ ‑ System System System Options Options ‑ ‑ ‑ Ports Options Ports & & & Devices Ports Devices ‑ ‑ ‑ Devices LED] LED] ( ( ( 設 設 設 定 定 定 ‑ ‑ ‑ シ シ シ ス ス ス テ テ テ ム ム ム オ オ オ プ プ プ シ シ シ ョ ョ ョ ン ン ン ‑ ‑ ‑ ポ ポ ポ ー ー ー ト ト ト と と と デ デ デ バ バ バ イ イ イ ス ス ス ‑ ‑ ‑...
  • Seite 114 AXIS M11 Network Camera Series 電 電 電 源 源 源 LED 説 説 説 明 明 明 緑 正常動作。 黄 ファームウェアアップグレー ド中は緑と黄の交互点滅。 コ コ コ ネ ネ ネ ク ク ク タ タ タ ー ー ー と と と ボ ボ ボ タ タ タ ン ン ン...
  • Seite 115 AXIS M11 Network Camera Series > > > Port Port & & & Devices Devices ( ( ( シ シ シ ス ス ス テ テ テ ム ム ム オ オ オ プ プ プ シ シ シ ョ ョ ョ ン ン ン > > > ポ ポ ポ ー ー ー ト ト ト と と と...
  • Seite 116 AXIS M11 Network Camera Series コ コ コ ン ン ン ト ト ト ロ ロ ロ ー ー ー ル ル ル ボ ボ ボ タ タ タ ン ン ン 111ページの、ハード コントロールボタンの位置については、 ウェアの概要 を参照してください。 コントロールボタンは、以下の用途で使用します。 123ペー 製品を工場出荷時の設定にリセットする。 •...
  • Seite 117 AXIS M11 Network Camera Series 製 製 製 品 品 品 AXIS 8~28 V DC Power over Ethernet M1124 IEEE 802.3af Class 2 AXIS M1125 コ コ コ ネ ネ ネ ク ク ク タ タ タ ー ー ー...
  • Seite 118 AXIS M11 Network Camera Series 動作させるにはピン 0~30 V DC (最大) デジタ 1に接続し、動作させ ル入力 ない場合はフロート 状態 (未接続) のまま にします。 0~30 V DC (最大)、 動作させるにはピン デジタ ル出力 1に接続し、動作させ オープンドレイ ない場合はフロート ン、100 mA 状態 (未接続) にしま す。 誘導負荷 (例: リ レー) とともに使用す る場合は、過渡電圧...
  • Seite 119 AXIS M11 Network Camera Series 接 接 接 続 続 続 図 図 図 I/O コ コ コ ネ ネ ネ ク ク ク タ タ タ 0 V DC (‑) DC出力12 V、最大15 mA I/O (入力として設定) I/O (出力として設定)
  • Seite 120 AXIS M11 Network Camera Series ハ ハ ハ ー ー ー ド ド ド ウ ウ ウ ェ ェ ェ ア ア ア の の の 設 設 設 置 置 置 重要 AXIS M11シリーズは、屋内、屋外で使用できるように設 計されています。 屋外で使用する場合は、認定済みの 屋外用ハウジングに収容して設置する必要があります。 www.axis.com 屋外用ハウジングの詳細については、...
  • Seite 121 AXIS M11 Network Camera Series スタンド ネジ ネットワークケーブル 製 製 製 品 品 品 へ へ へ の の の ア ア ア ク ク ク セ セ セ ス ス ス ネットワーク上でアクシス製品を検索したり、Windows® でそれにIPアドレスを割り当てるには、AXIS IP Utilityまた はAXIS Camera Managementの使用をお勧めします。 いずれの...
  • Seite 122 AXIS M11 Network Camera Series ® ® Internet Explorer (Windows の場合) • ® ® Safari (OS X の場合) • ® Chrome またはFirefox (その他のオペレーティン • グシステムの場合) 製品の使用の詳細については、アクシスのホームページ www.axis.com ) でユーザーズマニュアルを参照してください フ フ フ ォ ォ ォ ー ー ー カ カ カ ス ス ス と と と ズ ズ ズ ー ー ー ム ム ム の の の 調 調 調 整 整 整...
  • Seite 123 AXIS M11 Network Camera Series 注意 ズームとフォーカスの調節後、角のフォーカスが最適に なっていない場合には、上の図に示されているように工 場出荷時の設定の位置にレンズ全体を回転させます。 次に、レンズを時計回りまたは反時計回りに少し回転さ せ、四隅でフォーカスが合うようにします。 工 工 工 場 場 場 出 出 出 荷 荷 荷 時 時 時 の の の 設 設 設 定 定 定 に に に リ リ リ セ セ セ ッ ッ ッ ト ト ト す す す る る る...
  • Seite 124 ン ン ン 情 情 情 報 報 報 ) ) ) を参照してください。 www.axis.com/academy Axisラーニングセンター ( ) にアクセスし てください。役に立つトレーニング、ウェブセミナー、チュー トリアル、ガイドをご用意しています。 保 保 保 証 証 証 情 情 情 報 報 報 Axis の 製 品 保 証 と 関 連 情 報 に つ い て www.axis.com/warranty/ は、 をご覧ください...
  • Seite 126 Installation Guide Ver. M4.2 AXIS M11 Network Camera Series Date: September 2015 © Axis Communications AB, 2015 Part No. 1501424...

Diese Anleitung auch für:

M1125M11 serie

Inhaltsverzeichnis