Pioneer VSX-S520D Bedienungsanleitung

Verwandte Anleitungen für Pioneer VSX-S520D


Inhaltszusammenfassung für Pioneer VSX-S520D
-
Seite 138: Licence Et Marque Commerciale
> Avant de démarrer > Nom des pièces > Installation > Configuration initiale > Lecture Configuration avancée | Mise à jour du micrologiciel | Autres Licence et Marque commerciale ® The Bluetooth word mark and logos are registered trademarks owned by the MPEG Layer-3 audio coding technology licensed from Fraunhofer IIS and Bluetooth SIG, Inc. -
Seite 207: Información Sobre Licencias Y Marcas Comerciales
> Antes de empezar > Nombres de las piezas > Instalación > Configuración inicial > Reproducción Configuración avanzada | Actualización de Firmware | Otros Información sobre licencias y marcas comerciales ® The Bluetooth word mark and logos are registered trademarks owned by the MPEG Layer-3 audio coding technology licensed from Fraunhofer IIS and Bluetooth SIG, Inc. -
Seite 276: Informazioni Di Licenza E Dei Marchi
> Prima di iniziare > Nome dei componenti > Installazione > Initial Setup > Riproduzione Impostazioni avanzate | Aggiornamento del firmware | Altri Informazioni di licenza e dei marchi ® The Bluetooth word mark and logos are registered trademarks owned by the MPEG Layer-3 audio coding technology licensed from Fraunhofer IIS and Bluetooth SIG, Inc. -
Seite 278: Erste Einrichtung
Erweiterte Einrichtung | Firmware-Update | Sonstiges Vor dem Start Lieferumfang ................2 Teilenamen Bedienfeld ................3 AV RECEIVER Rückseite ................4 VSX-S520D Fernbedienung ............... 6 Display ..................7 Installation 1. Anschließen der Lautsprecher ..........8 2. Anschließen des Fernsehers ..........11 VSX-S520 3. -
Seite 279: Vor Dem Start
0 Änderungen der technischen Daten und des Erscheinungsbildes ohne vorherige Ankündigung vorbehalten. 0 Es ist Unterstützung für das Dolby Atmos und DTS:X-Audioformat über ein Firmware- Update dieses Geräts geplant. Weitere Informationen finden Sie auf unserer Website. Messmikrofon für die Lautsprechereinrichtung (1) DAB/FM-Antenne (1) (VSX-S520D) -
Seite 280: Teilenamen
3. Fernbedienungssensor 4. INPUT SELECTOR-Regler: Wechselt den Eingang, der wiedergegeben werden soll. (BD/ DVD / CBL/SAT / GAME / STRM BOX / CD / TV / PHONO / DAB (VSX-S520D) / FM / NET / USB / BT AUDIO) 5. MASTER VOLUME-Regler: Ermöglicht die Anpassung der Lautstärke. -
Seite 281: Rückseite
> Wiedergabe Erweiterte Einrichtung | Firmware-Update | Sonstiges Rückseite VSX-S520D 90° 180° 1. ANTENNA DAB / FM-Buchse: Hier kann die mitgelieferte Antenne angeschlossen 11. SUBWOOFER PRE OUT-Buchse: Hier kann ein aktiver Subwoofer mit einem Subwoofer- werden. - Seite 282 > Vor dem Start > Teilenamen > Installation > Erste Einrichtung > Wiedergabe Erweiterte Einrichtung | Firmware-Update | Sonstiges VSX-S520 90° 180° 1. ANTENNA FM UNBAL 75h-Buchse: Hier kann die mitgelieferte Antenne angeschlossen 11.
-
Seite 283: Fernbedienung
> Vor dem Start > Teilenamen > Installation > Erste Einrichtung > Wiedergabe Erweiterte Einrichtung | Firmware-Update | Sonstiges Fernbedienung 1. Í Taste: Hiermit wird das Gerät eingeschaltet bzw. in den Standby-Modus geschaltet. 2. Eingangsauswahltasten: Wechselt den Eingang, der wiedergegeben werden soll. ... -
Seite 284: Display
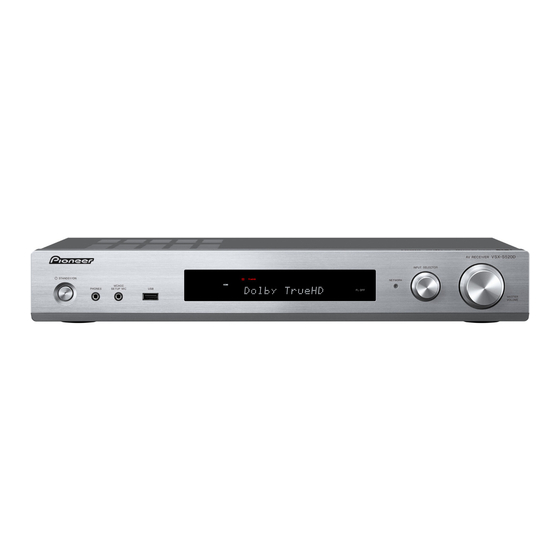
> Vor dem Start > Teilenamen > Installation > Erste Einrichtung > Wiedergabe Erweiterte Einrichtung | Firmware-Update | Sonstiges Display Neo:6 1. Leuchtet unter den folgenden Bedingungen. AUTO: Wenn der FM Tuning-Modus Auto ist. HDMI: HDMI-Signale werden eingegeben und ausgewählt. -
Seite 285: Anschließen Der Lautsprecher
> Vor dem Start > Teilenamen > Installation > Erste Einrichtung > Wiedergabe Erweiterte Einrichtung | Firmware-Update | Sonstiges 1. Anschließen der Lautsprecher Installation Installieren der Lautsprecher Über die Frontlautsprecher wird Front-Stereoklang ausgegeben, über einen Center-Lautsprecher wird Center- Klang wie Dialoge und Gesang ausgegeben. Die Surround- Lautsprecher erzeugen das hintere Klangfeld. - Seite 286 > Vor dem Start > Teilenamen > Installation > Erste Einrichtung > Wiedergabe Erweiterte Einrichtung | Firmware-Update | Sonstiges 1/2˝ (12 mm) Powered FRONT FRONT CENTER SURROUND SURROUND Subwoofer Anschließen der Lautsprecher aufgrund der Phasenumkehr schwach sein. Es kann ein aktiver oder passiver Subwoofer Informationen zum Anschließen des Lautsprechersystems angeschlossen werden.
- Seite 287 > Vor dem Start > Teilenamen > Installation > Erste Einrichtung > Wiedergabe Erweiterte Einrichtung | Firmware-Update | Sonstiges Vergewissern Sie sich, dass beim Anschließen der Kabel die freiliegenden Drähte nicht aus den Lautsprecheranschlüssen herausragen. Wenn die freiliegenden Lautsprecherdrähte die Geräterückwand berühren oder das (+)- und das (–)-Kabel einander berühren, wird die Schutzschaltung aktiviert.
-
Seite 288: Anschließen Des Fernsehers
> Vor dem Start > Teilenamen > Installation > Erste Einrichtung > Wiedergabe Erweiterte Einrichtung | Firmware-Update | Sonstiges 2. Anschließen des Fernsehers An ARC-Fernseher Verwenden Sie bei ARC-fähigen Fernsehern (Audio Return Channel) ( P67) ein HDMI-Kabel und nehmen Sie den Anschluss entsprechend Abbildung "a"... -
Seite 289: Anschließen Der Hdmi-Av-Komponenten
> Vor dem Start > Teilenamen > Installation > Erste Einrichtung > Wiedergabe Erweiterte Einrichtung | Firmware-Update | Sonstiges 3. Anschließen der HDMI-AV-Komponenten BD/DVD GAME Streamingmedien- Kabel-/Satellit- Player Digitalempfänger Dies ist eine Beispielverbindung mit einer AV-Komponente HDM I OUT e.g. BD mit HDMI-Buchse. -
Seite 290: Anschließen Der Audio-Komponenten
> Vor dem Start > Teilenamen > Installation > Erste Einrichtung > Wiedergabe Erweiterte Einrichtung | Firmware-Update | Sonstiges 4. Anschließen der Audio-Komponenten Anschließen eines CD-Players Verwenden Sie ein digitales Koaxialkabel, um einen CD- Player an die DIGITAL IN COAXIAL-Buchse anzuschließen. Anschließen eines Plattenspielers Sie können auch einen Plattenspieler mit einem MM- Tonabnehmer an die PHONO-Buchse anschließen. -
Seite 291: Anschließen Weiterer Kabel
Erweiterte Einrichtung | Firmware-Update | Sonstiges 5. Anschließen weiterer Kabel Antennenanschluss (Modelle für DAB/FM-Antenne (VSX-S520D) : Verbinden Sie die Nordamerika) mitgelieferte DAB/FM-Antenne mit dem ANTENNA DAB/FM- Anschluss. Stellen Sie sicher, dass der Stecker vollständig eingesetzt ist, und befestigen Sie diesen anschließend durch Drehen der Mutter nach rechts. -
Seite 292: Erste Einrichtung Mit Dem Automatischen Startup-Assistenten
> Vor dem Start > Teilenamen > Installation > Erste Einrichtung > Wiedergabe Erweiterte Einrichtung | Firmware-Update | Sonstiges Erste Einrichtung mit dem automatischen Startup-Assistenten Erste Einrichtung Initial Setup startet automatisch 1. Schalten Sie den Eingang des Fernsehers auf denjenigen, der mit dem Gerät belegt ist. 2. -
Seite 293: Source Connection
> Vor dem Start > Teilenamen > Installation > Erste Einrichtung > Wiedergabe Erweiterte Einrichtung | Firmware-Update | Sonstiges 1. Full Auto MCACC Subwoofers sind möglicherweise nicht eindeutig zu hören. Stellen Sie den Lautstärkepegel mindestens auf Platzieren Sie das mitgelieferte Mikrofon zur die Hälfte ein. -
Seite 294: Network Connection
> Vor dem Start > Teilenamen > Installation > Erste Einrichtung > Wiedergabe Erweiterte Einrichtung | Firmware-Update | Sonstiges und drücken ENTER. Um auszuwählen, ob das Passwort mit " * " maskiert oder im Klartext angezeigt werden soll, 3. Network Connection drücken Sie +Fav auf der Fernbedienung. -
Seite 295: Wiedergabe Von Av-Komponenten
> Vor dem Start > Teilenamen > Installation > Erste Einrichtung > Wiedergabe Erweiterte Einrichtung | Firmware-Update | Sonstiges Wiedergabe von AV-Komponenten Wiedergabe Grundlegende Funktionen Führen Sie die Wiedergabe einer AV-Komponente oder eines TV-Geräts aus, die/das über ein HDMI-Kabel oder ein anderes Kabel mit diesem Gerät verbunden ist. -
Seite 296: Internetradio
Code auf. Verwenden Sie einen mit dem Internet verbundenen Computer und navigieren Sie zu auszuwählen, und drücken Sie dann ENTER (b), um wiederzugeben. Die Wiedergabe beginnt, wenn der www.pandora.com/pioneer. Geben Sie Ihren Aktivierungscode ein und folgen Sie den Anweisungen, Buffer 100 % erreicht hat. 0 Drücken Sie... - Seite 297 > Vor dem Start > Teilenamen > Installation > Erste Einrichtung > Wiedergabe Erweiterte Einrichtung | Firmware-Update | Sonstiges Neuen Sender erstellen: Geben Sie den Namen eines Titels, Künstlers oder Genres ein und Pandora erstellt anhand der musikalischen Qualitäten des Titels, Künstlers oder Genres einen einzigartigen Radiosender für Sie.
-
Seite 298: Spotify
(c) Mit dieser Taste können Sie Wiederholung/zufällige Wiedergabe starten. Durch mehrmaliges Drücken dieser Taste wird zwischen den Wiederholungsmodi Pioneer VSX-XXXX XXXX umgeschaltet. (d) Mit dieser Taste wird die Wiedergabe pausiert. Wird die Taste bei pausierter Wiedergabe gedrückt, so wird die Wiedergabe fortgesetzt. -
Seite 299: Music Server
> Vor dem Start > Teilenamen > Installation > Erste Einrichtung > Wiedergabe Erweiterte Einrichtung | Firmware-Update | Sonstiges Music Server "Datenstrom", um die Player im Netzwerk aufzulisten und Das Streaming von Musikdateien, die auf PCs oder NAS- Geräten gespeichert sind, welche mit demselben Netzwerk gehen Sie dann zu Schritt 4. -
Seite 300: Ferngesteuerte Wiedergabe Von Einem Pc
> Vor dem Start > Teilenamen > Installation > Erste Einrichtung > Wiedergabe Erweiterte Einrichtung | Firmware-Update | Sonstiges ® 7. Wählen Sie mit den Cursortasten auf der Fernbedienung die 4. Wählen Sie die mit Windows Media Player 12 WAV (.wav/.WAV): Musikdatei aus, die wiedergegeben werden soll, und drücken wiederzugebende Musikdatei aus und klicken Sie sie mit der WAV-Dateien enthalten unkomprimiertes digitales PCM-Audio. -
Seite 301: Usb-Speichergerät
> Vor dem Start > Teilenamen > Installation > Erste Einrichtung > Wiedergabe Erweiterte Einrichtung | Firmware-Update | Sonstiges USB-Speichergerät Grundlegende Wiedergabe Sie können Musikdateien wiedergeben, die sich auf einem USB-Speichergerät befinden. 1. Schalten Sie den Eingang des Fernsehers auf denjenigen, der mit dem Gerät belegt ist. - Seite 302 > Vor dem Start > Teilenamen > Installation > Erste Einrichtung > Wiedergabe Erweiterte Einrichtung | Firmware-Update | Sonstiges USB-Speichergerätsanforderungen FLAC (.flac/.FLAC): Speichergerät unterstützt dieses Gerät die folgenden Musikdateiformate. Beachten Sie, dass Audiodateien, die 0 Unterstützte Abtastfrequenzen: 44,1 kHz, 48 kHz, 64 0 Beachten Sie, dass der Betrieb von USB- urheberrechtlich geschützt sind, auf diesem Gerät nicht kHz, 88,2 kHz, 96 kHz, 176,4 kHz, 192 kHz...
-
Seite 303: Airplay
Gerät automatisch eingeschaltet, und die iPhone Eingabe wird zu "NET" gewechselt. Um den Stromverbrauch im Standby-Modus zu verringern, Pioneer VSX-XXXX drücken Sie die -Taste auf der Fernbedienung und legen dann im angezeigten Home-Menü für "System Setup" – "Hardware" – "Power Management" – "Network Standby"... -
Seite 304: Bluetooth ® -Wiedergabe
Pairing-Modus wird aktiviert. 2. Aktivieren Sie die BLUETOOTH-Funktion beim BLUETOOTH-fähigen Gerät und wählen Sie aus der angezeigten Liste dieses Gerät aus. Wenn ein Passwort Pioneer VSX-XXXXX erforderlich ist, geben Sie "0000" ein. 0 Zum Anschließen eines weiteren BLUETOOTH-fähigen Geräts halten Sie die -Taste gedrückt, bis "Now... -
Seite 305: Wiedergabe Von Fm/Dab-Radio
> Vor dem Start > Teilenamen > Installation > Erste Einrichtung > Wiedergabe Erweiterte Einrichtung | Firmware-Update | Sonstiges Wiedergabe von FM/DAB-Radio Wiedergabe von FM-Radio Drücken Sie noch einmal MODE (e) auf der Fernbedienung, sodass "AUTO" auf dem Display angezeigt wird. Es wird Automatische Sendersuche automatisch ein Radiosender eingestellt. - Seite 306 > Vor dem Start > Teilenamen > Installation > Erste Einrichtung > Wiedergabe Erweiterte Einrichtung | Firmware-Update | Sonstiges währenddessen ENTER (a), um die Wiedergabe des Alphabet (Standardeinstellung) : Die Sender werden 2. Drücken Sie die / -Cursortasten (a) auf der Fernbedienung, um den gewünschten Programmtyp Senders zu starten.
-
Seite 307: Voreinstellung Eines Radiosenders
> Vor dem Start > Teilenamen > Installation > Erste Einrichtung > Wiedergabe Erweiterte Einrichtung | Firmware-Update | Sonstiges Voreinstellung eines Radiosenders Hiermit können Sie bis zu 40 bevorzugte FM/DAB-Sender registrieren. Die Registrierung von Radiosendern im Voraus ermöglicht es Ihnen, Ihre bevorzugte Radiostation direkt auszuwählen. -
Seite 308: Wiedergabemodi
> Vor dem Start > Teilenamen > Installation > Erste Einrichtung > Wiedergabe Erweiterte Einrichtung | Firmware-Update | Sonstiges Wiedergabemodi Auswahl von Wiedergabemodi Klangqualität beeinträchtigen können. Sie erhalten dadurch eine naturgetreuere Wiedergabe des Originalklangs. In Sie können den Wiedergabemodus während der diesem Fall wird die Lautsprecherkalibrierung mit MCACC Wiedergabe wechseln, indem Sie mehrfach "AUTO/ deaktiviert. - Seite 309 > Vor dem Start > Teilenamen > Installation > Erste Einrichtung > Wiedergabe Erweiterte Einrichtung | Firmware-Update | Sonstiges Wiedergabemodus-Effekte großen Saal. Eingangsquelle & Lautstärke Updates der Wiedergabemodi Dolby Atmos Mithilfe von Firmware-Updates für dieses Gerät ist eine In diesem Modus werden im Audioformat Dolby Atmos Unterstützung des Dolby Atmos- und DTS:X-Audioformats aufgenommene Klangdesigns originalgetreu geplant.
- Seite 310 > Vor dem Start > Teilenamen > Installation > Erste Einrichtung > Wiedergabe Erweiterte Einrichtung | Firmware-Update | Sonstiges Komprimierungstechnologie (MLP), das eine naturgetreue sowie ein LFE-Kanal für den Bassbereich (Klangelemente wiedergegeben. Beim Dolby Digital Plus-Format handelt es sich um eine Wiedergabe des Master-Audios aus dem Studio ermöglicht.
- Seite 311 > Vor dem Start > Teilenamen > Installation > Erste Einrichtung > Wiedergabe Erweiterte Einrichtung | Firmware-Update | Sonstiges Mit diesem Wiedergabemodus können Sie das Mehrkanal-Surroundsound auch mit nur zwei oder drei In diesem Modus werden im Audioformat DTS-HD High Resolution Audio aufgenommene Klangdesigns Wiedergabesignal je nach angeschlossener Lautsprechern genießen.
-
Seite 312: Auswählbare Wiedergabemodi
> Vor dem Start > Teilenamen > Installation > Erste Einrichtung > Wiedergabe Erweiterte Einrichtung | Firmware-Update | Sonstiges Auswählbare Wiedergabemodi Eingangsformat Wiedergabemodus Eingangsformat Wiedergabemodus Sie können aus einer Vielzahl von Wiedergabemodi je nach Analog Stereo Stereo Audioformat des Eingangssignals auswählen. Musikdateien (außer 0 Der Stereo-Modus kann bei allen Audioformaten Mono... -
Seite 313: Eingangsformat
> Vor dem Start > Teilenamen > Installation > Erste Einrichtung > Wiedergabe Erweiterte Einrichtung | Firmware-Update | Sonstiges Eingangsformat Wiedergabemodus Eingangsformat Wiedergabemodus Eingangsformat Wiedergabemodus Stereo Multich PCM Stereo Dolby Atmos Stereo Multich PCM Dolby Atmos Dolby Surround Dolby Surround Surround Virtual Surround Virtual Surround Virtual... - Seite 314 > Vor dem Start > Teilenamen > Installation > Erste Einrichtung > Wiedergabe Erweiterte Einrichtung | Firmware-Update | Sonstiges Eingangsformat Wiedergabemodus Eingangsformat Wiedergabemodus Eingangsformat Wiedergabemodus Dolby D Stereo Dolby D+ Stereo Dolby TrueHD Stereo Dolby D Dolby D+ Dolby TrueHD 1 2 3 Dolby Surround Dolby Surround...
- Seite 315 > Vor dem Start > Teilenamen > Installation > Erste Einrichtung > Wiedergabe Erweiterte Einrichtung | Firmware-Update | Sonstiges Eingangsformat Wiedergabemodus Eingangsformat Wiedergabemodus Eingangsformat Wiedergabemodus Stereo DTS 96/24 Stereo DTS Express Stereo DTS 96/24 DTS Express PL Ⅱ Movie PL Ⅱ Movie PL Ⅱ...
- Seite 316 > Vor dem Start > Teilenamen > Installation > Erste Einrichtung > Wiedergabe Erweiterte Einrichtung | Firmware-Update | Sonstiges Eingangsformat Wiedergabemodus Eingangsformat Wiedergabemodus Eingangsformat Wiedergabemodus DTS-HD HR Stereo DTS-HD MSTR Stereo DTS:X Stereo DTS-HD HR DTS-HD MSTR DTS:X PL Ⅱ Movie PL Ⅱ...
-
Seite 317: Av Adjust
> Vor dem Start > Teilenamen > Installation > Erste Einrichtung > Wiedergabe Erweiterte Einrichtung | Firmware-Update | Sonstiges AV Adjust Subwoofers während der Wiedergabe an. Wenn Sie die -Taste auf der Fernbedienung während der Wiedergabe drücken, können Sie häufig genutzte 0 Die vorgenommene Einstellung wird auf den vorigen Einstellungen wie die Klangqualität mithilfe von Status zurückgesetzt, wenn Sie das Gerät in den... - Seite 318 > Vor dem Start > Teilenamen > Installation > Erste Einrichtung > Wiedergabe Erweiterte Einrichtung | Firmware-Update | Sonstiges ∫ Other Center Width: Passen Sie im Dolby Pro Logic Ⅱ Music- Wiedergabemodus die Breite des vorderen Klangfelds an. Sound Delay: Hiermit können Sie eine Audioverzögerung Mit kleinen Zahlen wird der Klang in der Mitte konzentriert.
-
Seite 319: System Setup
> Vor dem Start > Teilenamen > Installation > Erste Einrichtung > Wiedergabe Erweiterte Einrichtung | Firmware-Update | Sonstiges System Setup Erweiterte Einrichtung Mit den erweiterten Einstellungen dieses Geräts können Sie Leistung und Bedienfreundlichkeit individuell anpassen. 1. Schalten Sie den Eingang des Fernsehers auf denjenigen, der mit dem Gerät belegt ist. 2. - Seite 320 > Vor dem Start > Teilenamen > Installation > Erste Einrichtung > Wiedergabe Erweiterte Einrichtung | Firmware-Update | Sonstiges GAME "HDMI 1 (HDCP 2.2)" bis "HDMI 4 (HDCP 2.2)": Weisen Sie dem Impose OSD Stellen Sie beispielsweise ein, ob die Informationen auf dem GAME-Eingangsselektor die gewünschte HDMI IN-Buchse zu.
- Seite 321 > Vor dem Start > Teilenamen > Installation > Erste Einrichtung > Wiedergabe Erweiterte Einrichtung | Firmware-Update | Sonstiges TV Out" auf "On" eingestellt ist. "COAXIAL", "OPTICAL ": Weisen Sie dem TV-Eingangsselektor die gewünschte DIGITAL IN-Buchse zu. (Der Standardwert ist ∫...
-
Seite 322: Channel Level
> Vor dem Start > Teilenamen > Installation > Erste Einrichtung > Wiedergabe Erweiterte Einrichtung | Firmware-Update | Sonstiges Surround Legen Sie die Eigenschaften des niederfrequenten Bereichs für Center Legen Sie den Abstand zwischen jedem Lautsprecher und der jeden Kanal fest, indem Sie zwischen "small" und "large" Hörposition fest. -
Seite 323: Audio Adjust
> Vor dem Start > Teilenamen > Installation > Erste Einrichtung > Wiedergabe Erweiterte Einrichtung | Firmware-Update | Sonstiges Headphone Level Passen Sie den Ausgangspegel der Kopfhörer an. Wählen Sie einen Subwoofer Wählen Sie einen Wert zwischen "-15 dB" und "+12 dB" (in Schritten von 1 dB) Wert zwischen "-12 dB"... - Seite 324 > Vor dem Start > Teilenamen > Installation > Erste Einrichtung > Wiedergabe Erweiterte Einrichtung | Firmware-Update | Sonstiges ∫ Audio Select 0 Die Einstellung kann nicht geändert werden, wenn "TUNER", "NET", "USB" oder "BT AUDIO" als Eingang ausgewählt ist. Legen Sie Prioritäten bei der Eingangsauswahl fest, wenn mehrere Audioquellen mit einem Eingangsselektor verbunden sind, z.
- Seite 325 > Vor dem Start > Teilenamen > Installation > Erste Einrichtung > Wiedergabe Erweiterte Einrichtung | Firmware-Update | Sonstiges HDMI Standby Wenn diese Einstellung nicht den Wert "Off" aufweist, können Audio TV Out Sie können Audiosignale über die Lautsprecher des Fernsehers Through Sie Video- und Audiosignale eines über HDMI angeschlossenen wiedergeben, wenn dieses Gerät eingeschaltet ist.
- Seite 326 > Vor dem Start > Teilenamen > Installation > Erste Einrichtung > Wiedergabe Erweiterte Einrichtung | Firmware-Update | Sonstiges ∫ Power Management Network Standby Wenn diese Funktion den Wert "On (Standardwert)" aufweist, können Sie dieses Gerät mit einer Anwendung zum Steuern des Sleep Timer Mit dieser Funktion kann das Gerät nach Ablauf der Geräts über das Netzwerk einschalten.
- Seite 327 0 Wenn "Initial Setup" nicht ausgewählt werden kann, warten Sie eine Weile ab. Die Option DAB Auto Scan Sie können die automatische Sendersuche ausführen, wenn wird angezeigt, wenn die Netzwerk-Funktion gestartet wurde. (VSX-S520D) neue DAB-Sender hinzugefügt werden oder ein Umzug erfolgt ∫ Lock ist.
-
Seite 328: Mcacc
> Vor dem Start > Teilenamen > Installation > Erste Einrichtung > Wiedergabe Erweiterte Einrichtung | Firmware-Update | Sonstiges MCACC Richten Sie die Lautsprecher automatisch ein oder nehmen Sie Änderungen nach Wunsch am Equalizer vor. Sie können auch die aktuellen Werte der Lautsprechereinstellungen überprüfen. - Seite 329 > Vor dem Start > Teilenamen > Installation > Erste Einrichtung > Wiedergabe Erweiterte Einrichtung | Firmware-Update | Sonstiges Lautsprecher die Lautstärke der verschiedenen Klangbereiche anpassen. Sie können drei Surround Right Nach dem Auswählen der Lautsprecherfrequenz zwischen "63 verschiedene Equalizer unter Preset 1 bis 3 speichern. Sie können bis zu 4 Bänder für den Hz"...
-
Seite 330: Mcacc Data Check
> Vor dem Start > Teilenamen > Installation > Erste Einrichtung > Wiedergabe Erweiterte Einrichtung | Firmware-Update | Sonstiges MCACC Data Check Sie können die Anzahl der angeschlossenen Lautsprecherkanäle und die Inhalte und Werte der jeweiligen Lautsprechereinstellungen überprüfen. ∫ Speaker Setting Sie können die Anzahl der angeschlossenen Lautsprecherkanäle und die ausgewählten großen/kleinen Werte für die Wiedergabe im niederfrequenten Bereich der einzelnen Lautsprecher überprüfen. -
Seite 331: Network/Bluetooth
> Vor dem Start > Teilenamen > Installation > Erste Einrichtung > Wiedergabe Erweiterte Einrichtung | Firmware-Update | Sonstiges Network/Bluetooth Nehmen Sie Einstellungen im Zusammenhang mit Netzwerkverbindungen und BLUETOOTH vor. 1. Schalten Sie den Eingang des Fernsehers auf denjenigen, der mit dem Gerät belegt ist. 2. - Seite 332 Das Eingangspasswort wird gespeichert. verbundenen Geräten angezeigt wird, in einen einfach wiederzuerkennenden Namen. Usage Data Zur Qualitätsverbesserung unserer Produkte und Dienstleistungen kann Zum Kaufzeitpunkt auf Pioneer VSX-S520D oder Pioneer VSX- unser Unternehmen Nutzungsinformationen über das Netzwerk erheben. S520 eingestellt. (" " steht für alphanummerische Zeichen zur Wählen Sie "Yes"...
- Seite 333 > Vor dem Start > Teilenamen > Installation > Erste Einrichtung > Wiedergabe Erweiterte Einrichtung | Firmware-Update | Sonstiges Bluetooth Device Der Name des BLUETOOTH-fähigen Geräts wird angezeigt, das mit dem Gerät verbunden ist. Bluetooth Wählen Sie aus, ob Sie die BLUETOOTH-Funktion verwenden 0 Der Name wird nicht angezeigt, wenn "Status"...
-
Seite 334: Firmware-Update
> Vor dem Start > Teilenamen > Installation > Erste Einrichtung > Wiedergabe Erweiterte Einrichtung | Firmware-Update | Sonstiges Firmware-Update Firmware-Update Update-Funktion dieses Geräts Aktualisierung der Firmware Aktualisierung der Firmware über das Netzwerk Bei diesem Gerät kann die Firmware (Systemsoftware) Es gibt zwei Möglichkeiten zur Aktualisierung der Firmware: über über ein Netzwerk oder den USB-Port aktualisiert werden. -
Seite 335: Update Über Usb
> Vor dem Start > Teilenamen > Installation > Erste Einrichtung > Wiedergabe Erweiterte Einrichtung | Firmware-Update | Sonstiges -17, -18, -20, -21: Internetverbindungsfehler. 0 Wir übernehmen keinerlei Haftung für Datenverluste, Überprüfen Sie das Folgende: Schäden an Daten oder fehlerhafte Speichervorgänge, System Setup –... - Seite 336 > Vor dem Start > Teilenamen > Installation > Erste Einrichtung > Wiedergabe Erweiterte Einrichtung | Firmware-Update | Sonstiges abgeschlossen ist. 9. Entfernen Sie das USB-Speichergerät von diesem Gerät. 10.Drücken Sie Í STANDBY/ON an diesem Gerät, um das Gerät in den Standby-Modus zu schalten. Der Vorgang ist abgeschlossen und Ihre Firmware ist auf die neuste Version aktualisiert.
-
Seite 337: Fehlerbehebung
> Vor dem Start > Teilenamen > Installation > Erste Einrichtung > Wiedergabe Erweiterte Einrichtung | Firmware-Update | Sonstiges Fehlerbehebung Sonstiges Bevor Sie den Vorgang starten Wenn das Problem nach einem Neustart des Geräts nicht behoben ist, kann es möglicherweise durch Zurücksetzen des Geräts in den ∫... - Seite 338 > Vor dem Start > Teilenamen > Installation > Erste Einrichtung > Wiedergabe Erweiterte Einrichtung | Firmware-Update | Sonstiges ∫ Wiedergabemodi fortsetzen. Von einem Lautsprecher werden keine Audiosignale wiedergegeben. 0 Bei einigen CD- oder LD-Playern kann das DTS-Material 0 Zur digitalen Surround-Wiedergabe in Formaten wie 0 Stellen Sie sicher, dass die Polarität der Lautsprecherkabel (_/ nicht richtig wiedergegeben werden, obwohl der Player Dolby Digital müssen die Audiosignale über eine...
-
Seite 339: Gekoppelter Betrieb
> Vor dem Start > Teilenamen > Installation > Erste Einrichtung > Wiedergabe Erweiterte Einrichtung | Firmware-Update | Sonstiges kompatiblen Geräten wie Fernsehern oder schnurlosen Telefonen, die mit Funkwellen im 2,4- Bei einer Quelle, die an einen HDMI IN-Terminal angeschlossen ist, wird kein Bild wiedergegeben 0 In Home des Geräts stellen Sie für "System Setup"... -
Seite 340: Netzwerkfunktion
> Vor dem Start > Teilenamen > Installation > Erste Einrichtung > Wiedergabe Erweiterte Einrichtung | Firmware-Update | Sonstiges werden kann, vergewissern Sie sich, dass die Anschluss mit Strom versorgt werden, kann nicht ggf. Hindernisse zwischen dem BLUETOOTH-fähigen Gerät und diesem Gerät. eingegebene URL korrekt ist und das vom Radiosender garantiert werden. - Seite 341 > Vor dem Start > Teilenamen > Installation > Erste Einrichtung > Wiedergabe Erweiterte Einrichtung | Firmware-Update | Sonstiges um Dolby Digital, Dolby Digital Plus, Dolby TrueHD oder Es wird eine Verbindung mit einer anderen als der 0 Legen Sie neue Batterien ein. Keine Batterien ausgewählten SSID hergestellt.
-
Seite 342: Allgemeine Technische Daten
Sonstiges Allgemeine technische Daten Abschnitt zum Verstärker (Audio) Allgemeine Daten 87,5 MHz - 108,0 MHz, RDS (Europa) DAB-Empfangsfrequenzbereich (VSX-S520D) Ausgangsnennleistung (FTC) (Nordamerika) Stromversorgung 174,928 MHz–239,200 MHz 4 Ohm Last, beide Kanäle angetrieben von 1 kHz; AC 100 - 240 V, 50/60 Hz Senderspeicherplätze... - Seite 343 > Vor dem Start > Teilenamen > Installation > Erste Einrichtung > Wiedergabe Erweiterte Einrichtung | Firmware-Update | Sonstiges Analog 1 (BD/DVD), 2 (CBL/SAT), PHONO (designiert) Audio-Ausgänge Analog SUBWOOFER PRE OUT Lautsprecherausgänge FRONT L/R, CENTER, SURROUND L/R, SUBWOOFER Kopfhörer PHONES (Vorderseite, 3,5 mm) Ø...
-
Seite 344: Über Hdmi
> Vor dem Start > Teilenamen > Installation > Erste Einrichtung > Wiedergabe Erweiterte Einrichtung | Firmware-Update | Sonstiges Über HDMI Kompatible Funktionen wiedergegeben werden. 60Hz, 1280 a 720p 24/25/30/50/60Hz, 1680 a 720p 24/25/ 30/50/60Hz, 1920 a 1080p 24/25/30/50/60Hz, 2560 a HDMI (High Definition Multimedia Interface) ist ein digitaler x.v.Color ™... -
Seite 345: Lizenz- Und Warenzeicheninformationen
> Vor dem Start > Teilenamen > Installation > Erste Einrichtung > Wiedergabe Erweiterte Einrichtung | Firmware-Update | Sonstiges Lizenz- und Warenzeicheninformationen ® The Bluetooth word mark and logos are registered trademarks owned by the MPEG Layer-3 audio coding technology licensed from Fraunhofer IIS and Bluetooth SIG, Inc. -
Seite 414: Licentie En Handelsm
> Vóór het starten > Namen van de onderdelen > Installeren > Begininstelling > Afspelen Geavanceerde Setup | Firmware-update | Overige Licentie en handelsm ® The Bluetooth word mark and logos are registered trademarks owned by the MPEG Layer-3 audio coding technology licensed from Fraunhofer IIS and Bluetooth SIG, Inc. -
Seite 483: Лицензии И Товарные Знаки
> Перед началом > Названия частей > Установка > Начальная настройка > Воспроизведение Расширенная настройка | Обновление встроенного программного обеспечения | Другие функции Лицензии и товарные знаки ® The Bluetooth word mark and logos are registered trademarks owned by the MPEG Layer-3 audio coding technology licensed from Fraunhofer IIS and Bluetooth SIG, Inc.