Herunterladen Inhalt Inhalt Diese Seite drucken
Inhaltsverzeichnis

Werbung

Verfügbare Sprachen
  • DE

Verfügbare Sprachen

  • DEUTSCH, seite 103
Model
Use & Care
Guide
x Please read and follow all safety rules and instructions in
this manual before operating.
x The product warranty is printed on the back of this guide,
so please keep it in a safe place for future use.
User Manual

Werbung

Inhaltsverzeichnis
loading

Inhaltszusammenfassung für Winix T1

  • Seite 1 User Manual Model x Please read and follow all safety rules and instructions in Use & Care this manual before operating. Guide x The product warranty is printed on the back of this guide, so please keep it in a safe place for future use.
  • Seite 2: Inhaltsverzeichnis

    Where to use Installing the filters Safety Instructions Safety and Cautions Operation Initial Operation Modes of Operation Features and Settings WINIX SMART Set Up Care and Maintenance Filter Care Smart Sensor Care Cleaning Care Troubleshooting Frequently Asked Questions Unit Specifications...
  • Seite 3: 5-Stage Air Purification

    5-STAGE AIR PURIFICATION 4 True HEPA Filter PlasmaWave® 3 High Capacity Filter 2 Anti-microbial PM 2.5 Filter 1 Fine Mesh Pre-Filter PACKAGE CONTENTS Product Instruction manual Filter Set EU & UK Power Cords English...
  • Seite 4 KNOW THE Top cover Air Outlet Vent Light Sensor Full Colour LCD Touch Screen Speaker Dust Sensor Top cover release Odour Sensor Filter cover Air Intake Vent English...
  • Seite 5 KNOW THE CONTROLS  The background colour will change, acting as an additional Air Quality Indicator; Brown: Poor / Green: Fair / Blue: Good Wi-Fi Connection Air Quality Indicator Indicator Local Climate and Weather Power Information PlasmaWave ® Menu PM 2.5 Dust Level Indicator Sleep Mode Fan Speed...
  • Seite 6: Controls

    KNOW THE CONTROLS Home Screen Selected Menu PlasmaWave Settings ® Set Timer Control (Wi-Fi, Brightness, Volume, Filter) Set the Sleep Mode Manual Fan Display Speed Control Control Language English...
  • Seite 7 KNOW THE CONTROLS Alert pop-up This type of pop-up will appear when there is an issue that is not allowing the unit to function properly. Verification pop-up This type of pop-up will appear when a setting or feature needs a confirmation to continue.
  • Seite 8: Where To Use

    WHERE TO USE Allow 30 ~ 45 cm. of space between TVs, radios, and other electronic products electromagnetic interference from certain electronics may cause product malfunction. Place indoors away from direct sun light direct exposure may cause product malfunction or failure. Only place on hard, flat surfaces flimsy or slanted surfaces may result in abnormal noise and vibrations.
  • Seite 9: Installing The Filters

    INSTALLING THE FILTERS This product comes with all of the required filters. The protective plastic wrap must be removed from the filters before use.  Operating the unit without removing the plastic wrap may result in product failure.  Unplug and make sure the unit is turned off before installing filters. ...
  • Seite 10 INSTALLING THE FILTERS Remove the Top Cover by pressing ⑥ the Release buttons on both sides. Pull the True HEPA filter out of the ⑦ unit and remove from protective plastic wrap. x Operating the unit without removing filter from plastic may cause abnormal noise, deformation, or fire as a result of overheating.
  • Seite 11  For optimal use, Pre-filter can be cleaned every 14 days which can extend the life of other filters. ▶ Refer to pages 13-17 for detailed information on filter care and how to replace them. To purchase replacement Winix filters: contact your local dealer True HEPA Filter High Capacity AOC Carbon Filter Anti-microbial PM 2.5 Filter...
  • Seite 12: Safety And Cautions

    SAFETY AND CAUTIONS Before operating this equipment, carefully read and follow these safety cautions and instructions to avoid damage and ensure safe use. Ensure filters are inserted before running unit running unit without filters can shorten the units life and cause electric shock or injury. Be sure foreign objects are NOT inserted into the vents on the unit objects can include pins, rods, and coins.
  • Seite 13: Initial Operation

    INITIAL OPERATION Insert the unit plug into an electrical outlet. ① Press the [Power] button ② x A short animation and music will play to ensure it is powered on. ▶ During the first 4 minutes of power up, the Smart Sensors measure the air quality in the environment, after which normal operation will begin, preset in Auto Mode.
  • Seite 14: Modes Of Operation

    MODES OF OPERATION On the Home Screen the following is displayed Mode, Fan Speed, PlasmaWave®, Air Quality, Local Climate and Weather 1. Auto Mode Enables Auto operation based on the unit's air quality Smart Sensors. Select Auto from the Home Screen. ①...
  • Seite 15: Sleep Mode

    PLASMAWAVE®, SLEEP MODE 1. PlasmaWave® PlasmaWave® works to remove harmful airborne contaminants. x Select the Menu Screen. x Select either [ON] or [OFF] to enable or disable PlasmaWave®. 2. Sleep Mode x Select the Menu Screen. x Select either [ON] or [OFF] to enable or disable Sleep Mode.
  • Seite 16 TIMER 3. Timer The timer can be set for when you want the unit to run for a specified period of time. x Select the Menu Screen. x Select the Timer Screen. x Select [-] or [+] to subtract or add time in increments of 1 hour.
  • Seite 17 SETTINGS 1. Brightness Allows the brightness on the LCD control panel to be adjusted. Go to the Brightness Setting screen. ① x Select the Menu Screen. x Select Settings. x Select Brightness. x Select [-] or [+] to gradually decrease or increase brightness of the screen.
  • Seite 18 SETTINGS 3. Filters Displays the life of the True HEPA Filter, High Capacity AOC Carbon Filter, and the Anti-microbial PM 2.5 Filter. Go to the Filter Setting screen. ① x Select the Menu Screen. x Select Settings. x Select Filters. ▶...
  • Seite 19: Winix Smart Set Up

    (6.0 or later recommended - iPhone 4S or later)  Before connecting to WINIX SMART • A Wi-Fi wireless router must be installed within range of the air purifier to use WINIX SMART. • Ensure Wi-Fi router matches the following specifications; 802.11b/g/n 2.4GHZ or for a dual-band wireless router (2.4GHz/5GHz), be sure to select 2.4GHz.
  • Seite 20 Run the app on your device and follow the prompts to connect the ② unit to the router. x When connecting to the Winix network on your device, look for "WINIX SMART" Confirm the Wi-Fi connection on the unit. ③...
  • Seite 21 WINIX SMART If connecting to a new device; download the WINIX SMART app on ② your device. x available via Google Play store or iTunes App store. Run the app on your device and follow the prompts to connect the ③...
  • Seite 22: Filter Care

    FILTER CARE 1. When to Replace Filters Filter When to service When to replace Clean once every 14 1 Fine Mesh Pre-filter Permanent days 2 Anti-microbial PM 2.5 Filter Lasts up to 3 High Capacity AOC Can NOT be WASHED Carbon Filter 12 months True HEPA Filter...
  • Seite 23 FILTER CARE 2. How to replace the filters Unit will automatically stop running when the Filter Cover or Top Cover are opened.  Bottom Filters  Anti-microbial PM 2.5 Filter & High Capacity AOC Carbon Filter  On the edge of each filter will show which way should face up. Remove the Filter Cover ①...
  • Seite 24 Insert the True HEPA filter back into place. ④ Hold the Release buttons on both sides of ⑤ the Top Cover and connect it back to the unit.  For optimal performance, only genuine Winix filters should be used with this unit. English...
  • Seite 25 FILTER CARE 3. Resetting the filters Each filter will need to be reset individually after replacement. After re-attaching the Filter Cover or Top Cover a pop-up will activate. ① x Selecting [YES] will return you to the Filter screen. Press the reset icon corresponding to the filter which was replaced. ②...
  • Seite 26: Cleaning The Pre-Filter

    FILTER CARE 4. Cleaning the Pre-filter Intervals between filter cleanings may vary depending on the air quality. Use a vacuum cleaner or soft brush to clean the Pre-filter. If it is excessively dirty, wash with room temperature water. x Use only water, do not use volatile substances such as alcohol or acetone. ...
  • Seite 27: Smart Sensor Care

    SMART SENSOR CARE 1. Cleaning the Dust Sensor For optimal performance of the Dust Sensor, which detects airborne dust and ultrafine particles, clean it every two months. Clean it more frequently when the unit is running in a place with high dust levels. Open the Dust Sensor cover.
  • Seite 28: Cleaning Care

    CLEANING CARE 2. Cleaning the exterior and interior  Cleaning the exterior. Wipe with a soft damp cloth using room temperature water. Afterwards, wipe it down with a clean dry cloth. x For optimal performance, clean the front panel 1-2 times a month. ...
  • Seite 29: Frequently Asked Questions

    FREQUENTLY ASKED QUESTIONS Problem Check Actions to take It does not turn on at all. ▶ Is there a power outage? Check to see if other lights and electrical equipment are working and try again. It doesn’t work in Auto mode.
  • Seite 30 FREQUENTLY ASKED QUESTIONS Problem Check Actions to take The power plug and outlet feel hot. ▶ Is the plug securely plugged in? Make sure the plug is properly plugged into the outlet. There is a strange smell. ▶ Is it being used in a place with a lot of smoke, dust, or Odours? Contact customer service to confirm the exact cause.
  • Seite 31 FREQUENTLY ASKED QUESTIONS Problem Check Actions to take Wi-Fi is not working properly. ▶ Is Wi-Fi enabled? Follow steps on pages 17-19 to enable and/or reset the Wi-Fi function. The display panel is dim. ▶ Is it in Sleep mode? Sleep mode is activated through Auto detection of a room’...
  • Seite 32: Unit Specifications

    UNIT SPECIFICATIONS Model Name Power Voltage AC220-240V, 50/60Hz Power Rate 200W AHAM Rated Room Size AHAM Verified at 64.8 m Weight 26 Kg Dimensions 43.0 cm (W) x 43.0 cm (D) x 101.0 cm (H) True HEPA Filter K / Item: 118410 Replacement Filter High Capacity AOC Carbon...
  • Seite 33: Product Warranty

    PRODUCT WARRANTY The terms of the warranty are as follows. 1. This product is manufactured under stringent quality control and inspections. 2. Warranty void if product failure is a result of negligence or misuse by the consumer, shipping and service fees may be incurred even during the warranty period.
  • Seite 34 Developed in partnership with Drexel University (Philadelphia, PA, USA) 160504 Rev.B www.winix.com Contact for product related inquiries and customer service...
  • Seite 35 Guide de l’utilisateur Modèle x Il convient de lire et respecter toutes les instructions Guide d’utilisation et consignes de sécurité indiquées dans ce manuel, et d’entretien avant toute utilisation. x La garantie de ce produit est imprimée au dos de ce manuel et, par conséquent, il convient de conserver celui-ci en lieu sûr pour un usage ultérieur.
  • Seite 36: English

    Emplacement d’utilisation Installation des filtres Consignes de sécurité Sécurité et avertissements Fonctionnement Première utilisation Modes opératoires Fonctionnalités et paramètres Configuration de WINIX SMART Entretien et maintenance Maintenance des filtres Entretien du capteur intelligent Nettoyage Dépannage Questions fréquemment posées Caractéristiques de l’appareil...
  • Seite 37: Purification De L'air En 5 Étapes

    PURIFICATION DE L’ A IR EN 5 ÉTAPES 4 Filtre True HEPA PlasmaWave® 3 Filtre haute capacité AOC 2 Filtre anti- microbien PM 2.5 1 Pré-filtre à mailles fines CONTENU DE L’EMBALLAGE Produit Guide de l’utilisateur Ensemble de filtres Cordons d’alimentation EU et UK Francais...
  • Seite 38 STRUCTURE DU Couvercle supérieur Orifices de sortie de l’air Capteur lumineux Écran tactile LCD pleine couleur Haut-parleur Capteur de poussière Bouton de déverrouillage Capteur d’odeurs du couvercle supérieur Cache de filtre Orifices d’entrée de l’air Francais...
  • Seite 39: Commandes

    COMMANDES  La couleur de fond change et sert ainsi d’indicateur supplémentaire de la qualité de l’air ; Marron : Pauvre / Vert : Normale / Bleu : Bon Indicateur de connexion Indicateur de la qualité de l’air Wi-Fi Informations climatiques et Power météorologiques (alimentation) locales PlasmaWave...
  • Seite 40 COMMANDES Écran d’accueil Menu sélectionné Contrôle Paramètres Réglage de PlasmaWave ® la minuterie (Wi-Fi, luminosité, volume, filtre) Réglage de Contrôle du Contrôle de la la langue mode Sleep vitesse de d’affichage ventilation en (sommeil) mode manuel Francais...
  • Seite 41 COMMANDES Message contextuel d’alerte Ce type de message contextuel s’affiche lorsqu’un problème ne permettant pas le fonctionnement correct de l’appareil survient. Message contextuel de vérification Ce type de message contextuel s’affiche lorsqu’un paramètre ou une fonction nécessite une confirmation pour continuer. Francais...
  • Seite 42: Emplacement D'utilisation

    EMPLACEMENT D’UTILISATION Laisser un espace libre d’environ 30-45 cm entre l’appareil et un téléviseur, un poste de radio ou tout autre produit électronique Les interférences électromagnétiques issues de certains produits électroniques peuvent entraîner des dysfonctionnements. Placer l’appareil à l’intérieur et à l’abri des rayons du soleil Une exposition directe au soleil peut entraîner des dysfonctionnements, voire des pannes.
  • Seite 43: Installation Des Filtres

    INSTALLATION DES FILTRES Ce produit est livré avec tous les filtres requis. Le film plastique de protection, qui enveloppe les filtres, doit être retiré avant toute utilisation.  L’utilisation de l’appareil sans retirer le film plastique peut provoquer des pannes. ...
  • Seite 44 INSTALLATION DES FILTRES Retirer le couvercle supérieur en ⑥ appuyant sur les boutons de déverrouillage des deux côtés. Sortir le filtre True HEPA de l’appareil ⑦ et retirer le film plastique de protection. x L’utilisation de l’appareil sans enlever le film plastique qui enveloppe le filtre peut entraîner des bruits anormaux, des déformations, voire un incendie à...
  • Seite 45 ▶ Se reporter aux pages 48 à 52 pour des ▶ informations détaillées sur la maintenance des filtres et leur remplacement. Pour acheter des filtres de remplacement Winix : contacter le revendeur le plus proche Filtre True HEPA Filtre au charbon haute capacité AOC Filtre antimicrobien PM 2.5...
  • Seite 46: Sécurité Et Avertissements

    SÉCURITÉ ET AVERTISSEMENTS Avant d’utiliser cet appareil, lire attentivement les consignes de sécurité et les avertissements et les respecter pour éviter les dommages et garantir une utilisation en toute sécurité. Veiller à ce que les filtres soient insérés dans l’appareil avant sa mise en marche L’utilisation de l’appareil sans les filtres peut raccourcir la durée de vie de l’appareil et provoquer un choc électrique ou blesser quelqu’un.
  • Seite 47: Première Utilisation

    PREMIÈRE UTILISATION Brancher la fiche de l’appareil dans une prise électrique. ① Appuyer sur la touche [Power] (alimentation) ② x Une brève animation apparaît et une musique retentit, confirmant que l’appareil est sous tension. ▶ Dans les 4 premières minutes de la mise sous tension, les capteurs intelligents mesureront la qualité...
  • Seite 48: Modes Opératoires

    MODES OPÉRATOIRES L’écran d’accueil affiche les éléments suivants Mode, Fan Speed (vitesse de ventilation), PlasmaWave®, Air Quality (qualité de l’air), Local Climate and Weather (informations climatiques et météorologiques locales) 3. Mode Auto (automatique) Ce mode permet un fonctionnement automatique, basé sur la qualité de l’air détectée par les capteurs intelligents.
  • Seite 49: Fonctionnalités Et Paramètres

    PLASMAWAVE®, MODE SLEEP (SOMMEIL) 1. PlasmaWave® Le système PlasmaWave® permet d’ é liminer les polluants atmosphériques nocifs. x Sélectionner l’écran Menu. x Sélectionner soit [ON], soit [OFF] pour activer ou désactiver la fonction PlasmaWave®. 2. Mode Sleep (sommeil) x Sélectionner l’écran Menu. x Sélectionner soit [ON], soit [OFF] pour activer ou désactiver le mode Sleep (sommeil).
  • Seite 50 MINUTERIE 3. Minuterie La minuterie peut être réglée si vous souhaitez que l’appareil fonctionne pendant une durée déterminée. x Sélectionner l’écran Menu. x Sélectionner l’écran Timer (minuterie). x Sélectionner [-] ou [+] pour retirer ou ajouter du temps par incréments d’1 heure. x Un maximum de 12 heures peut être réglé.
  • Seite 51 PARAMÈTRES 1. Luminosité La luminosité sur le panneau de commande LCD peut être réglée. Accéder à l’écran de réglage de la luminosité. ① x Sélectionner l’écran Menu. x Sélectionner Settings (paramètres). x Sélectionner Brightness (luminosité). x Sélectionner [-] ou [+] pour réduire ou augmenter progressivement la luminosité...
  • Seite 52 PARAMÈTRES 3. Filtres La durée de vie du filtre True HEPA, du filtre au charbon haute capacité AOC et du filtre antimicrobien PM 2.5 peut être affichée. Accéder à l’écran de réglage des filtres. ① x Sélectionner l’écran Menu. x Sélectionner Settings (paramètres). x Sélectionner Filters (filtres).
  • Seite 53: Configuration Initiale

     Avant la connexion à WINIX SMART • Un routeur sans fil Wi-Fi doit être installé à proximité du purificateur d’air afin de pouvoir utiliser WINIX SMART. • Vérifier que le routeur Wi-Fi correspond aux spécifications suivantes ; 802.11b/g/n 2,4 GHZ ou pour un routeur sans fil à...
  • Seite 54 WINIX SMART Exécutez l’application sur votre terminal mobile et suivez les ③ instructions pour connecter l’appareil au routeur. x Lors de la connexion au réseau Winix sur votre terminal mobile, rechercher « WINIX SMART » Confirmer la connexion Wi-Fi sur l’appareil. ④...
  • Seite 55 Disponible dans le Google Play store ou l'iTunes App store. Exécutez l'application sur votre terminal mobile et suivez les ③ instructions pour connecter l'appareil au routeur. x Lors de la connexion au réseau Winix sur votre terminal mobile, rechercher « WINIX SMART » Confirmer la connexion Wi-Fi sur l’appareil. ④...
  • Seite 56: Maintenance Des Filtres

    MAINTENANCE DES FILTRES 1. Fréquence de remplacement des filtres Fréquence de Fréquence de Filtre maintenance remplacement 1 Pré-filtre à mailles Nettoyer tous les Permanent fines 14 jours 2 Filtre antimicrobien PM 2.5 3 Filtre au charbon NE peut PAS être LAVÉ Changer tous les 12 mois haute capacité...
  • Seite 57 MAINTENANCE DES FILTRES 2. Comment remplacer les filtres L’appareil s’arrête automatiquement si le cache de filtre ou le couvercle supérieur sont ouverts.  Filtres du bas  Filtre antimicrobien PM 2.5 et filtre au charbon haute capacité AOC  Le sens d’installation est indiqué sur le bord de chaque filtre. Retirer le cache de filtre ①...
  • Seite 58 Remettre le filtre True HEPA en place. ④ Maintenir les boutons de déverrouillage ⑤ enfoncés des deux côtés du couvercle supérieur et le replacer sur l’appareil.  Pour des performances optimales, il convient de n’utiliser que les filtres originaux Winix dans cet appareil. Francais...
  • Seite 59 MAINTENANCE DES FILTRES 3. Réinitialisation des filtres Chaque filtre doit être réinitialisé individuellement après son remplacement. Après la remise en place du cache de filtre ou du couvercle supérieur, ① une fenêtre contextuelle s’affiche. x Sélectionnez [YES] (oui) pour revenir à l’écran Filter (filtre). Appuyer sur l’icône de réinitialisation correspondant au filtre qui a été...
  • Seite 60: Nettoyage Du Pré-Filtre

    MAINTENANCE DES FILTRES 4. Nettoyage du pré-filtre La fréquence des nettoyages du filtre peut varier en fonction de la qualité de l’air. Utiliser un aspirateur ou une brosse douce pour nettoyer le pré-filtre. S’il est excessivement sale, le nettoyer avec de l’eau à température ambiante.
  • Seite 61: Entretien Du Capteur Intelligent

    ENTRETIEN DU CAPTEUR INTELLIGENT 1. Nettoyage du capteur de poussière Pour des performances optimales du capteur de poussière, qui détecte les poussières en suspension et les particules ultrafines, le nettoyer tous les deux mois. Le nettoyer plus fréquemment si l’appareil fonctionne dans un environnement très poussiéreux. Ouvrir le cache du capteur de poussière.
  • Seite 62: Nettoyage

    NETTOYAGE 2. Nettoyage de l’extérieur et de l’intérieur  Nettoyage de l’extérieur. Essuyer l’appareil avec un chiffon doux, humidifié avec de l’eau à température ambiante. Ensuite, l’essuyer avec un chiffon sec et propre. x Pour conserver l’appareil en meilleure condition, nettoyer le panneau avant 1 à 2 fois par mois.
  • Seite 63: Questions Fréquemment Posées

    QUESTIONS FRÉQUEMMENT POSÉES Problème Vérification Mesure à prendre L’appareil ne démarre pas. ▶ Y a-t-il une coupure de courant ? Vérifier si les éclairages et les autres équipements électriques fonctionnent, puis réessayer. L’appareil ne fonctionne pas en ▶ Le mode Auto (automatique) a-t-il été mode Auto sélectionné ? (automatique).
  • Seite 64 QUESTIONS FRÉQUEMMENT POSÉES Problème Vérification Mesure à prendre La fiche d’alimentation et la prise sont chaudes. ▶ La fiche est-elle correctement insérée dans la prise ? Veiller à ce que la fiche soit correctement branchée dans la prise. L’appareil émet une étrange odeur.
  • Seite 65 QUESTIONS FRÉQUEMMENT POSÉES Problème Vérification Mesure à prendre Le Wi-Fi ne fonctionne pas correctement. ▶ Le Wi-Fi est-il activé ? Suivre les étapes aux pages 53 à 55 pour activer et/ou réinitialiser la fonction Wi-Fi. Le panneau d’affichage est ▶ Se trouve-t-il en mode Sleep (sommeil) ? sombre.
  • Seite 66: Caractéristiques De L'appareil

    CARACTÉRISTIQUES DE L’APPAREIL Nom du modèle Tension d’alimentation AC220-240V, 50/60Hz Puissance nominale 200 W Grandeur de la pièce AHAM vérifié à 64,8 m calculée par l’AHAM Poids 26 kg Dimensions 43,0 cm (L) x 43,0 cm (P) x 101,0 cm (H) True HEPA Référence du filtre K : 118410 Filtre de rechange Filtre au charbon haute...
  • Seite 67: Garantie Du Produit

    GARANTIE DU PRODUIT Les conditions de garantie sont les suivantes. 1. Ce produit est fabriqué et soumis à des contrôles de qualité rigoureux et des inspections régulières. 2. La garantie est annulée si les dommages de l’appareil sont le résultat d’une négligence ou d’une mauvaise utilisation de la part de l’utilisateur ;...
  • Seite 68 Conçu en partenariat avec l’université de Drexel (Philadelphia, PA, États-Unis) 160504 Rév. B Contact du service www.winix.com après-vente et pour toute demande relative au produit...
  • Seite 69 Manual del usuario Modelo x Antes de usar el aparato, lea y aplique las reglas e instrucciones de seguridad contenidas en este manual. Guía de uso x La garantía del producto está impresa en la parte y cuidados posterior de la presente guía, que deberá guardar en un sitio seguro para su futura consulta.
  • Seite 70 Instalación de los filtros Instrucciones de seguridad Seguridad y precauciones Funcionamiento Primer uso Modos de uso Características y ajustes Configuración de WINIX SMART Cuidados y mantenimiento Cuidado de los filtros Cuidados del sensor inteligente Limpieza Localización y resolución de problemas Preguntas frecuentes Especificaciones de la unidad Garantía del producto...
  • Seite 71: Purificación Del Aire En 5 Etapas

    PURIFICACIÓN DEL AIRE EN 5 ETAPAS 4 Filtro True HEPA PlasmaWave® 3 Filtro AOC de alta capacidad 2 Filtro antimicrobiano PM 2,5 1 Prefiltro de malla fina CONTENIDOS DEL PAQUETE Producto Juego de filtros Cables de alimentación Manual de instrucciones para la UE y Reino Unido Espanol...
  • Seite 72 CONOZCA EL Cubierta superior Salida de aire Sensor de luz Pantalla táctil LCD en color Altavoz Sensor de polvo Apertura de cubierta Sensor de olores superior Cubierta del filtro Toma de aire Espanol...
  • Seite 73: Controles

    FAMILIARÍCESE CON LOS CONTROLES  El color de fondo cambiará para actuar como un indicador adicional de la calidad del aire; Marrón: Mala calidad / Verde: Calidad razonable / Azul: Buena calidad Indicador de Indicador de la conexión calidad del aire Wi-Fi Información meteorológica...
  • Seite 74 FAMILIARÍCESE CON LOS CONTROLES Pantalla inicial Menú seleccionado Control Ajustes Ajuste del PlasmaWave ® temporizador (Wi-Fi, Brillo, Volumen, Filtro) Ajuste del Control del Control manual idioma de modo nocturno de velocidad la pantalla del ventilador Espanol...
  • Seite 75 FAMILIARÍCESE CON LOS CONTROLES Mensaje emergente de alerta Este tipo de mensaje emergente aparecerá cuando haya un problema que impida el correcto funcionamiento de la unidad. Mensaje emergente de verificación Este tipo de mensaje emergente aparecerá cuando un ajuste o característica precise de confirmación para continuar.
  • Seite 76: Lugar De Uso

    LUGAR DE USO Deje entre 30 y 45 cm de espacio con respecto a televisores, radios y otros aparatos electrónicos las interferencias electromagnéticas procedentes de ciertos electrodomésticos pueden causar un mal funcionamiento del aparato. Use el aparato en interiores, lejos de la luz solar directa una exposición directa a la luz solar puede causar un mal funcionamiento del aparato.
  • Seite 77: Instalación De Los Filtros

    INSTALACIÓN DE LOS FILTROS Este producto ya incorpora todos los filtros necesarios. Antes del uso, es preciso retirar la capa plástica protectora de los filtros.  El uso de la unidad sin retirar previamente la capa plástica protectora puede provocar averías. ...
  • Seite 78 INSTALACIÓN DE LOS FILTROS Retire la cubierta superior pulsando los ⑥ dos botones de liberación de ambos lados Extraiga el filtro True HEPA de la unidad y ⑦ retire el envoltorio protector de plástico x El uso de la unidad sin retirar previamente el envoltorio de plástico del filtro puede provocar ruidos extraños, deformaciones o un incendio causado por el sobrecalentamiento.
  • Seite 79 ▶ Consulte las páginas 82 a 86 para obtener información ▶ detallada sobre el cuidado de los filtros y su sustitución. Para adquirir filtros Winix de recambio:  póngase en contacto con su proveedor local Filtro True HEPA...
  • Seite 80: Seguridad Y Precauciones

    SEGURIDAD Y PRECAUCIONES Antes de usar este equipo, lea con atención las siguientes medidas de seguridad y aténgase a ellas para evitar daños y garantizar un uso seguro. Asegúrese de que los filtros estén insertados antes de poner la unidad en funcionamiento el uso de la unidad sin los filtros puede acortar su vida útil y causar descargas eléctricas o lesiones.
  • Seite 81: Primer Uso

    PRIMER USO Inserte el enchufe de la unidad en una toma de corriente. ① Pulse el botón de encendido ② x Una breve animación y una sintonía musical confirmarán que el aparato se ha encendido. ▶ Durante los primeros 4 minutos de funcionamiento, los sensores inteligentes miden la calidad del aire en el entorno, tras lo cual la...
  • Seite 82: Modos De Uso

    MODOS DE USO La pantalla Inicio muestra lo siguiente: Modo, velocidad del ventilador, PlasmaWave®, calidad del aire, información meteorológica local 3. Modo Auto Permite el funcionamiento automático en función de los sensores inteligentes de calidad del aire de la unidad. ①...
  • Seite 83: Modo Nocturno

    PLASMAWAVE®, MODO NOCTURNO 1. PlasmaWave® PlasmaWave® elimina los contaminantes aerotransportados nocivos. x Seleccione la pantalla Menú. x Seleccione [ON] u [OFF] para activar o desactivar PlasmaWave®. 2. Modo nocturno x Seleccione la pantalla Menú. x Seleccione [ON] u [OFF] para activar o desactivar el modo nocturno.
  • Seite 84 TEMPORIZADOR 3. Temporizador Programe el temporizador si desea que la unidad esté en funcionamiento durante un determinado periodo de tiempo. x Seleccione la pantalla Menú. x Seleccione la pantalla Temporizador. x Seleccione [-] o [+] para restar o añadir tiempo en incrementos de 1 hora.
  • Seite 85 AJUSTES 1. Brillo Permite ajustar el brillo del panel de control LCD. Vaya a la pantalla Ajuste de brillo. ① x Seleccione la pantalla Menú. x Seleccione Setting (Ajustes). x Seleccione Brillo. x Seleccione [-] o [+] para reducir o aumentar gradualmente el brillo de la pantalla.
  • Seite 86 AJUSTES 3. Filtros Muestra la vida del filtro True HEPA, el filtro AOC de carbono de alta capacidad y el filtro antimicrobiano PM 2,5. Vaya a la pantalla Filter Setting (Ajuste de filtros). ① x Seleccione la pantalla Menú. x Seleccione Setting (Ajustes). x Seleccione Filters (Filtros).
  • Seite 87: Configuración Inicial

    • Antes de realizar la conexión, desconecte temporalmente el interruptor de red inteligente en aquellos dispositivos que lo incorporen. • Una vez conectado WINIX SMART, podrá activar de nuevo el interruptor de red inteligente de su dispositivo.  Configuración inicial Conexión a la unidad por primera vez.
  • Seite 88: Configuración Adicional

    Ejecute la aplicación en su dispositivo y siga las indicaciones para ③ conectar la unidad al enrutador. x Al conectarse a la red Winix en su dispositivo, busque "WINIX SMART" Confirme la conexión Wi-Fi en la unidad. ④ x Seleccione la pantalla inicial.
  • Seite 89 Ejecute la aplicación en su dispositivo y siga las indicaciones para ③ conectar la unidad al enrutador. x Al conectarse a la red Winix en su dispositivo, busque "WINIX SMART" Confirme la conexión Wi-Fi en la unidad. ④ x Seleccione la pantalla inicial.
  • Seite 90: Cuidado De Los Filtros

    CUIDADO DE LOS FILTROS 1. Cuándo sustituir los filtros Cuándo realizar el Filtro Cuándo sustituir mantenimiento 1 Prefiltro de malla fina Limpiar cada 14 días Permanente 2 Filtro antimicrobiano PM 2,5 3 Filtro AOC NO SE PUEDE LAVAR Dura hasta 12 meses carbono de alta capacidad Filtro True HEPA...
  • Seite 91 CUIDADO DE LOS FILTROS 2. Cómo sustituir los filtros La unidad dejará de funcionar automáticamente cuando abra la cubierta del filtro o la cubierta superior.  Filtros inferiores  Filtro antimicrobiano PM 2,5 y Filtro AOC de carbono de alta capacidad. ...
  • Seite 92 Vuelva a colocar en su sitio el filtro True HEPA ④ Mantenga presionados los dos botones de ⑤ liberación a ambos lados de la cubierta y vuelva a colocar la cubierta en la unidad  Para un rendimiento óptimo de la unidad, use únicamente filtros Winix. Espanol...
  • Seite 93 CUIDADO DE LOS FILTROS 3. Reinicio de los filtros Cada filtro deberá reiniciarse individualmente tras cada sustitución. Tras recolocar la cubierta del filtro o la cubierta superior, aparecerá una ① ventana emergente. x Al seleccionar [YES] (Sí) regresará a la pantalla Filter (Filtro). Pulse el icono de reinicio correspondiente al filtro sustituido.
  • Seite 94: Limpieza Del Prefiltro

    CUIDADO DE LOS FILTROS 4. Limpieza del prefiltro Los intervalos entre limpiezas del filtro pueden variar en función de la calidad del aire. Limpie el prefiltro con un aspirador o un cepillo suave. Si está excesivamente sucio, lávelo con agua a temperatura ambiente. x Use únicamente agua;...
  • Seite 95: Cuidados Del Sensor Inteligente

    CUIDADOS DEL SENSOR INTELIGENTE 1. Limpieza del sensor de polvo Para que el sensor de polvo, que detecta polvo aerotransportado y partículas ultrafinas, rinda de forma óptima, límpielo cada dos meses. Límpielo con mayor frecuencia cuando use la unidad en entornos polvorientos. Abra la cubierta del sensor de polvo.
  • Seite 96: Limpieza

    LIMPIEZA 2. Limpieza del interior y el exterior  Limpieza del exterior. Pase un paño suave humedecido con agua a temperatura ambiente. A continuación, seque con un paño seco. x Para mantener la unidad a pleno rendimiento, limpie el panel frontal una o dos veces al mes.
  • Seite 97: Preguntas Frecuentes

    PREGUNTAS FRECUENTES Comprobación Problema Acciones a emprender La unidad no se enciende. ▶ ¿Hay un corte del suministro eléctrico? Compruebe si las luces u otros equipos eléctricos funcionan e inténtelo de nuevo. La unidad no funciona en el modo Auto. ▶...
  • Seite 98 PREGUNTAS FRECUENTES Comprobación Problema Acciones a emprender El enchufe y la toma de corriente están calientes. ▶ ¿Está el enchufe bien insertado en la toma? Asegúrese de que el enchufe esté bien insertado en la toma. La unidad emite un olor extraño.
  • Seite 99 PREGUNTAS FRECUENTES Comprobación Problema Acciones a emprender La red Wi-Fi no funciona correctamente. ▶ ¿Está la red Wi-Fi activada? Siga los pasos de las páginas 87 a 89 para activar y/o restablecer la función Wi-Fi. La iluminación del panel está atenuada. ▶...
  • Seite 100: Especificaciones De La Unidad

    ESPECIFICACIONES DE LA UNIDAD Nombre de modelo Tensión de alimentación AC220-240V, 50/60Hz Tensión nominal 200 W Tamaño de estancia 64,8 m (verificada por la AHAM) (homologado por AHAM) Peso 26 kg Dimensiones 43,0 cm (An) x 43,0 cm (Prof ) x 101,0 cm (Al) True HEPA Filtro K / N.º...
  • Seite 101: Garantía Del Producto

    GARANTÍA DEL PRODUCTO Términos de la garantía 1. Este producto se ha fabricado bajo estrictos controles de calidad y ha superado rigurosas inspecciones. 2. La garantía quedará anulada si el fallo del aparato se debe a un uso negligente o inadecuado del producto por parte del consumidor. Es posible que se cobren gastos de envío o de servicio incluso durante el periodo de garantía.
  • Seite 102 Conforme a RoHS Desarrollado en colaboración con la Universidad de Drexel (Filadelfia, PA, EE. UU.) Probado de forma independiente. Avalado por los consumidores. 160504 Rev. B Contacto para consultas www.winix.com relacionadas con el producto y el servicio técnico...
  • Seite 103 Benutzerhandbuch Modell x Bitte lesen Sie alle Sicherheitshinweise und Anweisungen in diesem Handbuch durch, bevor Sie das Gerät in Betrieb Bedienungs- nehmen. und Pflege- x Die Produktgarantie ist auf die Rückseite dieses anleitung Handbuchs aufgedruckt; bewahren Sie es daher für die zukünftige Verwendung an einem sicheren Ort auf.
  • Seite 104 INHALT 5-stufige Luftreinigung Bedienelemente Einrichtung Aufstellung Filterinstallation Sicherheitsanweisungen Sicherheits- und Vorsichtsmaßnahmen Betrieb Inbetriebnahme Betriebsmodi Funktionen und Einstellungen WINIX SMART Einrichtung Pflege und Wartung Filterpflege Smart Sensor-Pflege Reinigung Fehlersuche Häufig gestellte Fragen Gerätespezifikation Produktgarantie English Français Español Deutsche Italiano Nederlands  Dieses Produkt ist nur für 220 ~ 240 V geeignet.
  • Seite 105: 5-Stufige Luftreinigung

    5-STUFIGE LUFTREINIGUNG 4 True HEPA Filter PlasmaWave® 3 AOC Filter mit hoher Kapazität 2 Antimikrobieller PM 2,5-Filter 1 Feinmaschiger Vorfilter PACKUNGSINHALT Produkt Bedienungshandbuch Filterset EU- und UK-Netzkabel Deutsche...
  • Seite 106: Übersicht

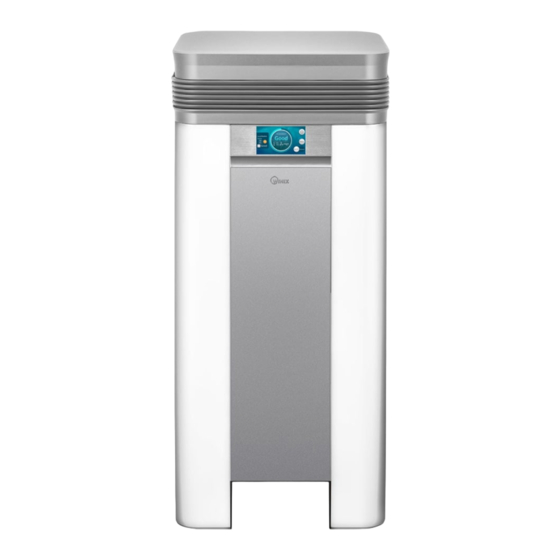
    ÜBERSICHT Obere Abdeckung Luftauslassdüse Lichtsensor Vollfarb-LCD-Touchscreen Lautsprecher Staubsensor Entriegelung obere Geruchsensor Abdeckung Filterabdeckung Lufteinlassdüse Deutsche...
  • Seite 107: Bedienelemente

    ÜBERSICHT BEDIENELEMENTE  Die Hintergrundfarbe ändert sich und zeigt damit zusätzlich die Luftqualität an; Braun: Schlecht / Grün: Normal / Blau: Gut Wi-Fi-Verbindungs- anzeige Luftqualitätsanzeige Lokale Klima- und Wetter- Ein/Aus informa tionen PlasmaWave ® Menü PM 2,5 Staub- konzentrations- Schlaf- Lüfter ges- anzeige modus-...
  • Seite 108 ÜBERSICHT BEDIENELEMENTE Startbildschirm Ausgewähltes Menü PlasmaWave Einstellungen ® Timer- Steuerung Einstellung (Wi-Fi, Helligkeit, Lautstärke, Filter) Einstellung Schlafmodus- Manuelle Display- Steuerung Steuerung Sprache Lüfter ges- chwindigkeit Deutsche...
  • Seite 109 ÜBERSICHT BEDIENELEMENTE Alarm-Popup-Fenster Dieses Popup-Fenster erscheint, wenn ein Problem auftritt, aufgrund dessen das Gerät nicht ordnungsgemäß funktioniert. Bestätigungs-Popup-Fenster Dieses Popup-Fenster erscheint, wenn zum Fortfahren eine Einstellung oder Funktion bestätigt werden muss. Deutsche...
  • Seite 110: Aufstellung

    AUFSTELLUNG Einen Abstand von 30 ~ 45 cm zu Fernsehern, Radios und anderen elektronischen Geräten einhalten Die elektromagnetische Störstrahlung von bestimmten Elektronikgeräten kann zu Fehlfunktionen des Produkts führen. In Innenräumen und nicht in direktem Sonnenlicht aufstellen Direkte Sonneneinstrahlung kann zu Fehlfunktionen oder Ausfällen des Produkts führen. Nur auf festen, ebenen Flächen aufstellen Nachgebende oder schräge Flächen können übermäßige Geräuschentwicklung und Vibrationen verursachen.
  • Seite 111: Filterinstallation

    FILTERINSTALLATION Das Produkt wird mit allen benötigten Filtern ausgeliefert. Vor der Verwendung muss die Plastik-Schutzhülle von den Filtern abgenommen werden.  Wird das Gerät betrieben, ohne die Plastikhülle zu entfernen, dann kann dies zum Ausfall des Produkts führen.  Ausstecken und sicherstellen, dass das Gerät ausgeschaltet ist, bevor die Filter installiert werden.
  • Seite 112 FILTERINSTALLATION Die obere Abdeckung durch ⑥ Drücken der Entriegelungstasten auf beiden Seiten entfernen. Den True HEPA-Filter aus dem Gerät ⑦ nehmen und die Plastik-Schutzhülle entfernen. x Wird das Gerät betrieben, ohne den Filter aus der Plastikhülle zu nehmen, dann kann dies zu ungewöhnlichen Geräuschen, Verformung oder Bränden aufgrund von Überhitzung führen.
  • Seite 113: Kauf Von Winix Ersatzfiltern: Wenden Sie Sich An Ihren Lokalen Händler

     Für einen optimalen Betrieb sollte der Filter alle 14 Tage gereinigt werden. Dies kann die Lebensdauer der anderen Filter verlängern. ▶ Siehe Seiten 116 – 120 bezüglich genauer Informationen ▶ zu Filterpflege und Filterwechsel. Kauf von Winix Ersatzfiltern: wenden Sie sich an Ihren lokalen Händler True HEPA Filter Aktivkohlefilter mit hoher Kapazität...
  • Seite 114: Sicherheits- Und Vorsichtsmaßnahmen

    SICHERHEITS- UND VORSICHTSMAßNAHMEN Vor der Inbetriebnahme dieses Geräts die Sicherheitshinweise sorgfältig lesen und befolgen, um Schäden zu verhindern und einen sicheren Betrieb zu gewährleisten. Vor dem Betrieb des Geräts sicherstellen, dass die Filter eingesetzt sind Der Betrieb des Geräts ohne Filter kann dessen Lebensdauer beeinträchtigen und Stromschläge oder Verletzungen verursachen.
  • Seite 115: Inbetriebnahme

    INBETRIEBNAHME Den Netzstecker in eine Steckdose einstecken. ① Die Taste [Power] (Ein/Aus) drücken. ② x Zur Bestätigung, dass das Gerät eingeschaltet ist, wird eine kurze Animation mit Musik abgespielt. ▶ Während der ersten 4 Minuten messen die Smart-Sensoren die Luftqualität in der Umgebung; danach beginnt der normale Betrieb des Geräts im voreingestellten Auto-Modus.
  • Seite 116: Betriebsmodi

    BETRIEBSMODI Auf dem Startbildschirm wird angezeigt: Modus, Lüftergeschwindigkeit, PlasmaWave®, Luftqualität, lokales Klima und Wetter 3. Auto-Modus Ermöglicht den automatischen Betrieb, basierend auf den Smart-Sensoren für die Luftqualität des Geräts. Auf dem Startbildschirm „AUTO“ wählen. ① x Im Auto-Modus ist PlasmaWave® aktiviert. x Im Auto-Modus wird die Lüftergeschwindigkeit automatisch entsprechend der Innenraum-Luftqualität angepasst.
  • Seite 117: Schlafmodus

    PLASMAWAVE®, SCHLAFMODUS 1. PlasmaWave® PlasmaWave® dient der Entfernung von schädlichen Luftverschmutzungen. x Den Menü-Bildschirm auswählen. x Entweder [ON] (EIN) oder [OFF] (AUS) wählen, um PlasmaWave® zu aktiveren oder deaktivieren. 2. Schlafmodus x Den Menü-Bildschirm auswählen. x Entweder [ON] (EIN) oder [OFF] (AUS) wählen, um den Schlafmodus zu aktiveren oder deaktivieren.
  • Seite 118 TIMER 3. Timer Der Timer kann eingestellt werden, wenn das Gerät für eine bestimmte Zeitdauer laufen soll. x Den Menü-Bildschirm auswählen. x Den Timer-Bildschirm auswählen. x [-] oder [+] auswählen, um die Zeit in Schritten von 1 Stunde zu erniedrigen oder erhöhen. x Es können maximal 12 Stunden eingestellt werden.
  • Seite 119: Helligkeit

    EINSTELLUNGEN 1. Helligkeit Ermöglicht die Einstellung der Helligkeit des LCD-Displays. Den Bildschirm für die Helligkeitseinstellung aufrufen. ① x Den Menü-Bildschirm auswählen. x „Settings“ (Einstellungen) auswählen. x „Brightness“ (Helligkeit) auswählen. x [-] oder [+] auswählen, um die Bildschirmhelligkeit schrittweise zu erhöhen oder verringern. 2.
  • Seite 120 EINSTELLUNGEN 3. Filter Zeigt die verbleibende Lebensdauer des True HEPA Filters, des AOC Aktivkohlefilters mit hoher Kapazität und des antimikrobiellen PM 2,5-Filters an. Den Bildschirm für die Filtereinstellung aufrufen. ① x Den Menü-Bildschirm auswählen. x „Settings“ (Einstellungen) auswählen. x „Filters“ (Filter) auswählen. ▶...
  • Seite 121: Verbindung Zu Winix Smart

    (6.0 oder neuer empfohlen – iPhone 4S oder neuer)  Voraussetzungen für die Verbindung zu WINIX SMART • Um WINIX SMART verwenden zu können, muss ein Wi-Fi-Router in der Nähe des Luftreinigers installiert sein. • Der Wi-Fi-Router muss den folgenden Spezifikationen entsprechen: 802.11b/g/n 2,4 GHz; bei einem drahtlosen Dual-Band-Router (2,4 GHz/5 GHz) muss 2,4 GHz ausgewählt werden.
  • Seite 122: Weitere Einrichtung

    Die App auf dem Mobilgerät ausführen und die Anweisungen ③ befolgen, um den Luftreiniger mit dem Router zu verbinden. x Zur Verbindung mit dem Winix-Netz auf dem Gerät WINIX SMART auswählen Die Wi-Fi-Verbindung am Luftreiniger bestätigen. ④ x Den Startbildschirm auswählen.
  • Seite 123: Wi-Fi-Anzeige

    Die App auf dem Mobilgerät ausführen und die Anweisungen ③ befolgen, um den Luftreiniger mit dem Router zu verbinden. x Zur Verbindung mit dem Winix-Netz auf dem Gerät WINIX SMART auswählen Die Wi-Fi-Verbindung am Luftreiniger bestätigen. ④ x Den Startbildschirm auswählen.
  • Seite 124: Filterpflege

    FILTERPFLEGE 1. Filter-Austauschintervall Filter Wartungsintervall Austauschintervall 1 Feinmaschiger Alle 14 Tage reinigen Nicht austauschbar Vorfilter 2 Antimikrobieller PM 2,5-Filter 3 AOC Darf NICHT gewaschen Aktivkohlefilter mit Hält bis zu 12 Monate werden hoher Kapazität True HEPA Filter  Die Filterwechselintervalle können in Abhängigkeit von den Umgebungsbedingungen variieren.
  • Seite 125: Wechsel Der Filter

    FILTERPFLEGE 2. Wechsel der Filter Wenn die Filterabdeckung oder die obere Abdeckung geöffnet werden, wird das Gerät automatisch abgeschaltet.  Untere Filter  Antimikrobieller PM 2,5-Filter und AOC Aktivkohlefilter mit hoher Kapazität  An der Außenseite der Filter ist jeweils angegeben, welche Seite nach oben zeigen muss.
  • Seite 126 Bränden aufgrund von Überhitzung führen. Den True HEPA-Filter wieder einsetzen. ④ Die Entriegelungstasten auf beiden Seiten ⑤ der oberen Abdeckung gedrückt halten und die Abdeckung wieder anbringen.  Für eine optimale Leistung sollten für dieses Gerät nur Original- Winix-Filter verwendet werden. Deutsche...
  • Seite 127: Zurücksetzen Der Filter

    FILTERPFLEGE 3. Zurücksetzen der Filter Nach dem Wechsel muss jeder Filter einzeln zurückgesetzt werden. Nach dem Wiederanbringen der Filterabdeckung oder der oberen ① Abdeckung erscheint eine Popup-Meldung. x Durch Auswahl von [YES] (JA) wird der Filterbildschirm wieder aufgerufen. Das Rücksetzsymbol für den Filter drücken, der gewechselt wurde. ②...
  • Seite 128: Reinigung Des Vorfilters

    FILTERPFLEGE 4. Reinigung des Vorfilters Die Reinigungsintervalle des Filters können in Abhängigkeit von der Luftqualität variieren. Zur Reinigung des Vorfilters einen Staubsauger oder eine weiche Bürste verwenden. Wenn er extrem schmutzig sein sollte, mit zimmerwarmem Wasser auswaschen. x Nur Wasser verwenden, keine flüchtigen Substanzen wie Alkohol oder Azeton. ...
  • Seite 129: Smart Sensor-Pflege

    SMART SENSOR-PFLEGE 1. Reinigung des Staubsensors Der Staubsensor, der Staub in der Luft sowie ultrafeine Partikel erkennt, muss für eine optimale Leistung alle zwei Monate gereinigt werden. Wenn das Gerät in einem Bereich mit hoher Staubbelastung betrieben wird, ist eine häufigere Reinigung erforderlich.
  • Seite 130: Reinigung

    REINIGUNG 2. Reinigung der Außen- und Innenflächen  Reinigung der Außenflächen. Mit einem weichen, feuchten Tuch und Wasser mit Raumtemperatur abwischen. Anschließend mit einem sauberen, trockenen Tuch nachwischen. x Für eine optimale Leistung sollte die Frontabdeckung alle 1 – 2 Monate gereinigt werden.
  • Seite 131: Häufig Gestellte Fragen

    HÄUFIG GESTELLTE FRAGEN Überprüfung/ Problem Durchzuführende Aktionen Das Gerät lässt sich nicht einschalten. ▶ Liegt ein Stromausfall vor? Prüfen, ob andere Lampen und elektrischen Geräte funktionieren, und erneut versuchen. Das Gerät funktioniert nicht im Auto-Modus. ▶ Wurde der Auto-Modus ausgewählt? Die Modus-Taste wiederholt drücken, bis der Auto-Modus ausgewählt ist.
  • Seite 132 HÄUFIG GESTELLTE FRAGEN Überprüfung/ Problem Durchzuführende Aktionen Der Netzstecker und die Steckdose fühlen sich heiß an. ▶ Ist der Stecker fest eingesteckt? Sicherstellen, dass der Stecker korrekt in die Steckdose gesteckt ist. Es tritt ein ungewöhnlicher Geruch auf. ▶ Wird das Gerät in einem Bereich mit viel Rauch, Staub oder starken Gerüchen eingesetzt? Den Kundendienst kontaktieren, um die genaue Ursache zu bestätigen.
  • Seite 133 HÄUFIG GESTELLTE FRAGEN Überprüfung/ Problem Durchzuführende Aktionen Wi-Fi funktioniert nicht richtig. ▶ Ist Wi-Fi aktiviert? Die Schritte auf den Seiten 121 – 123 durchführen, um die Wi-Fi-Funktion zu aktivieren bzw. zurückzusetzen. Die Anzeige leuchtet nur schwach. ▶ Befindet sich das Gerät im Schlafmodus? Der Schlafmodus wird über die automatische Erkennung der Helligkeit oder Dunkelheit im Raum aktiviert.
  • Seite 134: Gerätespezifikation

    GERÄTESPEZIFIKATION Modellbezeichnung Versorgungsspannung AC220-240V, 50/60Hz Leistungsaufnahme 200 W Raumgröße entsprechend AHAM-verifiziert für 64,8 m AHAM Gewicht 26 kg Abmessungen 43,0 cm (B) x 43,0 cm (T) x 101,0 cm (H) True HEPA Filter K/Artikel: 118410 Ersatzfilter Aktivkohle mit hoher Kapazität Filter L/Artikel: 118440 Ersatzfilter Antimikrobieller PM 2,5...
  • Seite 135: Produktgarantie

    PRODUKTGARANTIE Es gelten die folgenden Garantiebedingungen. 1. Dieses Produkt wird bei der Fertigung strengen Qualitätskontrollen und Inspektionen unterzogen. 2. Die Garantie kann nichtig sein, wenn der Ausfall des Produkts auf Vernachlässigung oder falschen Gebrauch durch den Kunden zurückzuführen ist; Versand- und Servicegebühren können auch während der Garantiezeit anfallen.
  • Seite 136 Entwickelt in Zusammenarbeit mit der Drexel University (Philadelphia, PA, USA) 160504 Rev.B Kontakt für Anfragen www.winix.com bezüglich des Produkts und Kundendienst...
  • Seite 137 Manuale per l’utente Modello x Prima dell’uso, leggere e rispettare tutte le regole e le Guida all’uso istruzioni di sicurezza contenute in questo manuale. e alla cura x La garanzia del prodotto è stampata sul retro di questa guida, conservarla pertanto in un luogo sicuro per uso...
  • Seite 138 Installazione dei filtri Istruzioni di sicurezza Sicurezza e precauzioni Funzionamento Messa in funzione iniziale Modalità operative Caratteristiche e impostazioni Installazione di WINIX SMART Cura e manutenzione Cura del filtro Cura del sensore intelligente Cura per la pulizia Risoluzione dei problemi Domande frequenti Specifiche dell’unità...
  • Seite 139: Purificazione Dell'aria A 5 Stadi

    PURIFICAZIONE DELL’ A RIA A 5 STADI 4 Filtro True HEPA PlasmaWave® 3 Filtro ad alta capacità 2 Filtro anti- microbico PM 2.5 1 Pre-filtro a maglia fine CONTENUTO DELL’IMBALLAGGIO Prodotto Manuale di istruzioni Set filtro Cavi di alimentazione UE e UK Italiano...
  • Seite 140 COME È FATTO Coperchio superiore Uscita dell’aria Sensore della luce Touch screen LCD a colori Altoparlante Sensore della Rilascio del polvere coperchio Sensore degli superiore odori Coperchio del filtro Entrata dell’aria Italiano...
  • Seite 141: Controlli

    I CONTROLLI  Il colore dello sfondo cambierà, fungendo da ulteriore indicatore della qualità dell’aria; Marrone: Scarsa / Verde: Discreta / Blu: Buona Indicatore di Indicatore della connessione qualità dell’aria Wi-Fi Informazioni sulla temperatura e sulle condizioni Accensione meteo locali PlasmaWave ®...
  • Seite 142 I CONTROLLI Schermata Home Menu selezionato Controllo Impostazioni Impostazione PlasmaWave ® del timer (Wi-Fi, Luminosità, Volume, Filtro) Impostazione Controllo della Controllo della lingua del modalità Riposo manuale della display velocità del ventilatore Italiano...
  • Seite 143 I CONTROLLI Notifica di avviso Questo tipo di notifica appare quando è presente un problema che impedisce all’unità di funzionare correttamente. Notifica di verifica Questo tipo di notifica appare quando, per continuare, è necessario confermare un’impostazione o una funzione. Italiano...
  • Seite 144: Dove Utilizzarlo

    DOVE UTILIZZARLO Lasciare 30 ~ 45 cm. di spazio da TV, radio e altri prodotti elettronici le interferenze elettromagnetiche prodotte da certi dispositivi elettronici possono causare il malfunzionamento del prodotto. Posizionare all’interno, lontano dalla luce diretta del sole l’ e sposizione diretta può causare il malfunzionamento del prodotto o un guasto. Poggiare solo su superfici solide e piatte superfici fragili o inclinate possono causare rumore e vibrazioni anomale.
  • Seite 145: Installazione Dei Filtri

    INSTALLAZIONE DEI FILTRI Questo prodotto ha in dotazione tutti i filtri necessari. Prima dell’uso occorre rimuovere dal filtro l’involucro di protezione in plastica.  L’azionamento dell’unità senza prima rimuovere l’involucro in plastica potrebbe causare il guasto del prodotto.  Scollegare il cavo e assicurarsi che l’unità sia spenta, prima di installare il filtro. ...
  • Seite 146 INSTALLAZIONE DEI FILTRI Rimuovere il coperchio superiore premendo i ⑥ pulsanti di rilascio su entrambi i lati. Estrarre il filtro True HEPA dall’unità e ⑦ rimuoverlo dall’involucro di protezione in plastica. x L’azionamento dell’unità senza rimuovere l’involucro in plastica dal filtro può causare rumore anomalo, deformazione o incendio come conseguenza del surriscaldamento.
  • Seite 147 ▶ Fare riferimento alle pagine 150-154 per informazioni ▶ dettagliate sulla cura dei filtri e su come sostituirli. Per acquistare filtri di ricambio Winix: contattare il locale rivenditore Filtro True HEPA Filtro carbone ad alta capacità...
  • Seite 148: Sicurezza E Precauzioni

    SICUREZZA E PRECAUZIONI Prima di utilizzare questa apparecchiatura, leggere attentamente e attenersi a queste istruzioni e precauzioni di sicurezza per evitare danni e garantire un uso sicuro. Prima di mettere in funzione l’unità, accertarsi che il filtro sia inserito il funzionamento dell’unità priva di filtro può abbreviarne la vita e causare folgorazione o lesioni. Accertarsi che nelle feritoie dell’unità...
  • Seite 149: Messa In Funzione Iniziale

    MESSA IN FUNZIONE INIZIALE Inserire la spina dell’unità in una presa elettrica. ① Premere il pulsante [Accensione] ② x Una breve animazione con motivo musicale serve da conferma dell’accensione. ▶ Per i primi 4 minuti dall’accensione, i sensori intelligenti misurano la qualità...
  • Seite 150: Modalità Operative

    MODALITÀ OPERATIVE Nella schermata Home viene visualizzato quanto segue Mode (Modalità), Fan Speed (Velocità ventilatore), PlasmaWave®, Air Quality (Qualità dell’aria), Local Climate (Temperatura locale) e Weather (Condizioni meteo) 3. Modalità Auto Attiva la modalità automatica basata sulle informazioni dai sensori intelligenti della qualità...
  • Seite 151: Modalità Riposo

    PLASMAWAVE®, MODALITÀ RIPOSO 1. PlasmaWave® PlasmaWave® opera per rimuovere contaminanti nocivi dispersi nell’aria. x Selezionare la schermata Menu. x Selezionare [ON] o [OFF] per abilitare o disabilitare PlasmaWave®. 2. Modalità Riposo x Selezionare la schermata Menu. x Selezionare [ON] o [OFF] per abilitare o disabilitare la modalità...
  • Seite 152 TIMER 3. Timer Se si desidera che l’unità sia in funzione per uno specifico periodo di tempo, è possibile impostare il timer. x Selezionare la schermata Menu. x Selezionare la schermata Timer. x Selezionare [-] o [+] per ridurre o aumentare il tempo in incrementi di 1 ora.
  • Seite 153 IMPOSTAZIONI 1. Luminosità L’ o pzione Brightness consente di regolare la luminosità sul pannello di controllo dell’LCD. Andare alla schermata dell’impostazione della luminosità. ① x Selezionare la schermata Menu. x Selezionare Settings (Impostazioni). x Selezionare Brightness (Luminosità). x Selezionare [-] o [+] per ridurre o aumentare gradualmente la luminosità...
  • Seite 154 IMPOSTAZIONI 3. Filtri Visualizza la durata del filtro True HEPA (True HEPA Filter), filtro carbone alta capacità AOC (High Capacity AOC Carbon Filter) e del filtro anti-microbico PM 2.5 (Anti-microbial PM 2.5 Filter). Andare alla schermata dell’impostazione del filtro. ① x Selezionare la schermata Menu.
  • Seite 155: Configurazione Iniziale

     Prima della connessione a WINIX SMART • Per utilizzare WINIX SMART, occorre installare un router wireless Wi-Fi all’interno del raggio d’azione del purificatore d’aria. • Assicurarsi che il router Wi-Fi sia conforme alle seguenti specifiche: 802.11b/g/n 2,4 GHZ o, nel caso di un router wireless dual-band (2,4 GHz/5 GHz), che sia selezionato 2,4 GHz.
  • Seite 156 WINIX SMART Eseguire l’app sul dispositivo e seguire i messaggi per collegare l’unità ③ al router. x Quando ci si collega alla rete Winix sul dispositivo, cercare "WINIX SMART" Confermare la connessione Wi-Fi sull’unità. ④ x Selezionare la schermata Home.
  • Seite 157 Google Play store o App Store iTunes. Eseguire l’app sul dispositivo e seguire i messaggi per collegare l’unità ③ al router. x Quando ci si collega alla rete Winix sul dispositivo, cercare "WINIX SMART" Confermare la connessione Wi-Fi sull’unità. ④ x Selezionare la schermata Home.
  • Seite 158: Cura Del Filtro

    CURA DEL FILTRO 1. Quando sostituire i filtri Quando effettuare la Quando effettuare la Filtro manutenzione sostituzione Pulire una volta 1 Pre-filtro a maglia fine Permanente ogni 14 giorni 2 Filtro anti-microbico PM 2.5 3 Filtro carbone ad alta NON PUÒ ESSERE Ha una durata massima capacità...
  • Seite 159 CURA DEL FILTRO 2. Come sostituire i filtri Il funzionamento dell’unità si interrompe automaticamente quando si apre il coperchio del filtro o il coperchio superiore.  Filtri inferiori  Filtro anti-microbico PM 2.5 e filtro carbone ad alta capacità AOC ...
  • Seite 160 Reinserire il filtro True HEPA al suo posto. ④ Tenere premuti i pulsanti di rilascio su ⑤ entrambi i lati del coperchio superiore e ricollegare all’unità.  Per avere prestazioni ottimali, usare solo filtri Winix originali per questa unità. Italiano...
  • Seite 161 CURA DEL FILTRO 3. Reset dei filtri Ogni filtro deve essere resettato individualmente dopo la sostituzione. Dopo aver rimesso il coperchio del filtro o il coperchio superiore, si ① attiva un pop-up. x Selezionando [YES] (Sì) si torna alla schermata Filter (Filtro). Premere l’icona di reset corrispondente al filtro sostituito.
  • Seite 162: Pulizia Del Pre-Filtro

    CURA DEL FILTRO 4. Pulizia del pre-filtro Gli intervalli tra le pulizie del filtro possono variare in funzione della qualità dell’aria. Usare un aspirapolvere o una spazzola morbida per pulire il pre-filtro. Se è troppo sporco, lavare con acqua a temperatura ambiente. x Usare solo acqua, non usare sostanze volatili come alcol o acetone.
  • Seite 163: Cura Del Sensore Intelligente

    CURA DEL SENSORE INTELLIGENTE 1. Pulizia del sensore della polvere Per ottimizzare le prestazioni del sensore della polvere, che rileva la polvere presente nell’aria e particelle piccolissime, pulirlo ogni due mesi. Pulirlo più spesso se l’unità è posta in un luogo con alti livelli di polvere. Aprire il coperchio del sensore della ①...
  • Seite 164: Cura Per La Pulizia

    CURA PER LA PULIZIA 2. Pulizia di interno ed esterno Pulizia dell’esterno. Pulire con un panno morbido inumidito con acqua a temperatura ambiente. Quindi passare un panno pulito e asciutto. x Per mantenere l’apparecchio nelle migliori condizioni operative, pulire il pannello anteriore ogni 1-2 mesi.
  • Seite 165: Domande Frequenti

    DOMANDE FREQUENTI Problema Controllo Azione da intraprendere Non si accende affatto. ▶ C’ è un abbassamento/mancanza di corrente? Controllare se altre utenze elettriche stanno funzionando e riprovare. Non funziona in modalità Auto. ▶ È stata selezionata la modalità Auto? Premere il pulsante Mode fino a che non viene selezionata la modalità...
  • Seite 166 DOMANDE FREQUENTI Problema Controllo Azione da intraprendere La spina e la presa elettrica sono calde al tatto. ▶ La spina è inserita a fondo correttamente? Verificare che la spina sia inserita correttamente nella presa. Si percepisce uno strano odore. ▶ Viene utilizzato in un ambiente con molto fumo, odori o polvere? Contattare l’assistenza clienti per determinare la causa esatta.
  • Seite 167 DOMANDE FREQUENTI Problema Controllo Azione da intraprendere Il Wi-Fi non funziona correttamente. ▶ Il Wi-Fi è attivato? Seguire i passi alle pagine 155-159 per attivare e/ o resettare la funzione Wi-Fi. Il pannello display è scuro. ▶ È in modalità Riposo? La Modalità...
  • Seite 168: Specifiche Dell'unità

    SPECIFICHE DELL’UNITÀ Nome modello Tensione di alimentazione AC220-240V, 50/60Hz Potenza nominale 200 W Dimensioni della stanza AHAM verificato in 64,8 m della verifica AHAM Peso 26 kg Dimensioni 43,0x43,0x101,0 cm (larghezza, profondità, altezza) True HEPA Filtro K / Articolo: 118410 Filtro di ricambio Filtro carbone ad alta capacità...
  • Seite 169: Garanzia Del Prodotto

    GARANZIA DEL PRODOTTO Termini e condizioni di garanzia 1. Questo prodotto viene costruito con severi controlli di qualità e ispezioni. 2. La garanzia non è applicabile se il guasto del prodotto risulta da negligenza o uso improprio da parte del consumatore; anche nel periodo di garanzia è possibile incorrere in spese di spedizione e assistenza.
  • Seite 170 Conforme a RoHS Sviluppato in collaborazione con la Drexel University (Filadelfia, PA, USA) Testato in modo indipendente. Consumer Trusted. 160504 Rev.B Contatti per www.winix.com domande sul prodotto e per il servizio clienti...
  • Seite 171 Gebruikershandleiding Model x Lees voor de ingebruikname van het apparaat eerst de veiligheidsvoorschriften en -instructies zorgvuldig en Gebruik en neem ze in acht. onderhoud x De productgarantie staat op de achterkant van deze handleiding. Bewaar deze op een veilige plaats voor toekomstig gebruik.
  • Seite 172 INHOUD Luchtzuivering in 5 fasen Bedieningsknoppen Configuratie Gebruiksomgeving Filters installeren Veiligheidsinstructies Veiligheid en voorzorgsmaatregelen Bediening Eerste ingebruikname Gebruiksstanden Functies en instellingen Configuratie WINIX SMART Service en onderhoud Filteronderhoud Onderhoud Smart Sensor Reiniging Probleemoplossing Veelgestelde vragen Specificaties Productgarantie English Français Español...
  • Seite 173: Luchtzuivering In 5 Fasen

    LUCHTZUIVERING in 5 FASEN 4 Origineel HEPA-filter PlasmaWave® 3 Hoog rendement -filter 2 Anti-microbieel PM 2.5 filter 1 Fijnmazig voorfilter INHOUD VERPAKKING Product Gebruiksaanwijzing Filterset EU- en VK-netsnoeren Nederlands...
  • Seite 174 BESCHRIJVING VAN Deksel Ventilatierooster Lichtsensor LCD-kleurenaanraakscherm Luidspreker Stofsensor Vergrendeling Geursensor Filterdeksel Luchtinlaatopening Nederlands...
  • Seite 175: Bedieningsknoppen

    BEDIENINGSKNOPPEN  De achtergrond verandert van kleur en dient als aanvullende luchtkwaliteits- indicator; Bruin: Slecht / Groen: Redelijk / Blauw: Goed Wifi-verbindings- indicator Luchtkwaliteitsindicator Plaatselijke informatie over Aan-/Uit-knop weer en klimaat PlasmaWave ® Menu PM 2.5 Stof- concentratie- Slaapstand- Ventilator- indicator indicator snelheid...
  • Seite 176 BEDIENINGSKNOPPEN Startscherm Geselecteerde menu PlasmaWave Instellingen ® Timer knop instellen (Wifi, Helderheid, Volume, Filter) Displaytaal Slaapstand-knop Knop hand matige instellen (Sleep) ventilatorsnelheid Nederlands...
  • Seite 177 BEDIENINGSKNOPPEN Pop-upwaarschuwing Dit type pop-up verschijnt wanneer er zich een probleem voordoet waardoor het apparaat niet naar behoren werkt. Verificatie-pop-up Dit type pop-up verschijnt wanneer een instelling of functie moet worden bevestigd om door te gaan. Nederlands...
  • Seite 178: Gebruiksomgeving

    GEBRUIKSOMGEVING Laat 30 ~ 45 cm ruimte vrij tussen televisies, radio's en andere elektronische apparatuur Elektromagnetische interferentie van bepaalde elektronica kan storingen in het product veroorzaken. Binnenshuis en buiten direct zonlicht plaatsen Directe blootstelling kan storingen of een slechte werking tot gevolg hebben. Uitsluitend op een harde, vlakke ondergrond plaatsen Dunne of schuine oppervlakken kunnen leiden tot abnormaal geluid en trillingen.
  • Seite 179: Filters Installeren

    FILTERS INSTALLEREN Dit product wordt geleverd met alle benodigde filters. De beschermende plastic verpakking moet voor gebruik worden verwijderd.  Gebruik van het apparaat zonder eerst de beschermfolie te verwijderen kan tot productstoring leiden.  Trek de stekker uit het stopcontact en zorg ervoor dat het apparaat is uitgeschakeld voordat u de filters plaatst.
  • Seite 180 FILTERS INSTALLEREN Verwijder de bovenafdekking door ⑥ de ontgrendelingsknoppen aan beide zijden in te drukken. Trek het originele HEPA-filter uit het ⑦ apparaat en verwijder de beschermende plastic verpakking. x Ingebruikname van het apparaat zonder eerst het filter uit het plastic te halen kan leiden tot abnormaal geluid, vervorming of brand als gevolg van oververhitting.
  • Seite 181  Voor optimaal gebruik kan het voorfilter om de twee weken worden gereinigd. Dit kan de levensduur van de andere filters verlengen. ▶ Zie pagina's 184-188 voor meer informatie ▶ over onderhoud en vervanging van filters. Aanschaf Winix-reservefilters: neem contact op met uw plaatselijke dealer Origineel HEPA-filter Hoog rendement AOC -koolstoffilter Anti-microbieel PM 2.5 filter...
  • Seite 182: Veiligheid En Voorzorgsmaatregelen

    VEILIGHEID EN VOORZORGSMAATREGELEN Lees deze veiligheidsinstructies zorgvuldig en neem ze in acht voordat u het apparaat in gebruik neemt om schade en letsel te voorkomen en een veilig gebruik te garanderen. Controleer of de filters zijn geplaatst voordat u het apparaat aanzet. Het apparaat zonder filters inschakelen kan de levensduur van het apparaat verkorten en elektrische schokken of letsel veroorzaken.
  • Seite 183: Eerste Ingebruikname

    EERSTE INGEBRUIKNAME Steek de apparaatstekker in een stopcontact. ① Druk op [Power] (Aan-/Uit-knop). ② x Een kort animatie en muziek geven aan dat het apparaat is ingeschakeld. ▶ Tijdens de eerste 4 opstartminuten meten de slimme sensoren de luchtkwaliteit in de omgeving. Vervolgens start de normale werking, die vooringesteld staat op de automatische stand...
  • Seite 184: Gebruiksstanden

    GEBRUIKSSTANDEN Het startscherm geeft het volgende weer: Mode (modus), Fan Speed (ventilatorsnelheid), PlasmaWave®, Air Quality (luchtkwaliteit), Local Climate and Weather (plaatselijk klimaat en weer). 3. Automatische stand (Auto) Schakelt de automatische werking in gebaseerd op de slimme luchtkwaliteitssensoren. Selecteer Auto op het startscherm. ①...
  • Seite 185: Functies En Instellingen

    PLASMAWAVE®, SLEEP MODE (slaapstand) 1. PlasmaWave® PlasmaWave® verwijdert schadelijke stoffen in de lucht. x Selecteer het menuscherm. x Selecteer [ON] (aan) of [OFF] (uit) om PlasmaWave® in of uit te schakelen. 2. Sleep (slaapstand) x Selecteer het menuscherm. x Selecteer [ON] (aan) of [OFF] (uit) om de slaapstand in of uit te schakelen.
  • Seite 186 TIMER 3. Timer De timer kan voor een bepaalde duur worden ingesteld. x Selecteer het menuscherm. x Selecteer het timerscherm. x Selecteer [-] of [+] om de tijd in stappen van 1 uur hoger of lager in te stellen. x De maximum instelbare tijd is 12 uur. 4.
  • Seite 187: Helderheid (Brightness)

    INSTELLINGEN 1. Helderheid (brightness) Voor het aanpassen van de helderheid van het LCD-bedieningspaneel. Ga naar het scherm Helderheid instellen. ① x Selecteer het menuscherm. x Selecteer Instellingen. x Selecteer Helderheid (brightness). x Selecteer [-] of [+] om de helderheid van het scherm geleidelijk te verhogen of te verlagen.
  • Seite 188 INSTELLINGEN 3. Filters Toont de levensduur van het originele HEPA-filter, het hoog rendement AOC koolstoffilter en het anti-microbiële PM 2.5 filter. Ga naar het scherm Filter instellen. ① x Selecteer het menuscherm. x Selecteer Instellingen. x Selecteer Filters. ▶ Een volle balk betekent dat het filter niet is gebruikt.
  • Seite 189: Configuratie Winix Smart

    (6.0 of hoger aanbevolen - iPhone 4S of hoger)  Voordat u verbinding maakt met WINIX SMART • Om WINIX SMART te kunnen gebruiken moet binnen het bereik van de luchtreiniger een draadloze wifi- router worden geïnstalleerd. • Controleer of de wifi-router aan de volgende specificaties voldoet: 802.11b/g/n 2,4 GHZ; selecteer bij een dualband draadloze router (2,4 GHz/5 GHz) 2,4 GHz.
  • Seite 190: Aanvullende Instellingen

    Start de app op het apparaat en volg de aanwijzingen om het ③ apparaat aan te sluiten op de router. x Zoek voor aansluiting van het apparaat op het Winix-netwerk naar "WINIX SMART". Bevestig de wifi-aansluiting op het apparaat. ④...
  • Seite 191 Start de app op het apparaat en volg de aanwijzingen om het ③ apparaat aan te sluiten op de router. x Zoek voor aansluiting van het apparaat op het Winix-netwerk naar "WINIX SMART". Bevestig de wifi-aansluiting op het apparaat. ④...
  • Seite 192: Filteronderhoud

    FILTERONDERHOUD 1. Filtervervanging Filter Servicebeurt Vervanging 1 Fijnmazig voorfilter Elke 14 dagen reinigen Permanent 2 Anti-microbieel PM 2.5 filter 3 Hoog rendement Mag NIET worden Levensduur: maximaal 12 -koolstoffilter GEWASSEN maanden Origineel HEPA-filter  Intervallen voor filtervervanging kunnen variëren, afhankelijk van de omgeving. ...
  • Seite 193: Filters Vervangen

    FILTERONDERHOUD 2. Filters vervangen Het apparaat wordt automatisch uitgeschakeld wanneer het filterdeksel of de bovenafdekking wordt geopend.  Bodemfilters  Anti-microbieel PM 2.5 filter en hoog rendement AOC -koolstoffilter  Op de rand van elk filter staat aangegeven welke kant naar boven moet worden gericht.
  • Seite 194 Plaats het originele HEPA-filter terug. ④ Houd de ontgrendelingsknoppen aan ⑤ weerszijden ingedrukt en bevestig de bovenafdekking weer aan het apparaat.  Gebruik voor een optimale werking van het apparaat uitsluitend originele Winix-filters. Nederlands...
  • Seite 195 FILTERONDERHOUD 3. Filters resetten Alle filters moeten afzonderlijk worden gereset na vervanging. Na terugplaatsing van het filterdeksel en de bovenafdekking ① verschijnt er een pop-up. x Selecteer [YES] (ja) om terug te keren naar het filterscherm. Druk op het reset-pictogram van het filter dat is vervangen. ②...
  • Seite 196: Voorfilter Reinigen

    FILTERONDERHOUD 4. Voorfilter reinigen Intervallen voor filterreinigingen kunnen variëren afhankelijk van de luchtkwaliteit. Reinig het voorfilter met een stofzuiger of zachte borstel. Als het erg vuil is, wassen met water op kamertemperatuur. x Gebruik alleen water, geen vluchtige stoffen zoals alcohol of aceton. ...
  • Seite 197: Onderhoud Smart Sensor

    ONDERHOUD SMART SENSOR 1. Reinigen van de stofsensor Reinig het stoffilter, dat stofdeeltjes en ultrafijne deeltjes detecteert, om de twee maanden voor een optimale werking. Reinig het vaker als het apparaat zich in een omgeving met hoge concentraties stof bevindt. Open de afdekking van de stofsensor.
  • Seite 198: Reiniging

    REINIGING 2. Binnen- en buitenkant reinigen  Buitenkant reinigen Gebruik een zachte, vochtige doek en gebruik water op kamertemperatuur. Droog vervolgens met een schone droge doek. x Reinig het voorpaneel 1 of 2 keer per maand voor een optimaal resultaat. ...
  • Seite 199: Veelgestelde Vragen

    VEELGESTELDE VRAGEN Controleren Probleem Uit te voeren handelingen Het apparaat start niet. ▶ Is er een stroomstoring? Controleer of het licht en andere elektrische apparatuur werken en probeer het opnieuw. Het werkt niet in de automatische stand (Auto). ▶ Is de automatische stand geselecteerd? Druk op de standenknop (Mode) tot de automatische stand is geselecteerd.
  • Seite 200 VEELGESTELDE VRAGEN Controleren Probleem Uit te voeren handelingen De stekker en het stopcontact zijn warm. ▶ Is de stekker goed aangesloten? Zorg ervoor dat de stekker goed in het stopcontact zit. Er hangt een vreemde lucht. ▶ Wordt het apparaat gebruikt in een ruimte met veel rook, stof of vieze luchtjes? Neem contact op met de klantenservice om de exacte oorzaak vast te stellen.
  • Seite 201 VEELGESTELDE VRAGEN Controleren Probleem Uit te voeren handelingen De wifi werkt niet goed. ▶ Is de wifi ingeschakeld? Volg de stappen op pagina's 189-191 voor het inschakelen en/of resetten van de wifi-functie. Het beeldscherm is ▶ Staat het in de slaapstand? dof.
  • Seite 202: Specificaties

    SPECIFICATIES Modelnaam Netspanning AC220-240V, 50/60Hz Vermogen 200 W AHAM-gecertificeerd AHAM-gecertificeerd voor ruimtes tot 64,8 m ruimteoppervlak Gewicht 26 kg Afmetingen 43,0 cm (B) x 43,0 cm (D) x 101,0 cm (H) Origineel HEPA-filter Filter K / Artikel: 118410 Vervangingsfilter Hoog rendement AOC koolstoffilter Filter L / Artikel: 118440 Vervangingsfilter...
  • Seite 203: Productgarantie

    PRODUCTGARANTIE Garantievoorwaarden 1. Dit product is vervaardigd onder strenge kwaliteitscontrole en keuringen. 2. De garantie vervalt in geval van productstoringen als gevolg van nalatigheid of verkeerd gebruik door de consument. Verzending en onderhoud kunnen ook tijdens de garantieperiode onderhevig zijn aan kosten.
  • Seite 204 Ontwikkeld in samenwerking met Drexel University (Philadelphia, PA, VS) 160504 Rev.B Kijk voor informatie www.winix.com over het product en de klantenservice op...

Inhaltsverzeichnis