Park Tool CRC-15 Bedienungsanleitung
Quicklinks
PARK TOOL CO.
5115 Hadley Ave. N., St. Paul, MN 55128 (USA) www.parktool.com
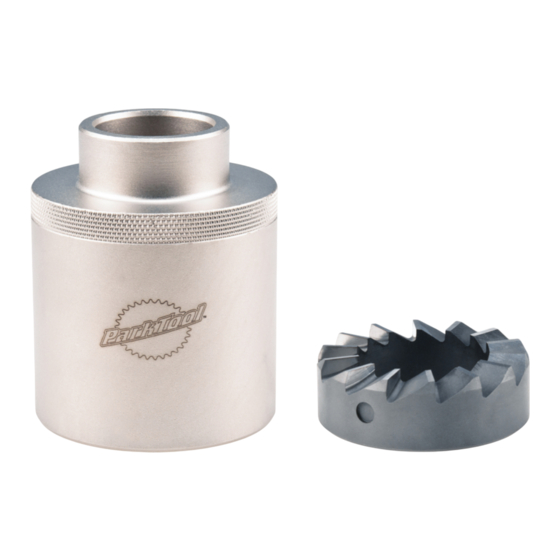
Machining a fork's crown race seat insures a proper press fit of the headset
crown race, as well as proper performance and longevity of the headset. The
Park Tool CRC-15 is a precision tool designed to be used in conjunction with the
Park Tool CRC-1 Crown Race Cutting Tool to machine forks with a 39.8mm metal
crown race seat (1.5" standard) that tapers to a 28.6mm steering column (1-1/8"
standard). The CRC-15 is not intended for use on full carbon steering columns.
Instructions:
1. Assemble components of the CRC-1 Crown Race Cutter and CRC-15
Crown Race Cutter Adaptor.
a. Place the CRC-1's 1-1/8" bushing (blue) into the handle set and thread
on the cap/nut. Do not tighten.
b. Install the CRC-15's body (#817) into the handle set of the CRC-1,
making sure the set screws in the handle set are in line with the two
positioning points in the body. Tighten the set screws.
c. Install the 39.8mm cutter (#818) into the CRC-15's body, making sure
the two set screws (#609) in the body are aligned with the positioning
points in the cutter. Tighten the set screws.
2. Position the CRC-1/CRC-15 assembly onto the fork's steering column and
Durch die Bearbeitung des Gabelkonussitzes werden die exakte Passung
des Gabelkonus auf der Gabel sowie die einwandfreie Funktion und
Haltbarkeit des gesamten Steuersatzes gewährleistet. Der Gabelkonussitz-
Adapter CRC-15 ist ein Präzisionswerkzeug und dient in Verbindung mit dem
Gabelkonussitz-Fräser CRC-1 zur Bearbeitung von Gabeln mit einem 39,8 mm
Konussitz aus Metall (1.5" Standard) und einem 28,6 mm Gabelschaft (1-1/8"
Standard). Der CRC-15 ist nicht für Vollcarbon-Gabelschäfte geeignet.
Bedienungsanleitung:
1. Montieren Sie die Komponenten von CRC-1 und CRC-15.
a. Platzieren Sie die 1-1/8" Schneidführung (blau) des CRC-1 im
Werkzeugschaft und schrauben Sie die Kappe auf ohne sie festzuziehen.
b. Montieren Sie den Korpus des CRC-15 (#817) im Schaft des CRC-1.
Beachten Sie, dass die beiden Fixieraufnahmen im Korpus genau auf
die beiden Fixierschrauben im Schaft ausgerichtet sind. Ziehen Sie
die Fixierschrauben fest.
c. Montieren Sie den 39,8 mm Fräser (#818) im Korpus des CRC-
15. Beachten Sie dabei ebenfalls die korrekte Ausrichtung von
Fixierschrauben (#609) und –aufnahmen. Ziehen Sie die beiden
Schrauben an.
Surfacer l'embase de votre fourche assure une mise en place correcte du
cône de direction, ainsi qu'une meilleure performance et longévité de votre
jeu de direction. Le CRC-15 de Park Tool est un outil de précision destiné à
être utilisé avec le kit de surfaçage de pivot de fourche CRC-1 de Park Tool
afin de surfacer les fourches avec une embase de 39.8mm (1.5'' standard) et
une colonne de direction de 28.6mm (1-1/8'' standard). Le CRC-15 n'est pas
conçu pour être utilisé avec un tube de direction carbone.
Utilisation:
1. Assembler les composants du kit de surfaçage CRC-1 Park Tool et
l'adaptateur CRC-15 Park Tool.
a. Placer le collier 1-1/8 du CRC-1 (le bleu) dans la poignée puis
enclencher la vis de capot. Ne pas serrer.
b. Placer le corps du CRC-15 (#817) dans la poignée du CRC-1, tout en
vérifiant que les vis de fixation sont bien alignées avec les points de
positionnement sur le corps. Serrer les vis.
c. nstaller la fraise de 39.8mm (#818) dans le corps du CRC-15, tout en
vérifiant que les vis de fixation sont bien alignées avec les points de
positionnement sur la fraise. Serrer les vis.
CRC-15
Instructions / Instructions / Anleitung / Instrucciones
CRC-15 Crown Race Cutter Adaptor
CRC-15 1.5 Gabelkonussitz-Adapter
CRC-15 Adaptateur pour Kit de Surfaçage de Pivot
tighten the cap/nut just until there is no play between the tool and the
steering column.
3. Mount the fork onto a front wheel. With the wheel on the ground, grasp
the wheel between your legs to stabilize the fork.
4. Liberally apply cutting fluid to the cutter and to the fork's crown race
seat. Park Tool CF-2 Cutting Fluid is recommended.
5. Lean over the wheel and fork and apply downward pressure while turning
the tool in a clockwise direction. Add additional cutting fluid as the tool
cuts down the crown race seat. Continue turning the tool clockwise until
the cutter contacts the bottom of the fork's crown race seat and a flat,
smooth, evenly faced surface is created.
6. Loosen the cap/nut and pull the tool assembly from the fork. Clean tool
and fork.
Note:
All components should be used and stored with extreme care. The cutter
should be cleaned and wiped with an oily cloth or rust inhibitor after use
and should be periodically sharpened by a qualified technician. Park Tool
Co. offers a sharpening service that can return cutting tools to factory
specifications. Information can be found at: www.parktool.com.
2. Platzieren Sie das komplette Fräswerkzeug auf dem Gabelschaft und drehen
Sie die Kappe soweit, bis das Werkzeug spielfrei auf dem Gabelschaft sitzt.
3. Montieren Sie die Gabel auf ein Vorderrad und klemmen Sie das auf dem
Boden stehende Vorderrad zur Stabilisierung der Gabel mit den Beinen fest.
4. Tragen Sie großzügig Schneidöl auf Fräser und Konussitz auf. Wir
empfehlen CF-2 Schneidöl.
5. Beugen Sie sich über Gabel und Laufrad und üben Sie etwas Druck aus,
während Sie das Fräswerkzeug im Uhrzeigersinn drehen. Geben Sie beim
Fräsvorgang weiteres Schneidöl hinzu. Drehen Sie den Fräser solange,
bis er die Auflagefläche des Konussitzes berührt und eine ebene, glatte
Oberfläche erreicht worden ist.
6. Lösen Sie die Werkzeugkappe und nehmen Sie das Fräswerkzeug vom
Gabelschaft. Reinigen Sie Werkzeug und Gabel sorgfältig.
Hinweis:
Alle Werkzeugkomponenten sollten mit großer Sorgfalt eingesetzt und
gelagert werden. Reinigen Sie die Fräseisen nach jeder Benutzung mit
einem öligen Lappen und lassen Sie sie regelmäßig von einem Fachmann
nachschleifen. Park Tool Co. bietet einen Schleifservice in Industriequalität
an. Weitere Informationen auf www.parktool.com.
2. Positionner l'ensemble CRC-1/CRC-15 sur le pivot de la fourche et serrer
le capot juste assez pour qu'il n'y ait plus de jeu entre la le pivot et l'outil.
3. Monter la fourche sur une roue avant. Avec la roue au sol, caller celle-ci
entre vos jambes afin de stabiliser la fourche.
4. Appliquer généreusement de l'huile de coupe sur la fraise ainsi que
l'embase de la fourche. L'huile de coupe Park Tool CF-2 est recommandée.
5. En se penchant pardessus la roue et la fourche, appliquer une force vers
le bas tout en tournant l'outil dans le sens des aiguilles d'une montre.
Ajouter de l'huile de coupe tout au long de l'avancement. Continuer à
tourner dans le sens des aiguilles d'une montre jusqu'à ce que la fraise
arrive en bas de l'embase et qu'une surface lisse et propre soit apparue.
6. Desserrer le capot et retirer l'outil de la fourche. Nettoyer l'outil et la fourche.
Note: Tous les composants doivent être utilisés et entreposés avec grand
soin. La fraise doit être nettoyée et essuyée avec un chiffon huileux ou de
l'antirouille après chaque utilisation et devrait être régulièrement aiguisé par
un technicien qualifié. Park Tool Co. offre un service d'affutage permettant
de rendre aux outils de coupe leurs spécificités originales. Pour tout
information à ce sujet : www.parktool.com

Verwandte Anleitungen für Park Tool CRC-15


Inhaltszusammenfassung für Park Tool CRC-15
- Seite 1 The steering column. Park Tool CRC-15 is a precision tool designed to be used in conjunction with the 3. Mount the fork onto a front wheel. With the wheel on the ground, grasp Park Tool CRC-1 Crown Race Cutting Tool to machine forks with a 39.8mm metal...
- Seite 2 óptimo piernas para estabilizar la tijera. funcionamiento y longevidad de la taza de dirección. El CRC-15 de Park Tool 4. Aplique lubricante para corte en el cortador y en la base del cono inferior es una herramienta de precisión diseñada para utilizarse con el CRC -1 Fresa...