Herunterladen Inhalt Inhalt Diese Seite drucken
switel BCF268 Bedienungsanleitung

switel BCF268 Bedienungsanleitung

Schnurloses a/v-überwachungssystem
Inhaltsverzeichnis

Werbung

Verfügbare Sprachen

Verfügbare Sprachen

Schnurloses A/V−Überwachungssystem
Système de surveillance sans fil A/V
Sistema di sorveglianza A/V cordless
Cordless A/V Monitoring Set
BCF268
Bedienungsanleitung
Mode d'emploi
Istruzioni per l'uso
Operating Instructions

Werbung

Inhaltsverzeichnis
loading

Inhaltszusammenfassung für switel BCF268

  • Seite 1 Schnurloses A/V−Überwachungssystem Système de surveillance sans fil A/V Sistema di sorveglianza A/V cordless Cordless A/V Monitoring Set BCF268 Bedienungsanleitung Mode d’emploi Istruzioni per l’uso Operating Instructions...
  • Seite 2 Bedienungsanleitung ....Mode d’emploi ..... . . Istruzioni per l’uso .
  • Seite 3: Inhaltsverzeichnis

    Inhaltsverzeichnis Sicherheitshinweise ....Bedienelemente und Anzeigen ..Geräte in Betrieb nehmen ..Wie bediene ich den Sender .
  • Seite 4: Sicherheitshinweise

    Sicherheitshinweise 1 Sicherheitshinweise Lesen Sie diese Bedienungsanleitung sorgfältig durch. Bestimmungsgemäße Verwendung Das Monitor−Set wurde zur Überwachung von Räumen entwickelt. Der Sender übermittelt von seinem Standort aus Stimmlaute und Bilder an den Empfänger. Jede andere Verwendung gilt als nicht bestim- mungsgemäß. Die Verwendung des Geräts ersetzt die persönliche Beaufsichtigung, z.
  • Seite 5: Bedienelemente Und Anzeigen

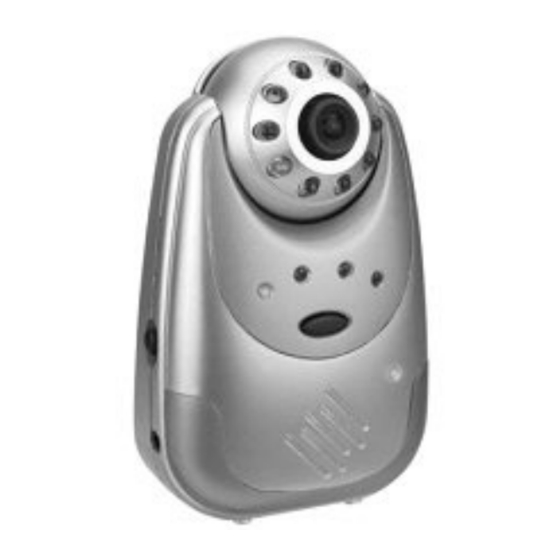
    Bedienelemente und Anzeigen 2 Bedienelemente und Anzeigen Monitor−Einheit (Empfänger) 7(+) 7(−) Kamera−Einheit (Sender) Deutsch TFT−LC−Display Lautsprecher Power−LED Kanalwahl−Taste Kanal−LED Scan−LED Helligkeit (+) (−) Lautstärkeregler mit Ein−/ Ausschalter LC−Display Ein/Aus Stromversorgungsbuchse Ausgang Audio/Video Gürtelclip Objektiv Kanal−LED Kanalwahl−Schalter Wahlschalter CAMERA, AUTO, AV Eingang Audio/Video Lichtsensor für autom.
  • Seite 6: Geräte In Betrieb Nehmen

    Geräte in Betrieb nehmen 3 Geräte in Betrieb nehmen Sicherheitshinweise Achtung: Lesen Sie vor der Inbetriebnahme unbedingt die Sicherheitshinweise in Kapitel 1. Verpackungsinhalt prüfen Zum Lieferumfang gehören: eine Kamera−Einheit eine Monitor−Einheit 5 wiederaufladbare, spezielle (Sender) (Empfänger) NiMH Akkus für den Empfänger zwei Netzteile ein Audio−/ Videokabel ein Gürtelclip...
  • Seite 7: Empfänger Anschließen

    Geräte in Betrieb nehmen Empfänger anschließen Achtung: Stellen Sie den Empfänger mit einem Mindestabstand von 1 m zu anderen elektro- nischen Geräten auf, da es sonst zu gegenseitigen Störungen kommen kann. Betrieb mit Netzteil Achten Sie auf die Verwendung des richtigen Netzteils. Der Empfänger darf nur mit dem grö- ßeren Netzteil betrieben werden, das eine Ausgangsleistung von 500mA hat.
  • Seite 8: Wie Bediene Ich Den Sender

    Wie bediene ich den Sender 4 Wie bediene ich den Sender Überprüfen Sie vor jedem Einsatz die einwandfreie Funktion von Sender und Empfänger. Sender ein−/ ausschalten 1. Stellen Sie den Power Ein/Aus Schalter in die Position ON". Die Power−LED leuchtet grün. Der Sender ist jetzt betriebsbereit.
  • Seite 9: Wie Bediene Ich Den Empfänger

    Wie bediene ich den Empfänger 5 Wie bediene ich den Empfänger Überprüfen Sie vor jedem Einsatz die einwandfreie Funktion von Sender und Empfänger. Empfänger ein−/ ausschalten und Lautstärke einstellen Drehen Sie den Lautstärkeregler in Richtung ON". Die Power−LED leuchtet grün. Der Empfänger ist jetzt betriebsbereit.
  • Seite 10: Falls Es Probleme Gibt

    Falls es Probleme gibt 6 Falls es Probleme gibt Service−Hotline Haben Sie Probleme mit Ihrem Überwachungsgerät, kontrollieren Sie zuerst die folgenden Hinweise. Bei technischen Problemen können Sie sich an unsere Service−Hotline unter Tel. 0900 00 1675 inner- halb der Schweiz (Kosten Swisscom bei Drucklegung: CHF 2.00/min) wenden. Bei Garantieansprü- chen wenden Sie sich an Ihren Fachhändler.
  • Seite 11: Technische Eigenschaften

    Technische Eigenschaften 7 Technische Eigenschaften Technische Daten Merkmal Wert Kamera (Sender) Schalter: ON/OFF Schalter: AV/AUTO/CAMERA Buchse: AV Input Buchse: 9 V DC Sensor: 1 Nachtlichtsensor LEDs: 4 Kanäle LEDs: Power ON IR−Dioden: 10 Monitor (Empfänger) 2,5" Bildschirmdiagonale Schalter: LCD ON/OFF Schalter: Ein/Aus mit Lautstärkeregelung Buchse:...
  • Seite 12: Pflegehinweise / Garantie

    Sollte Ihr Gerät dennoch einen Defekt innerhalb der Garantiezeit aufweisen, wenden Sie sich bitte un- ter Vorlage Ihrer Kaufquittung ausschließlich an das Geschäft, in dem Sie Ihr SWITEL − Gerät gekauft haben. Alle Gewährleistungsansprüche nach diesen Bestimmungen sind ausschließlich gegenüber Ihrem Fachhändler geltend zu machen.
  • Seite 13: Stichwortverzeichnis

    Stichwortverzeichnis 9 Stichwortverzeichnis Bedienelemente, 5 Bedienung, 8, 9 Betrieb mit Batterien oder Akkus, 7 Betrieb mit Netzteil, 6, 7 Empfänger anschließen, 7 Empfänger ein−/ ausschalten, 9 Fehlerbehebung, 10 Fragen und Antworten, 10 Garantie, 12 Gürtelclip montieren, 7 Helligkeit regeln, 9 Inbetriebnahme, 6 Kanal auswählen, 8, 9 Kanäle scannen, 9...
  • Seite 15 Table des matières Consignes de sécurité ... . . Éléments de manipulation et affichages Mettre les appareils en service ..Comment fonctionne mon émetteur .
  • Seite 16: Consignes De Sécurité

    Consignes de sécurité 1 Consignes de sécurité Lisez très attentivement ce mode d’emploi. Utilisation conforme aux prescriptions Le kit écran a été conçu pour la surveillance de pièces. Depuis sa position, l’émetteur transmet des voix et des images au récepteur. Toute autre utilisation est considérée comme non conforme à l’usage. L’utilisation de cet appareil ne remplace pas la surveillance personnelle, p.
  • Seite 17: Éléments De Manipulation Et Affichages

    Éléments de manipulation et affichages 2 Éléments de manipulation et affichages Unité écran (récepteur) 7(−) Unité caméra (émetteur) Allemand Écran TFT−LC Haut−parleur DEL Power Touche sélection de canal DEL canal DEL Scan Luminosité (+) (−) Régulateur de volume avec interrupteur marche/arrêt Écran LC activé/désactivé...
  • Seite 18: Mettre Les Appareils En Service

    Mettre les appareils en service 3 Mettre les appareils en service Remarques concernant la sécurité Attention : Avant de mettre votre appareil en service, lisez impérativement les consignes de sécurité mentionnées au chapitre 1. Vérifier le contenu de l’emballage Les éléments suivants font partie de la livraison : une unité...
  • Seite 19 Mettre les appareils en service Raccorder le récepteur Attention : Posez le récepteur à une distance minimum d’un mètre par rapport aux autres ap- pareils électroniques pour éviter d’éventuelles interactions. Fonctionnement par le bloc d’alimentation Veillez à utiliser le bloc d’alimentation correct. Le récepteur ne doit être alimenté que par le bloc le plus petit qui a une puissance de sortie de 500mA.
  • Seite 20: Comment Fonctionne Mon Émetteur

    Comment fonctionne mon émetteur 4 Comment fonctionne mon émetteur Avant chaque utilisation, veuillez vous assurez que l’émetteur et le récepteur fonctionnent de façon irréprochable. Brancher/Débrancher l’émetteur 1. Placez l’interrupteur Power Marche/Arrêt à la position ON". La DEL Power devient verte. L’émetteur est maintenant prêt à...
  • Seite 21: Comment Fonctionne Mon Récepteur

    Comment fonctionne mon récepteur 5 Comment fonctionne mon récepteur Avant chaque utilisation, veuillez vous assurez que l’émetteur et le récepteur fonctionnent de façon irréprochable. Brancher/Débrancher le récepteur et régler le volume sonore Tournez le régulateur de volume en direction ON". La DEL Power devient verte. Le récepteur est maintenant prêt à...
  • Seite 22: En Cas De Problèmes

    En cas de problèmes 6 En cas de problèmes Hotline de service Si vous avez des problèmes avec votre appareil de surveillance, contrôlez d’abord les remarques sui- vantes. En cas de problèmes techniques, vous pouvez vous adresser à notre hotline de service en Suisse au numéro de téléphone 0900 00 1675 (frais Swisscom à...
  • Seite 23: Caractéristiques Techniques

    Caractéristiques techniques 7 Caractéristiques techniques Données techniques Caractéristique Valeur Caméra (émetteur) Interrupteur : ON/OFF Interrupteur : AV/AUTO/CAMERA Prise : AV Input Prise : 9 V CC Détecteur : 1 détecteur de lumière nocturne DELs : 4 canaux DELs : Power ON Diodes IR : Écran (récepteur) 2,5"...
  • Seite 24: Remarques D'entretien / Garantie

    SWITEL. Vous ne pouvez faire valoir vos droits à la garantie selon ces dispositions qu’exclu- sivement auprès de votre revendeur . Deux ans après l’achat et la remise de nos produits, il n’est plus...
  • Seite 25: Index

    Index 9 Index Alimentation par le bloc d’alimentation, 18, 19 Alimentation par piles rechargeables ou piles, 19 Balayer les canaux, 21 Brancher/Débrancher l’émetteur, 20 Brancher/Débrancher le récepteur, 21 Consignes de sécurité, 16 Contenu de l’emballage, 18 Déclaration de conformité, 23 Données techniques, 23 Éléments de manipulation, 17 Fixation murale, 18, 19...
  • Seite 27 Contenuto Indicazioni di sicurezza ... . Elementi di comando e visualizzazioni Mettere in funzione gli apparecchi ..Come funziona il trasmettitore ..Come funziona il ricevitore .
  • Seite 28: Indicazioni Di Sicurezza

    Indicazioni di sicurezza 1 Indicazioni di sicurezza Leggere attentamente le presenti istruzioni per l’uso. Utilizzo conforme alle disposizioni Il dispositivo di monitoraggio è stato progettato per la sorveglianza di ambienti chiusi. Il trasmettitore è in grado di inviare dal proprio punto di ubicazione segnali audio e video al ricevitore. Qualsiasi altro impiego è...
  • Seite 29 Indicazioni di sicurezza zione appositi contenitori. Smaltire confezioni ed imballaggi in base a quanto indicato dalle norme in vigore a livello locale.
  • Seite 30: Elementi Di Comando E Visualizzazioni

    Elementi di comando e visualizzazioni 2 Elementi di comando e visualizzazioni Unità schermo (ricevitore) 7(+) 7(−) Unità videocamera (trasmettitore) Italiano Display LC−TFT Altoparlante LED di power Tasto di ricerca canale LED di canale LED di scansione Luminosità (+) (−) Regolatore di volume con tasto di ON/OFF Display LC ON/OFF Presa per alimentazione elettrica Uscita audio/video...
  • Seite 31: Verificare Il Contenuto Della Confezione

    Mettere in funzione gli apparecchi 3 Mettere in funzione gli apparecchi Indicazioni di sicurezza Attenzione: Prima della messa in funzione, leggere attentamente le indicazioni di sicurezza riportate al capitolo 1. Verificare il contenuto della confezione La confezione comprende: un’unità videocamera un’unità...
  • Seite 32: Collegare Il Ricevitore

    Mettere in funzione gli apparecchi Collegare il ricevitore Attenzione: Posizionare il ricevitore con una distanza minima di 1 m da altre apparecchiature elettroniche considerato il rischio di interferenze reciproche. Esercizio con alimentatore di rete Fare attenzione a utilizzare l’alimentatore di rete corretto. La messa in funzione del ricevitore è...
  • Seite 33: Come Funziona Il Trasmettitore

    Come funziona il trasmettitore 4 Come funziona il trasmettitore Verificare prima di ogni impiego il perfetto funzionamento di trasmettitore e ricevitore. Attivare / Disattivare il trasmettitore 1. Spostare l’interruttore Power ON/OFF in posizione ON". Il LED di power segna verde. Il trasmettitore è...
  • Seite 34: Come Funziona Il Ricevitore

    Come funziona il ricevitore 5 Come funziona il ricevitore Verificare prima di ogni impiego il perfetto funzionamento di trasmettitore e ricevitore. Attivare/Disattivare il ricevitore e impostare il volume Girare il regolatore di volume su ON". Il LED di power segna verde. Il ricevitore è quindi pronto per l’uso.
  • Seite 35: In Presenza Di Problemi

    In presenza di problemi 6 In presenza di problemi Hotline di assistenza In presenza di problemi con il dispositivo di sorveglianza, seguire le indicazioni riportate qui di seguito. La nostra hotline di assistenza è a vostra disposizione in caso di problemi tecnici chiamando al nu- mero telefonico 0900 00 1675 nell’ambito della Svizzera (costi da rete Swisscom in sede di stampa: CHF 2.00/min).
  • Seite 36: Specifiche Tecniche

    Specifiche tecniche 7 Specifiche tecniche Specifiche tecniche Caratteristica Valore Videocamera (trasmettitore) Interruttore: ON/OFF Interruttore: AV/AUTO/VIDEOCAMERA Presa: Input AV Presa: 9 V DC Sensore: 1 sensore di luce notturna LED: 4 canali LED: Power ON Diodi IR: Schermo (ricevitore) Diagonale schermo da 2,5" Interruttore: LCD ON/OFF Interruttore: ON/OFF con regolazione del volume Presa:...
  • Seite 37: Consigli Per La Cura / Garanzia

    SWITEL assieme al relativo scontrino di acquisto. In base alle presenti disposizioni, tutti i diritti di ga- ranzia dovranno essere fatti valere esclusivamente nei confronti del rivenditore autorizzato. Decorso il termine di due anni dalla data di acquisto e consegna dei nostri prodotti non sarà...
  • Seite 38: Indice Alfabetico

    Indice alfabetico 9 Indice alfabetico Attivare / Disattivare il trasmettitore, 33 Attivare/Disattivare il ricevitore, 34 Collegare il ricevitore, 32 Collegare il trasmettitore, 31 Consigli per la cura, 37 Contenuto della confezione, 31 Dichiarazione di conformità, 36 Domande e risposte, 35 Elementi di comando, 30 Eliminare guasti, 35 Esercizio, 33, 34...
  • Seite 39 Contents Safety Information ....Operating Elements and Indicators ..Putting the Units into Operation ..Operating the Transmitter .
  • Seite 40: Safety Information

    Safety Information 1 Safety Information Please read this operating instruction manual thoroughly. Intended use The monitoring set has been developed to monitor rooms. The transmitter sends acoustic and video signals from its point of installation to the receiver. Any other use is considered unintended use. The use of this equipment does not substitute personal supervision, e.g.
  • Seite 41: Operating Elements And Indicators

    Operating Elements and Indicators 2 Operating Elements and Indicators Monitor unit (receiver) 7(+) 7(−) Camera unit (transmitter) English TFT LC display Loudspeaker Power LED Channel selection button Channel LED Scan LED Brightness control (+) (−) Volume control with on/off switch LC display on/off Power supply socket Audio/Video output...
  • Seite 42: Putting The Units Into Operation

    Putting the Units into Operation 3 Putting the Units into Operation Safety information Attention: It is essential to read the Safety Information in Chapter 1 before starting up. Checking the package contents The package contains: one camera unit one monitor unit 5 rechargeable, special NiMH (transmitter) (receiver)
  • Seite 43: Connecting The Receiver

    Putting the Units into Operation Connecting the receiver Attention: Position the receiver with a minimum distance of 1 m to other electronic devices, otherwise there is a risk of mutual disturbance. Operating with a power adapter plug Ensure you use the correct power adapter plug. The receiver must be connected by means of the larger power adapter plug which has an output power of 500 mA.
  • Seite 44: Operating The Transmitter

    Operating the Transmitter 4 Operating the Transmitter Check the transmitter and receiver are working properly each time before the equipment is put into operation. Switching the transmitter on/off 1. Set the Power on/off switch to ON". The Power LED lights up green. The transmitter is now ready to operate.
  • Seite 45: Operating The Receiver

    Operating the Receiver 5 Operating the Receiver Check the transmitter and receiver are working properly each time before the equipment is put into operation. Switching the receiver on/off and setting the volume Turn the volume control towards ON". The Power LED lights up green. The receiver is now ready to operate.
  • Seite 46: In Case Of Problems

    In Case of Problems 6 In Case of Problems Service hotline Should problems arise with the monitoring set, please refer to the following information first. In the case of technical problems, please contact our hotline within Switzerland under tel. 0900 00 1675 (cost with Swisscom at time of going to print: CHF 2.00/min).
  • Seite 47: Technical Properties

    Technical Properties 7 Technical Properties Technical data Feature Value Camera (transmitter) Switch: ON/OFF Switch: AV/AUTO/CAMERA Socket: AV input Socket: 9 V DC Sensor: 1 Night vision sensor LEDs: 4 channels LED: Power ON IR diodes: 10 Monitor (receiver) 2.5" screen diagonal Switch: LCD ON/OFF Switch:...
  • Seite 48: Maintenance / Guarantee

    If your device does show signs of a defect within the period of guarantee, please contact the sales outlet where you purchased the SWITEL device, producing the purchase receipt as evidence. All claims under the terms of guarantee in accordance with this agreement can only be asserted at the sales outlet.
  • Seite 49: Index

    Index 9 Index Channel selection, 44, 45 Connecting the receiver, 43 Connecting the transmitter, 42 Declaration of Conformity, 47 Fitting the belt clip, 43 Guarantee, 48 Maintenance , 48 Night vision, 44 Operating elements, 41 Operating with a power adapter plug, 42, 43 Operation, 44, 45 Operation with batteries or rechargeable batteries, 43 Package contents, 42...
  • Seite 50: Declaration Of Conformity

    TELGO AG Route d’Englisberg 11 CH−1763 Granges−Paccot Declare under our own responsibility that the product MODEL: BCF268 DESCRIPTION: Wireless Baby Monitor Is in conformity with directives: R&TTE Directive (1999/5/EC) EN 60065:2002 Safety (R&TTE, Artivcle 3.1a), EN 301 489−3 V1.4.1 (2002−08) EMC (R&TTE, Article 3.1.b, EN 300 440−2 V 1.1.2 (2004−07) Use of Spectrum...

Inhaltsverzeichnis